

Page 1

BRACKETT AERO FILTERS, INC.
INSTRUCTIONS
ASSEMBLY PART NO. BA-2010
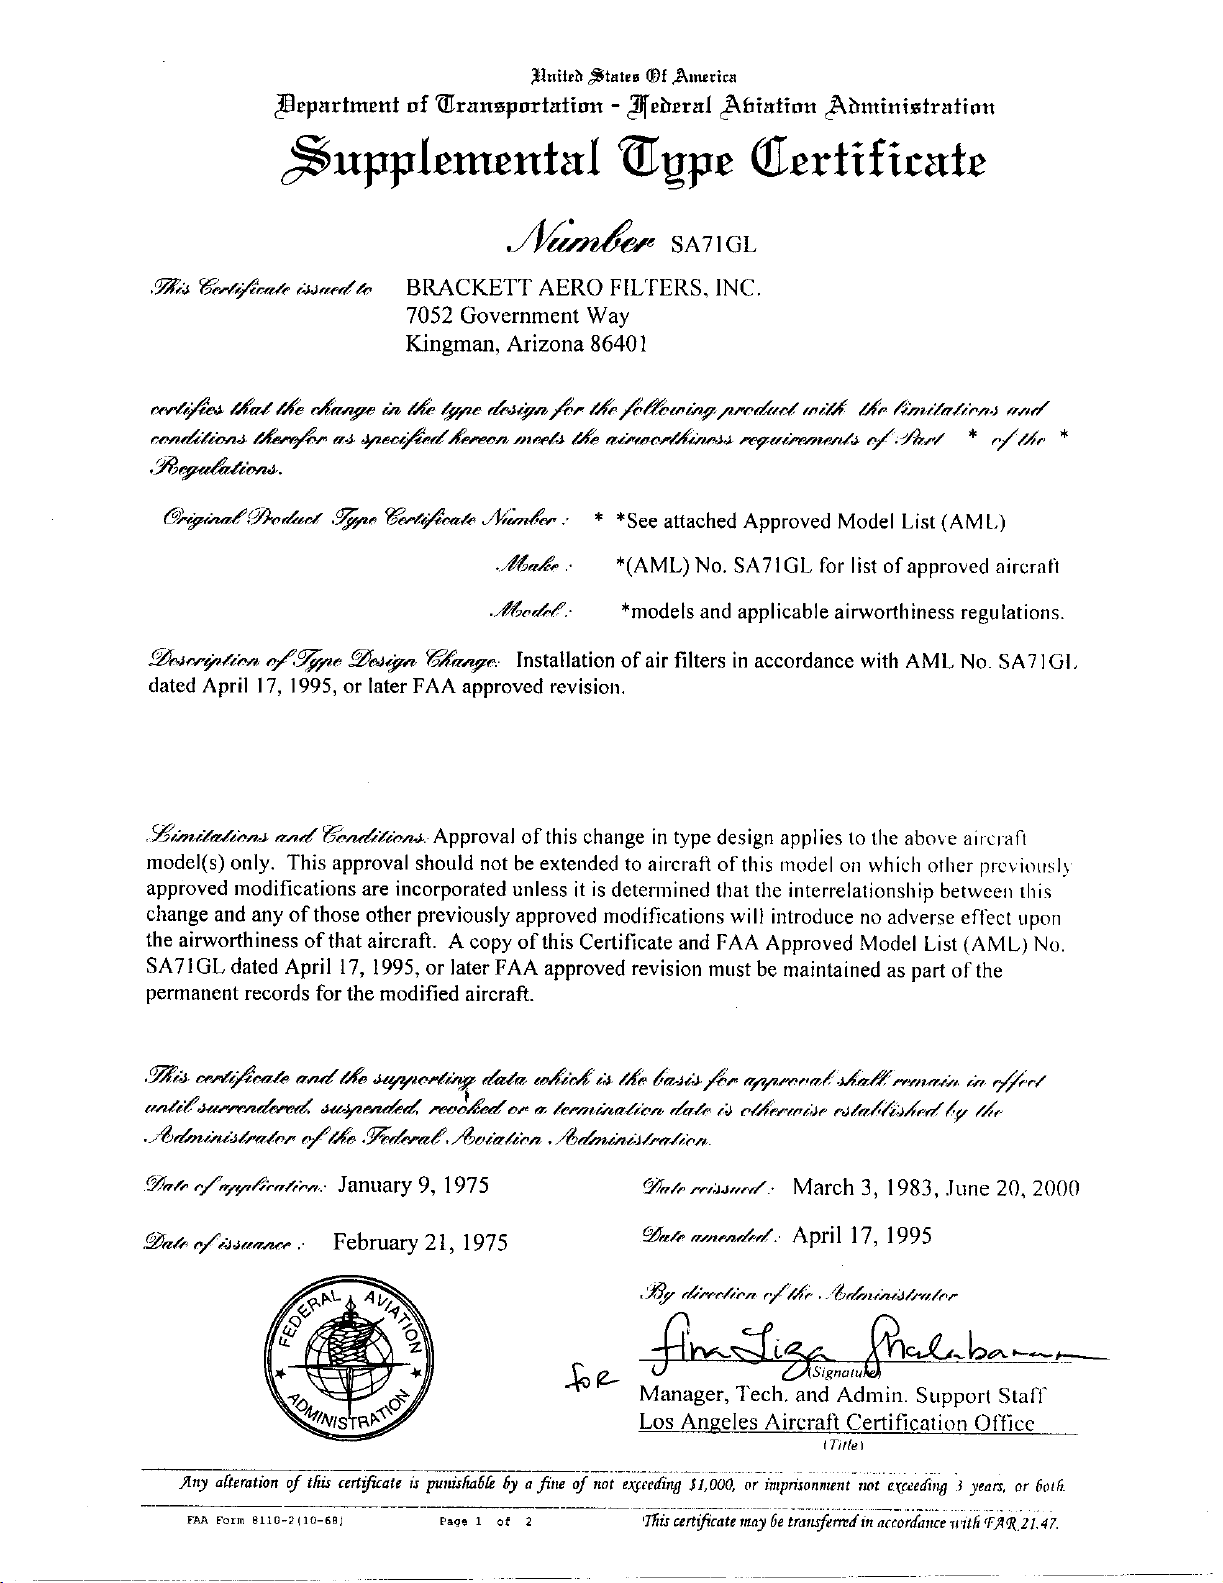
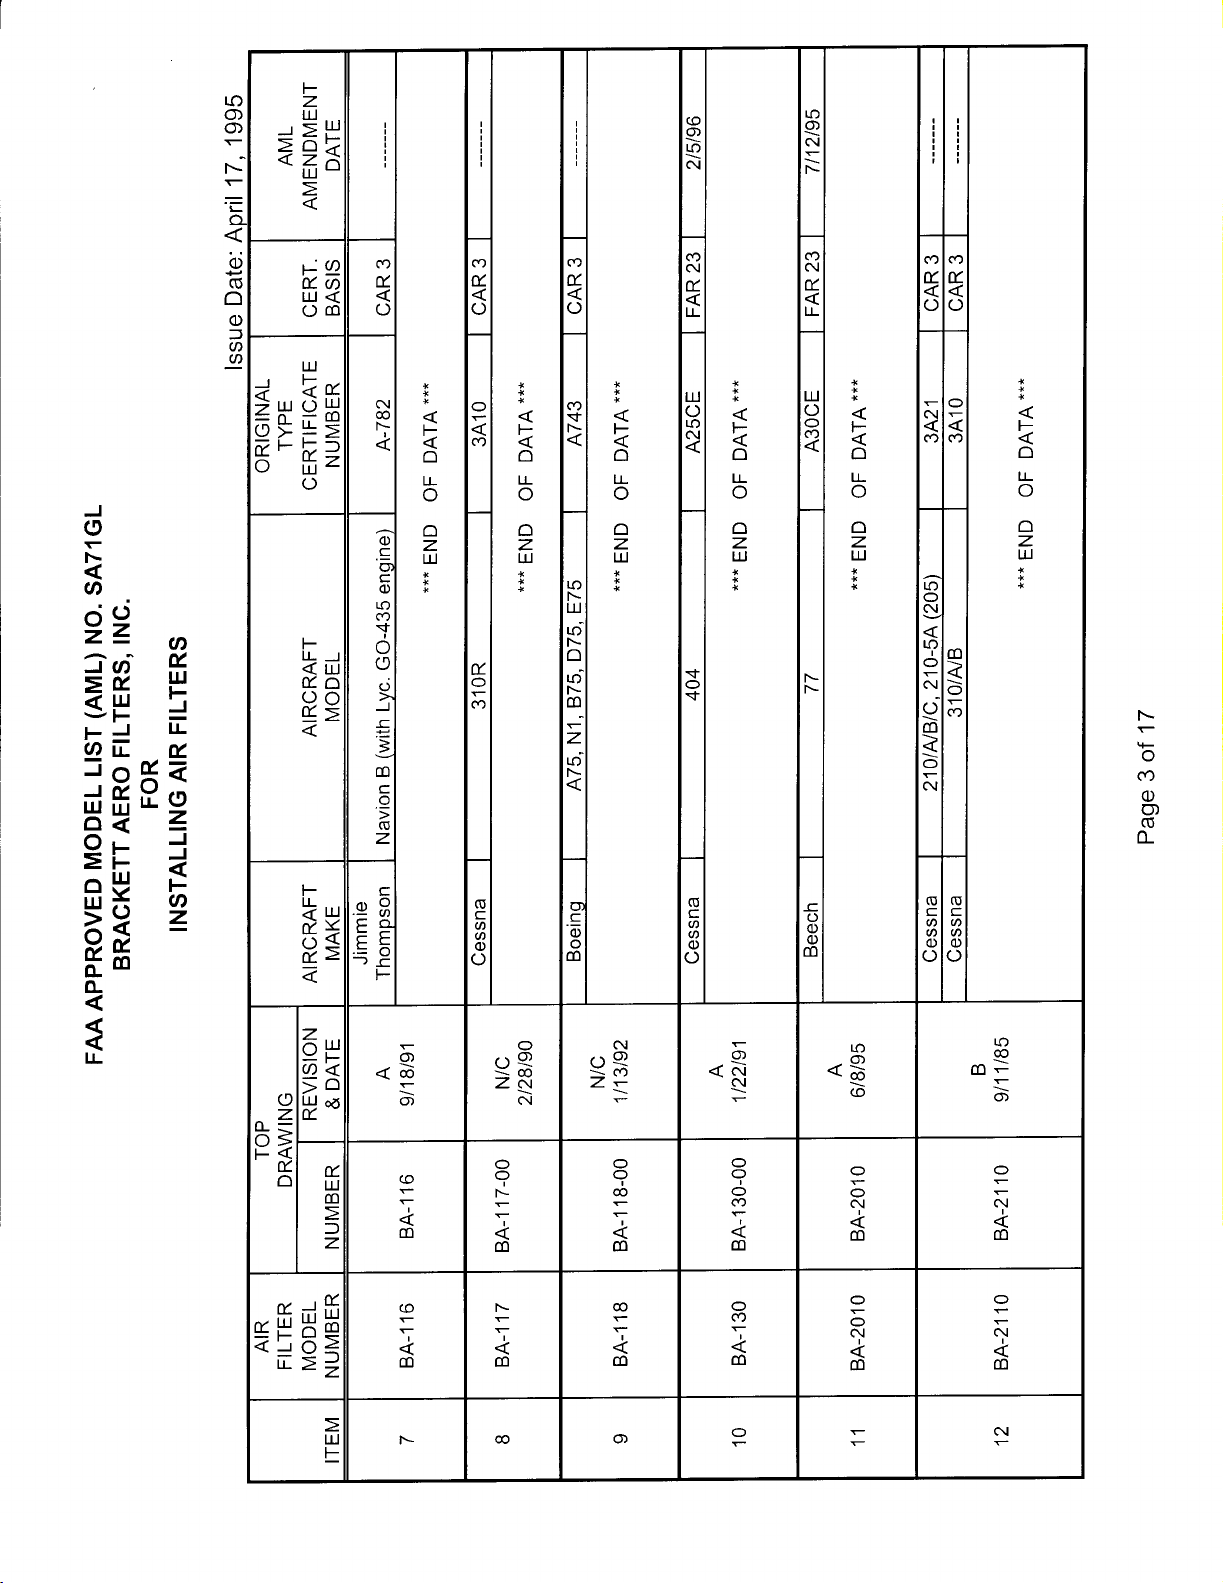
APPROVED ON AIRCRAFT MODELS: Beech 77 "Skipper" Replaces P/N P13-3881
FAA APPROVAL DATA: STC-SA71GL LIST NO. 1
FAA-PMA SUPPLEMENT NO. 1
Your new polyurethane air filter element has been designed to provide maximum dust
collecting efficiency, non-restrictive air flow, and economical element replacement, while
maintaining a lightweight filter. The element has been treated with a distinctive
treatment called a wetted agent and is approximately 98% efficient. The wetted agent is
an accompaniment in the efficient capturing of dust. In addition, the element has
received a fire retardant treatment. For the above reasons, replace the element each
100 hours of use, 12 months or when 50% covered with foreign material. DO NOT
WASH AND REUSE.
INSTALLATION INSTRUCTIONS
Step 1. Remove existing filter and gasket from carburetor heat box and discard.
Step 2. Inspect heat box for condition making sure valve shaft and bushing is not
worn. If un-airworthy, repair with kit or replace worn carburetor heat box.
Step 3. Bolt filter in place with the one top bolt. Mark the two bottom hole locations
and carefully drill .196 diameter holes, be sure and capture the chips.
Step 4. Attach filter frame to carburetor heat box with screws, nuts and washers, one
on each side (furnished). Torque each nut to where the neoprene gasket is
compressed to ½ of its original thickness.
Step 5. Install filter element PN BA-6108 into frame, making sure the taper of element
is the same as the taper of the frame and contact is being made on all sides.
Step 6. Install grill with the 2 legs under the frame and the cross bars facing out. Align
the piano hinges and insert safety pin making sure it is in the locked position.
Step 7. Re-install cover plate on the cowl.
Step 8. NOTE: After initial installation of filter assembly, fill out FAA Form 337 for
return to service. On future replacement of parts this form will not be required.
SERVICING: Under normal conditions, replace filter element, PN BA-6108, after 100
hours use or 1 year intervals. Under severely dusty conditions, check daily
and replace when element is 50% covered with foreign material. For
Continued Airworthiness Instructions, see Form I-194.
Instruction Sheet
Part No. 2004
Date Rev: 06-19-04
Mfg. by:
BRACKETT AERO FILTERS, INC.
Kingman, AZ
Page 2
Page 3
Page 4
BRACKETT AIR FILTER DOCUMENT I-194
PLACE IN AIRCRAFT RECORDS
CONTINUED AIRWORTHINESS INSPECTION
REQUIREMENTS AS PER FAR 23.1529
AND GENERAL PROCEDURES OF PART 43
INSPECTION INTERVALS: Pre-flight inspections, engine backfire
inspection, 100 hour inspections, annual inspections, filter element
replacements.
INSPECTION PROCEDURES
A. Pre-flight inspection: Per Pilots Operating Handbook, check filter assembly
for security, damage or 50% contamination of element face. If found report
to maintenance personnel prior to flight.
B. Engine start-up backfire inspection: Prior to flight, check the entire intake
system for security or damage. If a fire was present, the downstream face of
the foam element will show erosion. If any irregularities are found see
Chart I and also refer to the Aircraft Maintenance Manual for the intake
system.
C. At element replacement intervals: With the element removed, inspect the
filter grill, filter frame, filter mountings and entire intake system for
security, wear and any deformation. Note: On filter assemblies with gaskets,
visually inspect inside and outside of frame for any signs of gasket
looseness, movement or deterioration. If found refer to Chart I or the
proper maintenance manual for your aircraft or component.
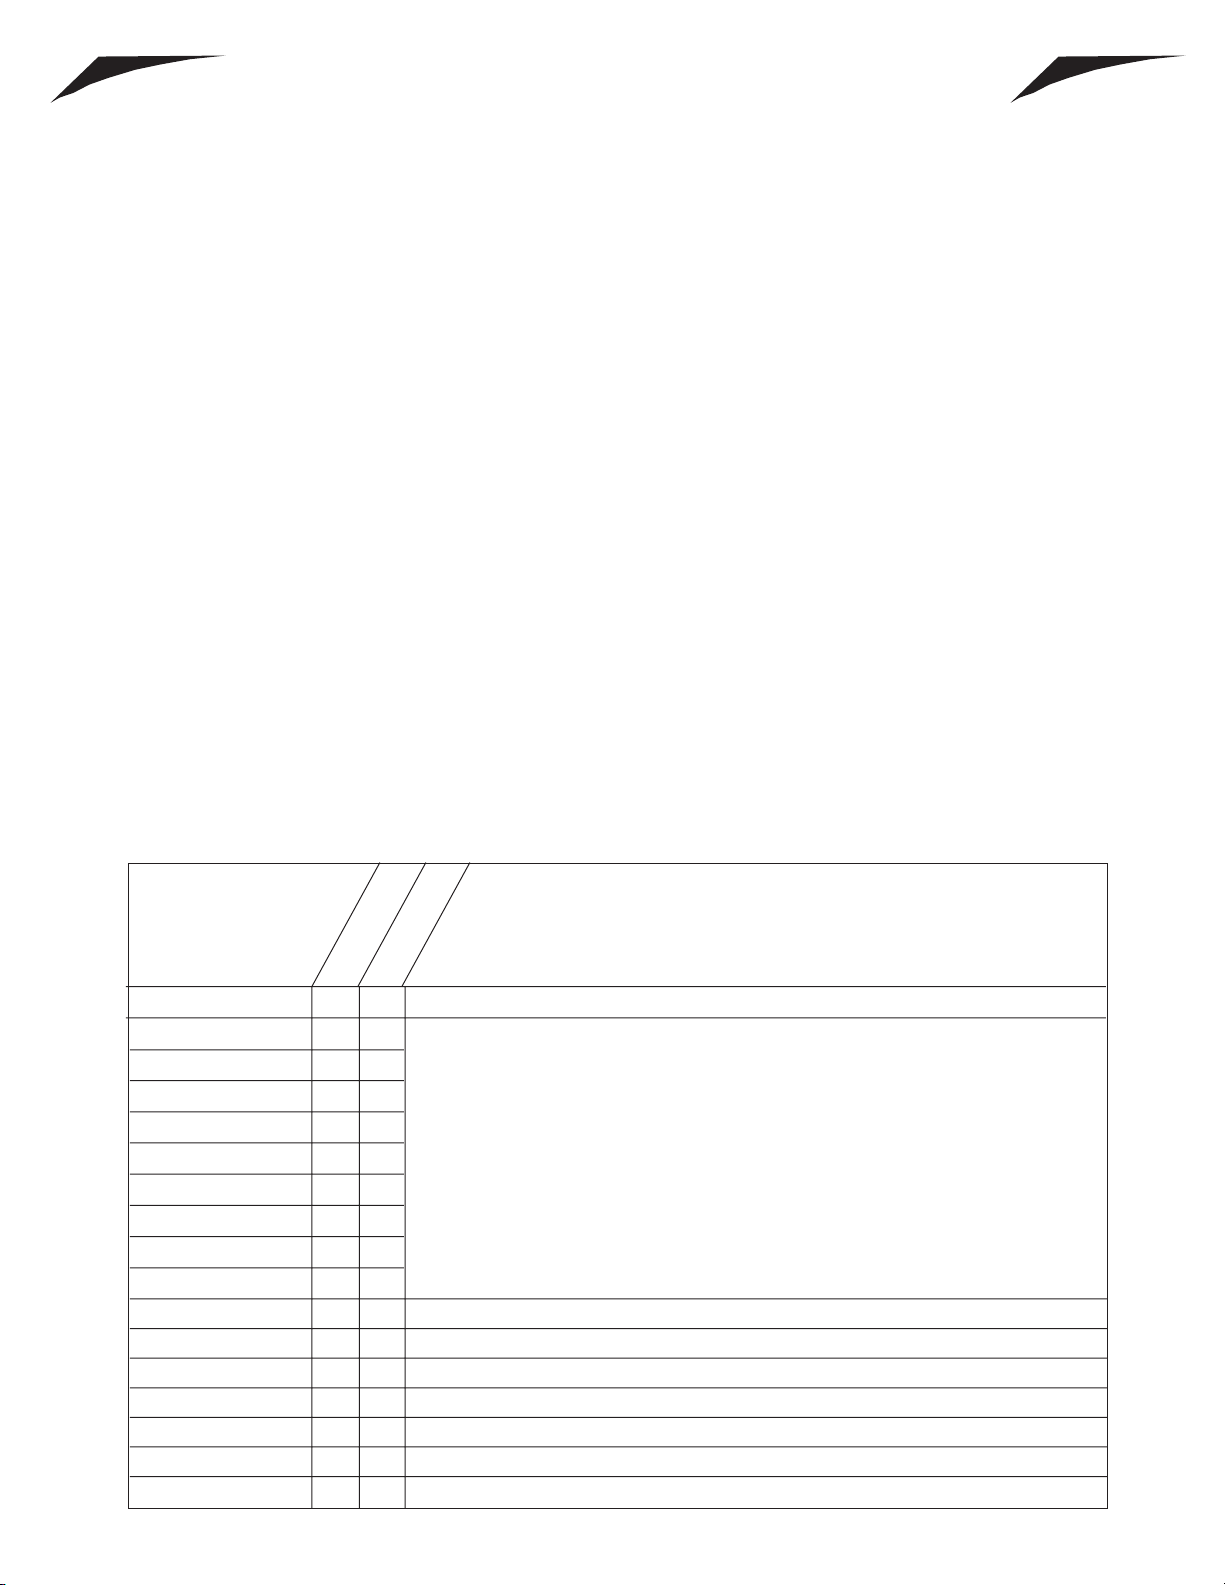
PART INSTRUCTIONS
FRAME X COMPLETE NEW ASSEMBLY
GASKET X
GRILL X REPLACE WITH NEW GRILL
HARDWARE X REPLACE UNSERVICEABLE WITH NEW
SCREEN X COMPLETE NEW ASSEMBLY
SCREEN/GASKET
X COMPLETE NEW ASSEMBLY ( )
ELEMENT X REPLACE ELEMENT
ON FILTER FRAME, REMOVE OLD NEOPRENE GASKET AND ALL TRACES OF ADHESIVE
DOWN TO A CLEAN ANODIZED FRAME SURFACE.
USE ADHESIVE 3M#847 OR DOW CORNING RTV-732. COAT ENTIRE MATING
SURFACE (GASKET TO FRAME). APPLY ADHESIVE FOLLOWING MANUFACTURER’S
LABEL DIRECTIONS. WHEN FRAME AND GASKET ARE PLACED TOGETHER,
CLAMP OR WEIGHT DOWN AT .75 LB./SQ. IN. OF CONTACT AREA. ALLOW TO
CURE 24 HOURS PRIOR TO INSTALLATION.
PRIOR TO REINSTALLATION OF FILTER, CHECK AIRBOX MATING SURFACE FOR
IRREGULARITIES. IF FOUND, CORRECT PER MANUFACTURER’S REQUIREMENTS.
UPON REINSTALLATION CHECK THAT THE GASKET MAKES 100% CONTACT. THE
GASKET SHOULD BE COMPRESSED 50% FOR OPTIMUM SEAL.
REPLACE
REWORK
ASSEMBLIES USING SCREEN GASKETS
PRE 1981; BA–4106, BA–5110 AND BA–8110.
DATE: 3-16-94 CHART 1
 Loading...