

Page 1
B&Q
POP UP GAZEBO ECRU 3X3
IMPORT ANT PLEASE NOTE
THESE POP-UP GAZEBO INSTRUCTIONS ARE FOR ILLUSTRATION PURPOSES AND MA Y NOT
REPRESENT THE PRODUCT YOU HAVE PURCHASED I.E. SIZE AND COLOUR MA Y VARY
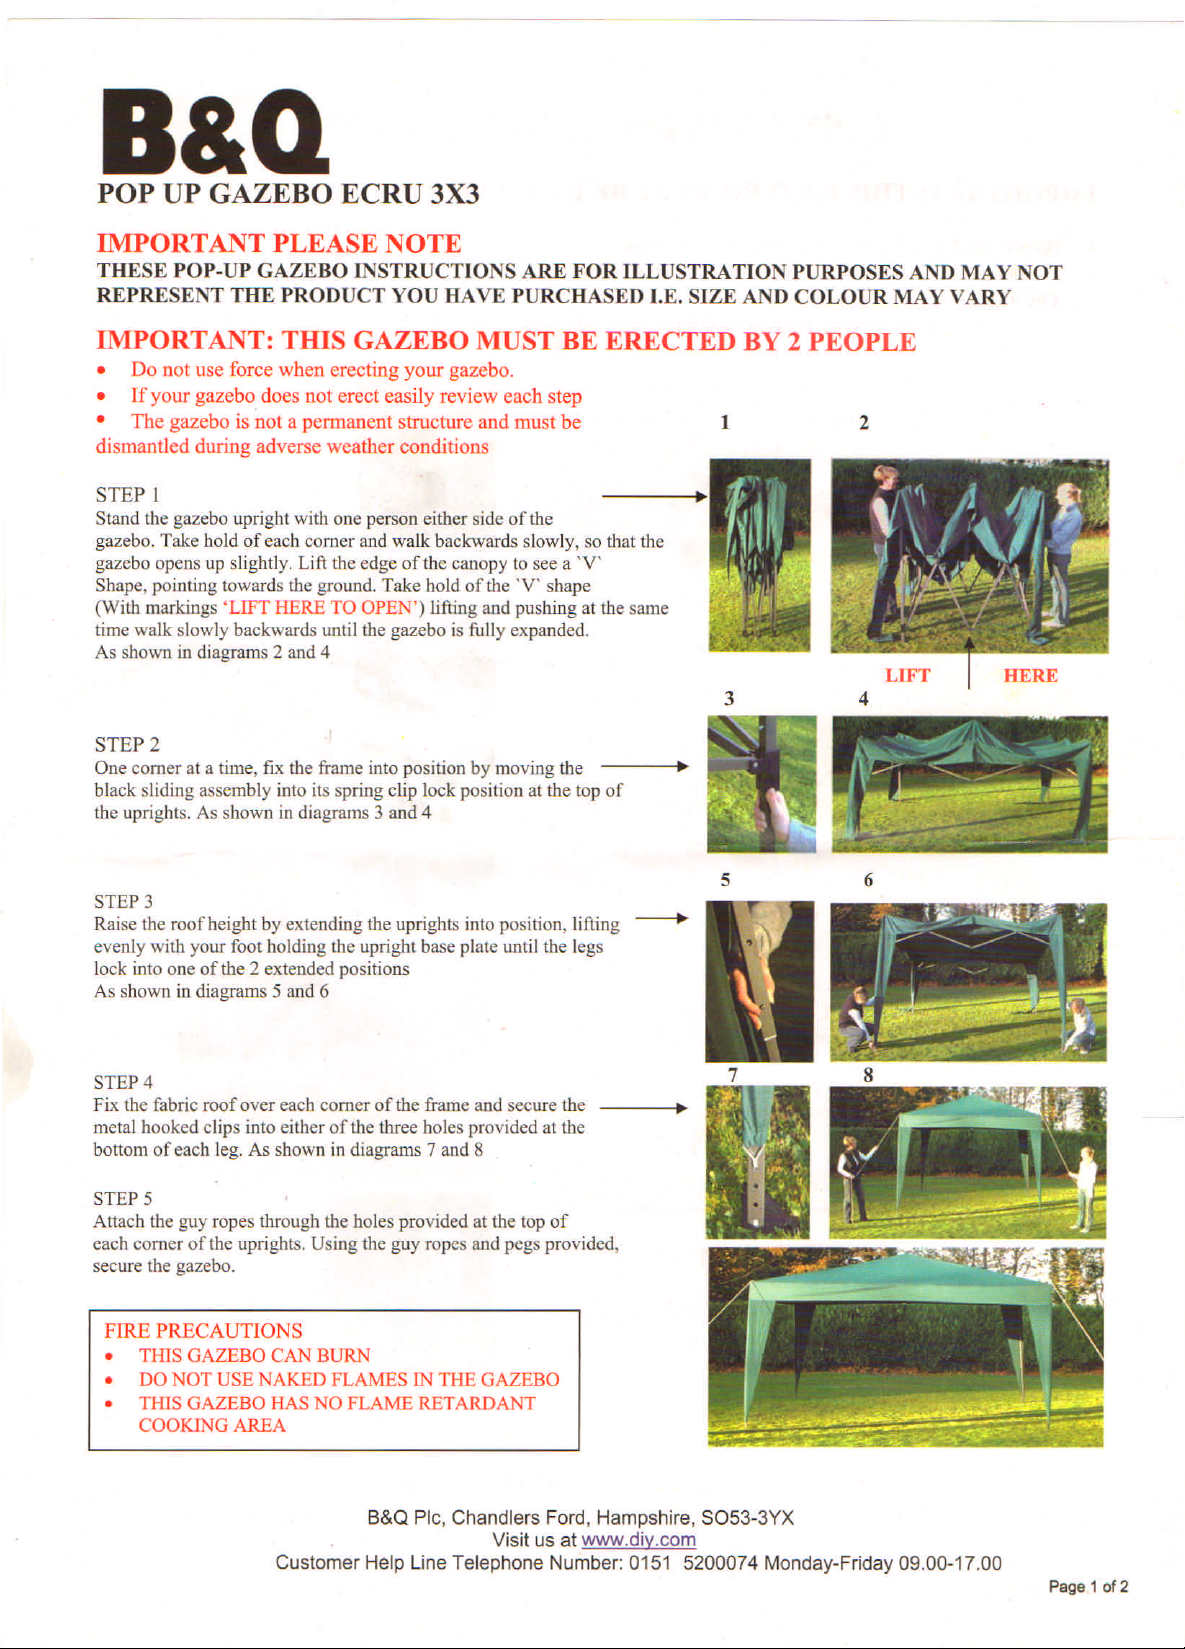
IMPORTANT: THIS GAZEBO MUST BE ERECTED BY 2 PEOPLE
• Do not use force when erecting your gazebo.
• If your gazebo does not erect easily review each step
• The gazebo is not a permanent structure and must be 2
dismantled during adverse weather conditions
~l •
Stand the gazebo upright with one person either side of the
gazebo. Take hold of each comer and walk backwards slowly. so that the
gazebo opens up slightly. Lift the edge of the canopy to see a 'V'
Shape. pointing towards the ground. Take hold of the 'V' shape
(With markings 'LIFT HERE TO OPEN') lifting and pushing at the same
time walk slowly backwards until the gazebo is fully expanded.
As shown in diagrams 2 and 4
STEP 2
One comer at a time, fix the
black sliding assembly into its spring clip lock position at the top of
the uprights. As shown in diagrams 3 and 4
STEP 3
Raise the roof height by extending the uprights into position, lifting
evenly with your foot holding the upright base plate until the legs
lock into one of the 2 extended positions
As shown in diagrams 5 and 6
STEP 4
Fix the fabric roof over each comer of the frame and secure the
metal hooked clips into either of the three holes provided at the
bottom of each leg. As shown in diagrams 7 and 8
STEP 5
Attach the guy ropes through the holes provided at the top of
each comer of the uprights. Using the guy ropes and pegs provided,
secure the gazebo.
frame
into positionbymoving the ~
-
3
5
4
6
FIRE PRECAUTIONS
• THIS GAZEBO CAN BURN
• DO NOT USE NAKED FLAMES IN THE GAZEBO
• THIS GAZEBO HAS NO FLAME RETARDANT
COOKING AREA
B&Q Pic, Chandlers Ford, Hampshire, S053-3YX
Visit us at www.diy.com
Customer Help Line Telephone Number: 0151 5200074 Monday-Friday 09.00-17.00
Page 1 of 2
Page 2
DISMANTLING INSTRUCTIONS
IMPORTANT: THIS GAZEBO MUST BE DISMANTLED BY 2 PEOPLE
• Do not use force when dismantling your gazebo.
• If your gazebo does not dismantle easily review each step
• The gazebo is not a permanent structure in the likelihood
of adverse whether conditions your gazebo must be dismautled
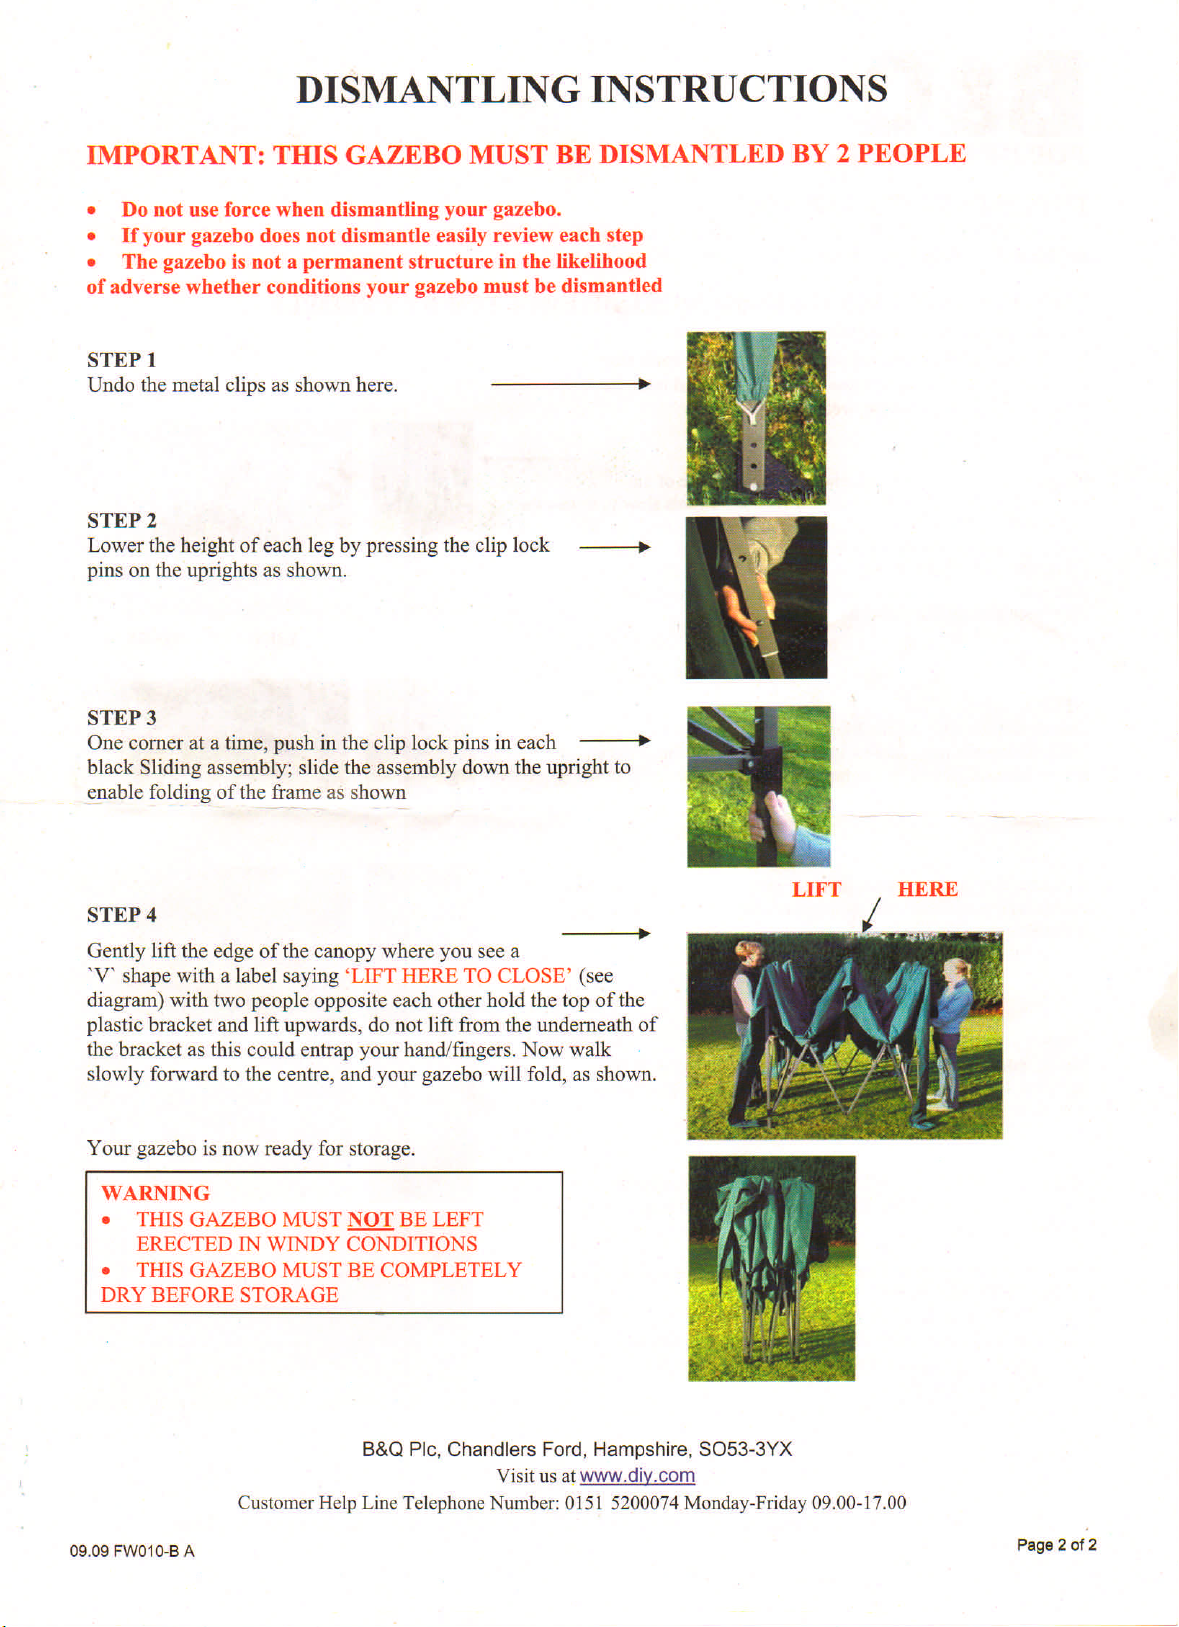
STEP I
Undo the metal clips as shown here. •
STEP 2
Lower the height of each leg by pressing the clip lock •
pins on the uprights as shown.
STEP 3
One corner at a time, push in the clip lock pins in each •
black Sliding assembly; slide the assembly down the upright to
"Ilable folding of the frame as show~
STEP 4
Gently lift the edge of the canopy where you see a
'Y' shape with a label saying 'LIFT HERE TO CLOSE' (see
diagram) with two people opposite each other hold the top of the
plastic bracket and lift upwards, do not lift from the underneath of
the bracket as this could entrap your hand/fingers. Now walk
slowly forward to the centre, and your gazebo will fold, as shown.
Your gazebo is now ready for storage.
WARNING
• THIS GAZEBO MUST NOT BE LEFT
ERECTED IN WINDY CONDITIONS
• THIS GAZEBO MUST BE COMPLETELY
DRY BEFORE STORAGE
HERE
09.09 FW01 0-8 A
B&QPic, Chandlers Ford, Hampshire, S053-3YX
Visitus at www.diy.com
CustomerHelp Line TelephoneNumber:0151 5200074 Monday-Friday09.00-17.00
Page 2 of 2
 Loading...