

bq Aquarius E10, Aquarius E10 3G User Manual
Complete User Manual

2
ENGLISH
Complete User Manual
Aquaris E10 / Aquaris E10 3G
The bq team would like to thank you for purchasing your new tablet Aquaris E10 / Aquaris
E10 3G. We hope you enjoy using it.
With this device you can browse the internet, check your email, play games, use apps
(which you can download directly onto the device), read e-books, transfer les via
Bluetooth
®
, record audio, watch movies, take photos and videos, listen to music, chat
with your friends and family.
About This Manual
· To make sure that you use your tablet correctly, please read this manual carefully
you start using it.
· Some of the images and screenshots shown in this manual may differ slightly
from those of the nal product.
· Due to rmware updates, it is possible that some of the information in this
manual does not correspond exactly to the operation of your device. To
obtain the most up-to-date version of this manual, please go to www.bq.com.
· bq shall not be held liable for any issues relating to performance or compatibility
resulting from modication of the registry settings by the user. Nor shall it be
held liable for any incompatibility issues with third-party applications available
through the app stores.
About This Manual
3
ENGLISH
Complete User Manual
Icon guidee/Trademarks
Icon guide
Danger: This icon indicates situations that could pose a risk to personal safety
or health.
Warning: Situations which pose no risk to personal safety or health, but could
pose a risk to the correct functioning of the device.
Tip: Additional information to help you get the best out of your device.
Trademarks
The Bq logo is a registered trademark of Mundo Reader, S.L.
The Android and Google Search
TM
are registered trademarks of Google Inc.
Wi-Fi
®
is a registered trademark of the Wi-Fi Alliance.
Bluetooth
®
is a registered trademark of Bluetooth SIG, Inc.
MicroSD
TM
and the corresponding logo are registered trademarks of SD-3D, LLC.
Dolby and the double-D symbol are registered trademarks of Dolby Laboratories.
All other trademarks are the property of their respective owners. All rights reserved.

4
ENGLISH
Complete User Manual
Contents
8 BEFORE YOU START
8 Box Contents
9 Product Overview
10 GETTING STARTED
10 Inserting a Micro-SIM Card*
11 Inserting and Removing the MicroSD
12 Switching the Device On and Off
13 Charging the Tablet and Transferring Files
15 Setup Wizard
16 HOME SCREEN
16 Screen Lock
17 Home Screen
18 Extending the Home Screen
18 Adjusting Screen Rotation
19 Customising the Home Screen
19 Moving and Deleting Icons on the Home Screen
19 Creating App Folders
20 Taking Screenshots
20 Making Screen Recordings
20 Learning to Use the Multi-Touch Screen
23 Buttons and Icons
23 Status Bar
24 Notications Bar
26 Keyboard
Contents
* Only on the Aquaris E10 3G model

5
ENGLISH
Complete User Manual
Contents
27 PHONE*
27 Managing Contacts
27 Adding a Contact
28 Editing an Existing Contact
28 Using a Contact
29 Create a Group of Contacts
30 Contacts to Display
30 Importing and Exporting Contacts
31 Blocking a Contact
31 Calls
33 Options Available During a Phone Call
34 Hiding Your Caller ID
34 Restricting Calls
35 SMS and MMS
35 Message Settings
37 SETTINGS
37 WIRELESS SETTINGS
37 SIM Management*
38 Wi-Fi
39 Bluetooth
40 Data Usage
40 More...
42 DEVICE SETTINGS
42 Audio Proles
43 Display
45 Storage
46 Battery
46 Apps
46 Users
47 PERSONAL SETTINGS
47 Location
48 Security
49 Language and Text Input
50 Backup & reset
* Only on the Aquaris E10 3G model

6
ENGLISH
Complete User Manual
Contents
51 ACCOUNTS
52 SYSTEM SETTINGS
52 Date and Time
52 Scheduled Power On and Off
53 Accessibility
56 Printing
56 About Tablet
56 Developer Options
58 PERFORMANCE SETTINGS
58 Optimising Battery Life
58 Monitoring Battery Usage Information
59 EMAIL
59 Setting Up a Gmail Account
60 Setting Up Other Email Accounts
61 Sending an Email
61 Replying to an Email
62
MULTIMEDIA
62 Camera
63 Photo and Video Settings
66 Preset Image Modes
67 Image Gallery
68 Playing Music
69 Playing Videos
70 APPLICATIONS
70 App Store
70 Apps from Unknown Sources
71 Preinstalled Apps
71 Internet Browser
72 Chat
73 Text Editor, Spreadsheets and Presentations
73 Calendar
74 Maps and GPS Navigation
74 File Explorer
75 Dolby
76 News & Weather (Genie Widget)

7
ENGLISH
Complete User Manual
77 TOOLS
77 Calculator
77 Clock
78 Sound Recorder
78 FM Radio
79 Voice Search
80 APPENDICES
80 APPENDIX A: OTA Updates
81 APPENDIX B: Technical Specications
82 APPENDIX C: Cleaning and Safety
85 APPENDIX D: Information on Exposure to Radio Waves and
the SAR Information on Exposure to Radio Waves and SAR
(Specic Absorption Rate)
86 APPENDIX E: Disposing of his Product Correctly
87 APPENDIX F: Declaration of Conformity
Contents
8
ENGLISH
Complete User Manual
Before you Start
BEFORE YOU START
Box Contents
Before using your bq device for the rst time, please check the contents of the box.
If any of the following items are missing, contact the retailer that sold you the device.
Aquaris E10 / Aquaris E10 3G
USB to micro-USB cable
Mains charger
SIM key (only with Aquaris E10 3G model)
Documentation:
Quick Start Guide
Warranty and Safety Manual
bq Accessories
9
ENGLISH
Complete User Manual
Before you Start
10
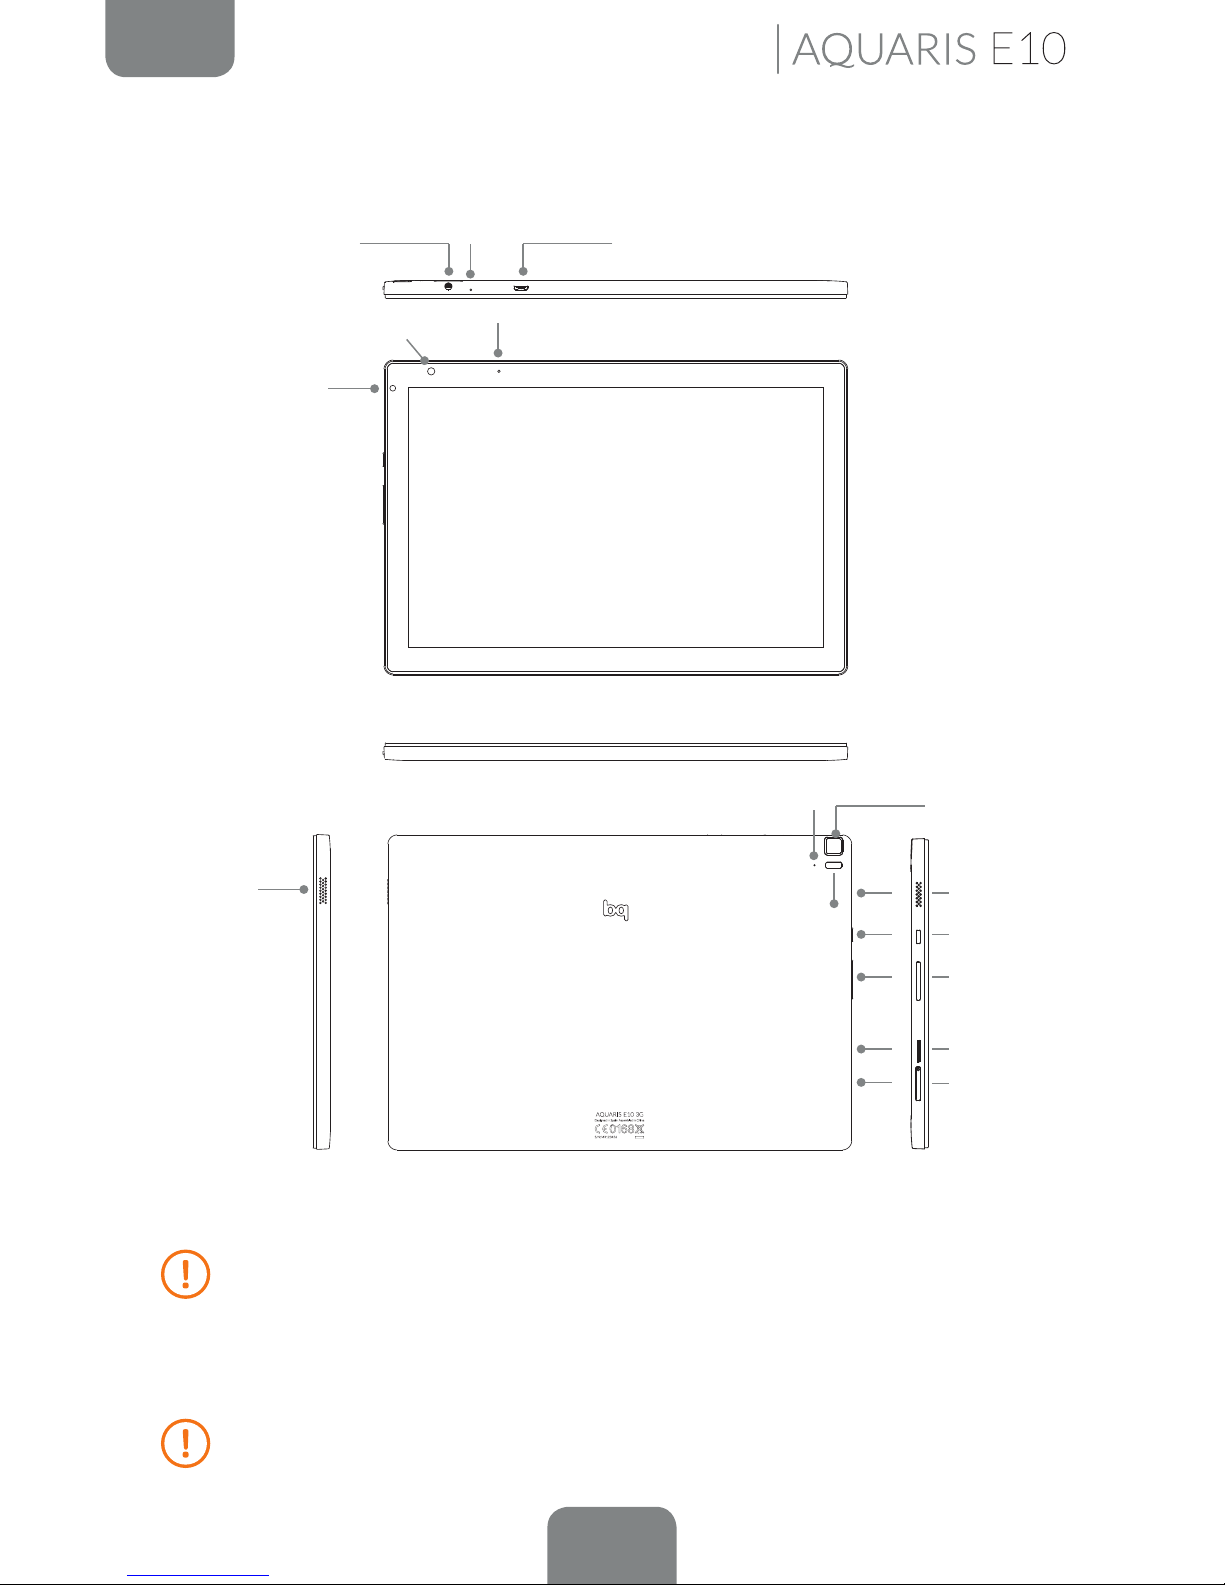
Product Overview
Do not attempt to remove the rear cover of your Bq Aquaris E10 / Aquaris E10
3G, as this may damage the device.
Do not remove the battery by any means. Removing it may invalidate the
warranty.
Do not insert any pointed objects into the opening as this may damage the
microphone.
Light sensor
Front camera
Speaker
Power button
Volume key
Microphone
Rear camera
MicroSD slot
Micro-USB
Headphone jack
Speaker
* SIM card slot only available on the Aquaris E10 3G model.
Notication lights
Noise canceller
Micro-SIM slot
10
ENGLISH
Complete User Manual
Getting Started
GETTING STARTED
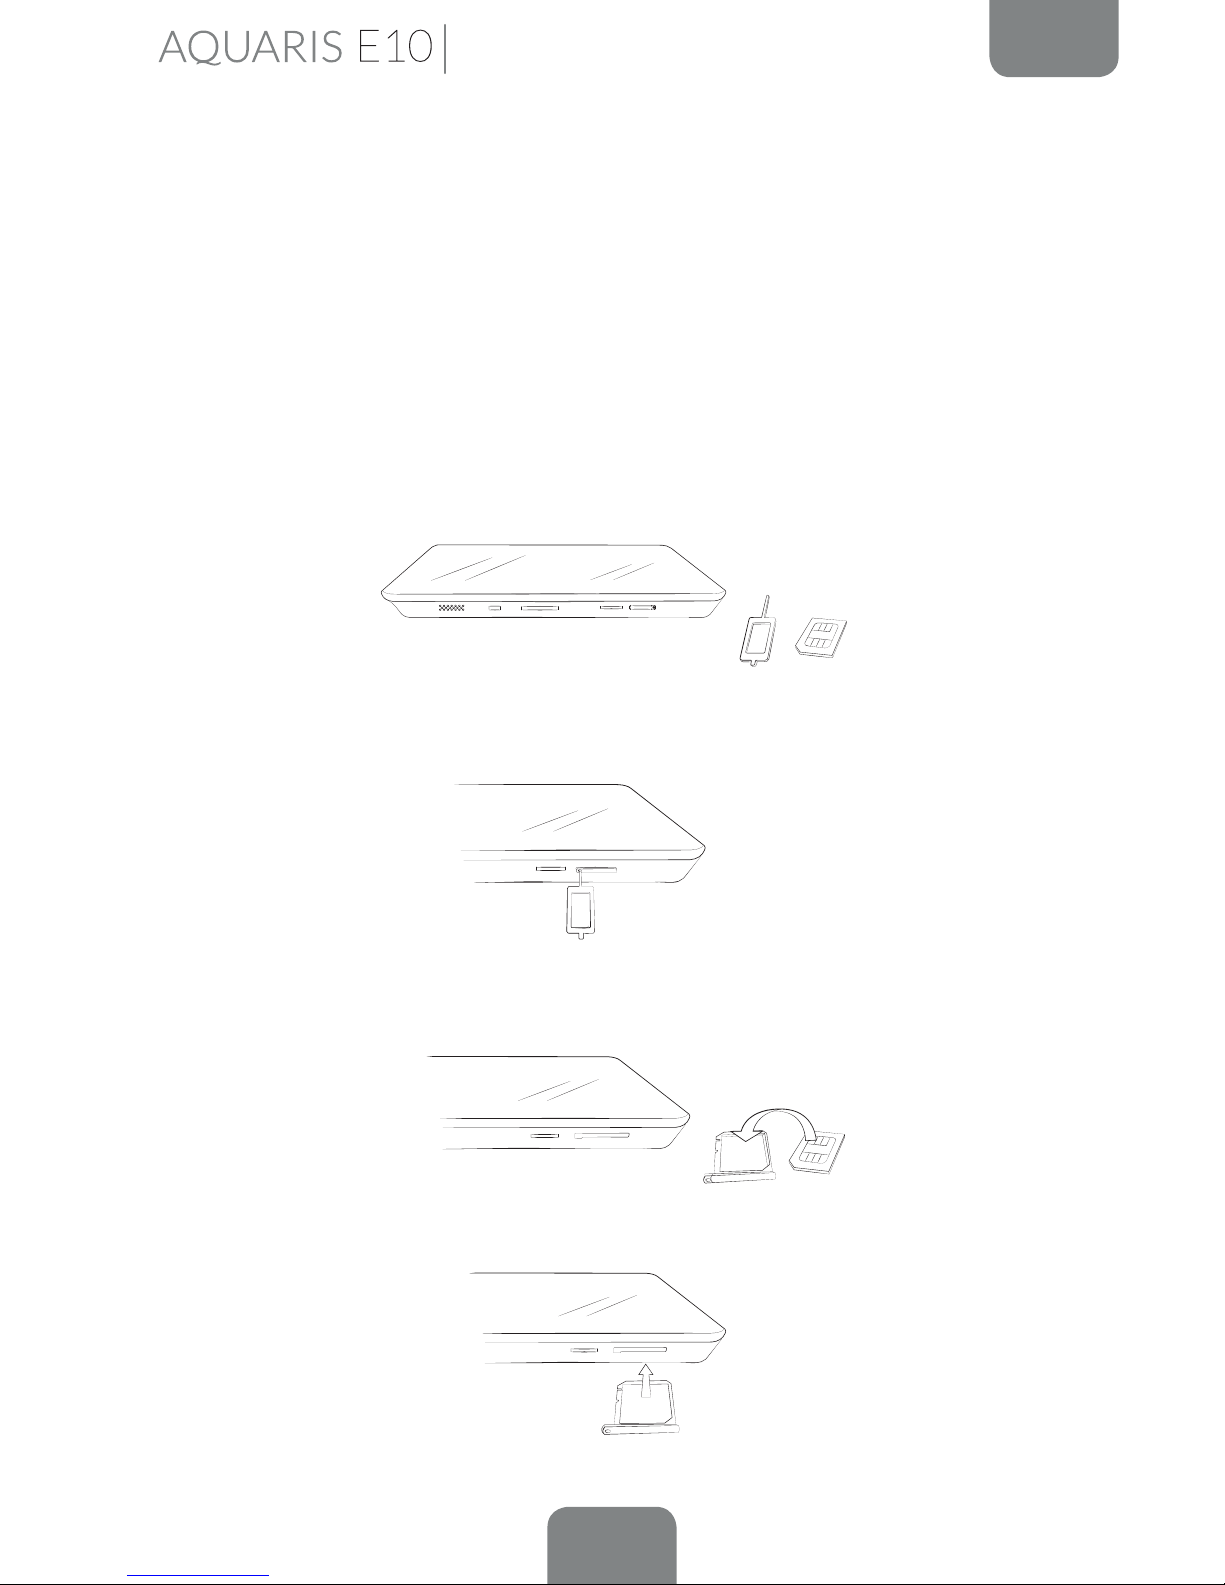
Inserting a Micro-SIM card*
Your Bq Aquaris E10 3G takes a micro-SIM card. The SIM tray is accessed from
the exterior of the device. The rear cover should not be removed under any
circumstances.
The following steps will help you to insert the card into your tablet before you start
using it.
You will nd a SIM key included in the box, together with the envelope containing
the device documentation.
Ensure that the device is switched off and insert the end of the SIM key into the hole
of the SIM slot.
Place your SIM card in the tray. Make sure it is in the correct position by using the
notch on the corner to guide you (see image).
Put the tray back into the slot after mounting the SIM card.
* SIM card slot only available on the Aquaris E10 3G model.
11
ENGLISH
Complete User Manual
Getting Started
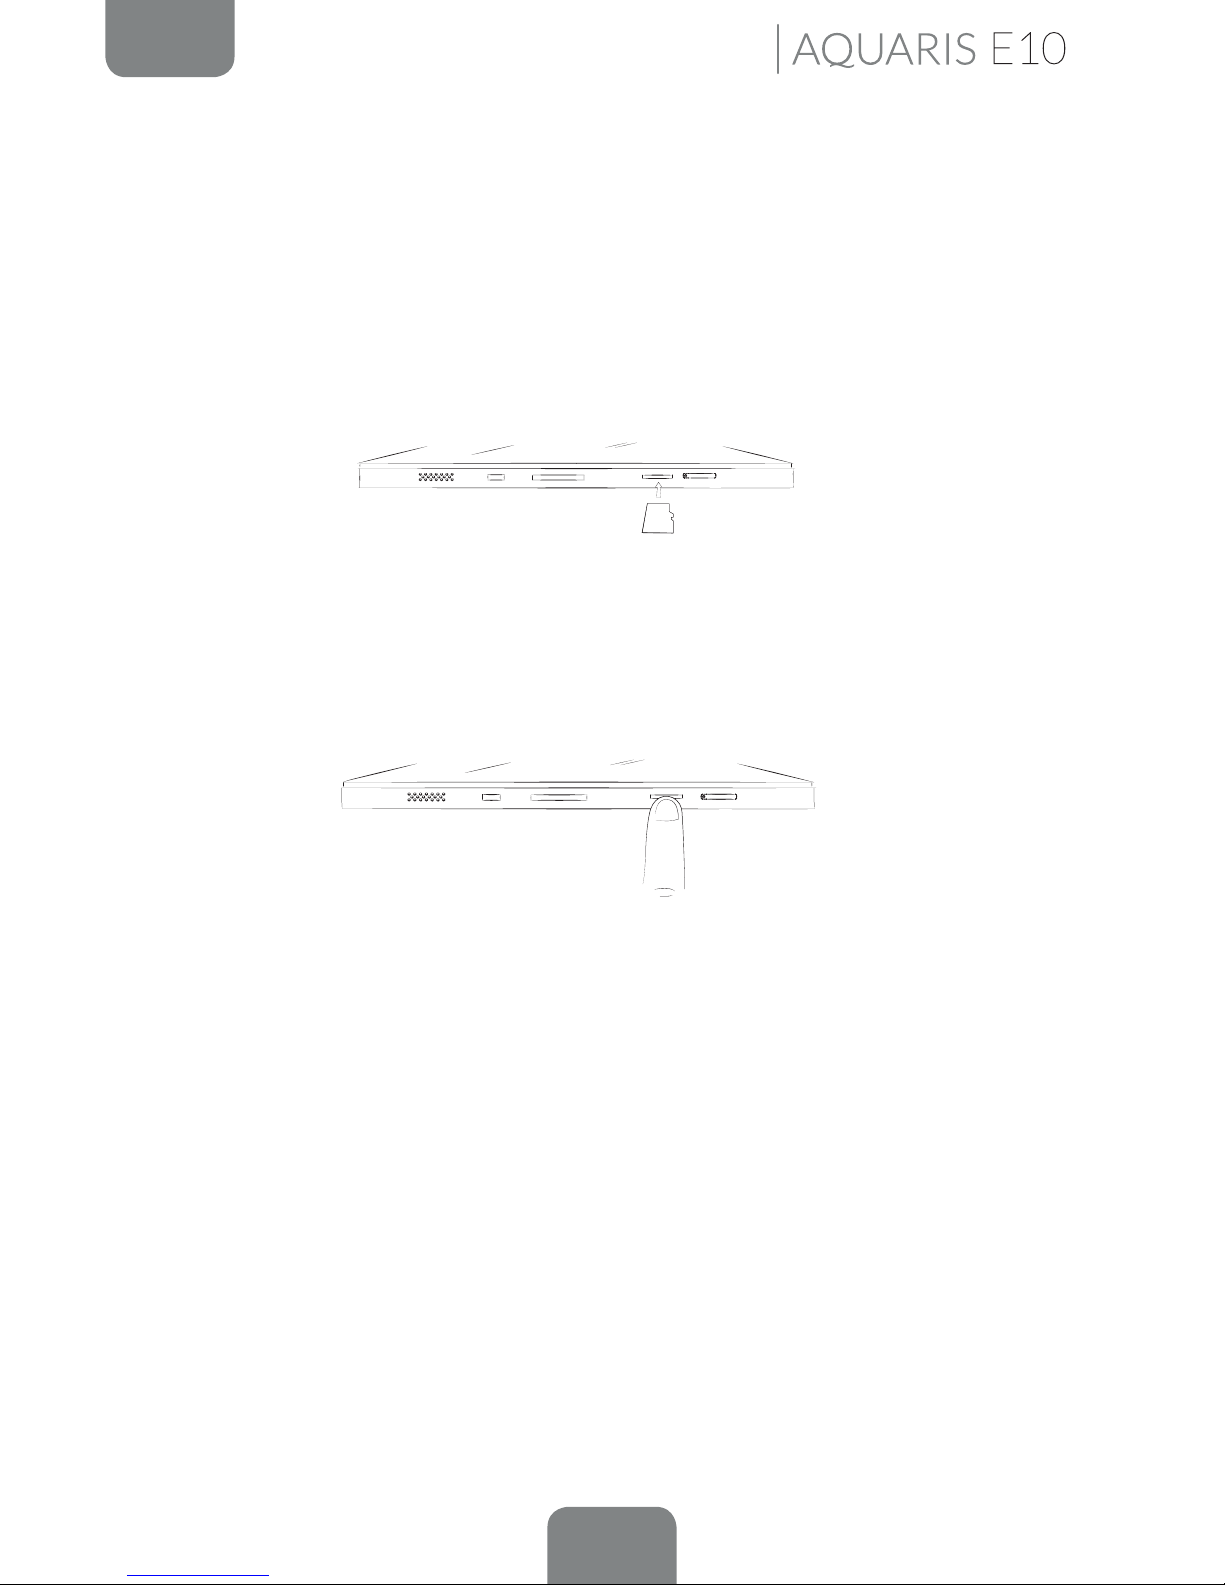
Inserting andRemoving the MicroSD
Your Bq Aquaris E10 / Aquaris E10 3G has an internal memory that can be expanded
to 32 GB by using a MicroSD card.
To insert a MicroSD card, follow these steps:
Insert the MicroSD card into the slot, making sure the metal pins are at the bottom
and facing backwards (i.e. towards the back of the device).
Push the card in until you hear a slight click, which indicates that it has been inserted
correctly. If the card is not inserted correctly, the device may not recognise it and its
content will not be available.
To remove the MicroSD card, follow the steps above in reverse, bearing in mind the
following recommendations:
a. For greater security, switch the device off before removing the MicroSD card.
b. If you need to remove the MicroSD card while the device is switched on,
unmount it rst to avoid damaging the card and losing any data.
To unmount the card, open the Settings menu on your device and go to Storage > Remove
SD card.
¡CLICK!
12
ENGLISH
Complete User Manual
Getting Started
If you press briey on the power button, the screen will switch off but not the
device.
You can choose whether to store your multimedia files on the tablet’s internal
memory or directly onto the MicroSD card. Remember that any content stored on
the MicroSD card will not be available when the card is removed, and any apps stored
on there will no longer function.
Push the card in until you hear a slight click to indicate that the card has been
released. When you remove your nger, the card will slide partially out of the slot,
allowing you to remove it completely.
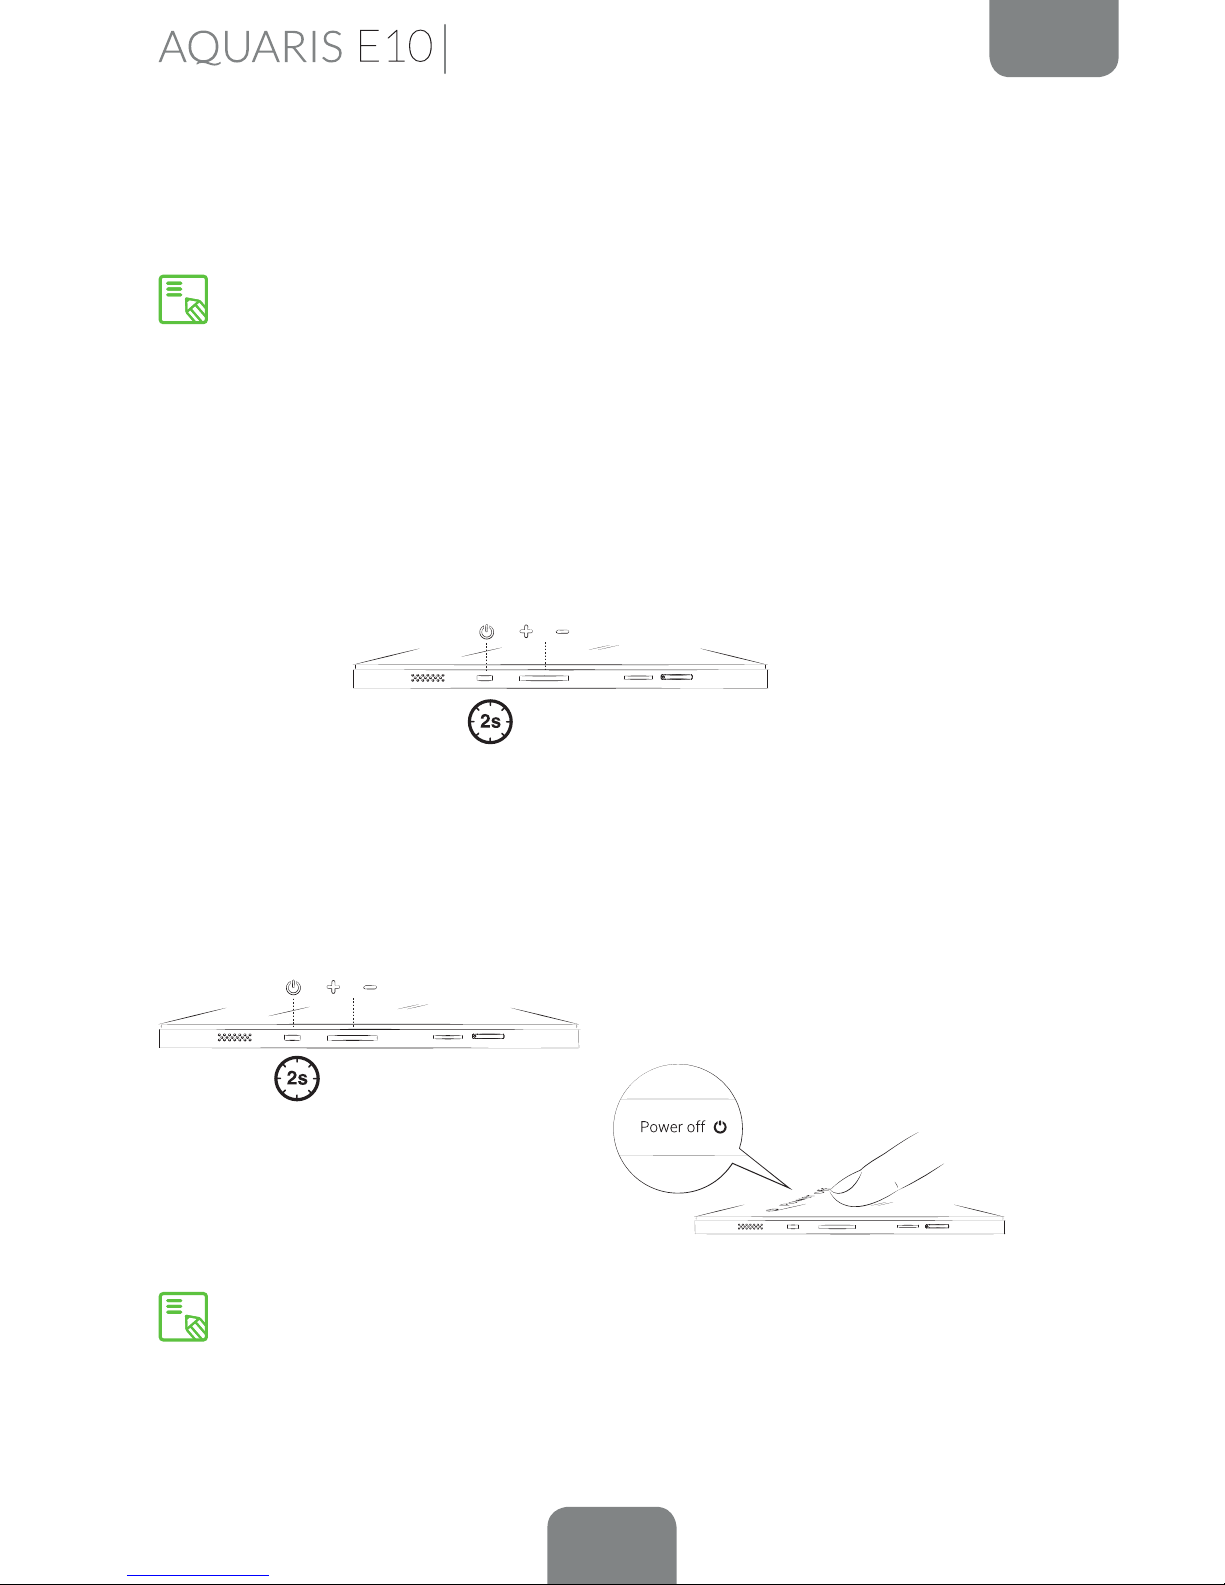
Switching the Device On and Off
To switch on your Bq Aquaris E10 / Aquaris E10 3G, press and hold down (for a few
seconds) the power button located on the side of the tablet.
To switch off the device, press and hold down the power button until a pop-up menu
appears, containing a number of different options. Select the Power off option in
order to switch your device off completely.
13
ENGLISH
Complete User Manual
Getting Started
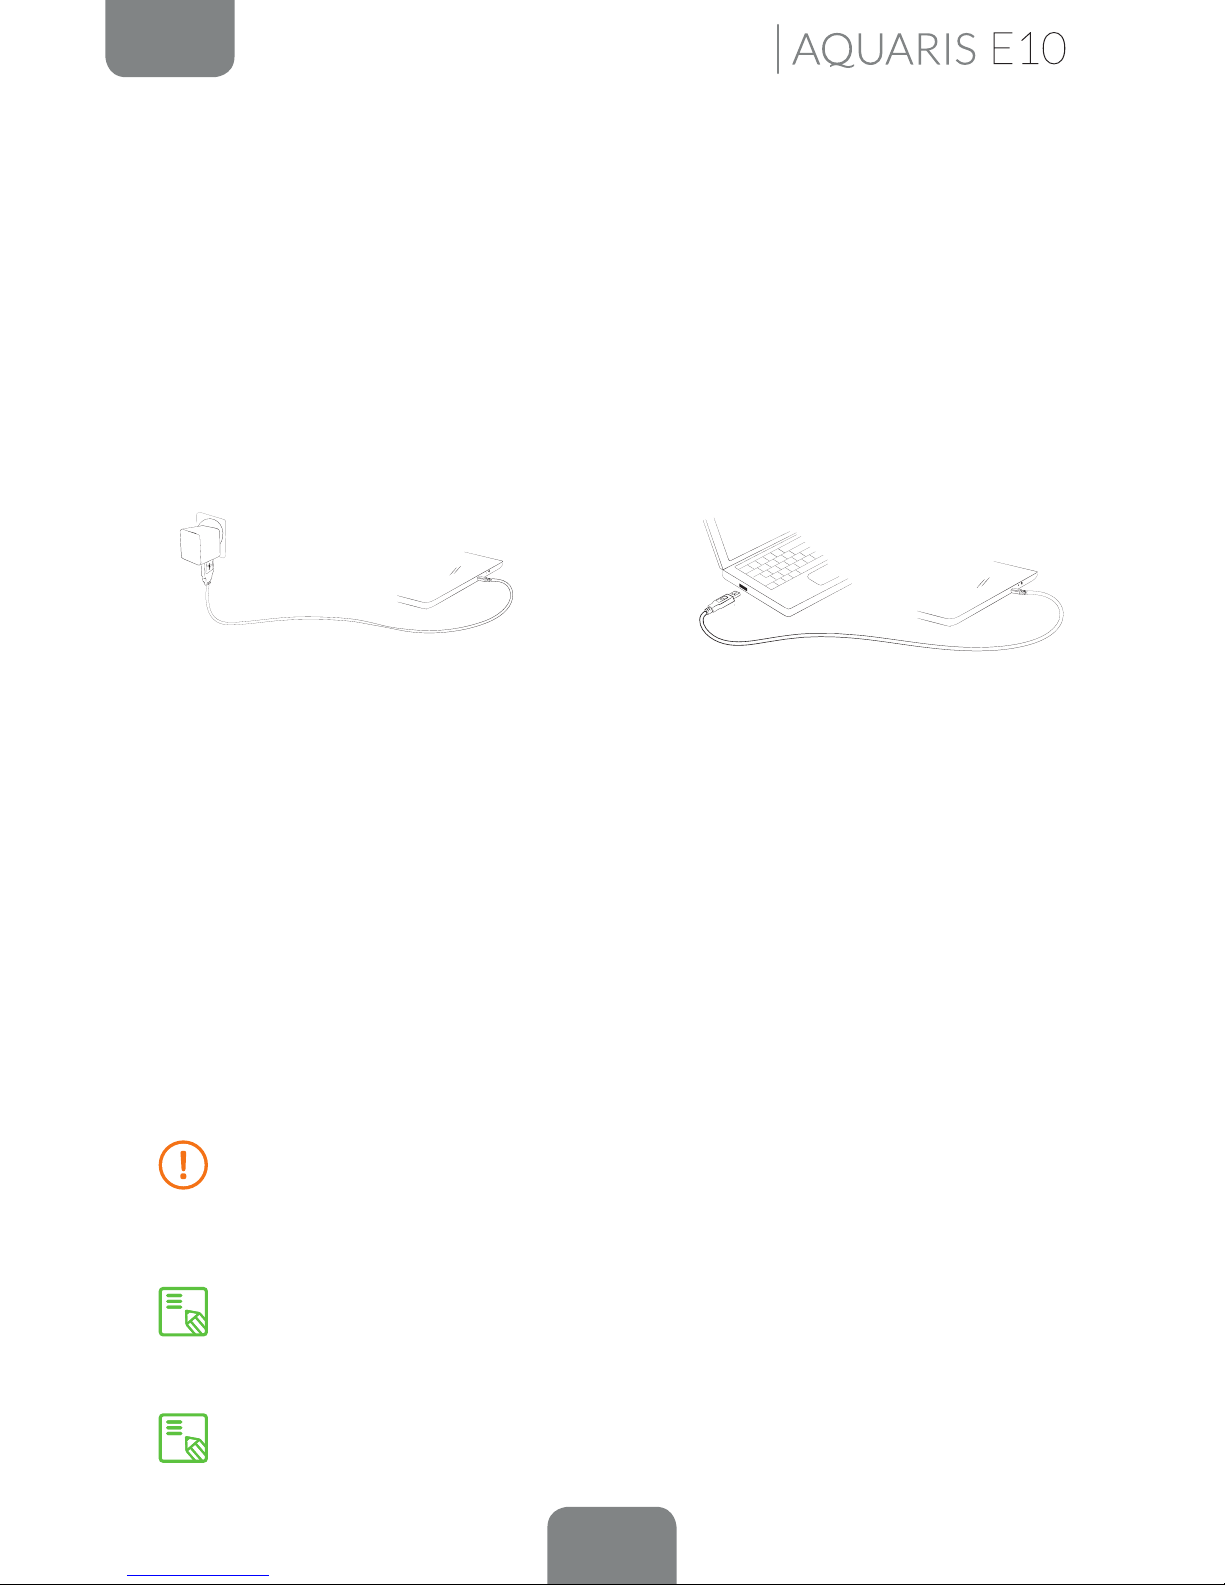
Charging the Tablet and Transferring Files
Your tablet has a rechargeable (non-removable) battery 8680 mAh which is charged
via the micro-USB port at the bottom of the device. A USB to micro-USB cable and
mains adapter are provided with the tablet. To charge it, follow these simple steps:
A) Using the mains adapter:
1. Plug the USB cable into the mains adapter.
2. Connect the mains adapter to any standard plug socket (220 V/50 Hz).
3. Plug the other end of the cable into the micro-USB port on your tablet.
B) Using a laptop or desktop computer:
1. Plug the USB cable into a compatible USB port on your computer.
2. Plug the other end of the cable into the micro-USB port on your tablet.
The battery in your bq Aquaris E10 / Aquaris E10 3G mini is non-removable. If it
is removed by anyone other than our Technical Support staff, your device could
be damaged and the warranty invalidated
Allowing the battery to charge fully is recommended when you charge it for the
rst time as this will help calibrate the battery meter. Bear in mind that some
batteries perform better after a number of full charge/discharge cycles.
The time required to charge your device may vary slightly depending on whether
it is charged via the mains adapter or via a computer USB port.
14
ENGLISH
Complete User Manual
If you connect your tablet to a computer using the USB cable, you can also transfer
les between the two devices (to/from the internal memory, or the MicroSD card,
if one is in use). This will allow you to use, copy or store images, videos, music, text
documents, etc. on one or both devices.
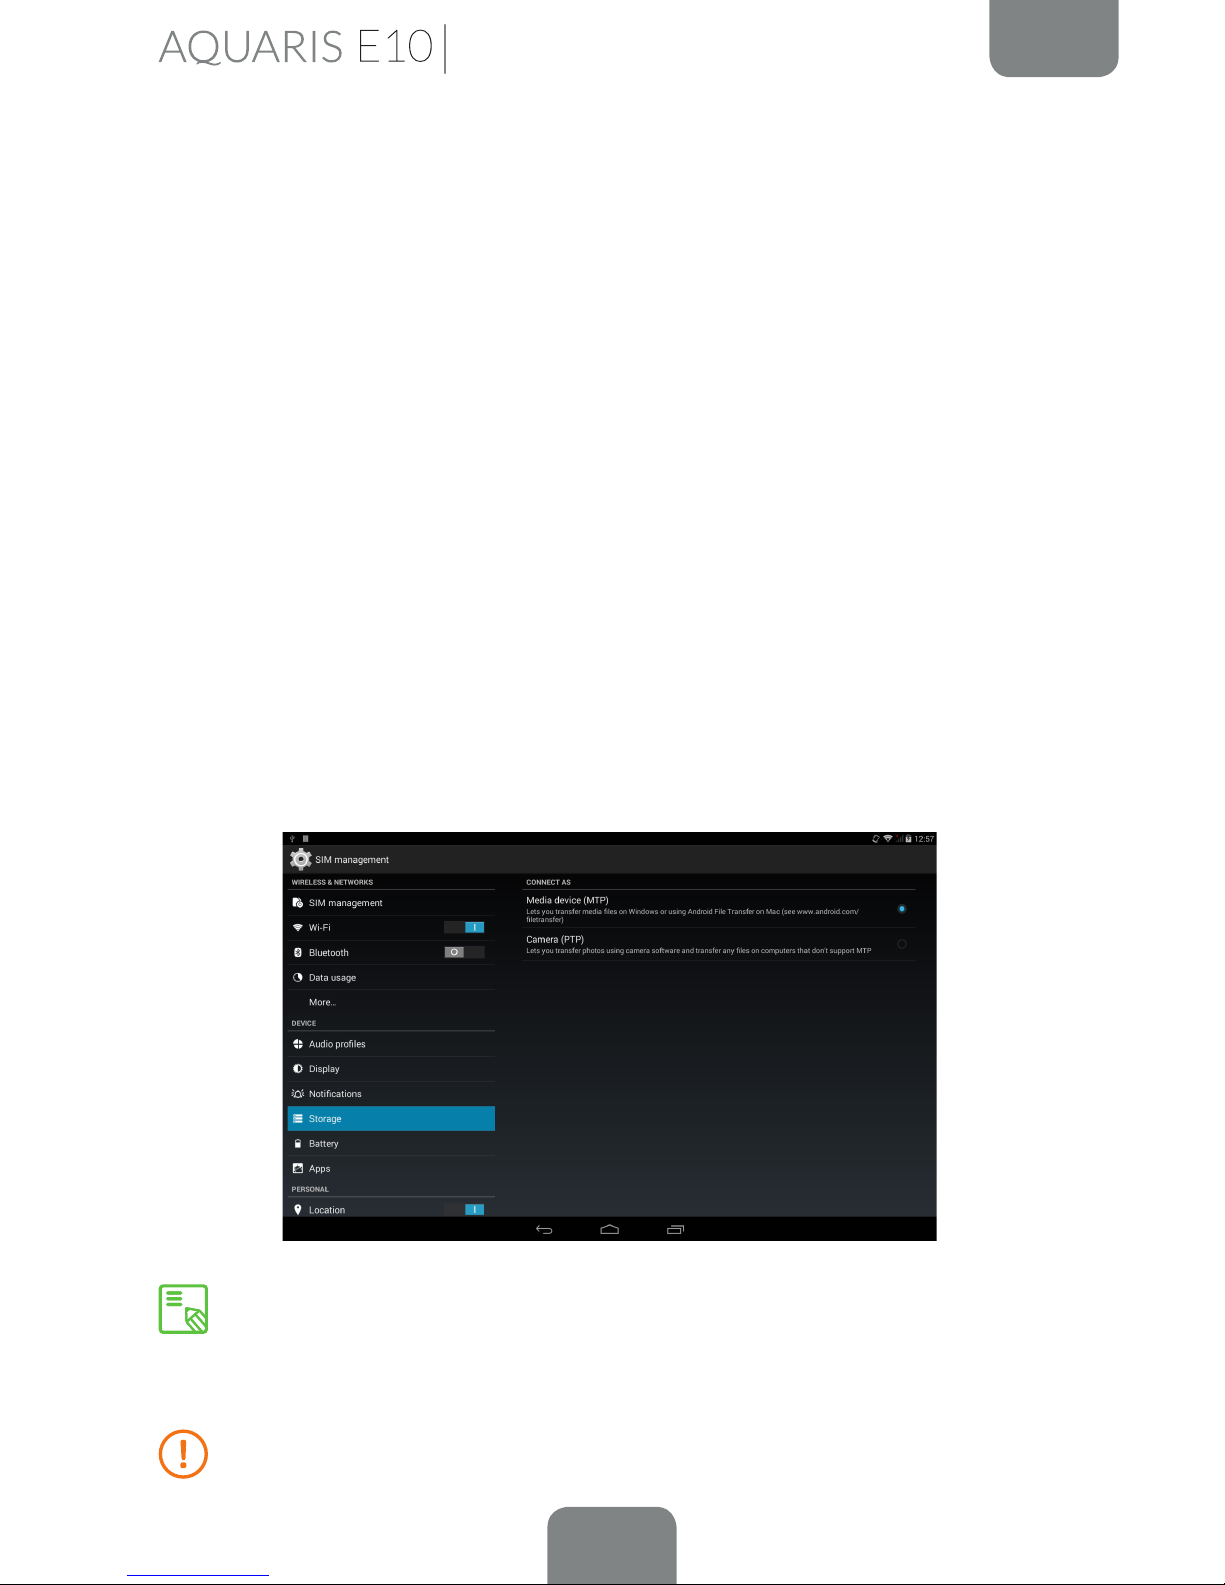
You can select the file transfer mode when you connect your bq Aquaris E10 /
Aquaris E10 3G to a computer. Swipe down (with a single nger) from the top of
the screen in order to display the various options for USB computer connection.
The tablet will be connected as a Media device (MTP) by default or you can also
connect it as a Camera (PTP).
There are a number of ways to transfer les. The steps below will show you how to
transfer them via USB:
1.
Connect your bq Aquaris E10 / Aquaris E10 3G to a computer using the micro-USB
to USB cable supplied. Insert the micro-USB connector into the corresponding port
on the device, and the generic USB connector into the corresponding port on the
computer.
2.
Select and copy the desired les onto your tablet or computer. Remember that
you can store them on either the internal memory or on the MicroSD card if you
are using one.
To transfer files in MTP or PTP mode from your tablet (internal memory or
MicroSD card) onto a computer running Mac OS (and vice versa), you will
need to download and install the free Android File Transfer app onto your
computer: www.android.com/filetransfer/.
Do not disconnect the cable while les are being transferred.
Getting Started
15
ENGLISH
Complete User Manual
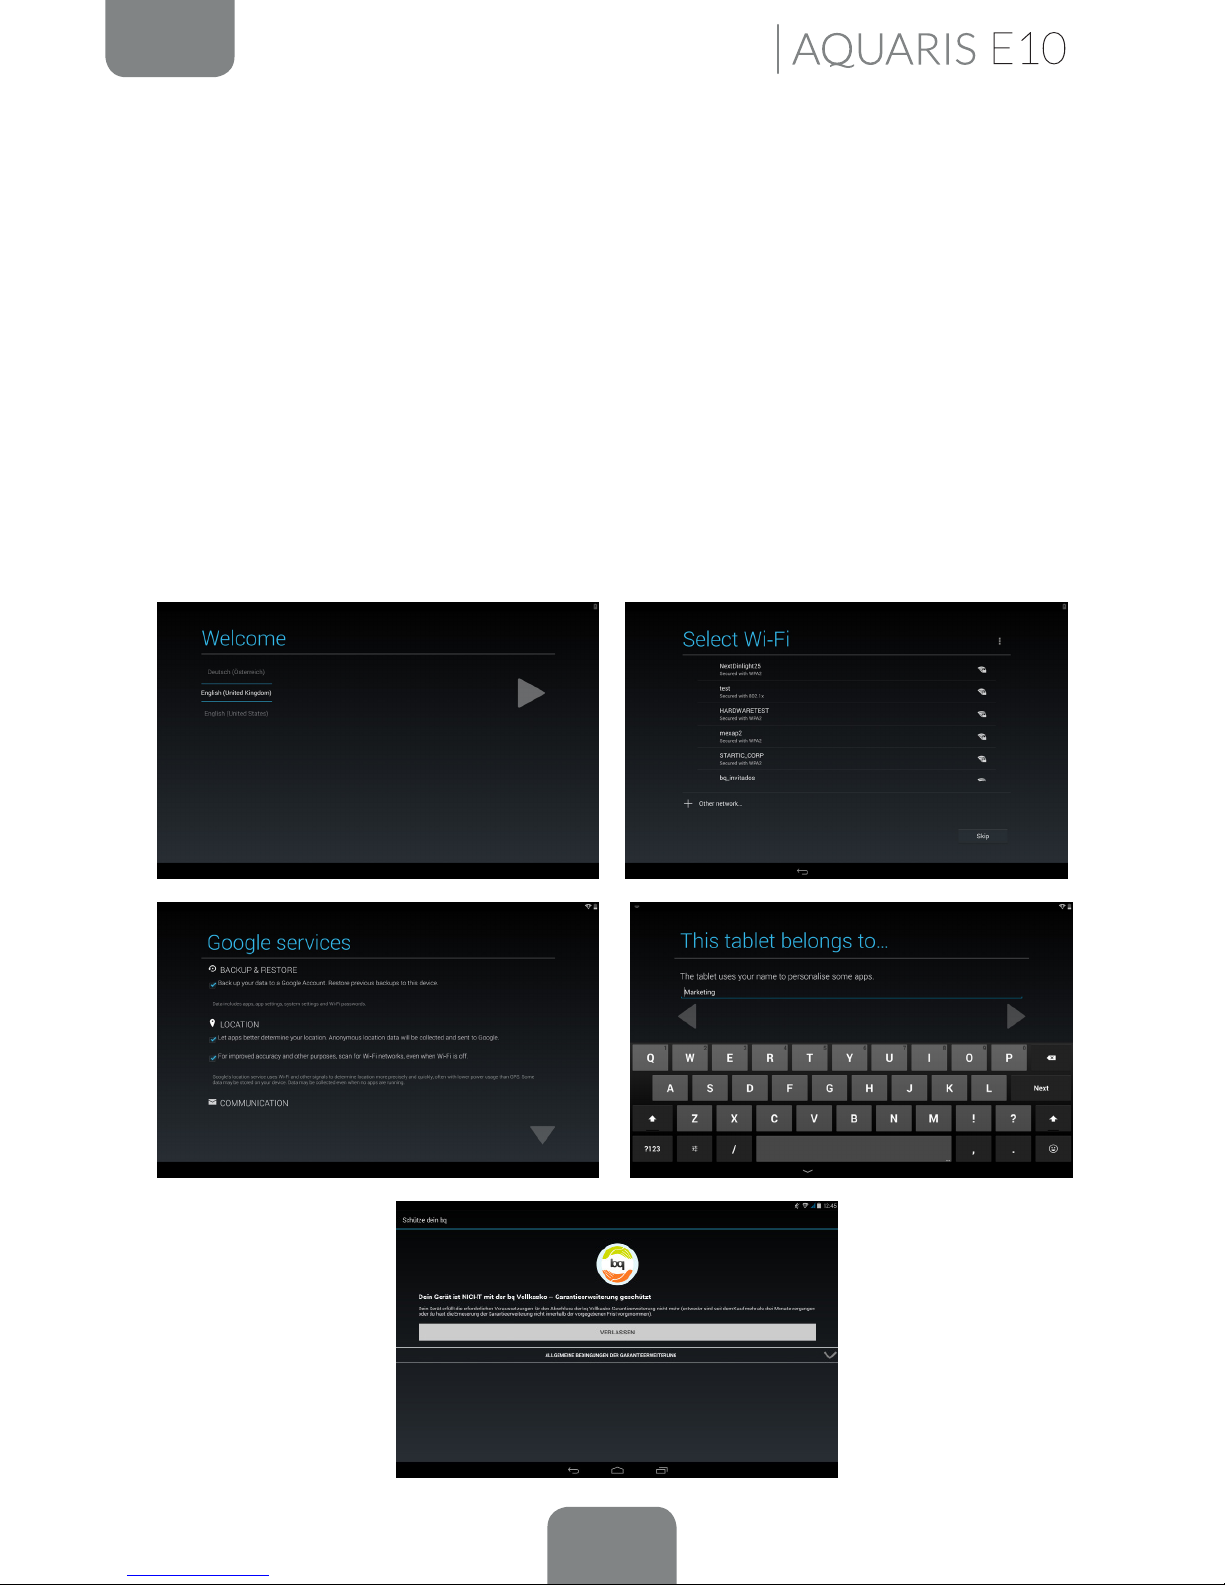
Setup Wizard
The rst time you switch on your bq Aquaris E10 / Aquaris E10 3G, a setup wizard
will help you to congure the basic settings for your device:
· Language
· Wi-Fi network
· Google account
· Location and Google settings
· Device name
· bq Protection Plus
Getting Started
16
ENGLISH
Complete User Manual
HOME SCREEN
Screen Lock
Your tablet screen will lock itself after a prolonged period of inactivity. To congure the
screen timeout interval, press the Menu button
, go to Settings > Display > Sleep and
select the desired time interval. To switch the screen off manually, briey press the power
button.
To unlock the screen, press (but do not hold down) the power button and the screen
will come on, displaying the unlock option. To change the unlock option, press the
Menu button, go to Settings > Security > Screen lock and choose from the following
options: None, Slide, Face Unlock, Voice Unlock, Pattern, PIN and Password. For
more information on each of these options, go to Settings > Security.
If you forget how to unlock the screen, after various wrong attempts, the
Forgot pattern message will appear at the bottom of the screen. If you press
this message you will be asked to enter the email address and password used to
set up your tablet. The screen lock will then be removed.
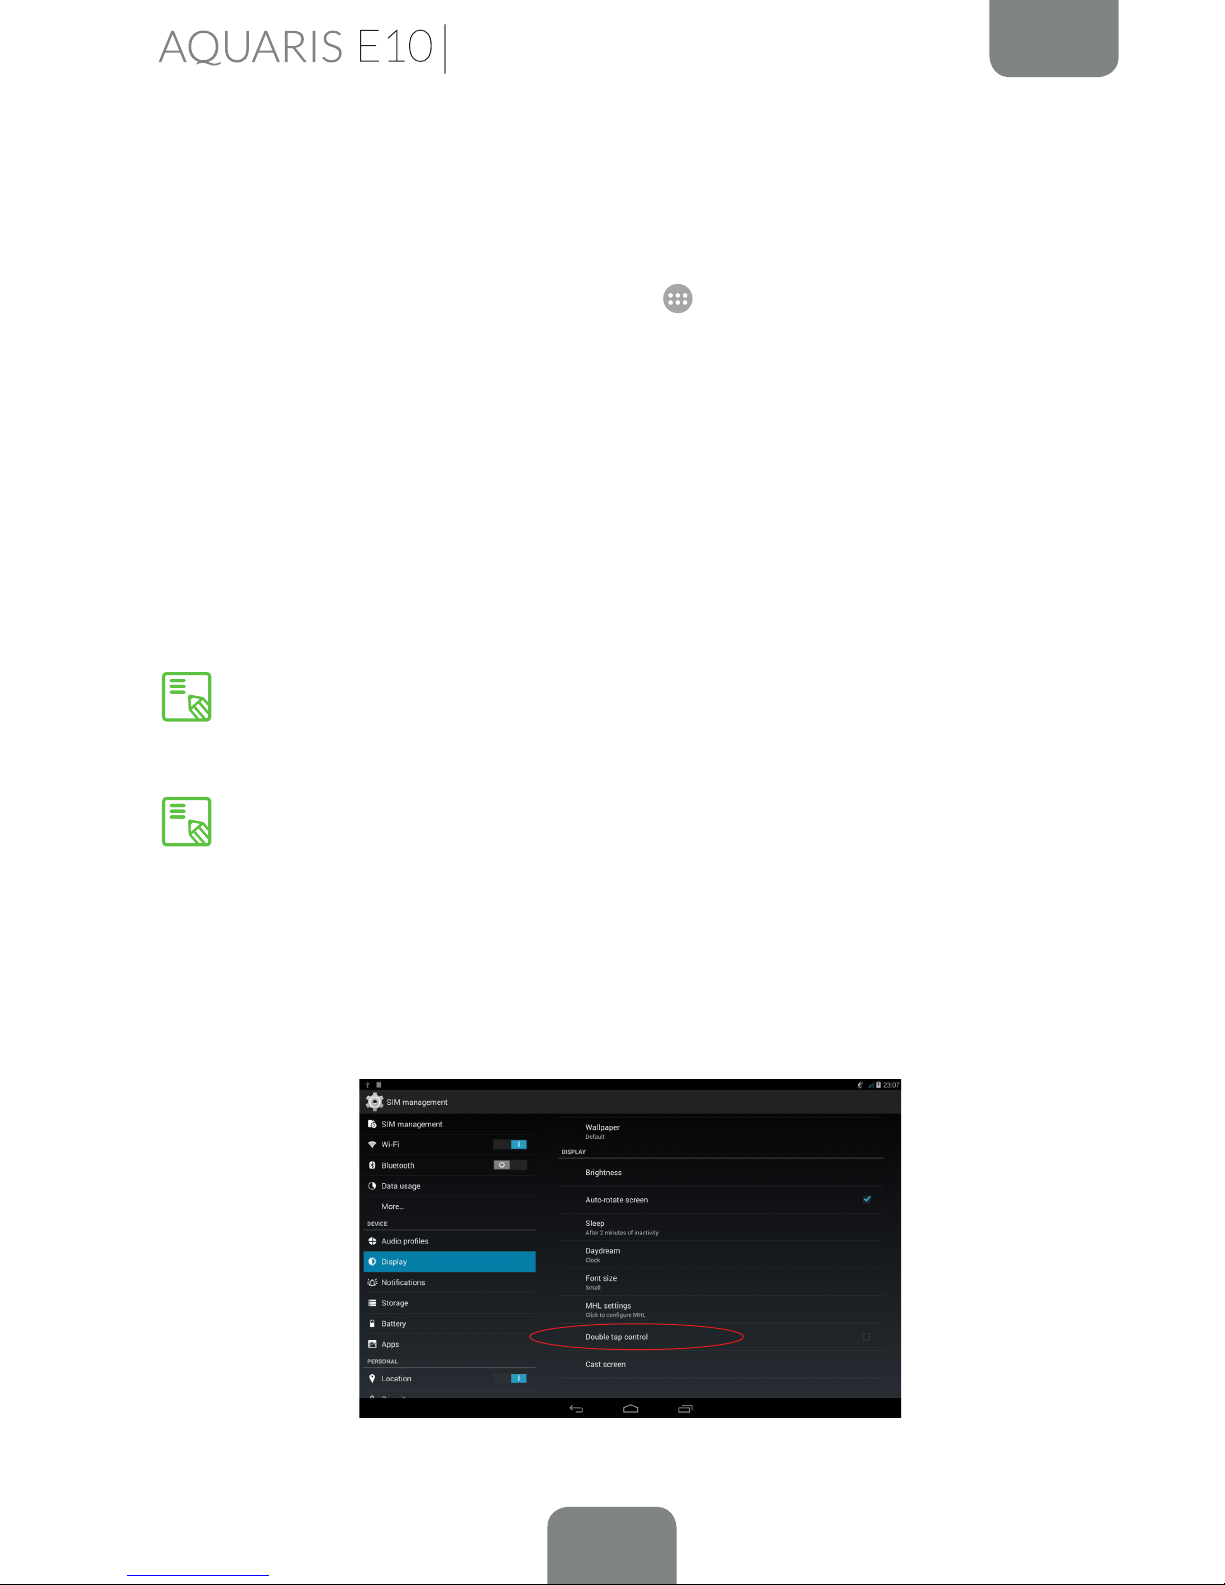
Your Aquaris E10 / Aquaris E10 3G includes a new feature that enables you to
lock and unlock your tablet via double tap control. Simply tap any part of the
screen twice in quick succession so that it lights up and requests the unlock
pattern. When the screen is activated, a double-tap anywhere in the notications
bar will lock and deactivate it.
This feature is disabled by default, so in order to use it you will need to activate
it by going to Settings > Display > Double tap control.
Home Screen
17
ENGLISH
Complete User Manual
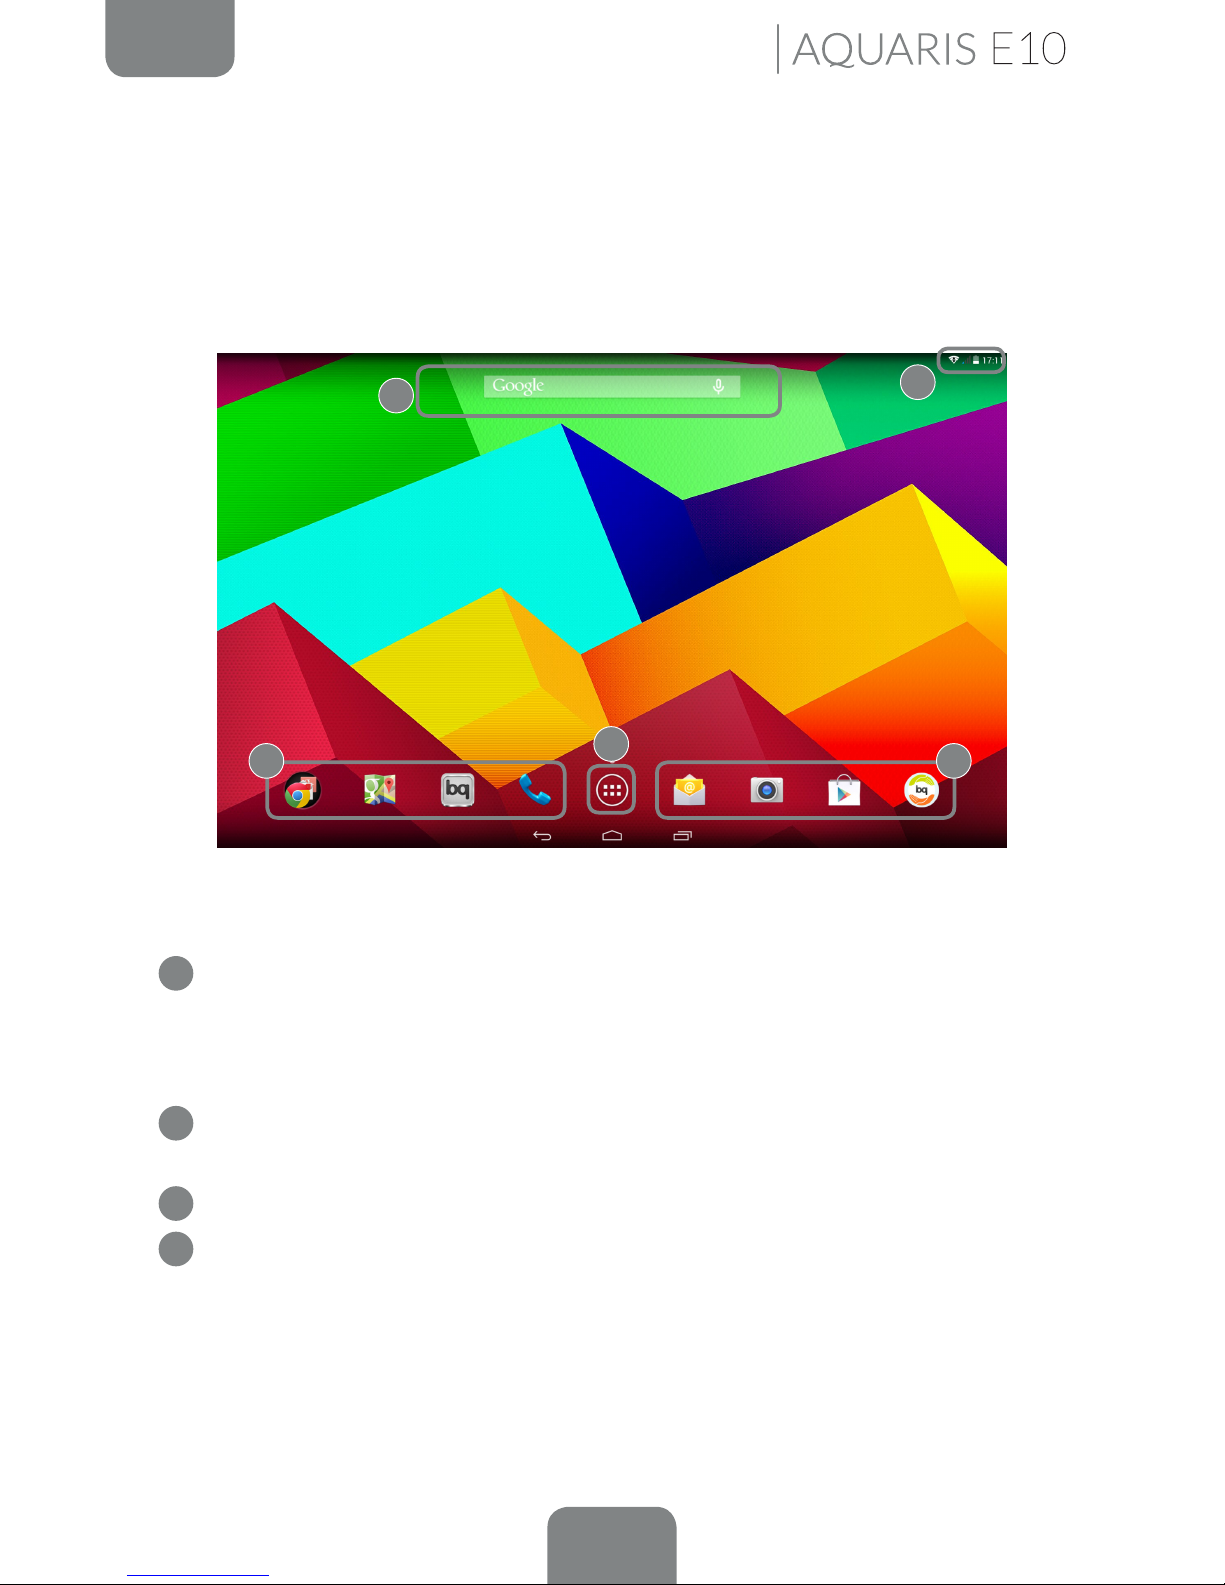
Home Screen
The Home screen, or Start screen, is your main access route to the tools and apps
installed on your device. From here, you can check the status of your device, visit
websites, open apps, and much more.
1
Status and Notifications bar. Displays the time, the Wi-Fi, 3G* (Aquaris
E10 3G model only) and Bluetooth connection status, the sound prole and
the remaining battery life. Slide the bar downwards from the left to check
your notifications, or from the right to access the quick settings menu.
2
Google search. Press the search bar to enter the text you want to search for
on the internet. You can also carry out a voice search.
3
Shortcuts. These give you quick access to the apps you use most frequently.
4
App menu. Here you can access all the apps installed on your device.
2
1
3 3
4
Home Screen

18
ENGLISH
Complete User Manual
From the Home screen you can also press the Menu button, or touch and hold an
empty area of the screen, to bring up the customisation options. These options consist
of the following:
· Wallpaper: You can select which image to use as a background for the Home
screen and extended screens.
· Widgets: You can add different widgets to the Home screen. Widgets are
small apps or programs whose main function is to provide quick and easy
access to the tablet’s features, and to display information on various subjects
such as the news, weather, etc.
· Settings: This option takes you directly to the device’s Settings menu, which
can also be accessed via the Notications bar and the App menu.
As well as widgets, you can also add shortcuts to your Home screen that give you
direct access to apps, contacts, etc. To do this, go to the App menu, touch and hold
the app you want to create a shortcut for, and drag it into the desired position onto
the Home screen.
Extending the Home Screen
The Home Screen has a screen that can expand up to four desktops more, which you
can customise with shortcuts, applications or widgets. To scroll through the Home
screen and extended screens, simply slide the screen to the left or right using your
nger.
Adjusting Screen Rotation
For some apps, the screen will rotate automatically from portrait (vertical) into
landscape (horizontal) mode and vice versa, depending on how you are holding your
device. If you want to stop the screen from rotating, press the Menu button, go to
Settings > Display and untick the Auto-rotate screen option.
You can also activate and deactivate automatic screen rotation via the corresponding
option (Auto-Rotate) in the Quick Settings menu.
Home Screen

19
ENGLISH
Complete User Manual
Customising the Home Screen
You can customise your tablet’s Home screen and Extended screens by using your own
images as wallpaper, adding icons, widgets and shortcuts to your favourite apps, etc.
To change the wallpaper or add a widget, press briey on the background image
of the Home screen or any of the Extended screens. A pop-up window will appear
enabling you to choose between Wallpapers, Widgets or Settings.
If you click on the Wallpapers option, you can select your desired image and then
press Set wallpaper to conrm your choice. If you have selected a large image, you
will need to crop it accordingly.
Moving and Deleting Icons on the Home Screen
To move an element on the Home screen, press down to detach it from the
background, then drag it to the desired position and release. You can also move
icons from one extended screen to another by dragging them to the edge.
To delete an icon, drag it to the top of the screen until an X and the word “Remove”
appear. When the icon turns red, release it to delete.
Creating App Folders
To create a folder, drag one icon on top of another that you want to store in the same
folder. A folder will automatically be created and the icons placed inside it. You can
add more icons to the folder by simply dragging them into it. To name a folder (or
rename an existing one), press briey on it and then on the “Unnamed folder” option.
You can remove icons from the folder by opening it and dragging them out.
Home Screen
20
ENGLISH
Complete User Manual
Taking Screenshots
You can take a screenshot at any time by simply pressing and holding the lower
volume button and the power button down simultaneously. The screenshot will be
automatically saved in the Gallery, in the Screenshot folder. If you are accessing the
tablet via your computer, go to Pictures > Screenshots.
Making Screen Recordings
Making a screen recording is very similar to taking a screenshot. Press the upper
volume button and the power button at the same time in order to start recording,
and press them again to stop. The video will be saved in the same folder as the
screenshots.
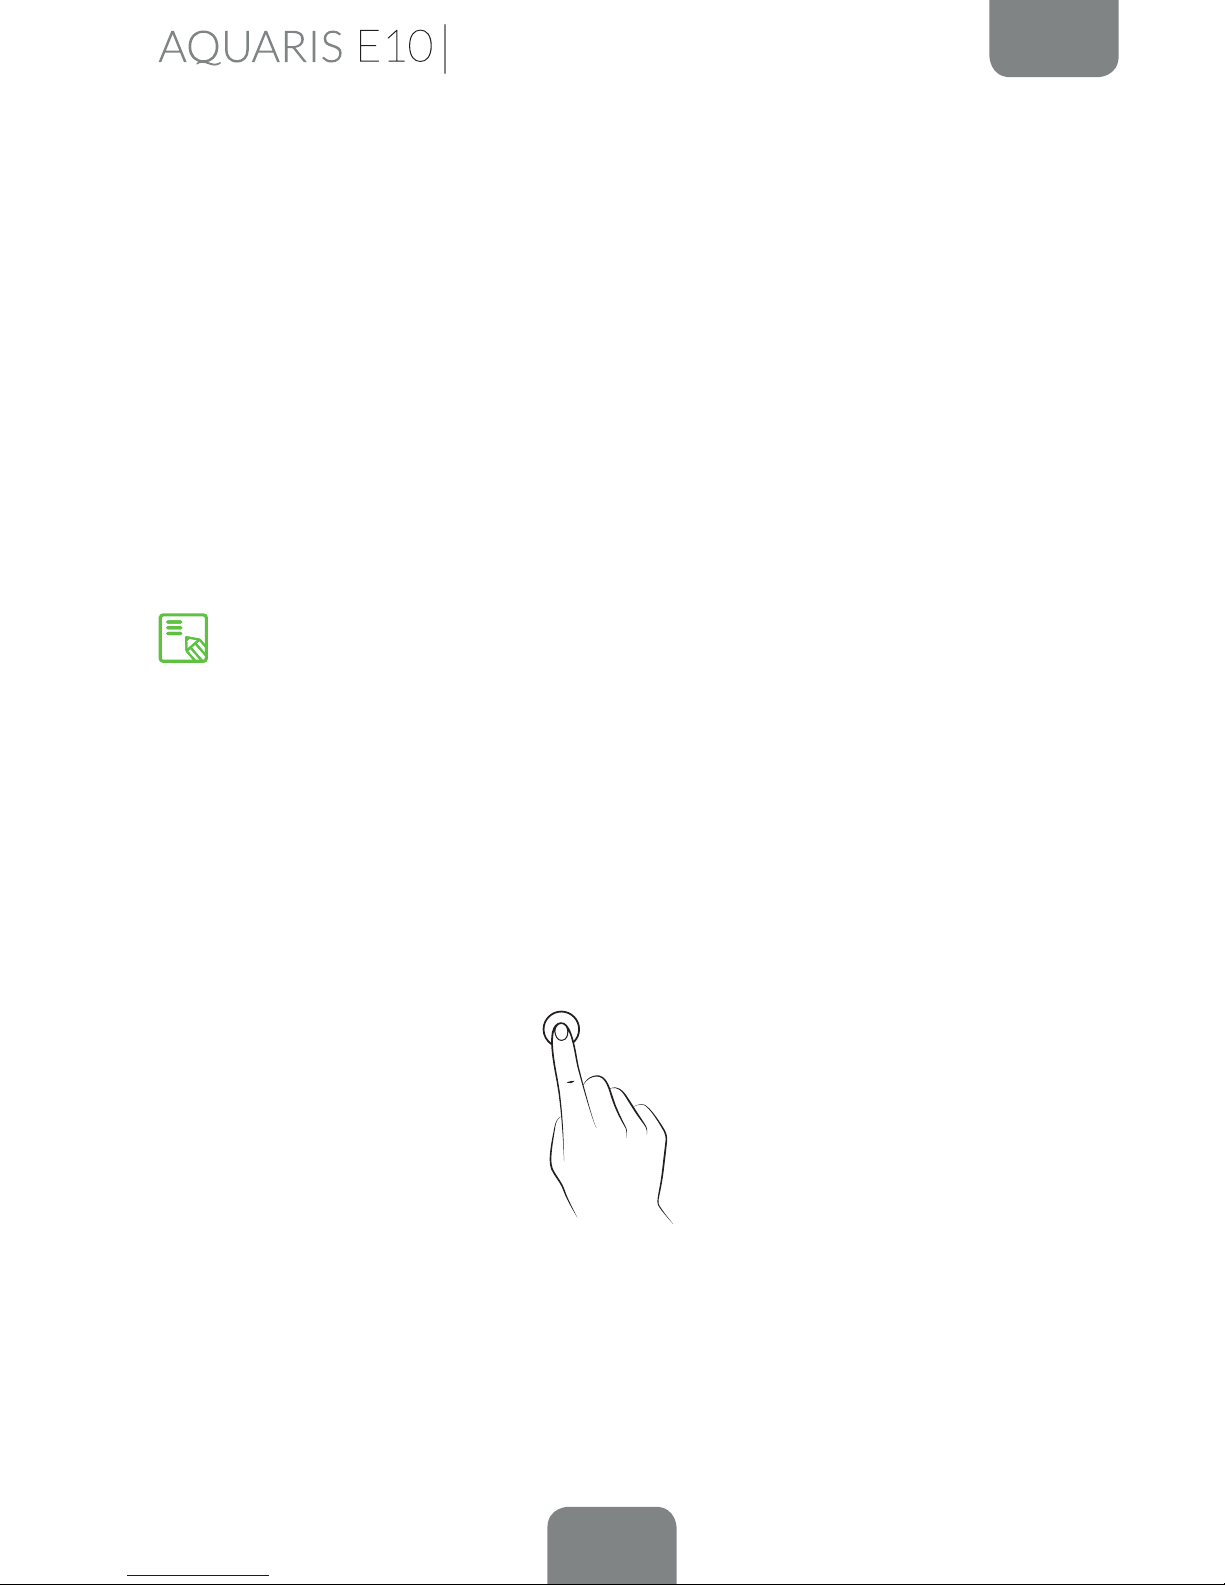
Learning to Use the Multi-Touch Screen
Your tablet has a capacitive multi-touch screen with ve simultaneous detection
points. Different movements can be made over these points which are linked to
different functions:
Touch. Touch the screen briey to select an icon, open an app, activate a text-entry
box, etc.
You can also take screenshots and make screen recordings by pulling down the
Notications bar with two ngers and selecting the corresponding option from
the pull-down menu.
Home Screen
21
ENGLISH
Complete User Manual
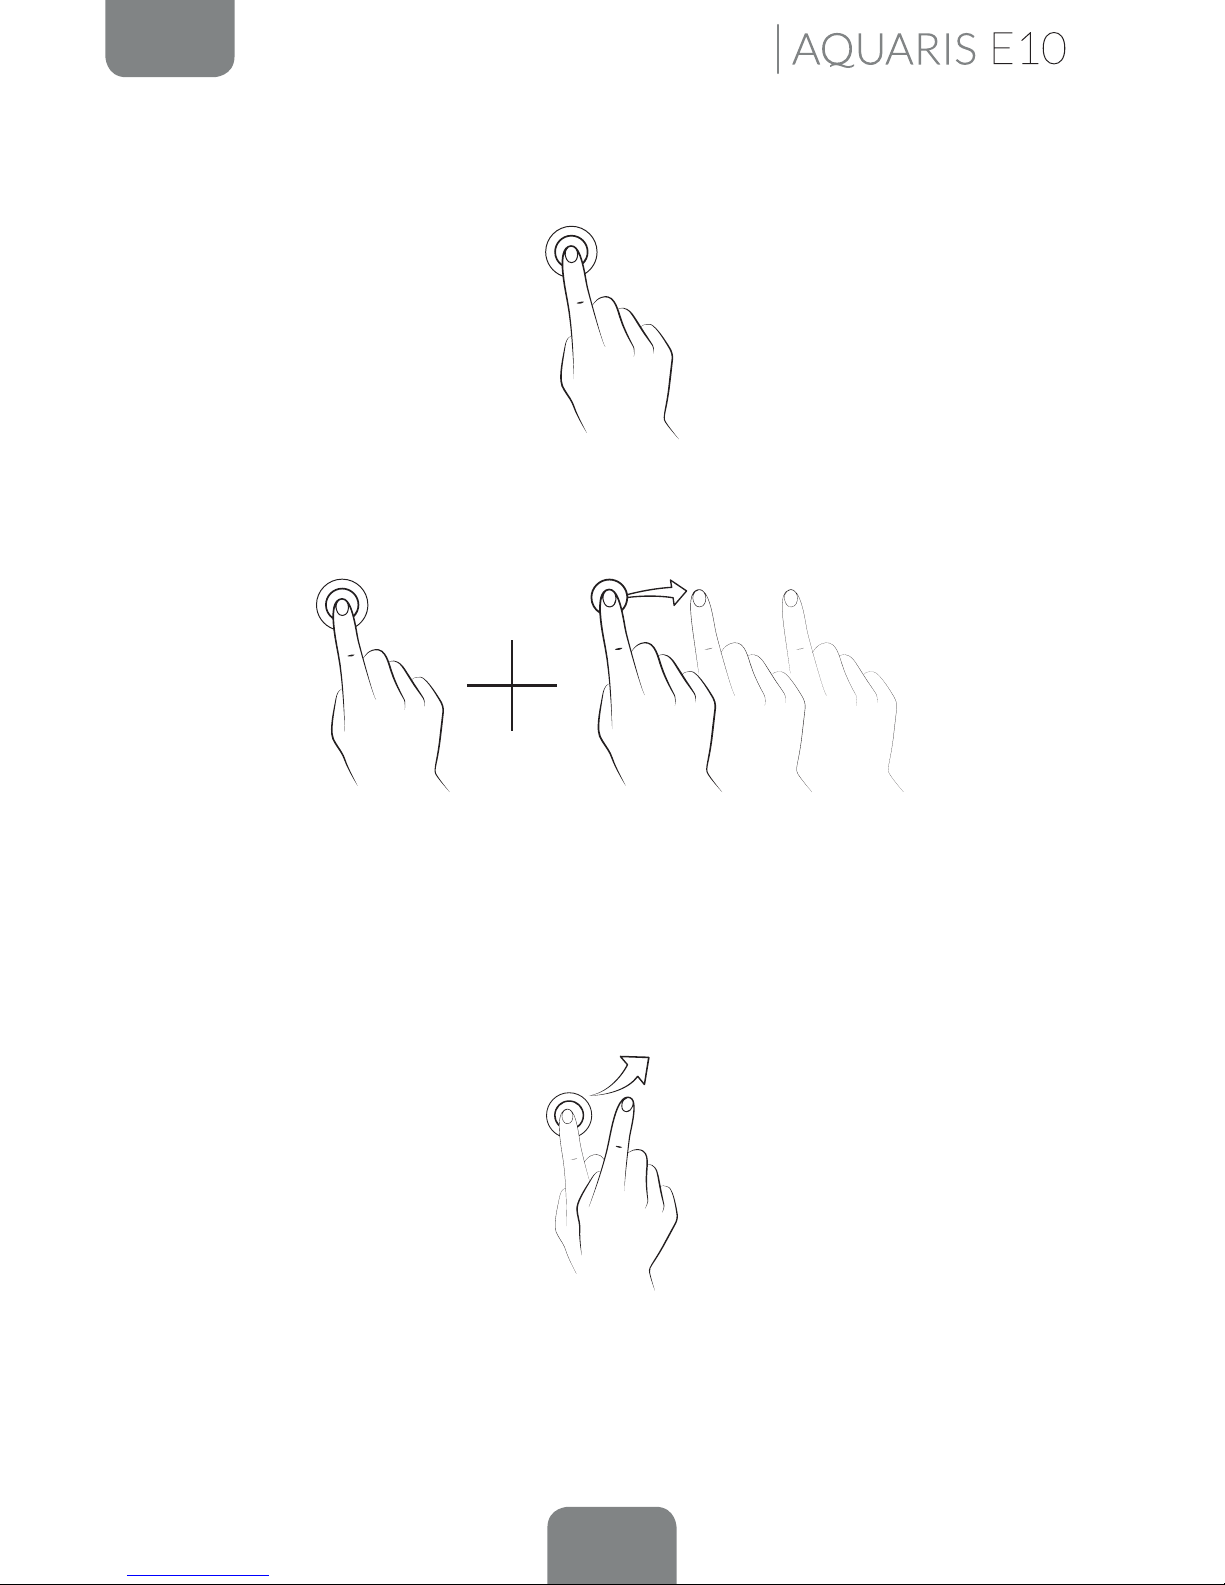
Touch and hold. Touch the screen (on either a clear area or on an icon) with your
nger and hold for approximately 2 seconds to bring up a menu of available options.
Drag. To move an icon, press and hold down, drag it to the desired position and then
release.
Swipe or slide. On the Home screen, slide your nger left or right across the screen
to access the extended screens, or slide your nger up and down the screen to scroll
through a webpage, list or menu
Home Screen
22
ENGLISH
Complete User Manual
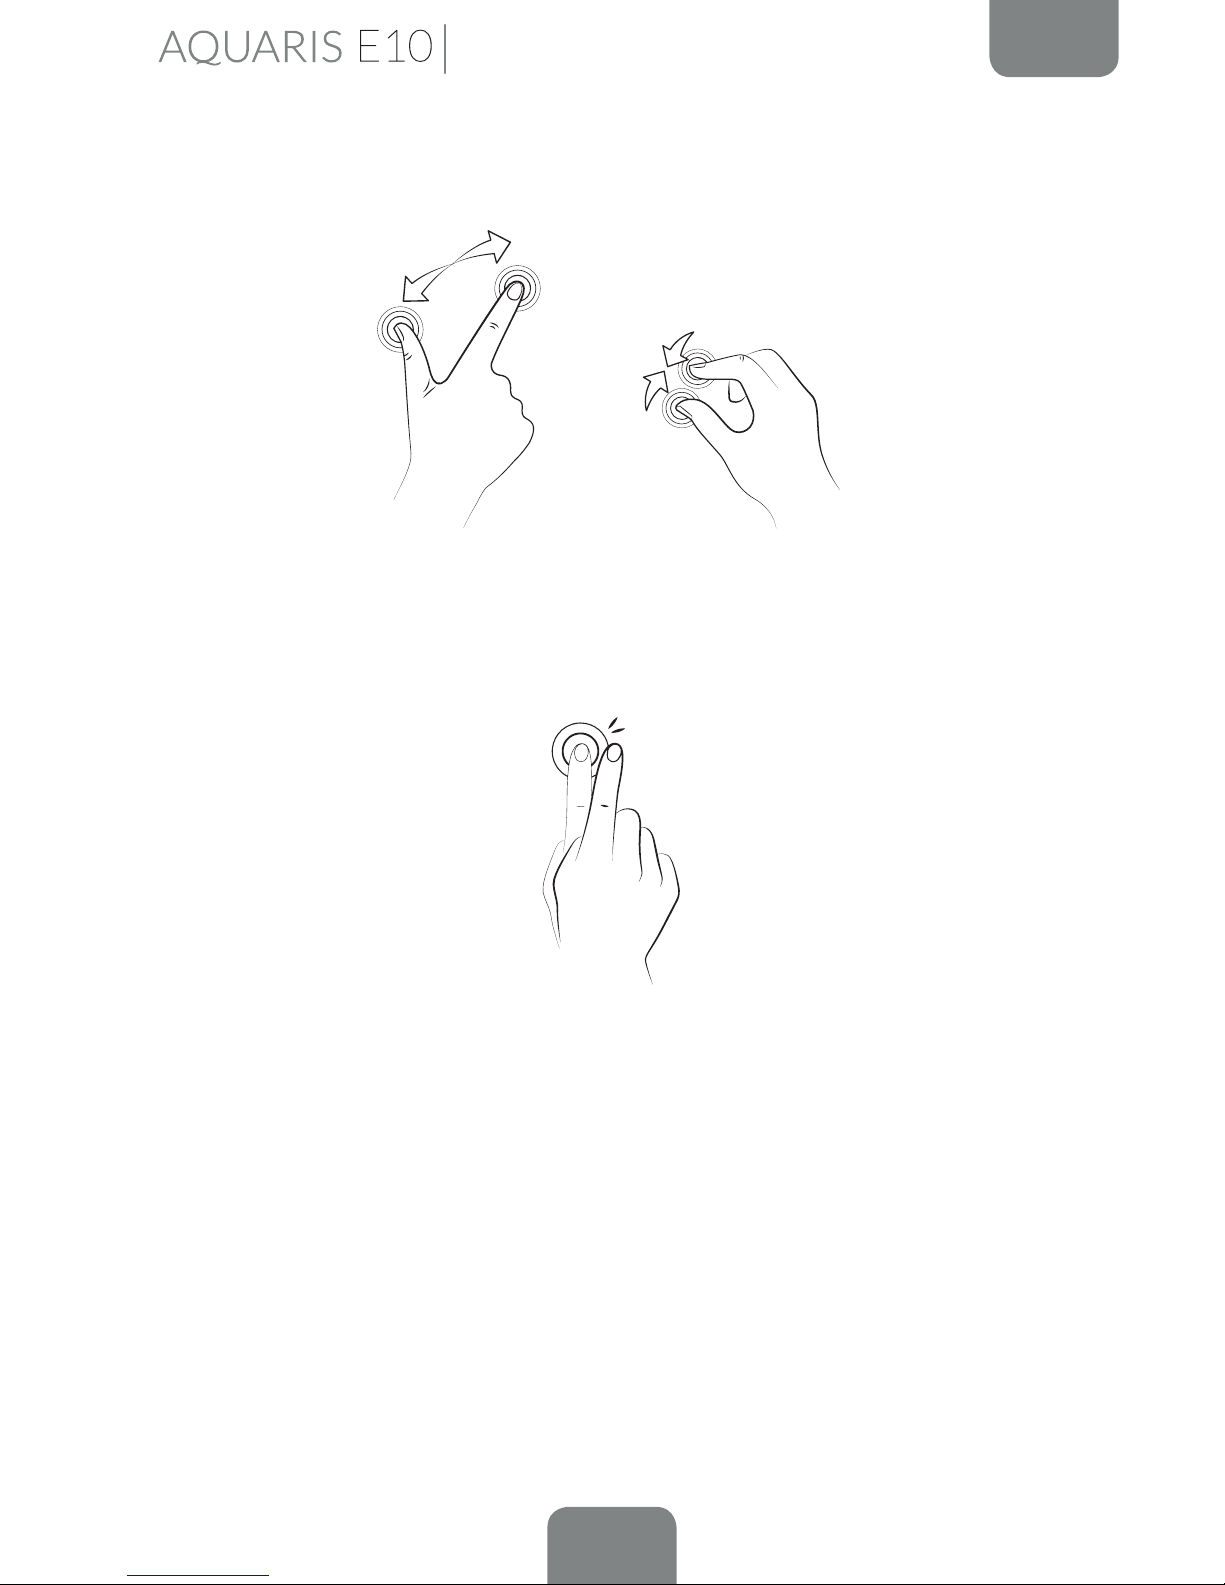
Pinch. Place two ngers on the screen at the same time and move them towards one.
Double-tap. Tap the screen twice in quick succession to increase the zoom. Repeat
the action to zoom out again. You can also use it to activate the screen.
Home Screen
23
ENGLISH
Complete User Manual
Buttons and Icons
Below is a short description of the different buttons and icons, along with
recommendations for how to use them.
While you are using an app, you can return to the previous screen by pressing the
Back button
.
You can go to the Home screen at any time by pressing the Home button . You
can also touch and hold to access the Google Now application.
You can access the options menu for an app by pressing the Menu button
.
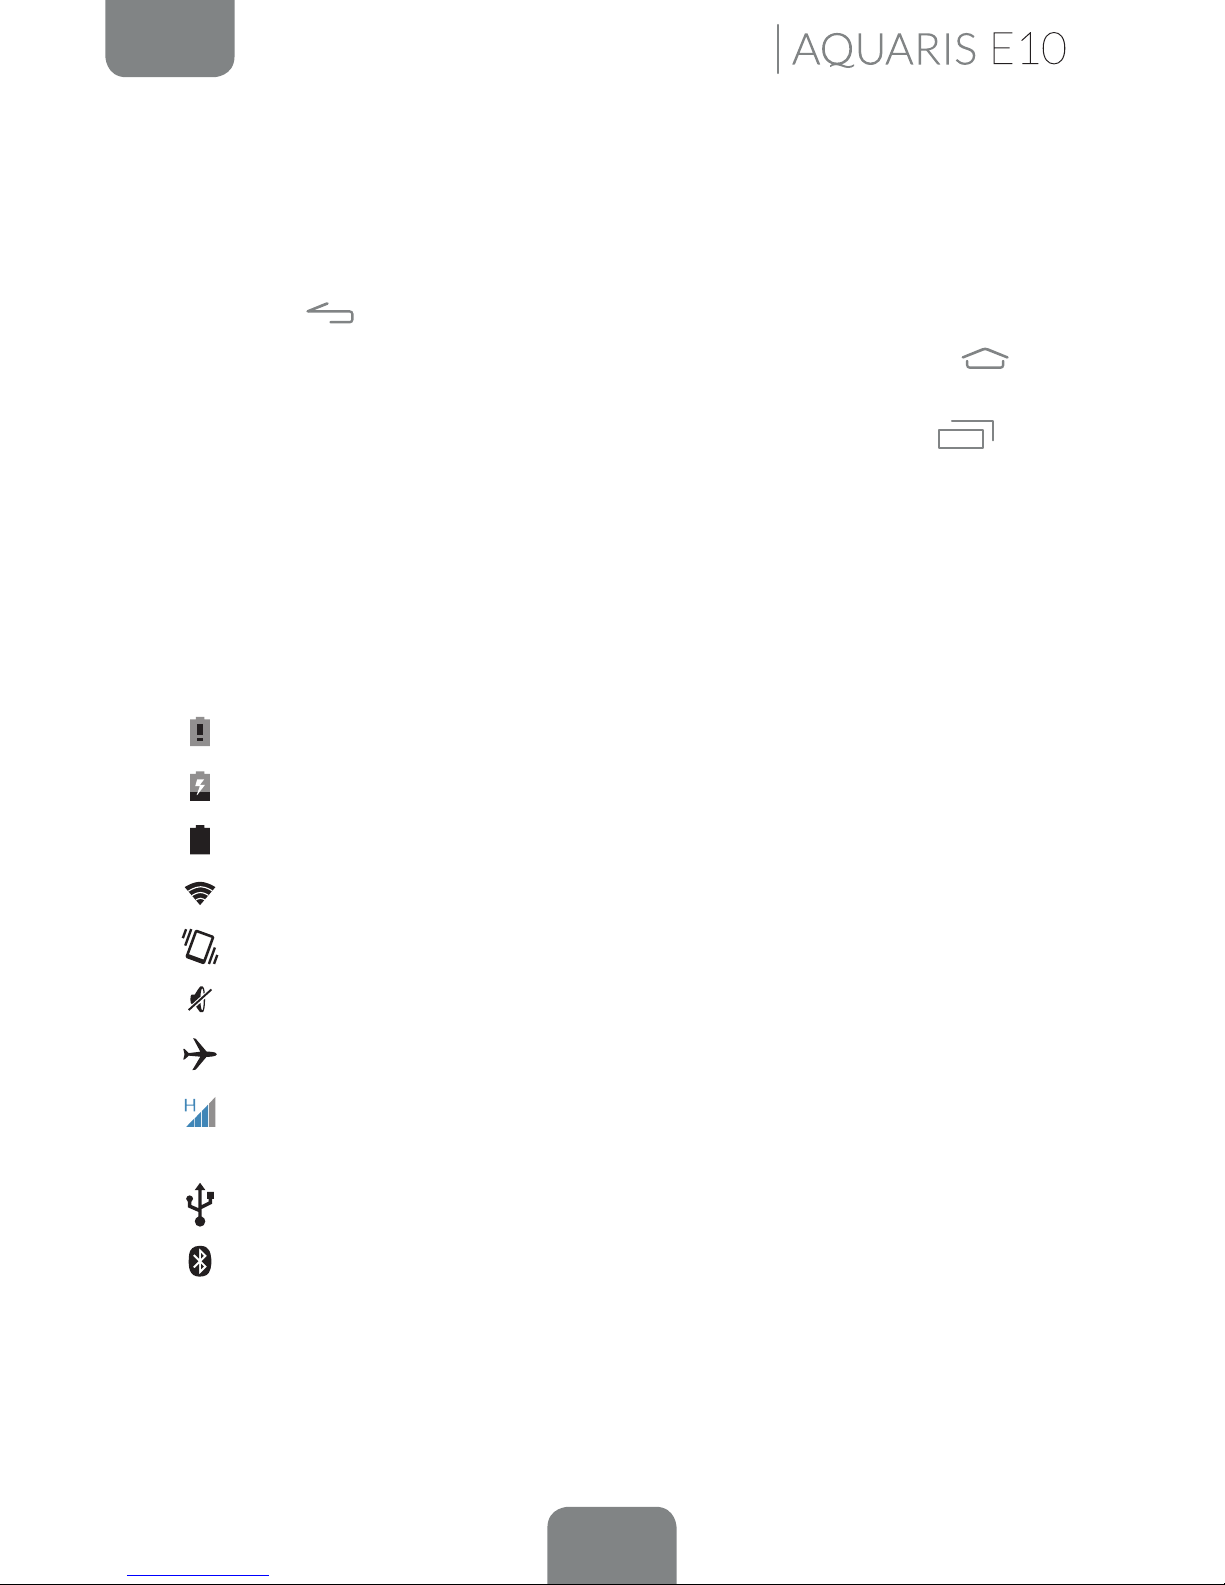
Status Bar
The Status bar contains important information and is always visible at the top of
the screen.
The main icons it displays include the following:
Battery almost empty.
Battery charging.
Battery fully charged.
Wi-Fi enabled and connected to a network.
Sound off and vibrate on.
Sound and vibrate off.
Aeroplane mode activated.
Data services enabled (this could be G, E, 3G, H or H+ according to the type
of data connection and the transfer speed).
USB connected.
Bluetooth enabled.
Home Screen
24
ENGLISH
Complete User Manual
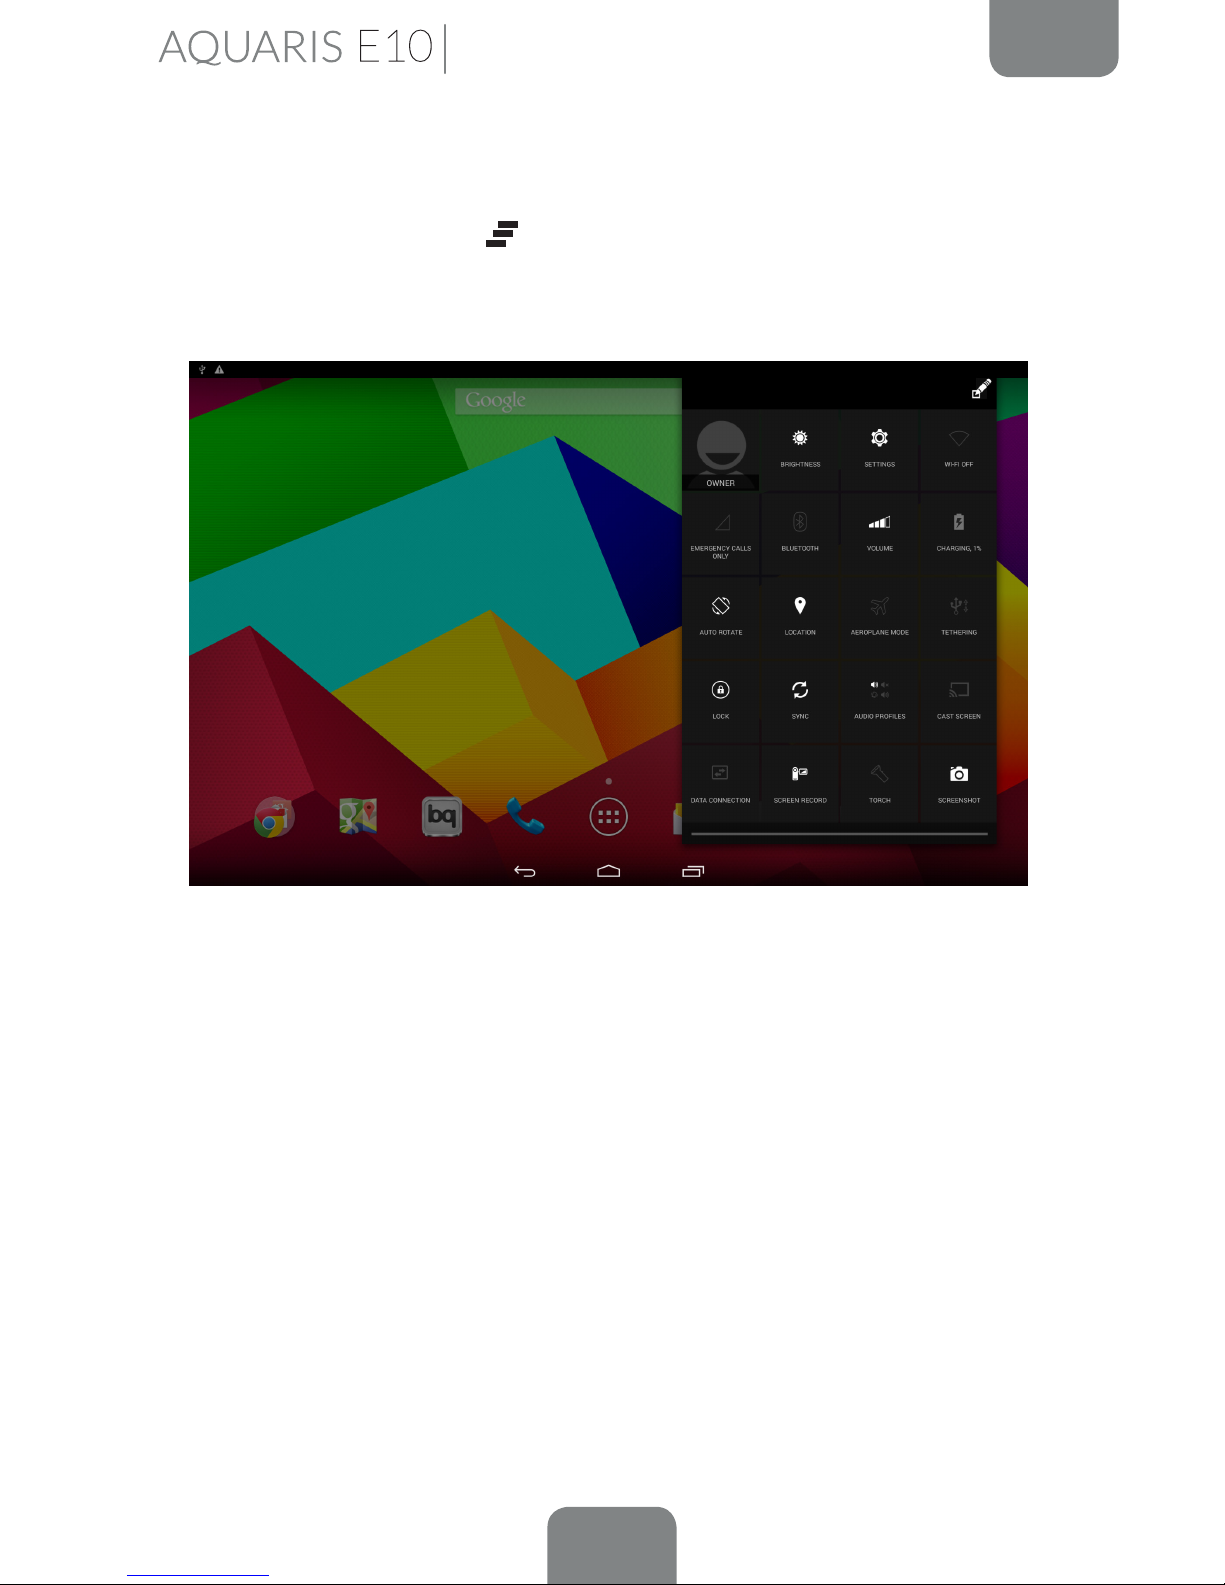
Notications Bar
Pull the bar down from the top left of the screen to view the notications. Delete all
notications by pressing the
icon, or delete each one by swiping it to the side
of the screen. Pull the bar down from the top right of the screen to view the Quick
Settings.
The list of options provide quick and easy access to many different settings, such as
the screen brightness and connections, etc.
Home Screen

25
ENGLISH
Complete User Manual
The options that can be enabled and disabled from the Quick Settings menu
(accessed by pulling down the Status bar from the top left) include:
Brightness: You can select from automatic or manual brightness adjustment
and set the desired level.
Settings: Opens the general Settings menu.
Wi-Fi: Enables/disables the Wi-Fi connection.
Coverage bar: Displays the level of network coverage. You can choose to
connect via 2G and/or 3G technology.
Bluetooth: Enables/disables the Bluetooth function.
Volume: Enables control of the audio volume (General, Notications, Multimedia
and Alarms).
Battery: Provides direct access to Settings > Battery.
Auto-Rotation: Enables/disables automatic rotation of the screen.
Location: Enables/disables GPS on your tablet.
Aeroplane mode: Enables/disables the signal.
Tethering: Access to the tethering and Wi-Fi zone settings.
Lock/Sleep: Activates the screen lock.
Sync: Enables/disables automatic syncing of the device.
Audio Proles: Select from General, Silent, Meeting or Outdoor.
Cast screen: Enables detection of remote screens for sending images and sound.
Data connection: Enables/disables your data connection.
Screen record: Enables you to make a real-time video recording of what is
being shown on the screen.
Torch: Enables/disables the torch.
Screenshot: Take a picture of the screen via the pull-down menu.
Shutdown: Enables power-off via the pull-down menu.
Home Screen
26
ENGLISH
Complete User Manual
Data Usage: A shortcut to Settings > Data usage.
Sound record: Gives you access to the app for making audio recordings.
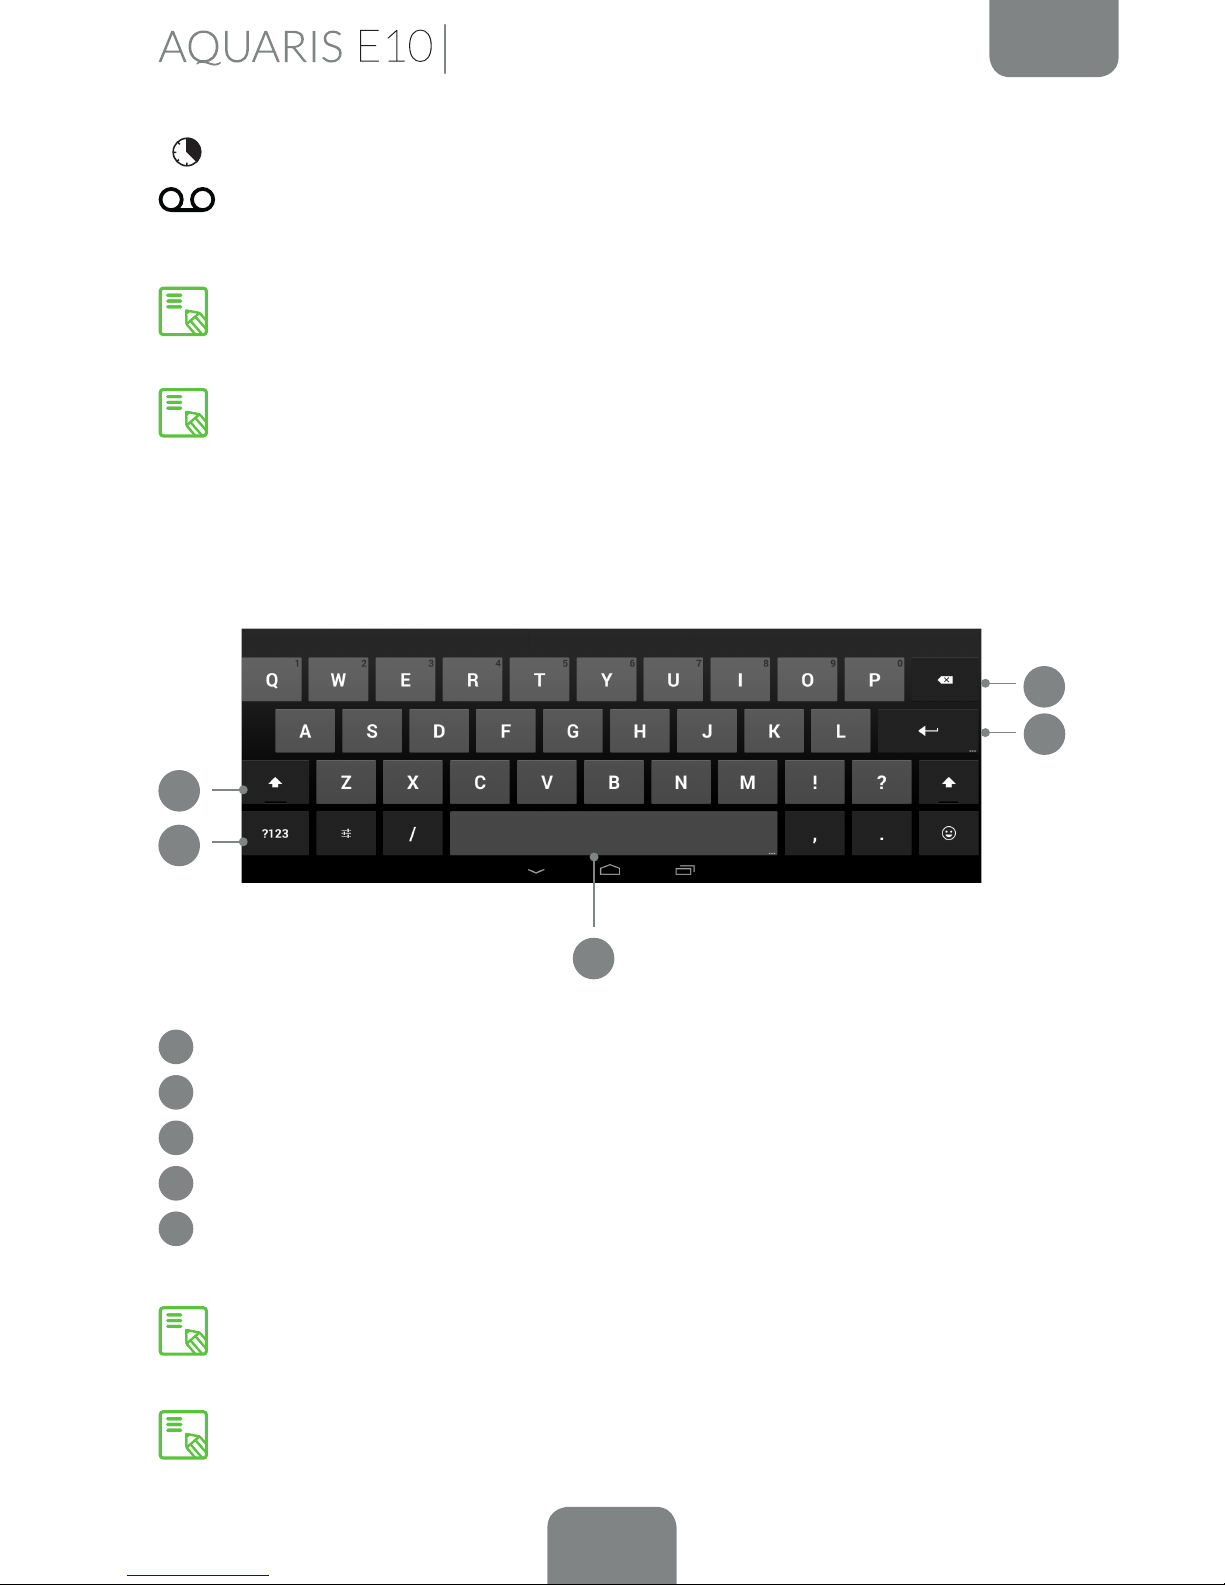
Keyboard
Pressing on any text eld will bring up the virtual keyboard.
1
Enable/disable Caps lock.
2
Open/close the number and symbol keyboard.
3
Space bar.
4
Enter/return.
5
Delete.
The keys with “…” in the bottom right-hand corner provide access to additional
features when you touch and hold them.
You can nd more information on the keyboard settings and languages for text
entry via Settings > Personal > Language & input.
3
5
1
2
4
Home Screen
You can access advanced settings for certain functions such as Wi-Fi and
Bluetooth by touching and holding the corresponding icon on the list.
When automatic brightness is deactivated, you can adjust the brightness level
of the screen by sliding your nger to the left or right.
27
ENGLISH
Complete User Manual
PHONE*
Managing Contacts
The Contacts application provides access to all of your saved contacts on your SIM
card, the internal memory of your device and any online accounts you have set up.
Using this application you can:
· Create new contacts
· Update existing contacts
· Create a group of contacts
· Select the lists to be displayed
· Make phone calls or send SMS
· Blocking Contacts
Adding a Contact
You can add a new contact manually to your list via the Contacts app or via the Call
history.
To add a contact manually:
1.
Open the Contacts app via the Home screen.
2.
Press the icon and the list of available accounts will appear on screen.
3.
Fill in the elds as desired:
a. Name and surname
b. Organisation
c. Phone numbers
d. Email
e. Postal address
f. Add another eld
4. Press Done to save the contact.
Phone
* Only on the Aquaris E10 3G model.
 Loading...