

Page 1
User's GuideUser's Guide
(Export)(Export)
Page 2
Dear Customer,
Congratulations on choosing “Boxer BM 125” motorcycle, brought to you by Bajaj Auto Limited.
Before you prepare for riding, please read this User's Guide carefully to familiarize yourself with
the mechanism and the controls of the vehicle.
To maintain your bike in perfect running condition to deliver consistent performance, we earnestly
advise you to avail periodic services, at Bajaj Dealers.
You can entrust Bajaj Dealers, who are well equipped with all necessary facilities, skill sets and
trained manpower for servicing and repairs of your “Boxer BM 125”. In the rare event of going
to a local garage, always insist on Genuine Bajaj Spares to ensure safety, performance and
longer life of your vehicle.
Should you require any additional information, please approach Bajaj Dealers. If necessary, you
may also write to selling dealers, with relevant details like Registration no. Chassis no., Engine
no., Date of purchase, Kms. run, name of selling dealer and your contact numbers.
Finally, may we request you to give your motorcycle proper care and regular maintenance, as
described in this manual. We are sure this will offer you a long trouble-free ownership experience.
Wishing you unlimited miles of happiness!
International Marketing
BAJAJ AUTO LIMITED
Akurdi Pune - 411 035 India
CIN-L65993PN2007PLC130076
DOC. NO. 71112544
REV. 00, JULY. 2016
Foreword
Page 3
Table of Contents
Safety and Warning information :
Warning : This indicates that a potential
hazard or injury to you or other persons &
to the vehicle can happen if advice
provided is not followed
Caution : This indicates that a potential
hazard that could result in vehicle
damage. Follow the Advice provided with
the caution.
Description
1. Technical Specifications..............................................1
2. Identification Data........................................................3
3. Location of Parts..........................................................4
4. Steering cum Ignition lock............................................5
5. Fuel Tank Cap / Fuel Tap.............................................. 6
6. Speedometer Details................................................... 7
7. Control Switches......................................................... 8
8. Removal & Fitment of Side Covers...............................9
9. Battery / Tool kit..........................................................11
10. Removal & Fitment of Seat........................................ 12
11. How to ride your Bike................................................ 13
12. Safe Riding Tips ....................................................... 17
13. Daily Safety Checks..................................................18
14. Engine Oil..................................................................19
15. Battery......................................................................20
16. Wheels - Tyre ...........................................................21
17. Periodic Maintenance Information............................ 22
18. Periodic Maintenance & Lubrication Chart................24
19. Non Use Maintenance ..............................................27
Notice:
The description and illustration in this booklet
are not to be taken as binding on the
manufacturers. The essential features of the
type described and illustrated herein remaining
unaltered. Bajaj Auto Limited reserves the right
to carry out changes at any moment without
being obliged to bring this booklet upto-date &
to do modifications on the vehicle, parts or
accessories as may be convenient and
necessary.
Page 4
Engine : 4 stroke, single cylinder
Natural air cooled,
Spark ignition
Bore x Stroke : 54.0 mm x 54.4 mm
Eng. Displacement : 124.6 cc
Compression Ratio : 9.5 + 0.5 : 1
Idling Speed : 1400 rpm + 100
Max. Net Power : 9 PS (6.62kw) @ 7500 rpm
Max. Net Torque : 10.8 Nm @ 5500 rpm
Ignition System : AC
Spark Plug (1 Nos) : Make- CHAMPION
(Gap:- 0.7 – 0.8 mm)
Identification- RG4HC
Spark Plug Gap : 0.7~0.8 mm
Lubrication : Wet sump, Forced.
Transmission : 4 s p e e d c o n s t a nt
mesh.
Front Brake : Mech. expanding shoe
110 mm dia. Drum
Rear Brake : Mech. expanding shoe
130 mm dia. Drum
Fuel Tank Capacity :
Full : 11 liters
Reserve : 2.5 liters
Usable : 1 liters
Dimensions :
Length : 2005 mm
Width : 704 mm
Height : 1073 mm
Wheel base : 1295 mm
Ground clearance : 803 mm
1
Technical Specifications
Page 5
Technical Specifications
Tyre Size
Front : 2.75 X 17”, 41 P
Rear : 3.00 X 17”, 50 P
Tyre Pressure
2
Front : 1.75 kg/cm (25 PSI)
2
Rear (Solo) : 2.00 kg/cm (28 PSI)
2
Rear (Pillion) : 2.25 kg/cm (32 PSI)
Electrical System : 12 Volts (AC/DC)
Head Lamp
(w/o Pilot lamp) : 12V 35/35 W HS1
Neutral : 12V, 2W
Tail / Stop Lamp : 12V, 5/21W
Turn Signal Indicator : 12, 2W
Side indicator Lamp : 12V, 10W (4 nos.-
clear bulb)
Hi Beam Indi. Lamp : 12V, 2W
Speedometer Lamp : 12V, 2W
Fuel Meter lamp : 12V, 2W
Horn : 12 V DC
Battery : 12 V 5 Ah MF
Vehicle Kerb Weight : 116 kg.
Gross Vehicle Weight : 246 kg.
Max. Speed : 90 km/h (With single
rider 75kg)
0
Climbing Ability : 25% (14 max)
Note : All dimensions are under UNLADEN
condition. Above information is subject to
change without any notice.
2
Page 6
Identification Data
The Frame and Engine serial numbers are used to register the motorcycle. They are the unique
alpha-numeric codes to identify your particular vehicle from others of the same model and type.
Frame Number Location
On LH Side of Steering Tube
(Alpha-Numeric - 17 Digits)
Engine Number Location
On LH Side Crankcase Near Gear
Change Lever (Alpha-Numeric - 11 Digits)
3
Page 7
Front Fork
Clutch Lever
Fuel Tank Cap
Rear
Shock Absorber
Pillion
Foot Rest
Side
Stand
Gear Change
Lever
Speedometer
Tail
Lamp
Grab Handle
Location of Parts
4
Page 8
Steering cum Ignition Lock :
It has three positions.
LOCK : Steering locked. Ignition OFF.
OFF : Steering unlock. Ignition OFF.
ON : Steering unlock. Ignition ON.
Steering cum Ignition Lock
5
To Lock the Steering : To lock the steering,
turn the handle bar to the left / right hand side
completely. Push & turn the key to the “LOCK”
position and then remove the key.
To Unlock the Steering : To unlock steering,
insert the key in steering cum ignition lock &
turn it clockwise to “OFF” or “ON” position.
Key : The key used for ‘Steering cum Ignition
lock’, ‘Fuel tank cap’ & ‘Side Cover LH’ is
common.
Page 9
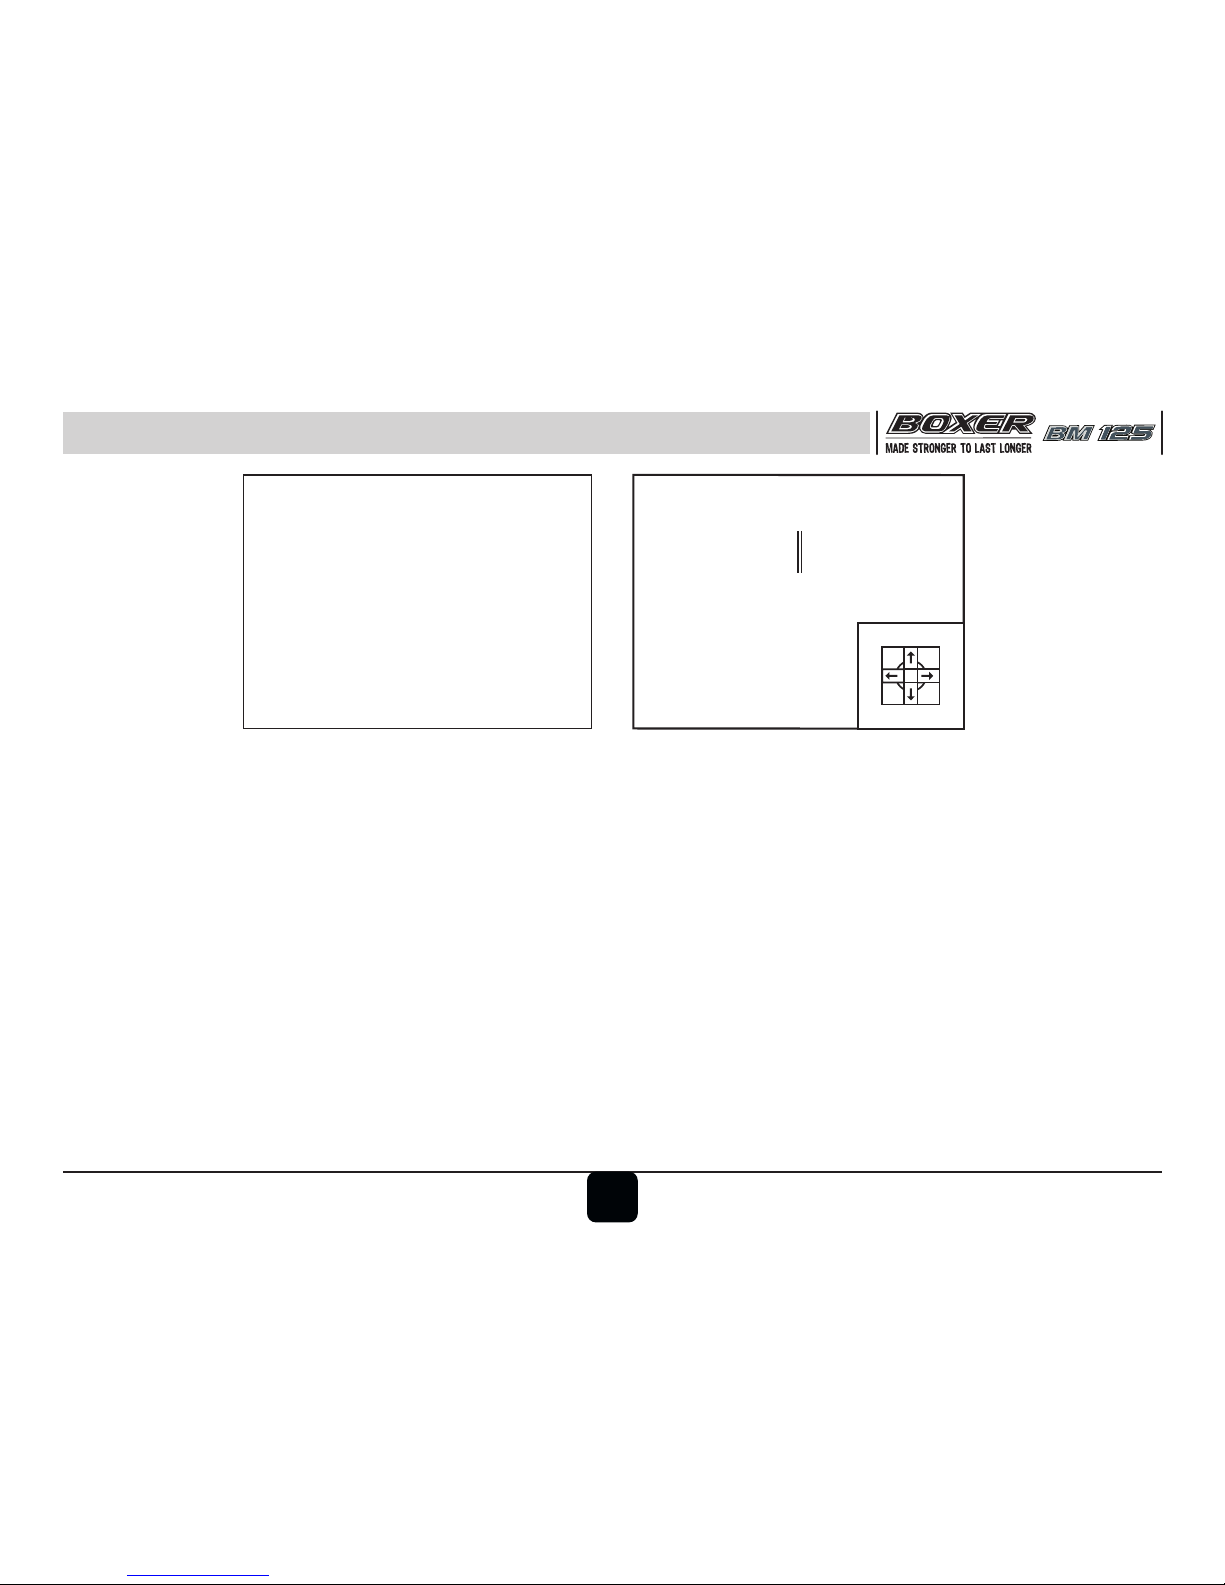
Fuel Tank Cap/Fuel Tap
Fuel Tank Cap
• To open the fuel tank cap, insert the key
inside the lock and turn it clockwise and
lift the fuel tank cap.
• ‘Fuel Tank Cap’ gets locked when pushed
/ pressed back into the petrol tank mouth
firmly.
Fuel Tap
Fuel tap lever has following 3 positions.
ON : When fuel level is above Reserve
position.
RES : When fuel level is below Reserve
position.
OFF : When fuel supply is to be cut off.
OFF
ON
RES
FUEL
Fuel Tap
Fuel Tank Cap
Fuel Tap
6
Page 10
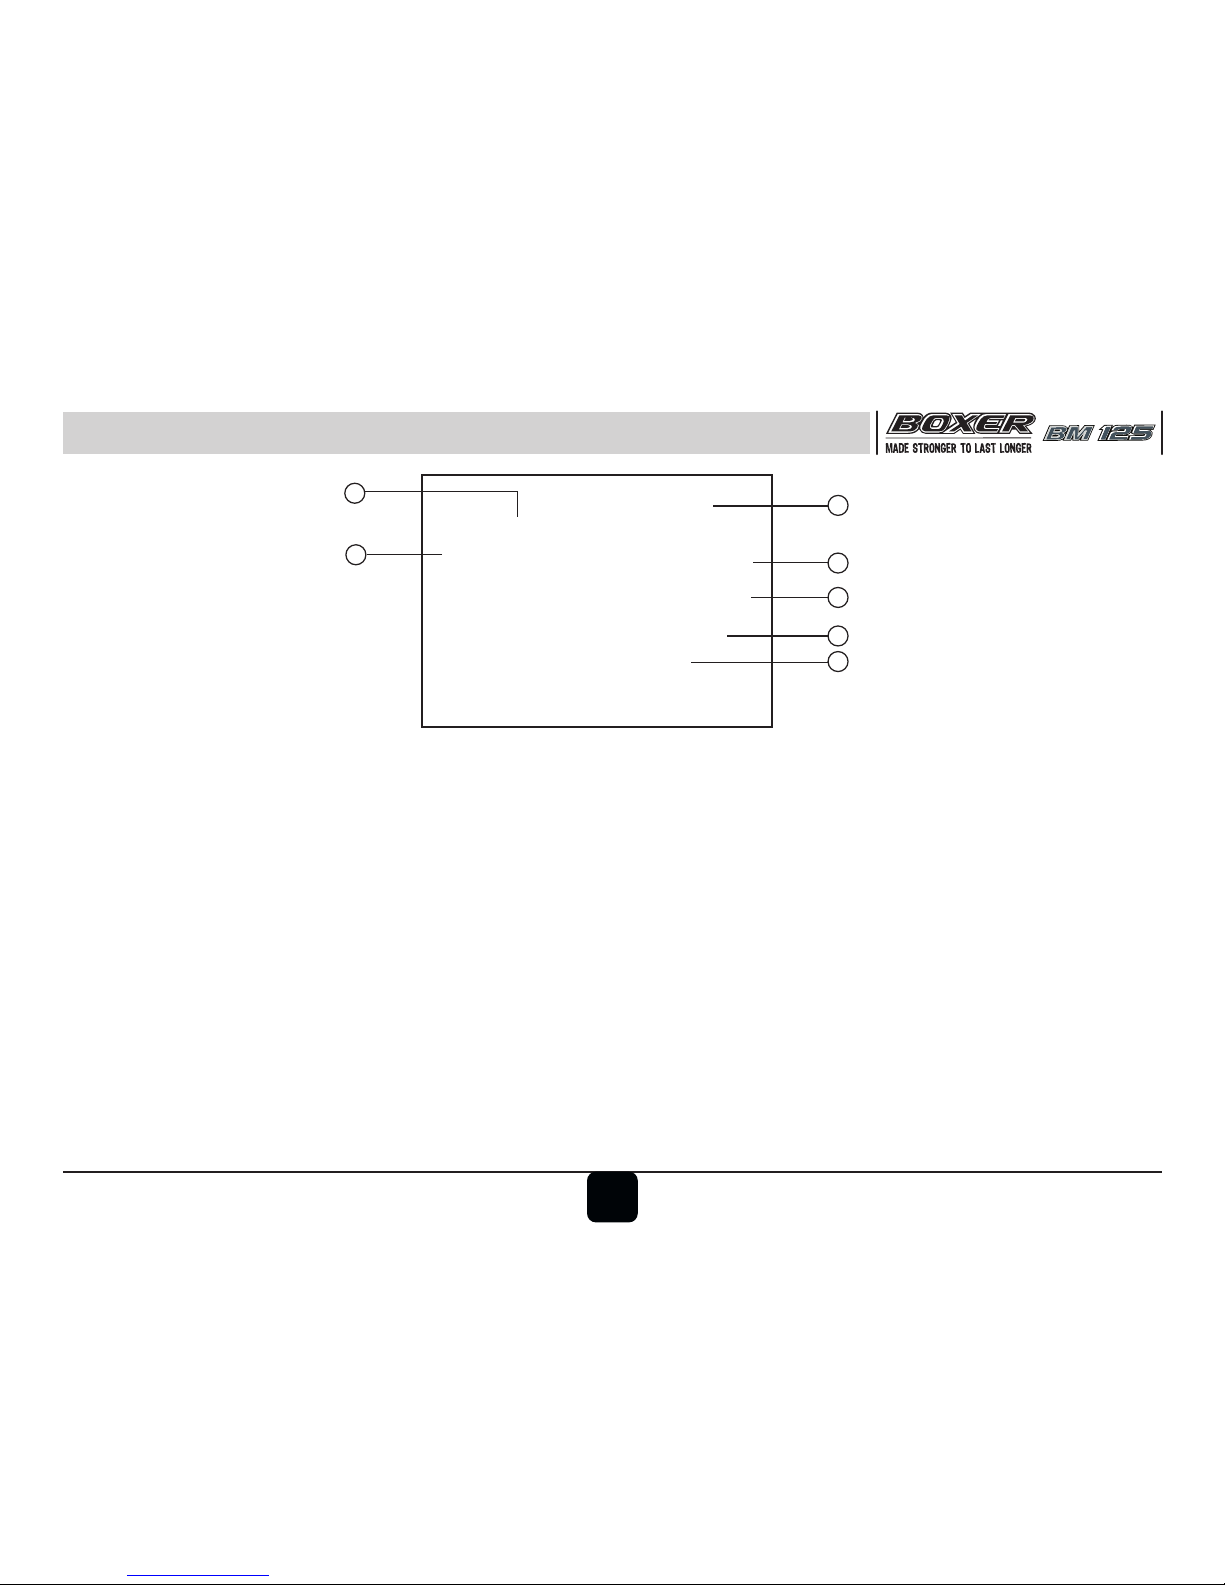
Speedometer Details
1
2
3
4
5
6
7
1. Speedometer: The speedometer shows the speed of the
vehicle in Km / Hr.
2. Odometer : The Odometer shows the total distance that
the vehicle has covered. Odometer reading cannot be
reset to ‘Zero’.
3. Turn Signal Indicator (LH & RH): When the turn signal
switch is turned to left or right side, the turn pilot Indicator
- LH & RH will start flashing.
4. Neutral Indicator: When the transmission is in neutral,
the neutral indicator will glow.
5. Fuel Level Indicator: It shows fuel level inside the fuel
tank.
6. Low Fuel Indicator : It shows the available fuel inside
the fuel tank.
7. Hi Beam Indicator: When Headlight is ‘ON’ & Hi beam is
selected, Hi beam indicator will glow.
7
Page 11
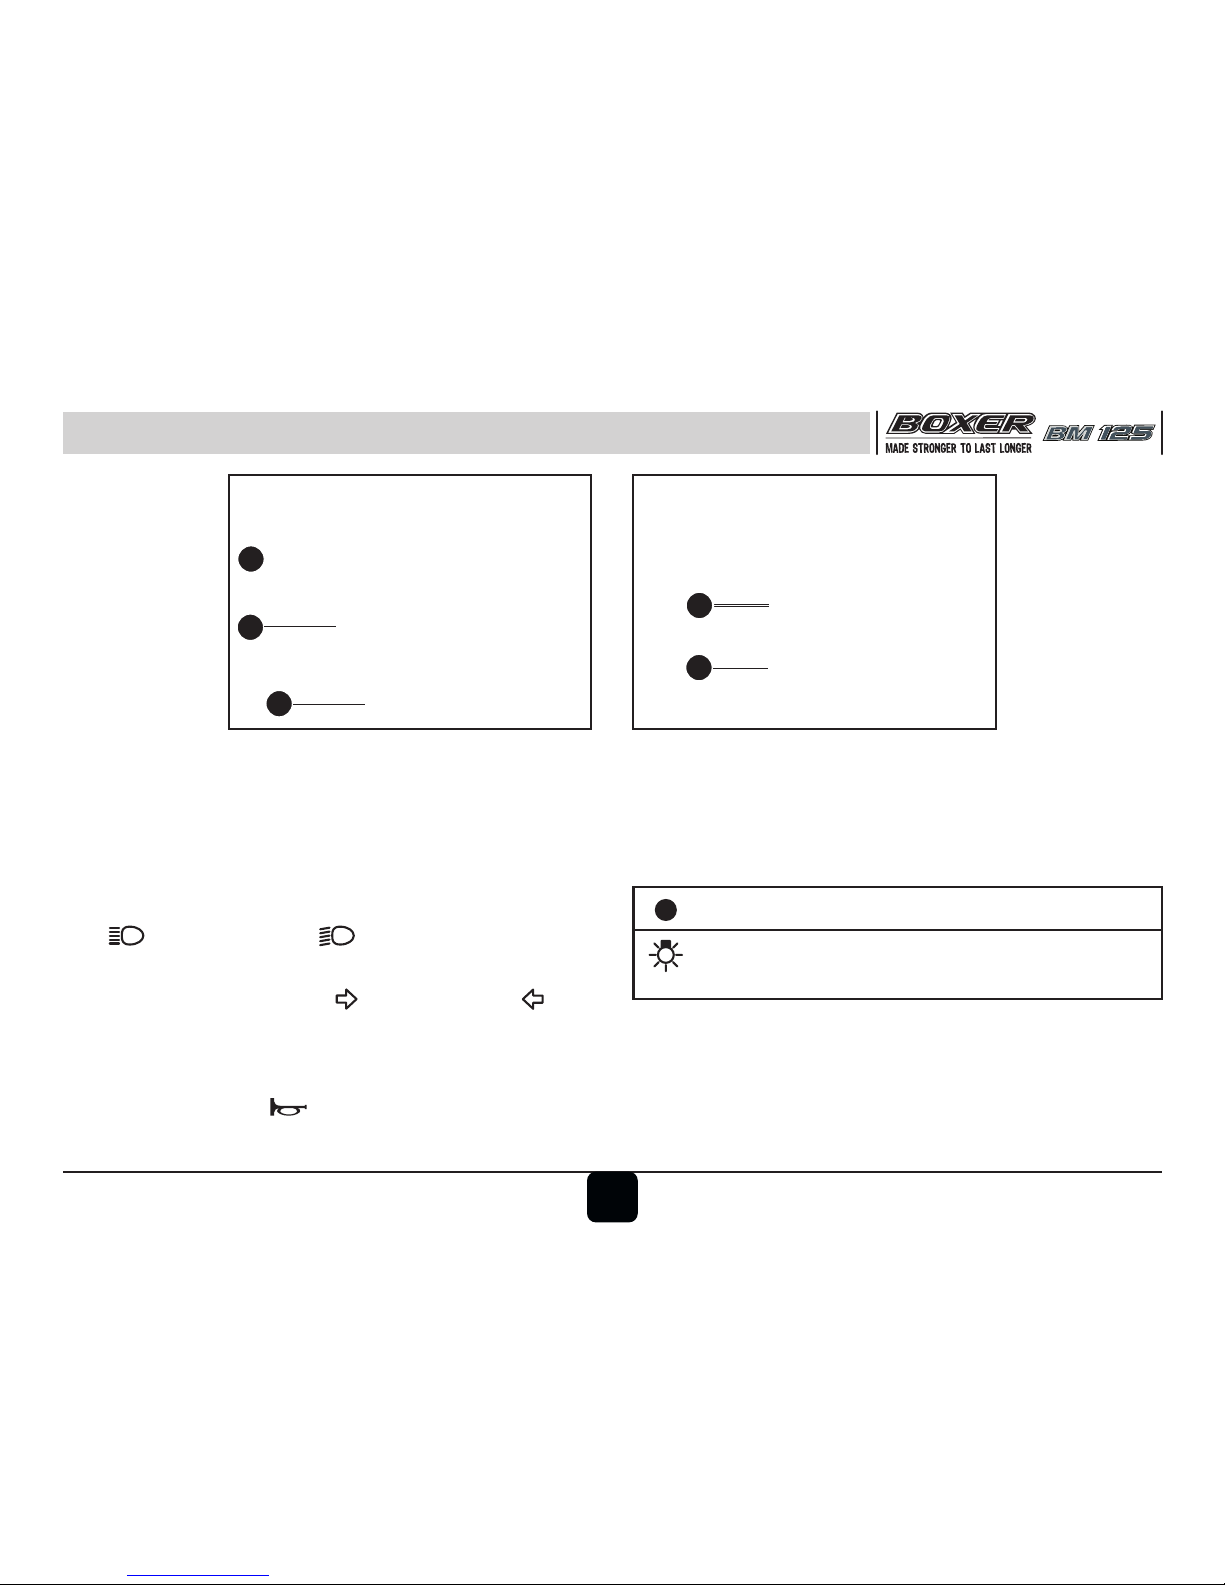
Left Handle Bar Switches
A. Dipper Switch : When headlight is ON, High or
Low beam can be selected using the dipper
switch. Hi beam indicator light located on
Speedo console will glow when high beam is
selected.
: High Beam : Low beam
B. Turn Signal Switch : When the turn signal knob
is turned to Left side ( ) or Right side ( ) the
respective indicator will start blinking. To Put off
the side indicator selected, just press the knob
‘B’ in the center & release it.
C. Horn Button : ( ) To operate the horn press
button ‘C’.
Control Switches
A
B
C
8
E
D
Right Handle Bar Switches
D. Head Light Switch : It has 2 positions.
: All lamps 'OFF’.
: While engine running, Head lamp,
Tail lamp & Meter lamps are ‘ON’.
E. Starter Button : Electric starter operates only
when the vehicle is in neutral position. Self start is not
possible in gear engaged mode.
Page 12
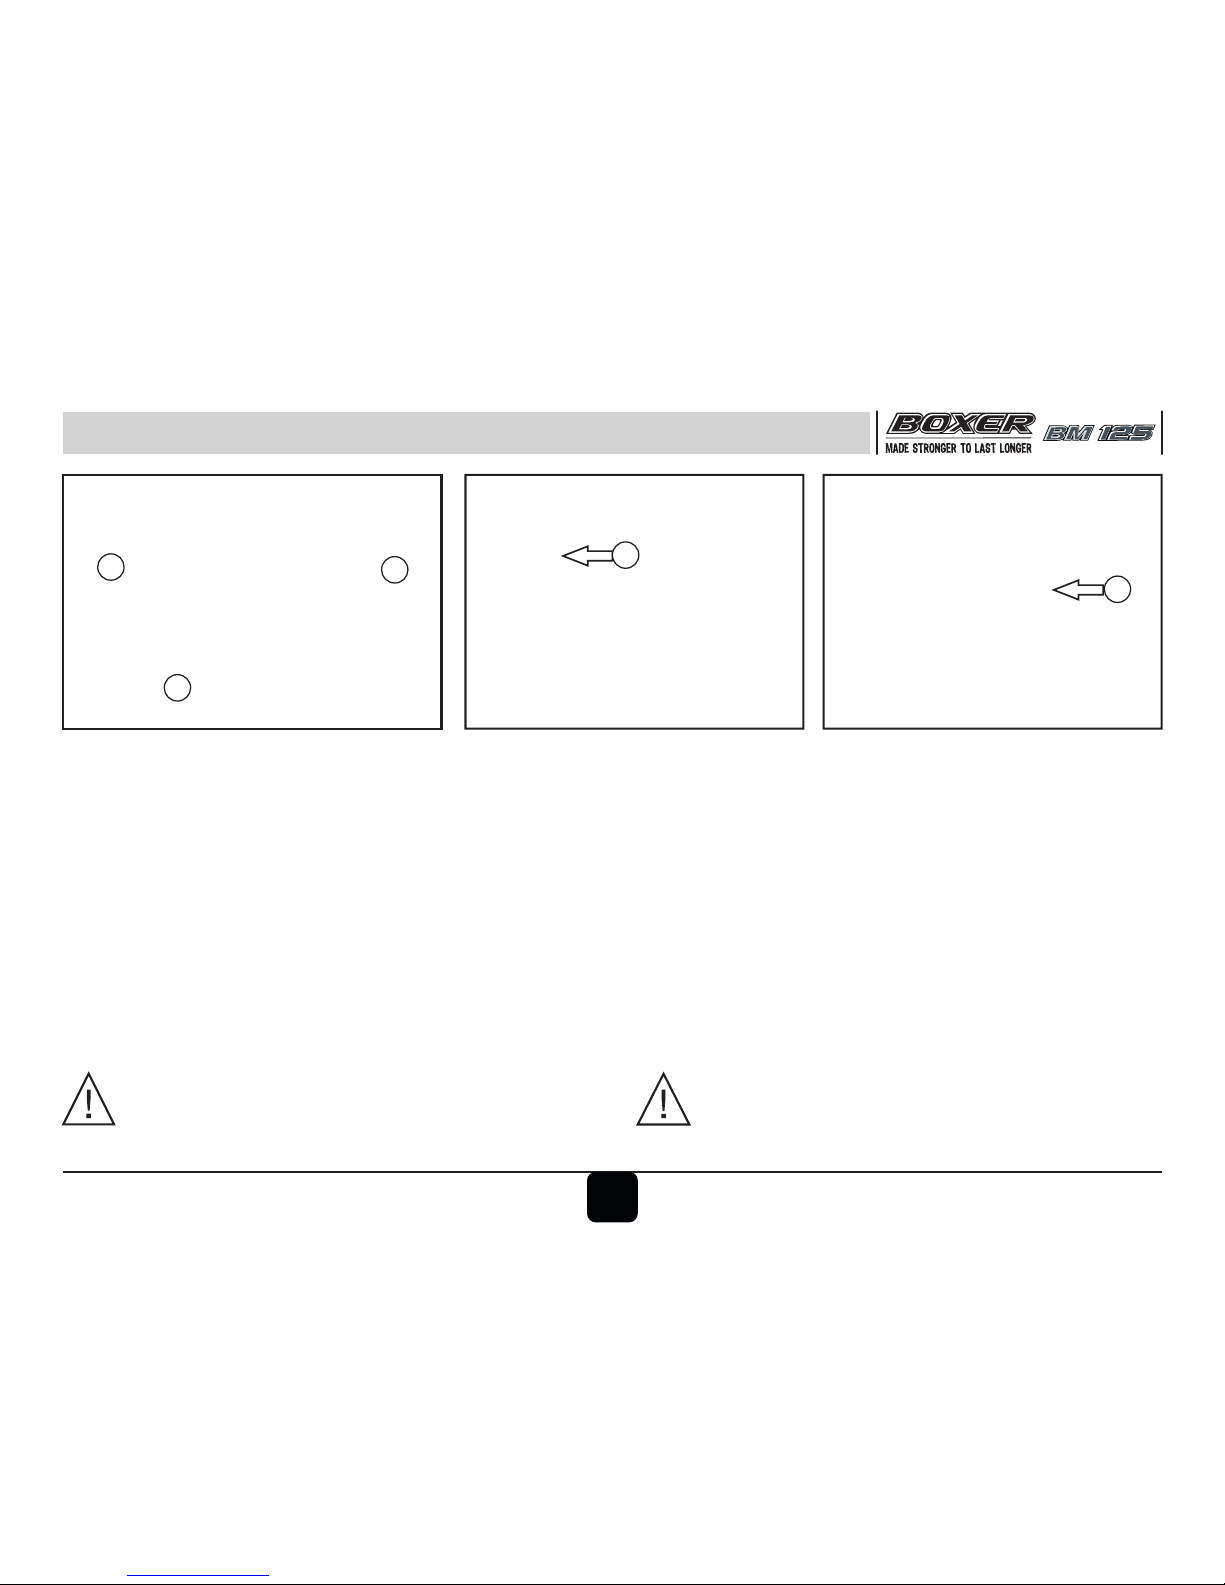
Removal & Fitment of Side Covers-LH
Fitment of Side Cover LH
• Match & insert the side cover in the
chassis lug "C" & then slide the cover LH
towards rear side.
• Match ‘B’ lug provided on front side of side
cover with hole provided on fuel tank &
press side cover inside.
Removal of Side Cover LH
• Insert the key into the cover lock (A) and
turn the key clockwise.
• Hold the cover with both hands and pull
front side (B) first & slide rear side (C)
toward front side. Take out ‘Side cover
LH’.
CAUTION : Remove cover as described
above, otherwise cover lugs may break.
A
B
C
CAUTION : Ensure tool kit is fully
inserted in tool kit slot.
9
B
C
Page 13
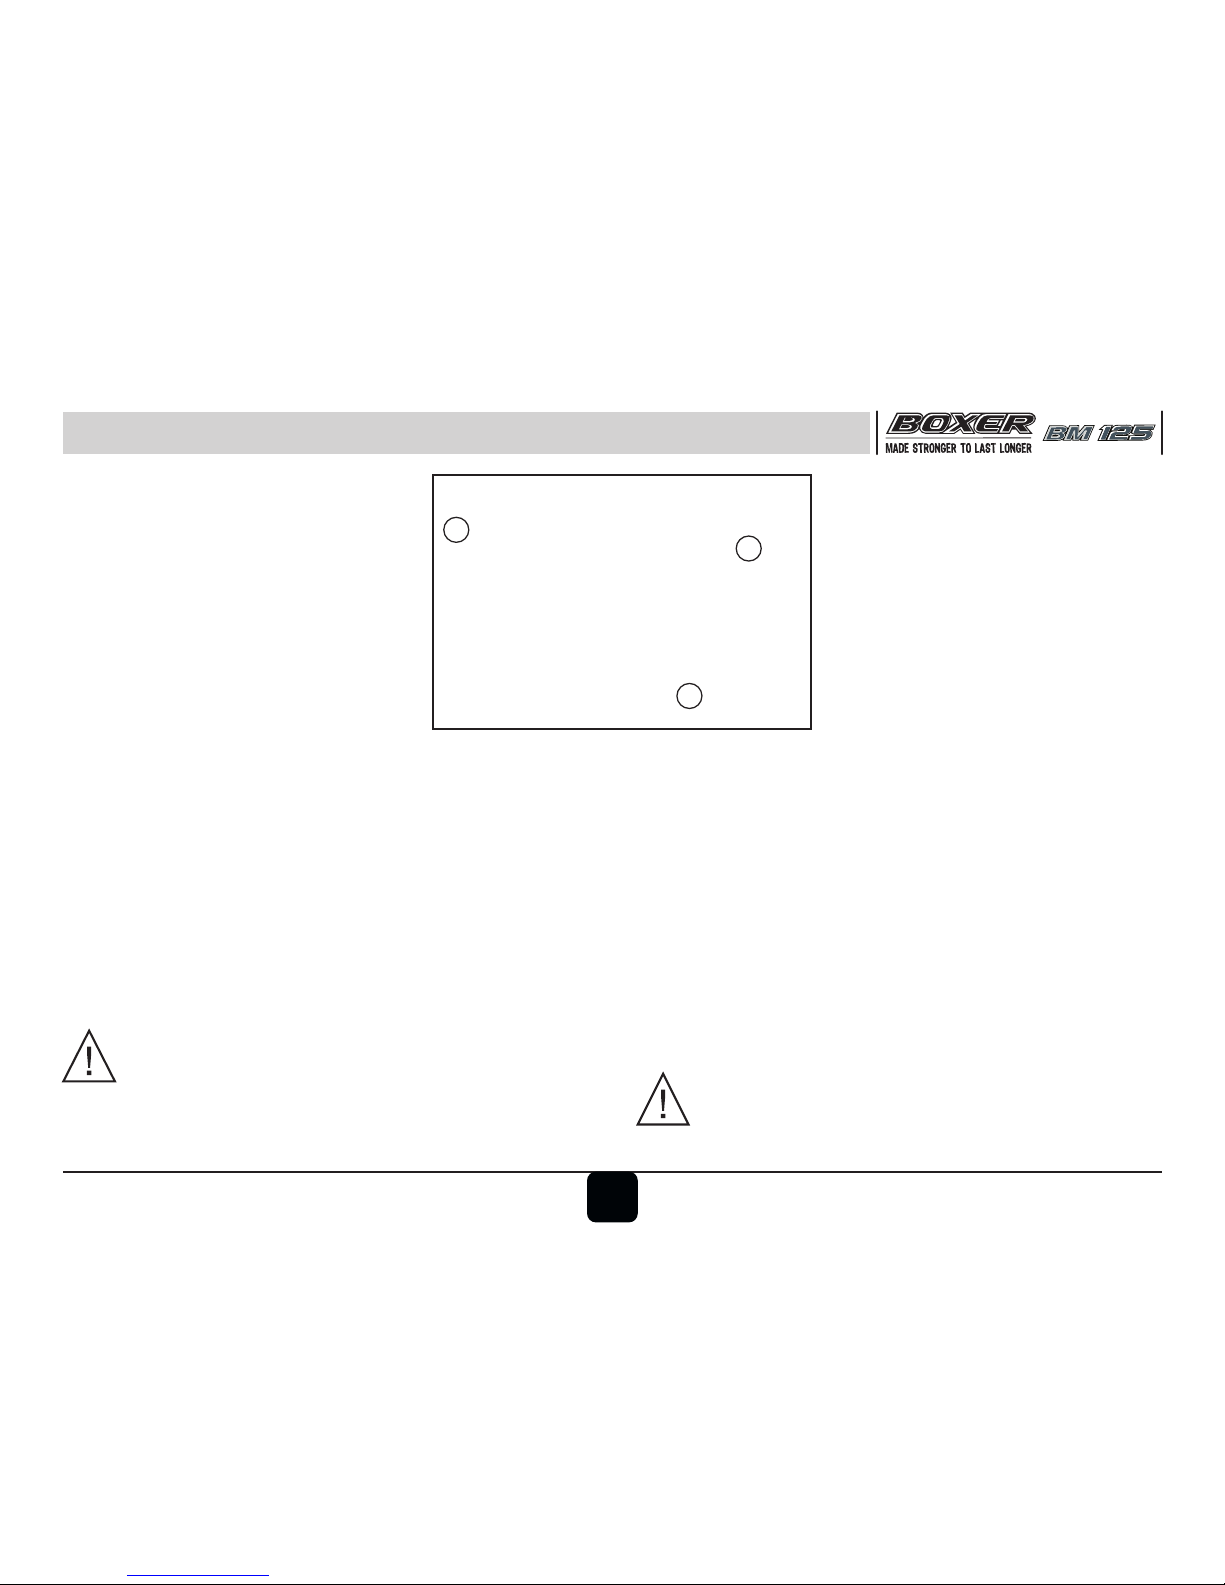
Fitment of Side Cover RH
• Match rear side (C) of ‘Side Cover’ lug with
hole located on chassis & press the cover
firmly.
• Match the Lug provided on front side (B) of
‘Side Cover’ with hole provided on ‘Fuel
Tank’ & press ‘Side Cover’ inside firmly.
• Match ‘Side Cover’ properly with bracket
provided on ‘Chassis’ & fix it with Screw (A).
CAUTION : Fit cover as described above
to ensure proper fitment.
Removal of Side Cover RH
• Remove the screw (A) given on the ‘Side
Cover’.
• Hold the cover with both hand and pull
front side (B) first & then rear side (C).
Take out ‘Side cover’.
CAUTION : Remove cover as described
above, otherwise the lugs may break.
A
B
C
10
Removal & Fitment of Side Covers-RH
Page 14
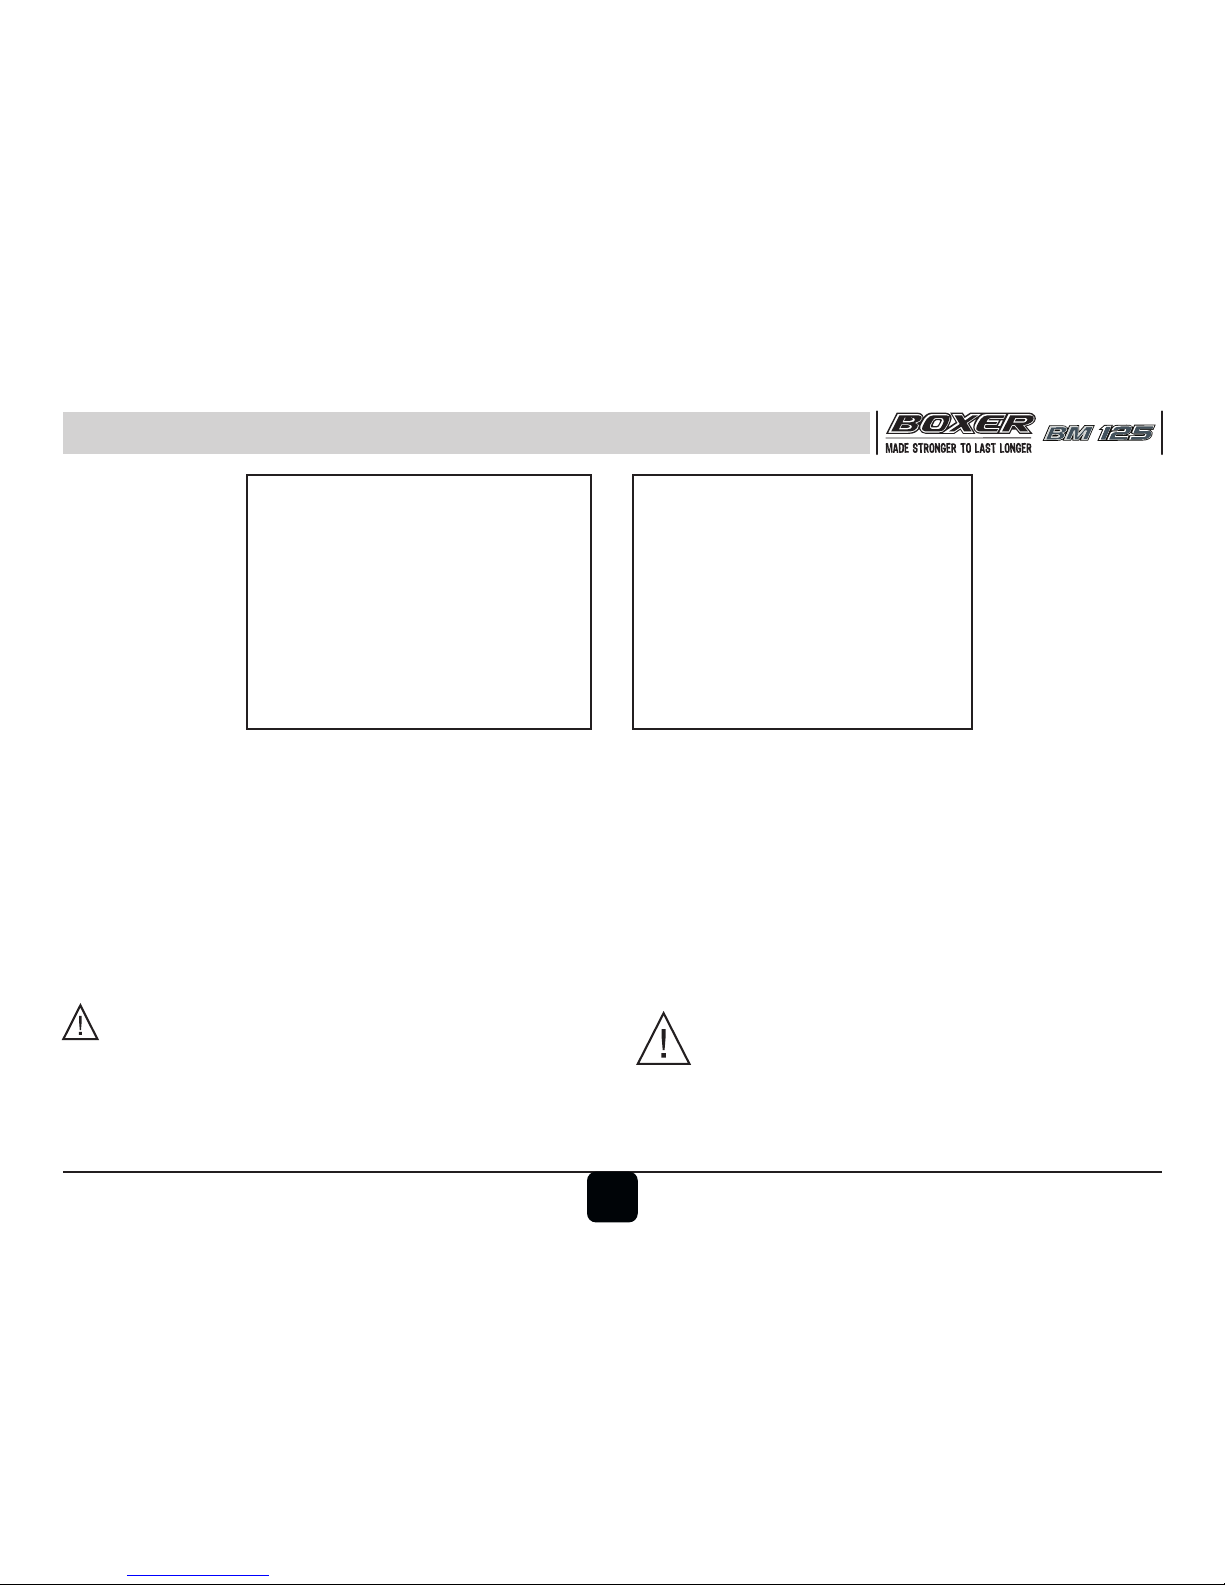
Battery / Tool Kit
Tool Kit Location
Make of Battery may differ from vehicle to vehicle
Tool Kit Location
• It is located below the battery box.
• If tool kit is not inserted properly, then it
may obstruct LH cover fitment.
Battery
• It is located inside the ‘Side Cover’ LH.
• Always maintain electrolyte level in each
cell between Max. & Min. level marks.
CAUTION : Do not drive/run vehicle in
battery disconnected condition. It may lead
to damage of electrical / electronic
components.
CAUTION : Ensure tool kit is fully
inserted in tool kit slot.
11
Page 15
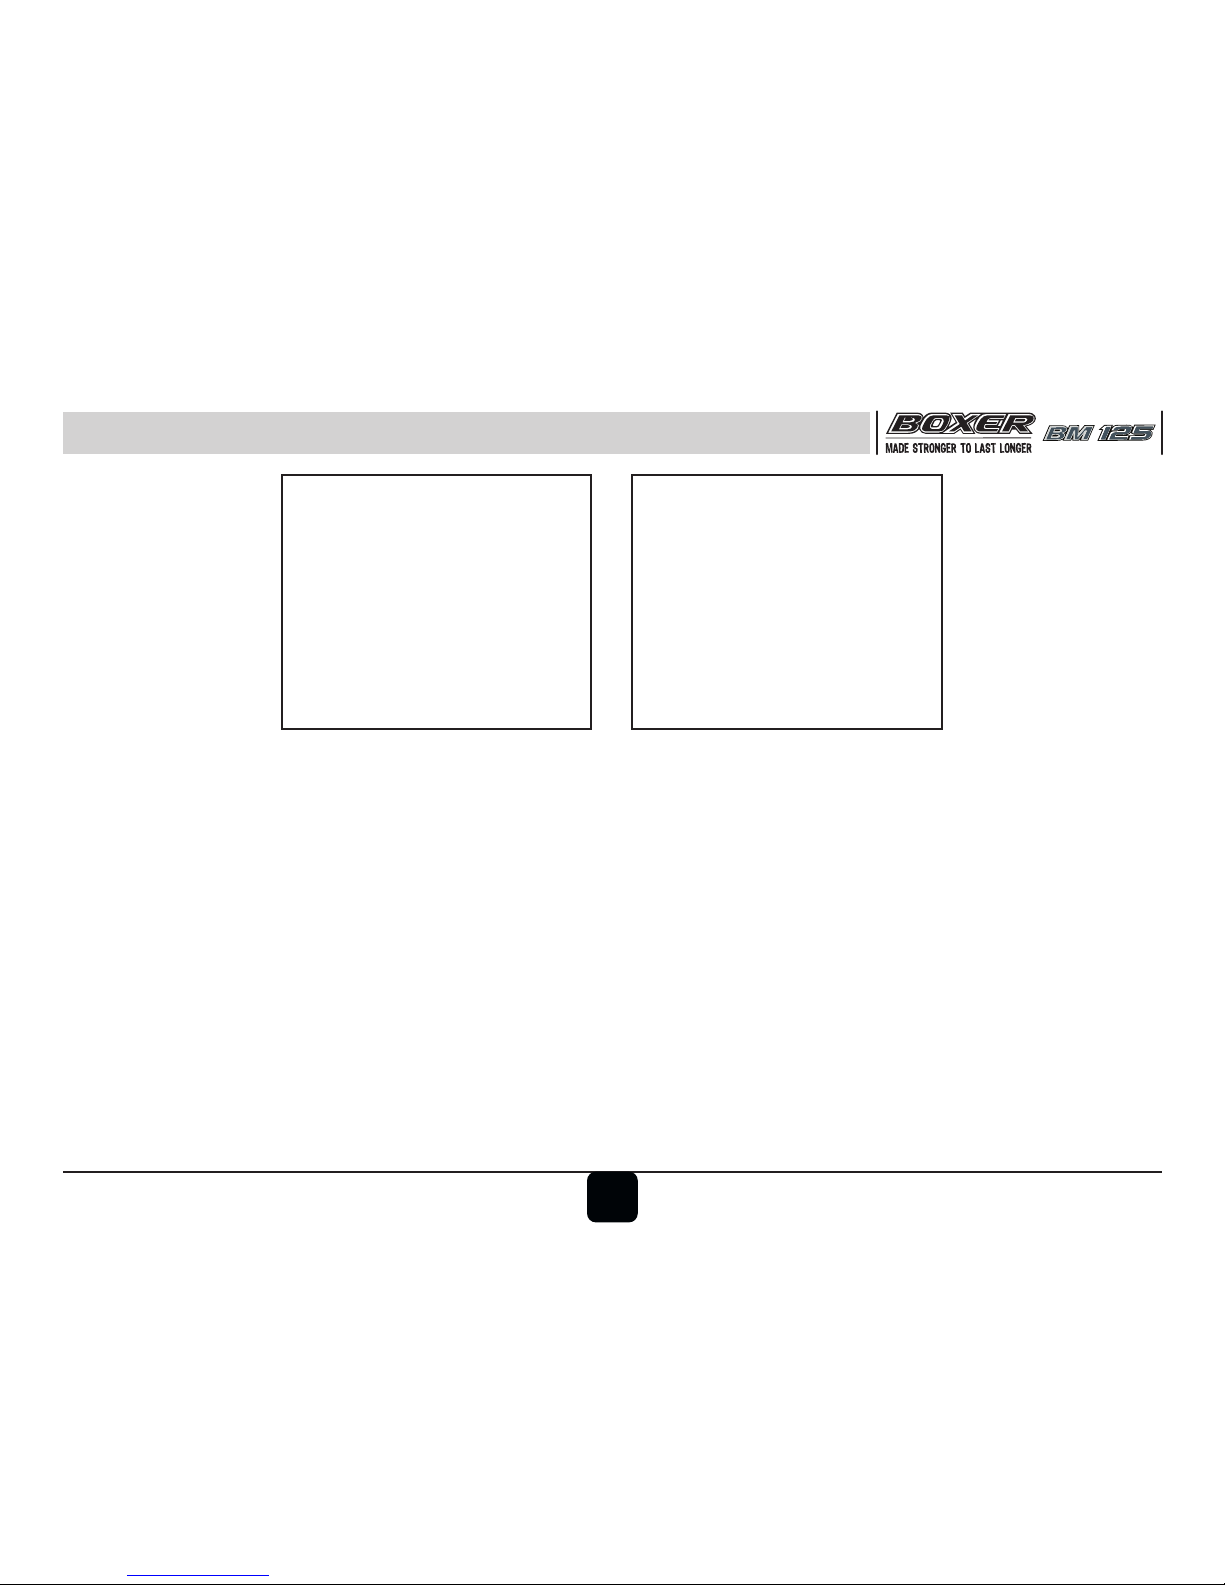
Removal & Fitment of Seat
Removal of Seat
• Remove 2 nos. M5 Allen bolts using allen
key on LH & RH.
• Lift the seat from rear side & pull it toward
rear side.
Fitment of Seat
• Match & insert the bracket ('1' of Fig. 'B')
of seat with slot ('2' of Fig. 'B') provided
below the fuel tank on chassis.
• Push seat towards fuel tank and align lugs
('3’ & ‘4’ of Fig. ‘B') with bracket on
chassis & tighten 2 nos M5 allen bolts on
LH/RH side.
Fig. BFig. A
12
Page 16
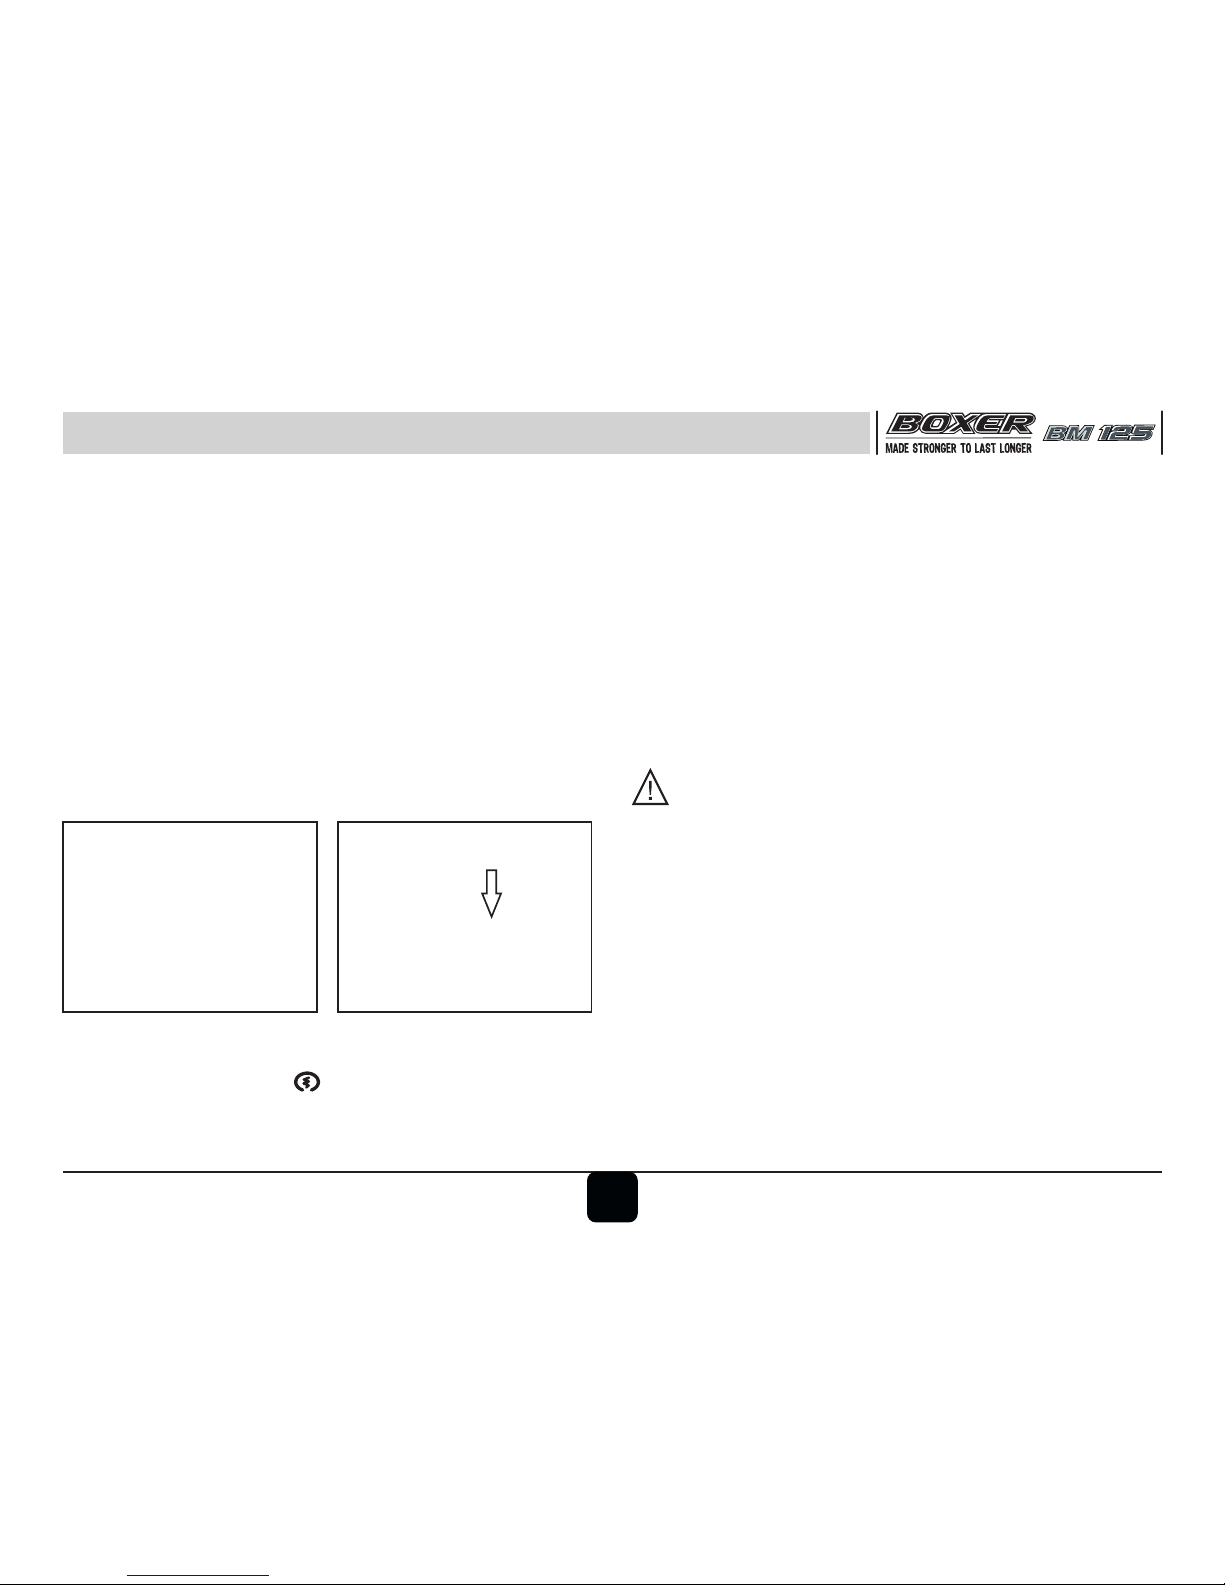
• Keep throttle completely closed, press
starter button “ ” / apply kick to start
the engine.
Starting The Engine :
• Turn the fuel tap knob to ‘ON’ or ‘RES’
position.
• Turn ignition switch key to ‘ON’ position.
• Confirm that transmission is in neutral.
• If the engine is cold or when starting for
first time, use manual choke for quick
starting. Choke lever is located on RH
side of Carburettor.
Caution : Do not operate the starter
button continuously for more than 5
seconds otherwise battery would get
discharged.
How to Ride Your Bike
• Release starter button / kick lever as
soon as engine gets started.
• When the engine is warmed up enough to
idle without using choke, return the
manual choke lever to the OFF position.
Note : Do not let the engine idle longer than 3 minuets
otherwise it might overheat the engine.
Manual Choke
OFF Position
ON Position
13
Page 17
How to Ride Your Bike
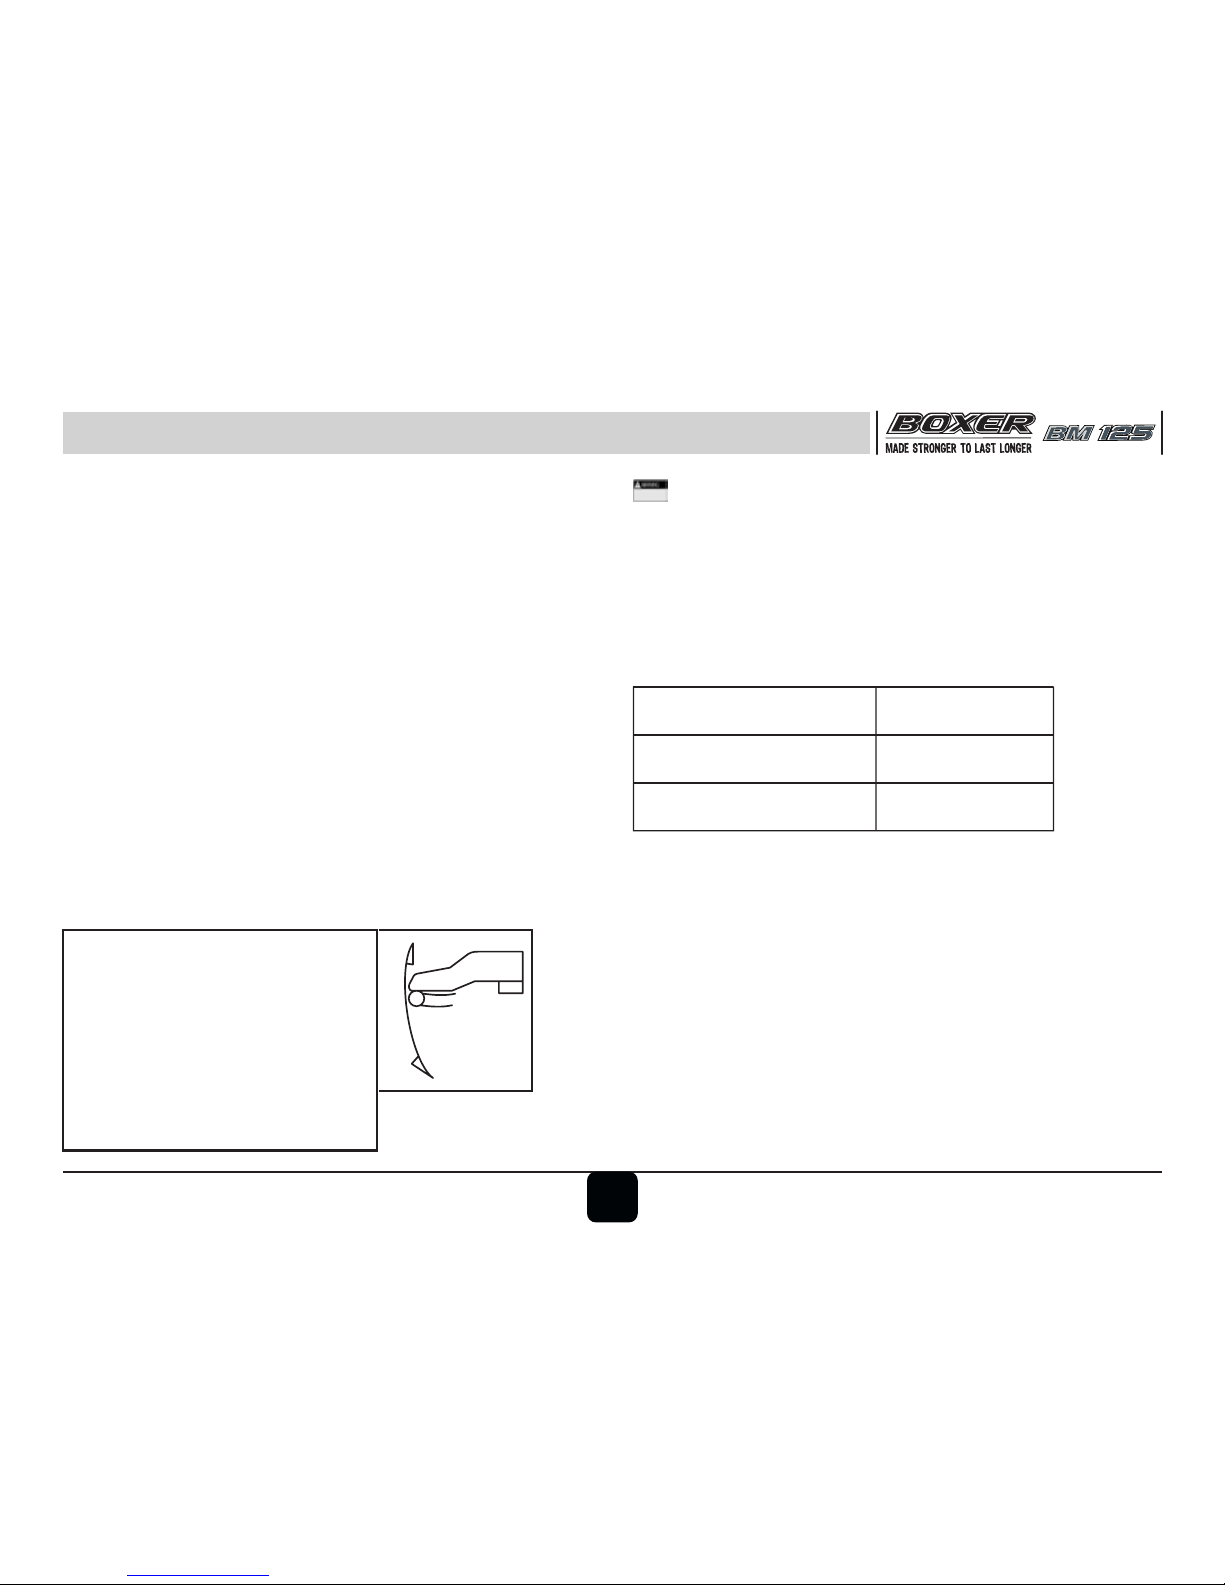
Braking :
• Close the throttle completely, leaving the
clutch engaged (except where shifting gears)
so that the engine braking will help slow
down the motorcycle.
• Shift down one gear at a time so that you
are in Neutral when you come to a complete
stop condition.
• When stopping, always apply both brakes at
the same time. De-clutch as necessary to
avoid engine stalling.
Warning : When shifting down to lower gear,
do not shift at such high speed that engine
rpm rises excessively. This may cause engine
d am a g e , a nd r e a r w he e l m a y ski d .
D o w n s h i f t i n g s h o u l d b e d o n e a t
recommended speeds as shown in table.
Moving Off :
• Start the bike.
• Check that Center/Side stand is retracted.
• Depress the clutch lever.
st
• Shift the gear pedal into 1 gear.
• Open the throttle gradually and simultaneously
release the clutch lever slowly.
• As the clutch starts to engage, open the throttle
a little more, giving the engine just enough rpm
to keep it from stalling.
Gear shifting
pattern
Shifting Gears :
• Close throttle & pull in the clutch lever.
• Shift into next higher or lower gear as
desired.
• Open the throttle and release the clutch lever
slowly and simultaneously.
N
1
2
3
4
14
th rd
From 4 to 3 Gear
rd nd
From 3 to 2 Gear
nd st
From 2 to 1 Gear
32 ~ 35 km/h
23 ~ 26 km/h
15 ~ 18 km/h
Recommended Speed for Shifting Down
Page 18
How to Ride Your Bike
• Never lock the brakes, or it will cause the
tyres to skid. When cornering, use brakes
judiciously and do not de-clutch. Reduce
your speed before you get into the corner.
F or eme r g e n cy bra k i n g , d i s reg a r d
downshifting, and concentrate on applying
brakes as hard as possible without
skidding.
Stopping the Vehicle :
• Close the throttle completely.
• Shift the transmission into neutral.
• Bring the vehicle to complete stop.
• Turn the ignition switch off.
Parking the Vehicle :
• Support the motorcycle on a firm level
surface with the center or side stand.
• Lock the steering.
CAUTION : Do not park on a soft or
steeply inclined surface this may result in
vehicle falling down.
Running IN
Proper running-in is important for the better
engine life and trouble free performance of the
vehicle.
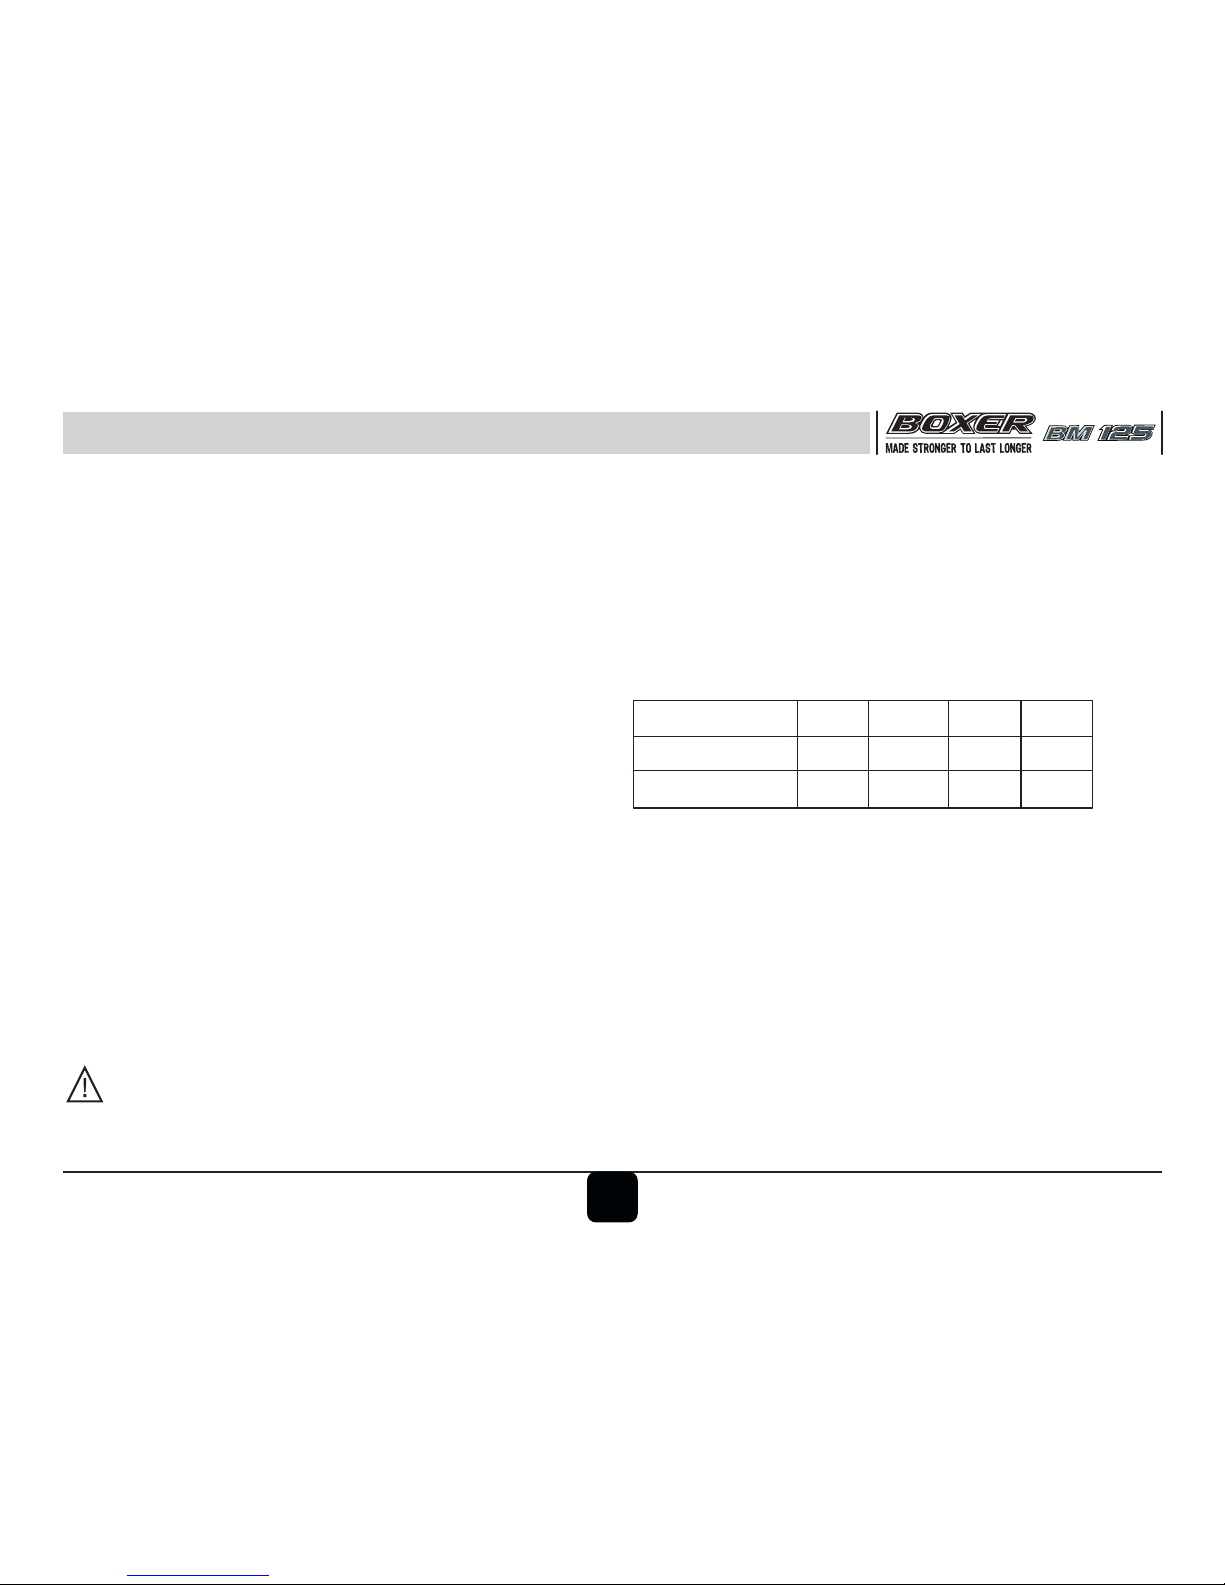
• During first 2000 kms running-in period do
not exceed following speed limits.
• Always keep the speed below the limits
mentioned in the table.
• Do not race the engine excessively.
• Do not raise the engine rpm immediately
after starting. Run the engine for a minute
in Idle speed to allow engine oil to reach
all moving components.
Kms 1st 2nd 3rd 4th
0 - 1000 14 24 34 43
1000 - 2000 18 30 42 53
15
Page 19
How to Ride Your Bike
Fuel Saving Tips :
A well maintained vehicle and good driving can contribute
a lot to the saving of petrol. Following are a few simple
fuel saving tips.
Good Riding Habits :
• Ride smoothly and steadily at an optimum driving
speed of 40 to 50 Km/h
• Avoid harsh braking.
• Change the gear judiciously according to the speed
and load requirement.
• Don’t overload the vehicle above the specified
payload.
• Use the accelerator judiciously.
• Cut off the engine if you want to stop for more than
two minutes.
• Ensure choke lever is in ‘OFF’ condition after engine
gets warm.
How to check mileage (Fuel efficiency)
Practical way to calculate the mileage is to be done by
following the “Full Tank to Full Tank” checking method.
• Fill the fuel tank completely up to the brim to a
specified point.
• Note the odometer reading.
• Run the bike for defined kilometers.(say 100 km.)
• Fill the fuel tank completely again at the same fuel
filling station up to the brim & again to the specified
point. Specified point of filling is necessary to prevent
over or under filling.
• Divide kilometer run against the fuel quantity filled.
Fuel Check fuel lines & connections for
no leakage.
Spark plug Inspect and clean spark plug.
Adjust electrode gap.
Air filter Clean air filter element periodically.
Engine oil Check level. Use oil of
recommended grade and quantity.
Brakes Ensure that the brakes are not
dragging / binding.
Clutch Ensure correct clutch lever free play.
Tyre Always maintain recommended
Pressure. tyre pressure.
Carburettor Clean & adjust the carburettor.
Adjust idling RPM.
Ensure following maintenance points to get
optimum fuel efficiency from your bike.
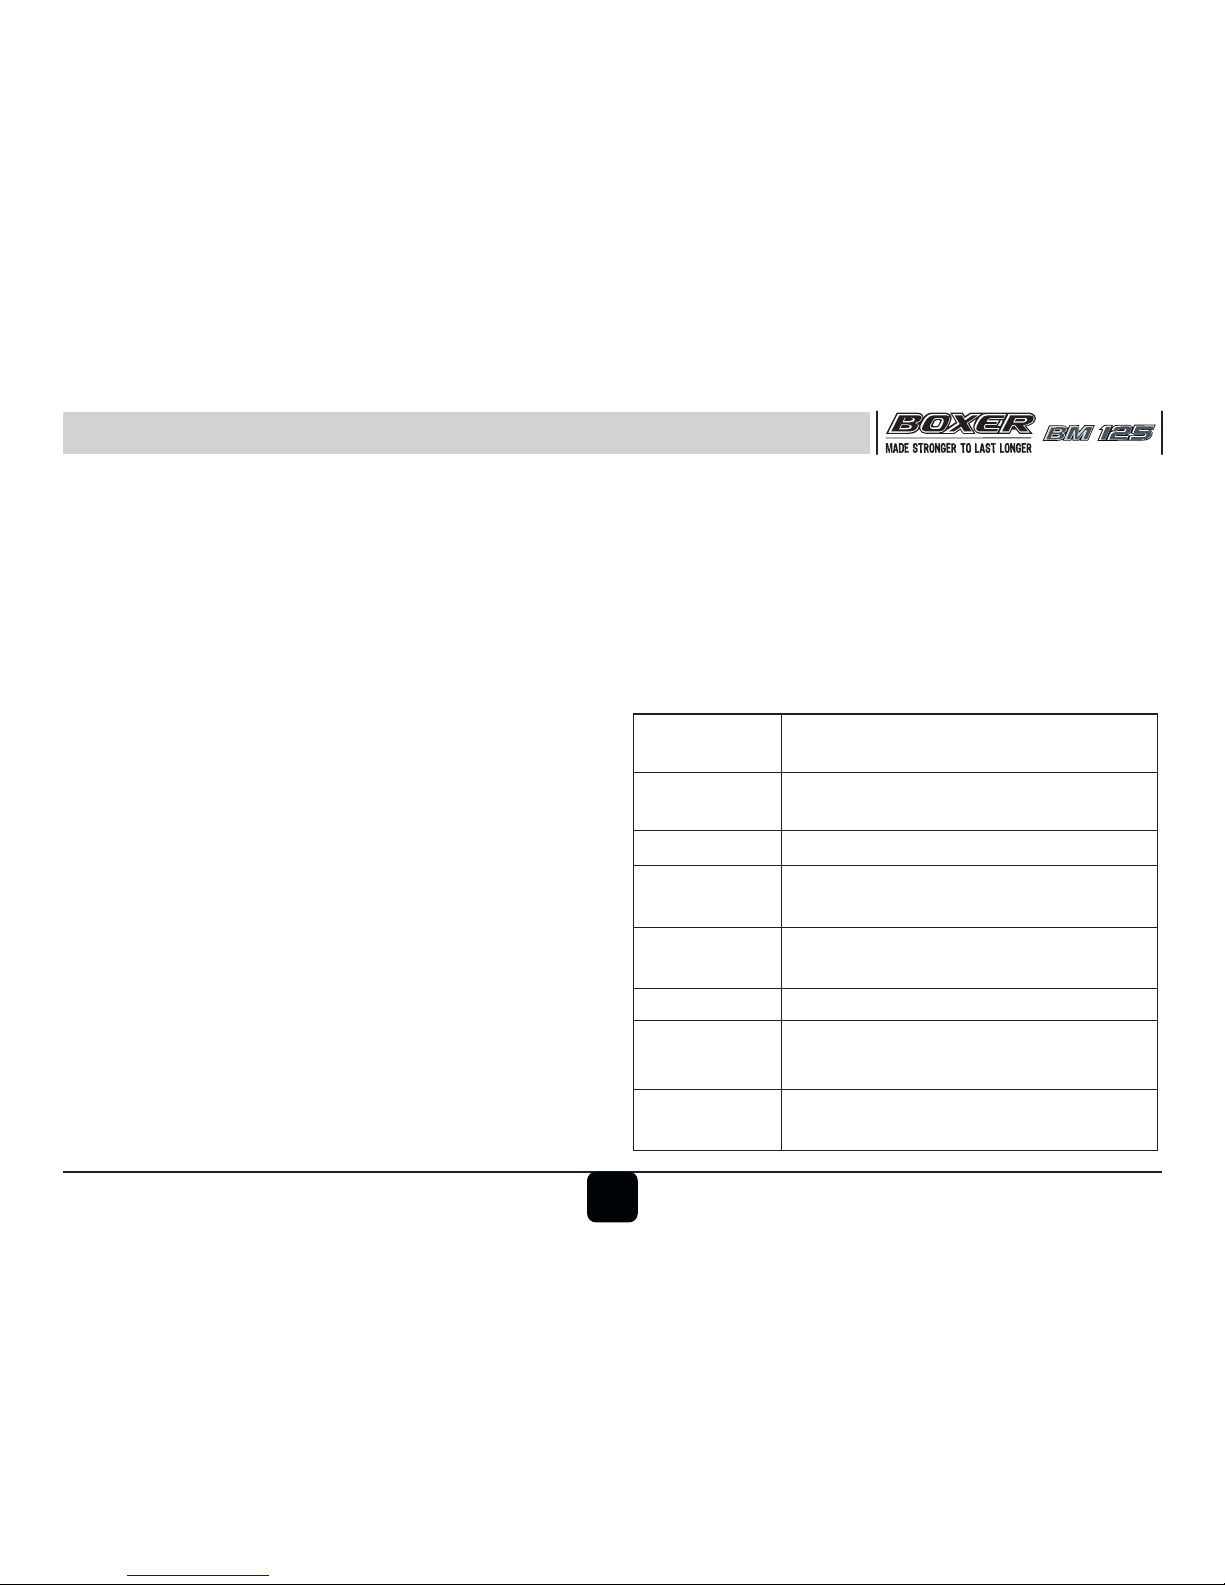
Optimum Shifting Speeds for best mileage
1st gear : 0 km/h
2nd gear : 14 ~ 17 km/h
3rd gear : 24 ~ 27 km/h
4th gear : 34 ~ 38 km/h
16
Page 20
Safe Riding Tips
• Drive cautiously. Start early & reach your
destination safely.
• Always carry vehicle registration & insurance
papers, and a valid driving licence with you.
• Avoid driving on loose sand or small
pebbles where vehicle is likely to skid.
• Properly wrap-up your clothes while riding to
avoid it entangling in wheels or other
objects on road.
Safe Riding Tips
• Always wear Helmet when riding the bike.
• Read thoroughly the instructions given in the
manual and follow them
carefully.
• A v o i d u n n e c e s s a r y
accessories fitment for
the safety of both rider
and other motorists.
• When applying the brakes, use both front &
rear brakes simultaneously. Applying only
one of the brake may cause vehicle
imbalance & loss of vehicle control.
• Riding at proper speed and avoiding
unnecessary acceleration and braking are
important not only for safety and low fuel
consumption, but also for longer life of the
vehicle.
• During monsoon drive the vehicle more
cautiously. Remember vehicle skidding is
more common during light showers.
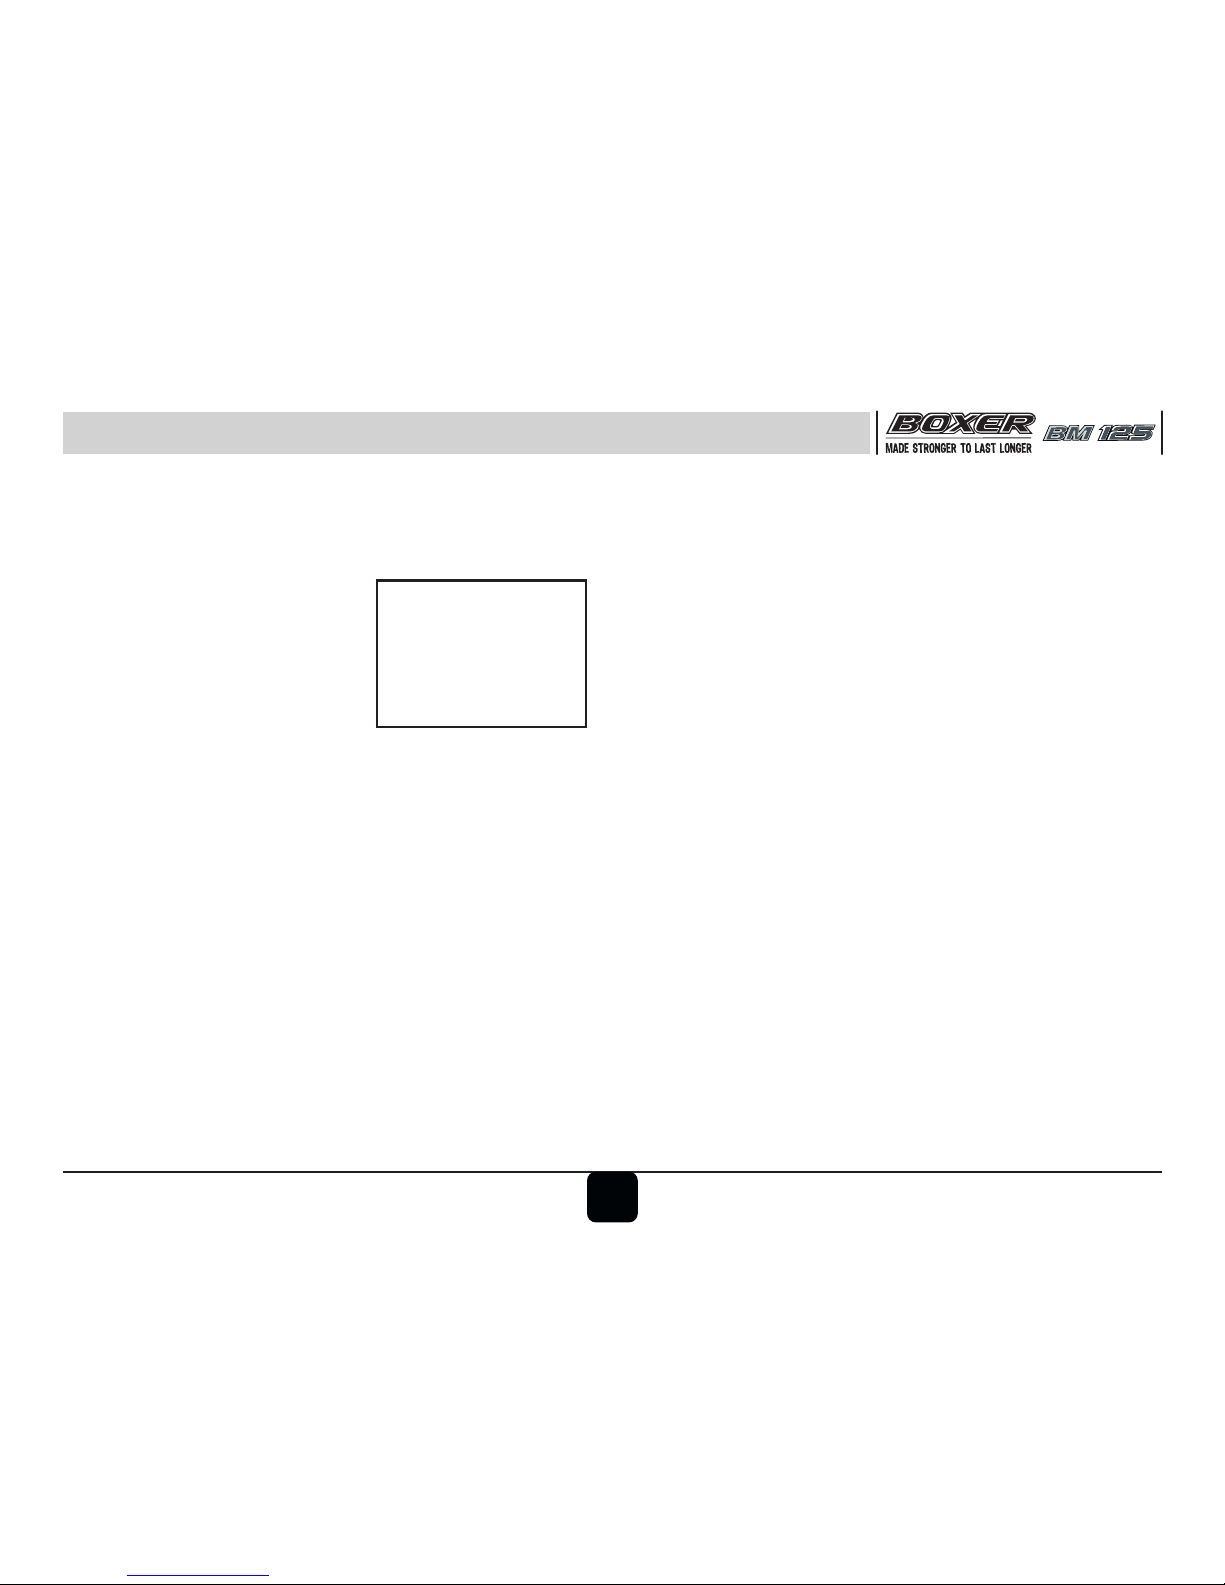
Daily Safety Checks :
Before riding motorcycle be sure to check
following items. Please give proper importance to
these checks and perform all of them before riding
motorcycle.
17
Page 21
Daily Safety Checks
Rainy Season Care :
• It is sugge s te d to the cust om er s to take
appropriate care in area of heavy monsoon or high
rainfall area. Carry out the appropriate surface
preventive coat to avoid rusting / poor surface
fini sh on acco un t of a dvers e at mosph eric
conditions.
• Vehicle cleaning to be done with soft & clean wet
cloth to avoid scratches on painted parts.
• Clean & lubricate all the important parts as
mentioned in the periodic maintenance chart.
• Do not apply direct high pressure water jet on
painted, electrical / electronic parts.
• Do not obstruct engine cooling by adding mud
protection sheet from front side of the engine.
If any irregularities are found during these checks, refer to
the Maintenance chapter & visit your Bajaj dealer for the
doing the necessary repairs to return the motorcycle to a
safe operating condition.
• Enough fuel is filled in for journey. Confirm no fuel
leakage are observed in the fuel lines.
• Engine oil level is correct (between upper and lower
level mark)
• Throttle cable play : 2/3 mm. Smooth operation &
positive return to closed position,
• Steering Lock smooth operation.
• Brake Pedal free play is 15 to 20mm.
• Break wear lining Indicator is within usable range. No
brake dragging is observed.
• Drive Chain slack is 25 to 30 mm chain is adequately
lubricated.
• Function of all lights & horn is ok.
• Clutch lever play is 2 to 3 mm
• Smooth without restriction
• Ensure that the Side Stand returns to its fully closed
position.
• Ch e ck for correc t tyr e inf lat i on (Fro n t &
Rear).Check adequate tyre tread depth confirm no
cracks / cuts on tyres.
• Correct rear view adjustment of both mirrors.
18
Warning : Failure to perform these checks
every day before you ride may result in
inconvience during riding, vehicle damages
or an accident.
Page 22
Engine Oil
A : Oil Filler Cap B : Oil Level Gauge
Recommended Engine Oil :
Always insist on Genuine Oil for optimum
engine performance.
Model Engine Oil Grade
Boxer 20W50 API ‘SL’
BM125 JASO ‘MA’ Grade
A
B
C
D
19
Engine Oil Level Checking :
• Check engine oil level every day. Park vehicle
on Center Stand, perpendicular to the ground
on a firm, level surface.
• Check oil level through oil level inspection
window ‘B’.
• Always maintain the engine oil level between
upper (C) and lower (D) mark provided on
Clutch Cover. Top up with specified grade of
oil if the oil level is below the lower level
mark.
Engine Oil Capacity :
• Refill quantity during servicing : 1000 ml.
• During engine overhaul : 1100 ml.
CAUTION :
• It is important to adhere to recommended grade & frequency of oil change
for optimum engine performance & long
life of engine components.
• Do not reuse drained oil.
st
• Engine oil replacement frequency : 1 service &
then every 5,000 Kms.
• Engine oil level top-up frequency : Every 5000 km.
Driving with insufficient, deteriorated or
contaminated engine oil will cause faster wear
of parts & may result in engine damages.
Page 23
CAUTION : Tap water is not a substitute
for distilled water and will shorten the life
of the battery.
• When battery is found discharged, it is advised
to get it charged immediately at authorised
Bajaj Dealer.
• Environment care must be taken to
dispose off the used battery. It is always
recommended to hand over the same to
the Authorised battery dealer for proper
disposal of the same.
How to keep battery healthy ?
• Switch ‘Off’ ignition when engine is not
running.
• Get battery checked/ charged during
periodic services.
• Do not press starter button for more than 5
sec. After 3 successive cranking, wait for
15-20 sec. for battery to get recover.
• Disconnect battery +ve & -ve wires if
vehicle is to be stored for more than 2
weeks. This avoids self discharge of the
battery.
Battery
Battery Maintenance :
Max
Min
Battery type : 12V 5Ah
• Add only distilled water to the battery if
battery electrolyte level is bellow minimum
level mark.
20
Page 24
Wheels - Tyre
2
Front 1.75 Kg/Cm (25.0 psi)
2
Rear (Solo) 2.00 Kg/Cm (28.5 psi)
2
Rear (with Pillion) 2.25 Kg/Cm (32.0 psi)
Use the recommended levers while removing
the Tyre / Tube for puncture work. This will
avoid any damages to the edges / scratches
on paint of the wheel.
Tyre Pressure :
Keep appropriate tyre pressure as mentioned
below to increase life of the tyre & for getting
better fuel consumption.
Wheel Puncture :
21
Page 25
Periodic Maintenance Information
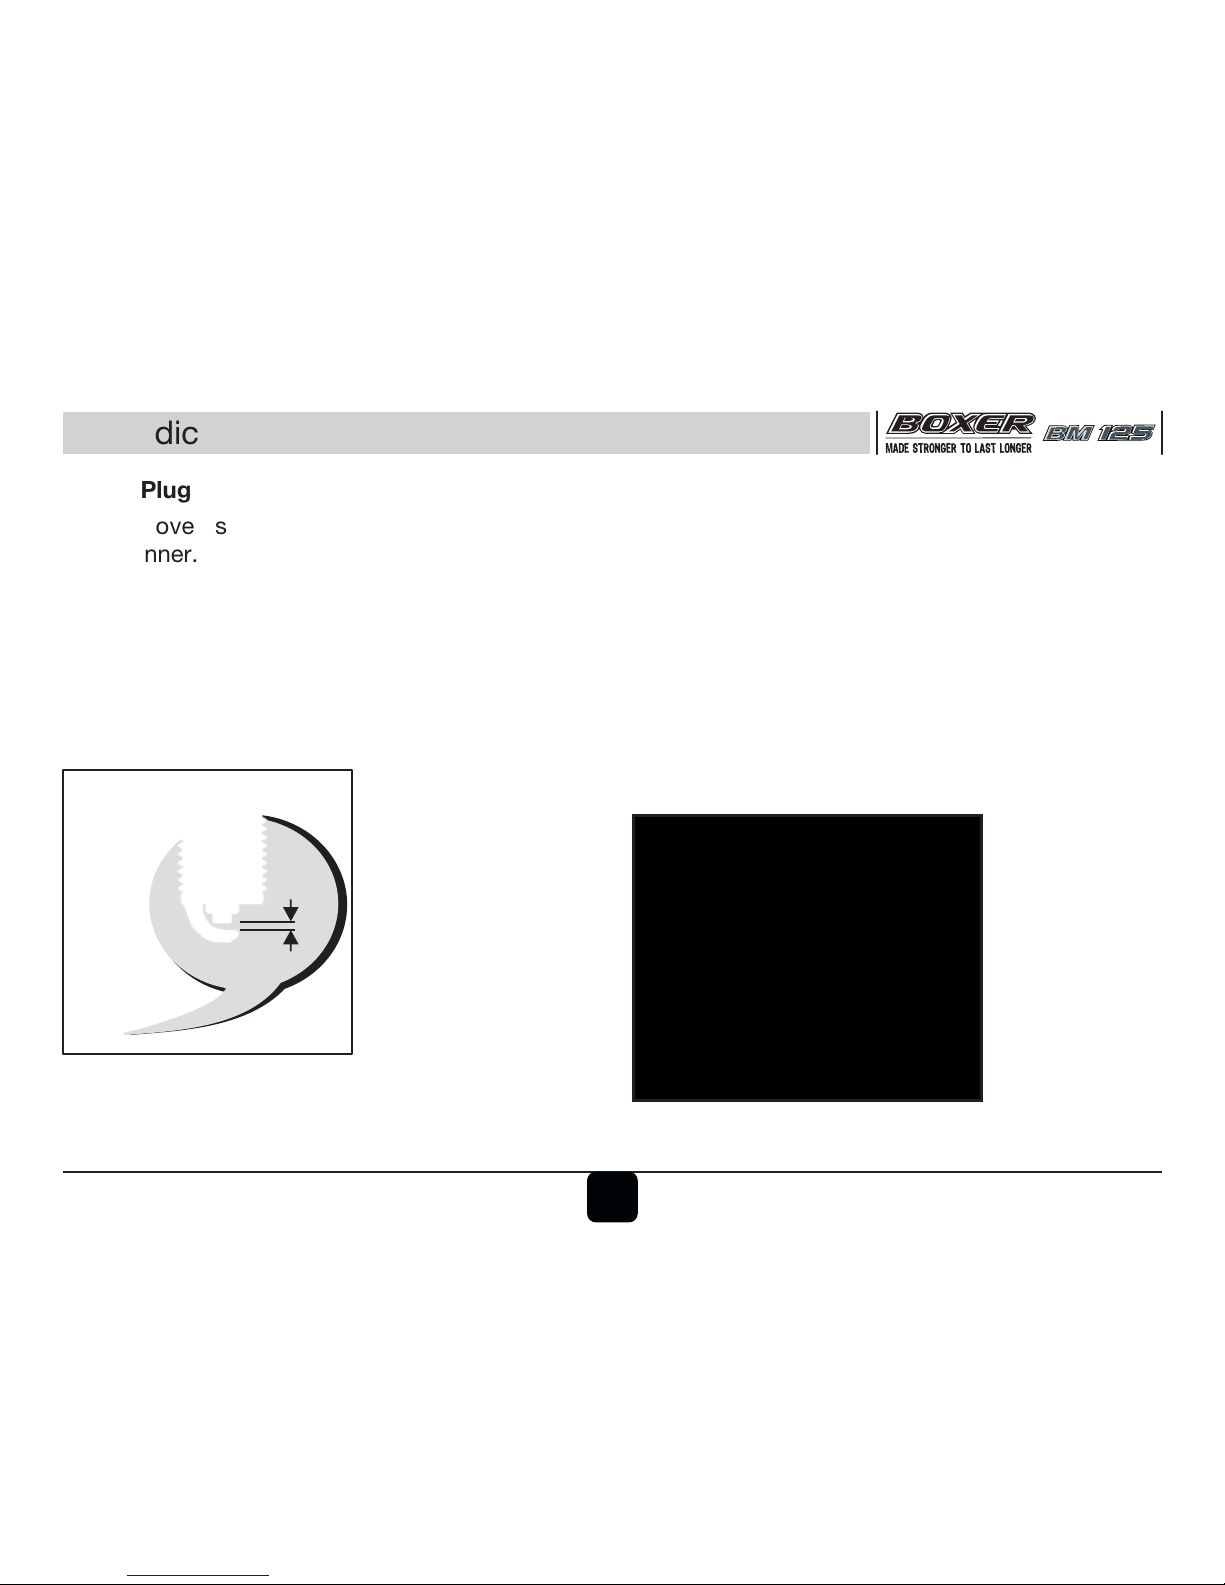
Spark Plug
• Remove spark plug by using the plug
spanner.
• Clean the spark plug.
• Adjust the gap if found incorrect.
Spark Plug Gap : 0.7 to 0.8 mm.
Spark Plug : Champion RG4GC
0.7 to
0.8 mm
Drive Chain Slackness
• Chain top edge to be kept between the
two marks of the chain case during chain
slackness inspection.
• Care should be taken, that the chain
should never run dry. Lubricate chain with
SAE 90 oil at every 500 kms.
• Chain slackness will have to be adjusted
whenever required at authorised Bajaj
Dealer.
Std. Chain slackness :
25~30 mm
22
Page 26
Periodic Maintenance Information
Cleaning
Chain Lubrication
23
Drive chain must be cleaned & lubricated as
per periodic maintenance schedule.
Non Sealed type Drive chain
• Place vehicle on the center stand. Dirt on
the chain should be cleaned using lint free
cloth.
• Lubricate chain with SAE 90 oil. Ensure oil
is directed on the ends of bushes & links
on either side.
• Rotate rear wheel to ensure oil entry into
bushes.
• Wipe off excess oil or dripping oil & close
the window cover.
• Chain to be cleaned & lubricated at every
5000 Kms. at authorised dealership.
Page 27
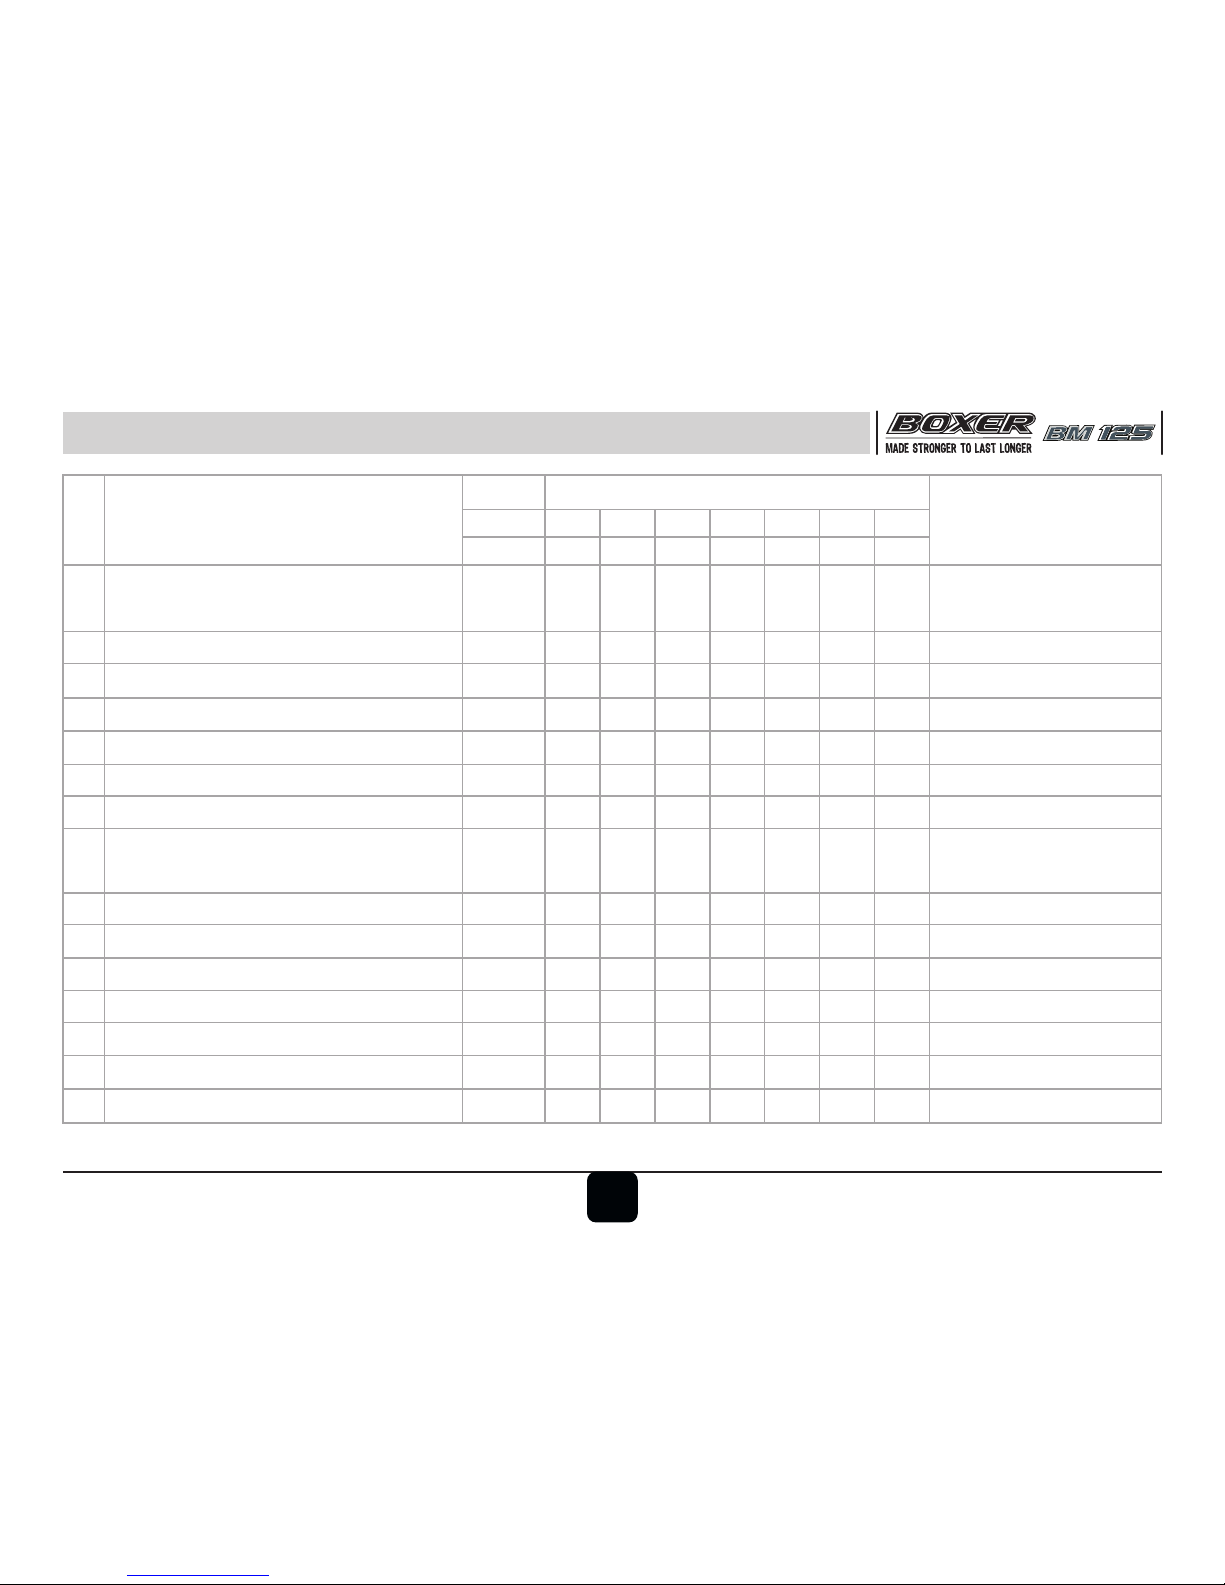
Periodic Maintenance & Lubrication Chart
More frequent cleaning may be required when driving in dusty condition.
1. Servicing 1st - 750 Kms / 30 Days
2nd onward @5000 Kms
2. Engine idling speed / CO% A A A A A A A A
3. Valve tappet clearance A A A A A A A A
4. Engine oil R R R R R R R R 20W50API SL JASO MA Grade
5. Oil strainer CL CL CL CL CL CL CL CL Clean at 5000 Kms
6. Paper oil filter R R R R R R R R Replace at every oil change
7. Spark plug functioning / Gap C, A, R C, A C, A C, A R C, A C, A R Replace at every 15000Kms
8. Air cleaner element Clean / Replace CL, R CL CL CL R CL CL R Clean at every 5000Kms
Replace at every 15000Kms
9. Air filter cover ‘O’ Ring R R Replace at every 20000Kms
10. Fuel cock sediment bowl cleaning CL CL CL CL CL CL CL Clean at every 5000 kms
11. Carburettor float bowl cleaning CL CL CL CL Clean at every 10000Kms
12. Carburettor rubber duct C, R C C C C R C C Replace at every 20000kms
13. Fuel pipes C, R C C C C R C C Replace at every 20000kms
14. Battery electrolyte level C, A C, A C, A C, A C, A C, A C, A C, A
15. Clutch lever free play C, A C, A C, A C, A C, A C, A C, A C, A
RECOMMENDED FREQUENCY
Servicing
Sr.
No.
Operation
1st
750
2nd
5000
3rd
10000
4th
15000
5th
20000
6th
25000
7th
30000
Kms
24
Page 28
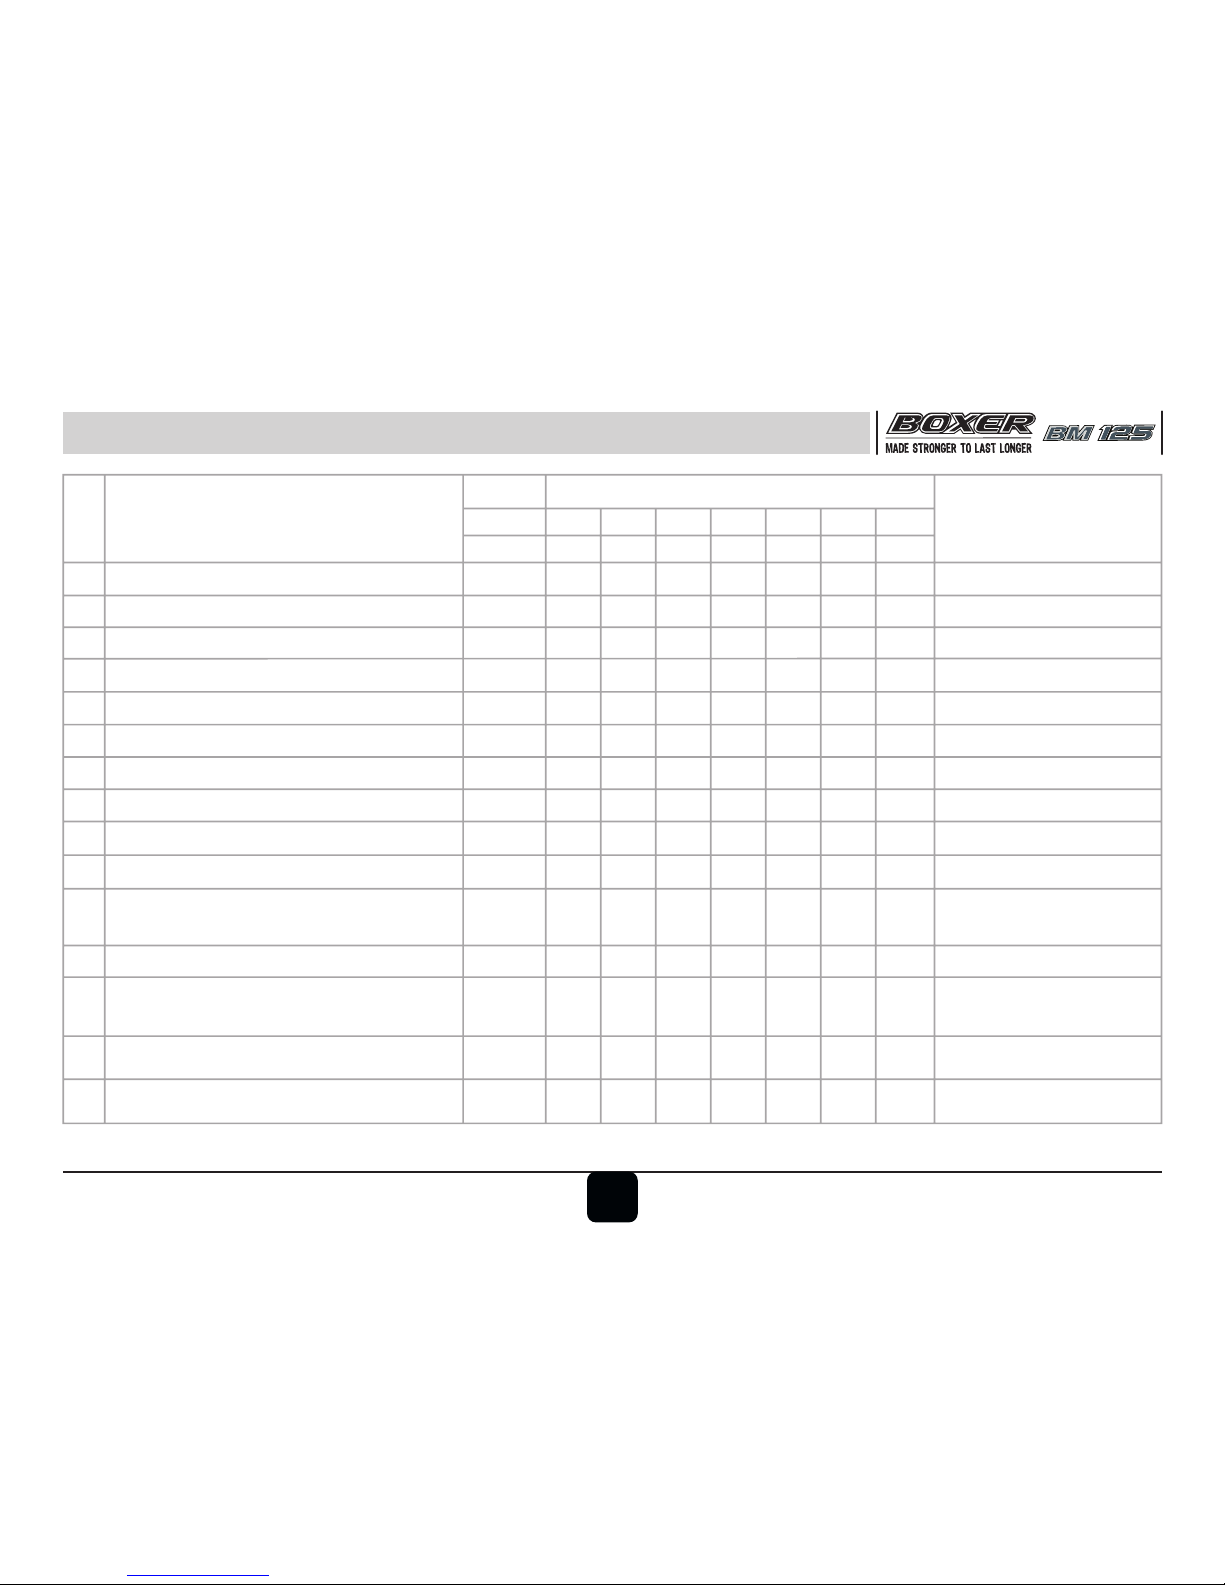
Periodic Maintenance & Lubrication Chart
16. Throttle grip play C, A C, A C, A C, A C, A C, A C, A C, A
17. Rear brake pedal free play C, A C, A C, A C, A C, A C, A C, A C, A
18. Brake lining or pad wear CL, R CL CL CL, R CL CL CL, R Replace at every 15000kms
19. Brake cam & pedal pivot pin L L L
20. Steering play C, A C, A C, A C, A C, A C, A C, A C, A
21. Steering stem bearing C, L, R C,L,R C,L,R C,L,R
22. All fasteners tightness C, T C, T C, T C, T C, T C, T C, T C, T
23. Rear sprocket fasteners C, T C, T C, T C, T C, T C, T C, T C, T
24. Rear wheel rubber shock damper C, R C, R C, R C, R Replace at every 10000kms
25. Silencer drain hole cleaning CL CL CL CL CL CL CL CL Clean at every 5000Kms
26. Cylinder head de-carbonising, valve lapping CL CL CL Clean at every 15000Kms
& Replace valve oil seals
27. Engine air breather tube R R Replace at every 20000Kms
28. Drive chain slackness adjustment C, A, L C,A,L C,A,L C,A,L C,A,L C,A,L C,A,L C,A,L Lubricate at every 500kms.
& lubrication A- slackness whenever reqd.
29. Drive chain remove, clean, insp. & lub. (O/H) CL, L CL, L CL, L CL, L CL, L CL, L CL, L At every 5000Kms
30. Drive chain link lock R R R R R R R Replace at every 5000Kms
RECOMMENDED FREQUENCY
Servicing
Sr.
No.
Operation
1st
2nd 3rd 4th 5th 6th 7th
750
5000
10000
15000
20000 25000
30000
Kms
25
Page 29
Periodic Maintenance & Lubrication Chart
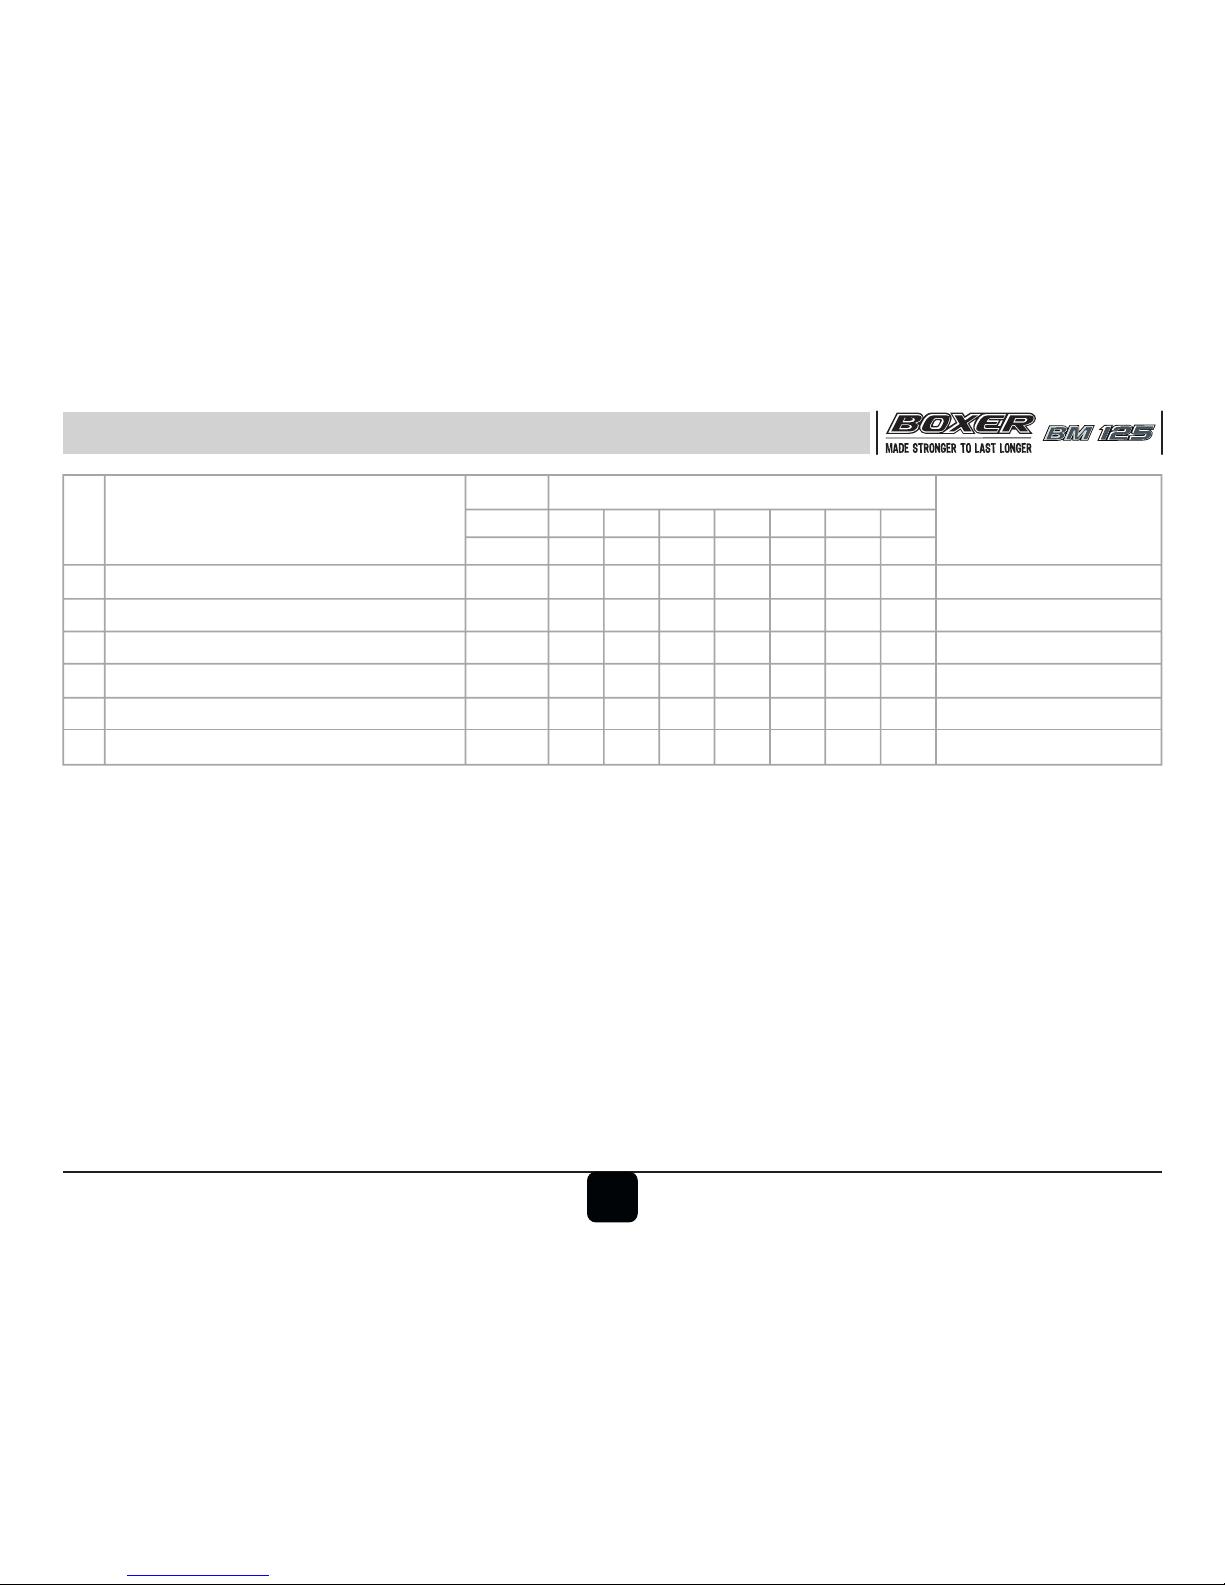
31. Wheel bearing (for non sealed bearings only) C, L C, L At every 20000Kms
32. Tyre tread wear C, R C, R C, R C, R C, R C, R At every ser. after 2nd ser.
33. Front fork oil R R Replace at every 20000Kms
34. Starter clutch bush kit for dry type CL, R CL, R CL,R (If applicable)
35. General lubrication L L L L L L L L
36. Swing arm pivot pin lubrication L L Lubricate at every 20000Kms
RECOMMENDED FREQUENCY
Servicing
Sr.
No.
Operation
1st
2nd 3rd 4th 5th 6th 7th
750
5000
10000
15000
20000 25000
30000
Kms
C : Check, A : Adjust, CL : Clean, R : Replace, T : Tighten, L : Lubricate
Note : Periodic parts / lubricants to be replaced as per Periodic Maintenance and Lubrication Chart are mandatory and
the same are chargeable to customer.
26
Page 30
Non-Use Maintenance
27
Non-use maintenance is necessary if the vehicle
remains off the road for a longer duration (more
than 15 days**). The correct and careful non-use
maintenance should be carried out before storing
the vehicle that will prevent the vehicle from
oxidation rusting of parts and also from other
non-operational damages like fire hazards.
• Clean the vehicle thoroughly.
• Remove the fuel from the fuel tank and
carburettor float bowl (if fuel is left in for a
longer period, the fuel will have a gummy
substance formation that could clog the
carburettor jets / internal passages).
• Remove spark plug & add few drops of Engine
oil into the cylinder. Kick the engine slowly so
that the oil gets spread over the cylinder wall.
Fit the spark plug firmly.
• Place the vehicle on a wooden box or a stand
firmly. Endure that both wheels are raised off
the ground.
• Spray the oil on all unpainted metal surfaces to
prevent it from rusting. Avoid oil spillage on
rubber parts and brake liners.
• Cover entire vehicle neatly. Make sure that the
storage area is well ventilated & free from
flames or spark.
• Fill 10% excess air pressure in both wheels.
** For Battery :
a. Remove battery and keep it on a wooden
plank, in ventilated area.
b. Before taking the vehicle for use.
• Get the battery recharged from the Authorised
Bajaj Dealer / Battery Dealer.
• Apply petroleum jelly on battery terminals.
Preparation for use after storage :
• Clean the vehicle.
• Tighten the spark plug.
• Fill the fuel in the fuel tank.
• Change the engine oil.
• Check all the points listed in the Daily Safety
Checks section.
• Check and inflate tyres to correct specification.
Page 31
Bajaj Auto Limited
Akurdi Pune 411 035 India
LAMP HEAD PULSAR DTS
QTY 1 NO.
APR 11
DJ201104
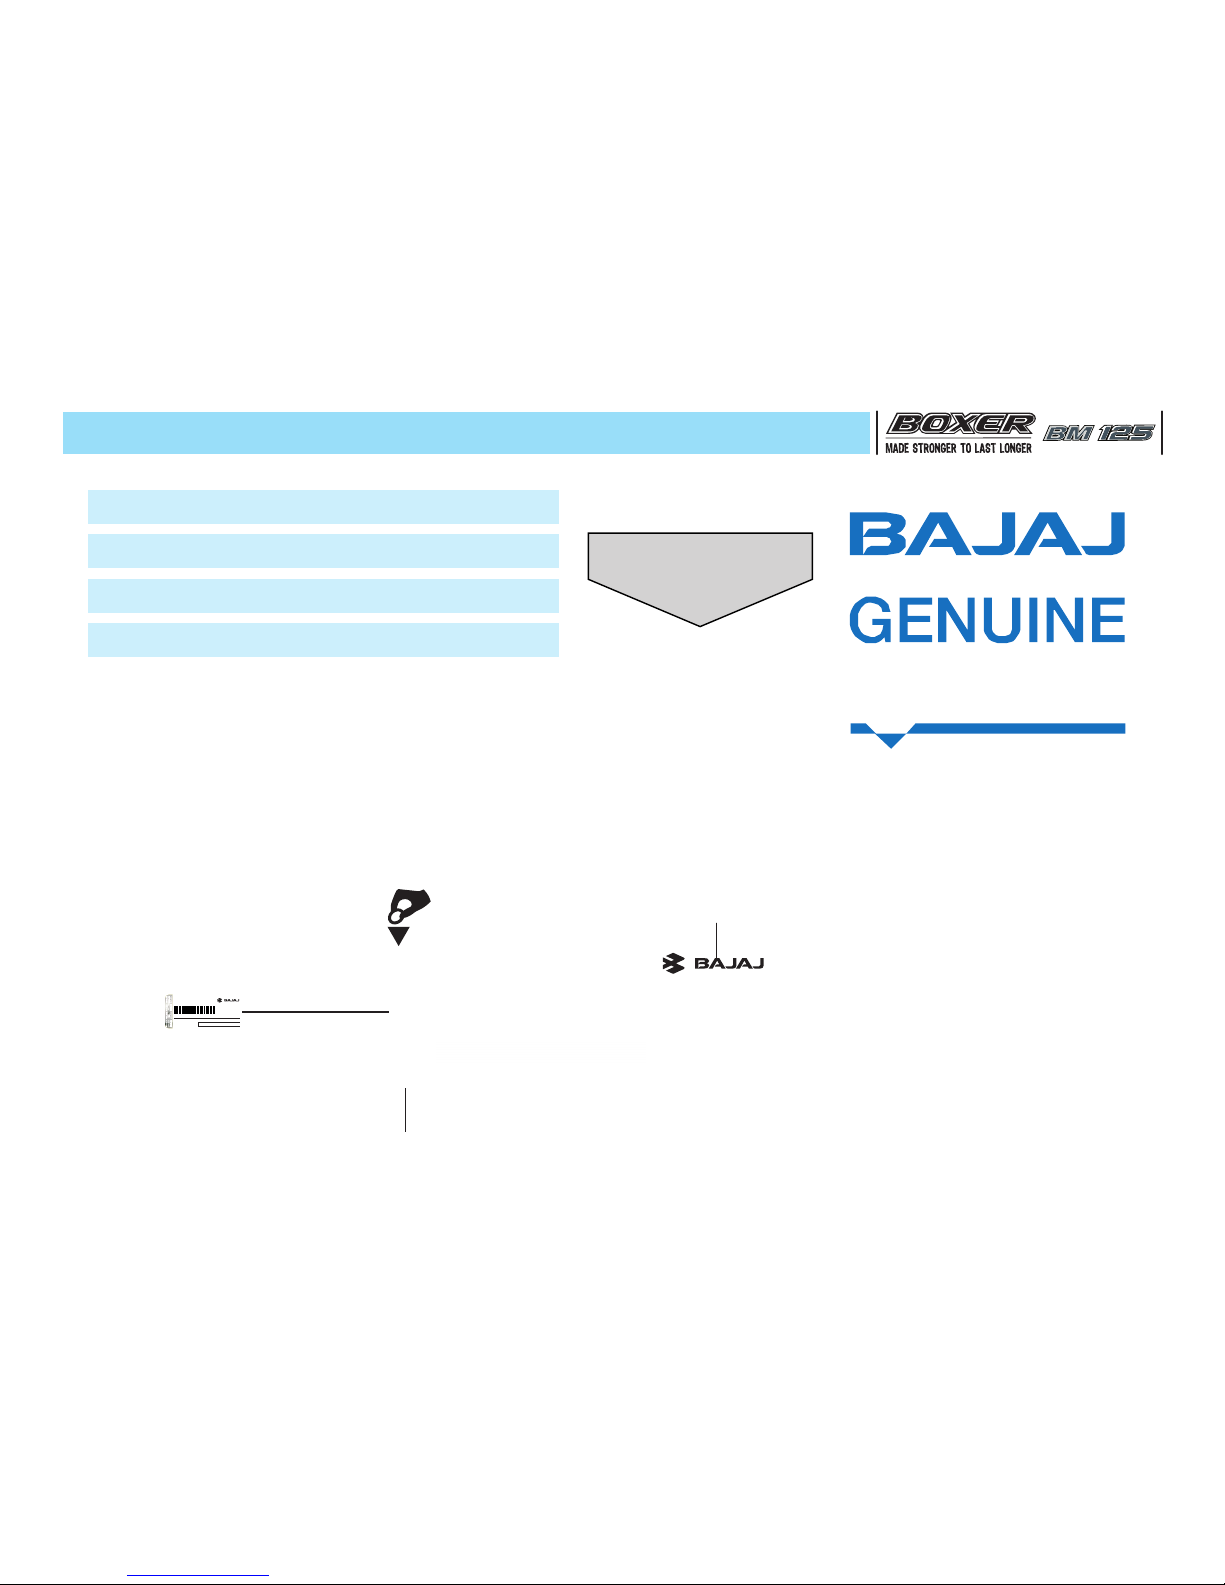
• For optimum performance of vehicle
• For prolonged life of components & vehicle
• For economical maintenance cost
• For rider's safety
parts
Genuinity Test
Genuine
M.R.P. (Incl. of All Taxes) in Rs. for Qty. packed
57.43
03100802
P0001
55.58
IN ASSAM, KARNATAKA, MANIPUR, M.P.,
NAGALAND, U.P.,
& UTTARANCHAL
IN OTHER STATES
Bajaj Auto Limited
Akurdi Pune 411 035 India
CLUTCH BOX
QTY. 1 NO.
PACKAGING MONTH
MAY 2003
Scratch Hologram to find ‘Genuine’
Partial transparent Hologram
Always Insist on
Golden Hologram
Use only Bajaj Genuine Parts
Page 32
Bajaj Auto Limited
Akurdi Pune 411 035 India
Tel +91 20 27472851
Fax +91 20 27407385
www.bajajauto.com
 Loading...