

Page 1

BOXCHIP S700A RADIO
S700A UHF: 400-470mhz
S700A VHF: 136-174mhz
Quick Start Guide
Page 2
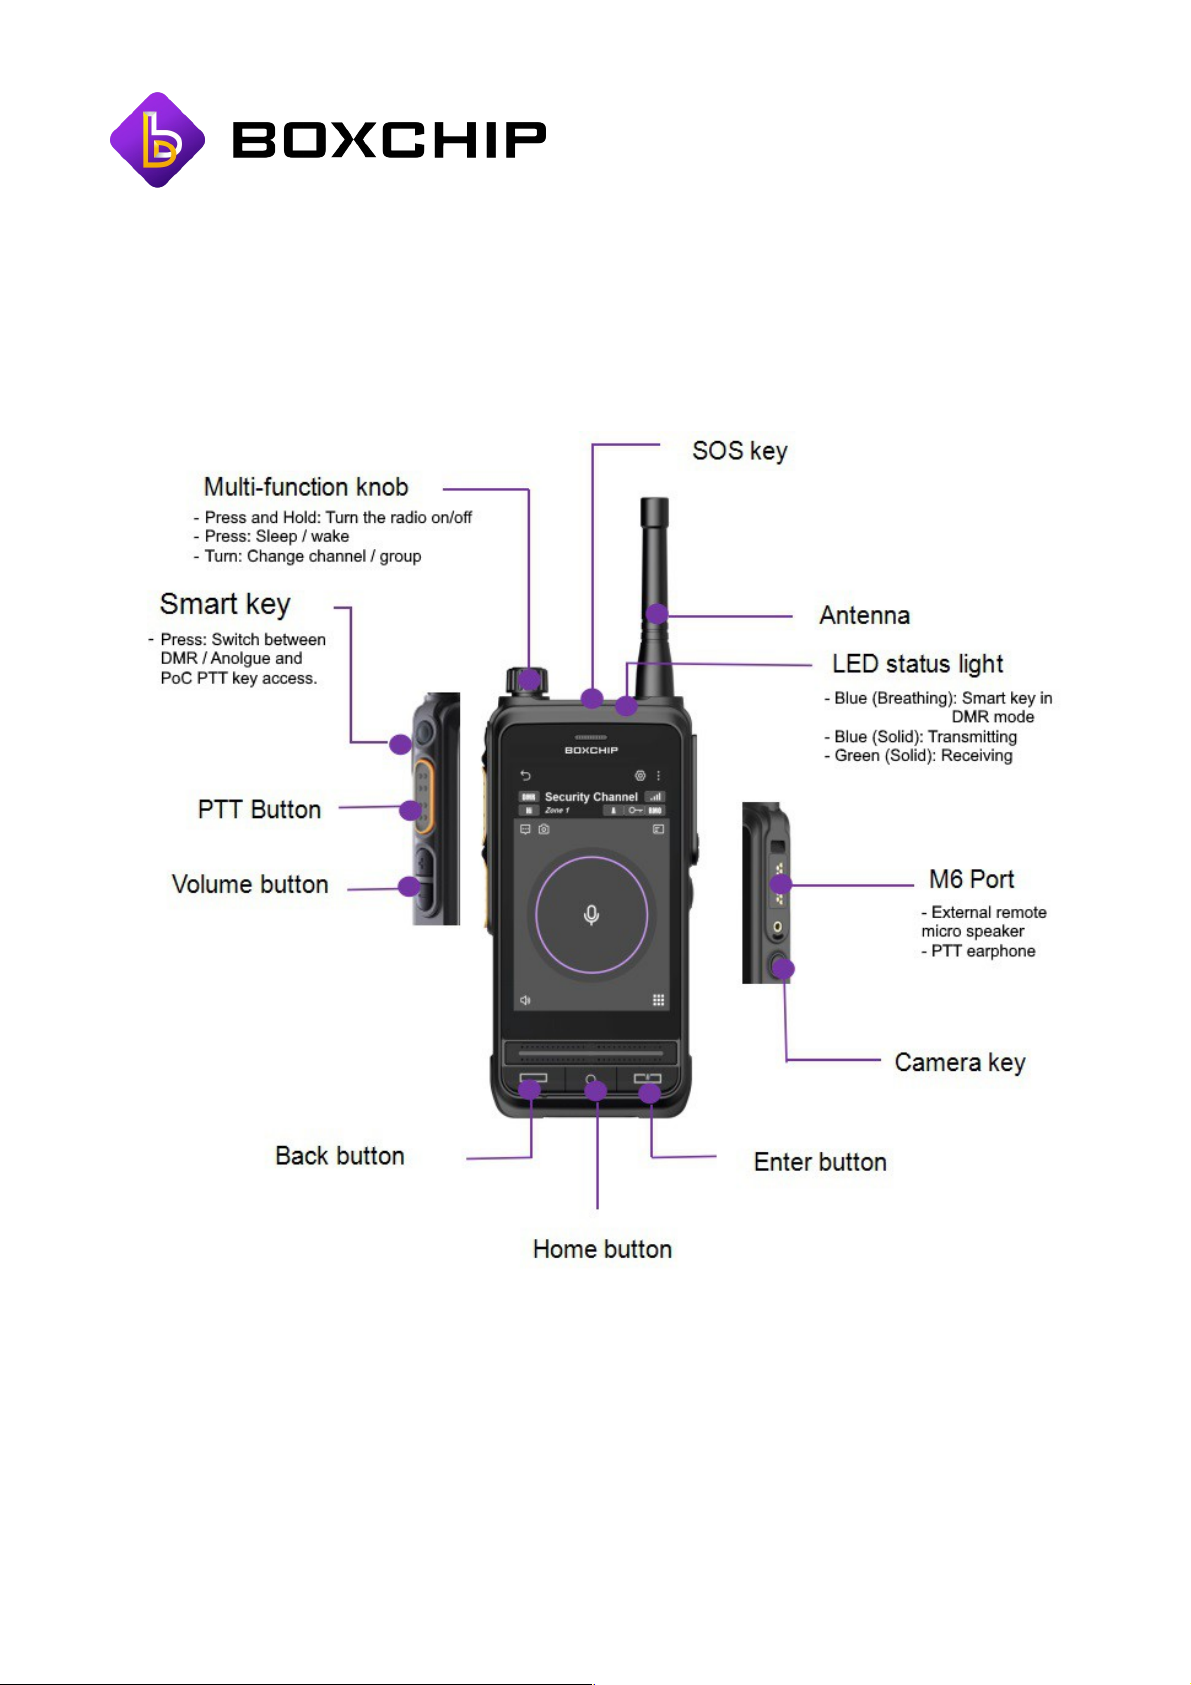
BOXCHIP S700A RADIO
Thank you for purchasing the BOXCHIP S700A radio. This quick start guide will talk you
through the basic features and functions of your new S700A radio.
BOXCHIP S700A Overview
Standard Included accessories:
•
1x Antenna (Model Dependent)
•
1x 3.8v 4500mAh Battery
•
1x USB C Cable
•
1x USB Charger
•
1x Belt Clip
Page 3
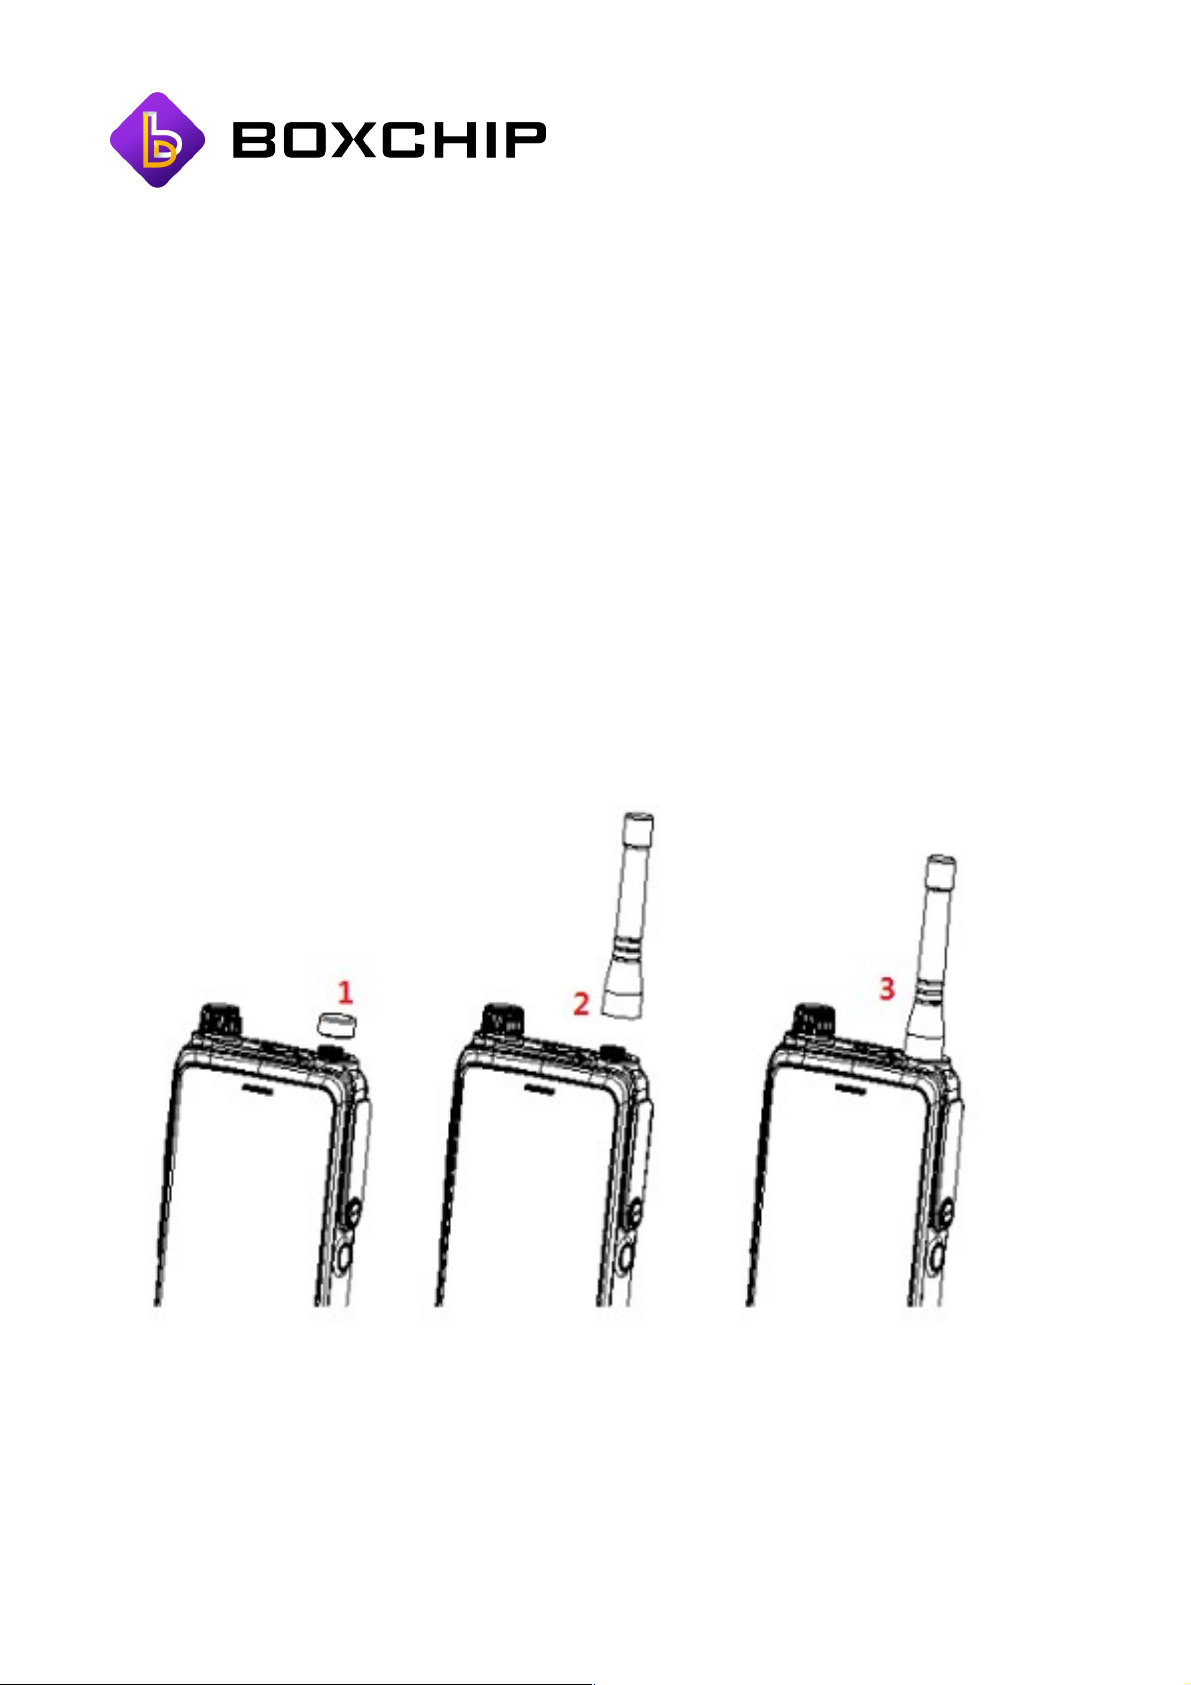
S700 Series Antenna
The BOXCHIP S700 series have three antenna styles depending on the radio model - don't
be alarmed if yours looks different to the images online.
•
S700A UHF: 400-470mhz Antenna
•
S700A VHF: 136-174mhz Antenna
•
S700B: Short Antenna
S700 Series Antenna Installation
Installing the BOXCHIP S700A antenna is as simple as screwing it on. Simply place the
antenna on top of the SMA connector and screw clockwise.
Please Note: Once you start to feel resistance stop - do not over tighten.
Page 4
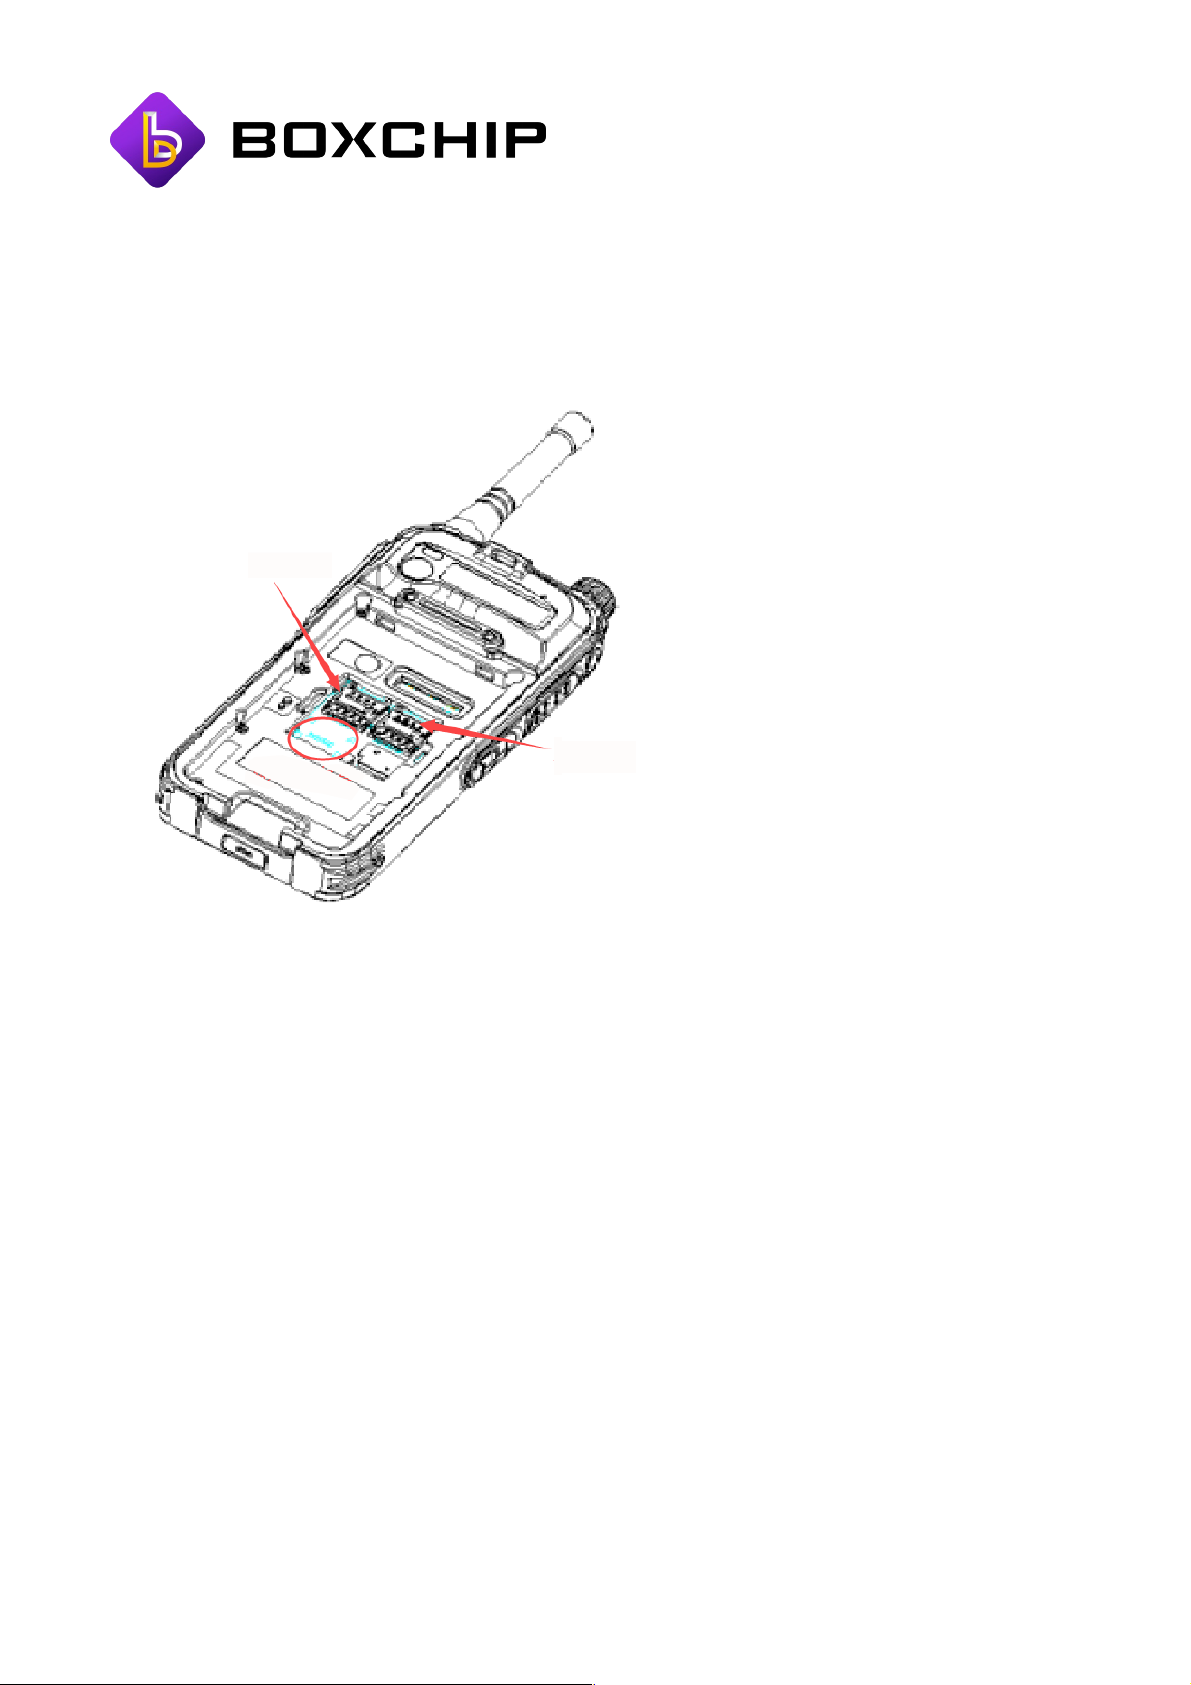
Dual SIM Card and Memory Card Installation
Step 1: Remove the battery if pre-
installed. (Follow the battery installation
and removal procedure below if you are
unsure how to do this)
Step 2: Locate the black silicone cover
which is located in the middle of the
device.
Step 3: Insert a small tool under the
notch located to the left hand side of the
silicone cover and pry it off.
Please note: The silicone cover can be
a little tough to remove as it forms a
waterproof seal protecting the internal
electronics.
Step 4: Install the SIM card and/or memory card by sliding the retainer to the 'open' position
(as marked) and insert the SIM/memory card. Once inserted simply slide the retainer to the
'locked' position.
Step 5: Reassemble by pushing the silicone cover back into place and sliding the battery
back on.
Page 5
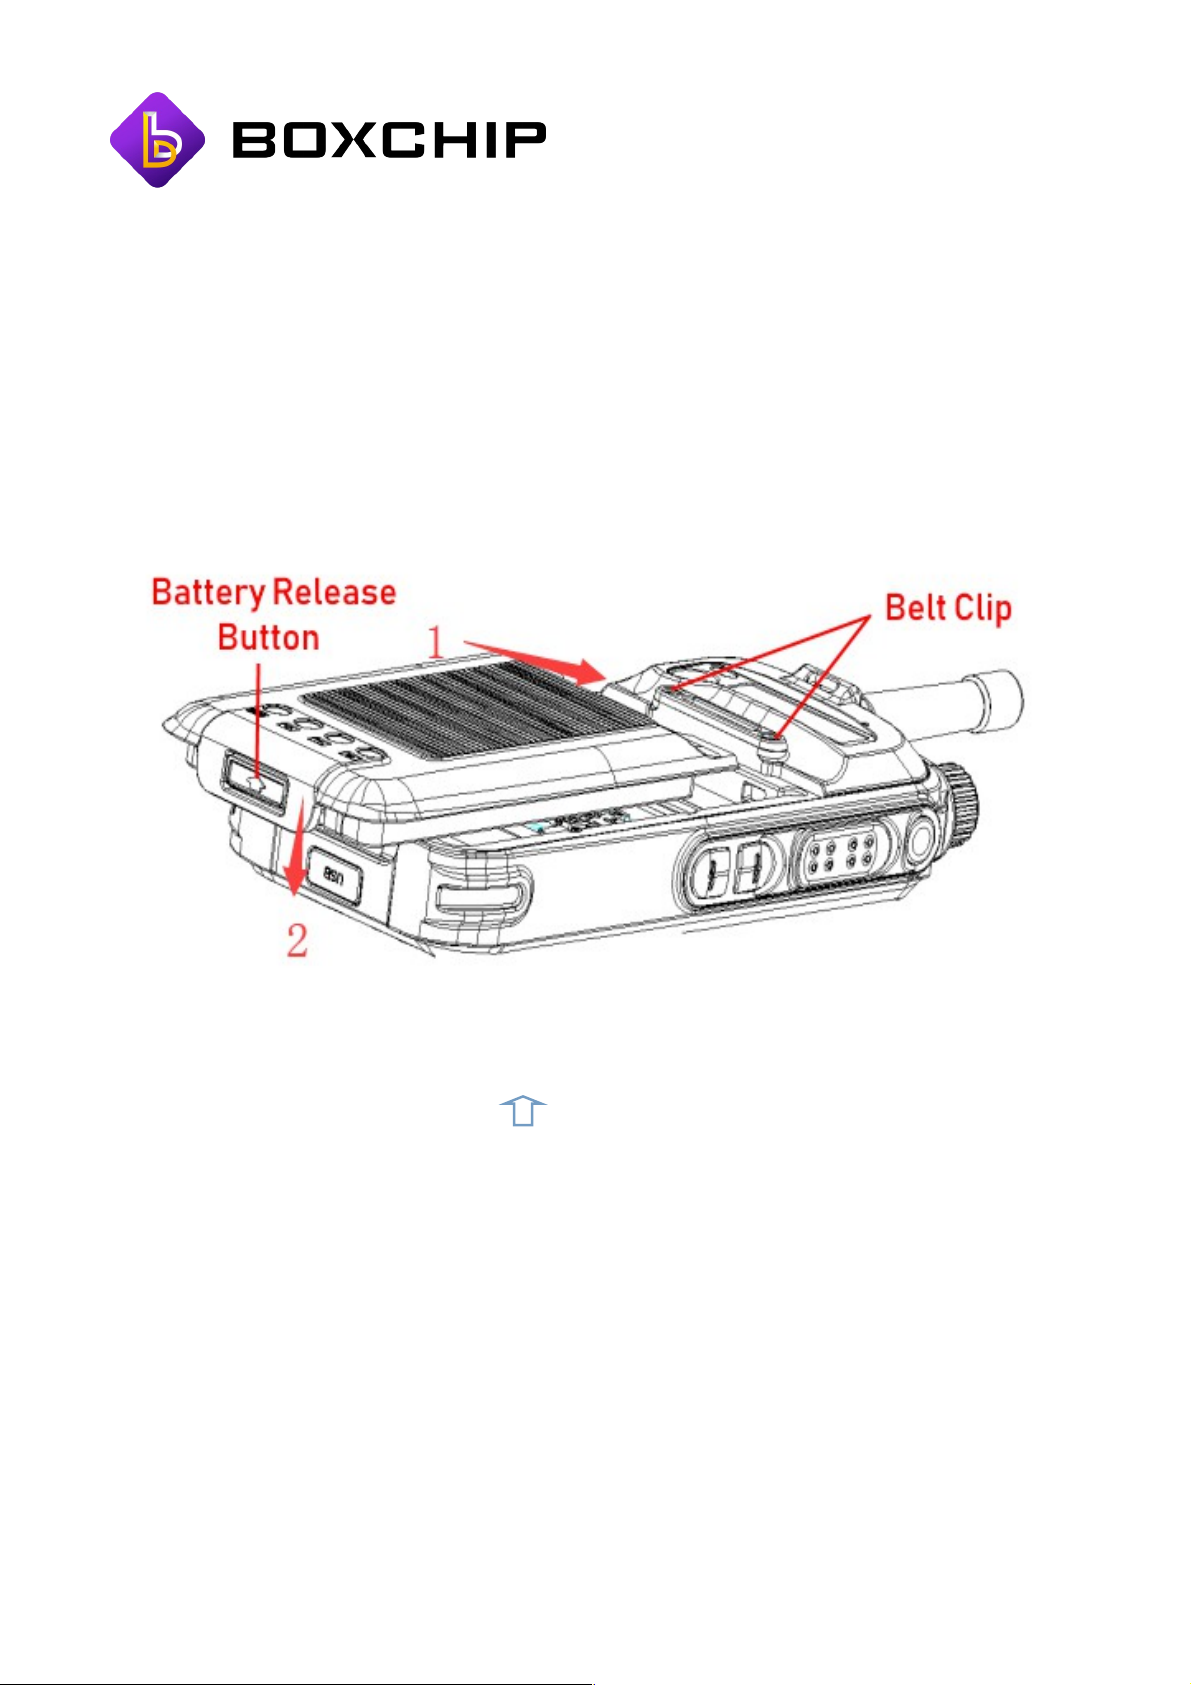
Battery Installation / Removal
Battery Installation Procedure
Step 1: Slide the top tabs of the battery into the corresponding indents on the back of the
radio housing
Step 2: Press down on the lower area of the battery to lock it into place.
Please Note: You will hear an audible click as it locks in place.
Battery Removal Procedure
Step 1: Press and hold the bottom “ “ button on the battery while simultaneously lifting
from the base of the battery.
Step 2: Slide the battery out towards the base of the device
Belt Clip Installation (If Required)
Step 1: Place belt clip on top of the 2 corresponding belt clip installation holes at the rear of
the device (just below the camera and BOXCHIP logo).
Step 2: Screw both screws in but do not over tighten.
Page 6
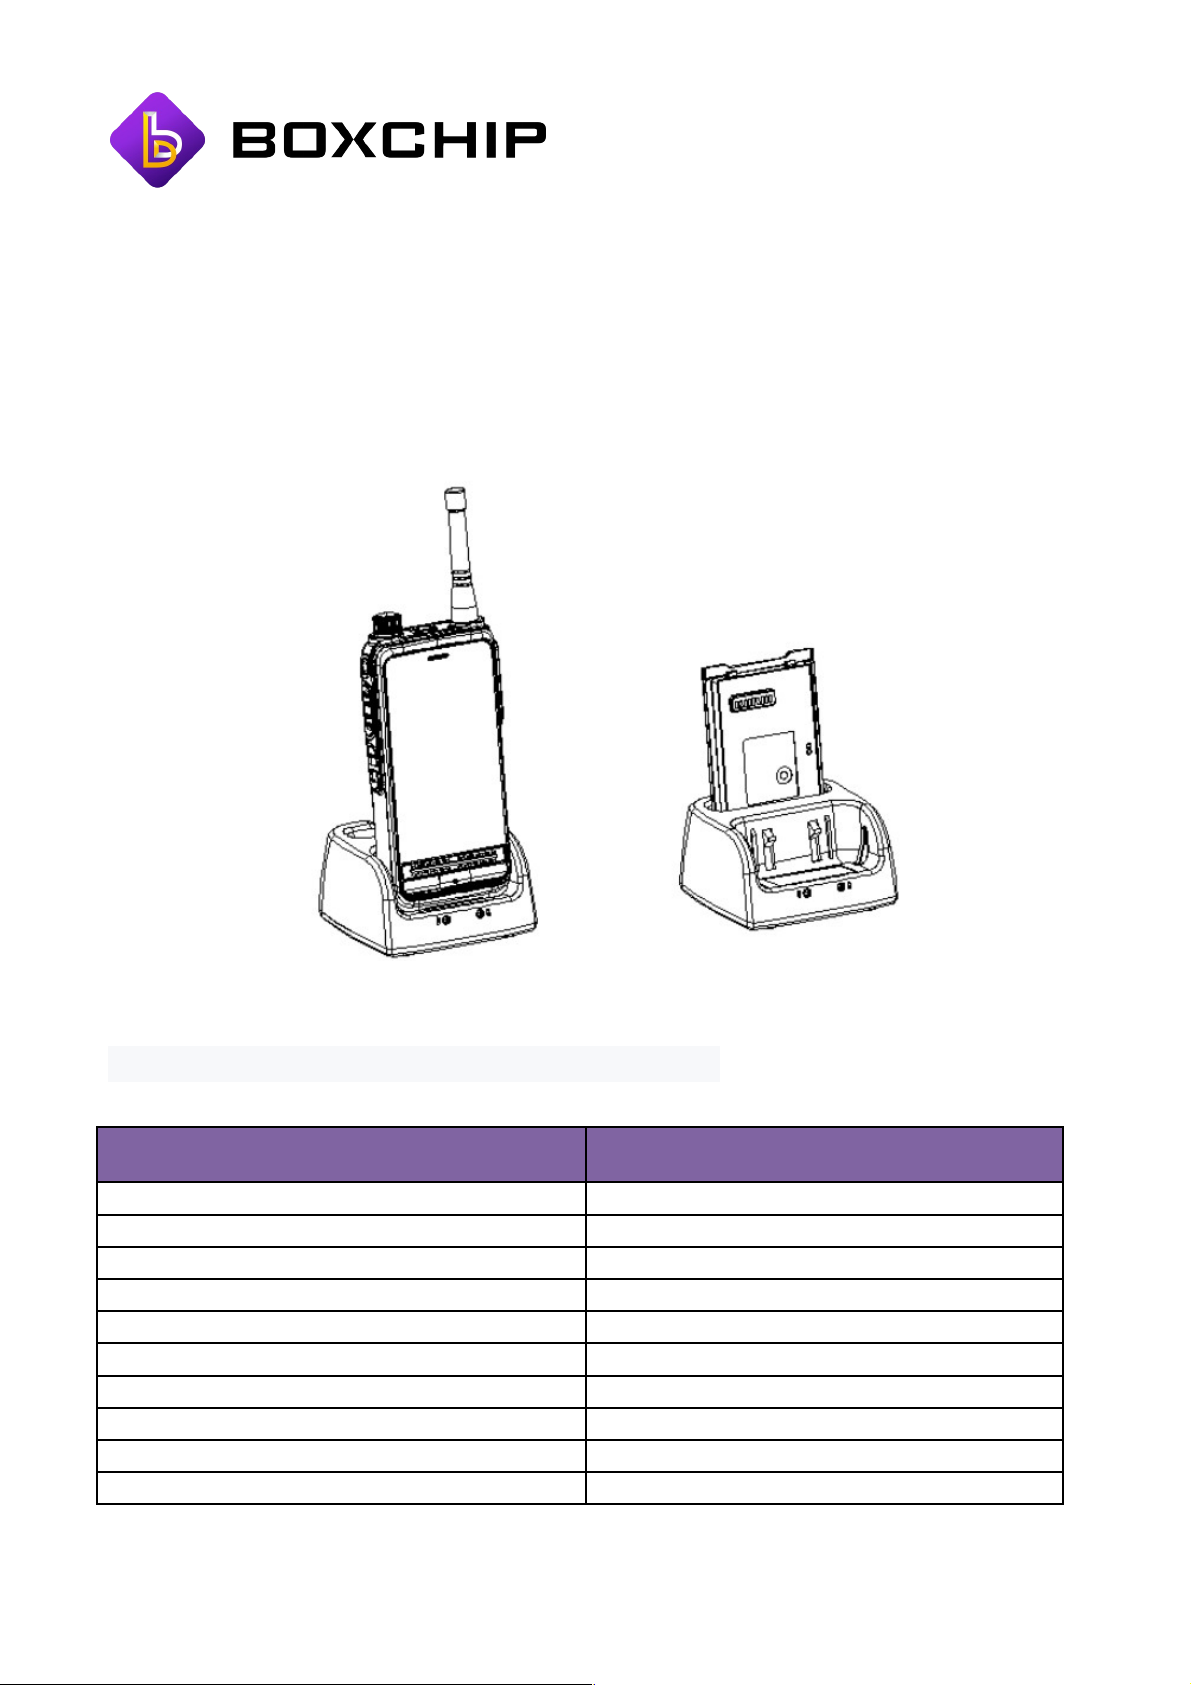
Dock Charger (Optional Accessory)
Step 1: Plug the appropriate USB C cable into the back of the dock and into the USB wall
charging socket.
Step 2: Slot the S700A or S700A battery into the dock as picture.
Important: Please read the information label at bottom of the dock before charging for the
first time.
What do the Different LED States Mean?
State in DMR Mode LED Indication
PTT button is in DMR mode Breathing Blue
Warning Quick Blinking Blue
Error Solid Red
Idle Breathing Blue
Transmitting (TX) Solid Blue
Transmission Inhibit/Failure Quick Blinking Blue
Receiving (RX) Solid Green
Hang Time Keeping Breathing Green
Activity Over The Air Detected Blinking Green
Emergency Quick Blinking Blue
Page 7
BOXCHIP BiMR
BiMR is BOXCHIP's powerful proprietary DMR and Analogue Software that allows you to
receive or transmit utilising the devices built in VHF or UHF radio.
Configuring the BiMR / BPS Software
To configure your new radio simply download and install the BPS (BOXCHIP Programming
Software) on your home computer or mac. The BPS software can be found by visiting the
official BOXCHIP website: www.boxchiptt.com.
Please Note:
You can find the complete BPS user guide within the BPS software installation folder.
Please read this before programming your radio.
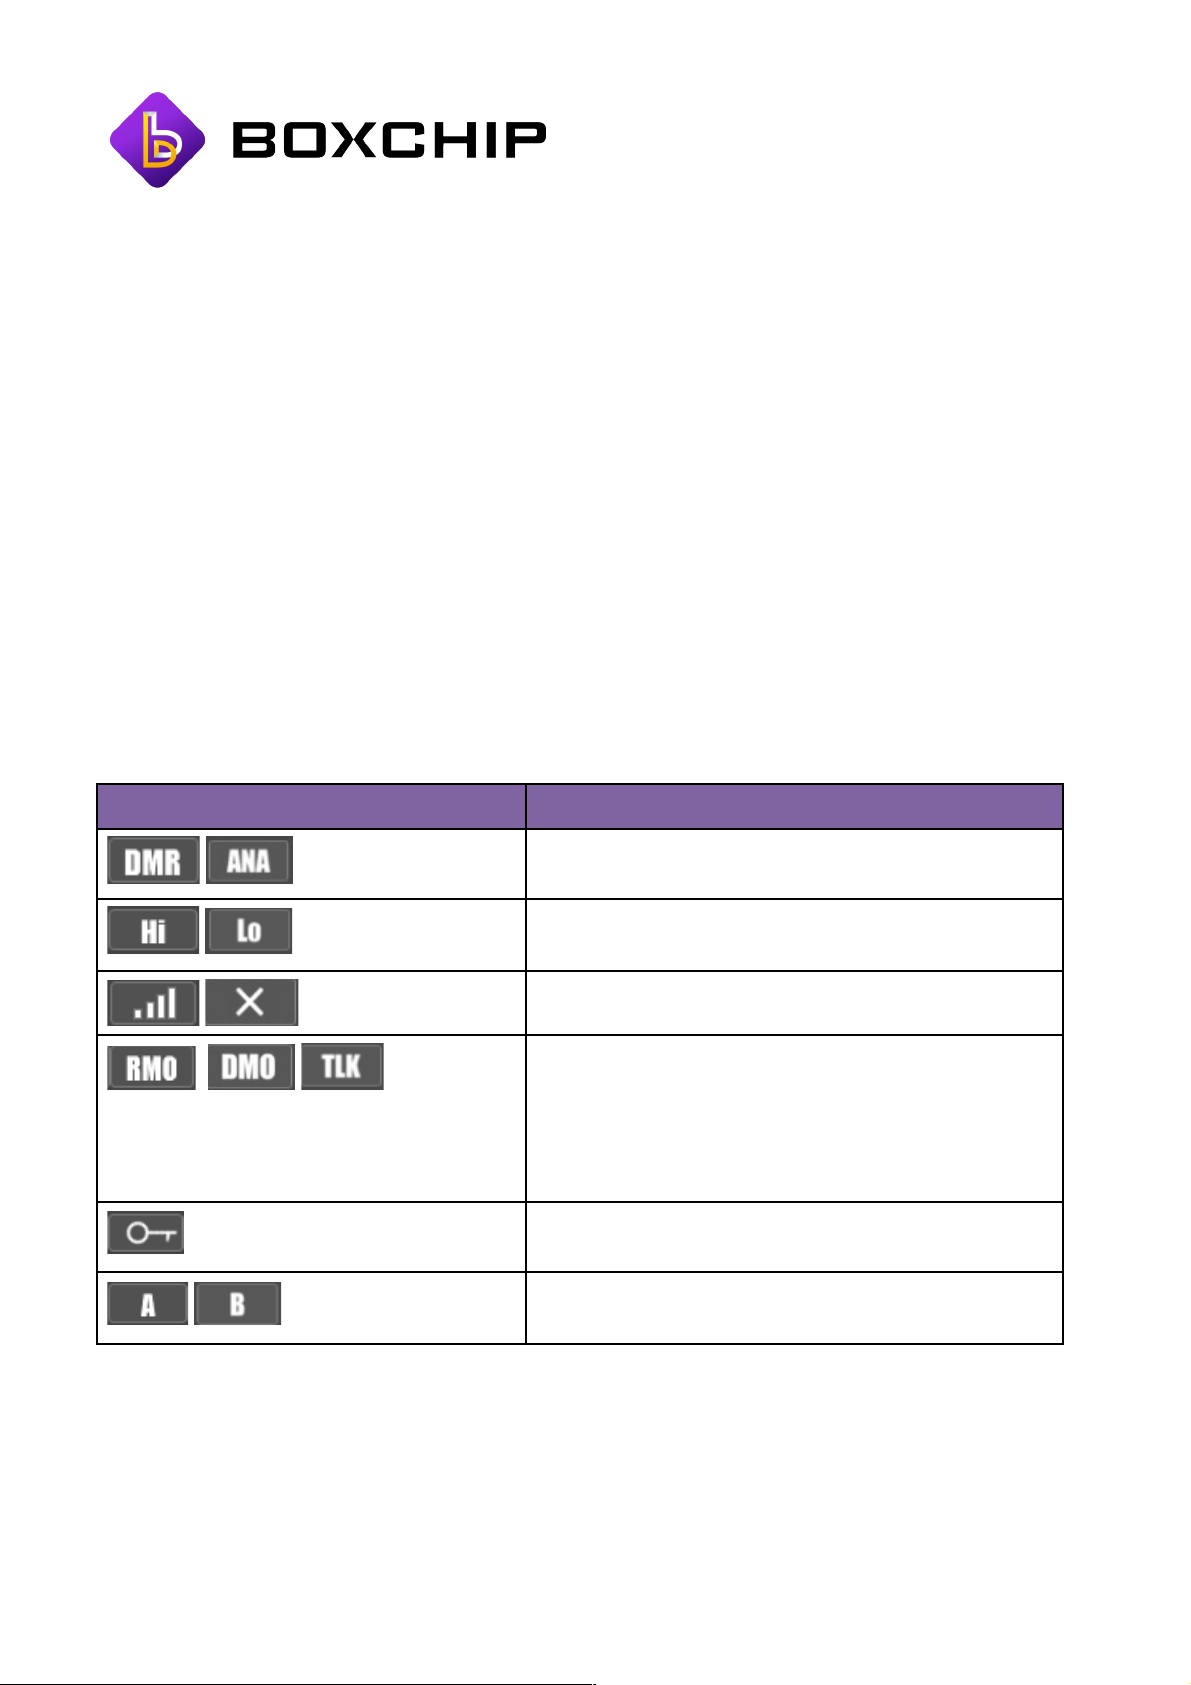
BiMR Icons
Icon states
Channel type: DMR or Analog
High Power or Low power
signal of DMR
DMO(direct mode operation
)
RMO(repeater mode operation
)
TLK(talk around mode)
encryption
time slot A, time slot B(only for DMR)
Page 8
What PoC Software can be used with BOXCHIP Devices?
For the very best BOXCHIP PoC experience we can confirm full compatibility with the
following PoC providers:
•
Walkiefleet
•
Eschat
•
Tassta
•
Mobiletorando
•
Proptt2
•
Realptt.
•
Zello (lacks SOS functionality due to software limitations)
More Information
If you require a little more information why not check out our online guides and videos or
join the thriving BOXCHIP community - which is free to join!
Page 9

B O XC H I P I S A L E A D I N G G L O B A L M A N U F A C T U R E R O F I N TE L L I G EN T
CO M M U N I C AT I O NS. W E A R E C O M M I TT E D T O U S I N G T EC HN O L O G Y T O C H A NG E
T H E R E L AT I O N S H I P B E T W E E N P EO P L E A N D T E C H.
w w w .b o xc h i pt t .c o m
 Loading...