

Page 1
Bouncepad Flex
Assembly Instructions
What’s in the box?
Tools you’ll need...
a
e
f
b
c
Tools Key
a
1
2
4
3
5
d
d
d
6
2
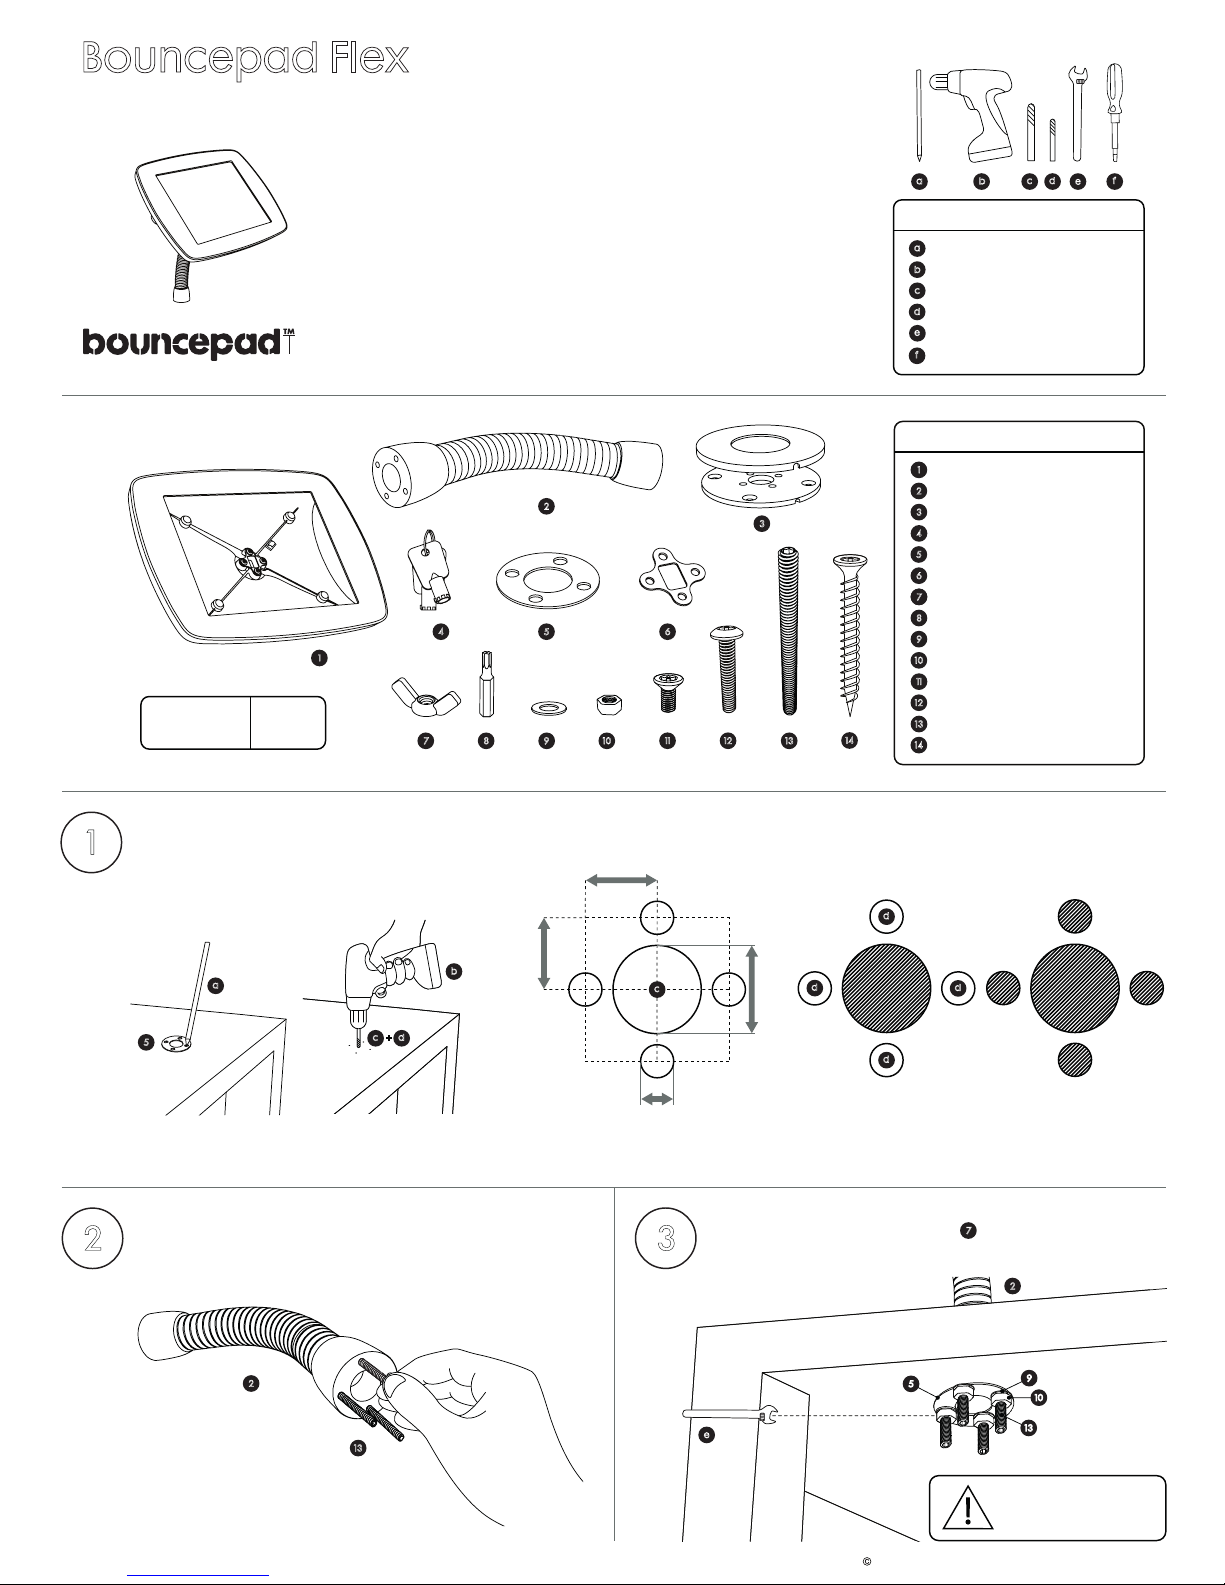
Attach Socket Setscrews to the Flexible Mounting Arm.
3
Attach the Flexible Mounting Arm to your surface. For faster
installation use the 4 x M4 Wingnuts ( ) in place of the M4 Hex
Nuts. You will need to feed the USB cable through before fully
tightening the wingnuts due to their larger size and shape.
7
2
13
2
e
Remember, wingnuts can be
undone by hand, so consider the
security of your installation before
choosing this mounting method.
Pencil
Drill
5/8” Drill Bit
1/4” Drill Bit
Adjustable Wrench
Socket Screwdriver
b
a
5
b
e
c
f
c d
+
To mount from beneath the surface drill the mounting holes in your surface using the Mounting Washer as a template. If you wish to secure
the Bouncepad from above your surface, use the Surface Mounting Kit provided. See point 9 for more details.
d
d
d
d
7 8
5 6
9
10
11 12
13
2
4
Note your
key number
3
14
1
1
2
3
4
5
6
77
8
9
10
11
12
Secure Case
Flexible Mounting Arm
Surface Mounting Kit
Key x 2
Mounting Washer
Case Washer
M4 Wingnut x 4
T20 Pin Torx Driver Bit
M4 Round Washer x 4
M4 Hex Nut x 4
M4 x 10mm Pin Torx Countersunk Screw x4
M4 x 16mm Pin Torx Buttonhead x4
M4 x 40mm Socket Setscrew x 4
No. 8 x 1 “½ Pin Torx Self Tapping CSK Screw x4
Components Key
13
14
5
9
10
13
toll free 1-888-423-3885 l local 1-617-275-8131 l www.thebouncepad.com l Bouncepad North America, Inc. 50 Terminal St, Unit 710, Building 2, 7th Floor, Charlestown, MA 02129, USA l 2013 Bouncepad Spotspot Ltd. All rights reserved.
1/4”
5/8”
33/64”
33/64”
c
Page 2
4
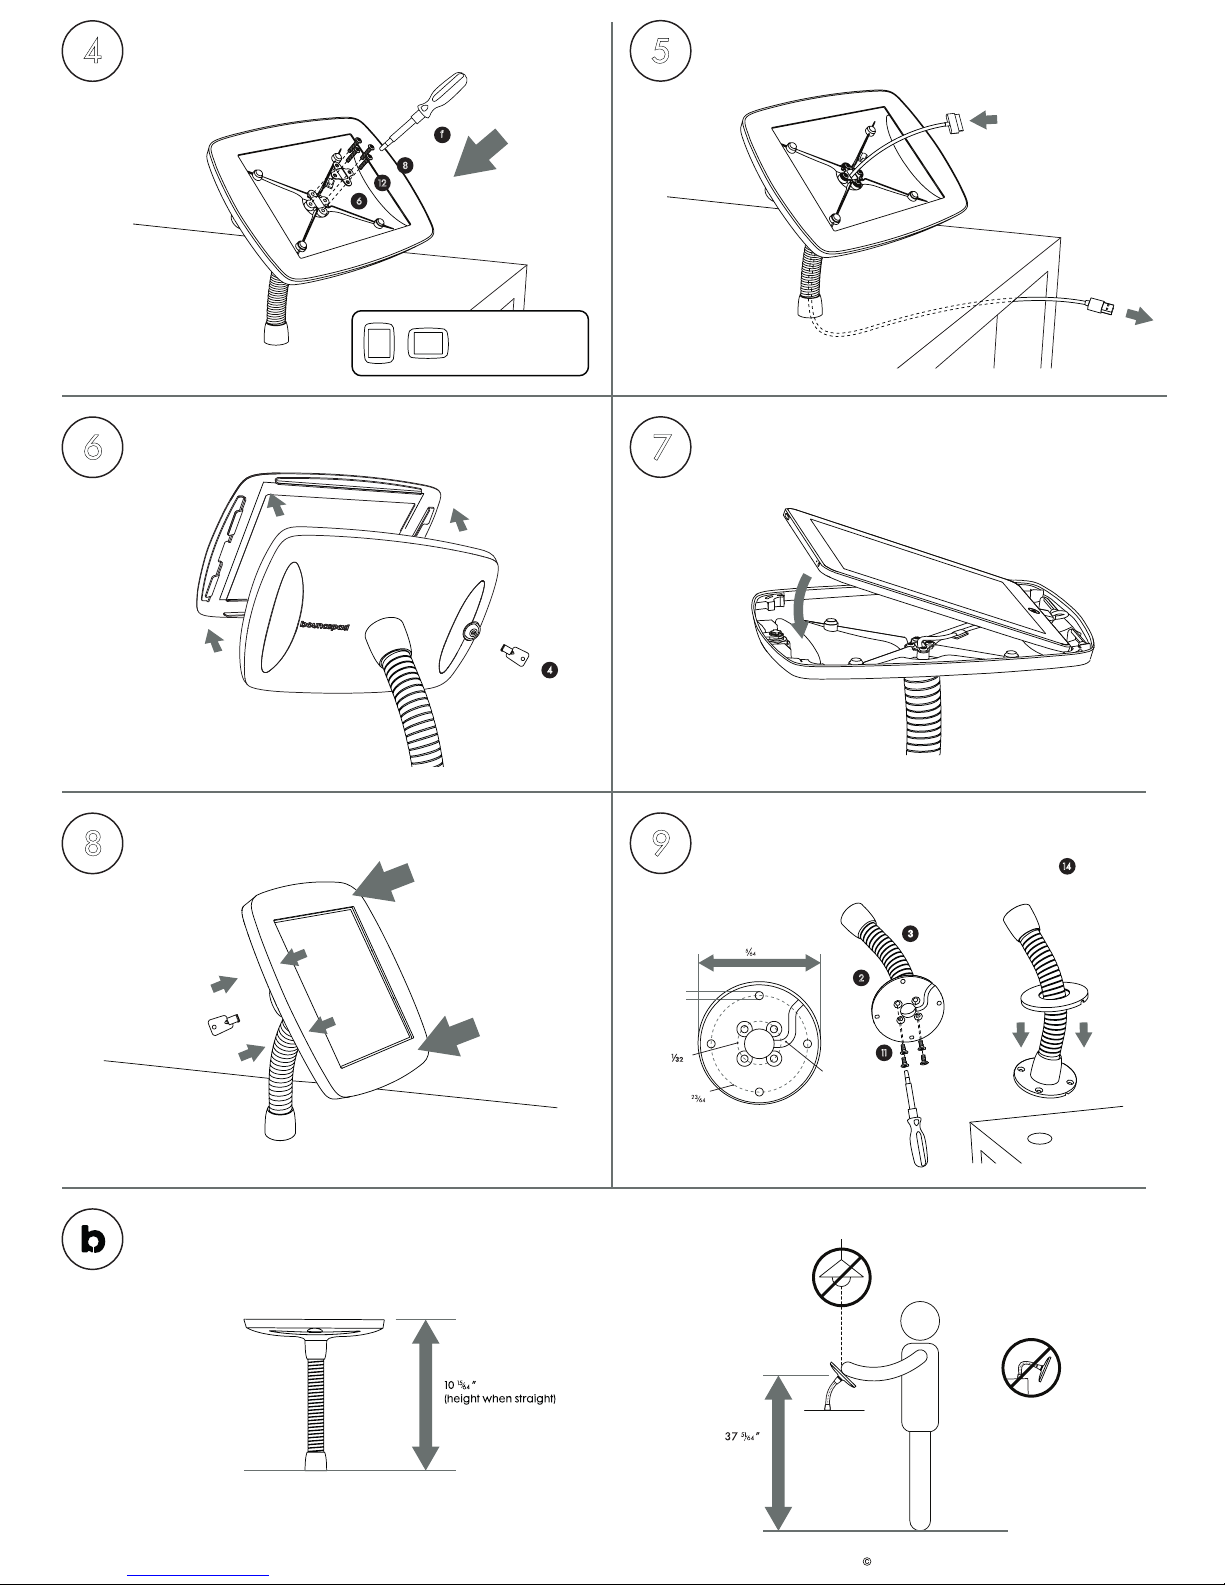
Attach the Secure Tablet Case to the Flexible Mounting
Arm. Be sure to fully engage all screws in their threads before
tightening. Always use a hand screwdriver for this step.
5
Feed the USB cable through the Flexible Mounting Arm
from above, straighten the Flexible Mounting Arm to help the
cable slide through more easily. Then connect to your power
supply.
6
Unlock and remove the face of Secure Case.
7
Connect cable to Tablet and place into Secure Case. Your
Bouncepad is set up to house the tablet model specified in your
order. If you need to use a different tablet, please contact us for
a conversion kit.
8
Lock the face of Secure Case back into place. Place the cable
end of the faceplate first, then squeeze the lock end while turning
the key.
9
Using the Surface Mounting Kit (alternative to points 1, 2 &
3). Attach the Surface Mounting Plate to the Flexible Mounting
Arm using M4 x 10mm Pin Torx Countersunk Screws. Then attach
the assembly to your surface using suitable screws ( ). The
plate cover fits on after the Flexible Mounting Arm is fixed.
Installation guidelines. To minimise glare on the screen, avoid installing the Bouncepad directly below a source of light.
Maintenance of your Bouncepad. To keep your Bouncepad looking its best, clean regularly with screen wipes.
6
12
You can mount the case
portrait or landscape.
f
3
8
not to scale
Surface Mounting Kit
2
11
cable
channel
14
toll free 1-888-423-3885 l local 1-617-275-8131 l www.thebouncepad.com l Bouncepad North America, Inc. 50 Terminal St, Unit 710, Building 2, 7th Floor, Charlestown, MA 02129, USA l 2013 Bouncepad Spotspot Ltd. All rights reserved.
1 “
diam.
3 “ diam.
11/64”
diam.
2 “
diam.
(recommended height
from the ground to the
center of the screen)
 Loading...