

Page 1
BostonAcoustics
CRB Mounting Bracket
INSTALLATION INSTRUCTIONS
Note: This mounting bracket is designed for use with the Boston Acoustics CR6 and CR7 loudspeaker
systems. Use with any other speakers may result in damage to the speaker system or the mounting
surface.
INTRODUCTION
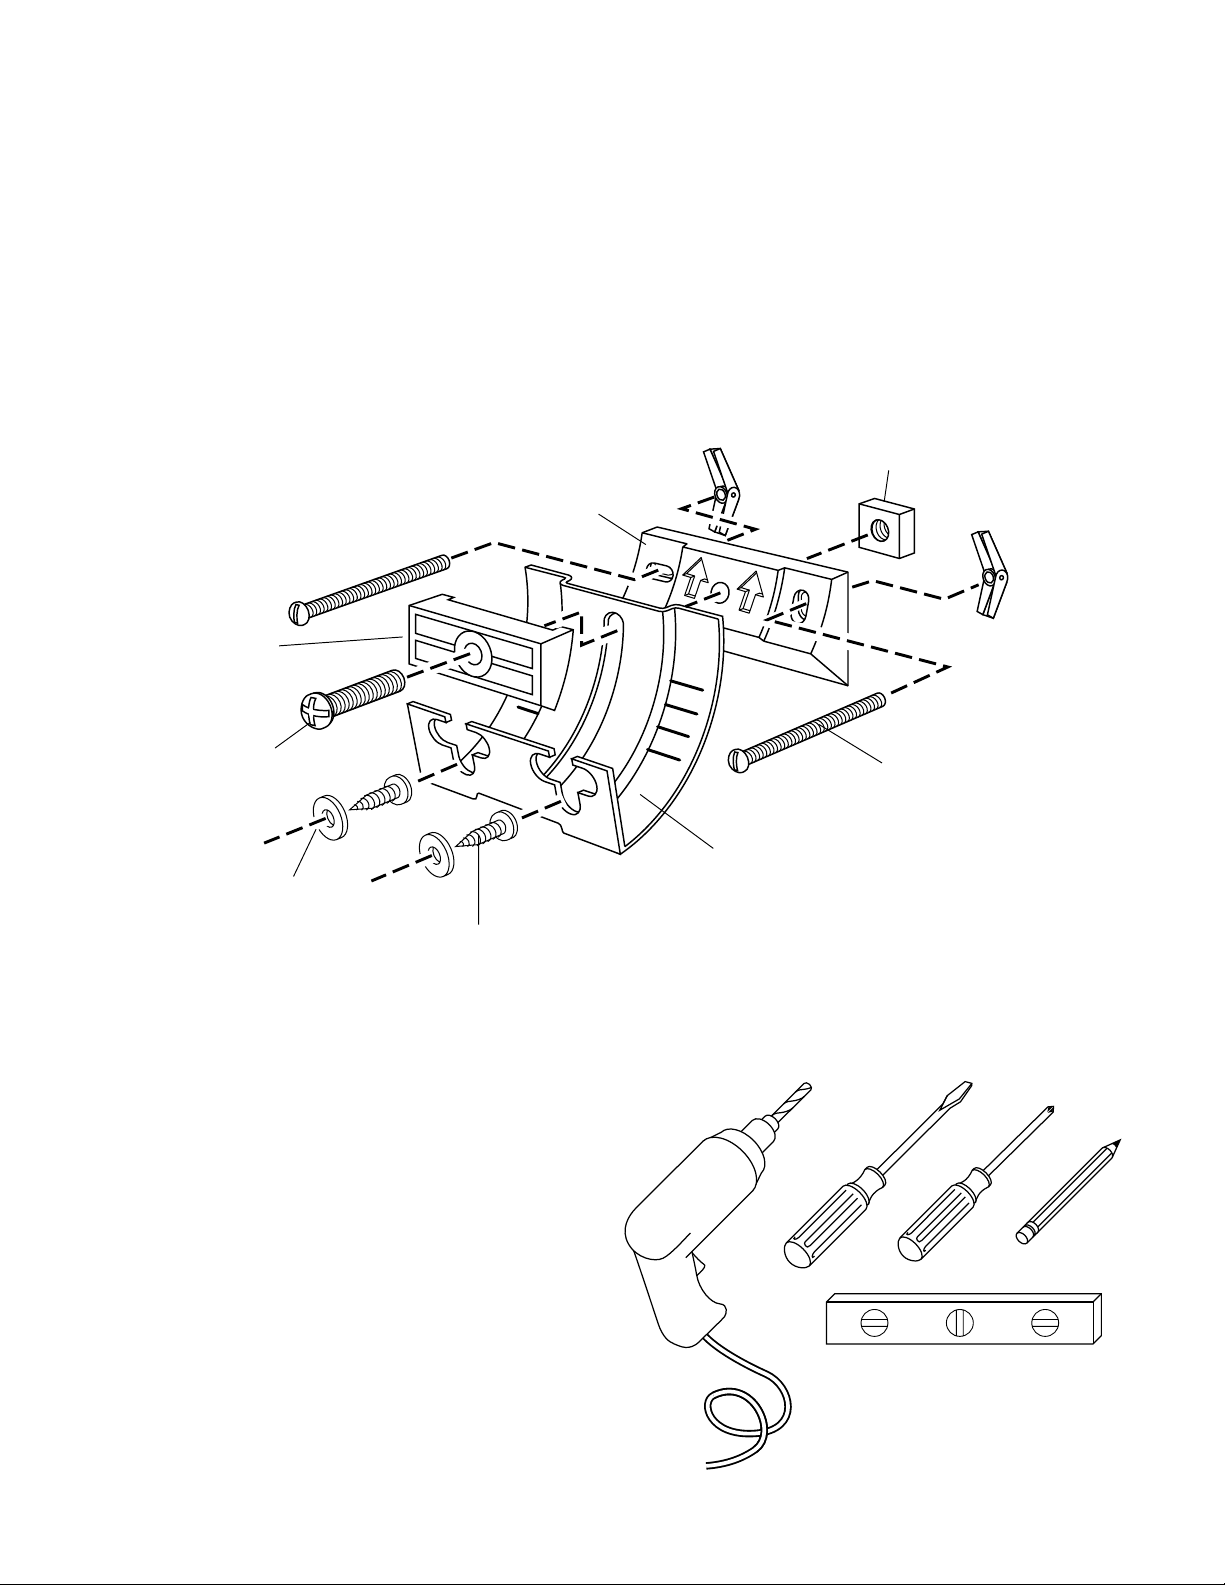
This package contains:
(2) BASEPLATES
(2) CLAMPS
1
(2)
/4-20 x 1" MACHINE SCREWS
(2) BRACKETS
(4) RETAINER WASHERS
(4) #10 x
You will need:
3
/4" SELF-THREADING SCREWS
1. A drill with a 5/8" (15mm) bit for drilling through the mounting
surface, if you are using the supplied toggle bolts.
2. Phillips and flat-head screwdrivers.
3. A level.
4. A pencil.
(2) 1/4" SQUARE NUTS
(4) 8-24 x 2
SCREWS and TOGGLE BOLTS
1
/2" MACHINE
Toggle bolts are supplied for use on drywall or a hollow
plaster wall. Alternatively, you may wish to obtain wood
screws for wood or wall studs, molly bolts or screw
anchors for drywall or plaster, or masonry anchors for
masonry.
Page 2
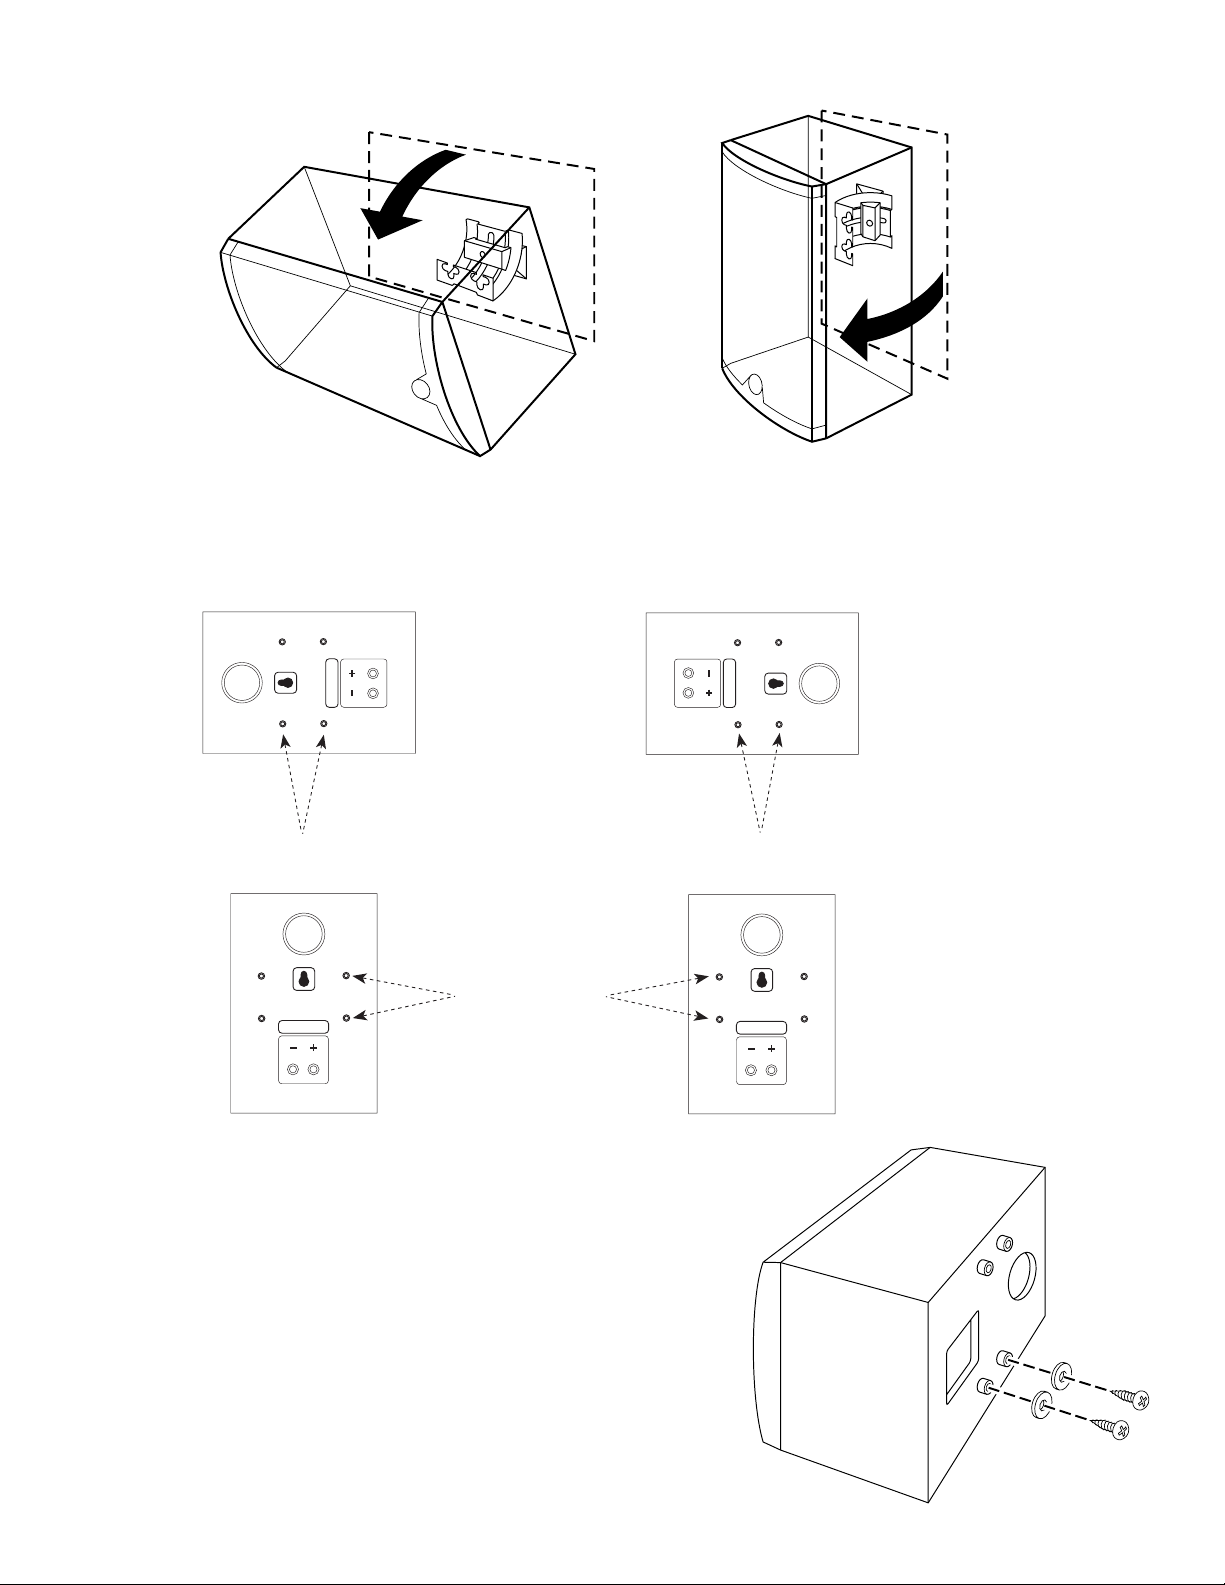
INSTALLATION
Boston
Boston
Boston
Boston
• Determine the mounting orientation.
Horizontally, with adjustable tilt downward
Vertically, with adjustable pivot side-to-side
• Identify the appropriate holes on the back of the speaker for the BRACKET:
For horizontal mounting, use these holes
For vertical mounting, use these holes
• Install the speaker RETAINER WASHERS:
Install two of the #10 x 3/4" SELF-THREADING SCREWS and
matching RETAINER WASHERS into the pair of holes you
identified above. Tighten firmly.
CAUTION: USE ONLY THE CORRECT #10 SCREWS
SUPPLIED.
Page 3

• Drill the wall holes:
Horizontal
mounting– arrows
pointing up
Vertical mounting,
left speaker–
arrows pointing
left
Holding the BASEPLATE in position as a template, mark the centers of
the two elongated mounting holes with a pencil. Drill
5
/8" (15mm) holes in
the wall for the supplied toggle bolts.
Fit a SQUARE NUT into the square well on
the back of the BASEPLATE. (Use a finger to
hold the SQUARE NUT in position until the
baseplate is on the wall.)
Vertical mounting,
right speaker– arrows pointing right
• Fit the MOUNTING SCREWS onto the BASEPLATE:
Loosely assemble two long machine screws and two toggle
bolts through the elongated mounting holes in either end of
the baseplate.
• Mount the BASEPLATE on the wall:
Orient the BASEPLATE over the holes you
drilled. Make sure the BASEPLATE is level.
Tighten MOUNTING SCREWS firmly, making sure TOGGLE BOLTS are properly
seated.
Page 4

• Fit BRACKET onto BASEPLATE:
Position BRACKET on baseplate so that BRACKET's plain
end (without the flange and T-slots) is toward the direction of
arrows on BASEPLATE. Assemble CLAMP over BRACKET
so that ribbed (open) side of CLAMP faces up, away from the
BRACKET as shown. Align hole in CLAMP with center hole
in BASEPLATE, and assemble with
1
/4-20 x 1" MACHINE
SCREW.
• Slide BRACKET to desired angle. Then
tighten MACHINE SCREW firmly.
• Hang speaker on BRACKET: Hang speaker so that the speaker
RETAINER WASHERS fit over flange on end of BRACKET as
shown. Wiggle speaker slightly to make sure both of the pins on the
speaker are fully engaged into the bottom of the T-slots.
BostonAcoustics
300 Jubilee Drive
Peabody, MA 01960
508-538-5000
Boston and Boston Acoustics are registered
trademarks of Boston Acoustics, Inc.
Specifications subject to change without notice.
© 1996 42-550-1
 Loading...