

Boston Duo-i Plus Owner's Manual
IMPORTANT SAFETY INSTRUCTIONS
This symbol
hazards arising
This symbol
user should read all safety statements
user manual.
This symbol
double
I.
I\ead these instructions
2.
Keep these instructions.
Heed all warnings.
t)
Follow
all
Do
not
5
6
7.
9.
10
11.
1,'
1.~.
14.
1:,
i
(l.
use this apparatus neilr water
Clean
only
Do
not
block any ventilation openings. Install in
accordance
Do
not
install near any heat sources suchasradiators,
heat registers, stoves, or
amplifiers) that
Do
not
defeat
grounding
with
one
wider
has
two
blades and a third
bladeorthe
the
provided
an electrician for replacementofthe obsolete outlet.
Protect the
pinched
and the
Only use attachments/accessories specifiedbythe
manufacturer.
Unplug
unused for
Refer all servicing to qualified service personnel.
Sel
damaged
plugISdamaged,
have fallen
exposedtorainormoisture, does
or
Maintain a
the
ventilation The ventilation should
by
around
cloths, curtains,
No
be placed on the apparatus.
Ihe ilpparatus shdll
',plashillg.Noobjects filled
.,h,,11
particularly at plugs, convenience receptacles,
point
this apparatus
vicingisrequired
has
beerl
front,
coverincJ the ventilation
the
open
flame sources, suchaslighted
be plnced
foundonthe apparatus indicates
from
dangerous voltages
foundonthe apparatus indicates the
foundonthe
insulation.
instructions.
with
dry
cloth.
with
the
manufacturer's instructions.
produce
the
safety purposeofthe polarized or
type
plug
A polarized
than
the
third
prongisprovided for your safety If
plug
does
power
cord from
where
they
during
long
periodsoftime.
when
in any way, suchaspower-supply
liquid
into
the apparatus, the apparatus has been
dropped
nlinirnum
rear,
apparatus items suchasnewspapers, table-
distance
and sidesofthe apparatus for sufficient
ptc
not
UI)
the
apparatll';.
apparatus indicates
other
apparatus
heat.
other. A
grounding
not
fit
into
being
exit
from
lightning
the
apparatus
has
been spilled or objects
of2"(50rnm) around
openingsorplacingonor
be exposedtodripping
with
liquids, suchasvases,
(including
plug
has
grounding-type
prong.The
your
outlet
walkedonor
the apparatus.
storms or
not
operate normally,
notbeimpeded
candles, should
foundinthe
two
blades
plug
wide
consult
when
has
been
cord or
or
Warning'To
shock,donot
moisture.
This symbol
that
the
collection facility for electronic waste and
-
17.
18
19.
Amencan Users:
Note: This
comply
to
provide
in a residential installation This
dnd can radiate radio frequency energy and,ifnot
and used in accordance
harmful interference to radio
thereisno
particular installation Ifthis
interference to radioortelevision reception,
determinedbyturning
is
moreofthe
disposed
Either
the
apparatusorthe
accessible, tobeable to
apparatus.
To
completely
Mains,
disconnect
AC
receptacle.
The mains
readily operable
.
equipment
with
the
part15of
encouraged to try to correct the interferencebyone or
Reorient or relocate
Increase the separdtion
receiver.
Connect
different
Consult
technician for
the
reasonable
guarantee
following
the
from
the
Caution: Unauthorized changes
the receiver
equipment.
could
Canadian Users
This class B digital apparatus
ICES-Om.
eet
appareil
NMB-003
numeriquedeclasse Best
e1u
Canadil.
reduce
the
riskoffire or electrical
expose this apparatustorain
foundonthe apparatus indicates
apparatus mustbeplaced in a separate
with
household waste
power
inlet
connectoronthe
power
plugatthe
disconnect
disconnect
the
plugofthe
~
===
has
limits for a
FCC
Rules.
protection
that
measures:
equipment
thattowhich
dealer or an experienced radiolTV
help
void user's
this apparatus from the
power
supply cord
power
supply cord shall remain
been tested and found
Class
Bdigital device, pursuant
These limits are designed
against
equipment
with
the instructions, may cause
communications.
interference will
equipment
the
equipment
the
receiving antenna.
between
intoanoutlet
the
or
modifications
authoritytooperate
rearofthe
wall
must
power
from
plug
harmful
off
the
receiver i) connected.
interference
generates,
However,
nOT
occur
does cause
which
and on,
equipment
on
acircuit
1+1
complies
with
Canadian
confornle
remain
to
installed
the
to
the
ala
or
not
the
AC
from
to
uses,
111
a
harmful
can be
user
and
norme
the
Introduction
Thank you for choosing Boston Acoustics and congratulations on your purchaseofthe
If
you
own
PerformanceTabletop Music System.
and ease-of-use
you've made a great choice. The Duo-j
with
dual alarms, auxiliary inputs and subwoofer output,
"Play
Smart:'Socheck
for years
to
come.
of
the
Duo-i
out
plul
should
all
the features and functionsofyour new music system.
comeasno
plul
is
other Boston products, the outstanding audio performance
surprise. Ifyou're
newtoBoston, welcome -
a sophisticated stereo radio and iPhone/iPod speaker system
all
in a high-style, enclosure -
We
Features
Outstanding audio performance from dual 31h-inch
extended response
BassTrac®
•
• Integrated universal iPod dock
Three intuitive,
audio processing for satisfying
with
video
easytouse controls operate all
bass
at any volume
output
Multi-function Remote controls the radio and iPhone/iPod
• Large,
easytoread
display
with
adjustable brightness
• Highly sensitive AM/FM Stereo tuner
10FMradio station presets; 5 AM radio presets
•
External antenna inputs for maximum reception
with
• Dual alarm functions each
Easytouse,
one-button
alarm setting
• Alarms gradually increase
• S-n-o-o-o-o-o-z-e bar -
the
• Sleep function lets you listen
• Make it your own! Customize your Duo-i
wake-to-alarm
in
volume for a gentle wake
entire outer aluminum trimisa touch sensitive, can't-miss-it snooze bar
to
musicupto90minutes before the Duo-i
plul
with optional grilles available at www.bostonacoustic.com/POP
• Time setting, station presets, and alarms settings
Headphone
outputonthe
front panel
• Dual auxiliary inputs - front and rear panel
• Composite video
is
• iPhone/iPod
• Internal
charged while placed in
power
supply -nobulky external adapter needed
output
lets you playTV programming stored on your iPhone/iPod
the
dock
speakers in separate acoustic chambers, vented for
the
and/or
plul
Duo-i
features
that
dims automatically in
wake-to-music from
low
the
radio or your iPhone/iPod
up
p1ul
turns itself
are
remembered during
power
outages
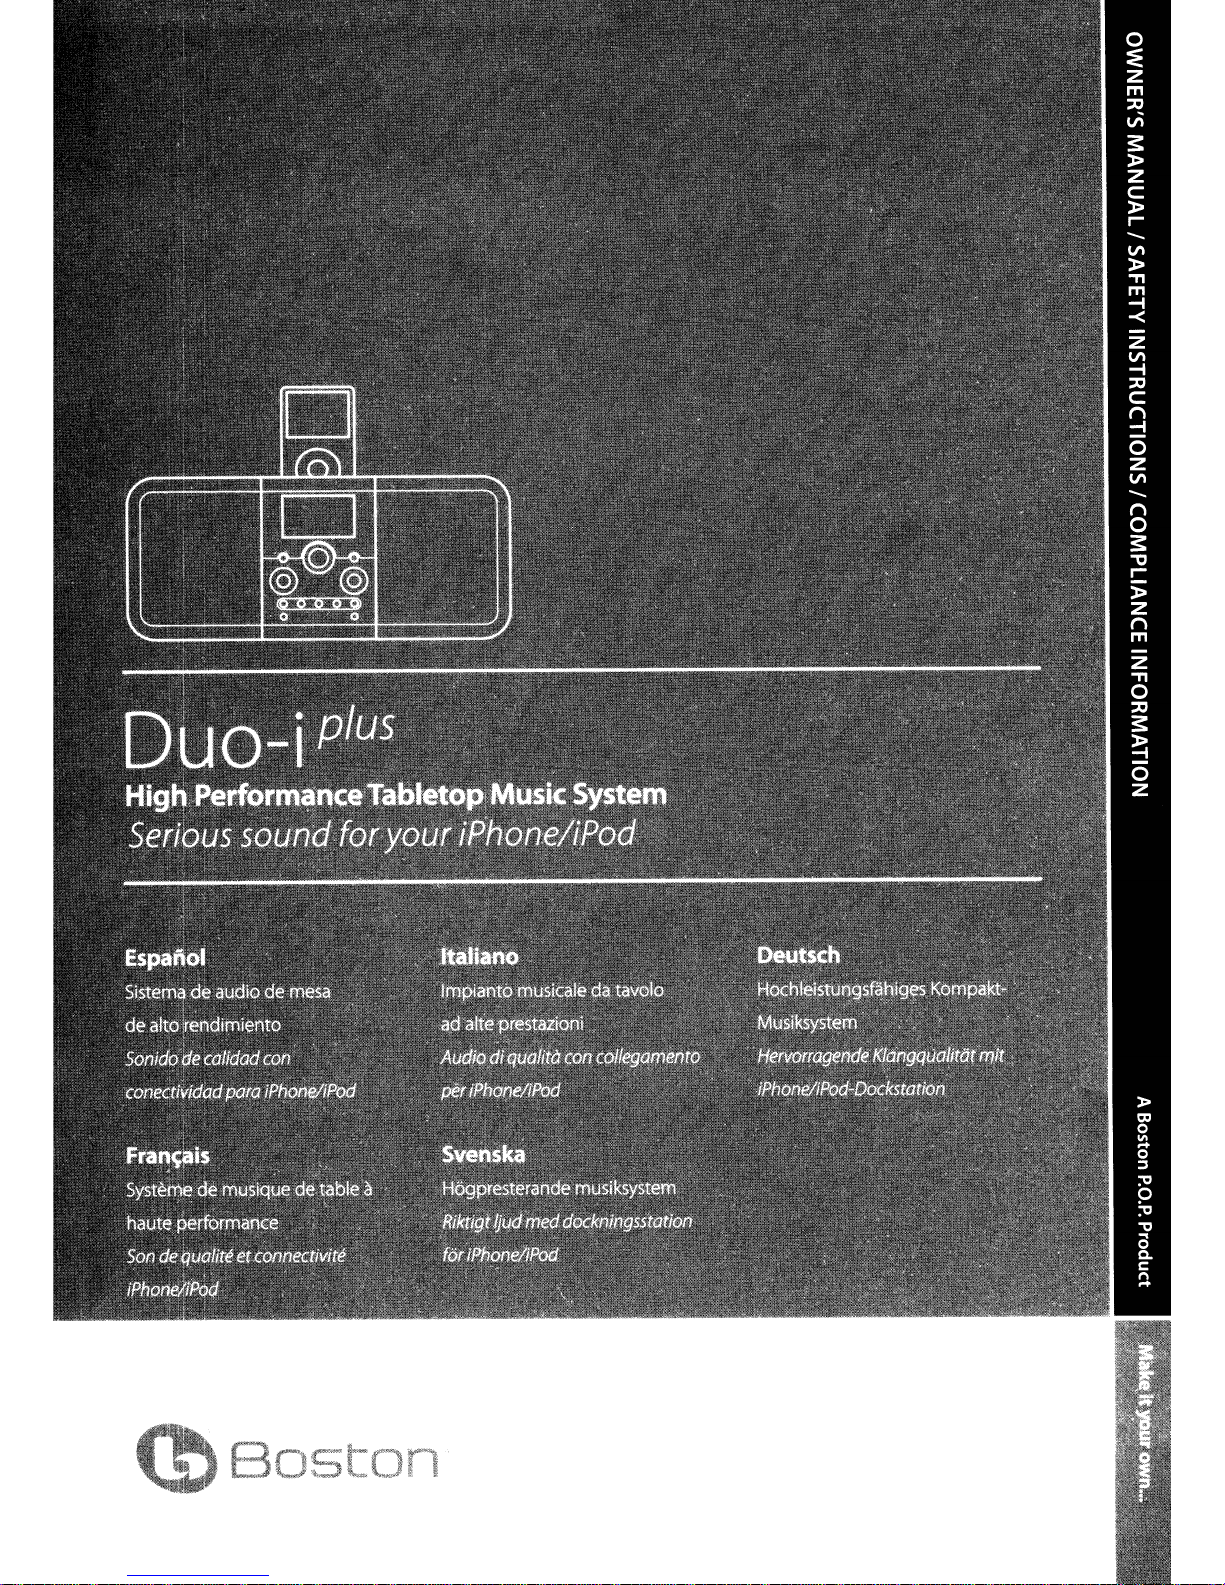
Duo-i plus High
we
all
the
things that
know
you'll enjoy it
light conditions
off
through
a television
think
3
Contents
Unpacking and Setting UpYour Duo-i
Placement
Power
Connection
AM andFMAntennas
About
About
Basic Control Operations
the
Front Panel Controls
the
Remote Control
Turning
Adjusting
Setting
Selecting a Source
Tuning In a Radio Station
Station Seek
Setting a Station Preset
Selecting a Preset Station
Adjusting
Using Your iPhone/iPod
Front Panel Control Operation
Remote Control iPhone/iPod Operation
the
the
Duo-i
the
Clock
Bass
Volume
plU5
OnorOff
and Treble
plU5
4 Alarm Clock Features
4 Setting
4 Setting an Alarm
5
How
the
Alarm Time
the
Alarms Work
5 The Snooze Feature
5 The Sleep Function
6
Other
Control Settings
6 Display
6 Display Brightness
6
Connecting
7
7 Using Aux Inputs
8 Using
8
9 SecurityCable
9 Service Port
10 Maintenance and Service
11
11
Connecting
About
Limited Warranty
If
Service Seems Necessary
Information
the
Clock
Other
Equipment
Headphones
Video
Memory
Connection
Output
11
11
12
12
12
13
14
14
14
15
15
15
15
15
15
15
15
16
16
Unpacking
Carefully
and/or
purchase receipt in a safe place,asit may be required for
In
unpack
delivery service. Keep
the
box you should find
and
the
Duo-i
Setting
plu5.lf
thereisany signofdamage
the
the
Duo-i
Up
shipping
plus,
the
Your Duo-i plus
carton and packing materials
remote control,
Placement
Your Duo-i
will be enhanced.
unobstructedtoallow
plus
will sound great
Don't
block
for
ventilation.
just
about
the
bass port.Besure
anywhere. Butifyou
the
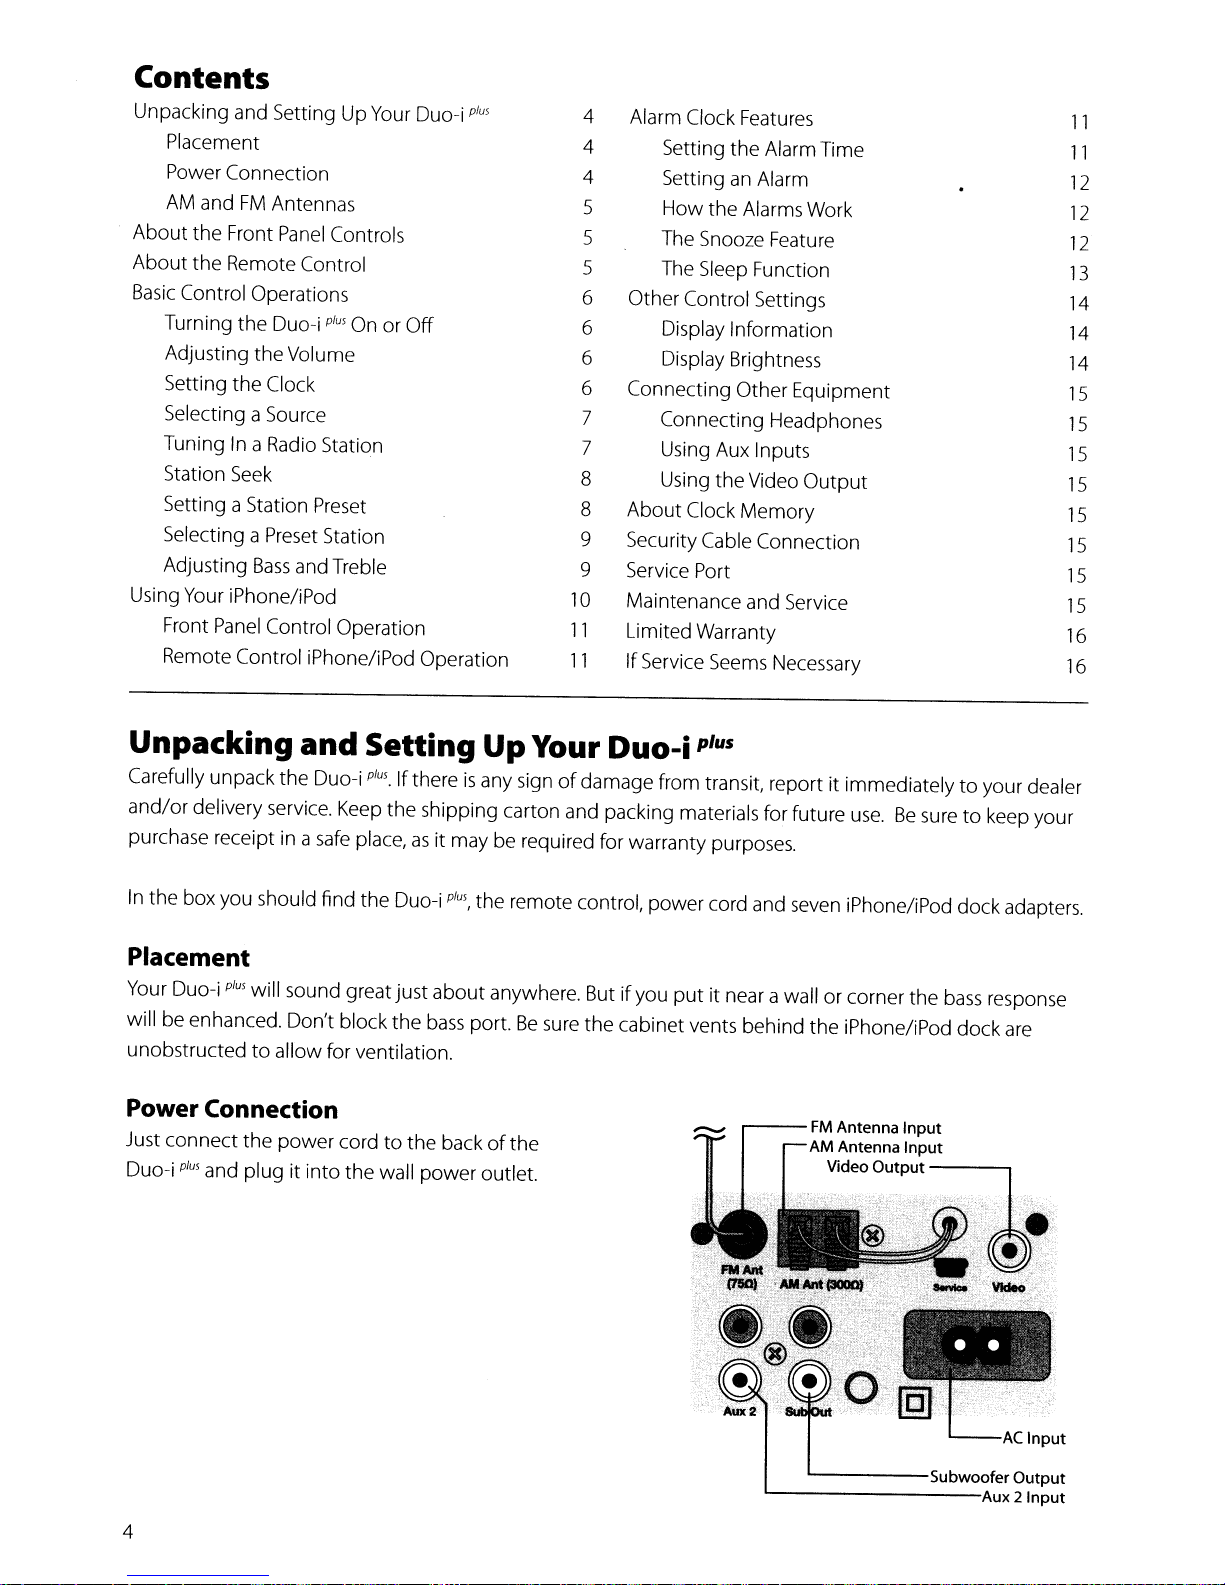
Power Connection
Just
Duo-i
connect
plus
the
and
plugitinto
power
cordtothe
the
wall
backofthe
power
outlet.
from
transit,
warranty
power
putitnear a wallorcorner
cabinet
vents
reportitimmediatelytoyour
for
purposes.
cord and seven iPhone/iPod
behind
...----FM
future
use.Besuretokeep
the
iPhone/iPod
Antenna Input
AM
Antenna Input
Video Output
dock
the
bass response
dock
-----,
dealer
your
adapters.
are
4
'------Subwoofer
l----------Aux
Output
2Input
AM
and FM Antennas
The Duo-i
also connected. Just extend the wire connectedtothe
in
more stations than any other radio you own. Butifyou
external antennas can be connected
plus
comes
outofthe
box readytouse.
to
the antenna inputs.
The internal
AM
antennaisconnected.TheFMantenna
plug. With
wanttolistentostations that
the
standard antennas you'll probably pull
are
very far away then
is
About
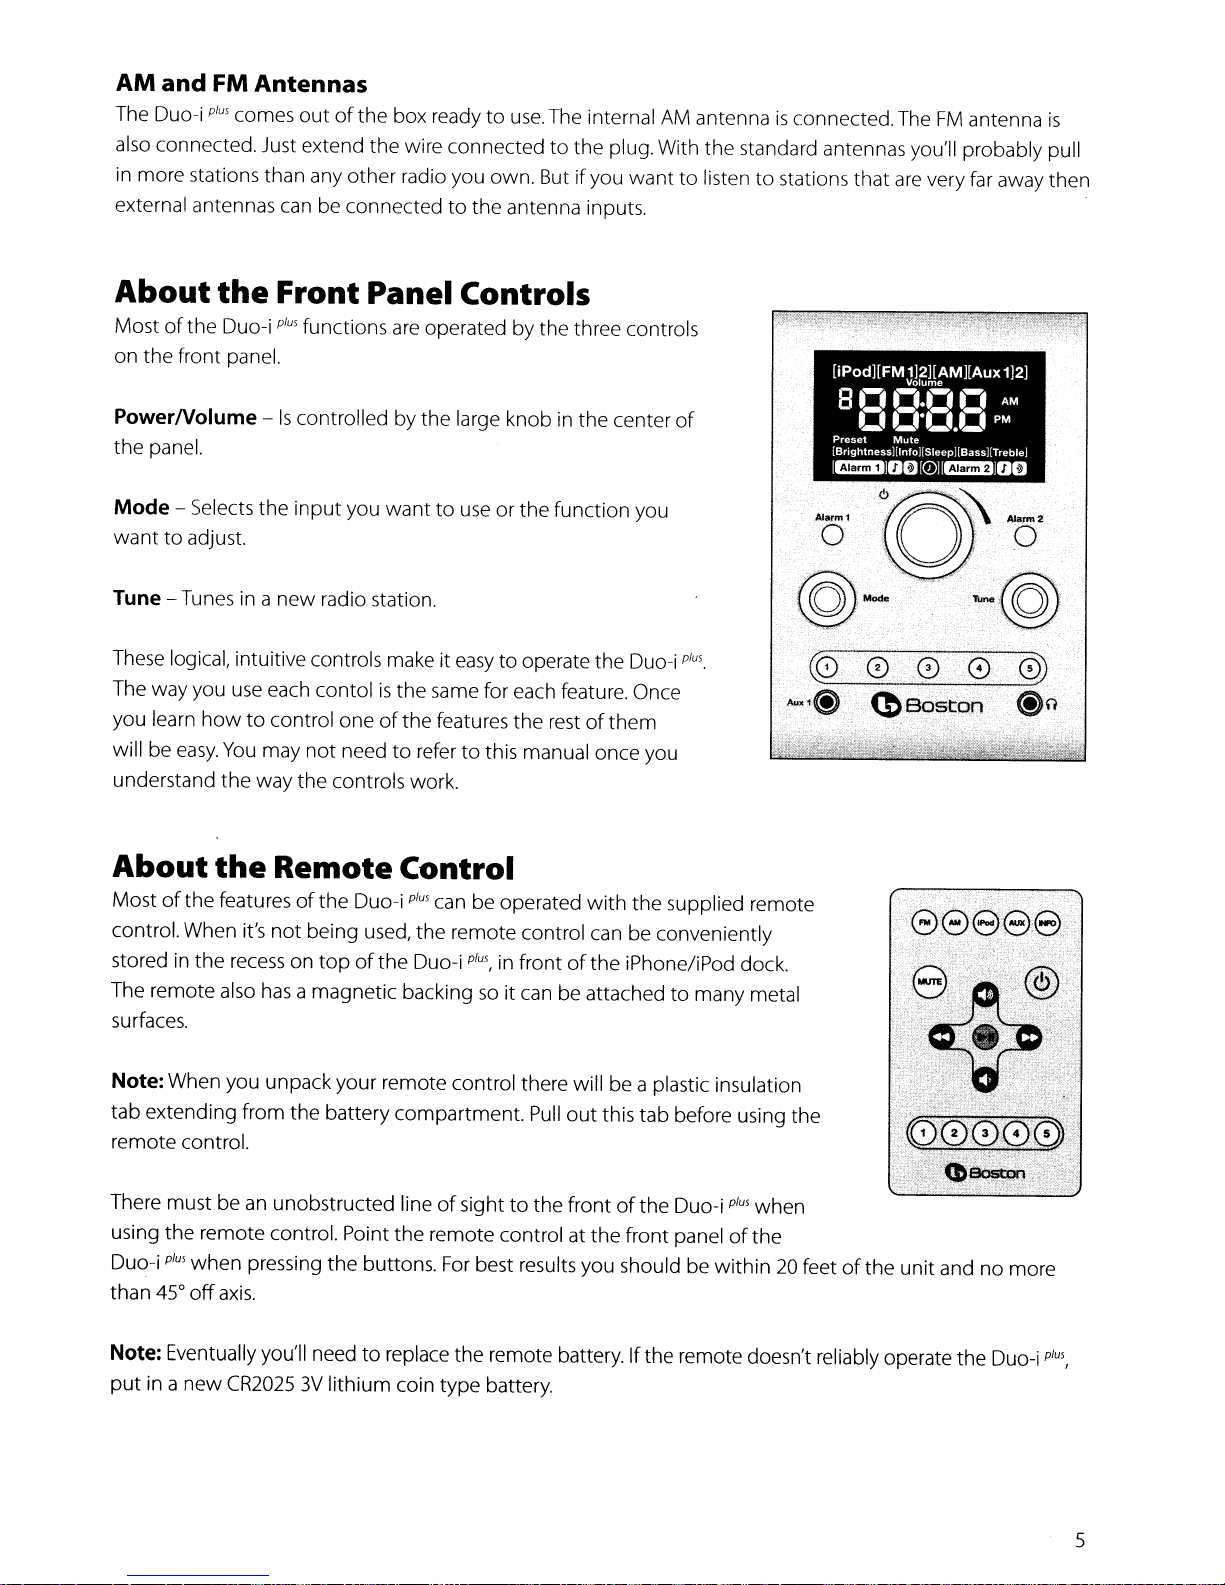
Mostofthe
on the front panel.
PowerNolume -
the
panel.
Mode - Selects the
wanttoadjust.
Tune - Tunes in a
These logical, intuitive controls make it
The way you
you learn
will be
understand
About
Mostofthe
control. When it's
stored in
The remote also
surfaces.
the
Front Panel Controls
Duo-i
plus
functions
Is
controlled by
input
you
new
radio station.
use
each contolisthe same for each feature. Once
howtocontrol oneofthe
easy.
You
may
not
needtorefertothis manual once you
the
way
the
controls work.
the
Remote Control
featuresofthe Duo-i
not
being used,
the
recessontopofthe
has
a magnetic backingsoit can be attachedtomanymetal
are
operated by
the
wanttouse
plus
can be operated
the
Duo-i
the
three controls
large knobinthe center
or the function you
easy
to operate the Duo-i
features
the
restofthem
with
remote control can be conveniently
plus,
in
frontofthe iPhone/iPod dock.
of
plus.
the
supplied remote
,·6'
..•
··~'\··O·
@-;:@
..C0!0..0:
~Xl~'"
(bB?~t~rl..
'.:
..c
-:::'.o~·.1
0 .0)
Note: When you unpack your remote control there will be a plastic insulation
the
tab extending from
remote control.
There mustbe
using
the
Duo-i
plus
than 45°
Note: Eventually you'll need to replace
putina
new
an
remote control. Point the remote control at
when
pressing
off
axis.
CR20253Vlithium coin type battery.
battery compartment.
unobstructed lineofsighttothe
the
buttons.
Pull
out
this tab before using the
frontofthe
the
For
best results you should be
the
remote battery.Ifthe remote doesn't reliably operate the Duo-i
Duo-i
plus
when
front panelofthe
within20feetofthe
unit
and no more
plus,
5
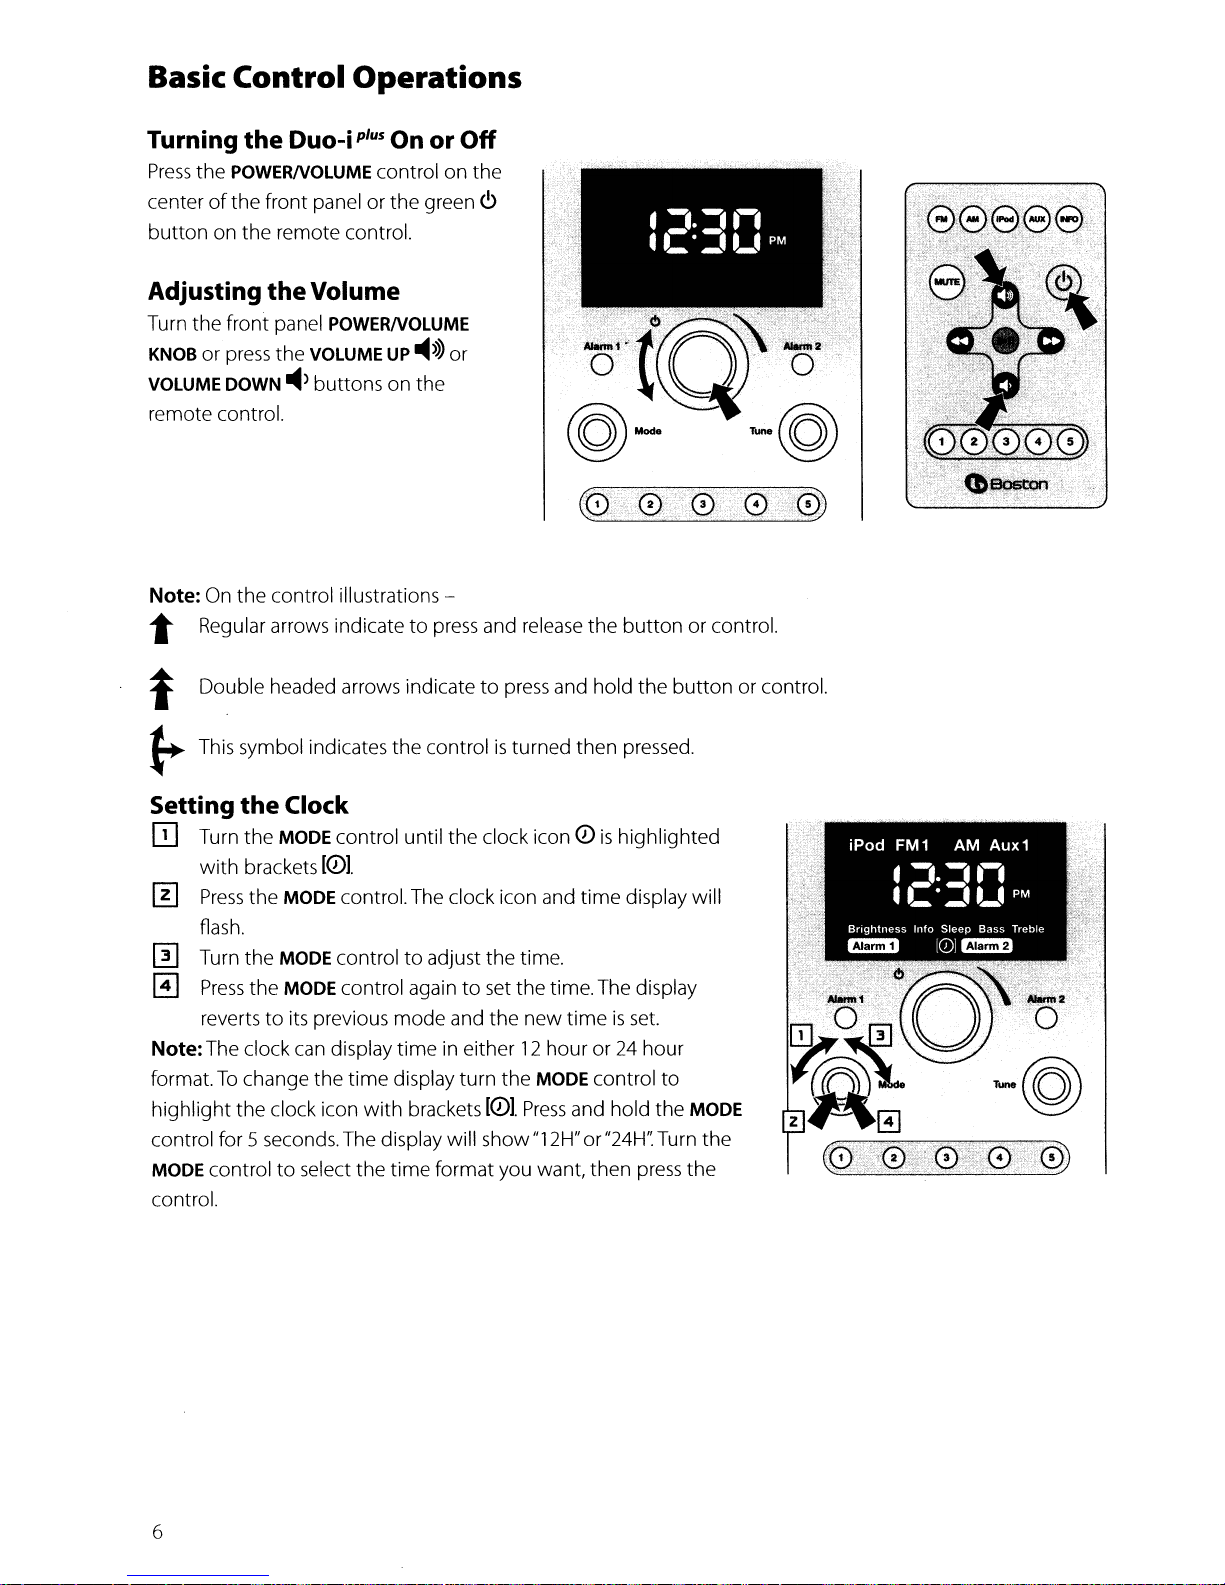
Basic Control Operations
Turning
Press
centerofthe front panel or the green
button
Adjusting
Turn the front panel POWERNOLUME
KNOB
VOLUME DOWN
remote control.
Note: On the control illustrations -
t Regular arrows indicate
the
Duo-iplus On or
the POWERNOLUME control on the
on the remote control.
the
Volume
or
press
the VOLUME UP
~>
buttons on the
-4>>>
to
press
or
t Double headed arrows indicate
Off
<!>
and release the
to
press
button
and hold the
or control.
button
or control.
~
This symbol indicates the controlisturned then pressed.
Setting
ED
III
[II Turn the MODE control
o
Note:The clock
format.Tochange the time display turn the MODE control
highlight
control for 5 seconds. The display will show"12H"or"24H': Turn the
MODE control
control.
the
Clock
Turn the MODE control until the clock icon Q)ishighlighted
with
brackets
Press
the MODE control. The clock icon and time display will
flash.
Press
the MODE control againtoset the time. The display
revertstoits previous mode and the
the clock icon
[Q)I.
to
adjust the time.
new
timeisset.
can
display
to
select the time format you want, then
with
time
in either12houror24
brackets
[Q)I.
Press
and hold
hour
to
the
press
MODE
the
6
 Loading...