

Page 1
QUICK START GUIDE
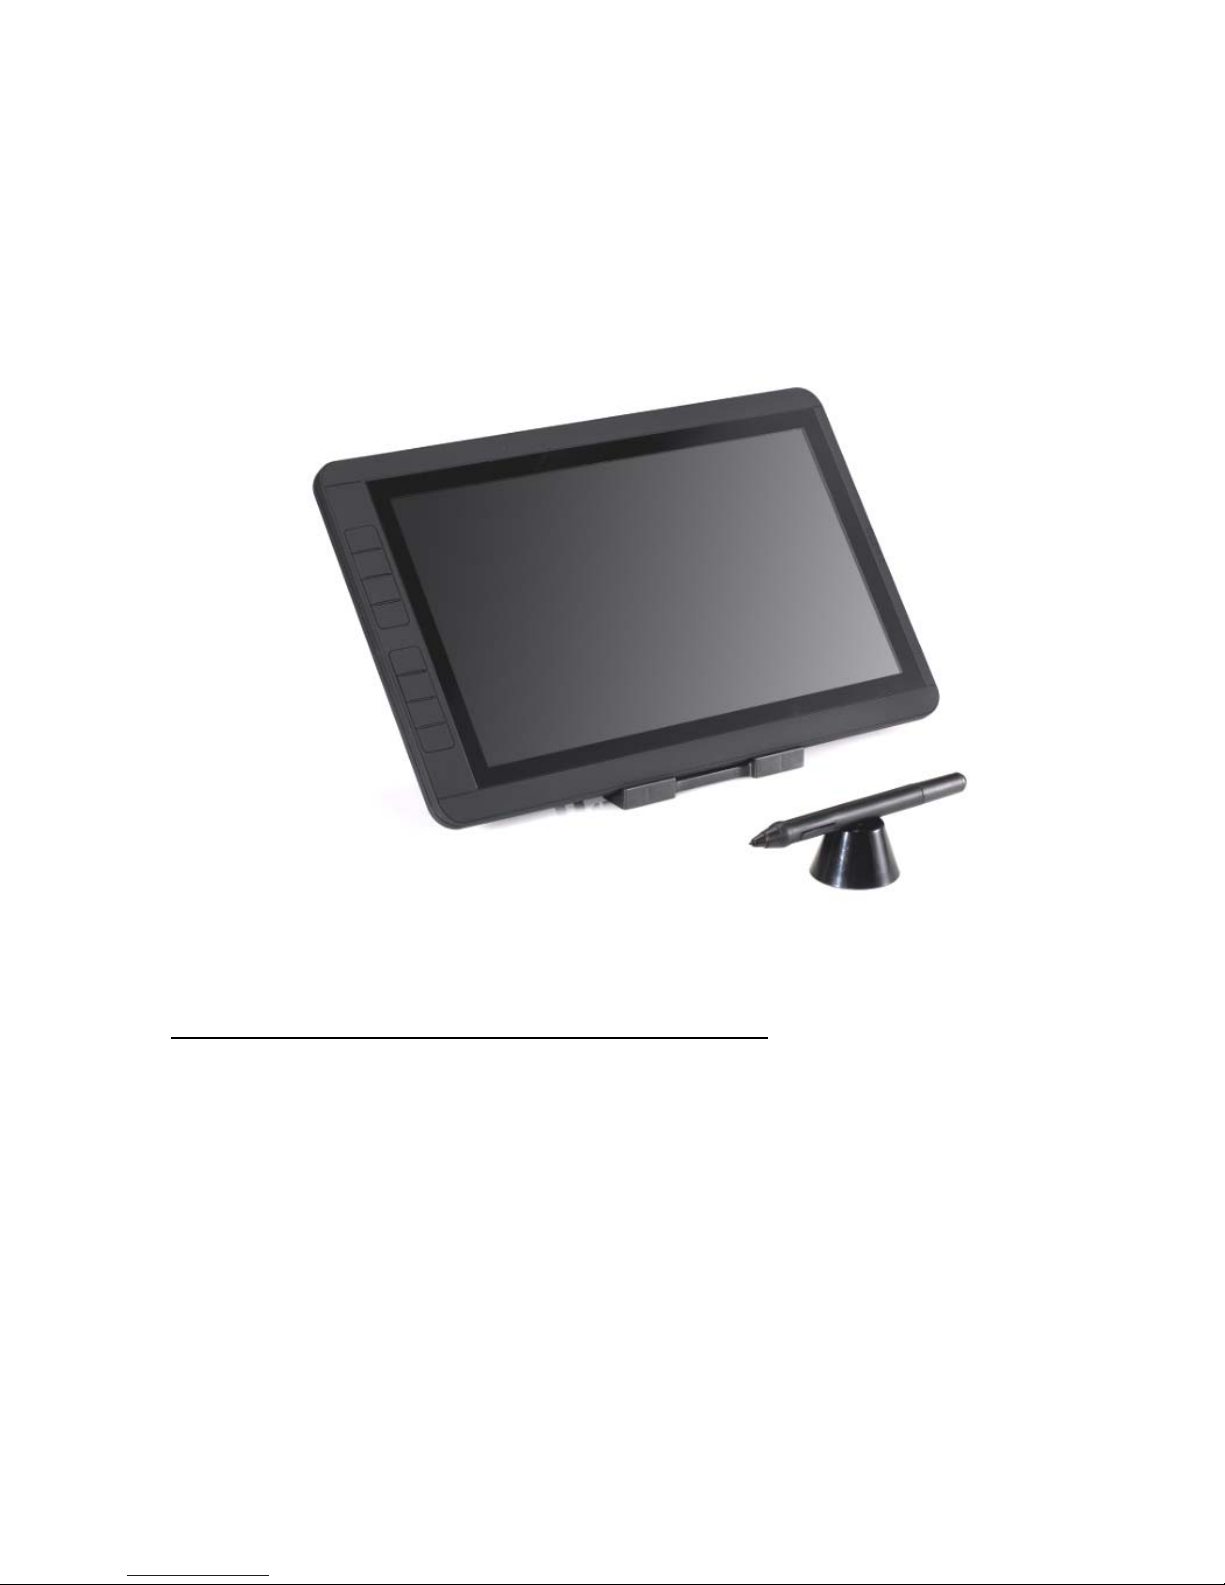
Model: Kingtee 13HD
STEP 1: KINGTEE 13HD COMPONENTS
When you have unpacked your Kingtee-13HD, make sure that you have
received the following items and accessories:
Kingtee 13HD
Felt Bag
Pen and Charging Cable
Nibs and Metal Ring
Tablet Stand
Quick Guide
Screw Driver
Glass cleaning Cloth
CD-ROM
Page 2
STEP 2: Driver Installation:
1. Display driver Installation
In this step, the interactive pen display is installed as a monitor on your system; On
Windows, the displayLink driver will be installed automatically when you connect
your pen display to your computer for the first time. You can also download and
install the DisplayLink driver from www.displaylink.com.
For more information in details, please review the DisplayLink Manual in CD-ROM
or download from www.displaylink.com.
2. Tablet & Express key driver Installation
Insert the installation CD into your computer’s CD-ROM drive. If the software
installer menu does not automatically display, double-click on the file icon located
on the CD. You can also download and install the latest software driver from the
Bosto local distributor’s website for your region.
STEP 3: CONTROL PANEL OVERVIEW
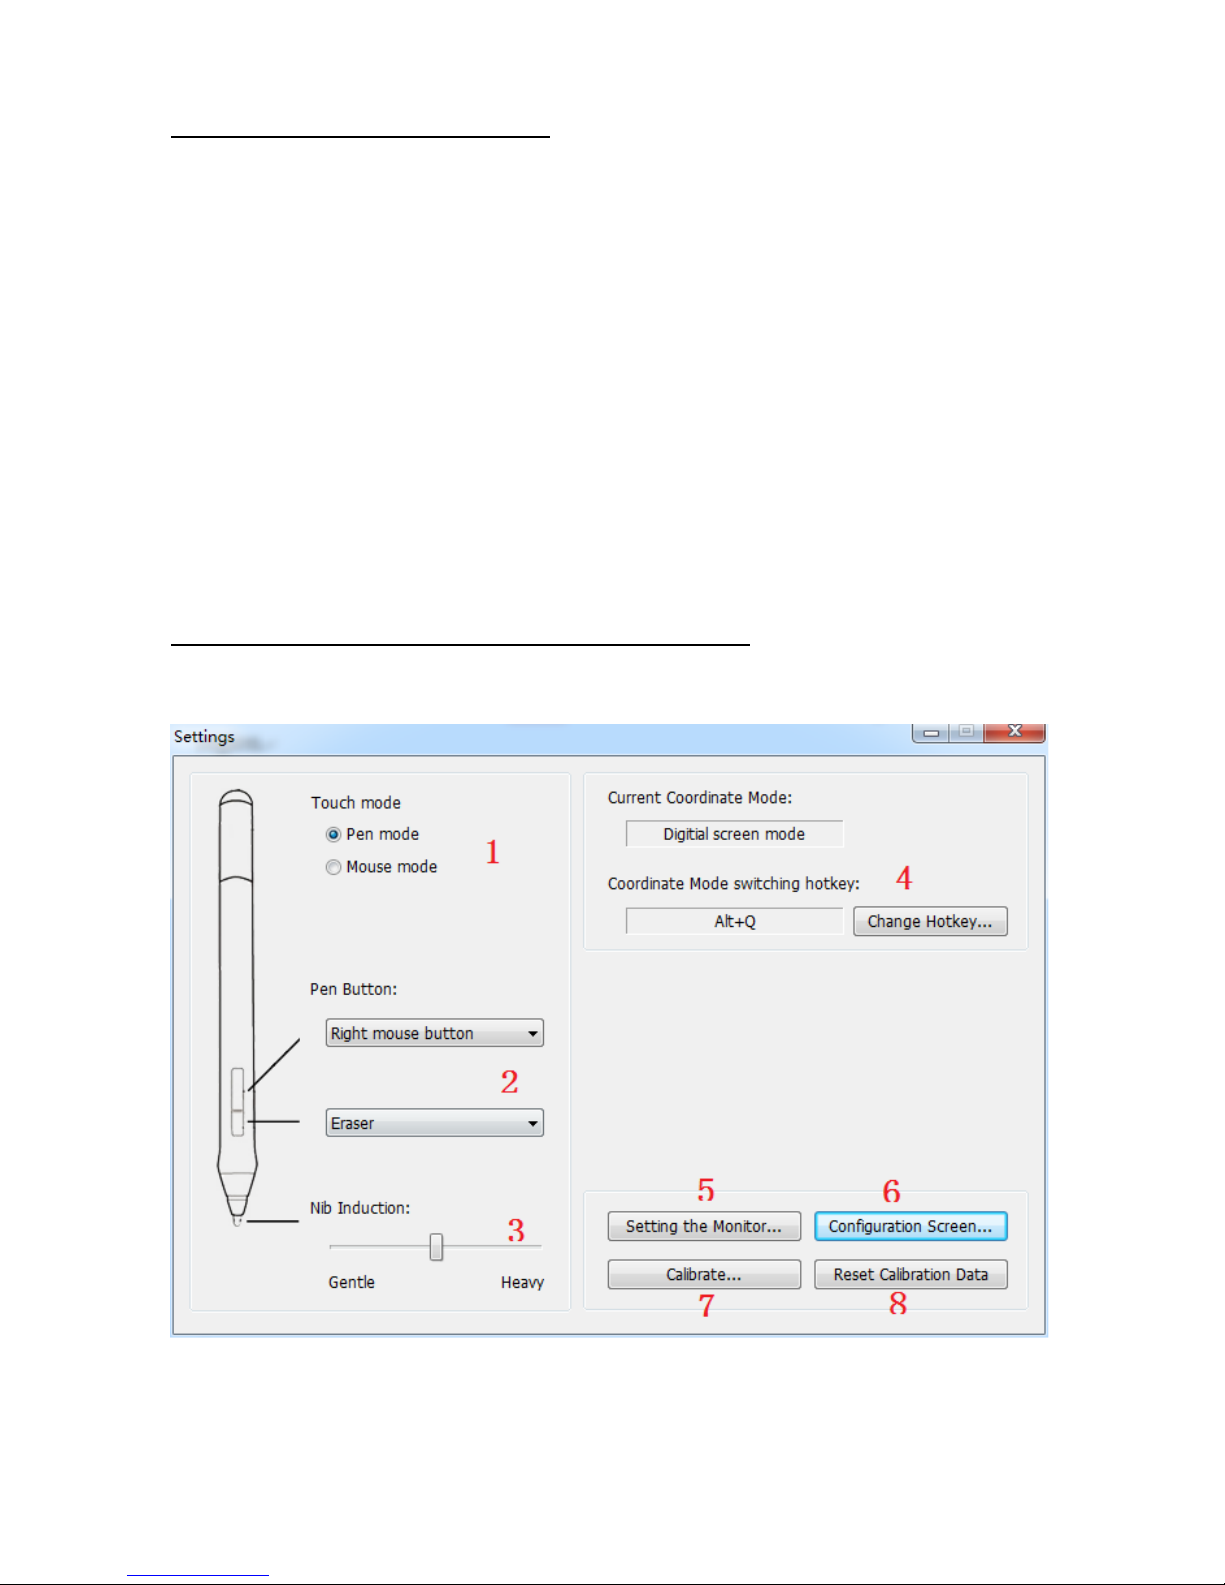
1. Tablet Control Panel
1.1 Generally choose “Pen mode”, “Mouse mode” is for office software
1.2 The pen has two programmable switches that can be used whenever the pen tip is
within proximity 5 mm of the display screen surface. The switch function can be
modified or disabled by using this control panel.
1.3 This slider is for adjusting drawing pressure, to create broad brush strokes or to
Page 3
click with a light touch, use a Gentle tip setting. For maximum control while
sketching thin lines, use a Heavy tip setting.
1.4 For multiple monitor systems, enables you to toggle the screen cursor between
the pen display and your other displays. When selected, your product can be used
either as a pen display (the screen cursor is positioned at the pen tip location) or as a
standard tablet (the screen cursor can be moved across the entire desktop or
additional displays.)
1.5 & 1.6 If more than one monitor connected in same system, the screen display
and cursor movement on the standard monitors will depend on your system
configuration, click this button to pop up the setting interface. Click configuration
screen button to set the cursor position based on the tips step by step.
1.7 You must calibrate the pen display to align the screen cursor with the position of
the pen on the display screen. This is required to compensate for viewing angle, and
to adjust for parallax caused by the display screen cover glass. Set the pen display in
its working position, and then follow the procedure.
1.8 Experiment with different calibrate to find what works best for you. Any changes
you make will take effect immediately. You can always click “Reset calibrating data”
to return to factory setting.
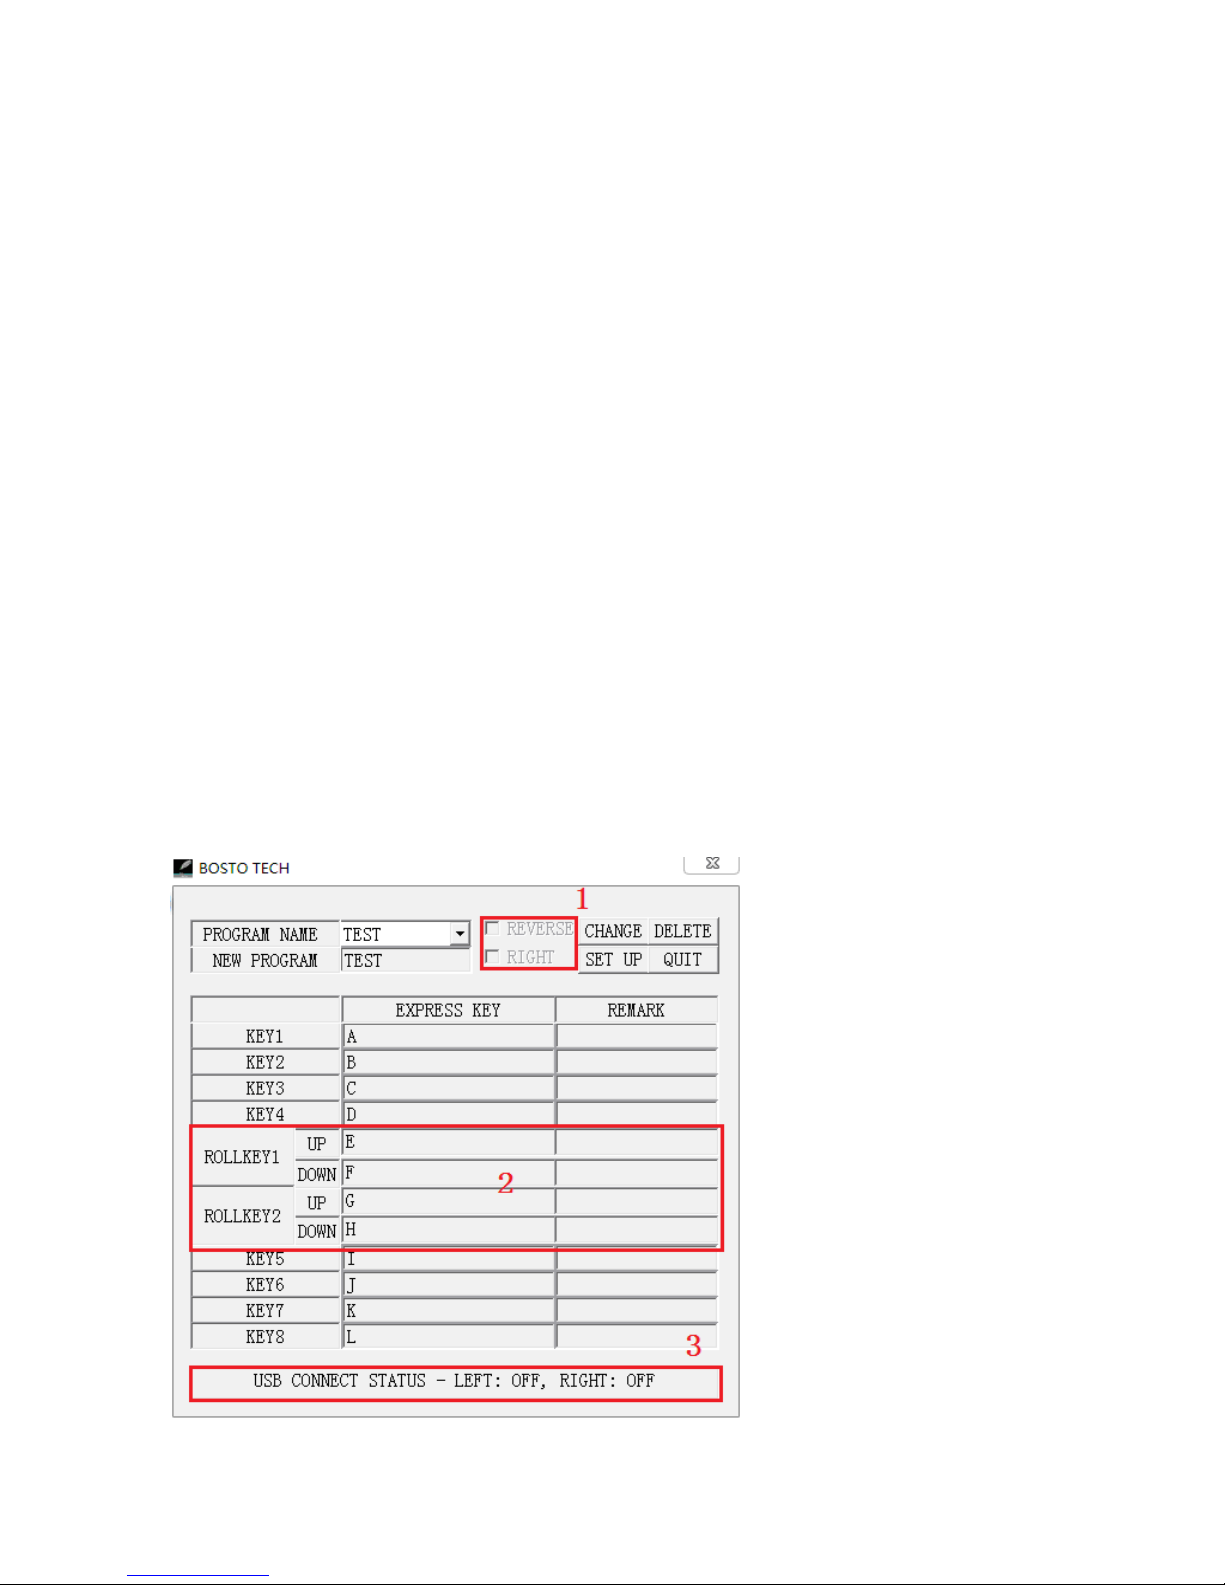
2. Express Key control Panel
Customizable Express keys: Eight keys on the front of the creative pen display allow
you t set frequently used functions or keystrokes, simulate button clicks or modifier
keys, or create automatic settings for a number of applications.
2.1This two choice need
ticked only when use by left
hand
2.2 Roll key is not capable
for 13HD
2.3 This is show the express
key hardware connection
condition, if well connected,
will show “on”
Note: Express keys can also
be operated in combination
with one another. When you
press both keys at the same
time, a combination function
is initiated.
Page 4
STEP 4: USING PEN
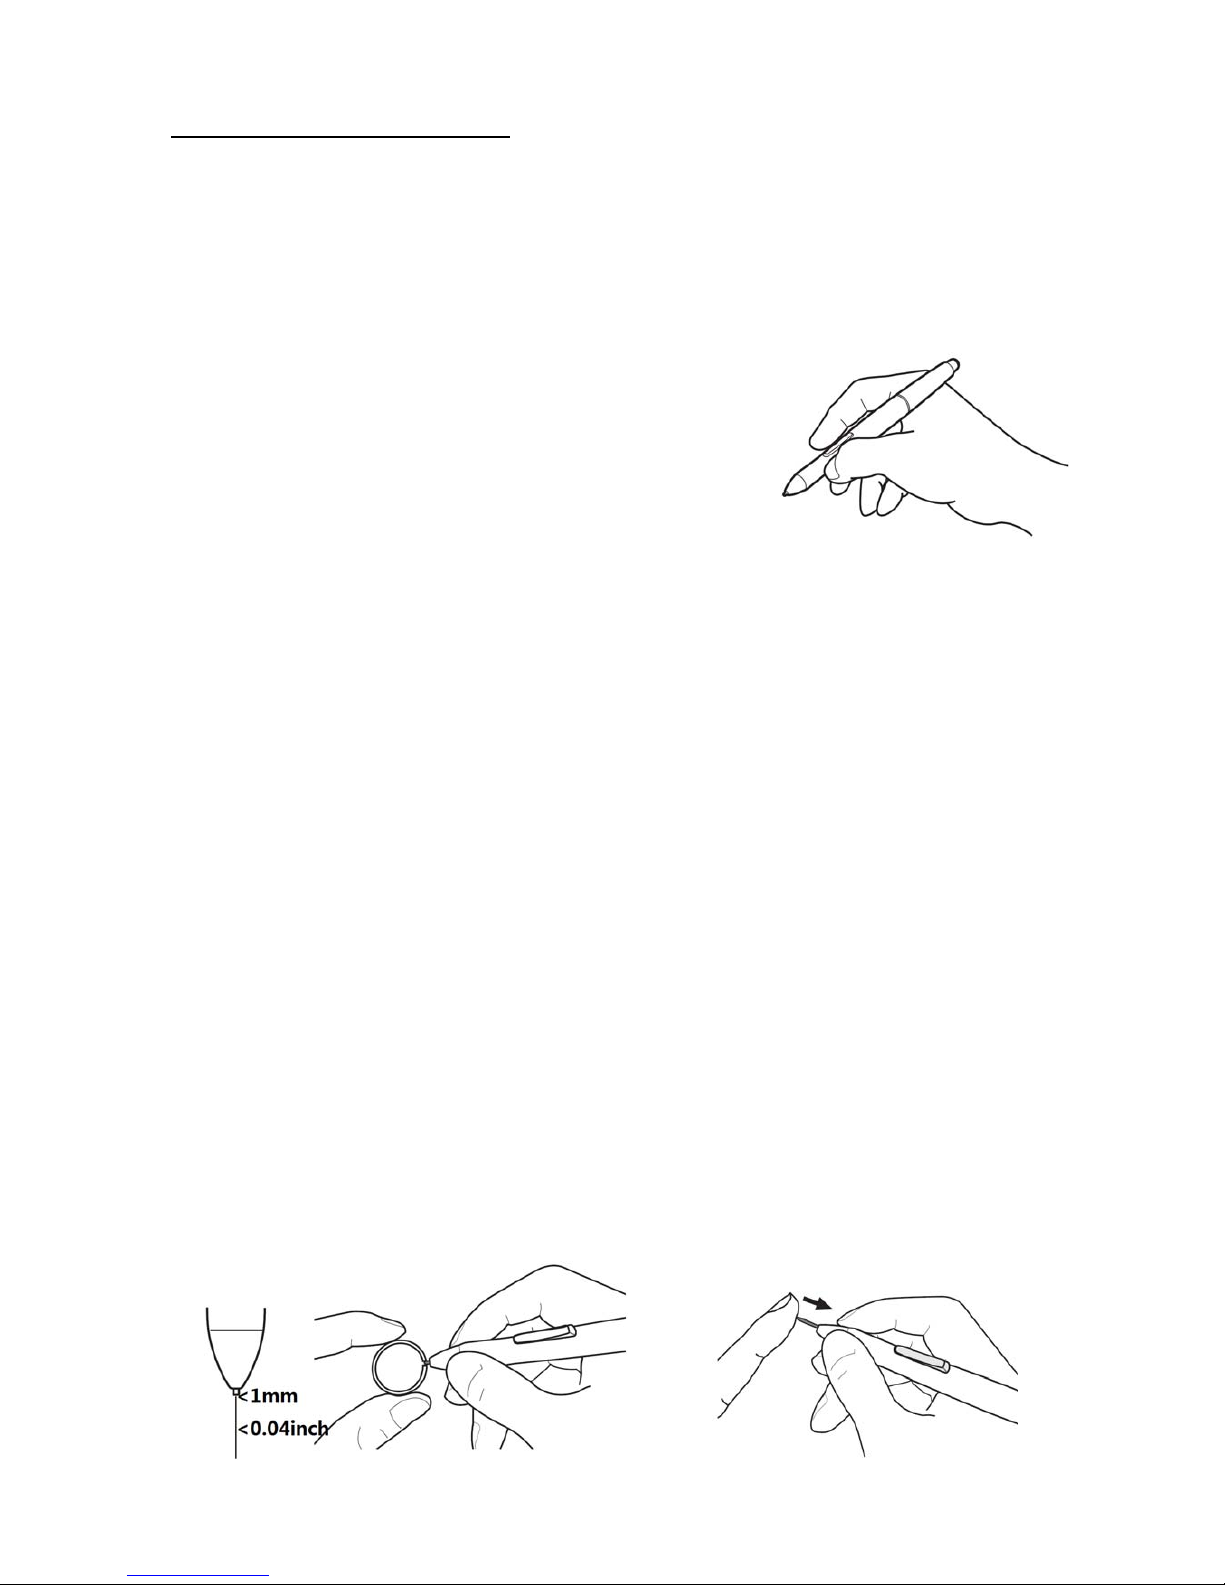
1. Kingtee 13HD are shipped with a cordless, battery build-in pen, you can hold,
write and draw with the pen just as you hold with any other pen, adjust your grip
so that you can toggle the side switch easily with your thumb or forefinger. Be
careful not to accidentally press the switch while drawing or positioning with the
pen.
Position the cursor: Move the pen slightly about the
active area without touching the screen surface.
Press the pen tip on the screen to make a selection.
Tap the screen once with the pen tip, or touch it to
the screen with enough pressure to register a click
Double click: press the upper side switch (when set to Double Click), or quickly
tap the screen twice in the same place with the pen tip.
Move: Select the object, and then slide the pen tip across the screen to move it.
2. Battery Charging ( by computer USB port-5V )
2.1 Led color show battery condition:
Blue: Battery enough.
Yellow: Battery lack, need charge
Red: Charging, will light off when charge finished.
2.2 It takes about 30 minutes to be fully charged, full of electricity, can be used
continuously for 50 hours. ( Charging 5 Minutes can work 8 Hours)
3. Replacing the Pen Tip
The pen tip (nib) will wear with normal use. Excessive pressure will cause it to
wear sooner. If your pen display has a coated surface a worn nib may cause
damage. To avoid this, periodic tip replacement is recommended.
When the nib gets too short or develops a sharp edge, replace it with one of the
extra nibs that came with the pen.
 Loading...