

Page 1
Page 2

34
1
To ensure safety while driving
and to comply with l aws,
drivers should not watch video or
operate the video device while driving.
Page 3
2
33
!
CAUTION
RIS K OF ELEC TRIC SH OCK
DO NO T OPE N
!
CAUTION: TO REDUCE THE RISK OF ELECTRIC SHOCK, DO NOT REMOVE
COVER (OR BACK). NO USER SERVICEABLE PARTS INSIDE. REFER
SERVICING TO QUALIFIED SERVICE PERSONNEL.
The lightening flash with arrowhead symbol, within an equilateral triangle, is
intended the alert the user to the presence of uninsulated dangerous voltage
within the products enclosure that may be of sufficient magnitude to con stitu te
a ris k of elec tric sh ock to pe rsons .
The exclamation point within an equilateral triangle is intended to aler t user to
the p resen ce of imp ortan t opera ting an d maint enanc e (serv icing ) instructions
in the literature accompanying the appliance.
CLASS 1 L ASER PR ODUCT
Laser product symbol: located on the rear panel of the unit, indica te this p layer i s a class
laser product, only use weak laser and no hazardous radiation outsi de of t he un it.
1.Read through this instruction manual before installation and use.
2.Do not open the cover or touch any of the components exposed out o f the u nit , onl y for
qua lifie d technicians.
3.D o not exp ose the u nit und er dire ct sunl ight or n earby o bject s that radiate heat to avoid
dam age the unit.
4.D o not pla ce the un it in moi st and hu mid con ditio ns, whi ch effect the pick-up of the unit
lea d to out of w ork.
5.P lace th e unit on a f lat sur face an d venti lativ e condi tion. P lease ensure the ventilation
hol es are no t cover ed to avo id over heati ng and ma lfunc tion.
6.Clear the panel and case with soft dry cloth only, do not apply any ki nd of thi nner,
alc ohol or s prays .
WARN ING: TO R EDUCE TH E
RIS K OF FIRE O R ELECT RIC
SHOCK, DO NOT EXPOSE
THIS APPLIANCE TO RAIN OR
MOISTURE.
PRECAUTION
Page 4

3
32
Contents
1. Before Operation...........................................................................................4
1.1 G lossa ry.... ............................................................................................ 4
1.2 P recau tions............................................................................................4
1.3 M aintenance and Cleaning of Discs..........................................................5
1.4 B atter y Infor matio n of the Re mote Control.................................................5
1.5 T he Re mot e Con tro l Description..............................................................6
1.6 L ocations and Names of the Controls.......................................................7
1.7 D escription of the Rear Cabinet....................... ........................................8
1.8 U nit Ins talla tion......................................................................................9
2. Common Operation......................................................................................10
3. Radio Operation..........................................................................................12
4. Basic Disc, USB or MMC/SD Operation..........................................................14
4.1 B egin Playback......................................................................................16
4.2 P ause Pl aybac k.....................................................................................16
4.3 S top Pla yback . ..... .................................................................................16
4.4 S elect Chapter/Track with the UP/DN or the >>|/|<< Buttons......................16
4.5 S elect Chapter/Track with the Number Buttons.........................................16
4.6 S elect Chapter/Track with the Root/PBC Menu.........................................16
4.7 Ter minate the Playback..........................................................................17
4.8 P layba ck with S peed..............................................................................17
4.9 P layba ck with S low Speed......................................................................17
4.1 0 Playb ack wit h Still F rame. ..... ..... ..... ......................................................18
4.11 P lay bac k Repeatedly............................................................................18
4.11 .1 On e/A ll Repeat..................................................................................18
4.11 .2 A-B R epe at........................................................................................18
4.1 2 Playb ack in Sc an Mode ..........................................................................19
4.1 3 Playb ack fro m a speci fied Ch apter /Trac k or a Sp eci fie d Time....................19
4.1 4 Playb ack in Ra ndom..............................................................................19
4.1 5 Playb ack in Di ffere nt Angle....................................................................19
4.1 6 Playb ack in Zo om Mode ........................................................................19
4.1 7 Change the Caption Language..............................................................20
4.1 8 Change the Audio Language.................................................................20
4.1 9 Look ov er the Pl aybac k Statu s.... ..........................................................20
4.2 0 Progr am Play back. ..... ..... ....................................................................21
4.2 1 Playb ack the P ictur e CD in JPE G Forma t...............................................21
4.2 2 Opera tion about file style of video.........................................................22
4.2 3 ESP and I D3 Fu nct ion .................................................................
.........22
4.2 4 USB and M MC/SD Reader Operation.....................................................22
4.2 5 The D VD Syst em Menu S etup Op erati on... ..... ........................................22
4.2 6 The P arent al Control............................................................................27
4.2 7 The Region Code.................................................................................28
5. .............................................................29
6. Trouble Shooting.........................................................................................31
7. Specification...............................................................................................32
BLUE TOOTH HANDFREE SYSTEM
7. Spec ifi ca tio n
General Specification
Power Supply Requirement..................................................DC 12V
Max imum Po wer Out put.. ..... ..... ..... ..4 x 80W (meas ure d at DC 1 4.4 V )
Dim ensio ns(w x h x d) ..... ..... ..... ..... ..... ..... ... ... ... ... ..7 ”W x 2”H x 6. 5”D
DVD D eck Spe cific ation
Format..............................DVD/VCD/MPEG 4/JPEG//MP3/WMA/CD
Video System........................................................................NTSC
Audio System..............................................................24 bit/96KHz
Loading System.......................................................... Auto Loading
Mounting Angle.................................................................0 to +/-30
Video Specification
Video Type...................................................................16:9 and 4:3
Video Output level......................................Composite:1.0± 0.2Vp-p
Loa d imp edanc e: 75 o hms
Horizontal Resolution................................................................500
Audio Specification
+0
Audio Output(Analog audio)..........................................2.0 -1.0Vrms
Frequency Response.............................20Hz ~ 20KHz (at 1KH z 0 dB)
S/N Ratio(Audio).............................................≥90d B(a t 1KH z 0 dB)
Separation..............................................................................50dB
Radio Specification
FM Section
Frequency range.......................................87.5MHz - 107.9MHz(US)
87. 5MH z - 108.0 MHz(E U)
Usable sensitivity......................................................................3uV
I.F Frequency....................................................................10.7MHz
AM Se ction
Frequency....................................................530KHz - 1 710KHz(US)
522 KHz - 1 620KHz(EU)
Page 5
4
31
1. Before Operation
1.1 Glo ssary
PBC (playback control)
It is a kin d of sign al(me nu) r ec ord ed i n the d isc wit h SVCD or VCD2.0
forma t used fo r the pla yba ck c ont ro l. Fo r the dis cs cont ained P BC, It ca n
playback interactive software with the menu displayed on TV.
Title
Gener ally, the tit le is the i mport ant p ar t of DV D di sc. f or e xample, the
theme part of movie is title 1, the part described how to make mov ie is t it le
2, the ca st is tit le 3, etc . Eve ry t itl e co nta in a seri al numb er that i s eas y to
lookup.
Chapter
A title ca n be divi ded int o sev er al bl oc ks, s o that ev ery blo ck can be o perat ed
as a unit , the uni t is call ed ch ap ter. T he chap ter c on tai n a un it at l east.
Track
It is the biggest component of VCD. Generally, every song of karaoke disc
is a trac k.
1.2 Precautions
Safety
1. The unit is designed for negative terminal of the battery which is
connected to the vehicle metal. Please confirm it before installation.
2. Do not allow the speaker wires to be shorted together when the unit is
switched on. Otherwise it may overload or burn out the power amplifier.
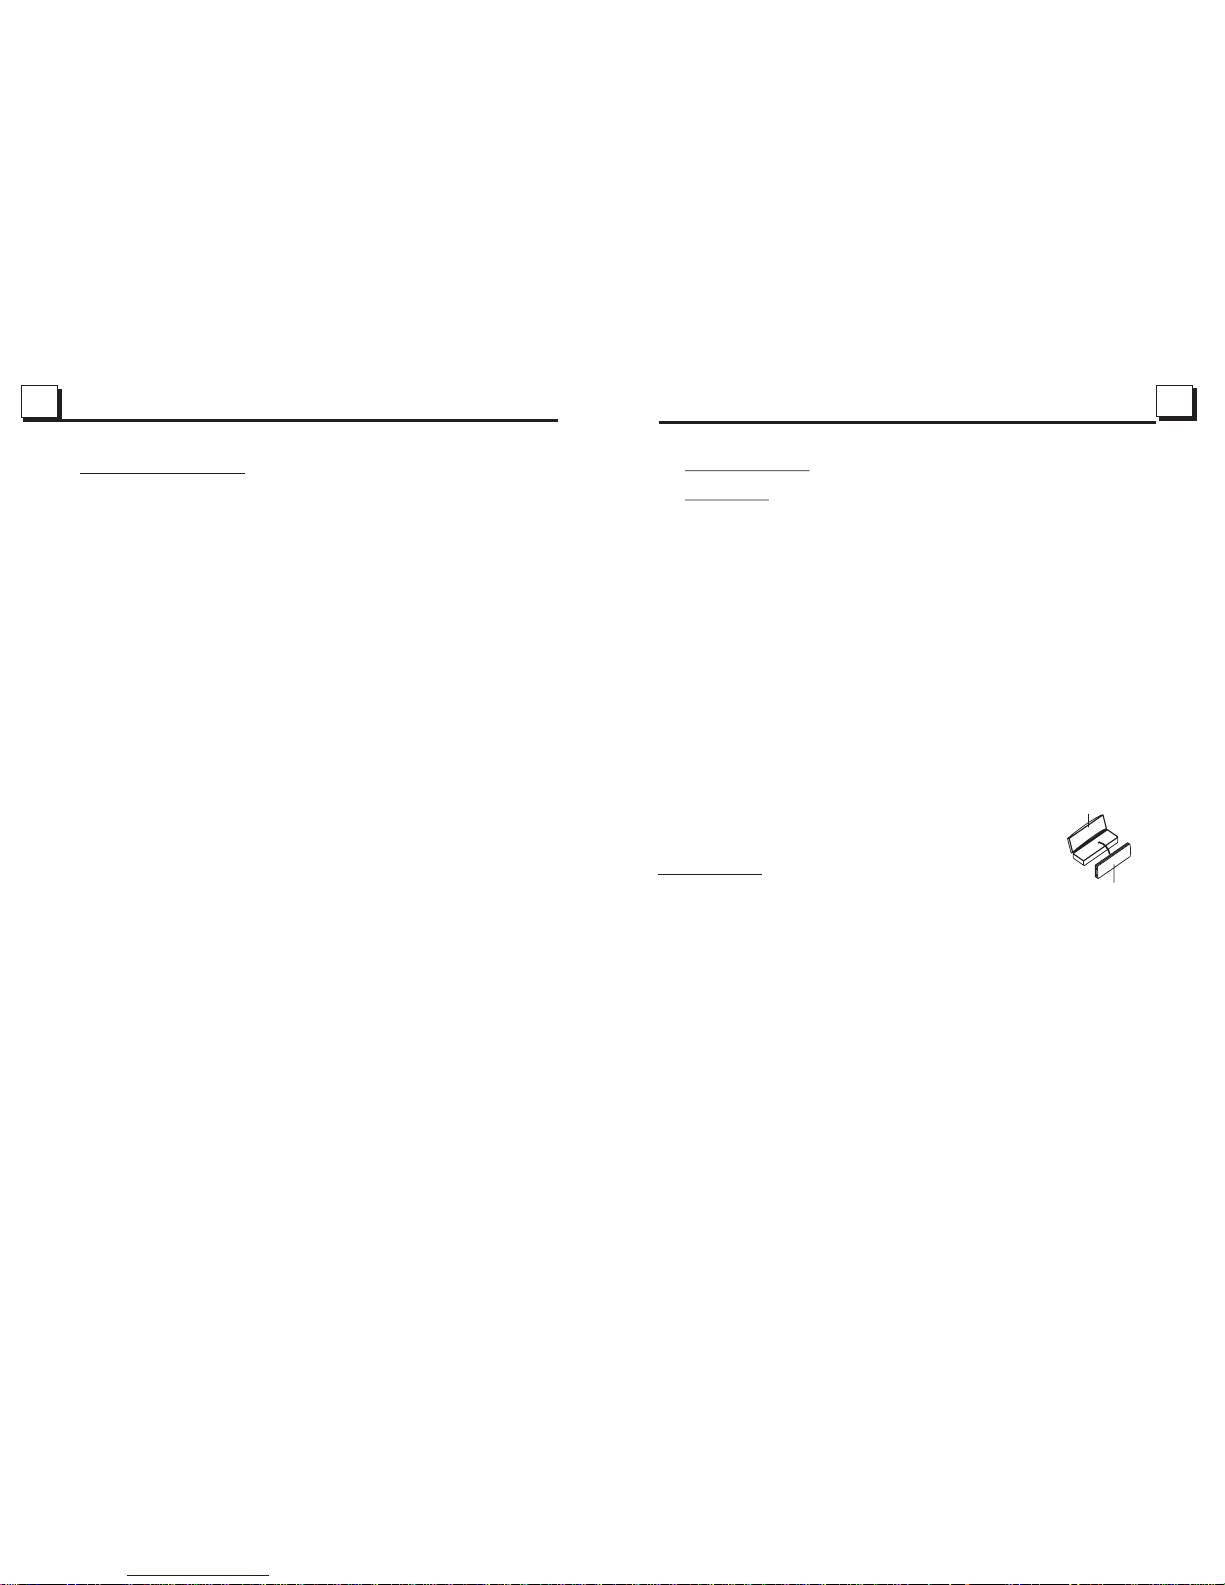
3. Do not install the detachable panel before connecting the wire.
4. The protective case is to safely keep the front panel(see the photo).
Environment
1. Do not use this unit when water and moisture is near it.
2. If moisture forms inside the Lens, it may not operate properly. To correct
this problem, wait about one hour for the moisture to evaporate.
3. If the car interior is extremely hot, do not use the player until the car has
been driven for a while to cool off the interior.
FRONT PANEL
PROTECTIVE CASE
6. The Tro uble Sh oot in g
Please read the user s manual carefully before using the DVD player. If you ha ve any tr oubles
in us ing thi s playe r, try to so lve the p roblems by the suggestions mentioned below. If you c an
not remove the trouble after using all the suggestions, please contact the company or the
technical service center authorized by us. For the sake of your safe ty, plea se do not o pen the
cover and repair the player by yourself, if that, it may cause electric shock.
NO PI CTURE , SOUND AN D INDIC ATION
* Ens ure tha t the pow er swit ch is on.
* Ens ure tha t the fus e is not blown.
NO SO UND BUT H AVE PI CTURE
* Ens ure tha t the player s aud io outp ut has a go od conn ectio n with TV s a udio input.
* Che ck whet her the a udio connector is damaged.
* Che ck whet her you h ave tur ned dow n the vol ume.
* Ens ure tha t you hav e set the r ight AUD IO setu p of the player.
* Ens ure tha t the aud io is not u nder mu te.
NO PI CTURE B UT HAVE SOU ND
* Ens ure tha t the player s vid eo outp ut has a go od connection with TV s video input.
* Ens ure tha t you hav e turne d your TV t o the AV input c hanne l connecting to your player.
* Ens ure tha t you hav e set the r ight VI DEO set tings o f the pla yer.
BLA CK AND WHI TE PICT URE OR SC REEN RO LLING
* Ens ure tha t you hav e set the r ight TV S YSTEM ( e.g . PAL, NT SC) setting.
FLAW S OF PICT URE OR SO UND
* Che ck whet her the s ettin g of AUDIO i s right.
* Che ck whet her the d isc is sc ratch ed or sta ined.
* Che ck whet her the re is condensation inside the Lens. If so, leave the player off for an hour
or so , then tr y again.
* Che ck whet her the i nstal latio n angle i s less th an 30.
DIS PLAY NO DIS C OR BAD DI SC
* Ens ure tha t you hav e put the d isc on th e tray.
* Che ck whet her the d isc is pu t in the reverse side.
* Che ck whet her the d isc is di stort ed.
* Che ck whet her the d isc is st ained or scratched badly.
* Ens ure tha t the dis c forma t is comp atibl e to the pl ayer.
* Ens ure tha t the tem perat ure ins ide the c ar is not t oo high. If so, cool off until the ambient
tem perat ure ret urns to n ormal .
* Replace another disc to insert it into the disc compartment.
REM OTE CON TROL IS IN SENSI TIVE OR D OES NOT W ORK
* Che ck the ba tteri es of rem ote con trol an d make sure that they are to be powerful and
goo d conductivity.
* Dir ect the r emote c ontro l to the IR s ensor o f the player.
* Che ck whet her the re are so me obst acles b etwee n the rem ote con trol an d IR sens or.
SOME FUNCTION BUTTONS DO NOT WORK
* Turn o ff the po wer, the n turn on a gain.
* Res et the un it to zer o, then t urn on again.
* Rem ove the f ront panel from the unit, then install it again and then turn on again.
THE RADIO DOES NOT WORK
* Che ck whet her the a ntenn a cable is connected firmly. Or manually tune for a stat ion .
Page 6

5
30
1.3 Maintenance and Cleaning of Discs
Disc Maintenance
1. To keep the disc clean, handle the disc by its edge, do not touch the disc
surface of the play side.
2. Do not stick paper or tape on the disc. If there is glue (or analog) on the
disc surface, must wipe it up before using.
3. Do not expose the disc to direct sunlight, or nearby heat sources such as
caliduct, or leave it in a car parked in direct sunlight where there can be a
considerable rise in temperature.
4. Put the disc inside disc case to keep temperature after finishing playback.
Disc Cleaning
1. Before playing, wipe the disc with a clean lint. wipe the disc outwards from
the disc center.
2. Do not use petrel, thinner, commercially cleaner or anti-static spray used to
plastic LP to wipe disc.
1.4 B atter y Infor matio n of the Re mote Co ntrol
Replace Battery in the Remote Control:
1.B efore u sing th e remot e contr ol for th e first t ime, pu ll the insulating
sheet out of the remote control as the direction indicated by the
arr ow.(se e fig.1 )
2.Press the movable block hold as the direction indicated by the A arrow
(Se e fig.2 ), then p ull the b atter y holde r out of th e remot e control as
the d irect ion ind icate d by the B ar row(s ee fig. 2).
3.Replace the old battery by a new ba tte ry wi th (+ ) polar ity sid e upward.
(Se e fig.3 ).
4.Insert the battery holder to the original position in remote control.
(Se e fig.3 ).
Note about the Battery of the Remote Control:
1.Improper use of battery may cause overheating or explosion. so tha t
Res ult in in jury or f ire .
2.Battery leakage may cause damage to the remote control(Battery
Lif e: 6 mont hs with n ormal u se in nor mal roo m temperature).
3.D o not sho rt the ba ttery.
4.D o not thr ow the ba ttery i nto the f ire.
5.To av oid the r isk of ac ciden t, keep t he batt ery out o f reach of children.
Fig.1
Fig.2
Fig.3
5.2 Dial with remote control with the following procedures:
(1) Input telephone number with number buttons 0-9
* Press CLEAR button briefly to cancel the wrongly input number if necessary
(2) Press TEL briefly to execute the dialling.
5.3 To redial the last phone number dialled
Press REDIAL button briefly or tap the icon to validate the last phone number.
6. Accept/Reject/End Call
6.1 When ringing, press TEL button briefly to accept the call;
6.2 When ringing, press HANGUP button briefly to reject the call;
6.3 When talking, press HANGUP button briefly to end the call.
Note: During ringing, the phone number appears.
7. To transfer the audio of a file played by Mobile Phone to the Car Audio Player
In the connection status between the Bluetooth devices of the Car Audio Player
and a Mobile Phone, if the mobile phone can play audio or video files and support
A2DP, when the Mobile Phone plays an audio or video file(For some Mobile Phones,
you must select Play by BT firstly), the audio of the playing file will be transferred
to the Car Audio Player.
In A2DP mode, if the Bluetooth device of the Mobile Phone support AVRCP, the
functions of the >>|, |<< , PLAY/PAUSE , EJECT, MUTE, EQ, LOUD, VOL and SEL
buttons are the same as one in disc mode(no fast forward/backward functions for
the >>|/|<< buttons). The other buttons available in disc mode are not available.
Page 7

6
29
1.5 The R emo te Control Description
16. S EARCH B UTTON
17. R DM BUTT ON
18. R PT BUTT ON
19. SUBTITLE/REDIAL BUTTON
20. T ITL E BUT TON
21. AN GLE/S T/# BUT TON
22. Z OOM BUT TON
23. AU DIO BUT TON
24. C LK BUTT ON
25. A- B BUTTO N
26. I NT BUTT ON
27. E Q BUTTO N
28. LOC/SLOW-FWD/* BUTTON
29. M UTE BUT TON
30. STOP BUTTON
31. VOLUME- BUTTON
32. < B UTTON
33. O K BUTTO N
34. V OLUME + BUTTO N
35. BAND/SHIFT BUTTON
36. P ROG BUT TON
37. O SD BUTT ON
38. L OUD BUT TON
39. STEP/TEL BUTTON
40. TA BU TTON
41. AF B UTTON
1. BA CK BUTT ON
2. ME NU/PB C BUTTO N
3. PO WER BUT TON
4. ^ BU TTON
5. >> | BUTTO N
6. > BU TTON
7. |< </CLE AR BUTT ON
8. v BU TTON
9. SE L B UTTON
10. P LAY/PAU SE BU TTON
11. NUMBER(0~10,+10
-10 ) BUTTO NS
12. 1 0+/PT Y BUT TON
13. S ETUP BU TTO N
14. M ODE BUT TON
15. APS/HAND UO BUTTON
5. BLUE TOOTH HANDFREE SYSTEM
. Pairing and connection
1) Turn on the Bluetooth mode of the mobile phone;
2) Select the item of Finding the Bluetooth Device
and enter it. After finishing the finding, it will show
the name of the Bluetooth Device if finding a
Bluetooth Device.
Select it and enter it, then it will show a interface
that ask you to input a password, input the
password 0000 and then enter it. Then it will tell you pair OK.
3) For some mobile phones, they can automatically connect with the BT device of the
car audio system after pairing is ok; for some mobile phones, they need to select
the paired BT device and press the CONNECTION button. When connection is ok,
the LCD of the car audio system will show LINK OK.
* when pairing is failed, please select BT search again by your phone.
3. Use the mobile phone to do connection or disconnection
In the connection status, find the paired and connected Bluetooth Device, then
press the disconnection button to do disconnection;
In the disconnection status, find the paired and disconnected Bluetooth Device,
then press the connection button to do connection.
4. In the connection status: the audio of mobile phone transfers to the car audio
system whenever a dialling takes place or receiving a call.
5. Dialling when in connection status
5.1 Dial with the mobile phone directly.
1. Enter Bluetooth mode
When you use MODE button or Mode Menu to enter
Bluetooth mode, it will display Bluetooth interface as
right.
Press and hold the BAND button to turn on shift
then to do select.
2
NOTE interface
Bluetooth interface
1
2
3
4
5
6
7
9
8
10
11
12
13
14
15
16
17
18
19
20
21
22
23
24
25
26
27
28
29
30
31
32
33
34
35
40
41
39
36
37
38
Page 8

7
28
1.6 L ocati ons and N ames of t he Cont rols
4.27 The Region Code
Q: Not be gin t o pla yback b ut to d isp lay REG ION E RRO R af ter i nse rti ng d isc i nto
disc co mpa rtm ent. Wh y ?
A: Because the DVD player and disc has respective region code. If th e reg ion c odes
of th em a re no t mat ch with e ach o the r, the DVD player can not play the disc.
Append ix: T he re gio n code of D VD:
The M oti on P ict ure As soc ia tio n of Ame reca (M PAA) d ivi ded t he worl d int o 6
regions, and named every region a cod e, na mel y re gio n code. The region codes
and the c oun tri es or are as represented by the region codes are as follows:
Region 1: America, Canada, East-Pacific Inlands;
Region 2: Japan, West Europe, North Europe, Egypt, South Africa, Middle East;
Region 3: South-east Asian countries include Taiwan, Hong Kong, South Corea,
Tha iland, indonesia, etc.;
Region 4: Australia, New Zealand, Central South America, South Pacific Inlands;
Region 5: Russia, Mongolia, Indian Peninsula, Middle Asia, East Europe, North
Cor ea , Nor th Afr ica , No rth -we st Asia et c.;
Region 6: China mainland.
Basic ally, when a DV D mov ie disc f or th e ver sion of r egion 6 was d eci ded not t o
issue , we ne ed to p urcha se an oth er DVD pl aye r tha t ca n pla y the D VD mo vi e dis c
for the v ers ion o f non-r egion 6. In order to view this disc, viewer who does not have
the non -re gio n 6 DVD player facilities will have to spend extra sum of money to buy
it. The pr oblems caused from the area code inconsistency between the disc an d the
DVD pla yer h as pu shed fo r the p roduction of Unlock-Version DVD player facilities,
and som e DVD d isc s ets all ow us er to m odify the area codes for a li mit ed n umb er of
times . But n ote t hat onl y the d isc s produced by the 8 biggest filmmaking companies
of Ameri ca re str ict so, t hey a re no t one of or iginal DVD format. That is to say, the
DVD mov ie di scs n ot produced by the 8 bi gge st filmmaking companies of America
were no t res tri cted by t he ru le of r egion code. Generally, they are called
FreeR egionCode discs or Full Region discs. The 8 biggest filmmaking companies
of America are as follows:
1. Wa rne rBros;
2. Colm bia;
3. 20th Cen tur yFOX;
4. Pa ra mou nt;
5. Univ ers al;
6. UA(U nit edA rtist );
7. MGM( Met roD ogwyn May er) ;
8. Wa ltD isn ey
2
3
6
1
13
859
1115 16
10
18 19
12
11
20
22
4
14
17
7
The figure of the Unit Chassis Facet After removing the Front Panel
The f igure o f the fro nt pane l
21
23
24
1. PO WER/M UTE BUT TON
2. DI SC SLOT
3. RE LEASE B UTTON
4. MO DE
5. TA BUTTON
6. SE L B UTT ON
AND VO L K NOB
7. AF BUTTON
8. SMALL MONITOR
9. IR R EMOTE S ENSOR
10. BAND/TEL BUTTON
11. UP AN D DN BU TTO NS
12. APS/HANG UP BUTTON
13. EJECT BUTTON
14. 1/PLAY/PAUSE BUTTON
15. 2/INT BUTTON
16. 3 /RPT BU TTO N
17. 4 /RDM BU TTON
18. 5 /-10 BU TTON
19. 6 /+10 BU TTON
20. U SB SOCK ET
21. RESET BUTTON
22. AU X IN SOCK ET
23. MICROPHONE
24. S D CARD SL OT
SD
AUX
3.6” TFT
AF
MU
TA
1
INT
2
3
RPT
4
RDM5-106+10
MODE
BND
SHIFT
MIC
APS
VOL
SEL
BV7948B
6-
SD
USB
Page 9

27
8
1.7 Description of the Rear Cabinet
Con necti ng the pa rking b rake li ne to the p arkin g brake s ystem b uilt in t he car
Parking brake
Parking brake switch
(ins ide the c ar)
Parking brake line(Pink)
To meta llic bo dy or cha ssis of t he car
Note: After connecting the Parking Line, the video on the small monitor of the front panel will
be display only after braking the car.
BT Antenna
4.26 The Parental Control
Q:After inserting DVD disc into disc compartment, it will appear a dia logue w indow
tha t ask me in put a pas sword o f 4 digit. Why ?
A:T his is be cause t hat the d isc mov ie you ar e playi ng was ra ted with the Parental
Con trol, a nd the cu rrent rating level of DVD player is lower than one of current
dis c. You must i nput right password and enter it to entry Parental Control setup
men u and the n set a equ al or hig her rat ing lev el than o ne of cur rent di sc. So th at
you c an playback the disc.
NOT E
* If yo u have no t changed the password, the factory preset password for the DVD
pla yer wil l be empt y. So th at yo u should input a de sired password and input it
again to verify it to enter the Parental Control setup menu.
* For t he rati ng leve l setup o f Paren tal Con trol of t he DVD player, p lease refer to
the r elati ve cont ent of LO CK setu p menu for details.
Acce ssori es: Par ental C ontro l
The P are nta l Contr ol func tion of a D VD play er can co ntrol t he play back of m ovie
rat ed leve l in a disc . Can set t he DVD player(include software player in PC) to be a
cer tain ra ting le vel wit h SETUP MENU on TV screen.If the rating level set in the
dis c is higher than one set in the DVD player, t he DV D player can not playback the
dis c. Some times t he Pare ntal Co ntrol s equences in some discs are different from
eac h other. T he ra tin g level s etup ca n be prot ected b y the password. Therein, if you
select Unlock item, the Parental Control function will be invalid, the c ont ent o f dis c
wil l be played totally.
The d isc m ovi e can be de signe d as that t he DVD pl ayer will playback the different
ver sion of c onten t of a same m ovie ac cordi ng to the d iffer ent r ati ng leve l set by
Par ental C ontro l. Depend on the DVD feature of seamless switching described above,
the s cenes t hat are n ot fitt ing for c hildren will be cleared or replaced by the other
fit ting sc ene aut omatically.
All ra ting le vels of P arent al Cont rol are a s follo ws:
Unlock
1 Kid S afe
2 G
3 PG
4 PG 13
5 PG R
6 R
7 NC 17
8 Adul t
AM/FM Antenna
BLACK
BLACK
BLACK
Rear View Camera
YELLOW
Reversal line White
Parking Line Green
Fixing Screw Bolt
Fixed ISO Female Connector
GRAY
GRAY
VIDEO OUT
YELLOW
YELLOW
BLACK
RED R
WHITE L
BLACK
FRONT RCA LINE OUT
SUBWOOFER
BLACK
GREEN
BLACK
USB LIN E IN
BLACK
AV IN
RED R
WHITE L
YELLOW VIDEO
GREY
GREY
RED R
WHITE L
REAR RCA LINE OUT
Rear View Camera
In any mode, the video signal will switch to camera mode (if applicable)when car is in reverse.
After taking the car out of reverse, it will resume to its previous mode.
Analog on-site backup Analog on-site backup
PIC
ANGLE
Warning:
Always check the surrounding environment. Objects might be reversed. The rear view
cam era is de signed only to assist while reversing. Due to the limitations of th e camer a
angle and range, it may cause accidents if the driver relies sole ly on the r evers e camer a
and display.
Page 10

9
26
1.8 UNI T INSTALLATI ON
INSTALLATION INSTRUCTIONS
TO BOOS T UP THE CAPA BILIT Y OF
ANTI-JAMMING, PLEASE FIX THE
METAL ST RAP ON THE M ETAL
CONNECTED TO THE CHASSIS OF
THE CA R.
METAL STRAP
DASH B OARD
SLIDING METAL HOUSING
TO DRAW THE CHASSIS OUT OF THE
SLID ING METAL H OUSIN G, INSE RT
THE LE FT AND RIGH T KEY PLATE S
INTO TH E TWO SID ES OF CHA SSIS.
FRONT PANEL
PLASTIC TRIM OUT
UNIT CHASSIS
SELECT THE PROPER TABS
OF THE SL IDING M ETAL
HOUS ING TO FIX T HE
SLIDING METAL HOUSING.
NOTE
REMOVE THE DECK TRANSPORT
SCRE WS BEFO RE INSTAL LING IT.
THE UNIT INSTALLATION IS ANTI-THEFT ONE. THE UNIT CHASSIS WEARS A SLIDING METAL HOUSING.
FIRSTLY CONNECT THE POWER LINES, SPEAKER LINES AND AUTO ANTENNA ACCORDING TO MANUAL
REQUIREMENT, THEN INSTALL THE SLIDING METAL HOUSING IN A CAR ACCORDING TO THE DIAGRAM.
REMOVE THE SLIDING METAL HOUSING
EJECT BUTTON
RESET BUTTON
4.25. 6 DIGITAL SETUP
OP MO DE
It is for selecting audio output mode
DYNAMIC RANGE
After s ele cti ng t he co mpr essio n mod e of LI NE OUT, set t he it em, s o yo u can
adjust the linear compression ratio. If you set it to be FULL, the Peak-to-Peak
value of the audio signal is the minimum; if you set it to be OF F, the Pe ak -to Peak va lue i s the m ax imu m.
DUAL MON O
It is for s ele cti ng a d esi red audio output mode for the left and right ways of signal.
It is mai nly f or Ka ra oke o f Ac3. T her e are 4 m od es in a ll as f ollows:
STERE O, MO NO L, M ONO R, MI X MON O.
The Description of the Fixed ISO Female Connector
CONNECTOR A
1.
2.
3.
4. Memory +12V
5. Auto Antenna
6.
7. 12V (To Ignition Key)
8. GROUND
CONNECTOR B
1. Rear Right Speaker (+)
2. Rear Right Speaker (-)
3. Front Right Speaker (+)
4. Front Right Speaker (-)
5. Front Left Speaker (+)
6. Front Left Speaker (-)
7. Rear Left Speaker (+)
8. Rear Left Speaker (-)
FUS E 10 A
Page 11

25
10
2. Comm on Op er ati on
1. To tur n on/of f the u nit
Under power off mode, press the POWER button to turn on the unit.
Under p owe r on m ode , press a nd ho ld t he PO WER but ton o n th e fro nt pane l
or brie fly p re ss th e POWER b utt on o n the r emote c ont ro l to tu rn off the uni t.
2. To sel ect fun ction m ode
Press t he MO DE b utt on to sel ect T UNER, D ISC
(Afte r ins er tin g a disc) , USB ( Af ter i nsert ing a
USB sto rag e) , Car d(Aft er in se rti nga MMC o r SD
card) ,AV IN ,AU X, BLU ETO OT H or SE TUPmode.
Press a nd ho ld t he BA ND butt on to t ur n on
shift t hen r ot ate t he VOL kno b or t he
direction
butto ns to s elect function mode; you can
also us e the d ir ect ion but ton s to s elect
funct ion m od e and p ress OK t o con fi rm.
Durin g playing , select the to up to t he m ain M enu.
Press a nd hold the MODE button the display can be turned off but the unit
keeps w ork in g, wh en we pre ss wh at eve r butto n it re tu rns o n.
Note: This u nit h as f ron t and rea r USB. On ly on e will wo rk at a tim e.
3. To adjust sound level
Rotat e the V OL kn ob or pre ss or h ol d the + o r - butto n to directly adjust the
volum e lev el .
4. To mut e sound
Press t he MU TE b utt on on rem ote c on tro l to turn o n/o ff MUTE mode.
Brief ly pr es sin g the POW ER bu tt on on t he fron t pan el a lso c an turn o n/o ff
MUTE mode.
5. To dis play th e time
Press t he CL K bu tto n on remo te co nt rol ler to di spl ay c loc k time on t he sm al l
monitor of the front panel in DISC/USB/SD-MMC modes, while under RADIO
mode it i s always displayed.
6. To sel ect a pre set EQ mo de
Press t he EQ b ut ton t o select the preset music equalizer curves: FLAT,
CLASS IC, R OC K, PO P, EQ OFF . T he so un d eff ect w ill be ch anged.
7. To rem ove the f ront pa nel
Press t he RE L but ton on th e fro nt p ane l to deta ch th e fr ont p anel fr om th e
unit, t hen y ou c an re move th e fro nt p ane l.
8. To tur n on/of f LOU DNESS m ode
Press t he LO UD b utt on to tur n on/ off LOUDNESS mode.
When tu rning on LOUDNESS mode, it will enhance bass level immediately
when th e bas s is n ot en ough.
Mode Menu
4.25. 4 VID EO SE TU P
BRIGHTNESS
It is for adjusting the brightness of the video output.
CONTRAST
It is for adjusting the contrast of the video output.
SATURATION
It is for a dju sti ng t he sa tur ation o f the v ide o outpu t.
HUE
It is for a dju sti ng t he hu e of th e video o utp ut.
4.25. 5 SPE AKE R SE TUP
DOWNMIX
It is for selecting your desired sound effect when there is no center speaker
and subwoofer. There are 3 modes: LT/RT, STE RE O, VS S.
LT/RT: When playing a me dia wit h ste reo effe ct , cho ose t heite m, so i t wil l
outpu t audio signal with vivid theatre effect.
STERE O: If y ou ch oo se th e ite m, wh en o utp utt ing aud io si gna l wi th 5.1 channels,
it will o utp ut th e le ft an d rig ht ch an nel s of si gnal ; wh en outputting audio signal
with 2 ch annels, it will output the common 2 channels of stereo signal.
VSS: If you choose the item, when playing a me dia rec ord ed wi th 5 .1 ch ann els,
the mai n cha nne l sp eak ers c an outp ut au dio s ignal with VSS effect.
Page 12

11
24
4.25. 2 LAN GUA GE S ETU P
OSD LAN GUA GE
This it em is f or se le cti ng th e la ngu age o f th e SYS TEM M ENU and all operating
prompt interface displayed during playback.
AUDIO L ANG
This it em is f or se le cti ng a au di o language.
SUBTITLE LANG
This it em is f or se le cti ng a su bt itl e lan guage.
MENU LANG
This it em is f or se le cti ng a me nu l ang uage.
4.25.3 AUDIO SETUP
KEY
It is for s ele cti ng y our d esi re d bas ic mu si c ton e(f rom low t o high).
9. Return control
When me dia p laying, press the button t o up to t he pr ev iou s men u, p res s
menu to u p to th e previous menu till to the main menu.(When playing Video,
please press stop button first)
10. To reset t he un it
when th e dis pla y is i nco rre ct , or th e fun ction b utt ons are n ot ef fec tive or s oun d
is dist ort ed, p re ss th e REL b utt on to d et ach t he fr ont pan el fr om the un it an d
remov e it, t hen u se t he sh arp e nd o f a thi ng to press the RESET button, which
will re set t o fac to ry de fau lt , and r e-i nstat e the c orrec t functions.
11.To adjust sound modes
To adjust the sound modes, briefly and repeatedly press the SEL button o n th e
front p ane l to se le ct on e of th e so und m ode s su ch as : V OL, B AS(wi tho ut pres et
EQ), TRE (wi tho ut pr es et EQ ), BA L, FA D.
12. To do setu p
In setu p mod e, se le ct th e GEN ER AL, C LOC K, AUDIO ,
VIDEO , RAD IO (r ot ate t he vo lu me tu ne or t he dire cti on
butto ns) as fo ll ow:
GENERAL SETUP
Wallpaper: this function allows to choose the display
bac kg rou nd.
Logo: t his f unc ti on al low s to c hoo se th e start ing s creen .
Beep: c hoo se th e bu tto ns' s ou nd on /of f
CLOCK SETUP
Clock m ode : sel ec t 24 HO UR or 1 2 HO UR.
Clock t ime : adj us t the c loc k.
AUDIO SETUP
Loud: choose between Loudness ON/OFF.
EQ: cho ose b etw ee n the d iff ere nt t ype s of EQ .
VIDEO SETUP
Standard Vide o: After s ett ing b ri ght nes s, c ont ras t,
sat uration, hue, tap it to turn to the
pre se t mod e.
Brightness
Contr ast
Satur ati on
Hue
RADIO SETUP
Radio region: choose the radio zone.
RDS set tin g: ON /O FF
Note: P res s and h ol d the B AND t o tu rn on S HIF T to do
select all the functionby the rotate VOL, after
selecting, press the SEL to confirm, or you can
also us e the d ire ct ion b utt on s to do s ele cting .
CLOCK SETUP
AUDIO SETUP
RADIO SETUP
GENERAL SETUP
VIDEO SETUP
Page 13

12
23
3. Radio Operation
1. BAND BUTTON
In RADIO mode, press the BAND button on the remote
control or on the front panel to select your desired radio
band of FM1, FM2, FM3, AM1 and AM2, and the selected
band will be displayed on the small monitor of the front panel.
2. TUNE/SEEK UP/DOWN BUTTONS
In RADIO mode:
1) Press and hold the >>|/|<< button to automatically search
up/down for a available station from the current frequency.
2) Briefly press the >>|/|<< button to manually search up or
down with step by step for your desired station from the
current frequency.
3. APS BUTTON
In RADIO mode:
1) When pressing and holding the APS button, the radio
searches from the lowest frequency and checks the signal
strength level until 1 cycle search is finished. And then the 6 strongest stations are preset to the
corresponding preset number memory bank. The APS operation is implemented in each bank of
the selected band. When the APS operation is finished, the radio executes the preset scan, and
after preset scanning for one cycle, it will stop scanning and broadcasting the No.1 station for
FM1.(It can store 3x6 stations for FM and 2x6 stations for AM in all)
2) When briefly pressing the APS button on the front panel or the remote control, the radio searches
for each preset station from the M1. When the field strength level is more than the threshold level
of the stop level, the radio holds at that preset number for few seconds with releasing mute, and
then searches again. After finishing a circle of searching, it will stop searching on the M1.
NOTE: In FM band, FM1,FM2,FM3 is checked one at a time.
In AM band, AM1, AM2 is checked one at a time.
4. PRESET STATION [ 1-6 ] BUTTONS
1) To memorize the current frequency on the current band, press and hold any one of the six
Number buttons (1-6) .
2) To recall the memory station on the current band, press one of the Number buttons [1-6] .
5. STEREO/MONO BUTTON
Press the ST button on the remote control to select the STEREO or MONO sound mode for
FM band.
6. LOC BUTTON
1) When the signal of the distance radio station are very weak and the receiving effect is bad during
tuning, check whether there is the word LOC on LCD. If there is the word LOC on LCD, press this
button to turn off the LOC function, then tune again for the distance radio station;
2) When the signals from the local radio stations are too strong, this could lead to interference.
press this button to turn on the LOC function, and the LOC icon will be lit up on the LCD.
Re-tune for the local station required.
For the D VD Sy ste m Me nu, t her e are 6 set up pages in all. They display as follows:
4.25.1 SYST EM SE TUP
TV TYPE
The setup item is for matching TV screen size.
4:3 PS: Choose the item when connecting a TV set w ith 4 :3 sc re en. W hen p layin g
the pic tur es wi th 1 6:9 s ize , the lef t and r ight pa rts o f the v id eo wi ll be c ut out,
and dis pla y in fu ll s cre en.
4:3 LB: Choose the item when connecting a TV set w ith 4 :3 sc reen. When playing
the pic tur es wi th 1 6:9 size, the top and bottom parts of the TV screen will be
turne d int o a bla ck s quare respectively.
16:9: Choose the item when connecting a TV s et wi th 16 :9 wide screen.
The vid eo ou tpu t of t he un it is o nly in NT SC fo rmat.
PASSWORD
This se tup i tem i s fo r loc kin g or unlo cki ng the ra tin g lev el o f the P are ntal Co ntr ol.
The defaulted state is locked. The defaulted password is 0000.
You ca n set a n ew pa ss wor d tha t yo u lik e: Select the PASSWORD item and then
press t he > bu tto n to e nte r it, t hen input the original password 0000, and then
press t he OK b utt on t o unl ock i t. Pres s the > b utton t o ent er it again, then input
a new pas swo rd th at y ou li ke an d then pr ess t he OK but ton t o mak e it e ffe cti ve.
Before the other persons see the Manual, you should get the password in m ind
and cut o ut th e par t of PAS SW ORD i n the M anual .
RATING
The ite m is fo r set ti ng a ne w rat ing lev el of t he Pare nta l Con tr ol.
1. Sele ct th e PASS WOR D it em an d the n press t he > bu tto n to e nte r it, t hen inp ut
the pas swo rd mentioned above, and then press the OK button to unlock the
setti ng of t he ra ti ng le vel o f the Par ent al Control.
2. Sele ct th e RATI NG it em a nd th en pr ess the > b utt on to e nt er it , the n use the
direc tio n but to ns to s ele ct your d esi red rat ing l eve l, t hen p res s the OK bu tto n
to conf irm .
3. Select the PASSWORD item again and then press the > b utton t o ent er it, th en
input t he pa ssw or d, an d the n press t he OK b utton t o loc k the n ew s ett ing o f
the rat ing l eve l of t he Pa ren tal Con tro l.
DEFAULT
This it em is f or ma ki ng al l set up item s cha nge bac k to or igi na l sta tus .
RADIO interface
Page 14

13
22
7. PTY (P ROG RAM TYP E) BU TTO N
Press the PTY button shortly to select one of the following mode:
PTY MUSIC gr oup - - PTY SPEECH group- - PTY OFF
When PTY group is o n, pr ess the V OL+ or VO L- butt on on the r emo te
contr oller or rotate the VOL knob on the front panel to select one of PT Y
progr ams: <-->NEWS<-->AFFAIRS<-->INFO<-->SPORT<-->EDUCATE
<-->DRAMA<-->CULTURE <-->SCIENCE<--> VARIED<-->WEATHER<-->
FINAN CE<-->CHILDREN<-->SOCIAL<-->RELIGION<-->PHONE IN<-->
TRAV EL< -- >LE IS URE<-->DOCUMENT< -->PTY NONE<-->POP M< -->
ROCK M< -->EASY M<-->LIGHT M<--> CLASSICS<-->OTHER M<-->
JAZZ< -->COUNTRY<-->NATION M<-->OLDIES<-->FOLK M<-->
When
PTY group is o n, pr essin g the 6 n um ber b utt on s als o can s el ect o ne of
PTY progra ms as a bove.
After selecting one of the PTY programs, it will display PTY SEEK and
autom atica lly sea rch f or t he st at ion o f the PTY p rog ra m. If t he stat ion of
the PTY p rog ram doe s not exi st, it wi ll di sp lay P TY NONE a nd th en r etu rn
back to t he norm al st at ion .
8. AF [ALTE RNAT IVE F RE QUE NCIES ] BUTTO N
When pr essed t he AF butt on sh or t, th e AF sw itc hing mo de is sel ected a nd
the sta te of the AF s wit ch ing m od e is di sp lay ed by AF seg ment in display.
Segme nt off: AF swit ching m ode off.
Segme nt on: AF sw itc hing mode on, and has RDS information.
Segme nt flas hin g: AF s wit ch ing m od e on, b ut RDS in forma tion is n ot
recei ved y et .
When th e AF switc hing mo de is s el ect ed , the r adio ch ecks the signal strength
of the AF al l the tim e. Th e inter val of ch eck in g tim e of e ach AF s de pen ds on
the signal strength of the current station, from a fe w minut e for t he s tro ng
stati on to a few s eco nd s for t he w eak s ta tio n. Ever y time th at a new AF is
stronger than the current station, it switches over to that frequenc y for v er y
short t ime, an d the N EW F REQ UE NCY i s dis pl aye d fo r 1-2 s ec ond. Because
the mut e time of t he AF sw it chi ng o r the c he cki ng time i s very sh ort, it i s
almos t inaudible in case of normal program. (When AF flash on LCD, it will
searc h for the s tro ng er RD S st ati on . If AF an d TP fl ash on LC D, it c an o nly
searc h for the t raf fic ann ounce men t st ati on ).
In FM mod e, when AF i s on, S EE K, (S CA N), AU TO- ME MOR Y fun ction c an
only re ceive a nd save t he RD S pr ogr am .
9. TA [TRAFFIC ANNOUNCEMENT] BUTTON
Press t he TA but ton s ho rtl y to turn o n TA sear ch mo de .
When tr aff ic anno uncem ent is tr ans mi tte d:
1).If t he unit i s in Di sc P lay m od e, it w il l swi tch to ra dio mode temporarily.
2).Temp orari ly swit ch ov er t o an EO N li nke d stati on when E ON dete cts a
traffic an nounc ement o n that ot her p ro gra m, a nd TA, TP will be displayed
on LCD
* TA inte rru pt ion f un cti on:
The c urren t traff ic an nounc ement i s cance lled by p res sing TA button
short ly.
* When TA is on, S EE K, (S CA N), AU TO ME MO RY funct ion can b e recei ved
or save d only wh en tr affic p rogra m ide nt ifi ca tio n co de ha s been re ceive d.
3. Du ring JP EG play back, p ress on e of the >/ </^/v b utton s to chan ge the an gle of
vie wing pi cture t hat is displaying as follows:
>: 90 d eg cw; <: 9 0deg cc w; ^:UP <-->D OWN; v: L EFT<- ->RIG HT
During JPEG playback, press the PROG button to change the mode of refr esh pic ture.
During JPEG playback, press the STOP button to stop playing and retu rn to t he ro ot
men u.
* Dur ing JPE G playback, the following buttons are not available: SLOW-FWD,
SUB TITLE , TIT LE, AN GLE, ST EP, AUDI O, RD M, INT an d A-B.
* In JP EG mode ,the ot her ope ratio ns are sa me as one s in MP3/ WMA mode.
4.22 Ope ratio n about f ile s tyl e of vi deo
1. Th e roo t men u is disp layed o n TV wh en be ginni ng to swi tch on DI SC mode , then it w ill
aut omatically play the first file.
During playback, press the STOP button to stop playing and return to t he ro ot me nu.
2. Wh en disp layin g the roo t menu, p ress th e direc tion bu ttons to select your desired
FOL DER or fi le, the n press t he OK or PL AY but ton t o ope n the F OLDER , or pl ay th e
sel ected f ile.
Whe n displ aying t he root m enu, yo u can als o use the n umber b utton s to sele ct the
ser ial num ber of th e file an d play th e file.
* The AN GLE , PRO G, RDM, I NT an d TITLE/PBC button are not valid.
* The o the r fun ction s are sam e as ones i n DVD dis c; but th e RPT func tio n is same a s
one i n MP3/W MA.
4.23 ESP a nd ID 3 Fun cti on
The re is E SP fu nct ion f or al l forma ts of dis cs.
In MP 3/WMA mo de, dur ing pla yback , the inf ormat ion of th e file na me, fol der nam e,
son g s title , artis t and alb um will b e scrol ling on t he LCD di splay. As l ong a s the
cur rent pl aying M P3 musi c conta ins rel evant I D3 tag in forma tion in v ersio n 1.0/2 .0
for mat, th e 3 items u nderl ined ab ove wil l be scro lling o n the LCD d ispla y; othe rwise ,
the y will no t.
4.24 USB a nd MMC/ SD Read er Oper ation
Pow er on the u nit, th en inse rt the US B stora ge or MMC /SD Car d(fir stly fl ip down t he
fro nt pane l), and t hen the m onito r will display the root menu of the USB storage or
MMC /SD Car d.
All th e opera tions a re same a s ones of t he corresponding format.
Whe n you wan t to pull o ut the Ca rd, fir stly pu sh it, an d then pu ll it out .
4.25 The D VD Sy ste m Men u Setup O perat ion
1. Pr ess the S ETUP bu tto n on th e remot e contr oll er to a cce ss th e DVD S ystem M enu on
the m onito r.
2. Th ere a re 6 se tup pag es in all f or the System Menu. Press the > or < bu tto n to select
an de sired s etup pa ge.
3. Pr ess the ^ o r v butto n to sele ct an set up item i n the sel ected s etup pa ge.
4. Pr ess the > b utton t o enter t he setu p item. T hen p res s the v or ^ bu tto n to se lec t a
des ired mo de of the s etup it em, fin ally pr ess the O K butto n to conf irm it.
* Pre ss the < bu tton to r eturn t o the upp er leve l.
* Pre ss the SE TUP but ton a gai n or use th e direc tion bu ttons t o highl igh t the i tem o f the
EXI T SET UP an d the n press the OK button to exit the System Menu.
Page 15

21
14
4. Basi c Disc, U SB or MMC /SD O pe rat io n
4.1 Beg in play back
1. Pres s the POW ER bu tt on br ie fly t o turn on t he DVD pl ayer.
After tu rning o n the D VD p lay er, p lea se t urn o n the mon itor, and ensure that
the vid eo outp ut of the m oni to r is th e vi deo i nput fr om the DV D playe r
conne cted wi th the mo nit or.
? Commo n Quest ion
Q: Th er e is no t anyth ing is di splay ed on TV scree n when th e DVD p la yer i s
turned on. How to solve the problem?
A: Ensu re that t he TV w as set to r ight vi deo input(not TV channel); for
examp le, if yo u make VI DEO 1 IN PUT o f TV an d DVD pla yer connected
with ea ch othe r, then yo u nee d se t TV to V IDE O1 .
2. Pres s the REL EASE bu tto n to d eta ch t he fr ont pan el from t he unit .
3. Inse rt a disc i nto t he D ISC S LO T(L abel su rface up), then flip up the
front p anel ti ll he ar ing a c li p.
NOTE
1. For so me disc s that ar e ser io usl y sc rat ched or p oor man ufact uring o r
recor ding qu ality, it may n ot play.
2. If the p layer c an not re ad di sc u nde r no rma l condi tion, p lease t ry to
eject a nd relo ad the di sc ag ai n.
3.
nsert a n USB or MM C/SD Ca rd in to t hei r sl ots r espec tivel y, the n the roo t
menu wi ll be dis playe d on th e mo nit or a nd it w ill pla y audio file automatically
if the US B or MMC/ SD Ca rd i ncl ud e aud io f ile s.
Remark:
1) In add ition t o norma l CD an d DV D, th is u nit s uppor ts to pla y CD-R,
CD-R/ W, DVD-R a nd DVD-R/W as well; however, depe nding on the
condi tions o f the rec ord in g equ ip men t, reco rding p rogra m or the di sc
itsel f, some C D-R , CD -R/ W, DV D-R o r DV D-R /W may no t play.
2) When dealing with CD-R, CD-R/W, DVD- R or D VD- R/ W rec ordin g,
too hig h recor ding sp eed m ay r esu lt i n poo r signa l quali ty and therefore,
it is rec ommen dable t o sel ec t as lo we r as po ssibl e recor ding speed.
4. Play U SB & Card
I
4.20 Pr ogr am P lay bac k
It allows you to enter the order in which you want some chapters/track s in
DVD/V CD/ MP 3/W MA/ CD d isc t o play.
1 Durin g pla yb ack , pre ss t he PR OG butt on to e nt er a pr ogr am i nte rface a s
follows:
2 Use the d ire ct ion b utt on s to mo ve cursor onto the desired place for inputting
the sequence number.
3 Use the n umb er b utt on to i np ut de sired s equ en ce number of title/chapter/
track w ith d es ire d sequence.
4 Use the d ire ct ion b utt on t o mov e cursor onto Play item, then press the OK
butto n to play the programmed titles/chapters/tracks in programmed order;
only pr ess in g the P LAY bu tto n also ca n pla y the pro gra mm ed titles/chapters
/trac ks in programmed order.
* To exit p rogra m pla yb ack , first ly pr ess the S TOP b utt on, t he n pre ss the PL AY
butto n to en ter seq uen ce p lay back; o r pre ss t he PR OG bu tt on tw ice aga in.
* To remo ve the al l pro gr amm ed sequ enc e numbers, move the cursor onto
Clear i tem , then pr ess t he O K but ton.
* To change the programmed sequence, move the cursor onto the item you
want to c han ge , inp ut th e de sir ed sequ enc e nu mbe r.
* Durin g VCD p la yba ck, i f it i s in PB C ON mode , at th e sa me ti me of e nt eri ng
the sta te of p rogra m pla yb ack , it turn s off P BC mo de .
4.21 Pl ayb ac k the P ict ur e CD in J PEG For mat
1. The root menu is displayed on the monitor when beginning to swi tc h on DI SC
mode. At the time, it plays MP3/WMA file.(the TITLE or MENU button is no t
available).
In the ro ot me nu, the l eft f il e sor t icon is f or MP 3/WMA fi le; t he m idd le file s ort
icon is f or JP EG file ; the r ig ht fi le sort i con i s for VID EO fi le . If on e of thes e 3
file so rt do es n ot ex ist , yo u can n ot move c urs or onto t he fi le s ort i con.
2. When d isp la yin g the r oo t men u, pres s the d ir ect ion b ut ton s to sele ct yo ur
desir ed FO LD ER, f ile o r fi le so rt icon , the n press t he OK o r PL AY button t o
open th e FOL DER, or p lay t he s elected file, or play only this sort of file.
When di spl ay ing t he ro ot m enu , you can a lso u se t he nu mbe r bu tto ns to
selec t the s erial n umb er o f the f ile and p lay t he f ile .
When yo u sel ec t a JPE G fil e so rt ic on, pre ss th e ^ or > butt on to s el ect t he
first J PEG f ile, th en pr es s the v b utton t o sel ect the d esi re d JPE G file, f inally
press t he OK o r PLAY/PAU SE b utt on to dis pla y the JPE G pic tu re in f ull scr een
from th e sel ected J PEG p ic tur e.
Page 16

15
20
: select to pause playback.
: select to stop playback .
:select one of them can switch on between
the speed levels of fast backward or forward.
(Except image mode.)
: select one of them can s ele ct n ext o r
previ ous c ha pte r/tra ck.
: select to turn volume up and down.
: select to turn the selecting page up and
down.
: select to RDM play mode as the remote control.
(Only f or mu si c mod e.)
: To select audio language.
: Same as t he PR G bu tto n on the re mot e co ntr ol.
: Same as t he A-B b ut ton o n the rem ote c on tro l.
: Same as t he RE PE AT button o n the r em ote
contr ol.
: Same as t he SUBTITLE button on the remote
contr ol.
: To select the track/chapter from 1-9 and then
select OK to play your selecting.
: Durin g playb ack, pr ess t he Z OOM
butto n and the n tap o ne o f the m ar e sam e as
the dir ectio n but to ns on t he R emo te C ont rol.
(Exce pt musi c & ima ge m ode .);During playback,
press o ne of the m to ch an ge theplayback angle.
(Only f or imag e mod e. )
: Same as t he ZOOM b utt on o n the r em ote c ontro l.
: Select to play step by step, select >II to turn to normal play.
: To select the track/chapter from0-9 and then select OK to play your selecting.
Key board i nterf ace-1
Keyboard int erfac e-2
Press a nd hold B AND to tu rn on S HI FT.
Interface for MUSIC
Keyboard int erfac e-3
ZOOMx 2,ZOO Mx3 ,Z OOM x4 ,ZO OMx1/ 2,ZOO Mx1/3 ,ZO OM x1/ 4, ZOO M OFF.
Press o ne of the ^ /v/ >/ < but to ns to s el ect t he area y ou want to enlarge.
4.17 Ch ange th e Capti on Language
In the st ate of DV D dis c pl ayi ng , pre ss t he SU BTITL E butto n repeatedly to
selec t the lan guage o f the c ap tio n or t urn o ff th e ca pti on .(depend on the
disc us ed.)
In the st ate of VC D/M P3 /WM A/ CD di sc p lay ing, th e butto n is not available.
4.18 Ch ange th e Audio La nguage
1. In the s tate of D VD di sc p lay in g, pr es s the AU DIO but ton repeatedly
on the IR r emote c ont roller to select the desired language type.
(depe nd on the d isc use d)
2. In the s tate of V CD di sc p lay in g, pr es s the AU DIO but ton repeatedly to
selec t the sou nd mode o f the M ON O L, MO NO R , MIX M ONO and S tereo ,
no lang uage function.
3. In the s tate of C D/W MA /MP 3 di sc pl ay ing , the AUDI O butto n is invalid.
4.19 Lo ok over t he Play bac k St atu s
1. In the s tate of D VD di sc p lay in g, pr es s the O SD butt on repe atedl y on th e
remote controller to turn on/off the playback status. When it is o n, it wil l
displ ay the in forma tio n su ch as : th e ser ial num ber of th e playing title, the
seria l numbe r of the pl ayi ng c hap te r, the elapsed time of the playing chapter,
the rem ained t ime of th e playing chapter, t he e lap se d tim e of the pl aying t itle,
the rem ained t ime of th e pla yi ng ti tl e, et c.
2. In the s tate of V CD/ CD d isc p la yin g, p res s the OSD b utton r epeatedly on the
remot e contr oller t o tur n on /of f the p la yba ck s tat us . Whe n it is on, i t will
displ ay the in forma tio n su ch as : th e ser ial num ber of th e playing track, the
elaps ed time o f the pla yin g tr ack , th e rem ained t ime of th e playi ng trac k, th e
elaps ted tim e of th e di sc, t he r ema in ed ti me of the d isc.
3. In the s tate of M P3/ WM A disc p la yin g, p res s the OSD b utton repeatedly on
the rem ote con tro ll er to t ur n on/ off t he p lay ba ck st at us. W hen it is o n, it wil l
displ ay the in forma tio n su ch as : th e ser ial num ber of th e playi ng trac k, th e
elaps ed time o f the pla yin g tr ack , th e rem ained t ime of th e playi ng trac k.
Page 17

4.2 Pau se Pl ayb ac k
In the st ate o f DVD /V CD/ CD/ MP3/W MA dis c pla yi ng, p res s the PAUSE
butto n on IR r emo te c ont roller to pause the playback, press the PLAY
butto n to re sum e no rma l pla yback .
4.3 Sto p Pla yba ck
In the st ate o f DVD /V CD/ MP3 /WMA/ CD di sc pl ay ing , pre ss the STOP butto n
once to pause the playback, then press the PLAY button to resume the normal
playb ack ; pre ss t he ST OP butto n twi ce to ful l sto p the p layback, then press
the PLAY bu tto n to s tar t pla yback f rom t he beginning of the first chapter/track.
4.4 Select Chapter/Track with the UP/DN or the >>| / |< < But ton
Press t he UP /DN b ut ton o n the f ront pa nel o r the > >| / | << bu tto n on the
remot e con troller during playback to select the next or last chapter/track to
playb ack .
Note: P res s the U P/ DN or t he >> |/|<< b utt on mu lt ipl e tim es to adv anc e
mul ti ple c hapters/tracks forward or backward.
4.5 Select Chapter/Track with the Number Buttons
In the st ate o f DVD /V CD( PBC O FF)/M P3/ WMA /C D dis c pla ying, p res s one
of the 1~ 9 and t he 0/ 10 n umb er bu ttons t o dir ect ly s ele ct an d pl ay th e 1st t o
10th tr ack /ch ap ter ( the 0 /10 but ton i s use d as t he 10 b utton).
If you wa nt to play the track/chapter that s ser ial num ber i s bigger than 10,
use the 1 0+, 1 ~9 an d 0/ 10 bu tto n. For ex amp le 1, t o pl ay th e 13t h track /
chapt er, fi rst ly p res s the 1 0+ butt on on ce, t he n pre ss th e 3 bu tto n. Fo r
examp le 2, t o pla y th e 34t h tra ck/chapter, f irs tly p re ss th e 10+ b utton f or 3
times , the n pre ss t he 4 bu tto n.(th e 0/1 0 but to n is us ed as t he 0 butt on)
Note: l ong p res si ng th e +10 o r -10 but ton c an pl ay t he ne xt 10 o r la st 10
chapter/track(only for MP3/WMA).
4.6 Select Chapter/Track with the Root/PBC Menu (If the disc includes th e
root/ PBC menu)
In the st ate o f DVD d is c pla yin g
1. Pres s the T ITL E but to n on th e rem ote con troller to display the title list.
2. Pres s the d ire ct ion b utt ons to se lec t you r de sir ed ti tl e, an d the n press t he OK
or PLAY but ton t o op en th e roo t menu of t he se lecte d tit le.
3. Pres s the d ire ct ion b utt ons to select your desired chapter, fin all y pr ess t he
OK or PLAY bu tto n to p lay t he se lecte d cha pter.
Durin g playback, pressing the MENU button can directly display the root
menu of t he ti tle t ha t is pl aying.
19
16
4.12Playback in Scan Mode
1. In the s tate of V CD( PB C OFF )/ CD di sc p lay ing, pr ess the I NT bu tton to p lay
the pre vious 1 5 secon ds pa rt o f eac h tr ack o n the dis c. Pres s the INT button
again to resume normal playback.
2. In the s tate of D VD/ MP 3/W MA di sc pl ay ing , the INT b utt on i s not available.
4.13 Pl aybac k from a sp eci fi ed chapter/track or a spe ci fie d time
1. In the s tate of D VD di sc p lay in g, pr es s the SEARCH button to display a
inter face an d highl igh t th e tit le i tem , then us e the num ber buttons to input
the ser ial num ber of th e tit le ; use t he d ire ction b utton s to highlight the chapter
item, t hen use t he nu mb er bu tt ons t o in put t he serial number of the chapter;
you can s till us e the dir ect io n but to ns to highlight the time item, then use the
numbe r butto ns to i np ut th e de sir ed t ime t o start p layba ck; fin all y pr ess t he
OK or PLAY bu tt on to p la y the s elect ed chap ter or pl ay from t he se le cte d ti me.
2. In the s tate of V CD/ MP 3/W MA /CD d is c pla ying, p ress th e SEARC H but to n to
displ ay a inte rface a nd highlight the track item, then use the number buttons
to input the serial number of the track; you can still use the direction buttons
to highlight the time item, then use the number buttons to input the desired
time to s tart pl ayb ac k; fi na lly p re ss th e OK or PLAY butt on to play the selected
track o r play fr om th e se lec te d tim e.
Note: To select a s ong, pr ess the “0/10” bu tton to c lear th e cur re nt di sp lay ed
selection until “0” is displ ayed, a nd th en i npu t yo ur se le cti on.
4.14 Playback in Random
In the st ate of DV D/V CD (PB C OF F)/ MP 3/W MA/CD d isc pla ying, p res s th e
RDM but ton to sw itc h be twe en R AND OM ( ON) /RAND OM OFF. Whe n in
RANDO M (ON) mo de, i t wi ll pl ay i n ran do m.
4.15 Pl aybac k in Differe nt Angle
1. In the s tate of V CD/ MP 3/W MA /CD d is c pla ying, t he ANGLE b utton o n the
IR remo te cont rol le r is no t av ail able.
2. In the s tate of D VD di sc p lay in g, pr es s the AN GLE but ton rep eated ly on
the IR re mote co ntr ol ler t o vi ew in d iff er ent a ng le. (T his f uncti on is onl y
for the D VD disc s wit h ANG LE fu nc tio n)
4.16 Playback in Zoom Mode
In DVD/ VCD mod e, du ri ng pl ay bac k, p res s the ZOO M butto n continuously
to enlarge a cert ain are a of th e im age s on t he screen with these multiples:
Page 18

17
18
In VCD mo de
1. When s tarti ng to t ur n on th e PB C fun ct ion , it will p lay from the beginning of
the dis c till it d isp la y the P BC m enu o n TV sc re en if t he d isc i nc lud e the PBC
menu.
2. Pres s the num ber but ton s to s ele ct y our d esire d track t o play.
In MP3/ WMA mode
1. Th e ro ot me nu is dis playe d on the monitor screen all the time(and the TITLE
or MENU b utton i s not a va ila bl e).
2. Pres s the dir ectio n but to ns to s el ect y our des ired FO LDER, t hen p re ss th e
OK or PLAY bu tt on to o pe n the F OLDER , and the n press t he direction buttons
to select your desired file, finally press the OK button to play the selected file.
In CD mod e, the TITLE , PBC, ME NU butt ons a re d isa bl ed.
4.7 Terminate the Playback
1. Pres s the REL EASE bu tto n to d eta ch t he fr ont pan el from t he unit , the n pr ess
the EJECT button to eject disc, and then remove the disc and flip up the fr on t
panel t ill hea ring a cl ip.
2. Long p ress th e POWER b utt on o n the f ro nt pa nel or br iefly p ress th e POWER
butto n on the re mot e co ntr ol ler t o tu rn of f the D VD p lay er.
4.8 Playback with Speed
Durin g norma l playb ack , lo ng pr es s the U P/DN bu tton on t he fron t panel o r
the >>|/|<< button on the remote controller continuously t o fas t fo rwa rd s
or back wards a t the f ol low in g spe ed s: x2 , x4, x8, x 20, normal.
Durin g speed p layba ck, p re ss th e PL AY button t o resum e normal playback.
4.9Playback with Slow Speed
Durin g playback , press t he SL OW _FW D bu tto n to exec ute the S low
Forwa rd func tio n.
With ea ch cons ecu ti ve pr es sin g of t he SL OW_FW D butto n, the playback
speed d ecrea ses. The spe ed leve ls in Slo w For wa rd as f ol low s:
x1/2, x1/3, x1/ 4, x1/ 5, x1/ 6, x1/ 7,nor mal.
Durin g slow fo rward , pre ss t he PL AY but ton to re sume no rmal playback.
The f un cti on is onl y for vid eo.
4.10 Pl aybac k with st ill f ra me
If the un it is cur ren tl y run ni ng DV D/ VCD d isc, pr ess the STEP button
conse cutiv ely to di spl ay t he st il l fra me forw ard wit h step by s tep .
Press t he PLAY but to n to re sume no rmal pl aybac k.
4.11 Pla yba ck Repe atedl y
4.11 .1 ONE/ALL Repeat
1. In the m ode of DV D disc pl ayb ac k:
Press t he RPT butto n to sele ct REP CHAPT ER, REP TI TL E, REP ALL
or REP CA NCE L.
2. In the m ode of VC D(P BC O FF) /C D dis c pl ayb ack:
press t he RPT butto n to sele ct REP 1, REP ALL or C ANCEL .
When it i s in the st ate o f PB C ON, d ur ing V CD d isc p layin g, the RP T
butto n are not a vai la ble .
3. In the m ode of MP 3/W MA di sc pl ay bac k:
Press t he RPT butto n to sele ct REP 1, REP DI R, RE P ALL or CANCEL.
4.11 .2 A-B R epe at
Press t he A-B button if you wa nt to r ep eat a s pe cif ic segm ent on a di sc
that yo u defin e:
1. Pres s the A-B butt on at a p oi nt (A ) wh ere y ou w ant i t to be the s tart po int
of the re peat se gme nt . Pre ss t he A-B button again at a poin t (B) whe re you
want it t o be the te rmi na l poi nt o f the r ep eat s egmen t. Th en i t wil l play th e
segme nt repe ate dl y.
2. To can ce l the A- B repea t mode an d resum e norma l pla yb ack , pr ess t he A-B
butto n for the t hir d ti me.
Note:
Durin g VCD/M P3/WM A/C D pl ayb ac k, po ints A and B mu st be within the
same tr ack.
Durin g DVD pla yback , poi nt s A a nd B c an be s elect ed from different chapters.
 Loading...