

Bosch WTL5410UC/10 Owner’s Manual

2
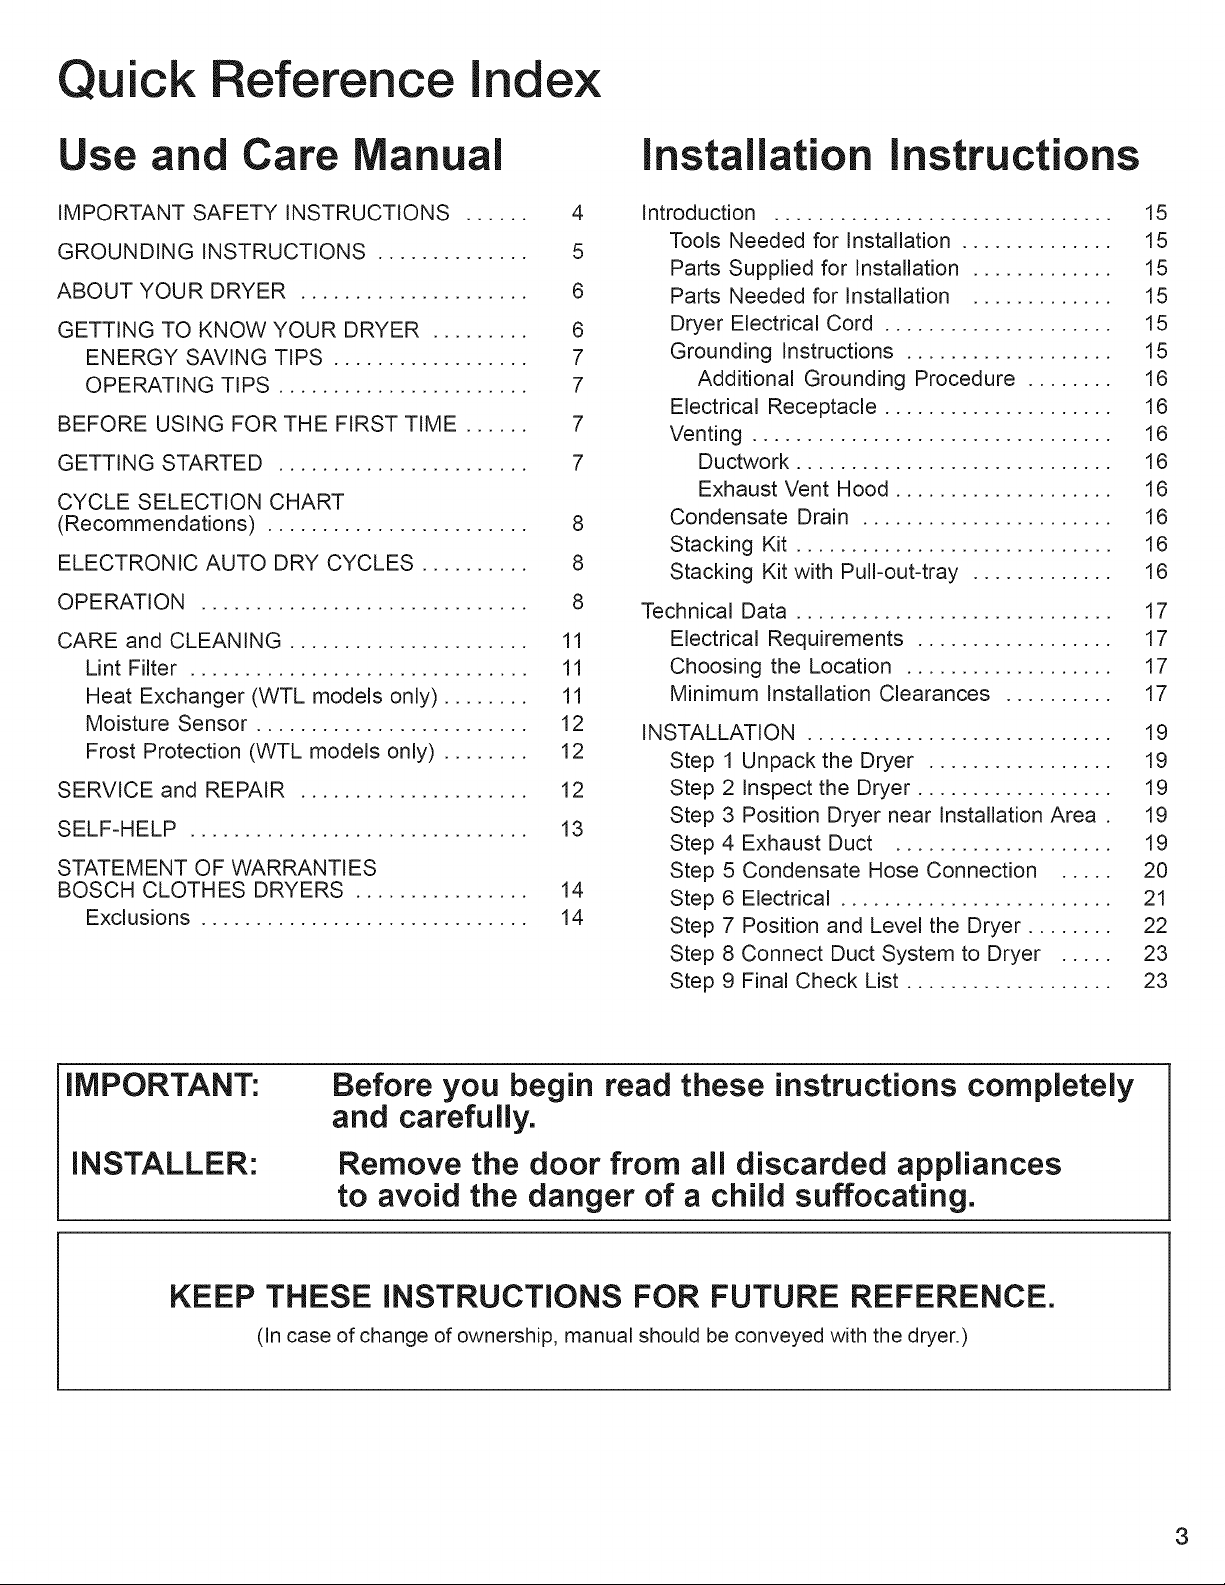
Quick Reference Index
Use and Care Manual
IMPORTANT SAFETY INSTRUCTIONS ...... 4
GROUNDING INSTRUCTIONS .............. 5
ABOUT YOUR DRYER ..................... 6
GETTING TO KNOW YOUR DRYER ......... 6
ENERGY SAVING TIPS .................. 7
OPERATING TIPS ....................... 7
BEFORE USING FOR THE FIRST TIME ...... 7
GETTING STARTED ....................... 7
CYCLE SELECTION CHART
(Recommendations) ........................ 8
ELECTRONIC AUTO DRY CYCLES .......... 8
OPERATION .............................. 8
CARE and CLEANING ...................... 11
Lint Filter ............................... 11
Heat Exchanger (WTL models only) ........ 11
Moisture Sensor ......................... 12
Frost Protection (WTL models only) ........ 12
SERVICE and REPAIR ..................... 12
SELF-HELP ............................... 13
STATEMENT OF WARRANTIES
BOSCH CLOTHES DRYERS ................ 14
Exclusions .............................. 14
Installation Instructions
introduction ............................... 15
Tools Needed for installation .............. 15
Parts Supplied for installation ............. 15
Parts Needed for Installation ............. 15
Dryer Electrical Cord ..................... 15
Grounding instructions ................... 15
Additional Grounding Procedure ........ 16
Electrical Receptacle ..................... 16
Venting ................................. 16
Ductwork ............................. 16
Exhaust Vent Hood .................... 16
Condensate Drain ....................... 16
Stacking Kit ............................. 16
Stacking Kit with Pull-out-tray ............. 16
Technical Data ............................. 17
Electrical Requirements .................. 17
Choosing the Location ................... 17
Minimum installation Clearances .......... 17
INSTALLATION ............................
Step
1 Unpack the Dryer ................. 19
Step
2 Inspect the Dryer .................. 19
Step
3 Position Dryer near Installation Area. 19
4 Exhaust Duct .................... 19
Step
5 Condensate Hose Connection ..... 20
Step
6 Electrical ......................... 21
Step
Step
7 Position and Level the Dryer ........ 22
Step
8 Connect Duct System to Dryer ..... 23
9 Final Check List ................... 23
Step
19
IMPORTANT:
INSTALLER:
KEEP THESE INSTRUCTIONS FOR FUTURE REFERENCE.
Before you begin read these instructions completely
and carefully.
Remove the door from all discarded appliances
to avoid the danger of a child suffocating.
(in case of change of ownership, manual should be conveyed with the dryer.)

Use and Care anual
I PORTA T SAFETY I ST CTIO
WARNING:
1. Bosch dryers are provided with an Use and Care
Manual and an Installation Instruction manual.
Read all instructions before using the dryer.
2. Do not dry articles that have been previously cleaned
in, washed in, soaked in, or spotted with gasoline,
dry cleaning solvents, other flammable, or explosive
substances as they give off vapors that could ignite
or explode.
3. Do not allow children to play on or in the appliance.
Close supervision of children is necessary when the
appliance is used near children.
4. Before the appliance is removed from service
or discarded, remove the door to the drying
compartment.
5. Do not reach into the appliance if the drum is
moving.
6. Do not install or store this appliance where it will be
exposed to the weather.
7. Do not tamper with the controls.
8. Do not repair or replace any part of the appliance or
attempt any service unless specifically
recommended in the user=maintenance instructions
or in published user repair instructions that you
understand and have the skills to carry out.
9. Do not use fabric softeners or products to eliminate
static unless recommended by the manufacturer of
the fabric softener or product.
10. Do not use heat to dry articles containing foam
rubber (may be labeled latex foam) or similarly
textured rubber=like materials. Foam rubber
materials can, under certain circumstances, when
heated become ignited by spontaneous combustion.
To reduce the risk of fire, electric shock, serious injury or death to persons when using your dryer,
follow basic precautions, including the following.
11. Clean lint screen before or after each load.
12. Keep area around the exhaust opening and adjacent
surrounding areas free from the accumulation of lint,
dust and dirt.
13. The interior of the machine and exhaust duct should
be cleaned periodically by qualified service
personnel.
14. Always be sure to unplug the dryer from the
electrical supply before attempting any service.
Disconnect the power cord by grasping the plug, not
the cord.
15. Store all laundry chemicals and aids in a cool dry
place according to the manufacturer's instructions in
an area where children cannot reach them.
16. To reduce the risk of fire, clothes, cleaning rags, mop
heads and the like which have traces of any
flammable substance, such as vegetable oil, cooking
oil, petroleum based oils or distillates, waxes, fats,
etc., must not be placed in the dryer. These items
may contain some flammable substance(s) even
after washing, which may smoke or catch fire by
itself.
17. Do not sit on top of the dryer.
18. To reduce the risk of fire or electrical shock, DO NOT
use an extension cord or an adapter to connect the
dryer to the electrical power supply.
19. The dryer must only be used for its intended
purpose.
20. Always check and empty pockets of any objects that
may have been forgotten. Cigarette lighters, in
particular, present a hazard that can be avoided by
this process.
4
iMPORTANT SAFETY iNSTRUCTiONS (continued)
21. Replace worn power cords and/or loose plugs.
22. Do not operate the dryer with any guards and/or
panels removed.
23. Do not operate the dryer with missing or broken
parts.
24. Do not bypass any safety devices.
25. Do not use plastic or non-metal flexible duct with this
dryer. Plastic or non-metal flexible duct presents
a potential fire hazard.
Notes: A
The IMPORTANT SAFEGUARDS and WARNINGS presented in this manual do not cover all
possible conditions that may occur. Common sense, caution and care must be exercised when
installing, maintaining or operating the dryer.
B
Always contact your dealer, distributor, service agent or the manufacturer about any problems or
conditions that you do not understand.
SAVE THESE INSTRUCTIONS
26. Do not operate this dryer until you are sure the dryer
has been installed according to the INSTALLATION
INSTRUCTIONS and installation and grounding are
in compliance with all local codes and/or other
applicable codes and requirements.
27. Failure to install, maintain and/or operate the dryer
according to the manufacturer's instructions may
result in conditions which can lead to bodily injury
and/or property damage.
GROUNDING INSTRUCTIONS
This appliance must be grounded. In the event of
malfunction or breakdown, grounding will reduce the risk
of electric shock by providing a path of least resistance
for the electric current. This appliance is equipped with
a cord having an equipment=grounding conductor and
a grounding plug. The plug must be plugged into an
appropriate outlet that is properly installed and grounded
in accordance with all local codes and ordinances.
WARNING - Improper connection of the equipment-
grounding conductor can result in a risk of electric shock.
Check with a qualified electrician or serviceman if you
are in doubt as to whether the dryer is properly
grounded.
DO NOT modify the plug provided with the appliance -
if it will not fit the outlet have a proper outlet installed
by a qualified electrician or exchange the cord with
an appropriate one rated for the dryer.
17 16 15 14 13 12
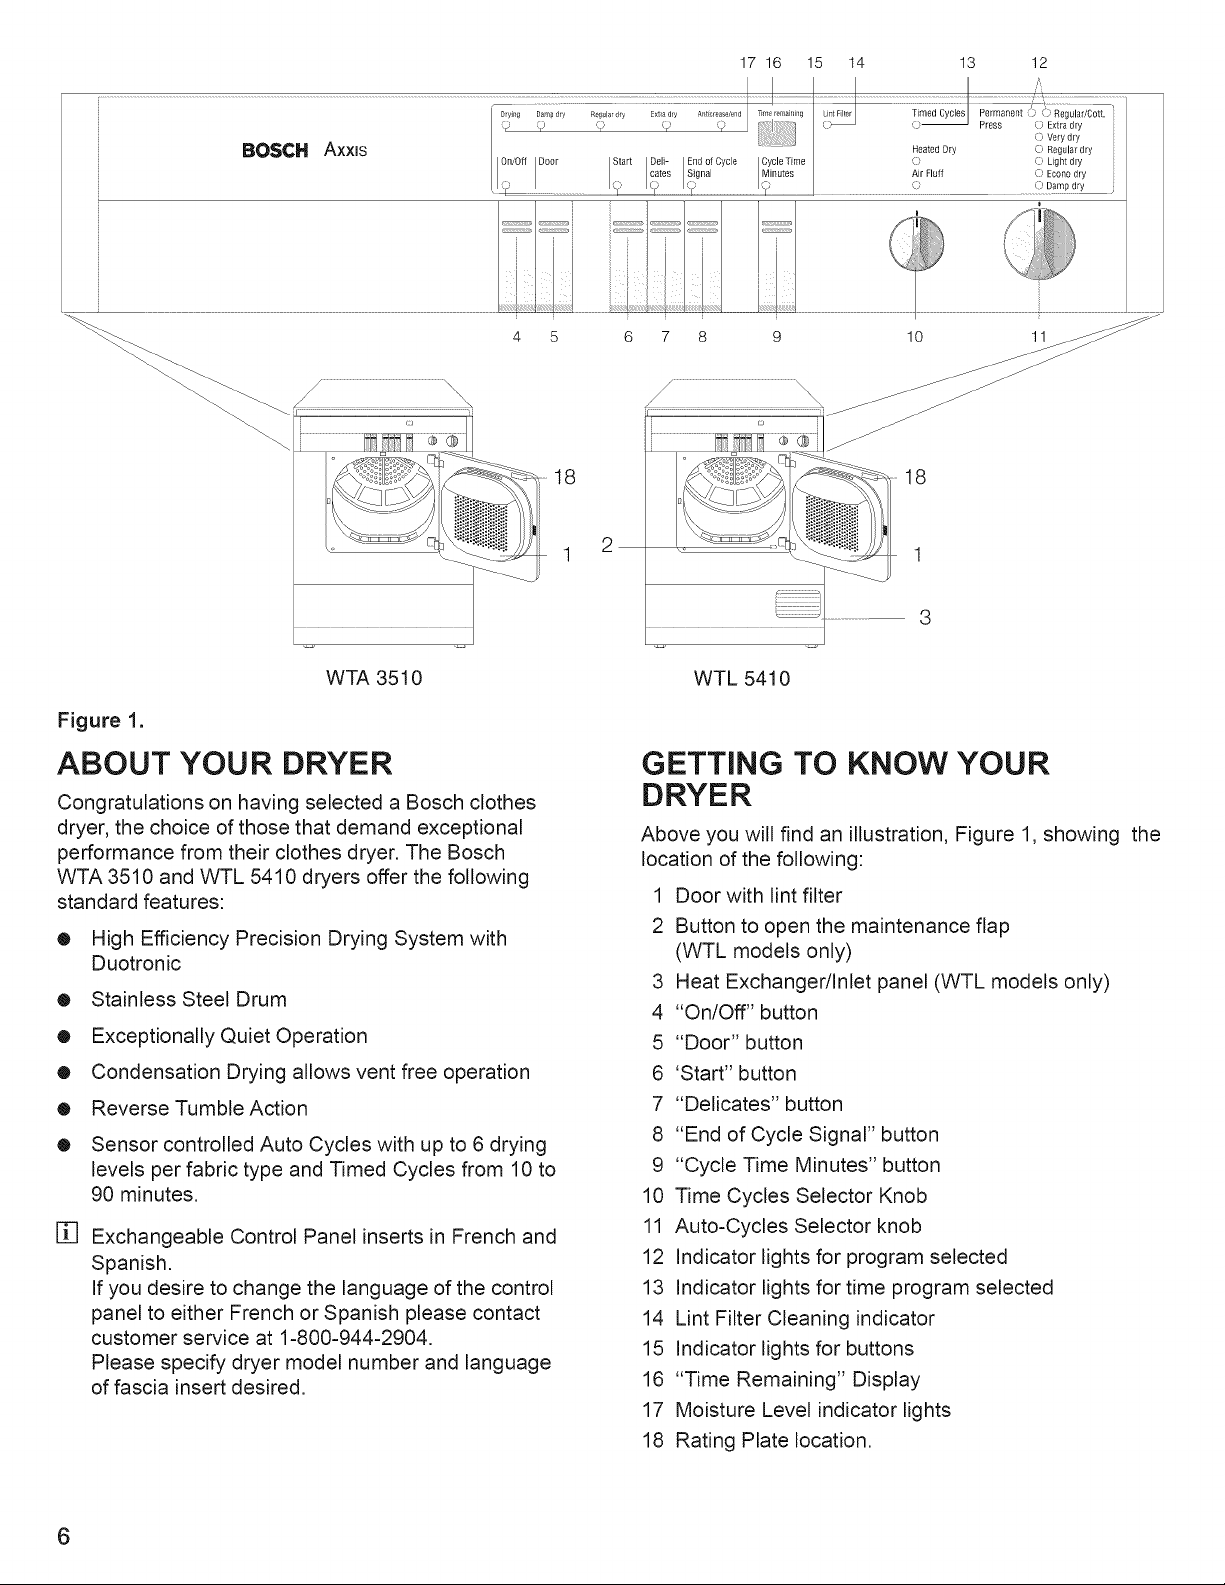
Figure 1.
BOSCH Axxls
/ \
WTA 3510
0n/0ff
_ Door
Start Deli- End of Cycle Cycle Time
_ete_ISignal IMinutes
18
2
18
3
WTL 5410
ABOUT YOUR DRYER
Congratulations on having selected a Bosch clothes
dryer, the choice of those that demand exceptional
performance from their clothes dryer. The Bosch
WTA 3510 and WTL 5410 dryers offer the following
standard features:
• High Efficiency Precision Drying System with
Duotronic
• Stainless Steel Drum
• Exceptionally Quiet Operation
• Condensation Drying allows vent free operation
• Reverse Tumble Action
• Sensor controlled Auto Cycles with up to 6 drying
levels per fabric type and Timed Cycles from 10 to
90 minutes.
[]
Exchangeable Control Panel inserts in French and
Spanish.
If you desire to change the language of the control
panel to either French or Spanish please contact
customer service at 1-800-944-2904.
Please specify dryer model number and language
of fascia insert desired.
GETTING TO KNOW YOUR
DRYER
Above you will find an illustration, Figure 1, showing the
location of the following:
1 Door with lint filter
2 Button to open the maintenance flap
(WTL models only)
3 Heat Exchanger/Inlet panel (WTL models only)
4 "On/Off" button
5 "Door" button
6 'Start" button
7 "Delicates" button
8 "End of Cycle Signal" button
9 "Cycle Time Minutes" button
10 Time Cycles Selector Knob
11 Auto-Cycles Selector knob
12 Indicator lights for program selected
13 Indicator lights for time program selected
14 Lint Filter Cleaning indicator
15 Indicator lights for buttons
16 "Time Remaining" Display
17 Moisture Level indicator lights
18 Rating Plate location.
ENERGY SAVING TIPS
OPERATING TIPS
To save energy, time and money, Bosch recommends
the following:
O
Always spin dry the laundry in the washer at the
highest recommended speed for the fabric type.
The highest spin speed will result in a dryer load and
shorten the drying time and amount of energy
required to dry the load.
O
Spin dry delicate washing before tumble drying.
O
Load the dryer properly. Do not exceed the maximum
load (see CYCLE SELECTION CHART).
• Always clean the lint filter after each use of the dryer.
BEFORE USING FOR THE FIRST TIME
Before beginning to use your dryer for the first
time:
1. Check to make sure that the voltage on
which the dryer is to operate is the same as
shown on the rating plate.
2. Wipe the interior of the drum with a damp cloth.
3. Thoroughly inspect the dryer for cosmetic damage.
• Follow the fabric care labels on the clothing.
• Avoid very small loads. When only one or two items
need drying, add a few similar items to improve
drying efficiency.
• Do not mix heavyweight and lightweight clothing.
• Do not dry wool or fabrics with a wool content
• Do not dry fabrics that do not allow the free passage
of air (for example, GORETEX)
• Do not dry delicate fabrics such as, silk, synthetic net
curtains, etc.
GETTING STARTED
Below, in order to get started, you will find a summary of
how to operate the clothes dryer. Also, refer to the
CYCLE SELECTION CHART, Table 1.
O
Turn On the Dryer
Press the "On/Off" button. The indicator light will
become illuminated and the indicator above the
'Start" button will begin to flash.
Check the Lint Filter
O
The lint filter, located in the door, should be cleaned
after or before each load.
O
Load the Dryer
Load the items in the dryer.
O
Add Fabric Softener Sheet
If a fabric softener sheet is to be added it should
be done after loading the dryer.
O
Close the Dryer Door
O
Select Cycle Desired
See CYCLE SELECTION CHART, Table 1, and
following section titled OPERATION for program
recommendations.
O
Select Additional Functions (if desired)
See following section titled OPERATION.
O
Press the 'Start" Button
The 'Start" indicator lamp will stop flashing and the
dryer will start. If one of the Auto-Cycles have been
selected the Duotronic system will monitor the
moisture level and display the progress of the drying
in the "Moisture Level Indicator Lights." If a timed
cycle has been selected the minutes remaining will
be displayed in the "Cycle Countdown Display."
The cycle will continue to the end, when the "End"
indictor lamp will become illuminated. And, if the
"End of Cycle Signal" has been selected a signal will
sound. - See following section OPERATION on how
to set or turn of the "End of Cycle" signal.
O
Depress the "Door" Button
The door will open.
O
Remove the Laundry from the Dryer
O
Clean the Lint Filter
O
Turn Off the Dryer
Depress the "On/Off" button.

CYCLE SELECTION CHART (Recommendations)
ELECTRONIC AUTO DRY CYCLES Drying Level Setting
Cotton or linen items (whites and coloreds), full load * Regular/Cott.
Note: For heat-sensitive items press the "Delicates" button.
Bed and table linen, towels for laundry which will be ironed with rotary iron or Damp dry
finished by air drying
Bed and table linen, towels, T-shirts, work for laundry which will be ironed with a steam iron Econo dry
clothes
T-shirts, trousers, work clothes, underwear for laundry which will be ironed lightly, or not at all Light dry
Bath towels, tea towels, hand towels, bed for laundry which will not be ironed Regular dry
linen, underwear, cotton socks
Bath towels, tea towels, hand towels, bed for thick, multi-layered materials which will not be Very dry
linen, underwear, cotton socks ironed
Flannel dressing gowns and bed linen particularly thick or multi-layered materials Extra dry
Permanent Press items (non-iron items) made of synthetic and mixed fibers and non-iron Permanent Press
cottons, 1/2 load *
Note: For heat-sensitive fabrics press the "Delicates" button.
Trousers, skirts, dresses, shirts for laundry which will be ironed with a steam iron Econo dry
Synthetic trousers, skirts, dresses, shirts, for laundry which will be ironed either lightly, or Light dry
blouses, leggings and sportswear not at all
Shirts, blouses, sportswear for laundry that will not be ironed Regular dry
Bed and table linen, jogging suits (sweats) for thick, multi-layered materials which will not be Very dry
ironed
Parkas (anoraks), bed covers particularly thick or multi-layered materials Extra dry
Timed Cycles
Pre-dried fabrics with low moisture content and separate, small items Heated Dry: 10=90 rain.
All fabrics or items needing freshening, tumbles without heat Air Fluff: 10-90 rain.
•Refers to full and half loads from Bosch tumble action clothes washer.
Table 1.
OPERATION
Below you will find a more detailed explanation of the
operation of your dryer:
1. Turn the dryer on
Depress the "On/Off" button. The indicator light
above the button will become illuminated indicating
that the machine is on and the light above the 'Start"
button will flash.
2. Check the Lint Filter
The lint filter, located in the door, should be cleaned
after or before each load. Check the lint filter and if it
was not cleaned after last use clean it now. Cleaning
the filter will shorten drying times and save energy.
Figure 2.
 Loading...