

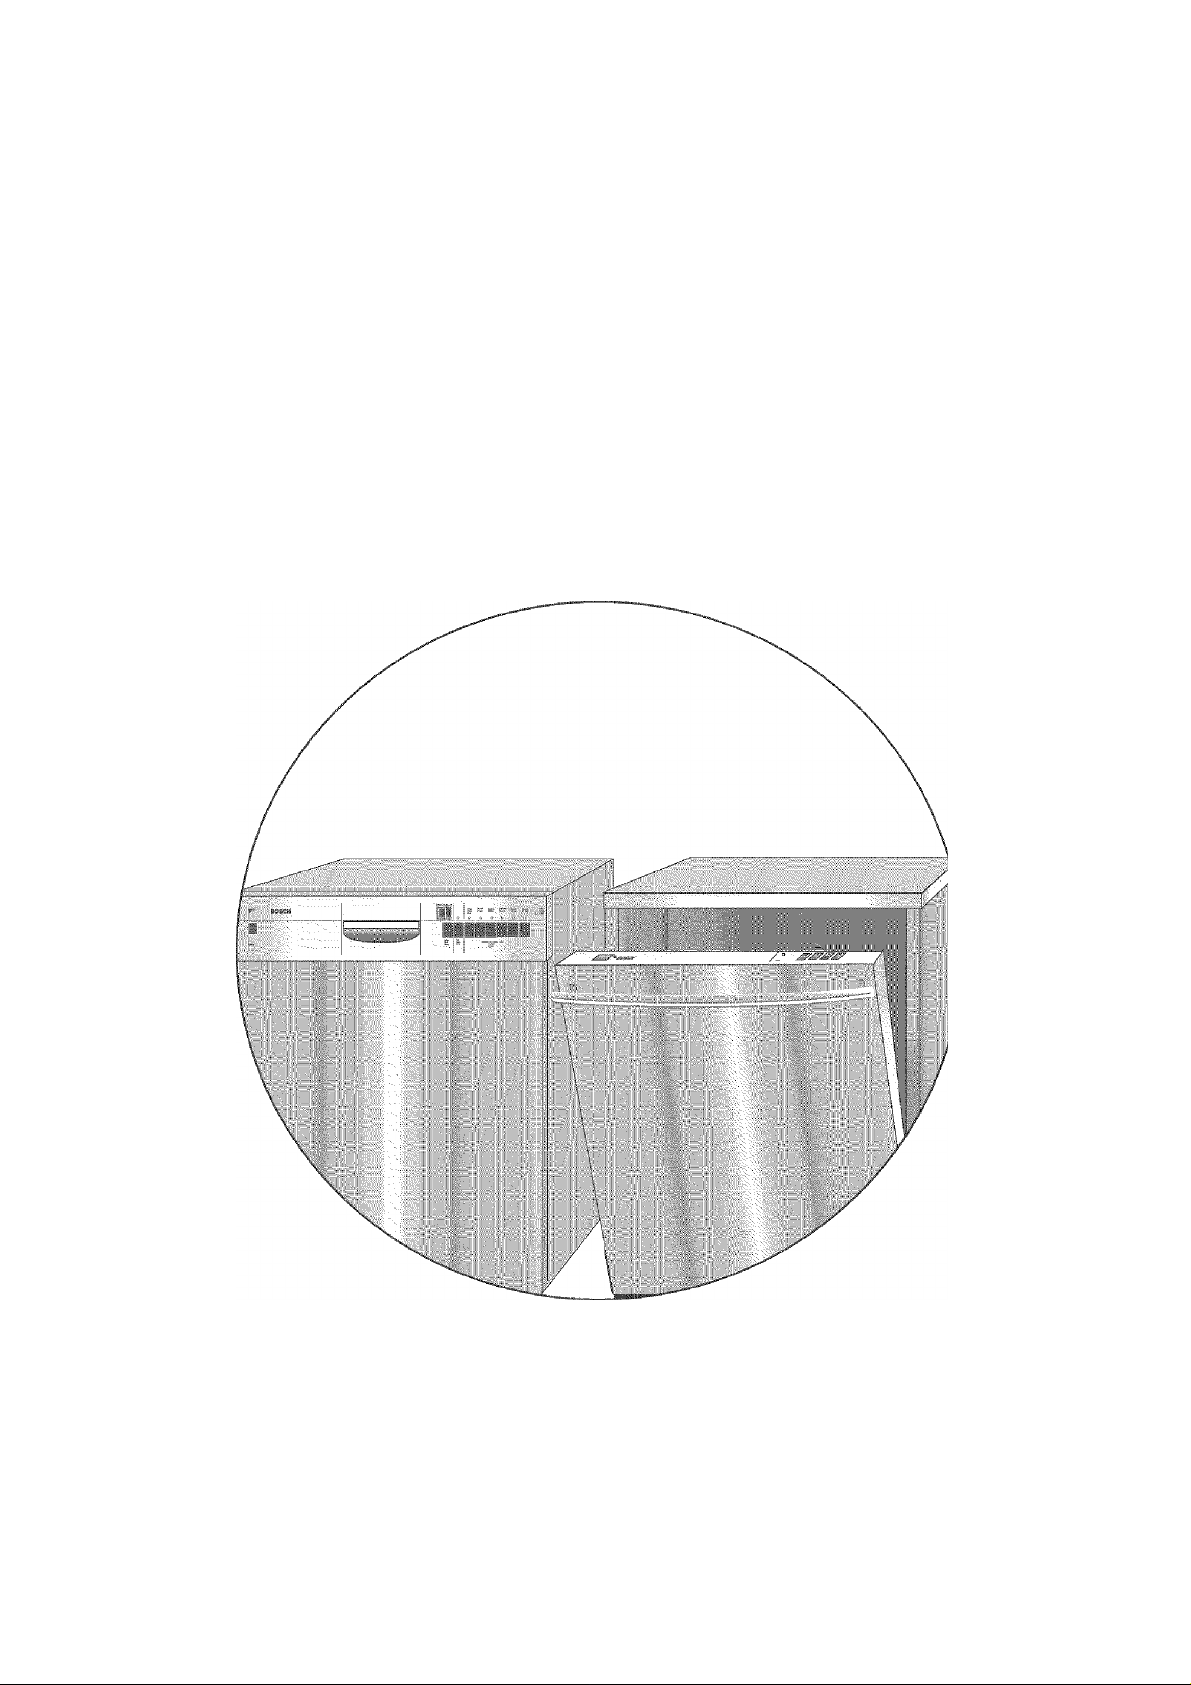
Bosch SHE660 User Manual
BOSCH
YOUR UFE. OUR INSPiRATION,
Dishwasher Installation Instructions
Instructions dlnstallation du lave-waisselle
Instrucciones de instalación para lawavajillas
Use and Care Manual located on reverse side
Tourner le guide pour les instructions d’utilisation et d’entretien
Voltee el manual para encontrar las instrucciones de uso y cuidado
9000053716 (8504)

BOSCH
Table of Contents / Important Instructions
Tgtjli-
.>•= = j, , . *:= .G ^f4=.= W .. P .1 ■ ■ ■ ■
TpoliN3o*d;
Mi^ÈpriaiPTîeedpd ::■ J
ëTçbsuæ; pToparsri&n; ;
Oi pciricà I Ftrepa;faEieR V. ;.
■fd>s(ribirïg;p№pa;;sÏG
■ Dish wnFhfiiVpi'epa siatipn-
■uiobrd Pa.a:rl:if iSîHliotiün-
;.:..:G;.'.;,; :V.:7;';::-.tG.Gh.t2:7GL:
;v/.-.-.;:(.Gt.;GG.(.:;;v.',:/;..-.).:2.GGG^l7.,T)iaih
ws
Important Safety Instructions
A WARNING
To avoid possible injury or property damage,
OBSERVE ALL WARNINGS AND CAUTIONS.
These instructions are intended for use by
qualified installers only.
The dishwasher must be installed by a qualified
service technician.
* In addition to these instructions, the dishwasher
shall be installed to meet all electrical and
plumbing codes and ordinances (both national and
local).
Read these installation instructions completely
and follow them carefully. They will save you time
and effort and help to ensure safety and optimum
dishwasher performance.
CAUTION
If the dishwasher is installed in a location that
experiences freezing temperatures (e.g., in a
holiday home), you must drain all the water
from the dishwasher’s interior. Water system
ruptures that occur as a result of freezing are
not covered by warranty.
Qfveàîitèrits;
.■ .■ .-GsoUfing rpe .u;;snvrasnor:: ■ .:,v\
V d ploii'WiàprvîonrreçfeR
3Gorinwdion.
V.P,:G G G ; VGpOGrTGSlS:0;lF.d;UsF
G,;:
7//; Btçp and Goë'Panéi:
■ GP d[;dr,aM nsÎruçfiQasa.; ^
G-.iG GIG GpGGlGGGGIGdtGViC.e
IMPORTANT
• The dishwasher drain hose must be installed
with a portion of it at least 20” (508mm) off the
cabinet floor; otherwise the dishwasher may not
drain properly.
• This dishwasher is intended for residential use
only, and should not be used in commercial food
service establishments.
® NEW INSTALLATION - If the dishwasher is a
new installation, most of the work must be done
before the dishwasher is moved into place.
• REPLACEMENT - If the dishwasher is replacing
another dishwasher, check the existing
dishwasher connections for compatibility with
the new dishwasher, and replace parts as
necessary.
• This appliance has been found to be in
compliance with CAN/CSA-C22.2 No. 167/UL
749. It is the responsibility of the owner and the
installer to determine if additional requirements
and standards apply in specific installations.
Inspect the Dishwasher
After unpacking the dishwasher and prior to
installation, thoroughly inspect the dishwasher for
possible freight or cosmetic damage. Report any
damage immediately. Cosmetic defects must be
reported within 5 days of installation.
NOTE: Do not discard any bags or items that come
with the original package until after the entire
installation has been completed.
•G-T-
EÉÎ
ïSBiE
III
m
mm
141
14 ■
eI-IiiIgg.;
GG.GîS-
A
V
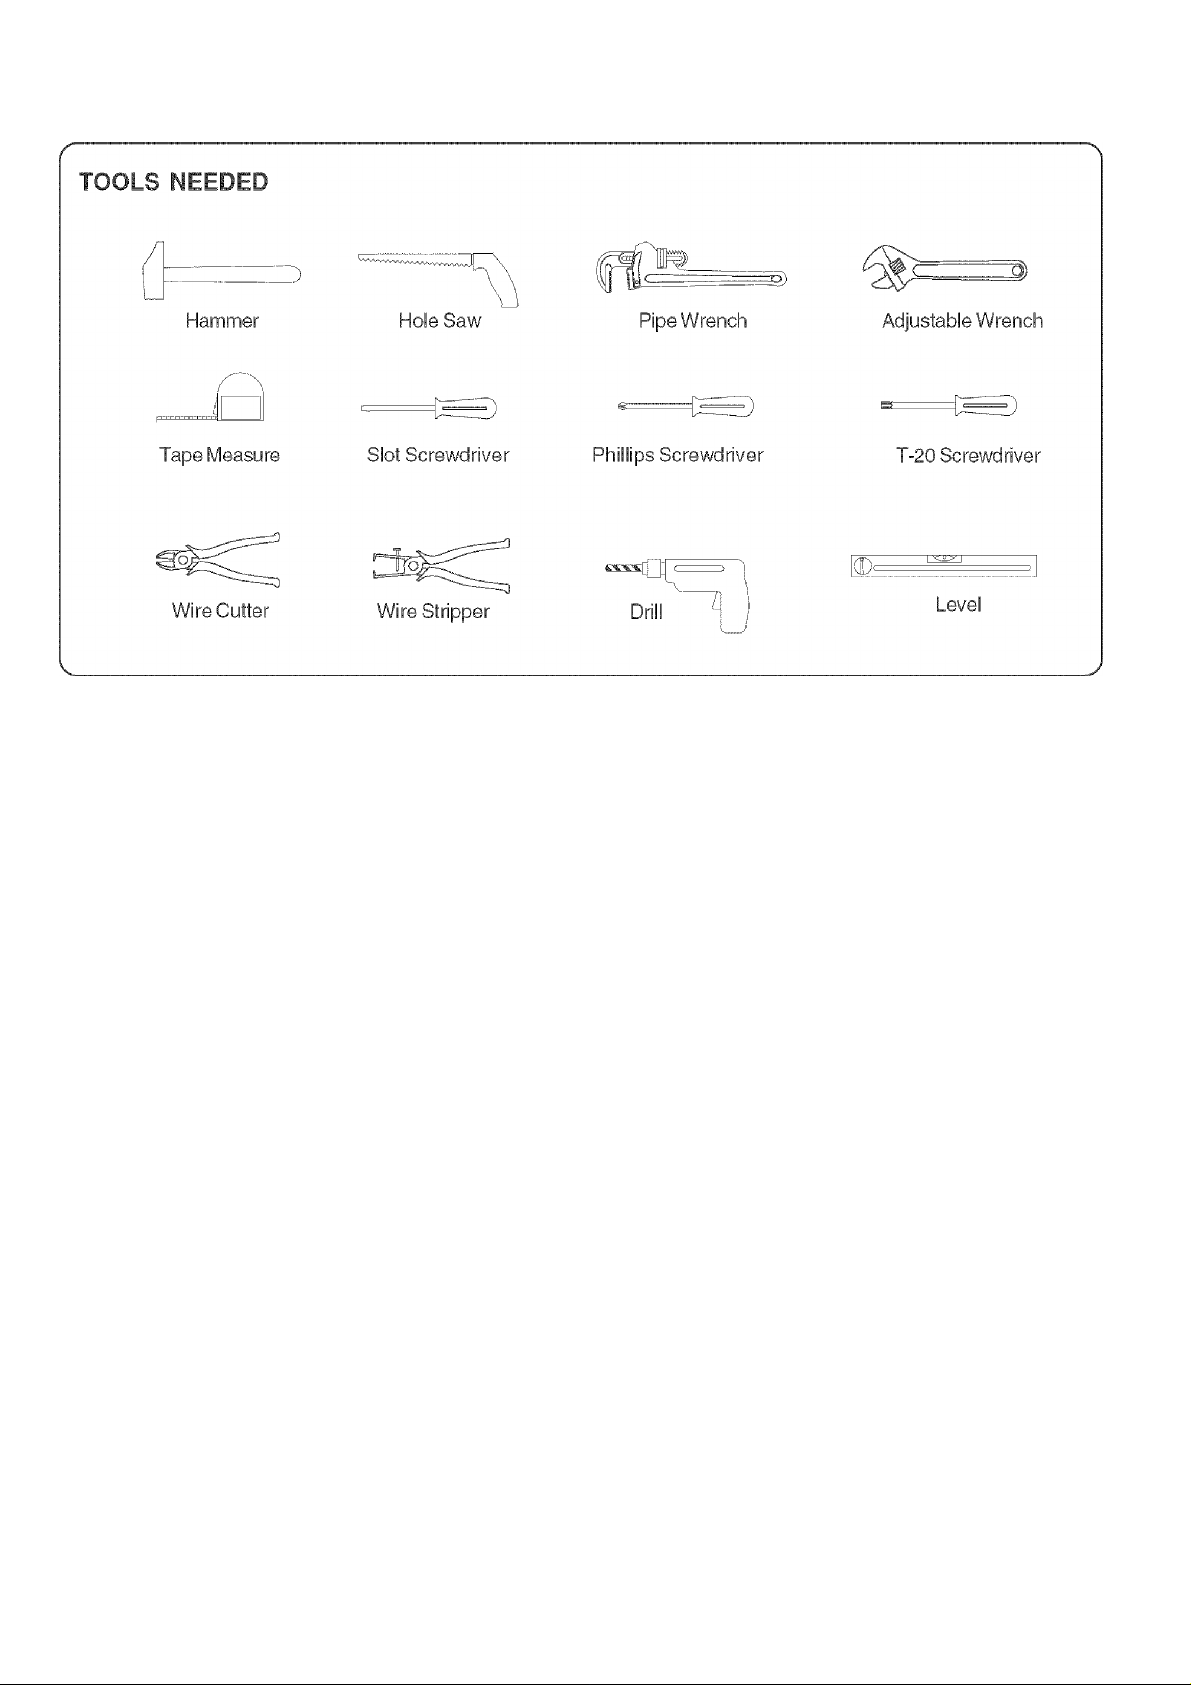
Tools and Materials Needed
f
MATERIALS NEEDED
(Additional materials may be required to comply with local codes.)
Electrical Supply Cable - Minimum #14 AWG, 2 conductor, 1 ground, insulated copper
conductors rated 75°C or higher.
Hot Water Supply Line - Minimum 3/8” O.D. copper tubing or metal braided dishwasher
supply line.
Shut-off valve and fittings appropriate for hot water supply line (copper tubing/
compression fitting, or braided hose).
90° elbow with 3/8” N.P.T. male threads on one leg, and sized to fit your water supply
line (copper tubing/compression fitting, or braided hose) on the other leg.
Teflon tape or other pipe thread compound to seal plumbing connections.
ft
UL listed conduit connector or strain relief.
V.
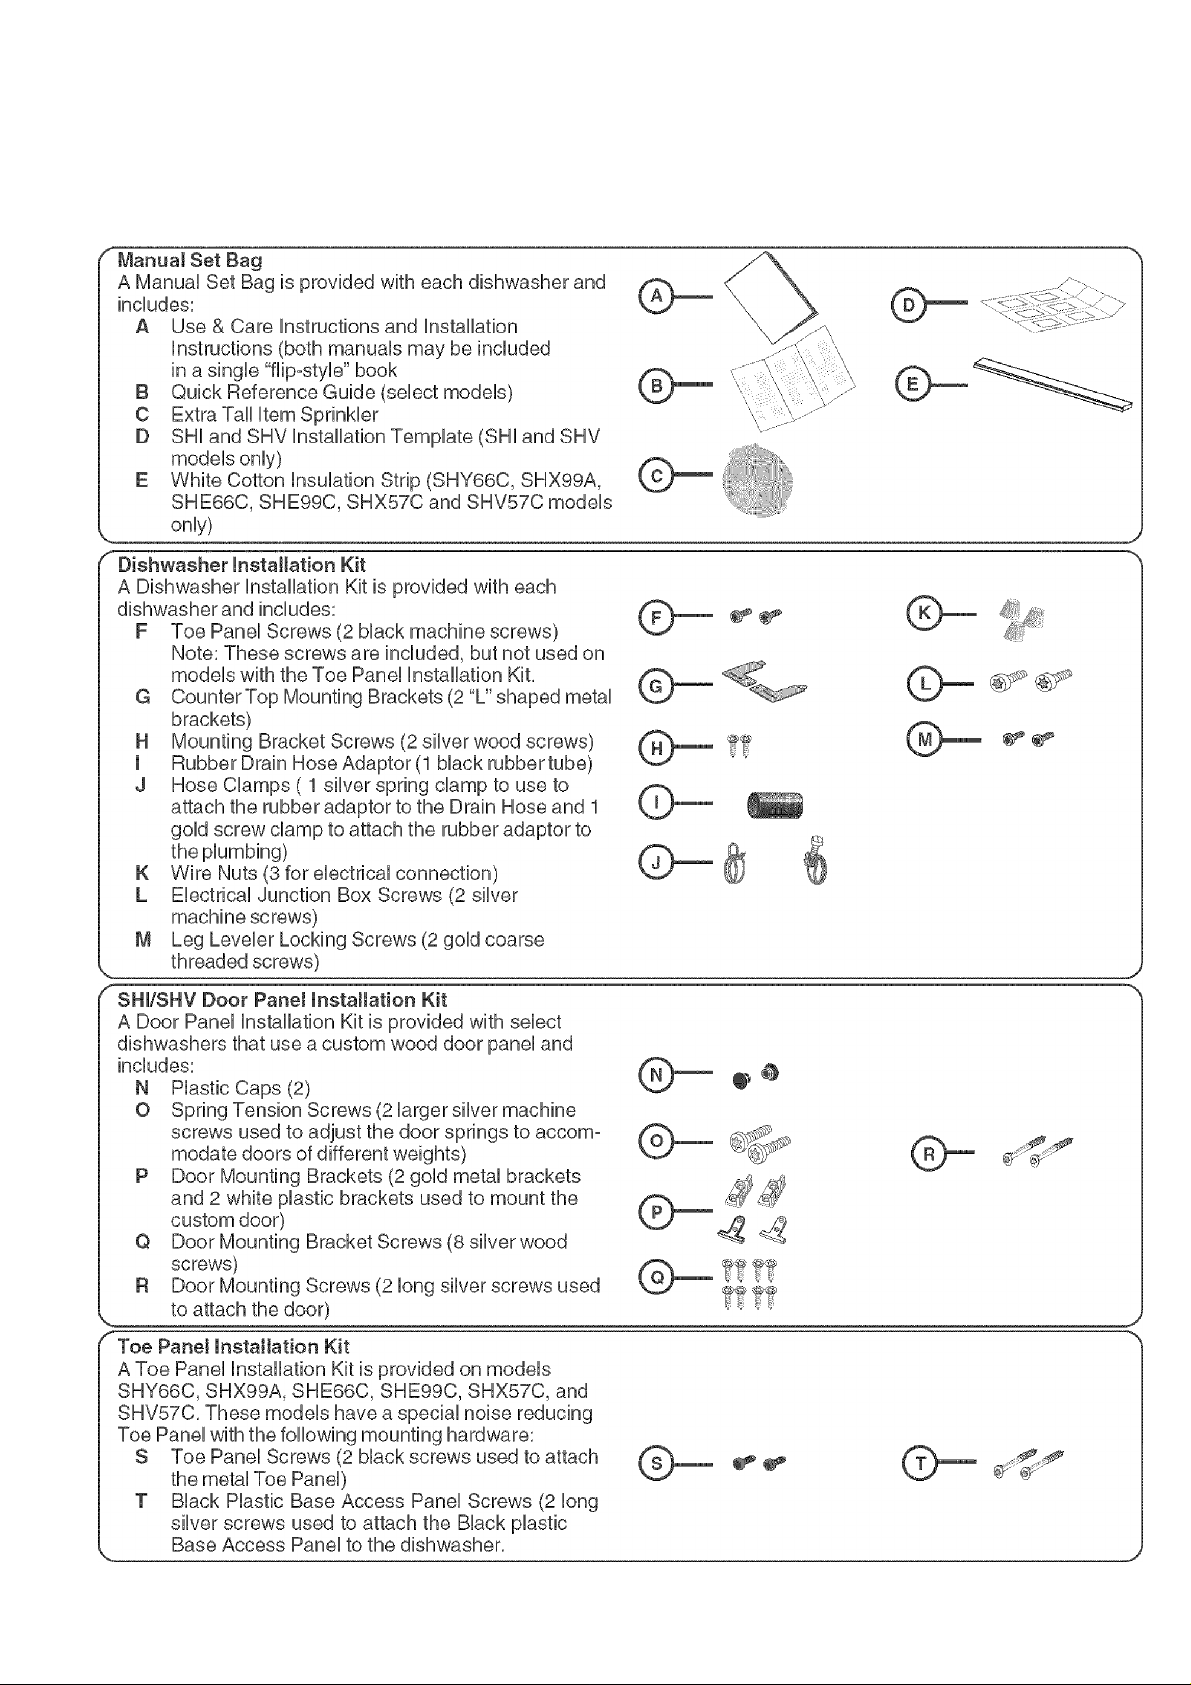
Materials Supplied
MATERIALS SUPPLIED
Accessory Parts Supplied
Accessory parts for your dishwasher come in one or more plastic bags that are outlined below.
fslOTE: Make sure you save all the bags until you have completed your installation.
NOTE: Always use the supplied or recommended hardware.
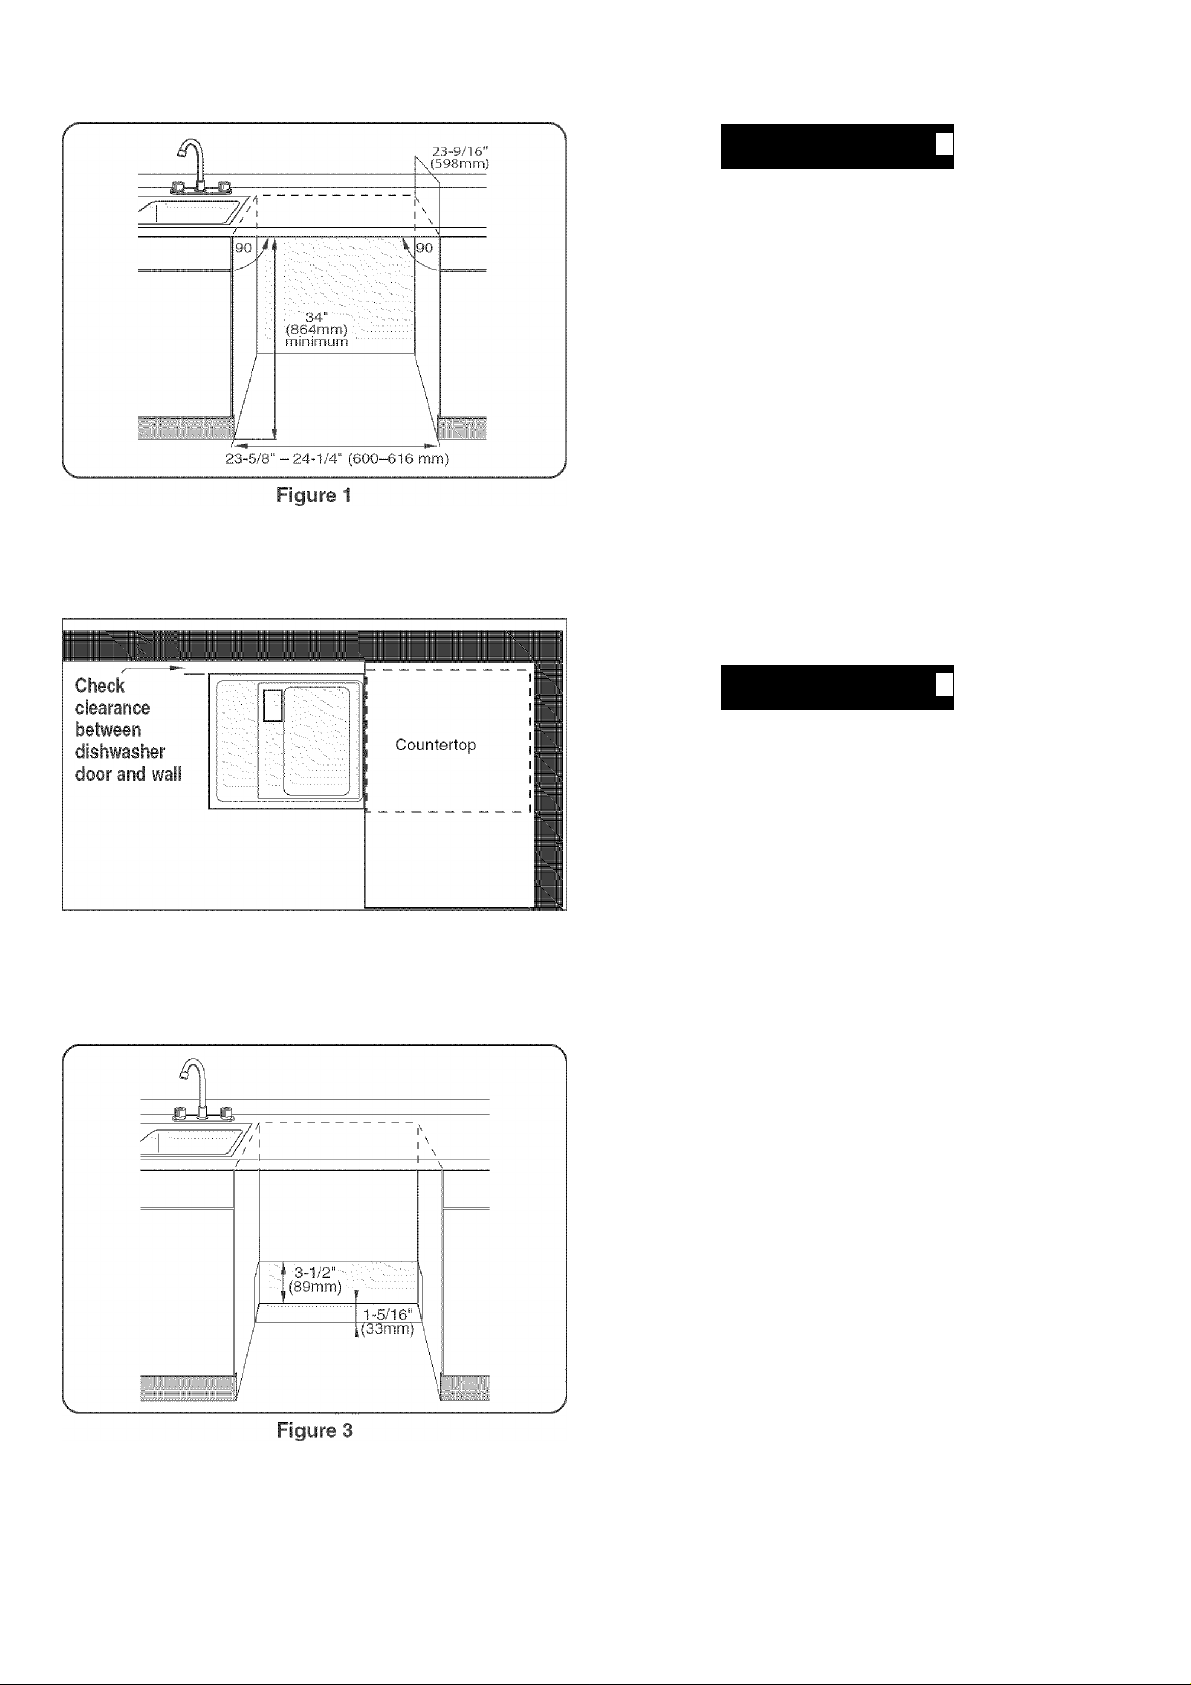
Enclosure Preparation
ikWARNIN
Electrical Shock Hazard
To avoid electrical shock, make sure the water
supply and electrical supply are shut off before
installation or service.
I
ENCLOSURE PREPARATION
NOTE: This dishwasher is designed to be enciosed on the
top and both sides by standard residentiai kitchen
cabinetry.
Select a location as close to the sink as possible for
easy access to water supply and drain lines.
For proper dishwasher operation and appearance, ensure
that the enclosure is square and has the dimensions
shown in Figure 1.
If the dishwasher is to be installed in a corner, make sure
that there is adequate clearance to open the door. See
Figure 2.
ikWARNIN
I
Figure 2
Electrical Shock/Fire Hazard
To avoid electric shock or fire, do not allow the
electrical and water supply lines to touch.
Separate channels are provided under the
dishwasher (see page 10).
If the enclosure requires openings for the electrical supply
cable, hot water supply line, and dishwasher drain hose,
place them within the dimensions shown by the shaded
area of Figure 3 to avoid interference with the dishwasher
frame or other components. Make the openings for the
electrical supply cable and hot water supply line 1 ”
(25.4mm) diameter. Make the opening for the dishwasher
drain hose 1 -1/4” {32mm) diameter. If the openings are
made through wood, sand them smooth. If the openings
are made through metal, make them large enough to
accommodate grommets or other protective sheaths with
inside diameters of 1 ” (25.4mm) for the electrical supply
cable and the hot water supply line, and 1 -1 /4” (32mm) for
the dishwasher drain hose.
Electrical Preparation
ELECTRICAL PREPARATION
Dishwasher Electrical Rating
Volts Herti Amperes Watts
120 60 15
1,450
(max)
__________
To avoid e
energized
injury ord
perform el
on the dis:
are certair
de-energi2
To avoid a fire hazard, make sure electrical work
is properly installed. Only qualified electricians
should perform electrical work.
Electrical Supply
The customer has the responsibility of ensuring that the
dishwasher electrical installation is in compliance with all
national and local electrical codes and ordinances. The
dishwasher is designed for an electrical supply of 120V,
60 Hz, AC, connected to a dishwasher-dedicated,
properly grounded electrical circuit with a fuse or breaker
rated for 15 amps. Electrical supply conductors shall be a
minimum #14 AWG copper wire rated at 75°C or higher.
Regardless of where the electrical supply cable enters the
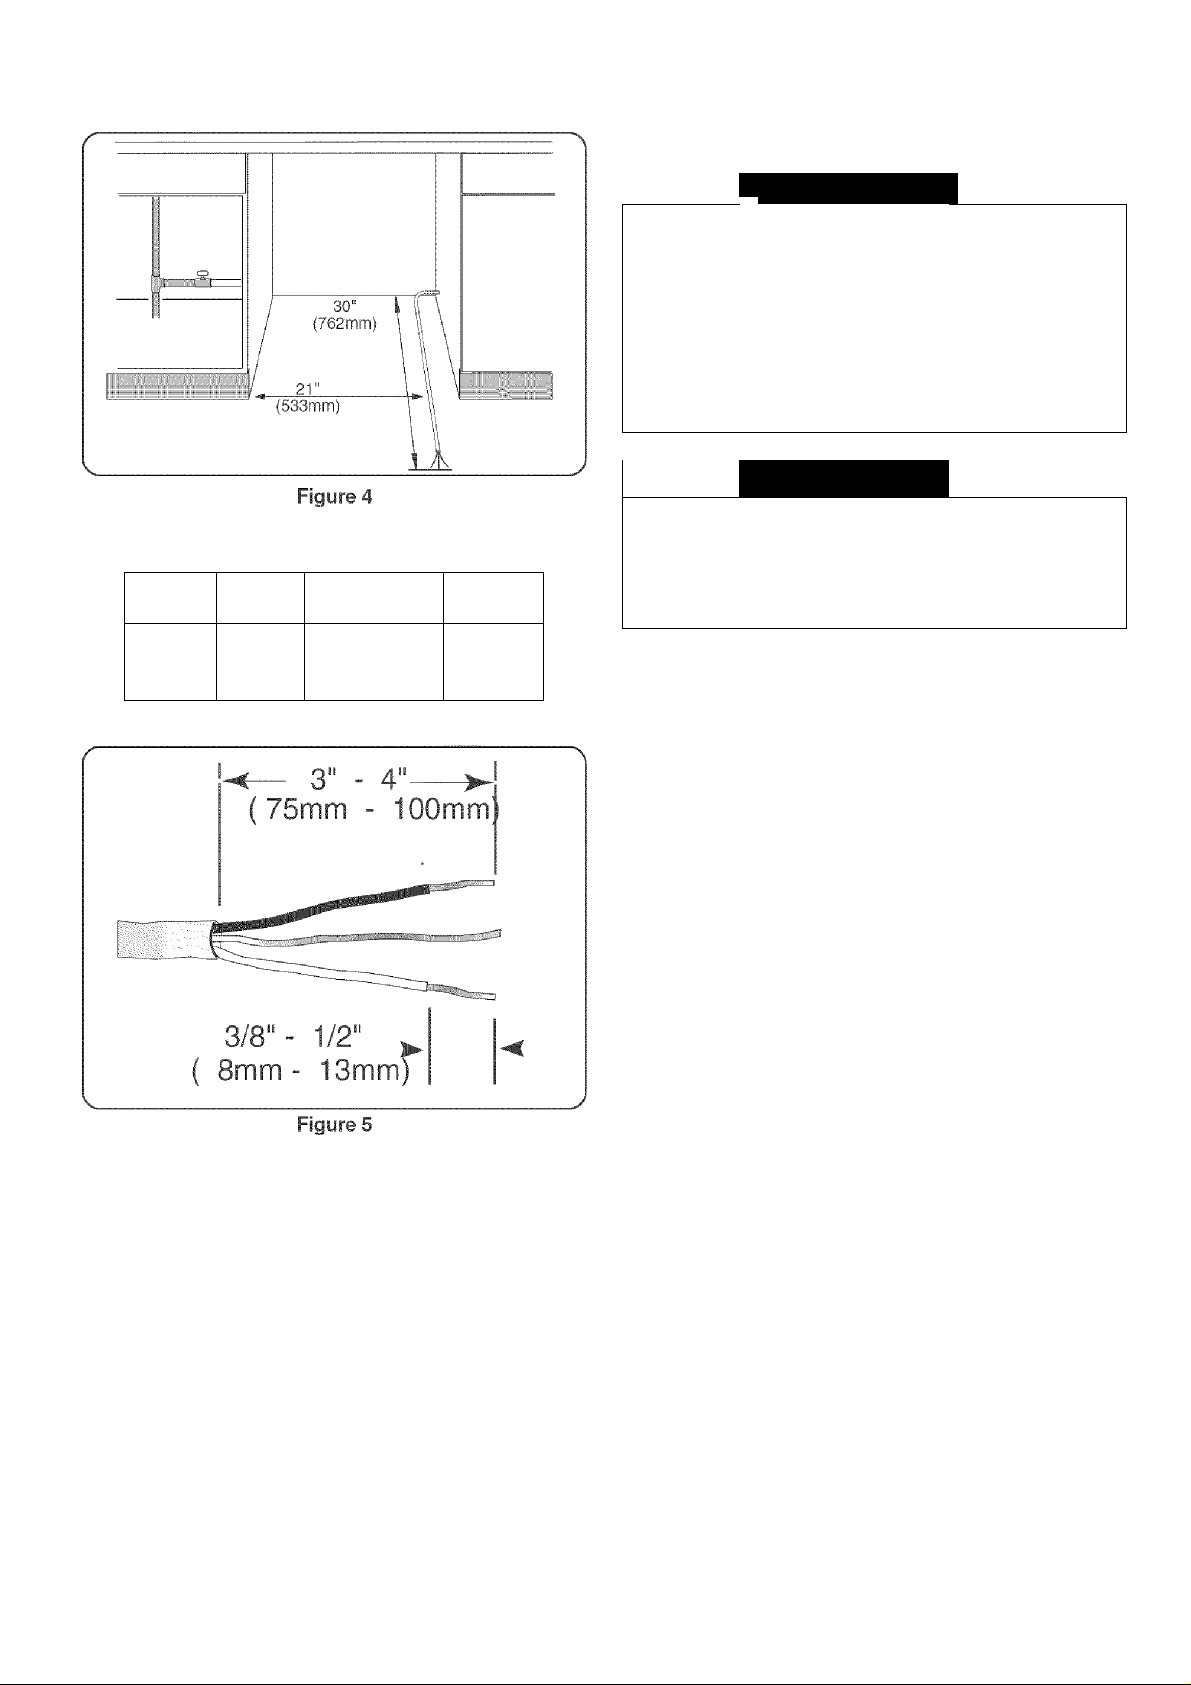
enclosure, position the cable 21” {533mm) from the
enclosure’s left side, as shown in Figure 4. Extend the
cable 30” (762mm) from the enclosure’s back, as shown
in Figure 4.
AWARNIN
1
Electrical Shock Has
ilectrical shock, do not
circuit. Doing so coulc
ieath. Only qualified elc
Metrical work. Do not a1
hwasher electric suppi
1 the circuit is
:ed.
AWARNIN
Fire Hazard
tard
work on an
i result in serious
sctricians should
Hempt any work
y circuit until you
p 1
Remove 3” - 4” (75mm -100mm) of the cable’s outer
casing, as shown in Figure 5, then remove 3/8” -1/2”
(9 -13mm) of insulation from each wire, as shown in
Figure 5.

Plumbing Preparation
PLUMBING PREPARATION
To avoid being scalded, do not perform any work
on a charged hot water line. Serious injury could
result. Only qualified plumbers should perform
plumbing work. Do not attempt any work on the
dishwasher hot water supply plumbing until you
are certain the hot water supply is shut off.
Temperatures required for soldering and sweating
will damage the dishwasher’s base and water inlet
valve. If plumbing lines are to be soldered or
sweated, keep the heat source at least 6 inches
(152.4 mm) away from the dishwasher’s base and
water in let valve.
ikWARNIN
Scald Hazard
CAUTIO
m
rt
n
Li
Hot Water Supply
The hot water heater should be set to deliver
approximately 120“ F {49“ C) water to the dishwasher.
Water that is too hot can cause some detergents to lose
effectiveness. Lower water temperatures will increase run
times. The hot water supply pressure must be between
15-145 psl(1 -10 bars).
Hot Water Supply Plumbing
Install an easily accessible shut-off valve (not supplied) in
the hot water supply line, as shown in Figure 6. All solder
connections must be made before the water line is
connected to the dishwasher’s water inlet valve. Water
may also be supplied to the dishwasher by using a
stainless steel braided hose approved for dishwasher use.
Check with your local plumbing supply sources for the
proper hose and 90“ elbow fitting.
NOTE: Regardless of where the hot water supply line
enters the enclosure, position the line 14" (355mm) from
the enclosure’s left side, as shown in Figure 6.
NOTE: Decide whether braided hose or copper tubing will
be used for the hot water supply plumbing, and purchase
the correct type of hot water supply shut-off valve, 90°
elbow, and necessary fittings for the hot water supply
plumbing.
 Loading...