

Bosch HEZ9YZ36UC, HEZ9YZ30UC, HEZ8YZ36UC, HEZ8YZ30UC Installation Manual

Backguard
Installation Manual
HEZ9YZ30UC, HEZ9YZ36UC, HEZ8YZ30UC, HEZ8YZ36UC

ö Installation Instructions
9 Safety Definitions ..................................................... 2
IMPORTANT SAFETY INSTRUCTIONS ........................ 3
Before You Begin .......................................................... 4
Parts Included ....................................................................... 4
Tools and Parts Needed ..................................................... 4
Cabinet Requirements ......................................................... 4
Installation Procedure ................................................... 4
STATEMENT OF LIMITED PRODUCT WARRANTY .... 5
What this Warranty Covers & Who it Applies to ............. 5
How Long the Warranty Lasts ............................................ 5
Repair/Replace as Your Exclusive Remedy ................... 5
Out of Warranty Product ..................................................... 5
Warranty Exclusions ............................................................ 5
Obtaining Warranty Service: ............................................... 6
Purpose
Thank you for purchasing a backguard accessory for
your Bosch Industrial Style Range.
The purpose of this accessory is to allow a 0” clearance
from the rear of the appliance to a combustible back
wall.
This accessory may be used where a 0” clearance from
the rear of the appliance to a non-combustible back wall
already exists, but it is not necessary.
9 Safety Definitions
9 WARNING
This indicates that death or serious injuries may
occur as a result of non-observance of this warning.
9 CAUTION
This indicates that minor or moderate injuries may
occur as a result of non-observance of this warning.
NOTICE: This indicates that damage to the appliance or property may occur as a result of non-compliance with this advisory.
Note: This alerts you to important information and/or tips.
Safety Definitions
2

9 IMPORTANT SAFETY INSTRUCTIONS
READ AND SAVE THESE INSTRUCTIONS
IMPORTANT SAFETY I NS TRU CTI ONSREAD AND SAVE THESE INSTRUCTIONS
Wear gloves to avoid cutting fingers on sharp edges
during Installation.
WARNING
Fingers or hands could get pinched when installing the
backguard. Severe injury could result. Use extreme
caution and wear thick protective gloves to avoid
potential laceration to finger or hand while sliding the
backguard down onto the range.
WARNING
To avoid possible burn or fire hazard, a backguard
designed specifically for this appliance must be installed
whenever the appliance is used.
Hidden surfaces may have sharp edges.
Use caution when reaching behind or
under appliance.
3
Before You Begin
Before You Begin
Industrial Style Range Backguard
HGS8055UC, HDS8055U,
HEZ9YZ30UC
HDS8055C
HGS8045UC, HDS8045U,
HEZ8YZ30UC
HDS8045C
HGS8655UC, HDS8655U,
HEZ9YZ36UC
HDS8655C
HGS8645UC, HDS8645U,
HEZ8YZ36UC
HDS8645C
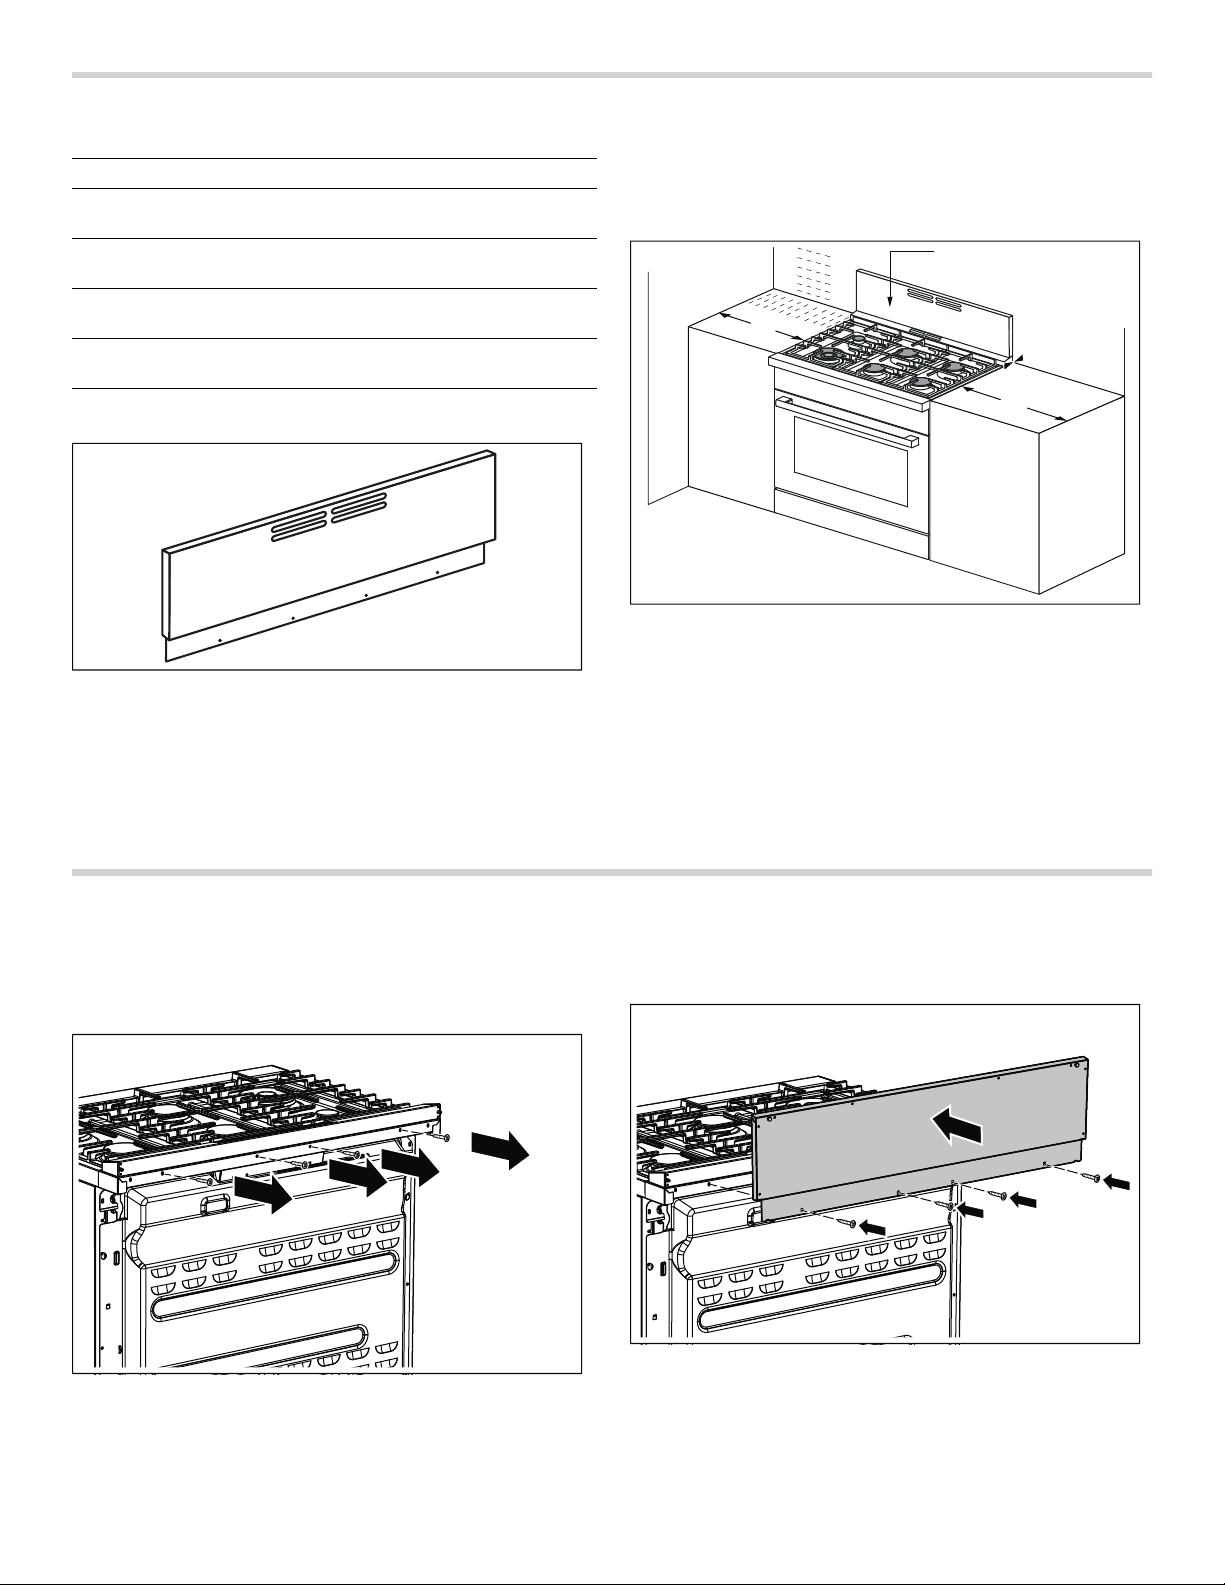
Parts Included
Tools and Parts Needed
▯ Phillips head screwdriver
▯ Gloves
Cabinet Requirements
Low Backguard Installation (applicable both with non
combustible back wall and combustible back wall)
$
%
▯ Option 1: A >= 12'' (305 mm) and B >= 28'' (711 mm)
▯ Option 2: A >= 28'' (711 mm) and B >= 12'' (305 mm)
* purchased separately
** Clearances from non-combustible materials are not
part of the ANSI Z21.1scope and are not certified by
Intertek. Clearances of less than 3'' (76 mm) should be
approved by the local codes and/or by the local authority
having jurisdiction.
Installation Procedure
1.
Remove any protective film.
2.
Remove the 4screws shown in the diagram below
Installati on Procedure
and retain for step 3.
3.
Fit the backguard over the backtrim and affix with the 4 screws removed in step 2.
4
 Loading...