

Bosch ETT 008.31, ETT 008.38 Repair Instructions

Repair instructions
Exhaust gas analyzer
ETT 008.31 - ETT 008.38
1

Contents: Page
Contents: Page
1. Important information 4
1.1 Compulsory calibration 4
2. Servicing the analyzer 4
2.1 Half-yearly service 4
2.2 Yearly service 4
2.3 Test equipment for customer service 5
2.4 Test gases for customer service 5
(with manufacturer's certificate) 5
3. Brief description of appliance function 6
3.1 Serial interface 6
3.2 Analyzer part (measurement of CO, HC and CO2)6
3.3 System adjustment 6
3.4 Self-test 6
3.5 Fine-tuning (HC, CO and CO
measuring channels) 6
2
3.6 O2 measuring channel (optional) 6
3.7 Correction of pressure influence 6
3.8 Compensation of temperature influence 7
3.9 Engine-speed measurement 7
3.10 Oil-temperature measurement (optional) 7
3.11 Lambda measurement 7
3.12 Corrected CO concentration (CO
3.13 Parameterization 7
)7
vrai
3.14 Filtration 7
4. Extended operating functions 8
4.1 Input mode ( switch S 60 at position 0,
auxiliary functions) 9
4.1.1 Leak test 10
4.1.2 Lambda measurement ON / OFF 11
4.1.3 O2 measurement ON / OFF 11
4.1.4 CO correction CO
4.1.5 Summer time ON / OFF 12
ON / OFF 12
vrai
4.1.6 Air-pressure gauge ON / OFF 13
4.1.7 Entering the altitude 13
4.1.8 Fine-tuning the zero of O
(up to software version A 10) 13
4.1.8 Fine-tuning the zero of O
(from software version A 13) 14
2
2
4.1.9 Adjusting the pump capacity 14
4.1.10 Analysis mode 14
4.1.11 Selecting a printer 15
4.1.12 Selecting the operator terminal 15
4.1.13 Temperature compensation 15
4.1.13.1 Error messages regarding temperature
compensation 16
4.1.14 External display ON / OFF (optional, variant
for Sweden only) 16
4.1.15 Selecting analog interface (optional) 16
4.2 Test mode ( switch S 60 at position 0) 17
4.3 Fine-tuning mode (switch S 60 at position 1,
mean values, air-pressure gauge and
chopper motor recognition) 19
4.4 Fine-tuning mode (switch S 60 at position 2,
upper range values, activation of temperature
compensation and setting appropriate version
for country of use) 20
5.4 Checking the start-up process 22
5.5 Checking the ”Analysis” function 23
5.6 Checking fault monitoring 24
5.7 Performing the leak test 24
6 Checking and fine-tuning measuring accuracy 25
6.1 Taking account of barometric altitude 25
6.2 Checking the indicating accuracy 25
6.3 Fine-tuning the indicating accuracy 26
6.4 Checking cross sensitivity 27
6.5 Fine-tuning the air-pressure gauge 28
6.6 Recognition of chopper motor 30
6.7 Procedure for setting appropriate version
for country of use 30
7 Error messages / malfunctions 31
7.1 Error messages in the CO display field 31
7.2 Error messages in the CO2 display field 32
7.3 Symbolic error messages 33
7.4 Other malfunctions 34
8 Trouble-shooting 34
8.1 Leakage faults 34
8.2 Flow faults (with zero-gas and test-gas flow) 34
8.2.1 Checking for an obstruction 35
8.2.2 Checking the pressure switches 35
8.2.3 Checking air-tightness 36
8.2.4 Checking the pump delivery rate 37
8.3 Indicating faults 38
8.4 RAM check error 39
8.5 Faulty channel identification 40
8.6 Faulty temperature compensation 40
8.7 Faulty channel amplifier 41
8.8 Faulty sensor board identification 43
8.9 Faulty pressure-influence correction
(faulty altitude setting or air-pressure gauge) 43
8.10 Faulty engine-speed measuring channel 44
8.11 Faulty oil-temperature measuring channel 45
8.12 Faulty O2 measuring channel 45
8.13 Supply-voltage alarm 46
8.14 Faulty pump actuation 46
8.15 Checking the sensor board 46
8.15.1 Checking the power supply 46
8.15.2 Checking the ”SELECT”,”ENTER o”
and ”TEST u” non-locking switches 46
8.15.3 Checking function of switch S60 47
8.15.4 Circuit diagram of sensor board 47
8.15.5 Sensor board, component location diagram 48
8.16 Power supply to power electronics 49
8.17 Power supply to motherboard 50
8.17.1 Motherboard, component location diagram 51
9 Functions of the serial interface 52
9.1 Technical data of serial interface V24 52
9.2 Operating the pocket keyboard 52
9.2.1 Basic command structure 52
9.2.2 Selecting ”Language” 53
9.2.3 Entries in the ”Name field” 53
9.2.4 Entering the date/time 54
5 Function test 21
5.1 Visual inspection (device is switched off and
disconnected from mains) 21
5.2 Checking the external gas duct 21
5.3 Checking the protective earth 21
2
10. Repair work 55
10.1 Replacing the lamp 55
10.2 Cleaning the lamp reflector 55
10.3 Replacing a receiver chamber 55
10.4 Cleaning the analyzer part 56

Contents: Page
10.5 Service limit values 56
10.5.1 Adjusting the channel amplifier 57
10.6 Installing the O2 measuring sensor 58
(up to software version A10) 58
10.6.1 Installing and calibrating the
measuring sensor 58
O
10.7 Replacing the battery 58
10.8 Replacing the motherboard 59
10.9 Replacing the sensor board 59
10.10 Replacing the pump seal kit 59
11. Safety test 60
11.1 Checking the protective earth 60
11.2 Voltage test 60
12 Diagrams, circuit diagrams and
12.1 Circuit diagram 1 61
12.2 Circuit diagram 2 62
12.3 Gas-route diagram 63
12.4 Diagrams 64
2
(to DIN 57411 / VDE 411) 60
gas-route diagram 61
3
1. Important information
Service and repair work on this piece of equipment may only be
performed by competent, that is, adequately instructed and
authorized persons.
2. Servicing the analyzer
The service work described below must be carried out irrespective of the applicable laws in the country of operation.
2.1 Half-yearly service
A safety test as described in Section 11 must be performed
following all service and repair work with a possible influence on
safety functions.
When the device is to be used in countries where calibration is
compulsory by law, the legal regulations in force in the country of
use regarding operation, service and calibration must be observed.
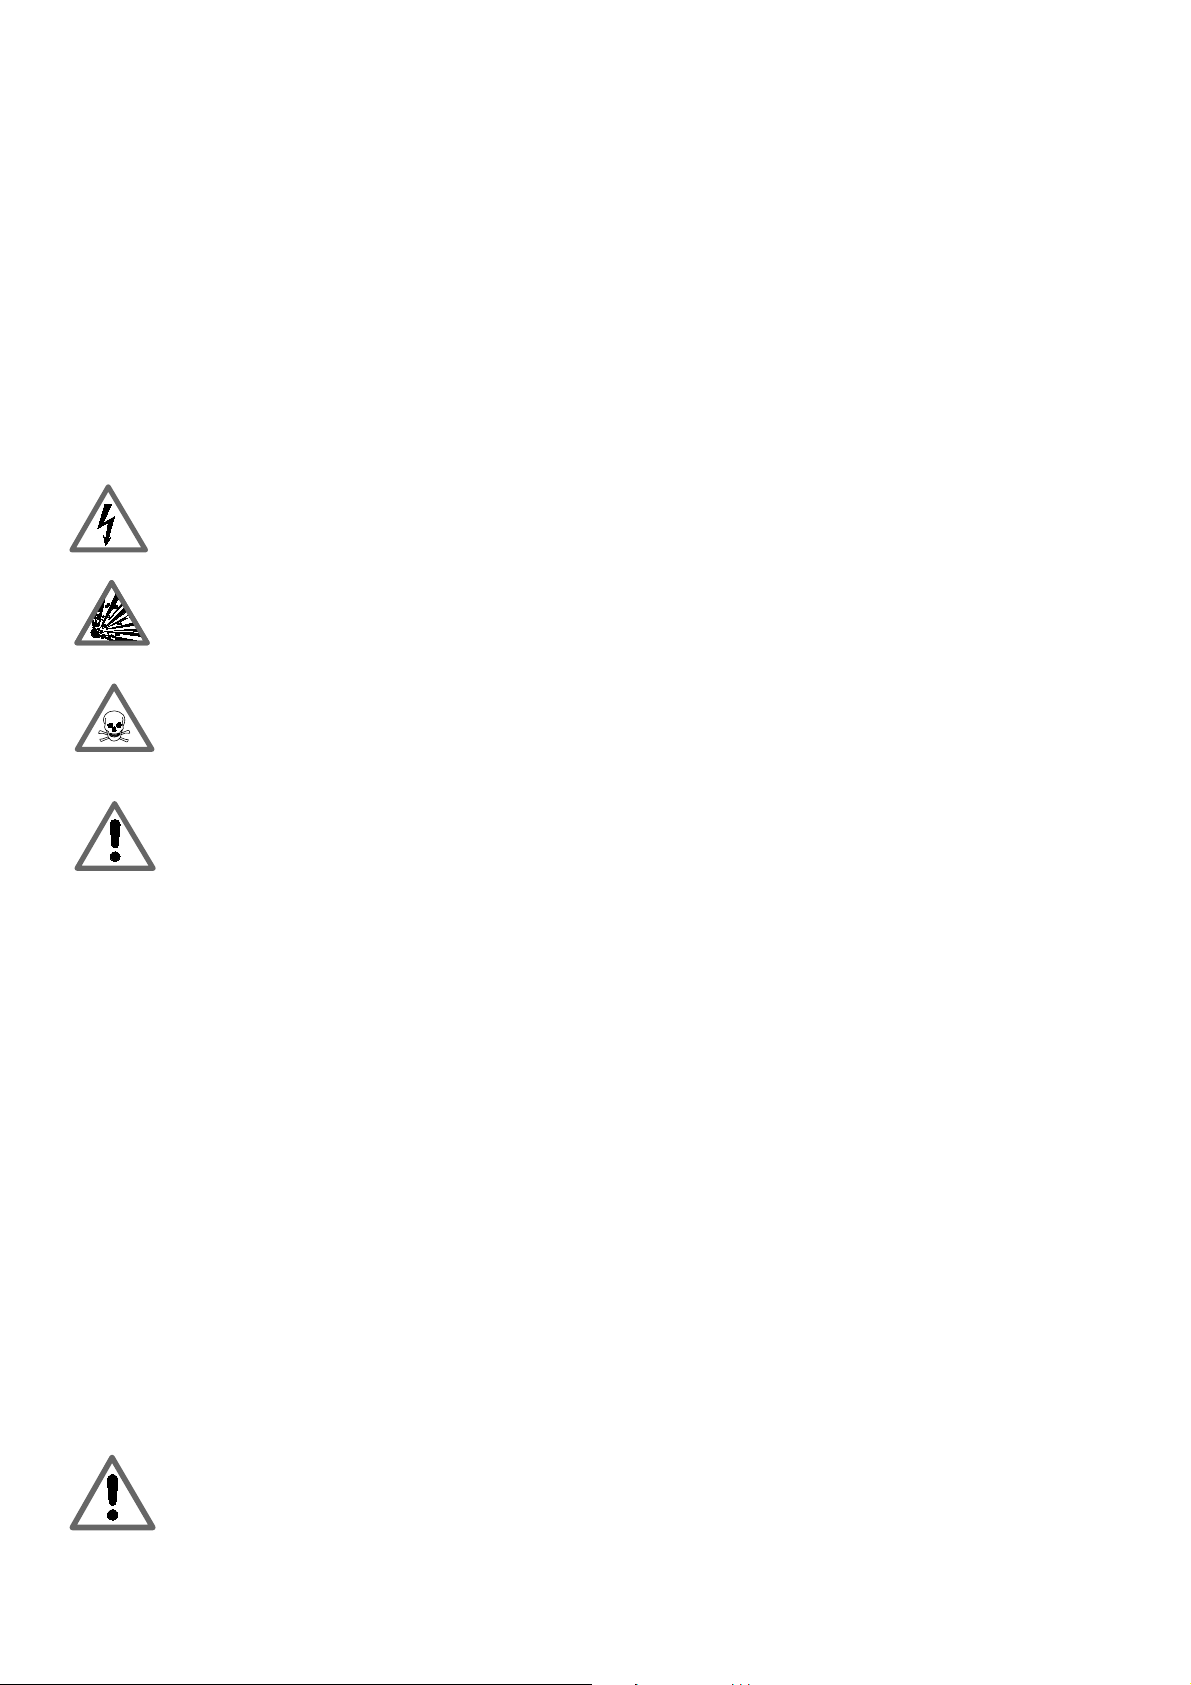
The exhaust-gas analyzer carries dangerous contact voltage. Poor service and repair work entails
a risk of accidents through electric shock.
1.1 Compulsory calibration
Explosive gases may not be measured with this
exhaust-gas analyzer. The exhaust-gas analyzer
must not be used in potentially explosive atmospheres.
When working with toxic gases, care must be
taken to ensure that a concentration hazardous to
health cannot build up in the workplace. Unskilled
service and repair work entails a risk of intoxication
during operation with toxic gases.
The assembly contains electrostatic sensitive
devices.
Observe the regulations for ESD!
i The only work to be performed at these intervals involves
checking and maintaining the device in working order.
! Before replacing filters, Sections 3.14 (Filtration) and 3.14.1
must be observed!
• Replace filter GF 1 (Figure 1, Pos. 1)
• Replace input filter GF 2 (Figure 1, Pos. 2)
• Replace paper filter (Figure 1, Pos. 4)
• Blow out fine filter (Figure 1, Pos. 5), replace if necessary
• Perform visual inspection of exhaust-sample probe. If seriously
clogged, blow out with compressed air against the intake
direction.
• Perform function test (Section 5)
• Check indicating accuracy (Section 6)
• Check zero point of oxygen measurement (Section 4.1.8)
• Perform leak test (Section 4.1.1)
2.2 Yearly service
This service work must be performed by a competent maintenance agent. It comprises the tasks from the half-yearly service
plus the following points:
• Replace protective pump filter GF 3 (see gas-route diagram).
• Replace carbon canister in zero-gas duct (Figure 2, Pos. 31).
• Replace battery on motherboard/computer board
(Section 10.7).
• Replace O
• Fine-tune air-pressure gauge (Section 6.5).
measuring sensor (Section 10.6).
2
National laws governing the calibration of exhaust-gas analyzers
must be observed.
Every six months
the exhaust-gas analyzer must be serviced by competent persons.
If, during such work, an official seal is damaged, proper and
expert repair work must be effected and confirmed by the authorized Service Agent or a new calibration performed.
For service work,
reports must be drawn up containing the following information:
- Time of service
- Type of service work
- Name of person or company carrying out service
These reports must be preserved for a duration of five years.
The operating instructions must be kept with the exhaust-gas
analyzer in such a way that they are available at all times.
The user of the exhaust-gas analyzer is responsible for observing calibration laws and
for regular servicing.
4

2.3 Test equipment for customer service
1 siphon, water gauge 100 cm, inside diameter max. 8 mm
1 flow meter (variable-area type), measuring range 1.0 l/min.
to 10 l/min., measuring medium air, 20 °C, 1 bar absolute
1 absolute-pressure sensor (barometer) or adjusting barometer
set to absolute pressure. Measuring accuracy 5 Hpa (5 mbar)
1 gas-wash bottle (bead bottle)
1 digital multimeter (DMM)
1 oscilloscope, sensitivity 5mV/cm
1 thermometer with surface probe
1 P100 or P200 or P140 for engine-speed measurement
1 DC calibrator, 0 to 15 mV
1 data terminal (pocket keypad)
1 measured-value printer (integrated or connected externally via
serial interface)
Viton hose to test-gas connection (do not use any other type of
hose material)
Compressed air for cleaning test-gas probe and hose
2.4 Test gases for customer service
(with manufacturer's certificate)
In order to save on bottles of test-gas, mixed gases are sometimes
recommended.
No.1: 14 % CO
No.2: 16.000 ppm C
2
(propane)*)Accuracy of analysis ± 1 %
3H8
Accuracy of analysis ± 1 %
No.3: 9 % CO Accuracy of analysis ± 1 %
No.4: 5 % CO + 7.5 % CO
2.000 ppm C
3H8
+
2
(propane)*) Accuracy of analysis ± 1 %
No.5: 2 % CO +
3.800 ppm C
No.6: 8.000 ppm C
(propane)*) Accuracy of analysis ± 1 %
3H8
(propane)*) +
3H8
1 % CO Accuracy of analysis ± 1 %
In some countries, A and B are used for the calibration of test
gases in accordance with OIML Directive R99. These gases may
also be used for the purpose of fine-tuning. In this case, gases no.
1 and 4 need not be used.
A 2.000 ppm C
3.5 % vol. CO Accuracy of analysis ± 1 %
14 % CO
(propane)*) Accuracy of analysis ± 1 %
3H8
2
Accuracy of analysis ± 1 %
B 200 ppm C3H8 (propane)*) Accuracy of analysis ± 1 %
0.5 % vol. CO Accuracy of analysis ± 1 %
6 % CO
2
Accuracy of analysis ± 1 %
*) The exhaust-gas analyzer is fine-tuned regularly with propane
(instead of hexane) for practical reasons. During fine-tuning,
the exhaust-gas analyzer is informed of the concentration of the
test gas in "ppm propane". The exhaust-gas analyzer automatically takes account of the necessary "propane factor".
5

3. Brief description of appliance function
3.3 System adjustment
The exhaust-gas analyzer is designed for the following measuring
ranges:
Carbon monoxide (CO) 0...10.00 % vol.
Hydrocarbons (HC) 0...9999 ppm
Carbon dioxide (CO2) 0...18 % vol.
Oxygen (O2) 0...21 % Vol. (optional)
Engine speed 0...9990 rpm
Oil temperature 0...150 °C
Excess air factor
(λ, Lambda) 0.500...1.800 (optional)
3.1 Serial interface
The exhaust-gas analyzer has a serial interface for connection to
the following items of equipment:
- Operator data terminal for entering the necessary identity data
during exhaust-gas tests, for entering the necessary measuring
parameters or for setting the internal battery-backed clock
(e.g. following a fault in the appliance).
- External printer (if the exhaust-gas analyzer does not feature an
integrated printer).
- Emission system analysis (3.110, 3.140, 3.250).
- Engine tester MOT 240 / 250 / 251 or FSA 560 / 600.
A special connecting line must be used for this purpose (see
operating instructions of different systems).
3.2 Analyzer part (measurement of CO, HC and CO
The channels for measuring CO, HC and CO
ding to the infrared pulsating-light method. In this process, the
function accor-
2
2
properties of the different gases are used to absorb infrared rays
of particular wavelengths. The infrared rays are produced by a
lamp, interrupted in cycles by a chopper wheel and fed one after
another through an analysis system for CO, HC and CO
. The
2
individual analysis systems are sensitive to infrared light of different wavelengths and can therefore be mechanically arranged
one behind the other.
Each of these systems consists of an analyzing chamber through
which test gas flows, and a receiving chamber filled with a
suitable gas mixture.
The systems are constructed in such a way that when zero gas
(air) flows through the analyzing chamber, a maximum electrical
alternating-voltage signal - the measured-value signal - is generated in the receiving chambers.
The signal is amplified by the appropriate channel amplifier,
rectified and conveyed on the motherboard to an analog-to-digital
converter (ADC). The digitalized signal is read and stored by the
MPU.
When test gas containing the component to be measured flows
through the analyzing chambers, component-specific wavelengths of the infrared ray are attenuated accordingly.
A smaller measured-value signal is generated in the receiving
chambers (see gas-route diagram, Section 12).
After the warm-up time and during various other processes, the
exhaust-gas analyzer performs a system adjustment in conjunction with a self-test. Each time that the exhaust-gas analyzer
carries out system adjustment, a solenoid valve switches the
zero-gas inlet (with carbon canister) into the test-gas duct for the
duration of the adjustment. During this process, the actual system
sensitivity of the HC, CO and CO
measuring channels is deter-
2
mined using zero gas (air) and stored as the zero point.
A system adjustment is always started automatically when the
system switches over to analyzing mode and the infrared measured values at this moment differ from zero. If the exhaust-gas
analyzer is still in analyzing mode after 15 minutes, the system
adjustment is repeated. Here, the analyzer automatically checks
whether analysis is currently taking place and, if it is, delays
system adjustment until all measured values have dropped to
zero.
3.4 Self-test
In conjunction with the system adjustment, the exhaust-gas
analyzer performs a self-test during which it checks its most
important functions. Any malfunctions it detects result in an error
message (Section 7).
3.5 Fine-tuning (HC, CO and CO
measuring channels)
2
During fine-tuning with test gas (upper-range value gas), the
measurement effect (difference from zero) is measured. The
analyzer is informed by means of a "setpoint" which test-gas
concentration corresponds to this measurement effect.
Fine-tuning is also carried out with mean-value gas (concentration in the middle of the measuring range).
Following this process, the exhaust-gas analyzer can then determine the characteristic curve, and all measured values which
occur within the measuring range can be interpreted and correctly indicated.
)
3.6 O
measuring channel (optional)
2
The sensitivity of this measuring channel is fine-tuned automatically during each system adjustment. Here, the measured oxygen
content is set against the compensating air = 20.9 % and the
condition of the O2 measuring sensor is monitored.
The zero of this O
measuring channel is fine-tuned manually
2
(see Section 4.1.8).
The oxygen measurement function can be deactivated
(Section 4.1.3).
3.7 Correction of pressure influence
Different levels of atmospheric pressure mean that different
concentrations are measured in the analysis system. In order for
the exhaust-gas analyzer to be able to display the correct value,
it is informed of the atmospheric pressure by means of a built-in
pressure sensor or by the entry of the mean altitude. The analyzer
can then calculate the correct display value itself.
In exhaust-gas analyzers without a built-in air-pressure gauge, the
new altitude must be entered if its location is changed
(Section 4.1.7).
6

3.8 Compensation of temperature influence
3.12 Corrected CO concentration (CO
vrai
)
Temperature sensors are situated on the receiving chambers.
The operating temperatures measured there are taken into consideration during fine-tuning of the exhaust-gas analyzer and during
the conversion of the measured value into the displayed value.
The correction factors required for this purpose are ascertained
specifically for each measuring channel (HC, CO and CO
during an automatic temperature-compensation process (see
Sections 4.1.13 and 4.4).
3.9 Engine-speed measurement
On the rear side of the exhaust-gas analyzer, an inductive clampon sensor can be connected to the designated jack and a
connecting line to terminal 1 or an optical pulse generator
connected (Figure 2, Pos. 7). In order to permit measurements to
be carried out on engines with differing numbers of cylinders and
at different signal sources, the exhaust-gas analyzer can be
informed of the number of pulses (PU) for each two crankshaft
revolutions. The pulse count is adjusted using the button for
selecting 2-stroke or 4-stroke measurement (Figure 1, Pos. 14).
Examples: 4-cylinder four-stroke engine; signal source
= cable to spark plug
Correct setting: PU = 1
4-cylinder four-stroke engine; signal source
= cable before distributor
Correct setting: PU = 4
The pulse count is adjusted for the exhaust-gas analyzer in the
range of 1 to 12 by pressing the "Select" button (Figure 2,
Pos. 25) several times.
The exhaust-gas analyzer calculates the true CO concentration
) from the concentrations of CO and CO2. For this pro-
(CO
vrai
cess, leaks in the exhaust system, for example, are taken into
consideration.
The true CO concentration is only printed out or is displayed on
)
the engine tester during operation with MOT 501. This function
2
can be deactivated (Section 4.1.4).
3.13 Parameterization
When the exhaust-gas analyzer has been switched to "Input
mode" (also see Section 4.1, input functions), it can be parame-
terized in accordance with the intended task. It is necessary to
break a test seal (in some countries) in order to get into input
mode.
3.14 Filtration
! Only Original Bosch filters part number 1 687 432 005 may
be used!
Particles and aerosols are removed from the test gas by means
of a cascade of filters.
Particles constitute solid bodies such as dust and soot, while
aerosols are tiny droplets of fluid which condense in the gas duct
and analyzing chambers. There, they form a coating which may
lead to error messages. Therefore, use of the correct filters is
extremely important.
3.10 Oil-temperature measurement (optional)
The temperature sensor required for this measurement is connected to the designated jack on the rear side of the exhaust-gas
analyzer (Figure 2, Pos. 27). In analysis mode, the oil-temperature display is automatically switched over to the lambda value
(excess-air factor) if the measured CO
content exceeds
2
2 % vol., that is, when vehicle exhaust gases are flowing through
the analyzer. To obtain this option, the functions "Lambda
measurement" and "Oxygen measurement" must be acti-
vated (see Sections 4.1.2 and 4.1.3).
3.11 Lambda measurement
The exhaust-gas analyzer calculates the excess-air factor from
the measured concentrations of CO, HC, CO
and O2. The
2
lambda value is indicated on the display if the measured CO
content surpasses 2 % and both the oxygen measurement and
lambda measurement functions are activated. The oxygen measurement is extremely important for calculating the excess-air
factor. An imprecise oxygen measurement leads to an incorrect
calculation of the excess-air factor. The lambda measurement
function can be deactivated (Section 4.1.2).
2
7

4. Extended operating functions
The functin switch S 60 on the side of the analyzer has three
settings which allocate various modes to the ”Select” ,
”Enter o ” and ”Test u buttons.
Switch position 0: Input mode (auxiliary function) and test mode
Switch position 1: Fine-tuning mode (mean values)
SELECT
ENTER
1 - 0 - 2
S 60
Switch position 2: Fine-tuning mode (upper-range values)
The function switch S 60 is normally concealed by a protective cover. In calibrated devices, this cover is also secured by a calibration
seal. This seal must be removed if you have to work in fine-tuning mode. After this, the exhaust-gas analyzer must be re-calibrated.
The switch position 0 is the standard setting.
In this setting, the functions described in Sections 4.1 (Input mode) and 4.2 (Test mode) may be used.
The following applies to all three operating modes:
A particular function can be selected and indicated on the display by pressing the "Select" button once or several times.
This function is activated by simultaneously pressing the "Enter u ” button.
Once this function has been activated, settings or parameters can be modified by means of the ”Enter o “or ”Test u “ buttons.
Pressing the "Select" button again terminates the function and accepts the modified settings or parameters. The next possible function
is displayed.
For further details on these operating functions, see Sections
- 4.1 Input mode (switch S 60 at position 0, auxiliary functions)
- 4.2 Test mode (switch S 60 at position 0)
- 4.3 Fine-tuning mode (switch S 60 at position 1, mean values)
- 4.4 Fine-tuning mode (switch S 60 at position 2, upper-range values)
TEST
If you suspect a malfunction in one of these control elements, perform trouble-shooting in accordance with Section 8.15, "Checking
the sensor board".
8
4.1 Input mode (switch S 60 at position 0, auxiliary functions)
Input mode permits you to carry out various checks and setting work on the device.
- Select the individual functions using the "Select" button. A code for each function and "
AnAn
An" for "Display"("Anzeige") appears in
AnAn
the oil-temperature display field.
- Simultaneously press the "Enter o" button to activate the chosen function. A code for each function and "
appears in the oil-temperature display field. After this, release both buttons.
You can now carry out modifications in the chosen function using the "Enter o" or "Test u" buttons.
- Press the "Select" button once more to return to standby mode.
Summary of select mode
Select mode functions in plain text
i Going into the "Select modes" varies with versions for
different countries!
The settings and various fine-tuning procedures described in
these instructions are based on the standard version.
Display in Function/seting mode
HC display field
LE.An Start leak test
Swiss Standard UK French
version version version version
U 13 H U 13 U U 13 E U 13 F
5C.An Set setpoints, with automatic recognition
for test gases. Separate for HC, CO and
CO
2
Press ETT 8.37, ETT 8.31, ETT 8.31 ETT 8.35
“SELECT” ETT 8.38 ETT 8.36 ETT 8.52
button
Li.An Limit value of oil temperature for official
measurements, adjustment
1 x LE.An LE.An LE.An LE.An
2 x 5C.An LA.An 5C.An LA.An
LA.An Pre-select lambda calculation On / Off
3 x 5C.An 02.An 5C.An 02.An
4 x 5C.An C0.An 5C.An C0.An
C0.An Pre-select CO
5 x Li.An 50.An AJ.An 50.An
6 x LA.An Pr.An LA.An Pr.An
5o.An Switch between Summer / Winter
7 x 02.An Ho.An 02.An 0F.An
8 x C0.An 0F.An C0.An Pl.An
Pr.An Pre-select air-pressure measurement On / Off
9 x 5o.An PL.An 5o.An An.An
10 x Pr.An An.An Pr.An LP.An
11 x CA.An LP.An Ho.An tE.An
CA.An Pre-select calibration, weekly or each
time button is pressed
12 x Ho.An tE.An 0F.An tc.An
13 x 0F.An tc.An Pl.An EA.An
Ho.An Set altitude
14 x An.An EA.An An.An 5t.An
15 x LP.An 5t.An LP.An
0F.An Set oxygen zero
16 x tE.An tE.An
17 x tc.An tc.An
An.An Analysis mode
18 x EA.An EA.An
19 x dA.An 5t.An
LP.An Select printer
20 x 5t.An
tE.An Select operator terminal
Ei Ei
Ei " for "Input" ("Eingabe")
Ei Ei
calculation On / Off
vrai
tc.An Start temperature compensation
EA.An External display switched on
dA.An Select single/dual printout
5t.An Pre-select analog output (only possible
with built-in analog interface)
PL.An Set pump capacity
AJ.An Start automatic calibration
02.An Oxygen measurement switched on
9
4.1.1 Leak test
Press
"SELECT" Display Meaning/function
1 x The pump starts up.
The analysis system is purged for 20 sec. with zero gas
5P. L E.Ei
6A5 L E.Ei
Abd. L E.Ei
The display "
- Either suck up car exhaust gas*) via the exhaust sample
probe (the test gas pump can be switched on with the
"Enter
button.
- Or introduce test gas (with a proportion of 10-15% vol.
CO2) via the calibration-gas inlet (set admission pressure
on bottle-pressure reducer to 0.7 bar).
Once the analyzer recognizes the flow of CO2, the flashing
changes to a continuous display.
*) Use only test gas no. 1 for the half-yearly test, see
Section 6
After a flow time of 20 seconds, the display switches to
Abd.Abd.
"
Abd." seal ("abdichten").
Abd.Abd.
- The analyzer automatically terminates flow through the
exhaust-sample probe via the pump by switching off the
pump.
- Manual flow through the calibration inlet must be termina ted manually.
In either of the above cases, the test-gas inlet must be sealed
off (e.g. by bending the intake hose).
6A56A5
6A5" flashes to prompt the flow of test gas.
6A56A5
oo
o " button and switched off with the "Test
oo
uu
u "
uu
10
LEC L E.Ei
i.0. L E.Ei
The analyzer must be informed that the inlet has been sealed
off. To do this, press "Enter o ".
The analyzer checks air-tightness (approx. 40 seconds) with
the pump running.
i.0i.0
"
i.0 " (OK) is displayed if the exhaust-sample intake system
i.0i.0
is sufficiently air-tight.
If error messages appear, perform trouble-shooting to
Section 8.
Err 1Err 1
Err 1 = Large leak
Err 1Err 1
Err 2Err 2
Err 2 = Small leak
Err 2Err 2

4.1.2 Lambda measurement ON / OFF
Press
"SELECT" Display Meaning/function
2 x Press "Enter o" to switch lambda calculation on
YE5 L A.Ei
or
lambda calculation off.
no L A.Ei
4.1.3 O2 measurement ON/ OFF
Press
"SELECT" Display Meaning/function
3 x Press "Enter o" to switch O2- measurement on
YE5 02.Ei
or
O2 measurement off.
no 02.Ei
11
4.1.4 CO correction CO
Press
"SELECT" Display Meaning/function
4 x Press "Enter o" to switch CO correction on
ON / OFF
vrai
YE5 C0.Ei
or
CO correction off.
If CO correction is switched on, the corresponding value is
printed out on the printer log.
no C0.Ei
4.1.5 Summer time ON / OFF
Press
"SELECT" Display Meaning/function
5 x Press "Enter o" to switch summer time on
or
YE5 50.Ei
summer time off.
no 50.Ei
12
4.1.6 Air-pressure gauge ON / OFF
Press
"SELECT" Display Meaning/function
6 x If an air-pressure gauge is built in, press the "Enter o" button
to activate the correction of pressure influence in accordance
with the values measured by the pressure gauge.
YE5 Pr.Ei
In the "
with the entered altitude.
nono
no" setting, the mean air pressure is corrected in line
nono
no Pr.Ei
4.1.7 Entering the altitude
Press
"SELECT" Display Meaning/function
7 x The first time the analyzer is put into operation, the altitude,
rounded to the nearest hundred metres, must be entered. The
height appears in the engine-speed display field.
Enter the altitude in steps of 100 metres using the "Enter o"
YE5 EA.Ei
4.1.8 Fine-tuning the zero of O2 (up to software version A 10)
or "Test u" buttons.
Press
"SELECT" Display Meaning/function
8 x Introduce a calibration gas consisting of at least 10% CO2 and
no oxygen into the calibration-gas inlet.
0FF5
Set the admission pressure on the bottle-pressure reducer to
0.7 bar
1732 0F.Ei
The millivolt display in the engine-speed display window
drops with the flow. Once the display has fallen below 80 mV,
0.0
79 0F.Ei
the display "
Zero has been found when the millivolt display in the enginespeed display window remains constant.
0FF50FF5
0FF5" in the oxygen display window disappears.
0FF50FF5
13

4.1.8 Fine-tuning the zero of O2 (from software version A 13)
Press
"SELECT" Display Meaning/function
8 x An automatic process is executed.
10.02 98
870
5P 0F.Ei
28.05 99
2525
0F.Ei
4.1.9 Adjusting the pump capacity
Press
"SELECT" Display Meaning/function
9 x Here, after the system has switched from function "
Err Pl.Ei
The current date is shown in the display window for HC
and CO.
In the O2 display window, the voltage value from the O2 measuring
sensor is displayed.
Limit values: 1.850V to 3.550V
Pl.EiPl.Ei
to "
Pl.Ei" first an error message "
Pl.EiPl.Ei
window for engine speed.
Press the speed selector button: the LED lights up.
Set the pump capacity from 0 to 15 in the engine-speed display window using the "Enter o" and "Test u" buttons.
Check the setting in accordance with Section 8.2.2.
ErrErr
Err" appears in the display
ErrErr
Pl.AnPl.An
Pl.An"
Pl.AnPl.An
4.1.10 Analysis mode
Press
"SELECT" Display Meaning/function
10 x In analysis mode calibration gas of any concentration entering
1000 5.00
0.0 7.5
An.Ei
via the calibration-gas inlet can be displayed without the pump
having to be switched on. The admission pressure must be set
to 0.7 bar on the bottle-pressure reducer.
This mode enables measuring accuracy to be checked using a
minimal amount of calibration gas. At 0.7 bar, the flow resistance of the non-return valve is overcome and a suitable flow
is bound to be achieved (1 l/min to 4 l/min).
If a flow meter is connected to the gas outlet, the flow can be
set to a minimum of 0.5 l/min.
! Do not connect the flow meter to the calibration-gas inlet.
Calibration gas can also be introduced through the exhaustsample intake hose. To do so, switch in a flow meter between
the calibration-gas bottle and the sample intake hose. The
flow as a whole must not exceed 10 l/min.
14
4.1.11 Selecting a printer
Press
"SELECT" Display Meaning/function
11 x The following settings are possible:
11
1 = external printer 20 characters (Switzerland)
11
22
2 = internal printer (PDR 078)
22
33
3 = external printer (PDR 200)
33
L P.Ei
4.1.12 Selecting the operator terminal
Press
"SELECT" Display Meaning/function
12 x The following settings are possible:
11
1 = Pocket keypad PT 14 (V24 interface)
11
22
2 = Data terminal DTL 224 (RS 232 interface)
22
tE.Ei
4.1.13 Temperature compensation
Press
"SELECT" Display Meaning/function
13 x If "
no tc.An
7.345 7.446
7.407
i.0 tc.Ei
nono
no" appears in the display window for engine speed, the
nono
temperature-compensation sequence has not been enabled.
To enable temperature compensation, this function must be
selected as described in Section 4.4.
Before temperature compensation, please observe the following points:
- Let device cool for 2 hours with cover closed.
- Set up switched-off device in a calm spot free from
draughts.
- Switch on device with cover closed.
An automatic sequence takes place. The current ADC values
are shown in the display window for HC, CO and CO2. After
approx. 100 minutes, "
play window once compensation has been successfully com
pleted.
i.0.i.0.
i.0." appears in the engine-speed dis-
i.0.i.0.
15
4.1.13.1 Error messages regarding temperature compensation
- Temperature-compensation selection is set to "
- Temperature compensation was started during the warm-up
phase.
Err1
- Device had not cooled sufficiently prior to temperature
compensation.
- Ambient temperature fluctuated greatly during temperature
compensation.
Err2
- ADC values show excessive temperature sensitivity.
- Foreign gases are diffused into the system during tempera ture compensation.
- If temperature compensation was terminated incorrectly, all
Err3
4.1.14 External display ON / OFF
Press
"SELECT" Display Meaning/function
further measurement is disabled.
nono
no".
nono
14 x Press the "Enter o" button to switch the external display on
or
YE5 EA.Ei
external display off.
When the external display is switched on, the printer selection is automatically set to the internal printer.
no EA.Ei
4.1.15 Selecting analog interface (optional)
Press
"SELECT" Display Meaning/function
15 x Press the "Enter o" or "Test u" buttons to alter the entry in
the engine-speed display window.
nono
no Analog output not activated
nono
00
0 Measuring range 0 to 20 mA
no 5t.Ei
00
44
4 Measuring range 4 to 20 mA
44
16
4.2 Test mode ( switch S 60 at position 0)
In this menu, internal measured values and device settings can be displayed for the purpose of assessing error messages
when repairing the device. To display this information, press the "Test u" button once or several times. The indicated measured value or analyzer parameter remains on display for the duration that the "Test u" button is depressed.
Press
uu
"Test
u" Display Meaning/function
uu
1 x Current measured values prior to linearization (non-linearized
0.2 0.4
values).
0.0
roh
2 x Temperature in the analyzer part in °C (averaged temperature
36.87
of all receiving chambers).
tEP
3 x Measured values from the analog-to-digital converter (ADC)
2.820 2.794
in the HC, CO and CO2 measuring channels in volts.
2.435 2.729
Adu
4 x Temperature-compensated measured values from the analog-
7.738 7.546
7.875
to-digital converter (ADC) in the HC, CO and CO2 measuring
channels in volts.
Adut
5 x Current date
19.05 99
dot
6 x Current time
07.38 46
Uhr
7 x Identification number for error message "
RAM check. This identification number defines the parameter(s) recognized as faulty (see Section l7.1).
CM05
Err 128Err 128
Err 128" CMOS-
Err 128Err 128
17
Press
uu
"Test
u" Display Meaning/function
uu
8 x Measured supply voltage (auxiliary power) in % of the nomi-
nal mains value.
94 U
9 x The output voltage of the air-pressure gauge is shown in the
3.494
HC display field.
The current air pressure or an error message "
the display field for engine speed (see Section 8.9).
ErrErr
Err" appears in
ErrErr
980 Pr
10 x The number of exhaust-gas measurements performed is
shown in the engine-speed display field.
28 coun
11 x The check sum of the software version is shown in the
engine-speed display field.
94 U
18

4.3 Fine-tuning mode (switch S 60 at position 1, mean values, air-pressure gauge and chopper-motor recognition)
Procedure Display
Press button Press simultaneously Current measured Current setting value Function symbol in
value in display in engine-speed temperature display
window
Select 1 x - - - - HC x x x x
Enter o HC x x x x
With the "Enter o" and "Test u" buttons, the current setting value can now be changed until the current
measured value matches the test-gas concentration.
Select 2 x - - - - CO x x x x
Enter o CO x x x x
With the "Enter o" and "Test u" buttons, the current setting value can now be changed until the current
measured value matches the test-gas concentration.
Select 3 x - - - - C 0
Enter o CO
2
2
x x x x
x x x x
With the "Enter o" and "Test u" buttons, the current setting value can now be changed until the current
measured value matches the test-gas concentration.
Select 4 x - - - - HC x x x x
Enter o HC x x x x
d.And.An
d.An
d.And.An
d.Eid.Ei
d.Ei
d.Eid.Ei
d.And.An
d.An
d.And.An
d.Eid.Ei
d.Ei
d.Eid.Ei
d.And.An
d.An
d.And.An
d.Eid.Ei
d.Ei
d.Eid.Ei
bo.Anbo.An
bo.An
bo.Anbo.An
bo.Eibo.Ei
bo.Ei
bo.Eibo.Ei
See Section 6.5 for fine-tuning procedure
Select 5 x - - - - Engine speed
Enter o Engine speed
See Section 6.5 for fine-tuning procedure
ErrErr
Err
ErrErr
1515
15
1515
CH.AnCH.An
CH.An
CH.AnCH.An
CH.EiCH.Ei
CH.Ei
CH.EiCH.Ei
19

4.4 Fine-tuning mode (switch S 60 at position 2, upper-range values, activation of temperature compensation and setting
appropriate version for country of use)
Procedure Display
Press button Press simultaneously Current measured Current setting value Function symbol in
value in display in engine-speed temperature dislpay window
window window
Select 1 x - - - - HC x x x x
Enter o HC x x x x
With the "Enter o" and "Test u" buttons, the current setting value can now be changed until the current
measured value matches the test-gas concentration.
Select 2 x - - - - CO x x x x
Enter o C O x x x x
With the "Enter o" and "Test u" buttons, the current setting value can now be changed until the current
measured value matches the test-gas concentration.
Select 3 x - - - - C 0
Enter o CO
2
2
x x x x
x x x x
With the "Enter o" and "Test u" buttons, the current setting value can now be changed until the current
measured value matches the test-gas concentration.
Select 4 x - - - - HC + CO + CO
Enter o HC + CO + CO
2
2
x x x x
x x x x
E.AnE.An
E.An
E.AnE.An
E.EiE.Ei
E.Ei
E.EiE.Ei
E.AnE.An
E.An
E.AnE.An
E.EiE.Ei
E.Ei
E.EiE.Ei
E.AnE.An
E.An
E.AnE.An
E.EiE.Ei
E.Ei
E.EiE.Ei
tb.Antb.An
tb.An
tb.Antb.An
tb.Eitb.Ei
tb.Ei
tb.Eitb.Ei
When the entry is set to "
YE5 tb.EiYE5 tb.Ei
YE5 tb.Ei", temperature compensation is activated.
YE5 tb.EiYE5 tb.Ei
Select 5 x - - - - Engine speed
Enter o Engine speed
For setting see Section 6.7
U 13 UU 13 U
U 13 U
U 13 UU 13 U
U 13 UU 13 U
U 13 U
U 13 UU 13 U
tY.AntY.An
tY.An
tY.AntY.An
tY.EitY.Ei
tY.Ei
tY.EitY.Ei
20
 Loading...