

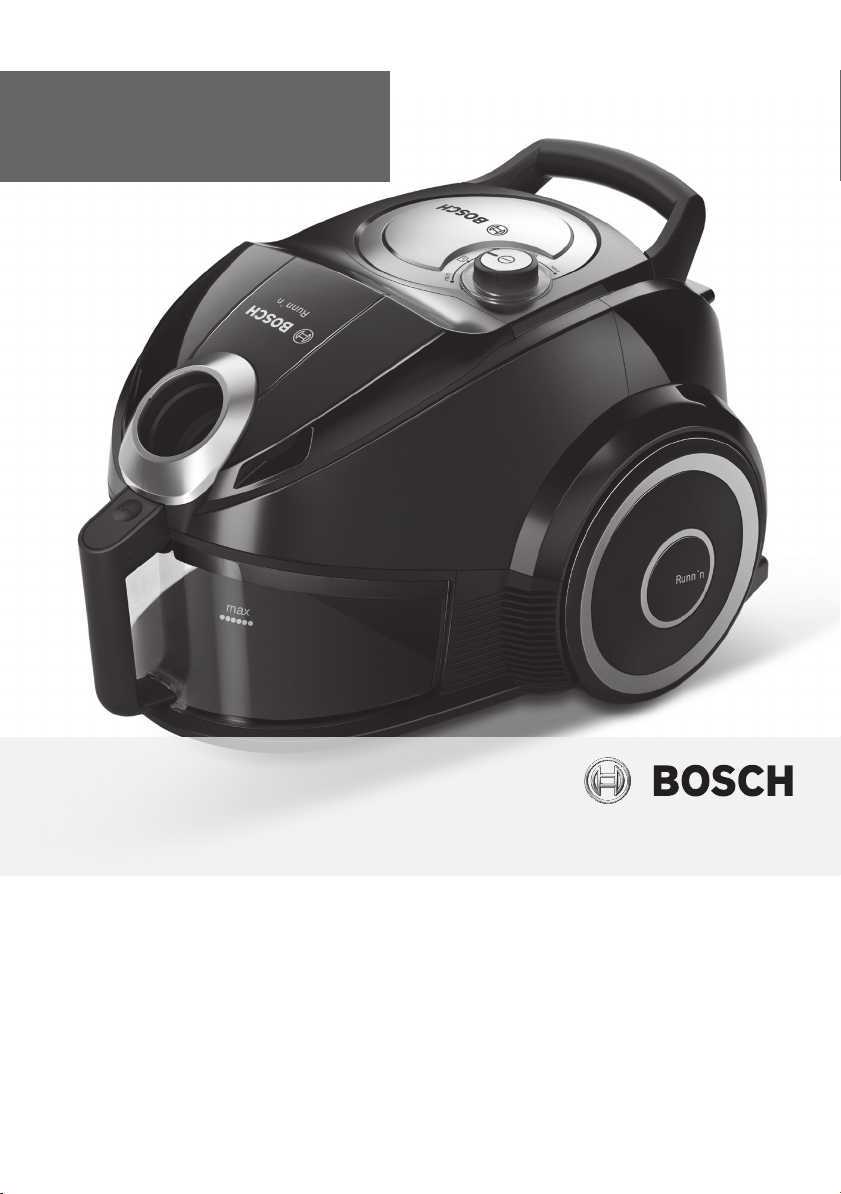
Bosch BGS4334GB Instruction manual
Register your new Bosch now:
www.bosch-home.com/welcome
BGS 4..
Runn´n
en Operating instructions

Table of content
Safety information . . . . . . . . . . . . . . . . . . . . . . . . . . . . . . . . . .4
Intended use . . . . . . . . . . . . . . . . . . . . . . . . . . . . . . . . . . . . . . .4
Safety information . . . . . . . . . . . . . . . . . . . . . . . . . . . . . . . . . .5
Proper use . . . . . . . . . . . . . . . . . . . . . . . . . . . . . . . . . . . . . . . .5
Your vacuum cleaner . . . . . . . . . . . . . . . . . . . . . . . . . . . . . . . .8
Replacement parts and special accessories . . . . . . . . . . . . .10
Initial use . . . . . . . . . . . . . . . . . . . . . . . . . . . . . . . . . . . . . . . .11
Connecting the flexible hose . . . . . . . . . . . . . . . . . . . . . . . . .11
Putting the handle and the telescopic tube together . . . . . . .11
Inserting the telescopic tube into the floor nozzle . . . . . . . . .11
Adjusting the telescopic tube . . . . . . . . . . . . . . . . . . . . . . . . .12
Connecting the appliance . . . . . . . . . . . . . . . . . . . . . . . . . . . .12
Switch on /off . . . . . . . . . . . . . . . . . . . . . . . . . . . . . . . . . . . . .12
Controlling the suction level . . . . . . . . . . . . . . . . . . . . . . . . . .13
Vacuuming . . . . . . . . . . . . . . . . . . . . . . . . . . . . . . . . . . . . . . .14
Set the adjustable floor nozzle . . . . . . . . . . . . . . . . . . . . . . . .14
Vacuuming with accessories . . . . . . . . . . . . . . . . . . . . . . . . . .15
Parking aid . . . . . . . . . . . . . . . . . . . . . . . . . . . . . . . . . . . . . . .15
Vacuuming stairs . . . . . . . . . . . . . . . . . . . . . . . . . . . . . . . . . . .16
After vacuuming . . . . . . . . . . . . . . . . . . . . . . . . . . . . . . . . . . .16
Disconnecting the appliance . . . . . . . . . . . . . . . . . . . . . . . . . .16
Sliding the telescopic tube . . . . . . . . . . . . . . . . . . . . . . . . . . .17
Storing and transporting . . . . . . . . . . . . . . . . . . . . . . . . . . . . .17
Disassembly . . . . . . . . . . . . . . . . . . . . . . . . . . . . . . . . . . . . . .18
Removing the flexible hose . . . . . . . . . . . . . . . . . . . . . . . . . . .18
Removing the telescope tube . . . . . . . . . . . . . . . . . . . . . . . . .18
Removing the floor nozzle . . . . . . . . . . . . . . . . . . . . . . . . . . . .18
2

Table of content
Cleaning and care . . . . . . . . . . . . . . . . . . . . . . . . . . . . . . . . .19
Emptying the dust container . . . . . . . . . . . . . . . . . . . . . . . . . .19
Removing the dust container . . . . . . . . . . . . . . . . . . . . . . . . .19
Maintaining the dust separation system . . . . . . . . . . . . . . . . .21
In normal operation . . . . . . . . . . . . . . . . . . . . . . . . . . . . . . . .21
Cleaning the foam filter . . . . . . . . . . . . . . . . . . . . . . . . . . . . .21
In the event of a fault . . . . . . . . . . . . . . . . . . . . . . . . . . . . . . .23
Removing a blockage from the dust separation unit . . . . . . . .23
Exhaust filter care . . . . . . . . . . . . . . . . . . . . . . . . . . . . . . . . .24
Cleaning a washable HEPA filter . . . . . . . . . . . . . . . . . . . . . . .24
Replacing the HEPA-filter . . . . . . . . . . . . . . . . . . . . . . . . . . . .26
Cleaning the micro filter . . . . . . . . . . . . . . . . . . . . . . . . . . . . .27
Cleaning instructions . . . . . . . . . . . . . . . . . . . . . . . . . . . . . . .29
Notes on the energy label . . . . . . . . . . . . . . . . . . . . . . . . . . .29
Disposal . . . . . . . . . . . . . . . . . . . . . . . . . . . . . . . . . . . . . . . . .30
Costumer service . . . . . . . . . . . . . . . . . . . . . . . . . . . . . . . . . .31
Conditions of guarantee . . . . . . . . . . . . . . . . . . . . . . . . . . . .31
3

Safety information
Please keep this instruction manual. When passing the vacuum
cleaner on to a third party, please also pass on this instruction
manual.
Intended use
This vacuum cleaner is intended for domestic use and not for commercial use. Only use this vacuum cleaner in accordance with the
instructions in this instruction manual. The manufacturer will not
accept any responsibility for damage caused by improper use or incorrect operation.
Therefore, please note the following points.
The vacuum cleaner must only be operated with:
Original replacement parts, accessories or special accessories
In order to prevent injuries and damage, the vacuum cleaner
must not be used for:
Vacuum-cleaning persons or animals
Vacuuming up:
- insects or spiders.
- hazardous, sharp-edged, hot or glowing substances.
- damp or liquid substances.
- highly flammable or explosive substances and gases.
- ash, soot from tiled stoves and central heating systems.
- toner dust from printers and copiers.
4

Safety information
Safety information
This vacuum cleaner complies with the recognised rules of technology and the relevant safety regulations.
The appliance may be used by children over the age of 8 years and
by persons with reduced physical, sensory or mental capacity or by
persons with a lack of experience or knowledge if they are
supervised or have been instructed on the safe use of the
appliance and the have understood the potential dangers of using
the appliance.
Children must never play with the appliance.
Cleaning and user maintenance must never be carried out by
children without supervision.
Plastic bags and films must be kept out of the reach of children
before disposal. => Risk of suffocation.
Proper use
Only connect and use the vacuum cleaner in accordance with
the specifications on the rating plate.
Never vacuum without the dust bag or dust container, motor
protection or exhaust filter.
=> This may damage the vacuum cleaner.
Always keep the vacuum cleaner away from your head when
using nozzles and tubes.
=> This could cause injury!
When vacuuming stairs, the appliance must always be positioned below the user.
Do not use the power cord or the hose to carry or transport the
vacuum cleaner.
For safety reasons, if this appliance's mains power cable becomes damaged, it must be replaced by the manufacturer, their
after-sales service department or a similarlyqualified person.
5

Safety information
If using the appliance for longer than 30 minutes, pull out the
power cord completely.
When disconnecting the appliance from the mains, pull on the
plug itself to remove it; do not pull on the power cord.
Do not pull the power cord over sharp edges or allow it to become trapped.
When the cable is being automatically rewound, ensure that the
mains plug is not thrown towards persons, body parts, animals
or objects.
=> Use the mains plug to guide the power cord.
Pull out the mains plug before carrying out any work on the
vacuum cleaner.
Do not operate the vacuum cleaner if it is damaged. Unplug the
appliance from the mains if a fault is detected.
For safety reasons, only authorised after-sales service personnel
are permitted to carry out repairs and fit replacement parts to
the vacuum cleaner.
Protect the vacuum cleaner from the weather, moisture and
sources of heat.
Do not pour flammable substances or substances containing
alcohol onto the filters (dust bag, motor protection filter,
exhaust filter, etc.).
The vacuum cleaner is not suitable for use on construction sites.
=> Vacuuming up building rubble could damage the appliance.
When not in use, switch off the appliance and pull out the mains
plug.
At the end of its life, the appliance should immediately be rendered unusable, then disposed of in an appropriate manner.
6
Safety information
! Please note
The mains socket must be protected by at least a 16 amp circuit breaker.
If a circuit breaker is tripped when you switch on the vacuum
cleaner, this may be because other electrical appliances which
have a high current draw are connected to the same power circuit.
To prevent the circuit breaker from tripping, select the lowest
power setting before switching the appliance on, and increase
the power only once it is running.
7
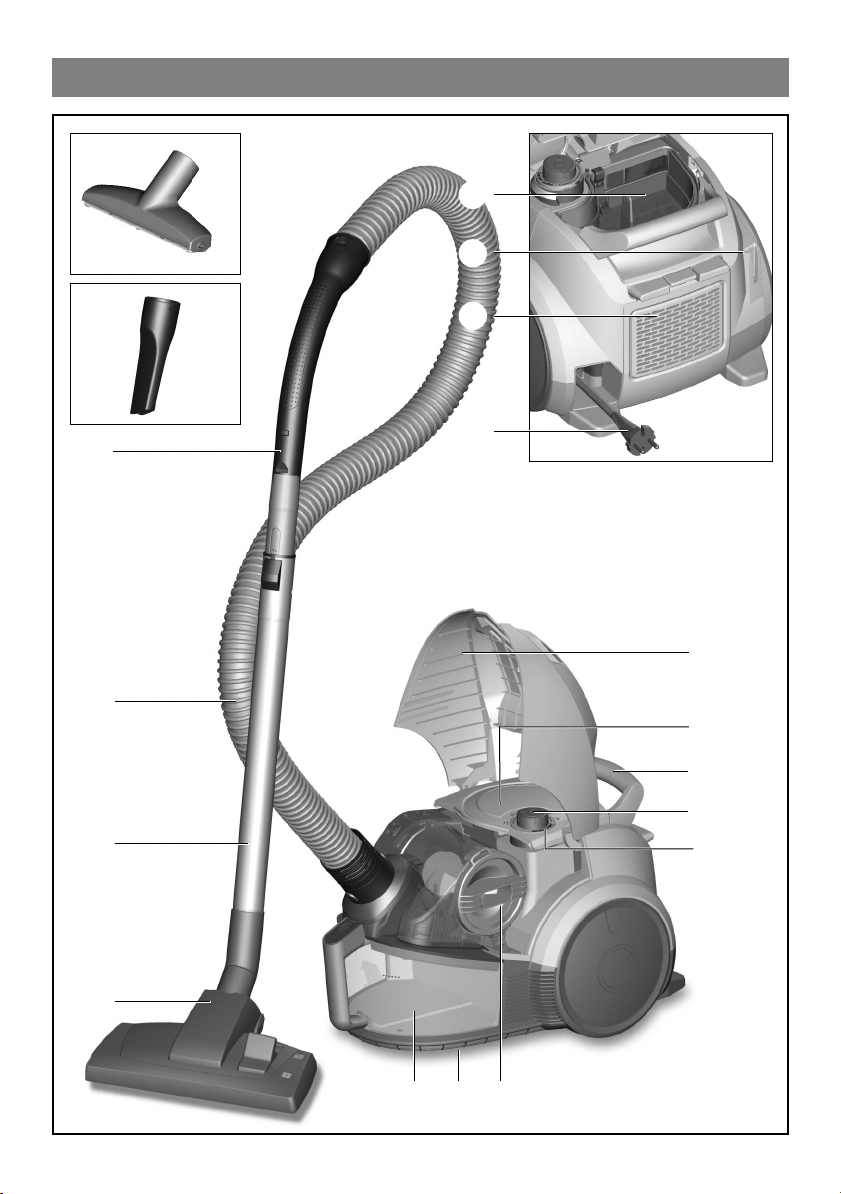
Your vacuum cleaner
17
5
6
18
7
8
4
9
3
10
11
12
2
13
1
14
1615
8

Your vacuum cleaner
1 Adjustable floor tool
2 Telescopic tube with sliding
switch but without accessory
connection
3 Flexible hose
4 Handle
5 Foam filter
6 Parking aid on the back of
the appliance
7 Exhaust filter lid
8 Power cord
9 Appliance lid
10 Foam filter lid
11 Carrying handle
12 On/Off button with
electronic suction
regulator
13 Filter control display
(Sensor Control)
14 Dust container with
carrying handle
15 Storage aid on the
underside of the appliance
16 Fluff filter cover
17 Professional upholstery
nozzle
18 Crevice nozzle
9
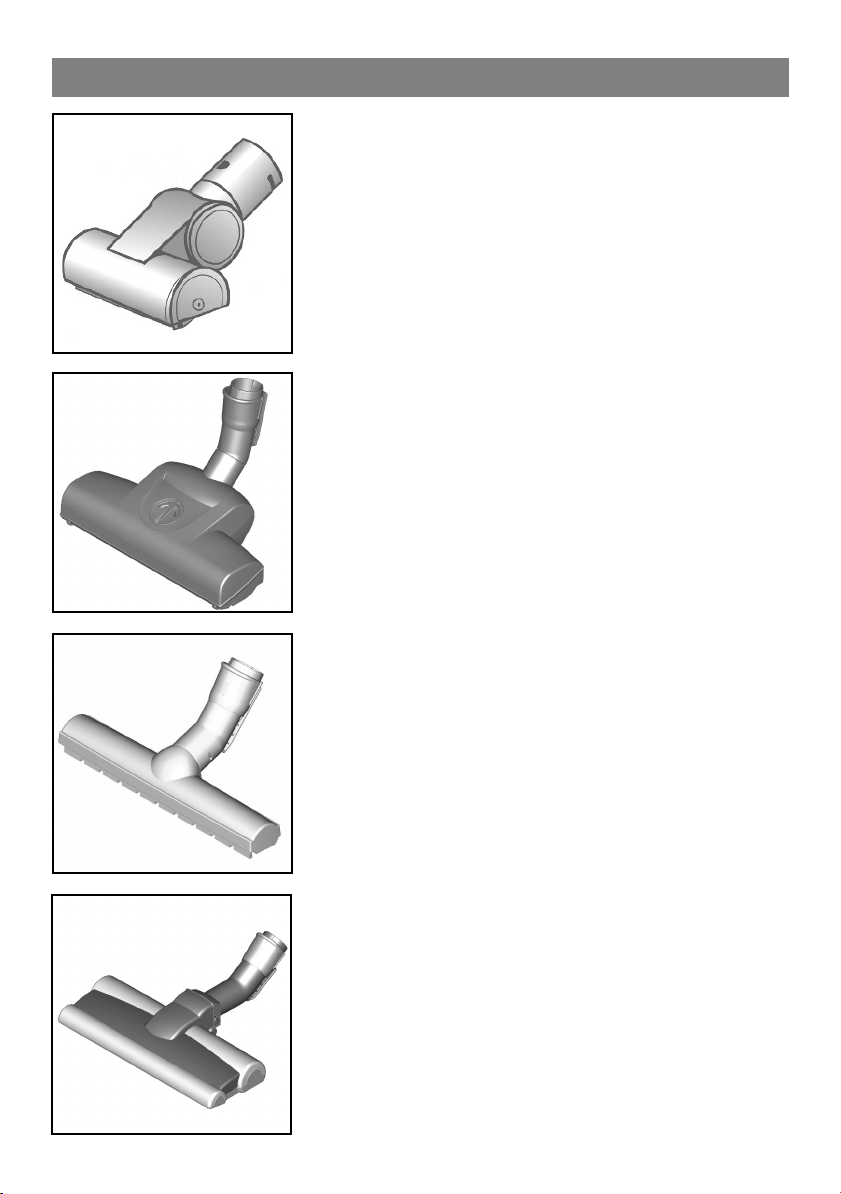
Replacement parts and special accessories
®
brush for
®
brush for floors
A
B
C
A TURBO-UNIVERSAL
upholstery BBZ42TB
All-in-one brushing and vacuuming of
upholstered furniture, mattresses, car
seats, etc. Especially suitable for
picking up pet hair. The brush roller is
driven by the suction air flow through
the vacuum cleaner.
No separate electrical connection is
needed.
B TURBO-UNIVERSAL
BBZ102TBB
All-in-one brushing and vacuuming of
rugs and carpets as well as all hard
floor coverings.
Especially suitable for picking up pet
hair. The brush roller is driven by the
suction air flow of the vacuum cleaner.
No separate electric connection is
needed.
10
D
C Hard-floor nozzle BBZ123HD
For vacuuming hard floors
(parquet, tiles, terracotta, etc.)
D Hard-floor nozzle BBZ124HD
With 2 rotating brush rollers
For caring for expensive hard floors
and for the improved collection of
coarse dirt.
 Loading...