

Page 1

Page 2
WARANTY
Terms and conditions
BOS MTB offers warranty on its products on the following terms :
BOS MTB guarantees to the original purchaser that the BOS product for which they
received this warranty is free from defects in material and workmanship for one year
from the date of original retail purchase. A proof a purchase will be asked for any
warranty claim. This warranty is not transferable to a subsequent purchaser.
Wear and tear parts such as dust seals, Oring, bushings, rear shock mouting
hardwares, stanchions, threaded parts and bolts are not covered under this warranty.
Terms
This warranty is subject to legal jurisdictional or warranty rights of the country where it
has been originally purchased, which will prevail if different from the terms herein
listed.
Limits
BOS MTB cannot be liable for any loss, inconvenience damages, whether direct,
incidental, consequential, resulting from the use of its products, local legislation
prevailing.
Warranty exclusions
This warranty does not cover the following cases:
• Damage to products resulting from improper assembly other than listed below
• Products that have been modified by the owner or a third party
• Improper use
• Damages resulting from an accident, crash under any circumstances
• Invalid servicing procedures and servicing time frame not respected
• Replacement of the original parts by parts from others manufacturers
• Products whose serial numbers has been altered, defaced or removed.
Warranty procedure
The owner should always refer to an approved BOS center for any warranty claim. A
proof a purchase is compulsory for any warranty claim. Otherwise the warranty claim
will not be considered. Always contact BOS MTB warranty department before returning
any products that may fall under this warranty. If “the faulty parts” do not fall under
warranty, the customer will be charged for any costs in respect with warranty such as
transport and package back and forth.
Page 3
1. INTRODUCTION
Thank you for purchasing a Bos Vip'R2 shock. Your shock has been assembled specifically for one bike - obviously
yours ! - which means that the internal valving and the air chamber volume are settled for your bike. The adequate
mounting kit is also provided with the shock.
CAUTION
Never try to disassemble your shock. Limit yourself to the instructions given in this manual.
This shock is pressurized, for your own safety, do not try to open it.
Contact an authorized service center for any maintenance operation.
2. ASSEMBLY
Your VIP'R2 shock features adequate mounting kits for the bike mentionned while ordering.
Check the mounting way
by refering to the compatibility table, available on bos mtb website : http://www.bosmtb.com.
Refer to the bike manual
to follow the specific shock mounting procedures of your bike.
3. SETTINGS
3.1. AIR PRESSURE
Before using the shock, you must set up the air pressure, depending on your weight.
The air pressure is not related only to your weight but also to your bike’s rear suspension geometry.
Refer to the compatibility table on Bos mtb’s website, in the download area :
http://www.bosmtb.com to check the correct air pressure, related to your weight AND your bike..
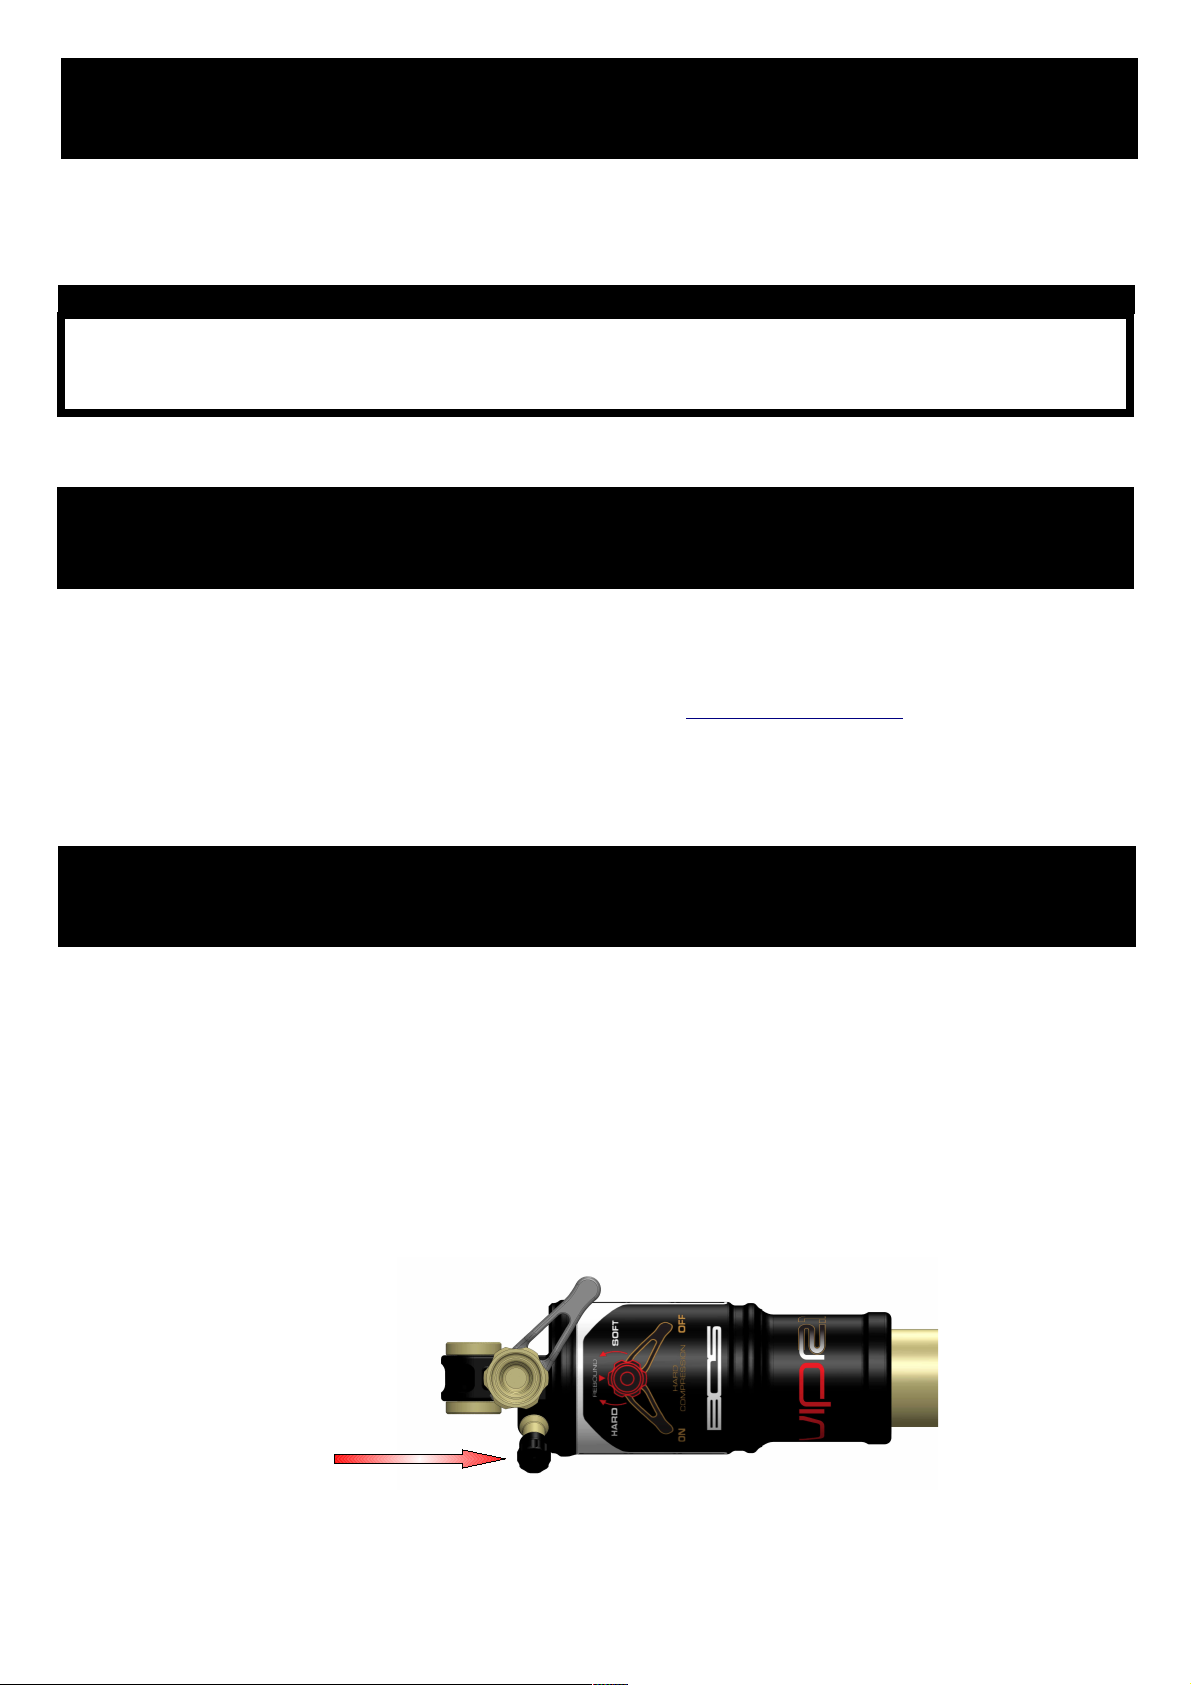
Connect a pump equipped with a precise manometer to the Schrader valve located on the side of the upper part of
the body, and inflate at the right pressure.
air valve
Page 4
3.2. AIR CHAMBERS BALANCE
In order to guarantee a perfect functioning of your shock, after having settled up the air pressure, you must proceed
to the air chambers balance.
The shock must be mounted on the bike.
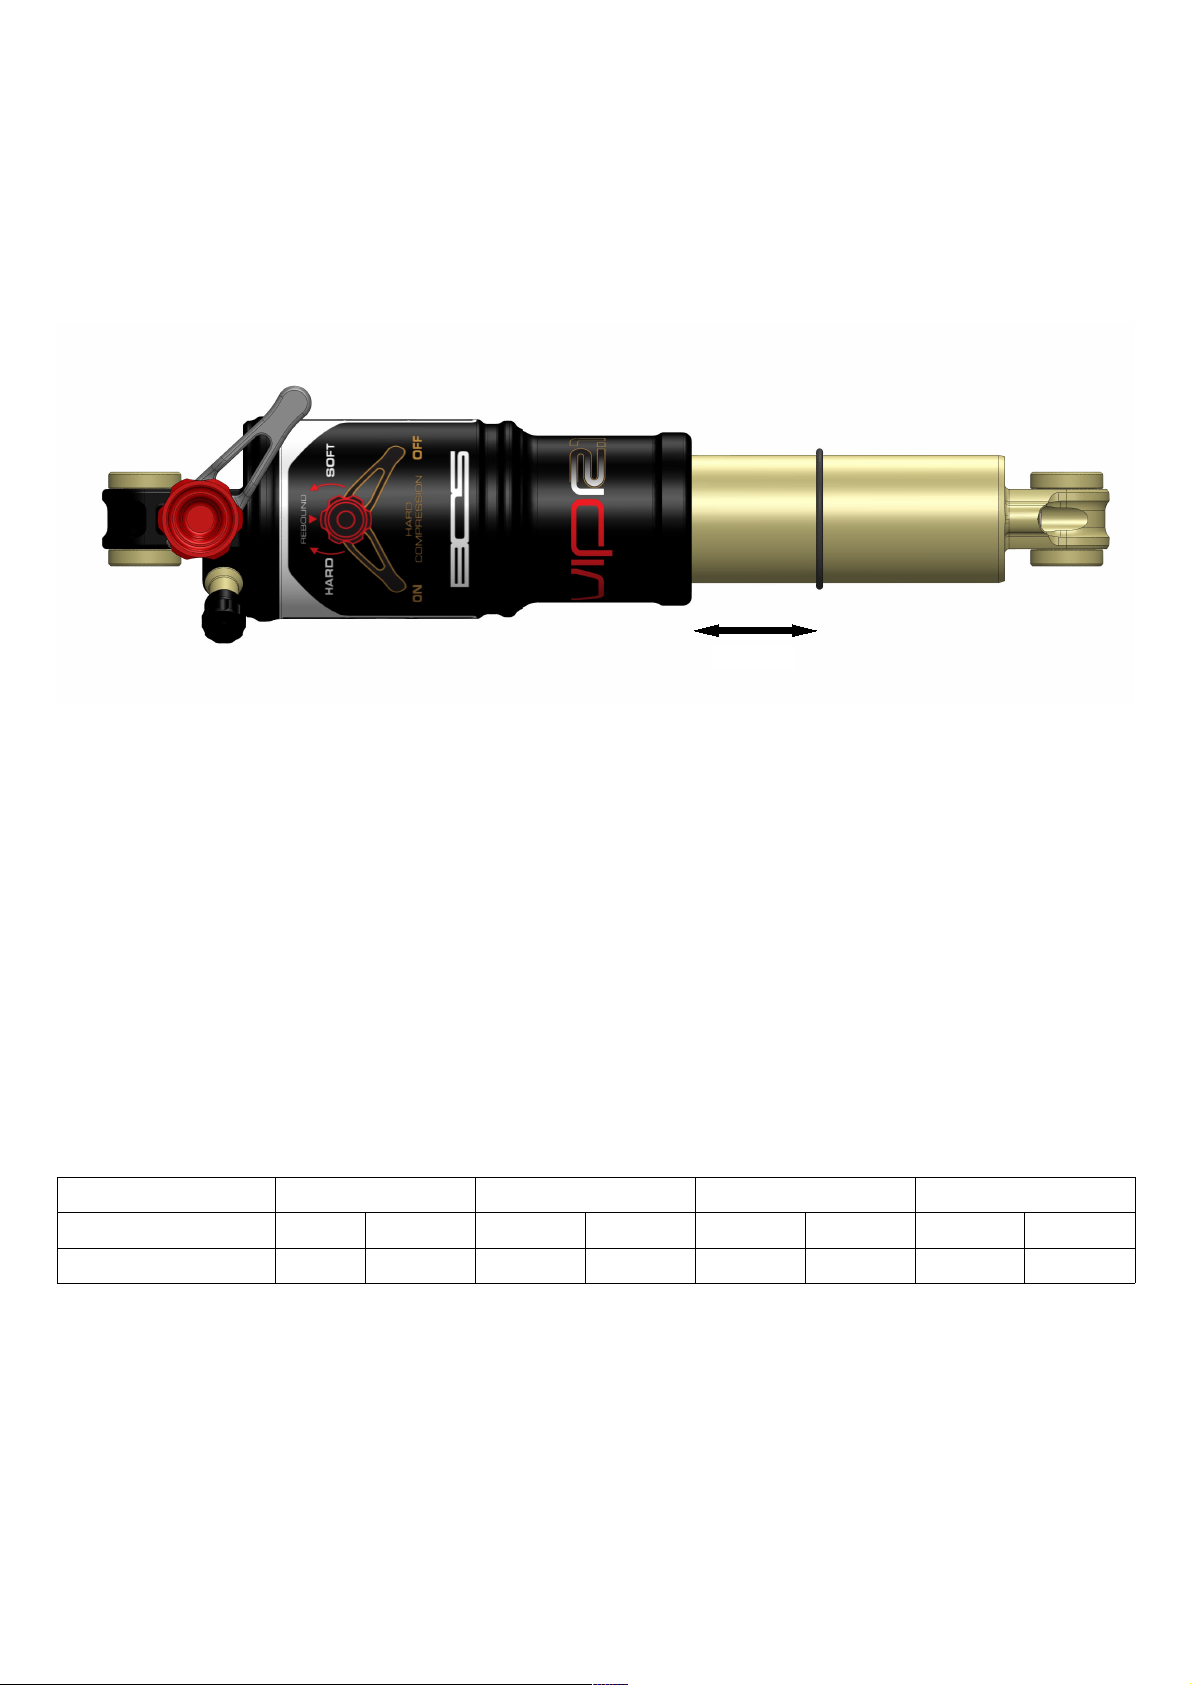
Place the O’ring at 15 mm from the seal of the shock, sit on your bike, and push slowly on the suspension, to
compress the shock until the seal come onto the O’ring.Let the suspension extend itself, still slowly.
Repeat 15 times those up and down movements, always at low speed.
15 mm
3.3. CHECKING THE SAG
The SAG is the quantity of travel used while sitting on your bike, due to the effect of your weight. It has to be set up
by adjusting slightly the air pressure.
BOS recommends a percentage of SAG of 30 to 35 %.
The bike manufaturer may also indicate a percentage of SAG. Please refer to your bike’s owner manual to check it.
If the bike percentage differs from Bos advices, please test on the track what is the best setting for your riding style.
How to measure and set up the SAG ?
Slide the O’ring onto the seal of your shock.
Sit on your bike (if possible dressed with your riding outfit) feet on the pedals - horizontal position, and let the sus @
pension compress under the effect of your weight. Get down from the bike, extend the rear suspension to the
maximum by pulling up the saddle, and measure the distance between the O’ring and the seal. This distance will
allow you to check the percentage of SAG obtained with the current air pressure. To convert the distance into
percentage, refer to the table below.
length. x stroke (mm) 190x51 200x52 200x56 216x64
SAG (%) 25 30 25 30 25 30 25 30
SAG (mm) 12,5 15 13 15,5 17 19 16 19
If the SAG is not correct, slightly set up the air pressure, by 15 PSI steps.
Too much SAG : increase the air pressure.
Not enough SAG: reduce the air pressure.
Page 5
3.4. HYDRAULIC SETTINGS
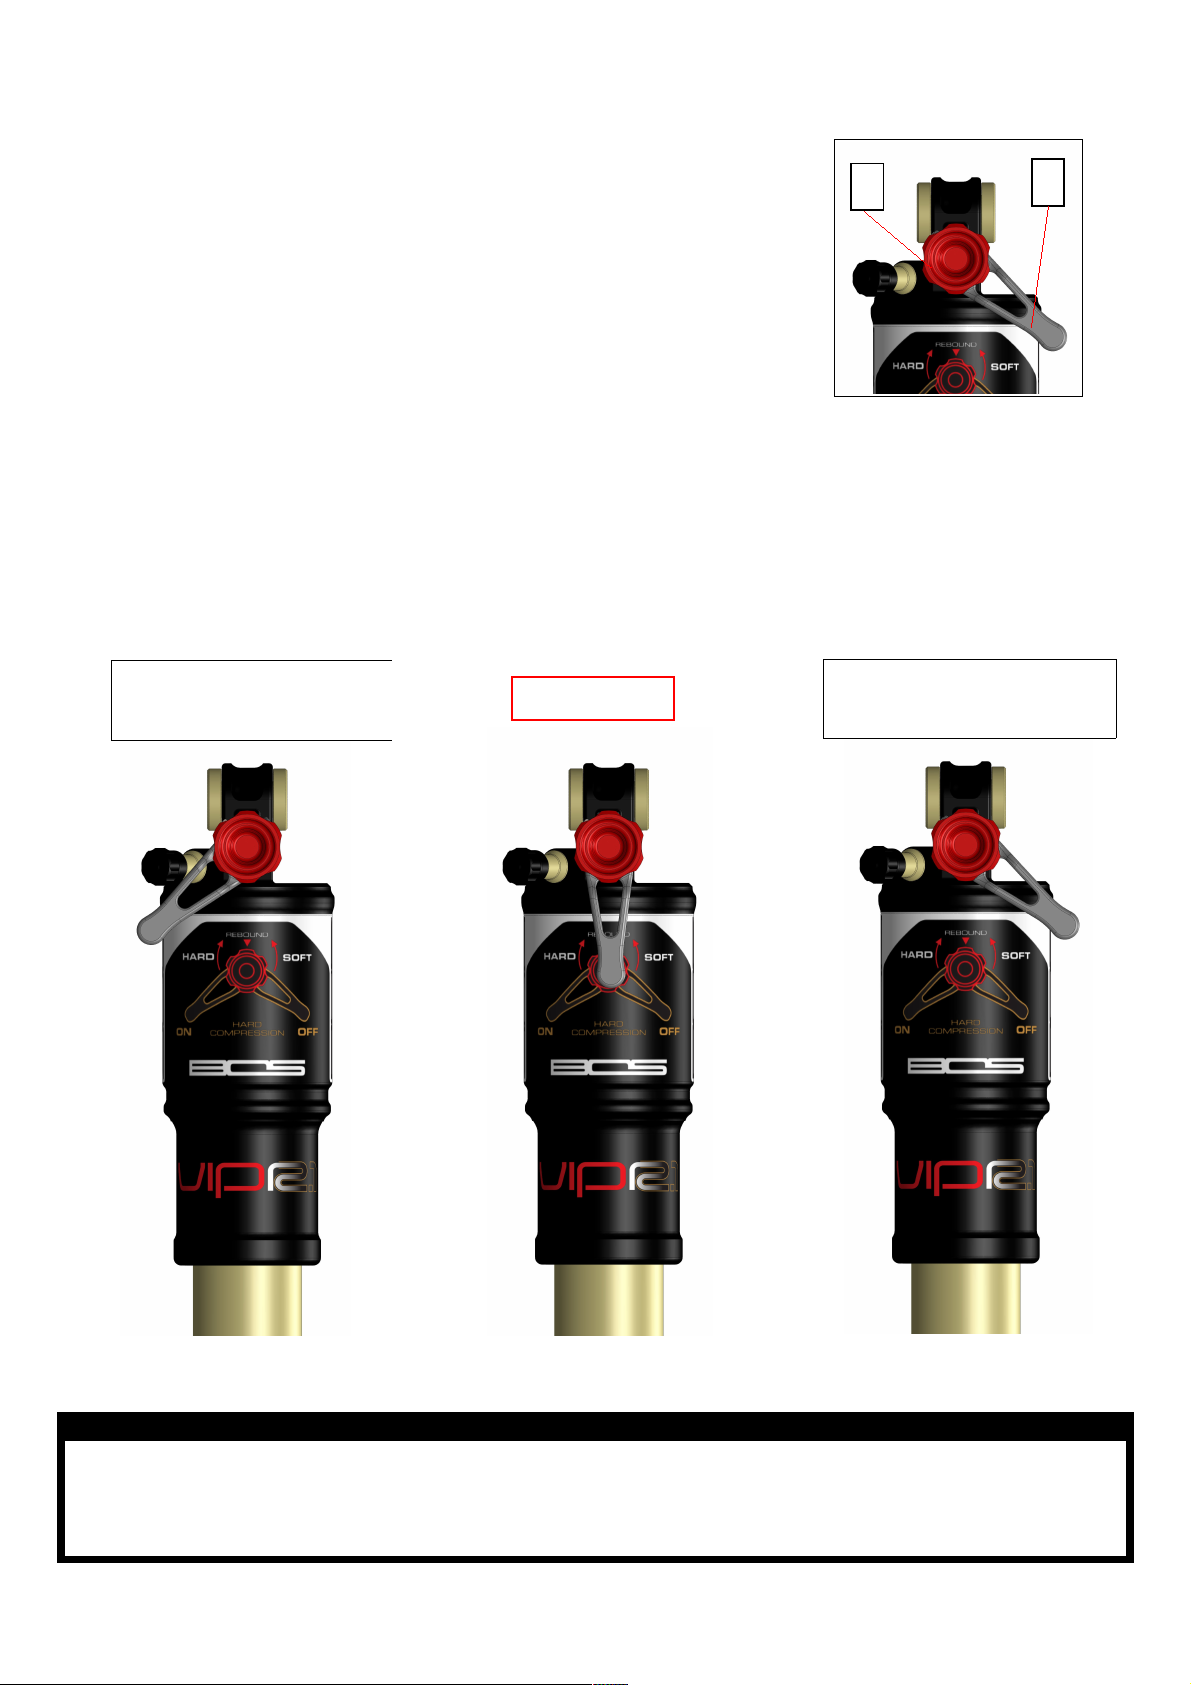
Your Vip'R2 damper features 2 hydraulic ways of settings:.
The compression adjusted through the lever A.
The Rebound adjusted through the knob B
3.4.1. Compression
The compression setting offers two positions : «hard» et «soft».
The lever must be turned on one of these two positions, never between.
The soft position is used for normal riding conditions. The suspension is 100% efficient.
The hard position changes the whole compression curve. The shock becomes stiffer on all the travel. It has to be
used when you need better pedaling efficiency, while climbing, or on flat hi speed track sections.
HARD position
FORBIDDEN !
better pedaling efficiency
B
SOFT position (standard)
fully active suspension
A
WARNING
The hard position is not locking the shock out.
As for the TRC system featured on the Deville fork, it reduces the suspension moves, by stiffening it, but the
suspension remains efficient. A still efficient -although stiffer- suspension keep guaranting a good traction.
It’s also a safe option, in case of unexpected shocks.
Page 6
3.4.2. Rebound
The rebound can be adjusted through the red knob, featuring 30 clicks.
The close position (totally screwed), offers a stiff or SLOW rebound.
The open position (totaly unscrewed) offers a soft or FAST rebound.
Prior to proceed to the settings, turn the knob clockwise until the end, then unscrew by 15 clicks to reach the
intermediate
position.
From that position, on the track, adjust the rebound depending on your riding style.
Start setting up the rebound by stages of 3 clicks, before making a more precise setting, when you feel that you’ve
reached a close to perfect setting.
WARNING
Thanks to a good compression curve, the Vip’R shock allows the bike to keep a good balance, quite high, and a
very good response and handling. Bos thus recommends to set up the bike with a fast rebound, to keep that
chassis balance, and avoid the bike staying low, which means that it will be less nervous, and less comfortable.
The feeling of «fast» or «slow» rebound will be different from a rider to another one, thus it’s difficult to define it
precisely. It’s related to your riding style. We advise you to define your own range of correct rebound - the range
of settings between «too fast» and «too slow». Then, always choose the faster part of that range, for example
the three last clicks (unscrewing) on a range of nine.
3.5. AIR VOLUME ADJUSTMENT
Depending on your riding style and your playground, you can adjust the progressivity of your Vip'R2.
So if you ride mostly downhill or if you want to increase the comfort of your suspension without bottoming out, you
can add some O-rings in the positive chamber and increase the air pressure.
Conversely, if you ride on a versatile ground, you need a dynamical bike but you still want to use the full travel of the
damper, so you can substract some O-rings and decrease the air pressure.
An adjustement of the progressivity may be necessary if the air pressure is fine on first half of the stroke
but too soft or too firm on the second half of the stroke.
We recommend to perform the first tests by varying the number of O-rings in pairs and then refine your adjustment
by adding or removing only one O-ring.
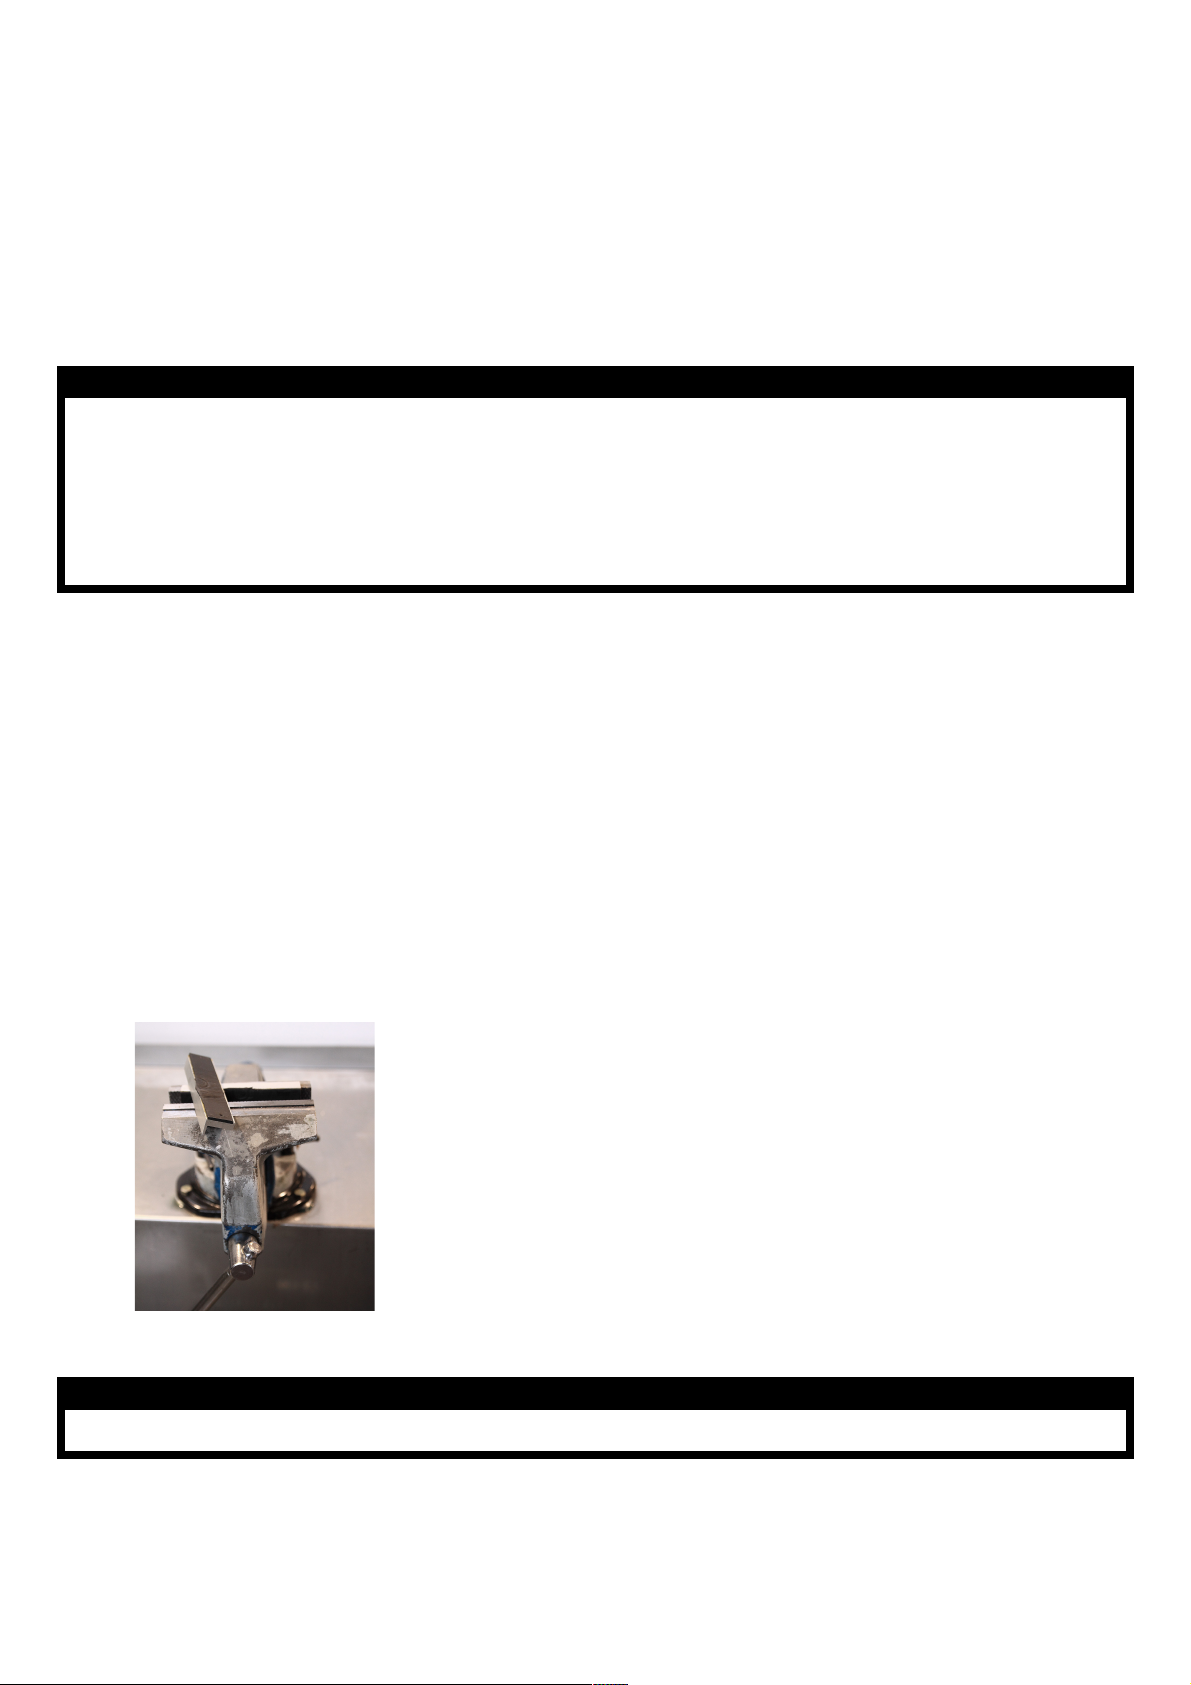
Tools and spare parts :
1 « kit O’ring for progressivity setup » including 5 O'ring available on Bos Store at bosmtb.com.
1 vise using the soft jaws as below:
CAUTION
Use only the o’rings provided by Bos. The material and the dimensions are specific.
Page 7
Procedure
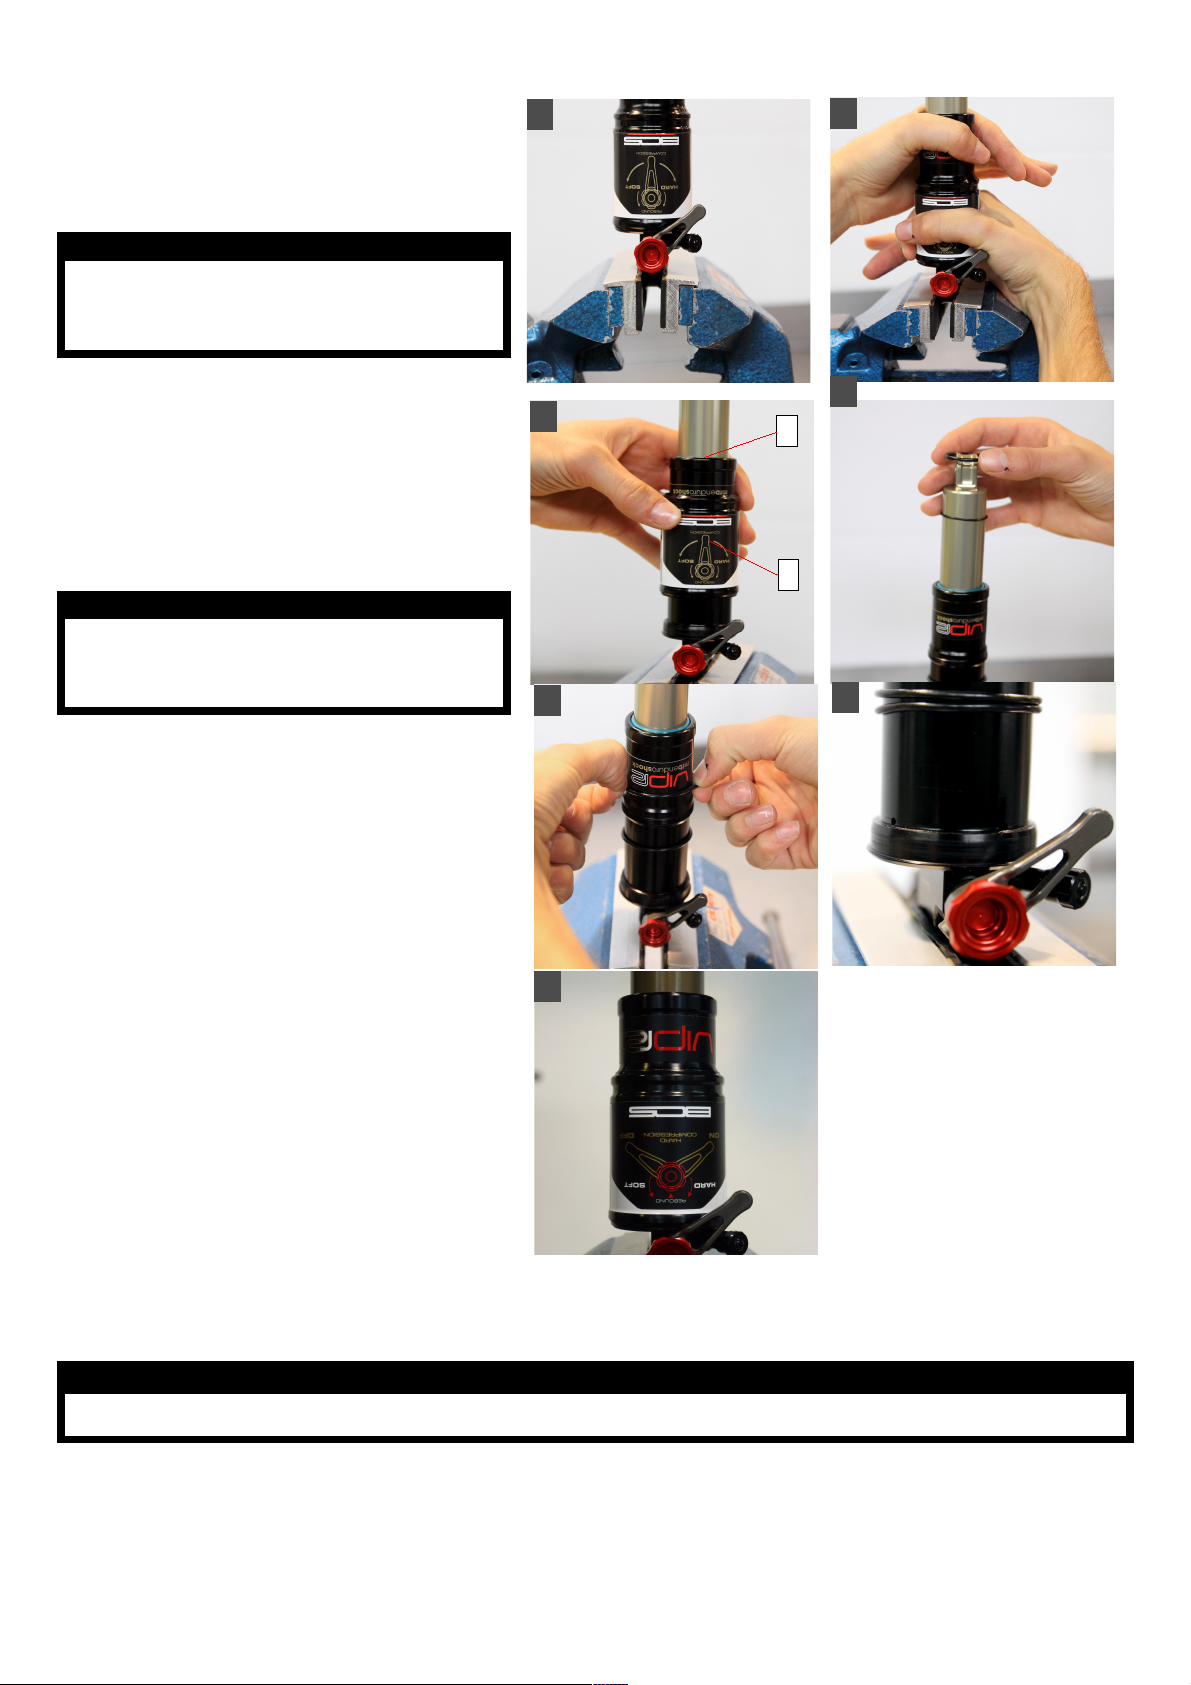
1. Install the shock in a vice using the soft
jaws(picture 1).
2.Tighten slightly to avoid damaging your shock.
CAUTION
Make sure that the jaws are applied on a flat
surface and do not touch the rebound knob
nore the compression lever.
3.Take note of the current pressure in your
shock before deflating it. Take into account the
air loss, due to the insertion of the pump.
Completely deflate the shock.
4. Unscrew the air can (b), by firmly handling the
shock body (a) (picture 2).
CAUTION
The shock body must not be unscrewed. The
air can must be unscrewed by hands only
(no tool)
1
3
5
2
4
a
b
6
5. Remove the air can (picture 3).
6. Add the O'ring by the shaft side (pictures 4 &
5) and drag them to their position (picture 6)
7. Make sure that the rebound knob and the
sticker of the shock body (a) are aligned.
8. Place the air can to the shock body and screw
it until the alignment of the stickers is correct.
(picture 7)
9. Inflate the air chamber.
10. Install the shock on the bike.
11. Proceed to the air chambers balance
(chapter 3.2).
7
CAUTION
Make sure that the Oring or the grease do not obstruct the air holes. (picture 6).
Page 8
4. MAINTENANCE
Cleaning
Clean your shock after each ride using a non-aggressive, non-alkaline cleaning product, let it dry then spray with
silicon spray and protective grease. Check it regularly and remove any dust/dirt from the bottom-out bumper.
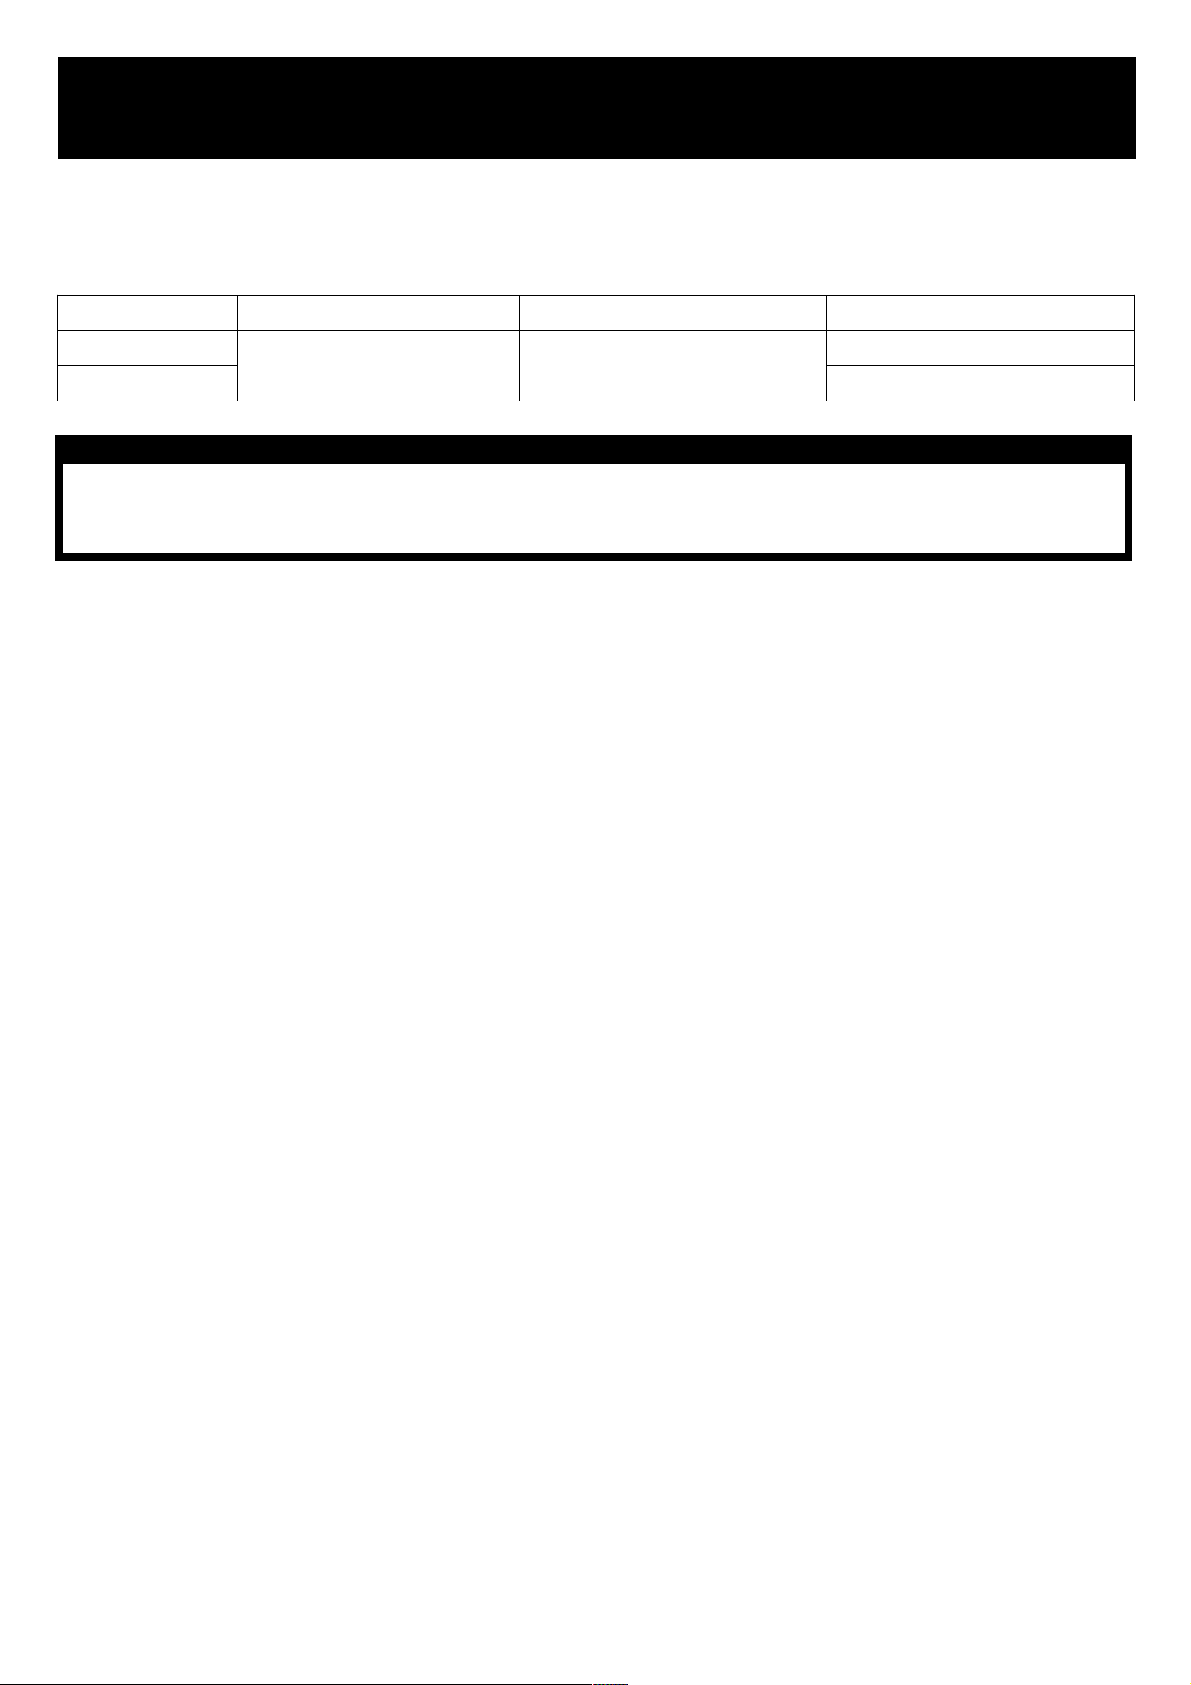
Cleaning Oil service Full service
Recreational use
After single ride once a year
Racing use once a year
Every 2 years
CAUTION
The oil service and full service must be performed by a BOS approved center. The BOS approved centers are
the only able to identify and appraise a damaged or worn parts, especially in case of shock or wear on structural
elements such as the legs, the stanchions and the crowns.
Page 9

5. FAQ
What is the basic set up ?
Your shock has been set up for your bike, with a specific internal valving and a specific air chamber volume. It is
delivered with a standard pressure of 80 to 100psi. You can find in the download section of our website all the infos
about standard settings for each bike.
There is air leaking when I connect the high pressure pump, what can I do ?
Check your pump : make sure that the shell of the shrader valve is correctly mounted.
My shock is too stiff on the first inches of travel and / or the rebound is very fast . What can I do ?
The balance between the two air chambers is not correct. Refer to chapter 3.2 to check how to set it up.
Once reassembled, the stickers are not aligned. What can I do ?
To be sure that the stickers will be correctly aligned, the rebound knob must be perfectly aligned with the piggy back
when you start to screw the air chamber. Check it on chapter 3.5
My shock features negative stroke. Is that normal ?
The air spring of the Void is designed to obtain the best sensibility on the first inches of travel. Thus, on a few bikes,
you may notice some negative stroke.
Where can I purchase original stickers and valve cap ?
You can purchase these items through your approved BOS center, or on the Bos store on bosmtb.com.
I noticed some play between my shock and the frame, what can I do ?
The rear shock mounting hardwares must be replaced. Contact an approved BOS center, or connect on
bosmtb.com.
My shock is getting compressed when I deflate it, is that normal?
When you deflate your shock, you deflate only the positive air chamber. The negative air chamber is still
pressurized, it acts in the opposite way, and pulls the shaft. If you want to avoid it, deflate step by step (30 to 40psi),
and proceed to the balance of the air chambers between each step (5 to 6 slow extension moves, forth and back,
on 15mm).
 Loading...