

Page 1
Installation for Honda Accord
PN 11840, 11853
These instructions have been written to help you with the installation of your Borla Performance Exhaust System. Please
read this document completely before beginning the installation of your system.
Please compare the parts in the box with the bill of materials provided to assure that you have all the parts necessary for
this installation.
Thank you for purchasing a Borla Performance Exhaust System.
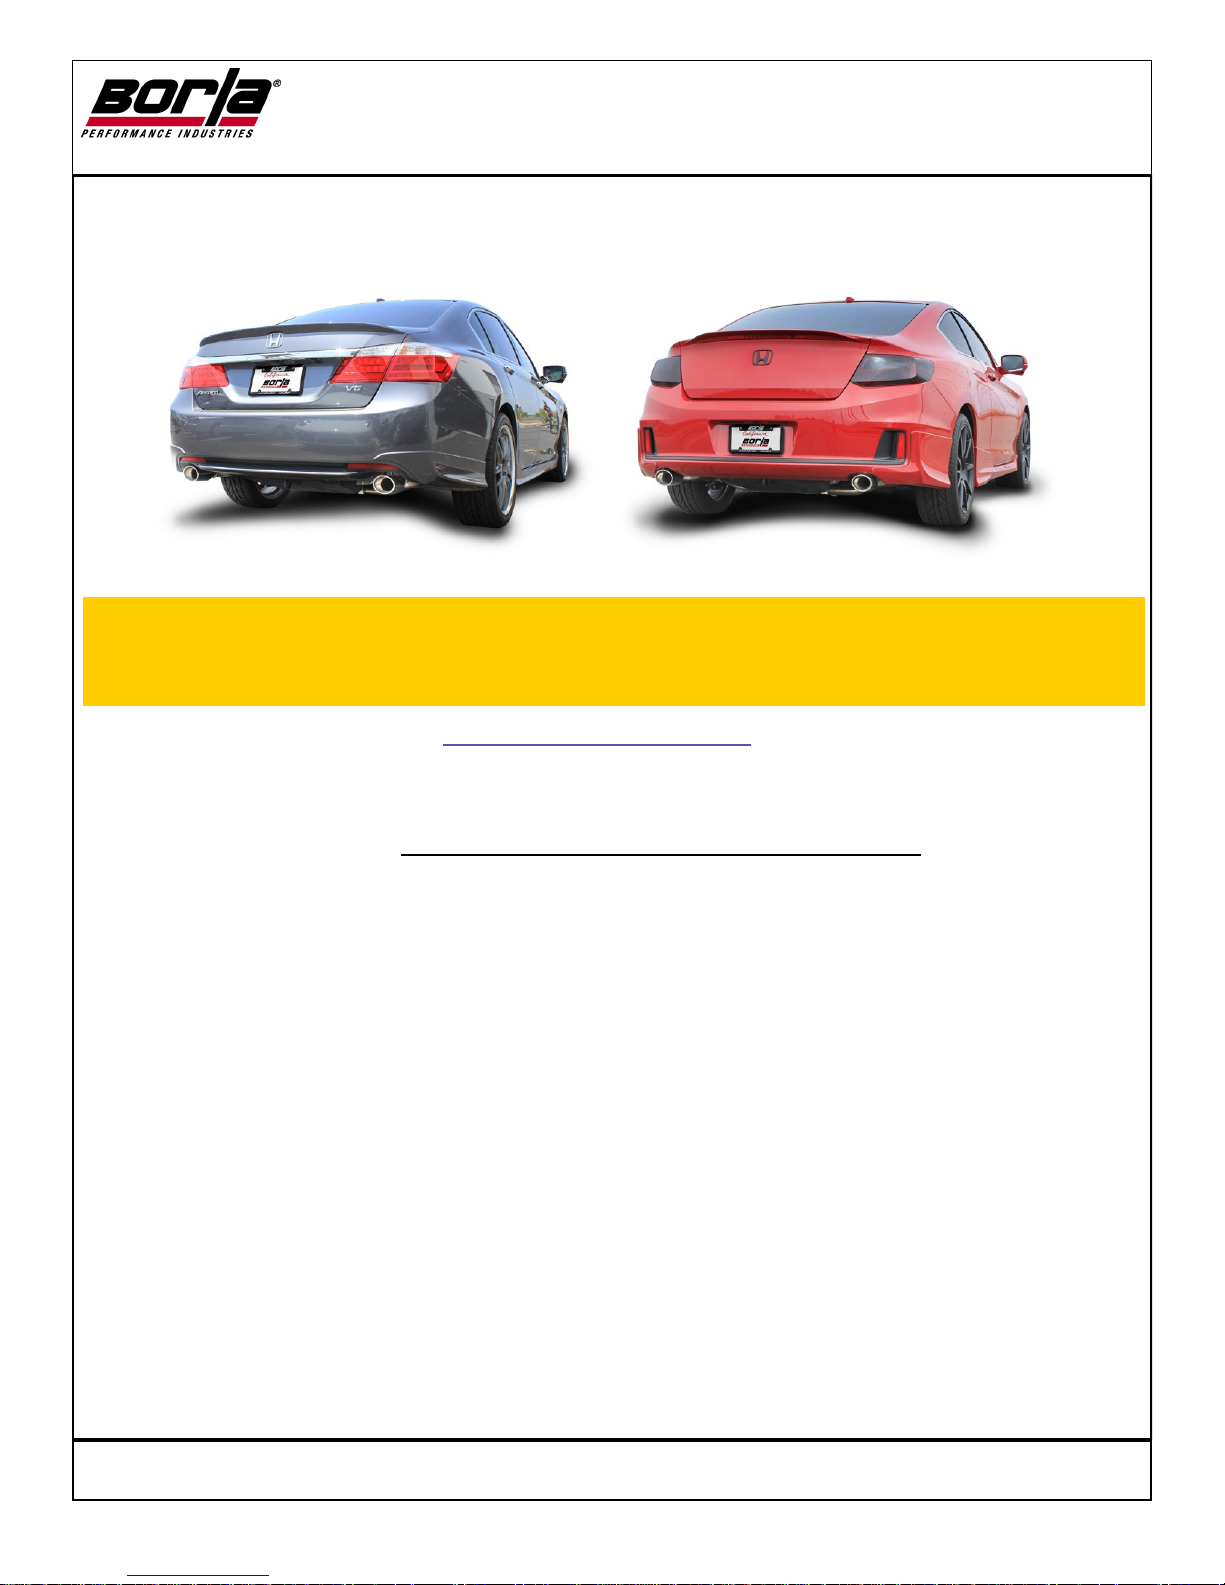
Borla Performance Rear Section Exhaust System (11840) is designed for the Honda Accord Sedan,
3.5L 6-cylinder engine FWD/automatic transmission and Sport Model with 2.4L 4-cylinder engine
FWD/automatic transmission. Does Not fit 2.4L 4-cyclinder engine with single exit.
Borla Performance Rear Section Exhaust System (11853) is designed for the Honda Accord Coupe,
3.5L 6-cylinder engine FWD, automatic/manual transmissions.
Borla Performance Industries recommends that an exhaust shop or professional after market parts installer perform the installation
of this system. However, if you decide to perform the installation on your own it is recommended that two people are used. This
installation should not be performed by one person due to the risk of injury. Ensure the installers use all under car safety precautions including eye protection.
Please take time to read and understand the following…
By installing your Borla Performance Exhaust System, you indicate that you have read this document and you agree with the terms
stated below.
It is the responsibility of the purchaser to follow all installation instruction guidelines and safety procedures supplied wi th your
Borla Performance Exhaust System
Borla Performance Industries assumes no responsibility for damages occurring from misuse, abuse, improper installation, impro per operation, lack of responsible care, or all previously stated reasons resulting from incompatibility with other manufactur er’s
products and/or systems.
Included with your Borla Performance Exhaust System is a warranty card. Please read it carefully before you begin any work on
your vehicle. If you should have any questions regarding our warranty policy, installation, or any other matter pertaining to your
TITLE: Honda Accord Rear-Section Installation Instructions
Page 2
TOOLS:
1. 3/8” Drive Ratchet
2. 3/8” Drive Extension 3”
3. 14mm, 15mm Deep Well Socket
4. Pry Bar
SHOP SUPPLIES:
1 Spray Lubricant
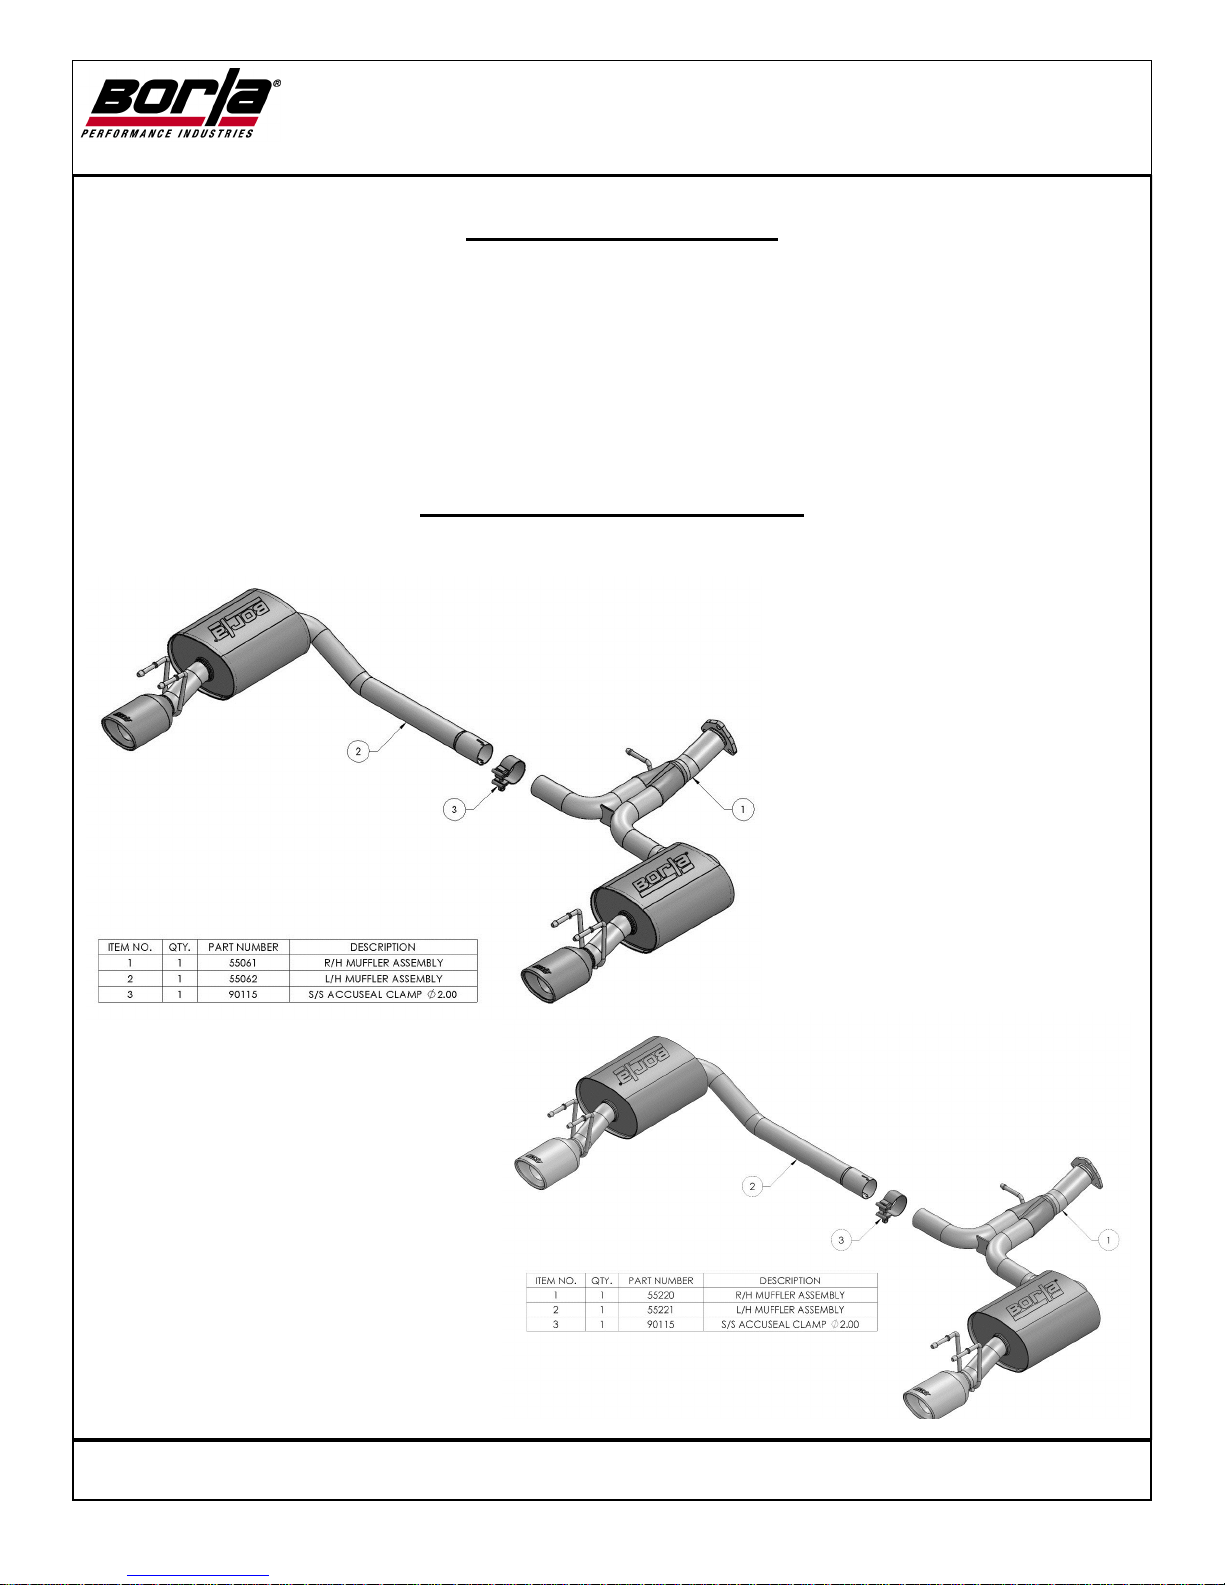
Borla Performance - Bill of Materials
Minimum Required Tool List:
11840
TITLE: Honda Accord Rear-Section Installation Instructions
11853
Page 3
Original Exhaust System Removal
Note: With a used vehicle, we suggest a penetrating spray lubricant to be applied liberally to all exhaust fasteners and allowing a significant period of
time for the chemical to lubricate the threads before attempting to disassemble.
1. Lubricate all the hangers and rubber isolators.
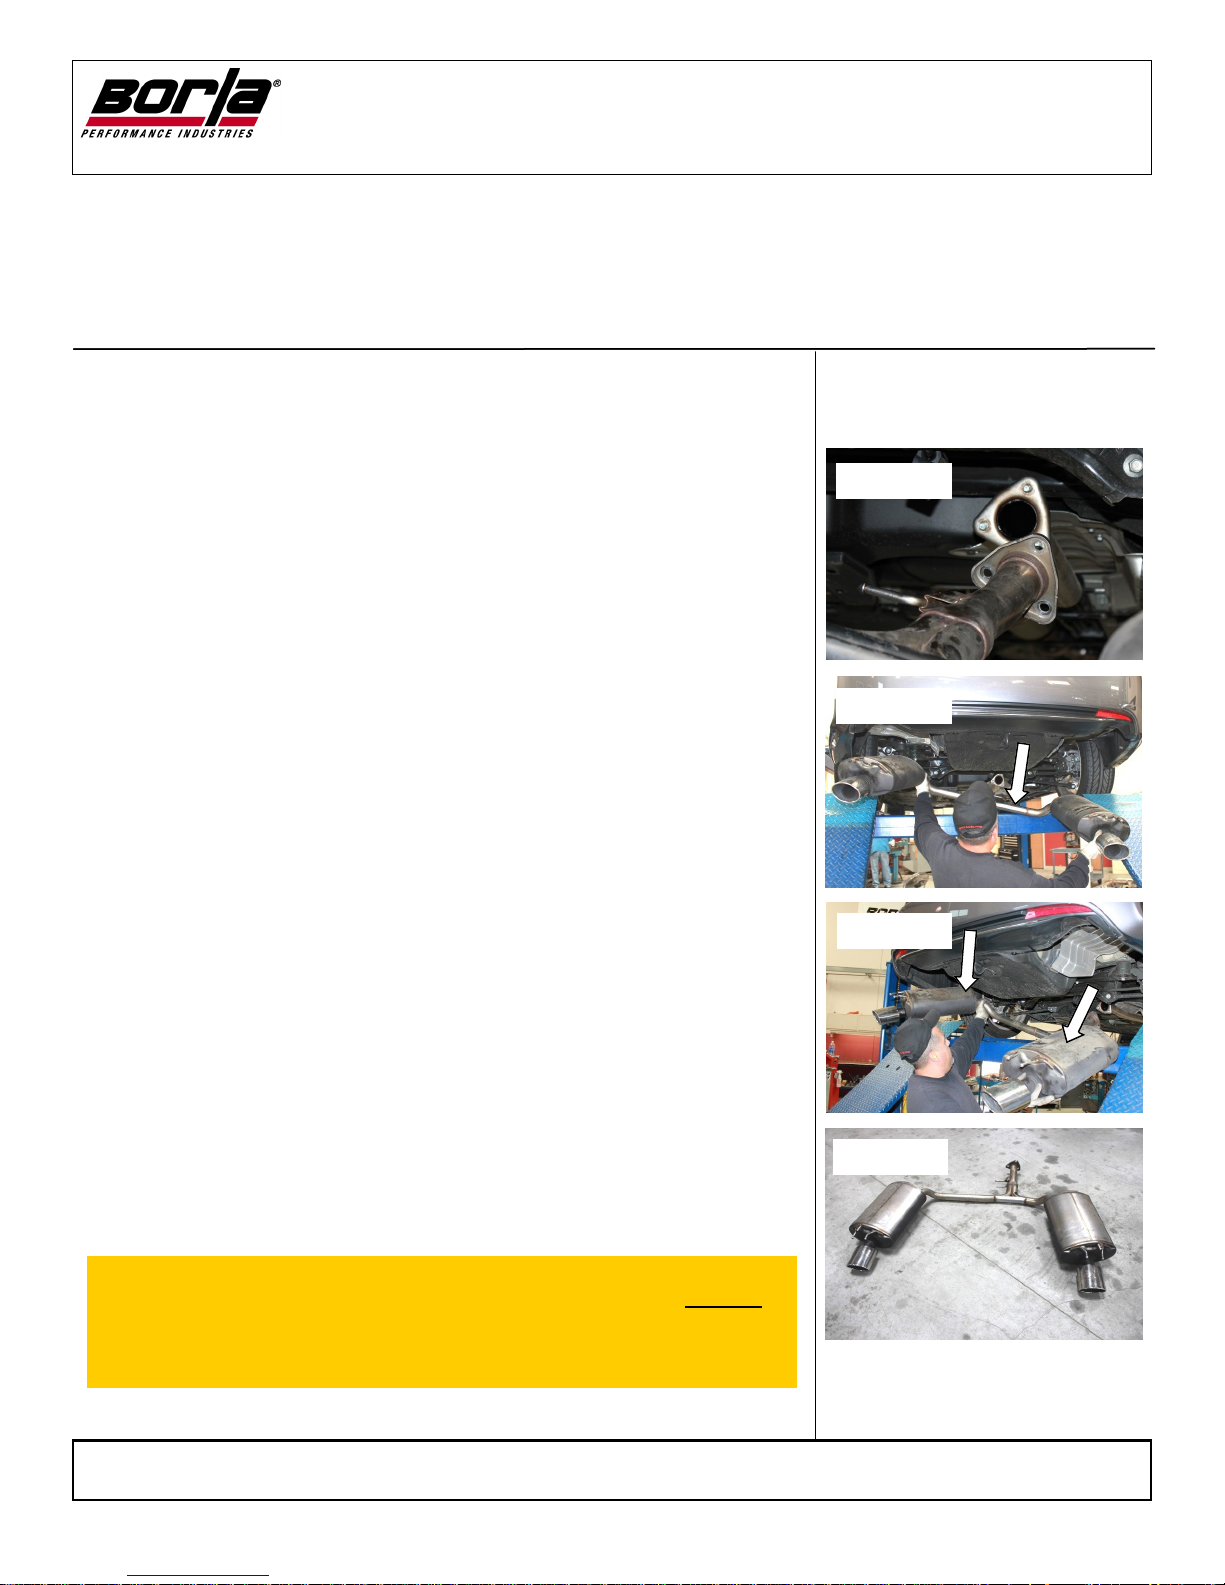
2. Remove rear muffler flange hardware. Note: Keep factory hardware and
sealing gasket for reinstallation. (See Fig.1)
3. Carefully slide and remove rubber isolators from hangars and remove rear
muffler assembly. (See Figs. 2 & 3)
4. Removed factory exhaust. (See Fig. 4)
5. Remove factory metal sealing ring for reuse and installation on your new
exhaust system.
Figure 1
Figure 2
Figure 3
Warning: Use extreme caution during installation. Torque all fasteners according to manufacturer’s torque values and tightening sequence. DO NOT
use air impact tools to tighten fasteners on Borla Performance Exhaust Systems. Use of such tools may result in bent flanges or gasket contact areas
leading to exhaust leaks.
TITLE: Honda Accord Rear-Section Installation Instructions
Figure 4
Page 4
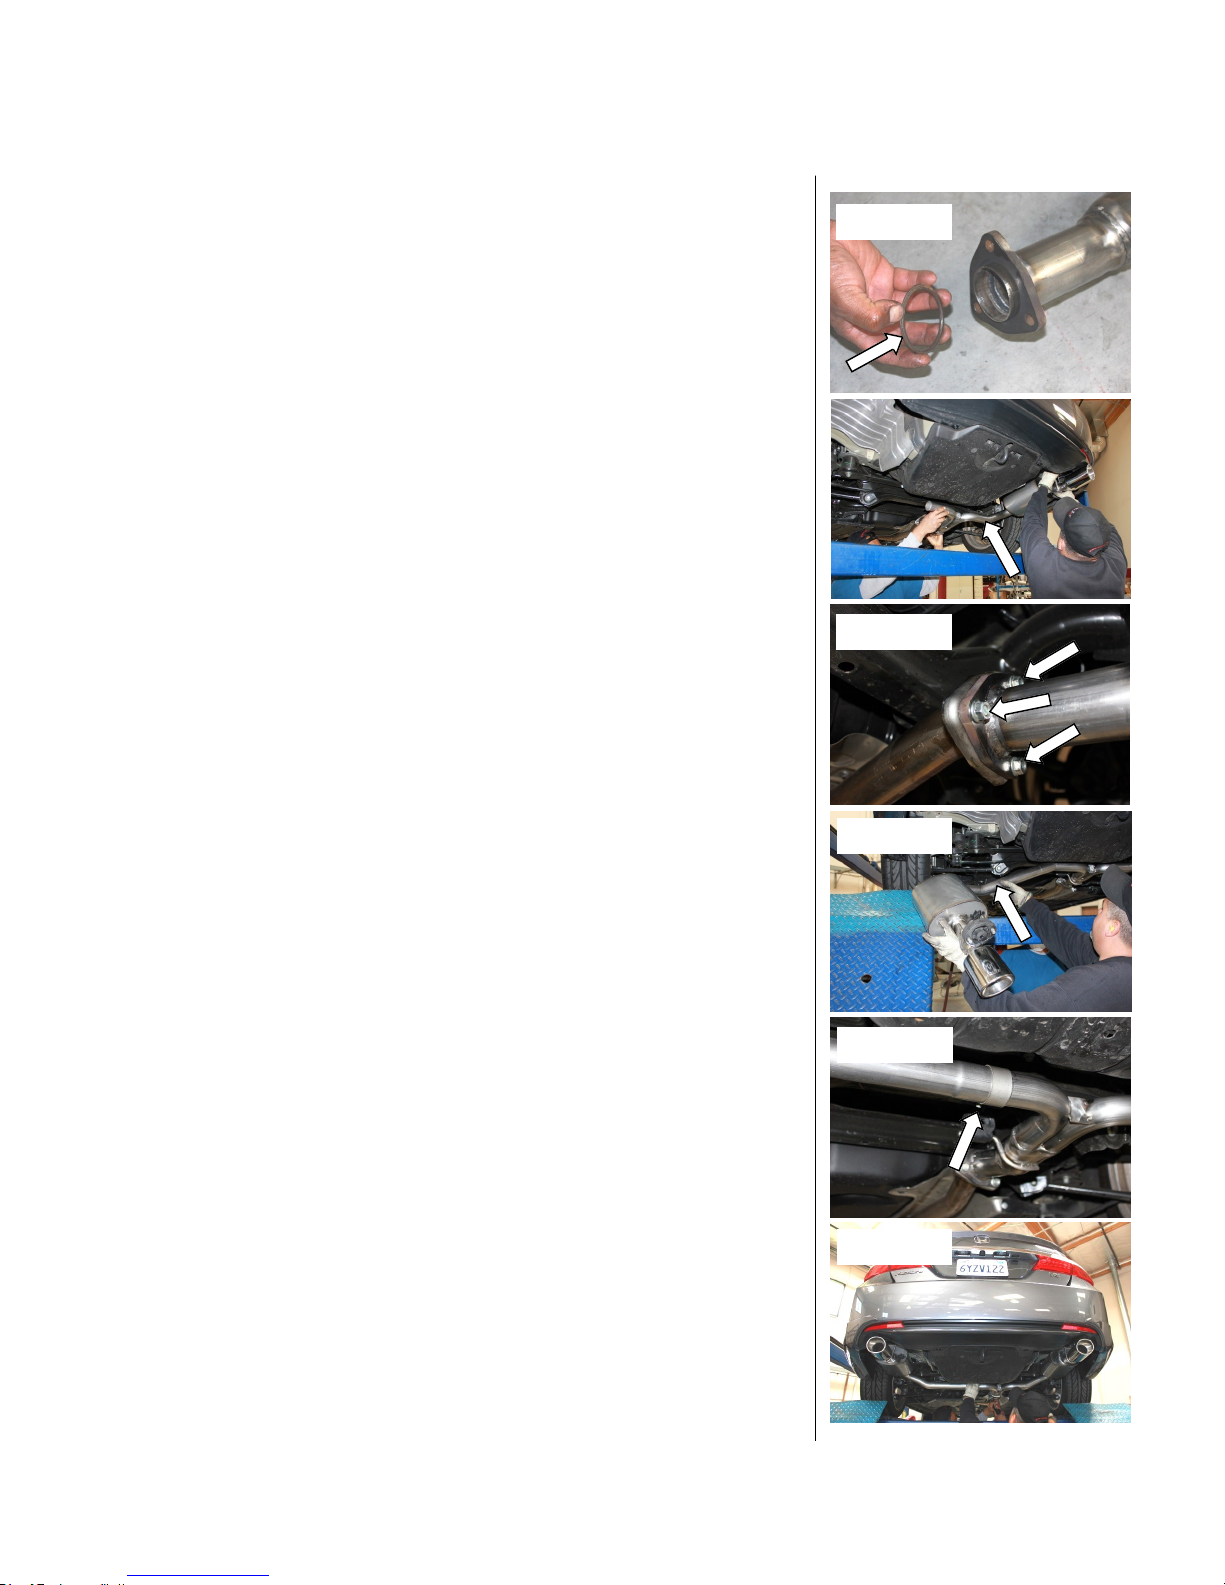
1. Place Muffler Assembly into position using factory gasket. (See Fig. 4)
2. Insert Right Side Muffler Assembly hangers into factory rubber isolators.
Lightly tighten hardware on flanges. (See Fig. 7)
3. Place clamp on Insert Left Side Muffler Assembly inlet and insert hangers
into factory rubber isolators. (See Fig. 8)
4. Check your exhaust for proper clearance under the vehicle and also for tip
alignment. Tighten flange bolts 18-22 ft.lbs torque. Tighten clamp 35
ft.lbs. (See Fig. 9 & 10)
5.
Start vehicle and check for any leaks. If any leaks are found, determine
cause (such as loose hardware) and repair as necessary.
Figure 5
Figure 6
Figure 7
Figure 8
Figure 9
Figure 10
 Loading...