

Page 1
WARRANTY INFORMATION
3 YEAR LIMITED WARRANTY
Sunbeam Products, Inc. doing business as Jarden Consumer Solutions or if in Canada, Sunbeam Corporation (Canada)
Limited doing business as Jarden Consumer Solutions (collectively “JCS”) warrants that for a period of three years
from the date of purchase, this product will be free from defects in material and workmanship. JCS, at its option, will
repair or replace this product or any component of the product found to be defective during the warranty period.
Replacement will be made with a new or remanufactured product or component. If the product is no longer available,
replacement may be made with a similar product of equal or greater value. This is your exclusive warranty. Do NOT
attempt to repair or adjust any electrical or mechanical functions on this product. Doing so will void this warranty.
This warranty is valid for the original retail purchaser from the date of initial retail purchase and is not transferable.
Keep the original sales receipt. Proof of purchase is required to obtain warranty performance. JCS dealers, service
centers, or retail stores selling JCS products do not have the right to alter, modify or any way change the terms and
conditions of this warranty.
This warranty does not cover normal wear of parts or damage resulting from any of the following: negligent use or
misuse of the product, use on improper voltage or current, use contrary to the operating instructions, disassembly,
repair or alteration by anyone other than JCS or an authorized JCS service center. Further, the warranty does not
cover: Acts of God, such as fire, flood, hurricanes and tornadoes.
What are the limits on JCS’s Liability?
JCS shall not be liable for any incidental or consequential damages caused by the breach of any express, implied or
statutory warranty or condition.
Except to the extent prohibited by applicable law, any implied warranty or condition of merchantability or fitness for
a particular purpose is limited in duration to the duration of the above warranty.
JCS disclaims all other warranties, conditions or representations, express, implied, statutory or otherwise.
JCS shall not be liable for any damages of any kind resulting from the purchase, use or misuse of, or inability to use
the product including incidental, special, consequential or similar damages or loss of profits, or for any breach of
contract, fundamental or otherwise, or for any claim brought against purchaser by any other party.
Some provinces, states or jurisdictions do not allow the exclusion or limitation of incidental or consequential damages
or limitations on how long an implied warranty lasts, so the above limitations or exclusion may not apply to you.
This warranty gives you specific legal rights, and you may also have other rights that vary from province to province,
state to state or jurisdiction to jurisdiction.
How to Obtain Warranty Service
In the U.S.A.
If you have any question regarding this warranty or would like to obtain warranty service, please call
1-800-397-5964
and a convenient service center address will be provided to you.
In Canada
If you have any question regarding this warranty or would like to obtain warranty service, please call
1-800-397-5964
and a convenient service center address will be provided to you.
WARRANTY INFORMATION
131686/9100010010742 BORGD120009EM1 Printed In China
In the U.S.A., this warranty is offered by Sunbeam Products, Inc. doing business as Jarden Consumer Solutions located
in Boca Raton, Florida 33431. In Canada, this warranty is offered by Sunbeam Corporation (Canada) Limited doing
business as Jarden Consumer Solutions, located at 20 B Hereford Street, Brampton, Ontario L6Y 0M1. If you have any
other problem or claim in connection with this product, please write our Consumer Service Department. PLEASE DO
NOT RETURN THIS PRODUCT TO ANY OF THESE ADDRESSES OR TO THE PLACE OF PURCHASE.
© 2009 Sunbeam Products, Inc. doing business as Jarden Consumer Solutions. All Rights Reserved.
Distributed by Sunbeam Products, Inc. doing business as Jarden Consumer Solutions, Boca Raton, Florida 33431.
PLEASE READ AND SAVE THESE IMPORTANT INSTRUCTIONS
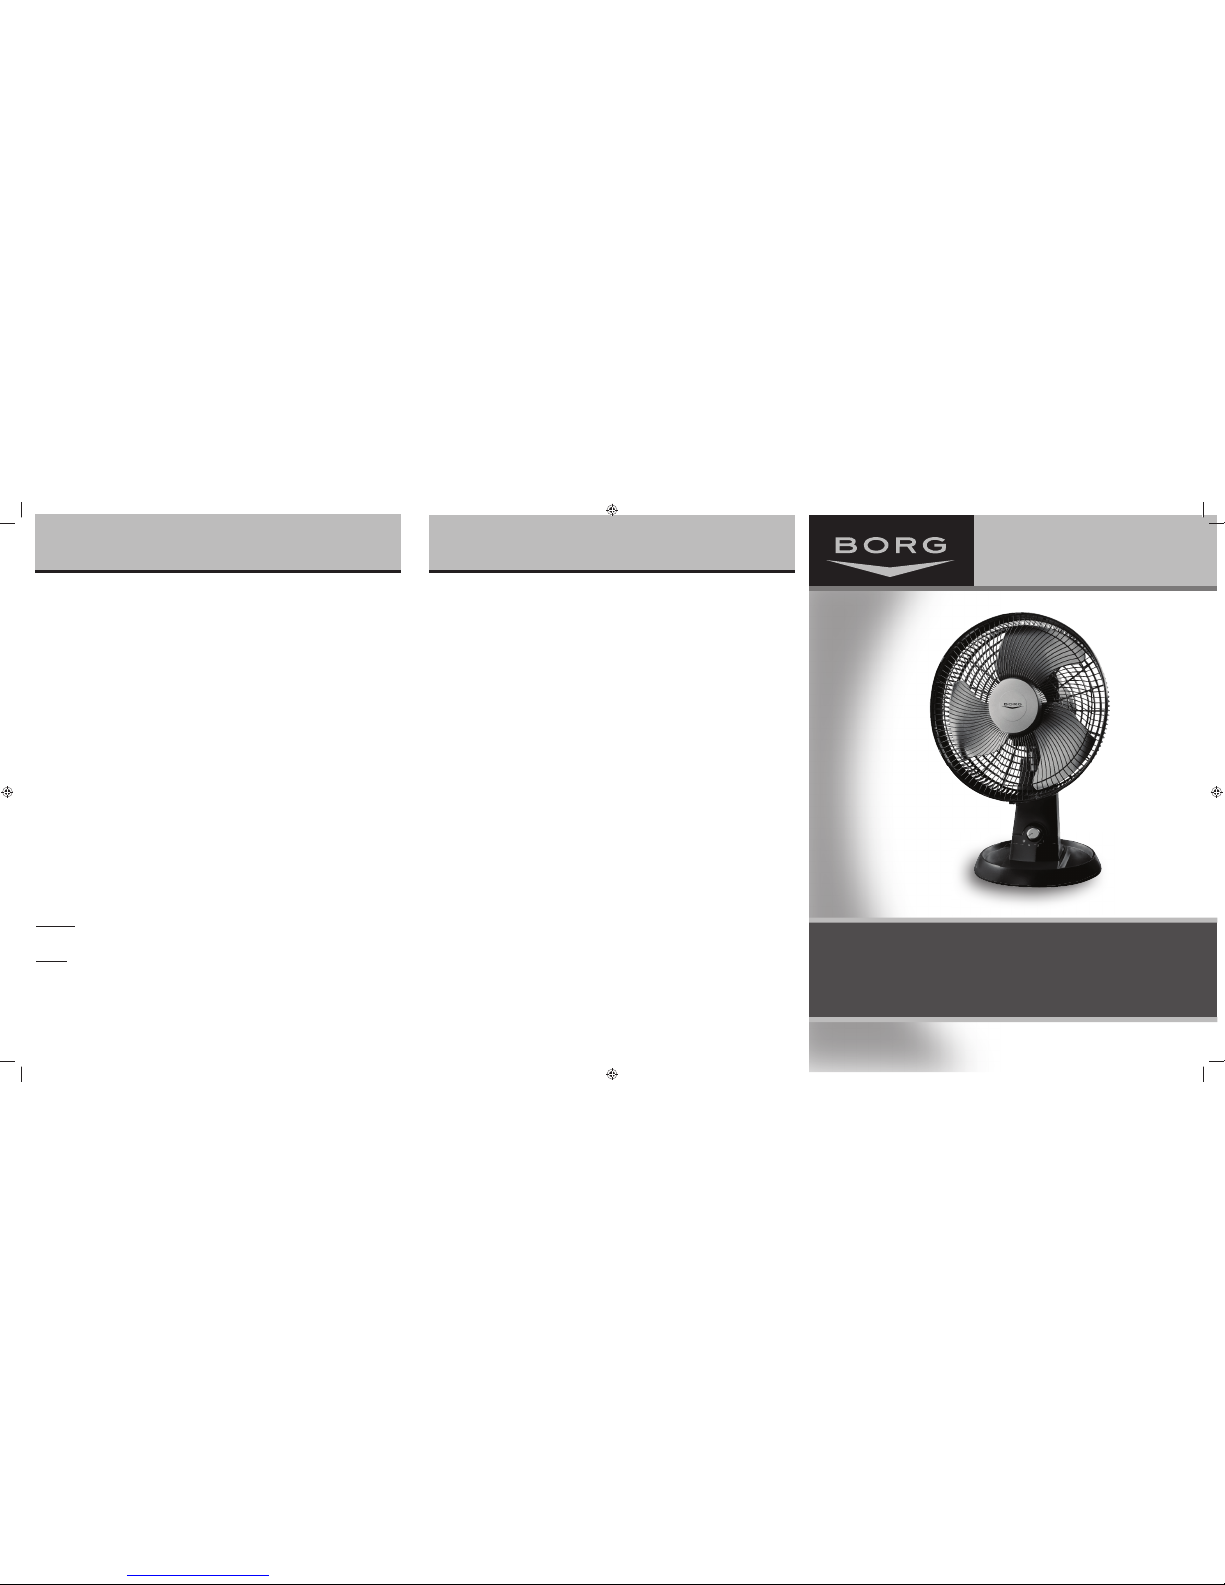
Owner’s Guide
BORGD1200
Architect
Table Fan
TM
BORGD1200-U_09EM1.indd 1BORGD1200-U_09EM1.indd 1 12/23/08 10:42:36 AM12/23/08 10:42:36 AM
Page 2
PLEASE READ AND SAVE THESE
IMPORTANT SAFETY INSTRUCTIONS
FEATURES - OPERATIONS
CLEANING/MAINTENANCE
Follow these instructions to correctly and safely care for
your table fan. Please remember:
• Always unplug the fan before cleaning or
disassembling.
• Do not allow water to drip on or into the Fan Motor
Housing.
• Do not use any of the following as a cleaner:
gasoline, thinner, benzene.
NOTE: This fan can also be used during the cold winter
season to circulate warm air throughout your home.
Fan Blade Cleaning
1. To access the Fan Blade, loosen the Rear Grill Screw,
remove the Front Grill and the Blade Cap.
2. Clean the Fan Blade, Front Grill and Rear Grill with a
soft cloth moistened with a mild soap solution.
3. Replace blade, tighten the Blade Cap, and securely
fasten the Front Grill.
Fan Head and Base Cleaning
Using a soft, moist cloth, with or without a mild soap
solution, carefully clean the Fan Base and Head. Please
use caution around the Motor Housing area. Do not allow
the motor or other electrical components to be exposed to
water.
FAN STORAGE
When storing your fan in the off season, it is important to
keep it in a safe dry location. It is important to protect
the fan head from dust.
ASSEMBLY INSTRUCTIONS
NOTE: MAKE SURE YOU REMOVE ALL CONTENTS FROM
THE PACKAGE. PLEASE CHECK PACKAGING MATERIALS FOR
PARTS THAT COULD BE REQUIRED TO OPERATE YOUR FAN.
1. Remove the Rear Grill Nut from the Motor Housing.
2. Line up the posts located on the front of the Motor
Housing with the holes located around the center of
the Rear Grill.
3. Secure the Rear Grill to the Motor Housing Assembly
by tightening the Rear Grill Nut over the threaded
post of the Motor Housing Assembly.
4. Slide the Fan Blade over the Motor Shaft making sure
the pins located on the Motor Shaft line up with
hollowed interior of the Fan Blade.
5. Secure the Fan Blade onto the Motor Shaft by turning
the Blade Cap counter clockwise and tighten firmly.
6. Center the Front Grill by aligning the BORG™ logo
plate parallel to the floor, and then snap the Front
Grill into the clips located around the inner perimeter
of the Rear Grill.
NOTE: you may need to loosen the Grill Screw
located on the bottom of the Rear Grill prior to
securing the Front Grill to the Rear Grill.
7. Tighten the Grill Screw at the bottom of the Rear Grill.
8. Run the power cord through the opening located on the
top of the base and pull the cord all the way through.
Line the tabs located on the bottom of the stem with
the holes located around the pocket of the base and
push the stem down until it is secured to the base.
OPERATING INSTRUCTIONS
1. Set fan on a dry, level surface.
2. Make sure that the Power/Speed Knob is in the off
position ( ). The Power/Speed Knob is located on
the front stem of the fan housing.
3. Plug cord into any standard 120 volt AC outlet.
4. Adjust the speed of your fan by turning the Power/
Speed Knob to the desired setting: 3-High, 2-Medium,
1-Low.
5. To turn the fan off turn the Power/Speed Knob to the
off position ( ).
6. The Oscillation Control Knob ( ) is located on
the top of the Fan Motor Housing. To start Oscillation,
push Oscillation Knob all the way down. To stop
Oscillation, pull Oscillation Knob all the way up.
ADJUSTMENT INSTRUCTIONS
Fan Head Tilt Adjustment
To adjust the angle of the fan head simply grab the stem
with one hand. With your other hand, adjust the angle of
the fan head.
When using electrical appliances, basic safety precautions
should always be followed to reduce the risk of fire,
electric shock, and injury to persons, including the
following:
1. Read all instructions before using this appliance.
2. Use fan only for purposes described in the instruction
manual.
3. To protect against electrical shock do not immerse
unit, plug or cord in water or spray with liquids and
plug the appliance directly into a 120V AC electrical
outlet.
4. Close supervision is necessary when any appliance is
used by or near children.
5. Unplug from outlet when not in use, when moving
fan from one location to another, before putting on
or taking off parts and before cleaning.
6. Avoid contact with moving parts.
7. Do not operate in the presence of explosive and/or
flammable fumes.
8. To avoid fire hazard, NEVER place the cord under
rugs or any parts near an open flame, cooking or
other heating appliance.
9. Do not operate any appliance with a damaged cord
or plug after the appliance malfunctions, or has been
dropped/damaged in any manner.
10. The use of attachments not recommended or sold by
the appliance manufacturer may cause hazards.
11. Do not let the cord hang over the edge of a table,
counter or come in contact with hot surfaces or leave
exposed to high traffic areas.
12. Do not use outdoors.
13. To disconnect, grip plug and pull from wall outlet.
Never yank on cord.
14. Always use on a dry, level surface.
15. Do not operate fan until fully assembled with all
parts properly in place.
16. This product is intended for household use ONLY and
not for commercial or industrial applications.
17. WARNING: To reduce the risk of electrical shock
and injury to persons, do not use in window.
18. WARNING: This fan is provided with an internal
electronic fan speed control. To reduce the risk of fire
or electric shock, do not use this fan with any other
solid-state speed control device.
PLEASE READ AND SAVE
THESE IMPORTANT
SAFETY INSTRUCTIONS
CLEANING / MAINTENANCE
THIS APPLIANCE HAS A POLARIZED PLUG (one blade is wider than the
other). To reduce the risk of electric shock, this plug is intended to fit in
a polarized outlet only one way. If the plug does not fit fully in the
outlet, reverse the plug. If it still does not fit, contact a qualified
electrician to install the proper outlet.
DO NOT ATTEMPT TO MODIFY THIS PLUG OR DEFEAT THIS
SAFETY FEATURE IN ANY WAY.
AMBC
D
E
J
F
H
I
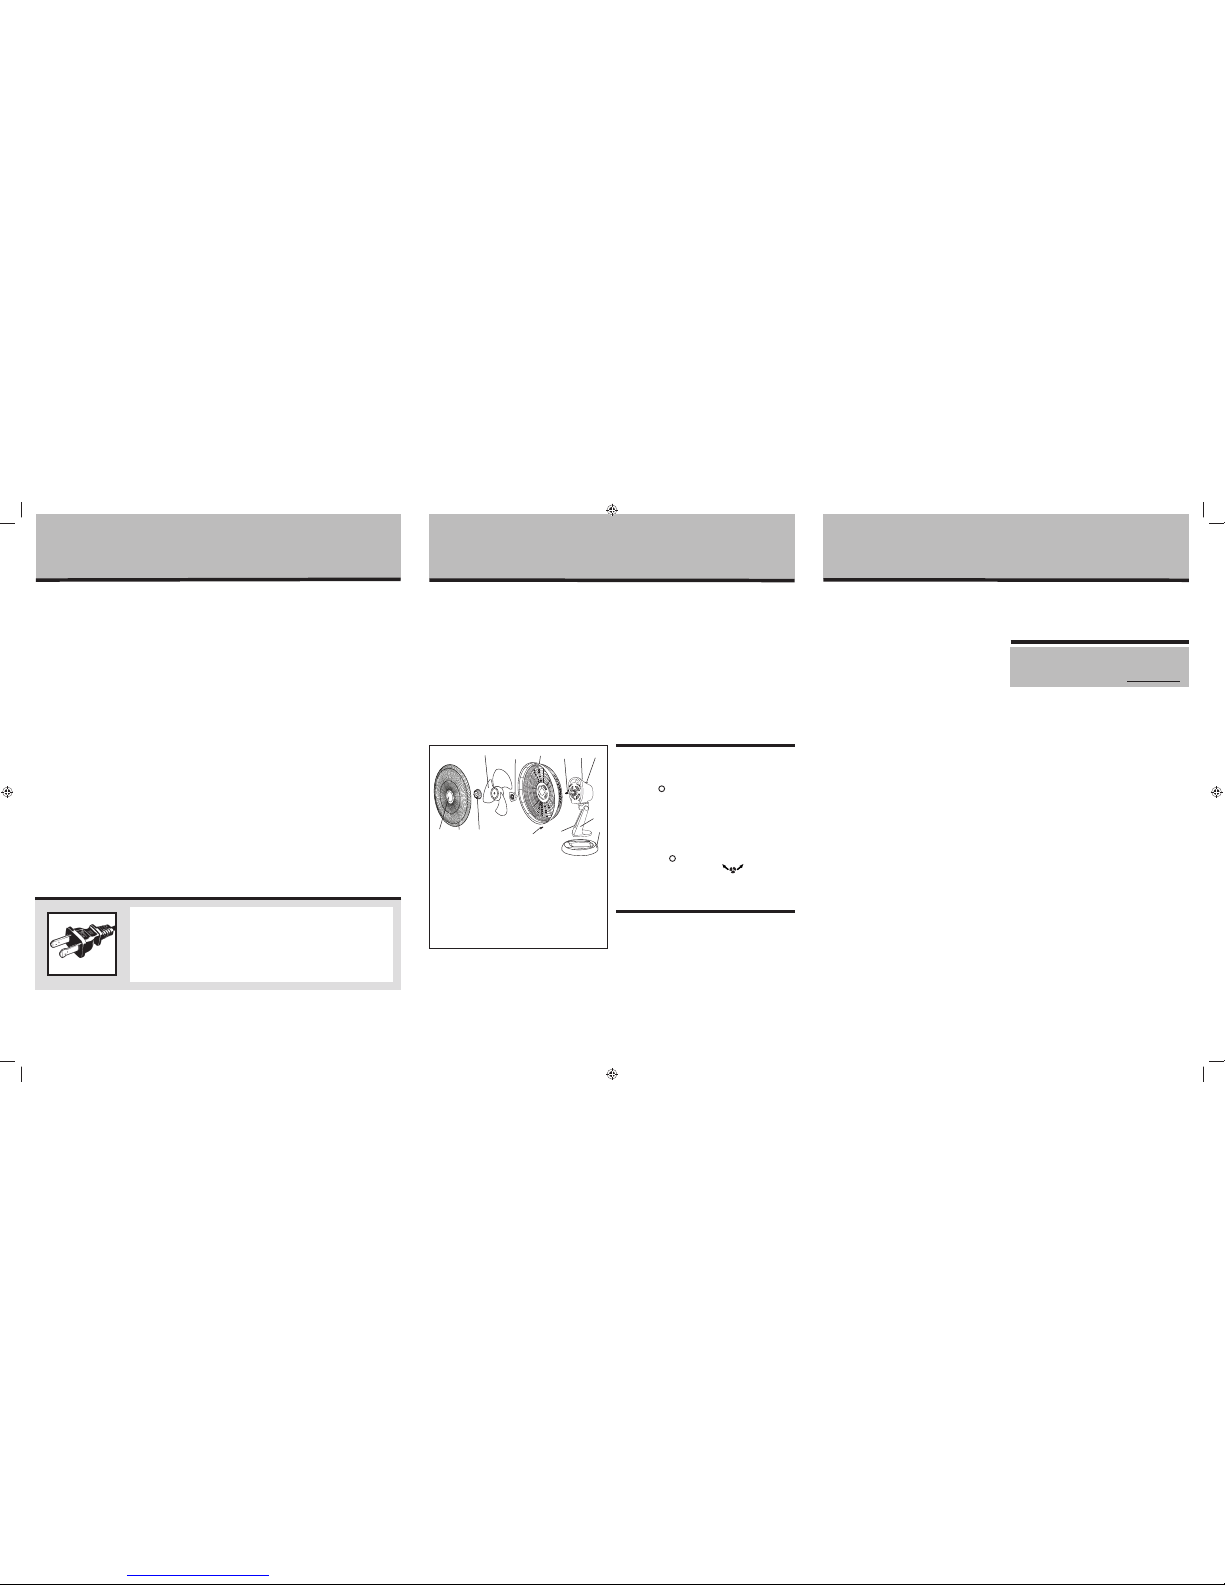
Figure 1
A. Logo Plate
B. Front Grill
C. Blade Cap
D. Fan Blade
E. Rear Grill Nut
F. Rear Grill
G. Rear Grill Screw
H. Motor Shaft
I. Motor Housing Assembly
J. Oscillation Knob
K. Power/Speed Knob
L. Fan Stem
M. Base
K
G
L
If you have any questions regarding your product
please contact our Consumer Service Department at
1-800-397-5964 or visit our website at www.jardencs.com.
BORGD1200-U_09EM1.indd 2BORGD1200-U_09EM1.indd 2 12/23/08 10:42:39 AM12/23/08 10:42:39 AM
 Loading...