

Page 1
MP301 User Guide
Page 2

2 |
Bonitor
All R
ights Reserved.
BONITOR Mini Projector
User Guide Menu
Overview
Specifications
Compatibility
Operating Instructions
Trouble Shooting
MP301
3
4
5
6-7
8
Safety Statements
9
Page 3
3 |
Bonitor
All R
ights Reserved.
BONITOR Mini Projector
Overview
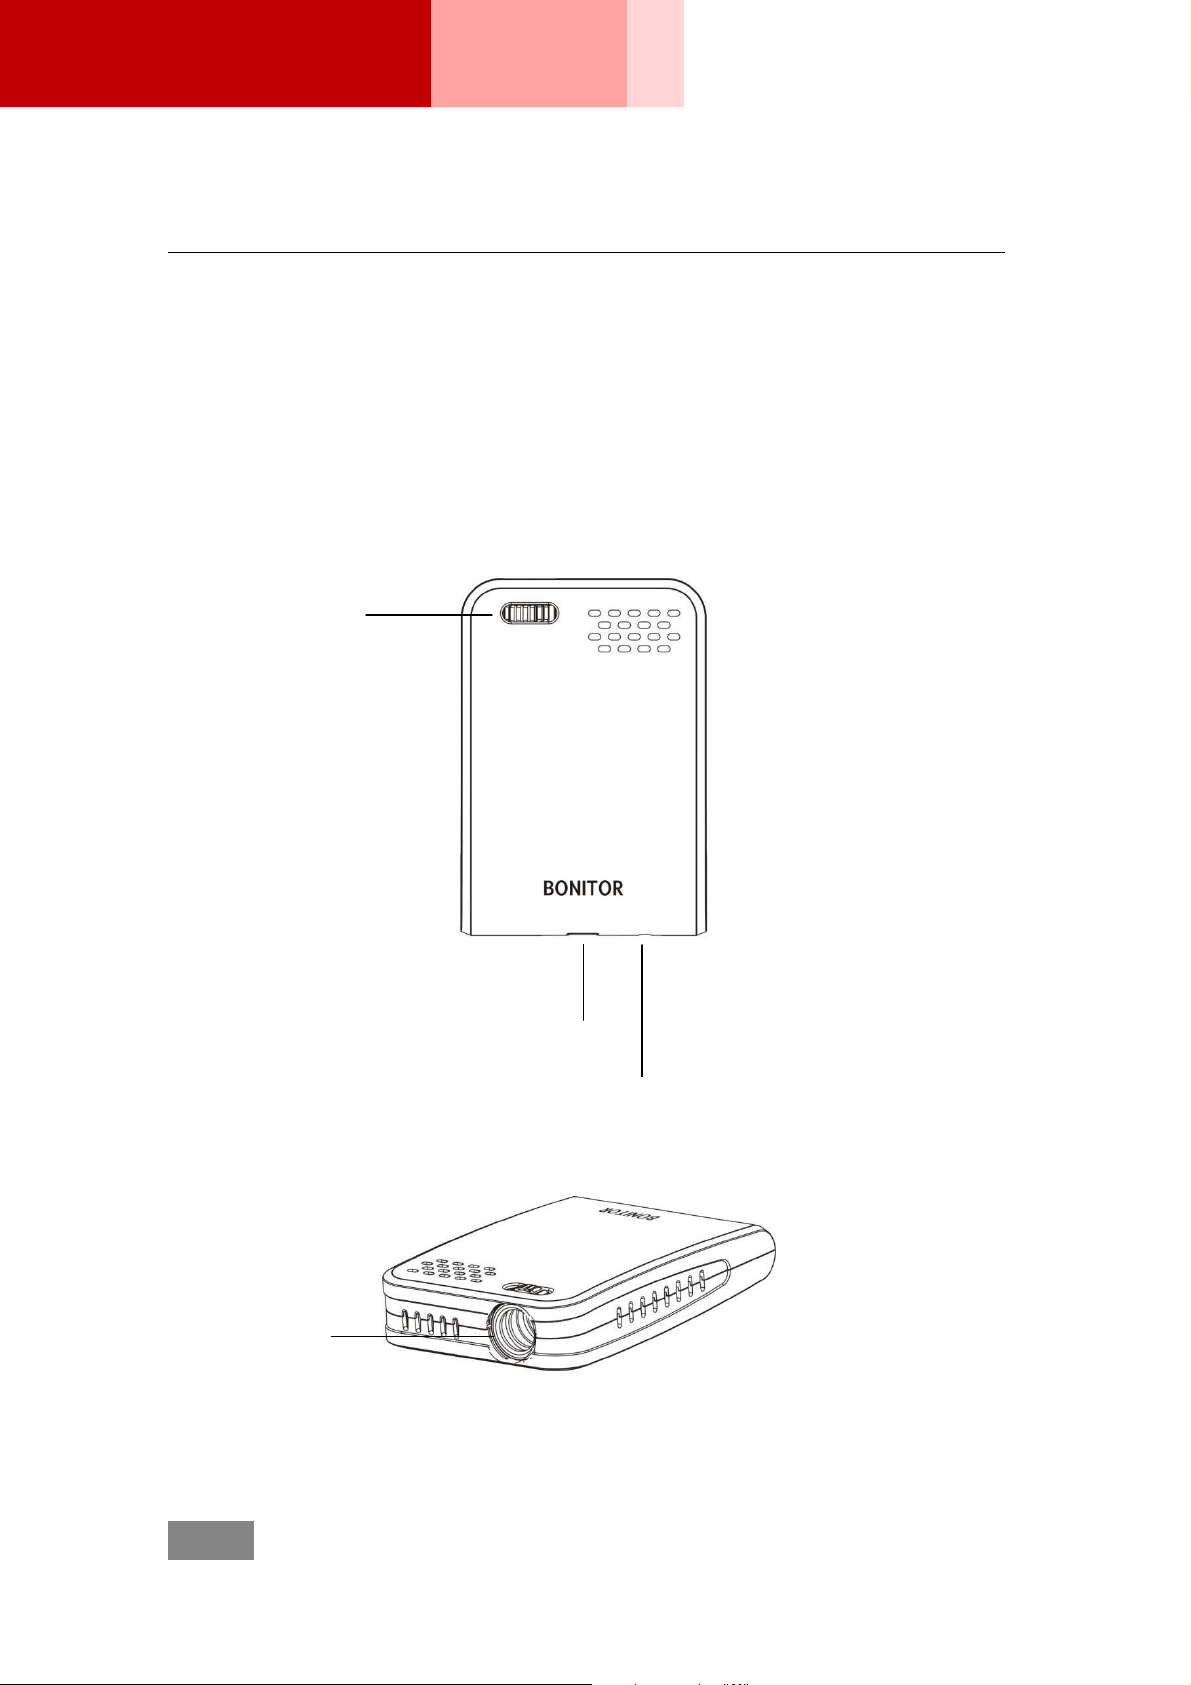
Bonitor MP301 is a portable mini projector powered by usb port. It is able to
project images shown in computer display. Typical examples are desktop
computer, laptop, netbook and umpc. It does not require complicated setup,
just plugs and plays after installing a driver.
Focus
MP301
USB Input
LED Light
Lamp
Page 4

4 |
Bonitor
All R
ights Reserved.
BONITOR Mini Projector
Specifications
Description Parameter
Display Technology LCOS
Image Resolution 640 x 480 pixels
Aspect Ratio 4 : 3
Brightness 12 lumens
Throw Ratio 1.62
Projection Distance 140mm - infinite
Image Size 86.4mm - infinite / 3.4” - infinite
Light Source LED
LED Lifetime >30,000 hours
MP301
Inputs VGA, DC Power
Input Resolution VGA, SVGA, XGA, WXGA, WSXGA
Dimension 62 x 90 x 20 mm
Weight 80 grams
Tripod Socket ¼" – 20
Operating Temperature 10˚ - 27˚C / 50˚ - 80˚F
Page 5

5 |
Bonitor
All R
ights Reserved.
BONITOR Mini Projector
Operating Instructions
Functioning MP301
1. Connecting a computer
Connect MP301 and a computer with the included USB cable.
2. Installing a driver
Browse www.bonitor.com/support/ to download the latest driver for MP301.
Install the driver according to the instruction in the unzipped folder.
MP301
3. Functioning MP301
After successful driver installation, MP301 should be functioning itself without
going any further step. A projector icon should be added to the tool bar at the
right bottom of the screen. Mouse over and right click to adjust the projecting
mode.
Image Size
Distance between MP301 and the display decides the image size. The
following table gives a quick reference for the relationship.
Distance Image Size
5.5 Inch 3.4 Inch
16 Inch 9.9 Inch
32 Inch 19.8 Inch
80 Inch 49.4 Inch
118 Inch 72.8 Inch
Page 6

6 |
Bonitor
All R
ights Reserved.
BONITOR Mini Projector
Mode
Styles of the projected images can be adjusted by switching projection mode.
Locate the projector icon at the right bottom of the screen. Mouse over and
right click.
Mode Description
Off Turn off the projector
Mirror Computer screen is enabled. Under VGA
MP301
resolution, MP301 can project everything
shown on the screen. Under higher resolutions,
MP301 only shows images around the mouse
pointer.
Primary Computer screen is disabled. Projected image
is adjusted to VGA resolution.
Extended Projected image is split from the screen. Drag
the file beyond the right hand side of the screen
and the dragged file will be projected.
Focus Adjustment
Rotate the focus wheel until the projected image is satisfactory.
Page 7

7 |
Bonitor
All R
ights Reserved.
BONITOR Mini Projector
Trouble Shooting
Situations Problems and Solutions
No Projection 1. Driver uninstalled
Blurred Image 1. Not focused
MP301
Install proper driver for MP301
2. Projection mode off
Right click the projector icon and enable
3. USB connection
Reconnect the USB cable
Rotate the focus wheel until the projected image is
satisfactory
2. Out of range
Place MP301 within the distance range
Page 8

8 |
Bonitor
All R
ights Reserved.
BONITOR Mini Projector
Safety Statements
CE Statement
This product is herewith confirmed to comply with applicable directive
2004/108/EC Electromagnetic Compatibility (as amended) in accordance with
European Union Rules.
The equipment was passed. The test was performed according to the following
applicable standards:
EMC
EN 55022: 2006
MP301
EN55024: 1998+A1: 2001+A2: 2003
EN61000-3-2: 2006
EN61000-3-3: 1995+A1: 2001+A2: 2005
FCC Statement Class B
This equipment has been tested and found to comply with the limits for a class
B digital device, pursuant to Part 15 of the FCC rules. These limits are
designed to provide reasonable protection against harmful interference in a
residential installation. This equipment generates uses and can radiate radio
frequency energy and, if not installed and used in accordance with the
instructions, may cause harmful interference to radio communications.
However, there is no guarantee that interference will not occur in a particular
installation. If this equipment does cause harmful interference to radio or
television reception, which can be determined by turning the equipment off and
on, the user is encouraged to try to correct the interference by one or more of
the following measures:
- Reorient or relocate the receiving antenna
- Increase the separation between the equipment and receiver
- Connect the equipment to an outlet on a circuit different from that to which the
receiver is connected
- Consult the dealer or an experienced radio/TV technician for help
 Loading...