

Page 1
MP201 User Guide
Page 2

2 |
Bonitor
All R
ights Reserved.
BONITOR Mini Projector
User Guide Menu
Overview
Specifications
Compatibility
Operating Instructions
Trouble Shooting
MP201
3
4
5
6-7
8
Safety Statements
9
Page 3
3 |
Bonitor
All R
ights Reserved.
BONITOR Mini Projector
Overview
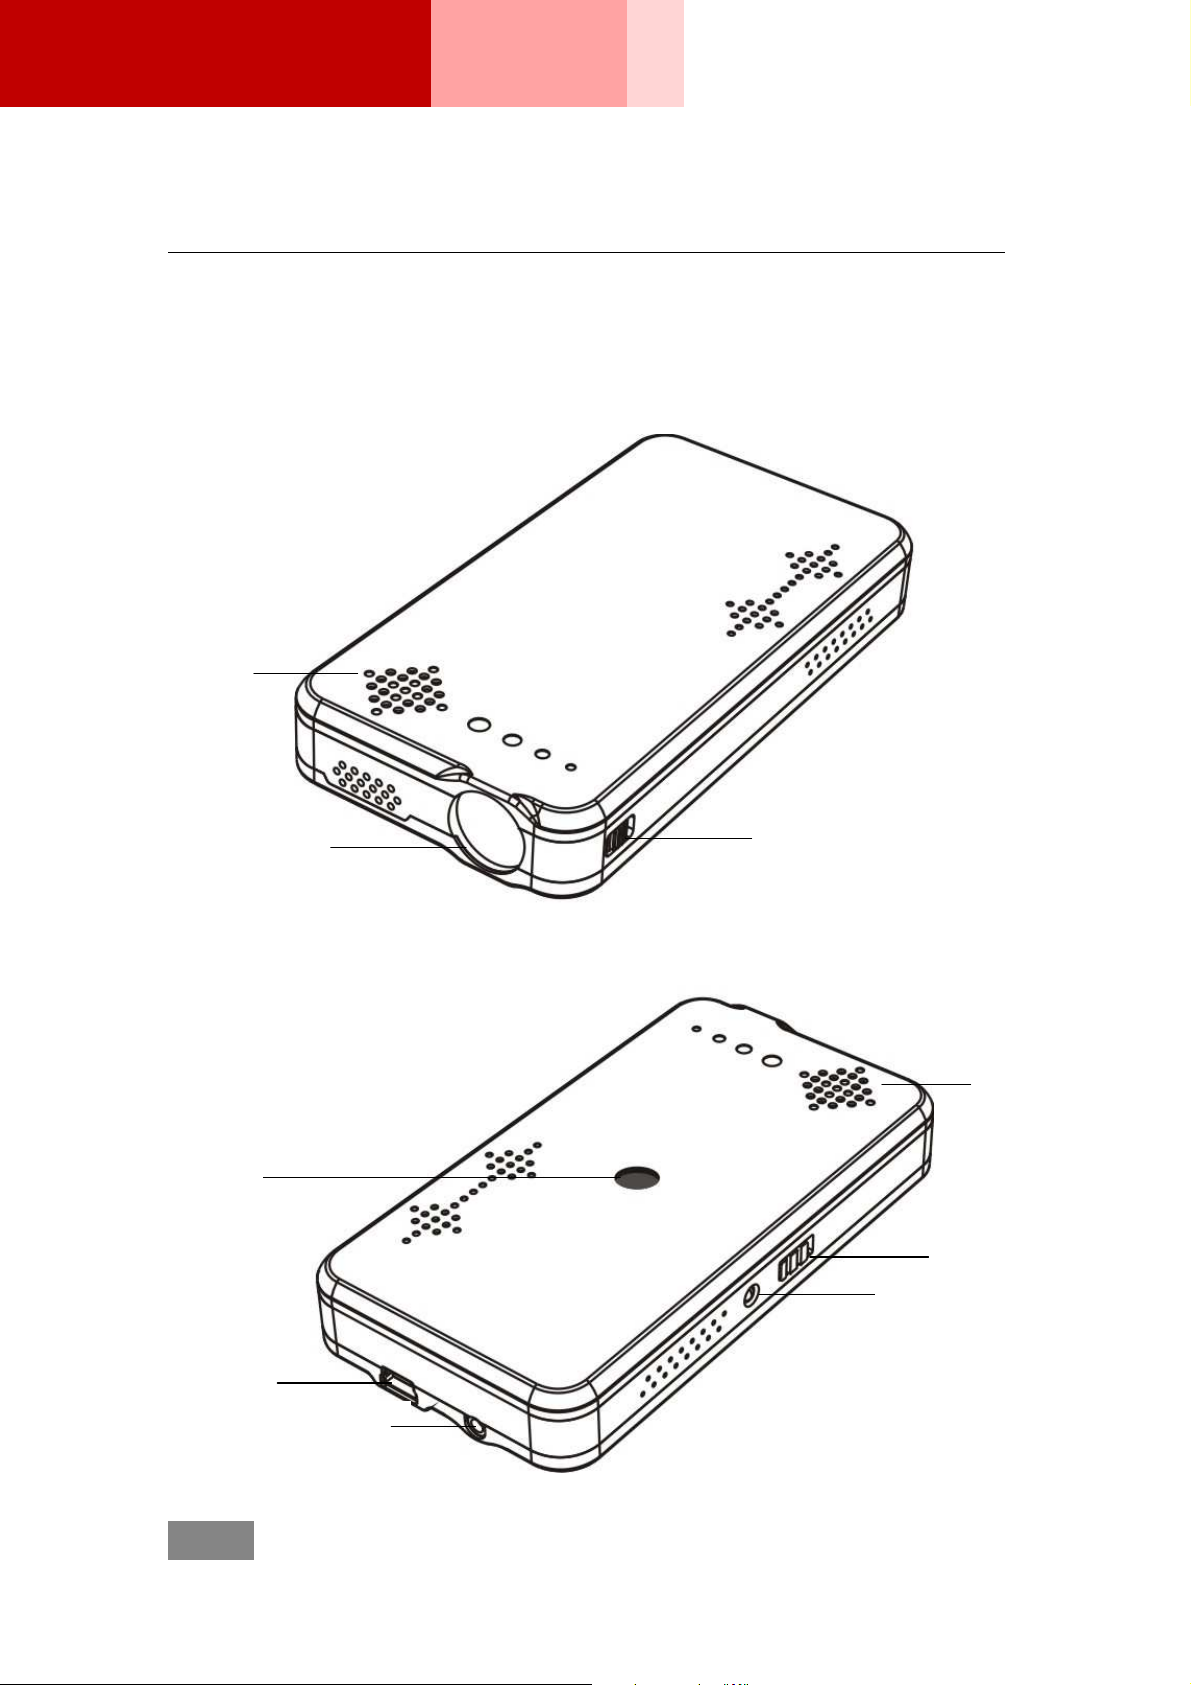
Bonitor MP201 is a portable mini projector powered by both long-life rechargeable
li-ion battery and dc power. It works with most of the devices with video output
capability to project videos anywhere. Typical examples are game consoles, dvd and
blueray disc player, mobile phone, portable media player.
MP201
Speaker
Tripod Socket
Lamp
Focus
Ventilation Hole
Power ON/OFF
LED Light
USB Jack
2.5mm Input
Page 4

4 |
Bonitor
All R
ights Reserved.
BONITOR Mini Projector
Specifications
Description Parameter
Display Technology LCOS
Native Resolution 640 x 480 pixels
Aspect Ratio 4 : 3
Brightness 15 lumens
Throw Ratio 1.57
Projection Distance 195 - infinite
Image Size 124.5 - infinite / 4.9” - infinite
Light Source LED
MP201
LED Lifetime >30,000 hours
Inputs Composite Video, DC Power
Input Signal NTSC, PAL, SECAM
Refresh Rate 50 Hz / 60 Hz
Input Resolution VGA, SVGA, XGA
Dimension 60 x 113 x 18 mm
Weight 160 grams
Tripod Socket ¼" - 20
Operating Temperature 10˚ - 27˚C / 50˚ - 80˚F
Speaker Built-in stereo 0.5W / 4ohm x 2
Battery Rechargeable Li-ion 3.7v - 2500mAh
Battery Life >2 hours
Page 5

5 |
Bonitor
All R
ights Reserved.
BONITOR Mini Projector
Compatibility
Bonitor MP201 connects devices with AV output capability, including game
consoles, mobile phones, portable media players and more. Here are some
officially verified popular examples (Compatibility of MP201 is not limited to the
examples below and the functionality is not guaranteed due to the possibility of
different setups and environments.):
Category Model
Game Consoles Sony Playstation 2
Sony Playstation 3
Sony PSP
MP201
Microsoft Xbox 360
Nitendo Wii
Mobile Phones Apple iPhone
Nokia N79
Nokia N95
Nokia N96
Nokia 5800XM
Portable Media Players Apple iPod Touch
Apple iPod Classic
Apple iPod Nano
Others DVD Player
Digital Video Camcorder
Digital Camera
Page 6
6 |
Bonitor
All R
ights Reserved.
BONITOR Mini Projector
Operating Instructions
Recharging MP201
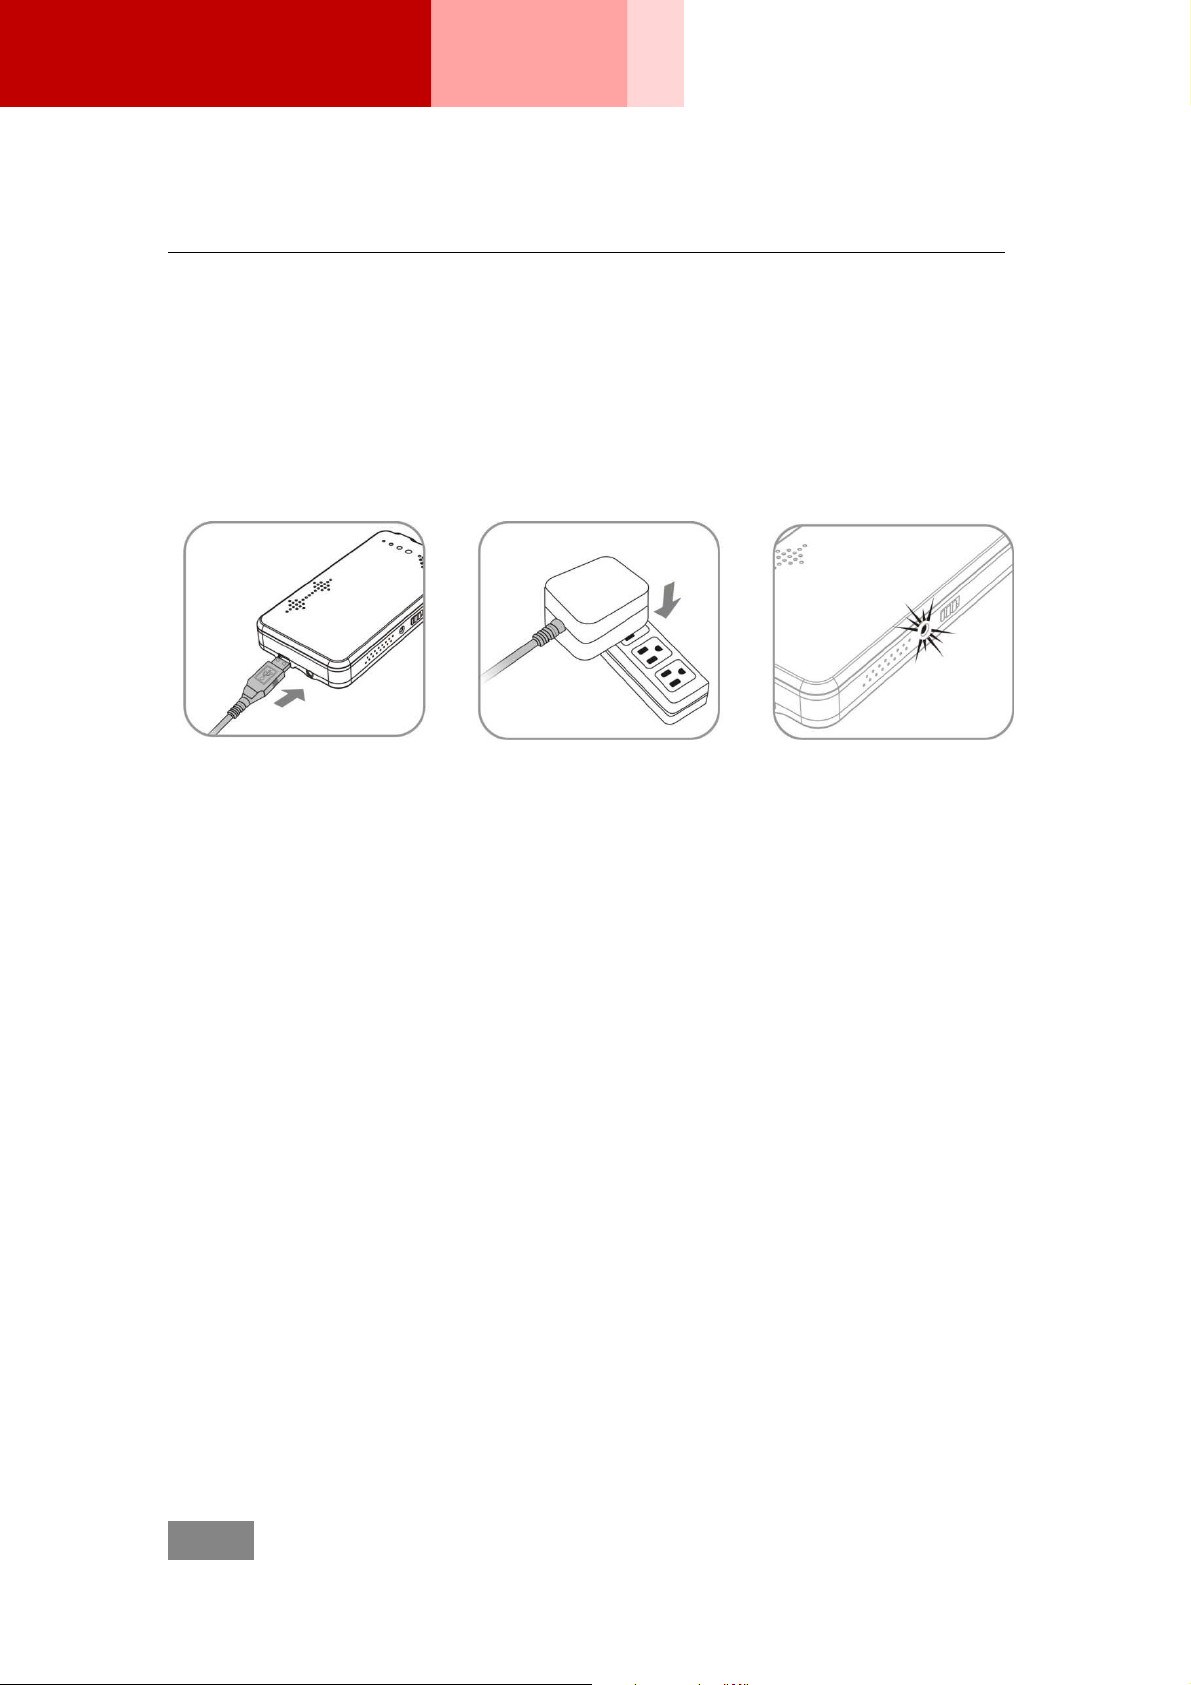
Slide the power switch to OFF mode and recharge MP201 with the included
AC adaptor / charger. LED light flashes once per second during recharging.
Full recharge takes probably 4-5 hours. LED light will stop flashing once the
battery is fully recharged.
MP201
Functioning MP201
1. Connecting a device
MP201 auto-detect video signals from an external video device with correct
cable connection. (1) Connect the included RCA cable to MP201. (2) Connect
another RCA cable to your video device. (3) Connect two RCA cables with the
included RCA adaptor.
2. Turning to video output mode
Manual settings should be required for your video device. Turn your video
device to video output mode. If you have problems on turning it to video output
mode, please consult the documentation of your video device or the
manufacturer.
3. Powering on
Slide the power switch of MP201 to ON mode. The LED light will turn on and
project the detected signals. If no video signal is detected, MP201 will not
project anything and the LED light will flash twice per second.
Page 7

7 |
Bonitor
All R
ights Reserved.
BONITOR Mini Projector
LED Light
LED light indicates the situations of MP201. Learn more indications from LED
light mode.
Situations LED light mode
Projecting LED light turns on without flashing
Recharging LED light flashes once per second
No Signal LED light flashes twice per second
Low Power LED light flashes ten times per second
Overheat LED light flashes ten times per second
Image Size
Distance between MP201 and the display decides the image size. The
MP201
following table gives a quick reference for the relationship.
Distance Image Size
9 Inch 5.7 Inch
16 Inch 10.2 Inch
32 Inch 20.4 Inch
80 Inch 50.9 Inch
118 Inch 75.2 Inch
Focus Adjustment
Rotate the focus wheel until the projected image is satisfactory.
Page 8

8 |
Bonitor
All R
ights Reserved.
BONITOR Mini Projector
Trouble Shooting
Slide the power switch to OFF mode and recharge MP201 with the included
AC adaptor / charger. LED light flashes once per second during recharging.
Full recharge takes probably 4-5 hours. LED light will stop flashing once the
battery is fully recharged.
Situations Problems and Solutions
No Projection 1. Power is off
MP201
Turn the projector on
2. No input signal
Turn your video device to video output mode
Blurred Image 1. Not focused
Rotate the focus wheel until the projected image is
satisfactory
2. Out of range
Place MP201 within the distance range
Page 9

9 |
Bonitor
All R
ights Reserved.
BONITOR Mini Projector
Safety Statements
CE Statement
This product is herewith confirmed to comply with applicable directive
2004/108/EC Electromagnetic Compatibility (as amended) in accordance with
European Union Rules.
The equipment was passed. The test was performed according to the following
applicable standards:
EMC
EN 55022: 2006
MP201
EN55024: 1998+A1: 2001+A2: 2003
EN61000-3-2: 2006
EN61000-3-3: 1995+A1: 2001+A2: 2005
FCC Statement Class B
This equipment has been tested and found to comply with the limits for a class
B digital device, pursuant to Part 15 of the FCC rules. These limits are
designed to provide reasonable protection against harmful interference in a
residential installation. This equipment generates uses and can radiate radio
frequency energy and, if not installed and used in accordance with the
instructions, may cause harmful interference to radio communications.
However, there is no guarantee that interference will not occur in a particular
installation. If this equipment does cause harmful interference to radio or
television reception, which can be determined by turning the equipment off and
on, the user is encouraged to try to correct the interference by one or more of
the following measures:
- Reorient or relocate the receiving antenna
- Increase the separation between the equipment and receiver
- Connect the equipment to an outlet on a circuit different from that to which the
receiver is connected
- Consult the dealer or an experienced radio/TV technician for help
 Loading...