

Page 1
Ultimaker Installation manual QR V2.3 2019-02-18
1
The Bondtech QR Extruder for 2.85/3.0 mm filament for use as a Bowden or a direct
Extruder. The extruder uses high-quality industrial pneumatic push-fit fittings for attaching the
bowden tube. It has also thread inserts to have a strong connection of the fasteners. The
mount for the hotend is a standard “Groovemount” that makes it possible to use the E3D
hotends aswell as others following this standard.
This new revolution in design utilizes the Bondtech Dual Drive Technology with precision
CNC-manufactured parts which gives the markets best performance and reliability.
Thanks for your support making this project a reality!
This work is licensed under a Creative Commons Attribution 4.0 International License.
Assembly &
Installation Guide
ULTIMAKER 2.85/3.0
Page 2

Ultimaker Installation manual QR V2.3 2019-02-18
2
Contents
Mechanical & Electrical Installation........................................................................................ 4
Software Configuration .........................................................................................................10
Simplify3D ............................................................................................................................11
Page 3
Ultimaker Installation manual QR V2.3 2019-02-18
3
Page 4
Ultimaker Installation manual QR V2.3 2019-02-18
4
Mechanical & Electrical Installation
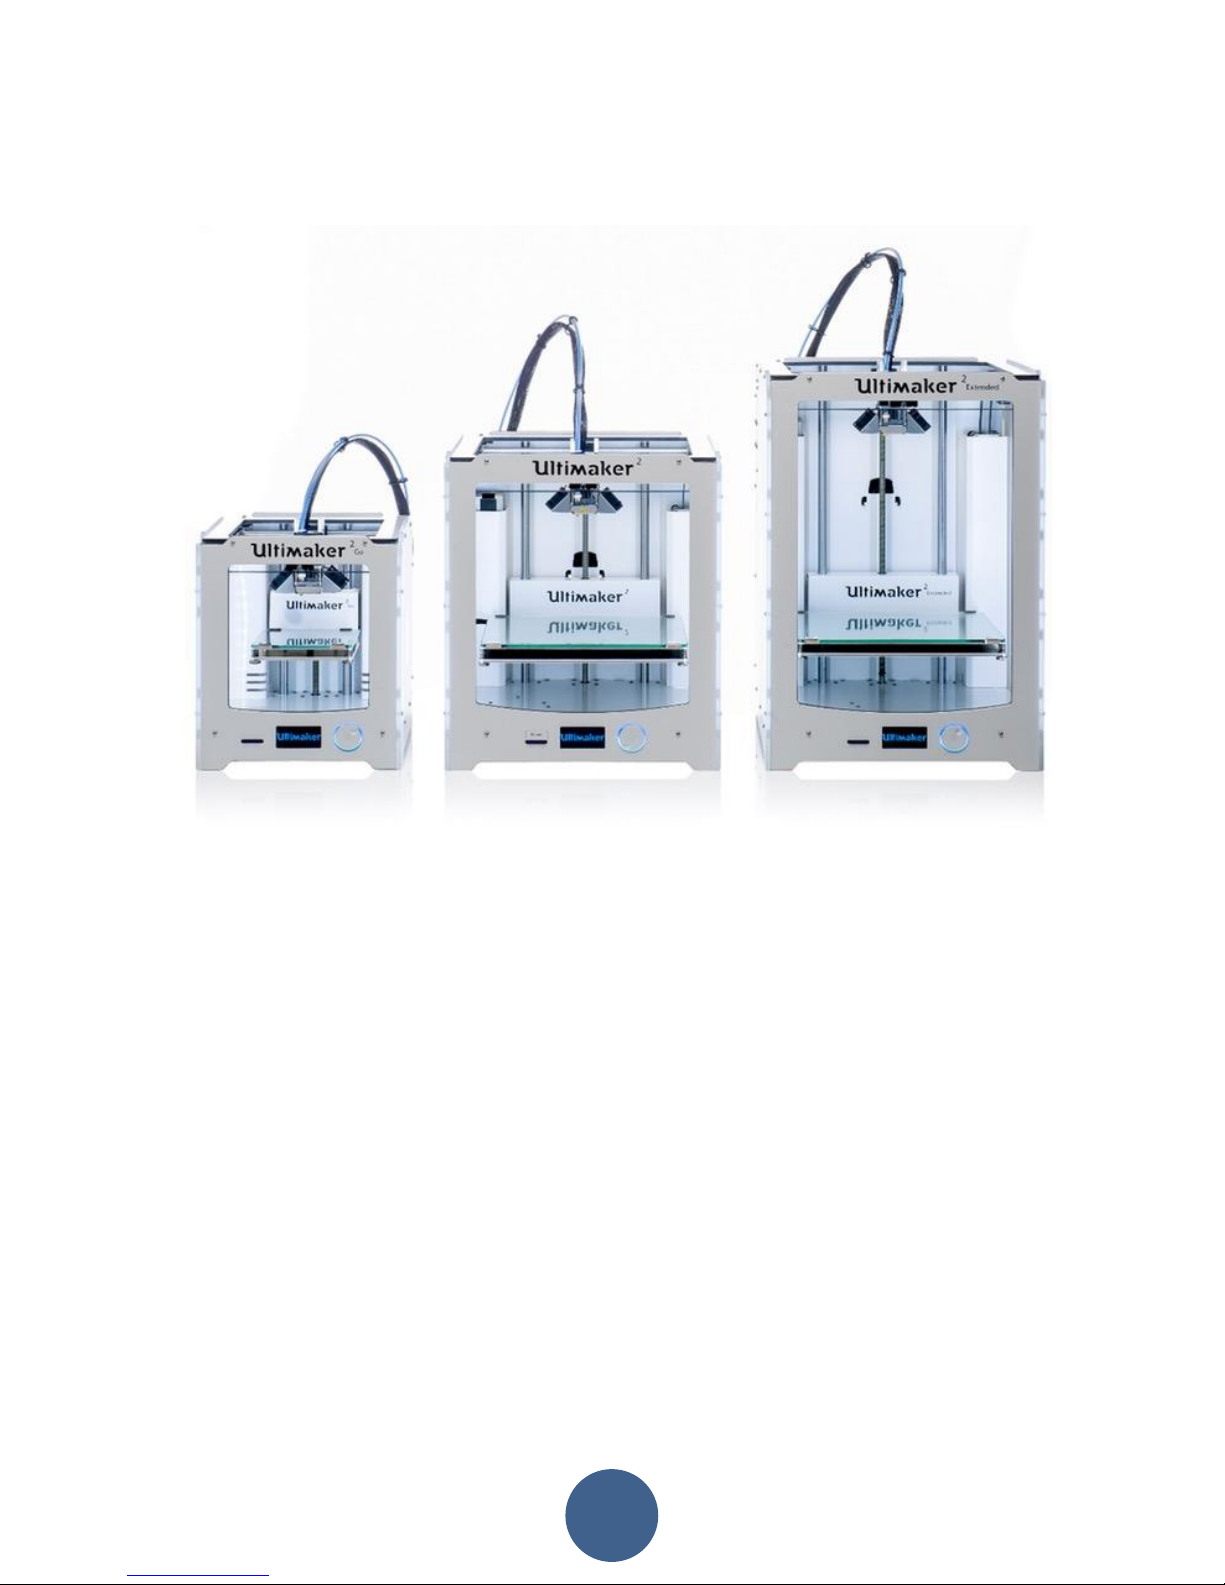
This guide shows the installation on a Ultimaker 2 Extended.
1. Start by removing the material from your printer with selecting “Material”, “Change”, after
the filament is removed, power off the printer.
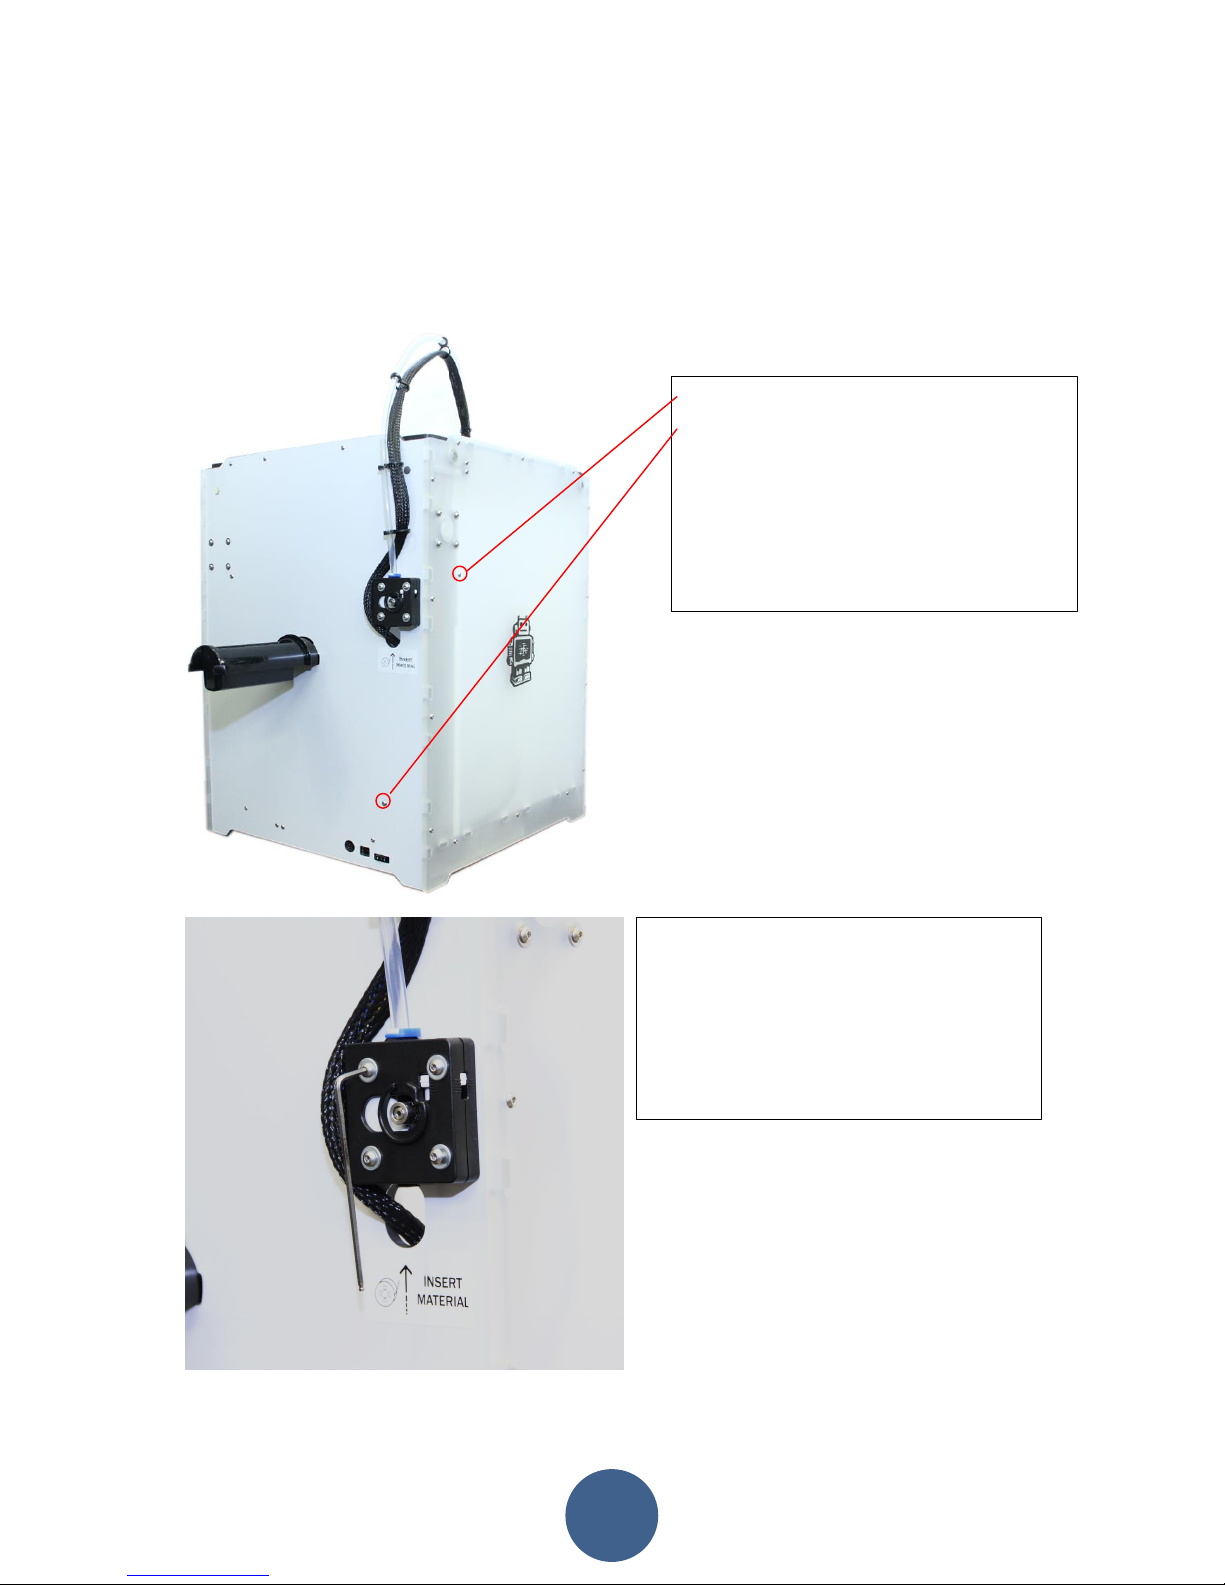
2. Rotate the printer so you can access the side and the rear side.
Loosen M3-screws for the inside cable
cover and remove the cable cover.
Remove the holder for the spool.
Loosen 4 x M3-screws that holds the
original extruder and motor. Support the
motor from the inside so it does not fall
down and damages the build plate.
Remove the blue bowden clip and
remove the bowden tube.
Page 5
Ultimaker Installation manual QR V2.3 2019-02-18
5
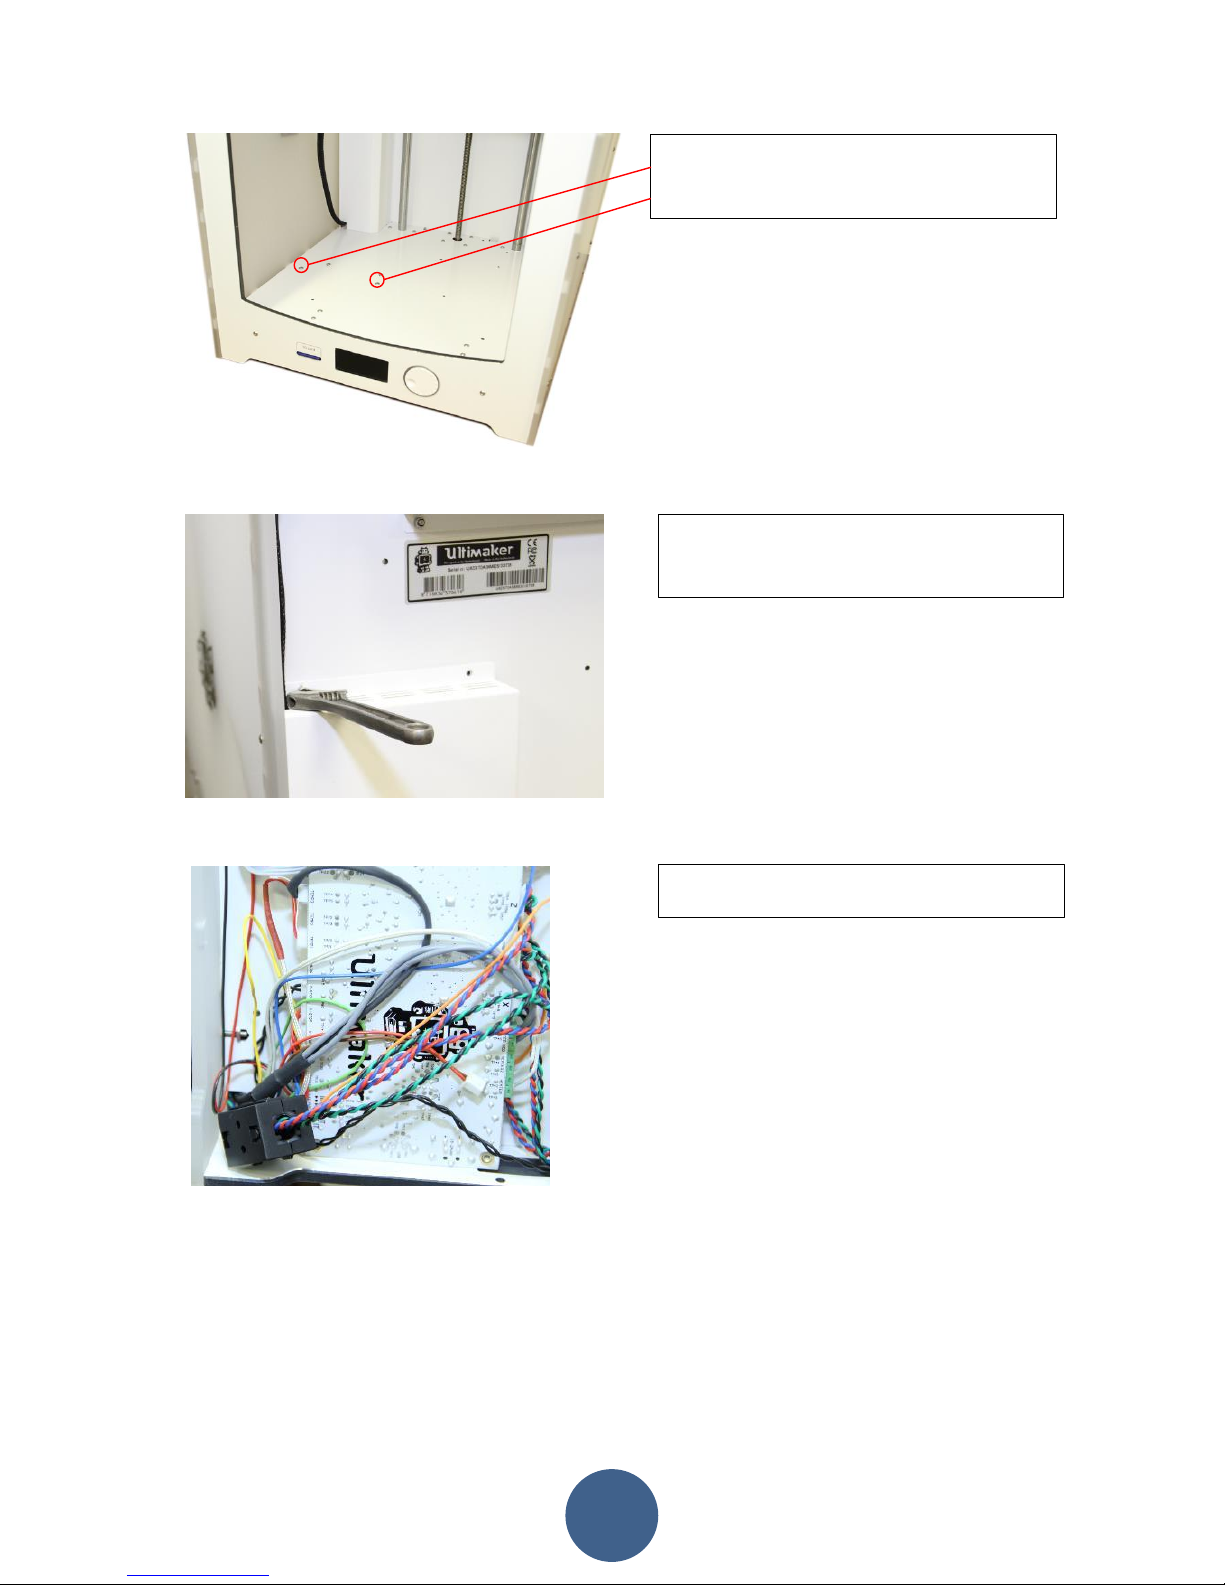
Loosen 2 x M3-screws that holds the
cover for the controller board.
Use a spanner to hold the nut from the
underside of the printer.
This reveals the controller board.
Page 6
Ultimaker Installation manual QR V2.3 2019-02-18
6
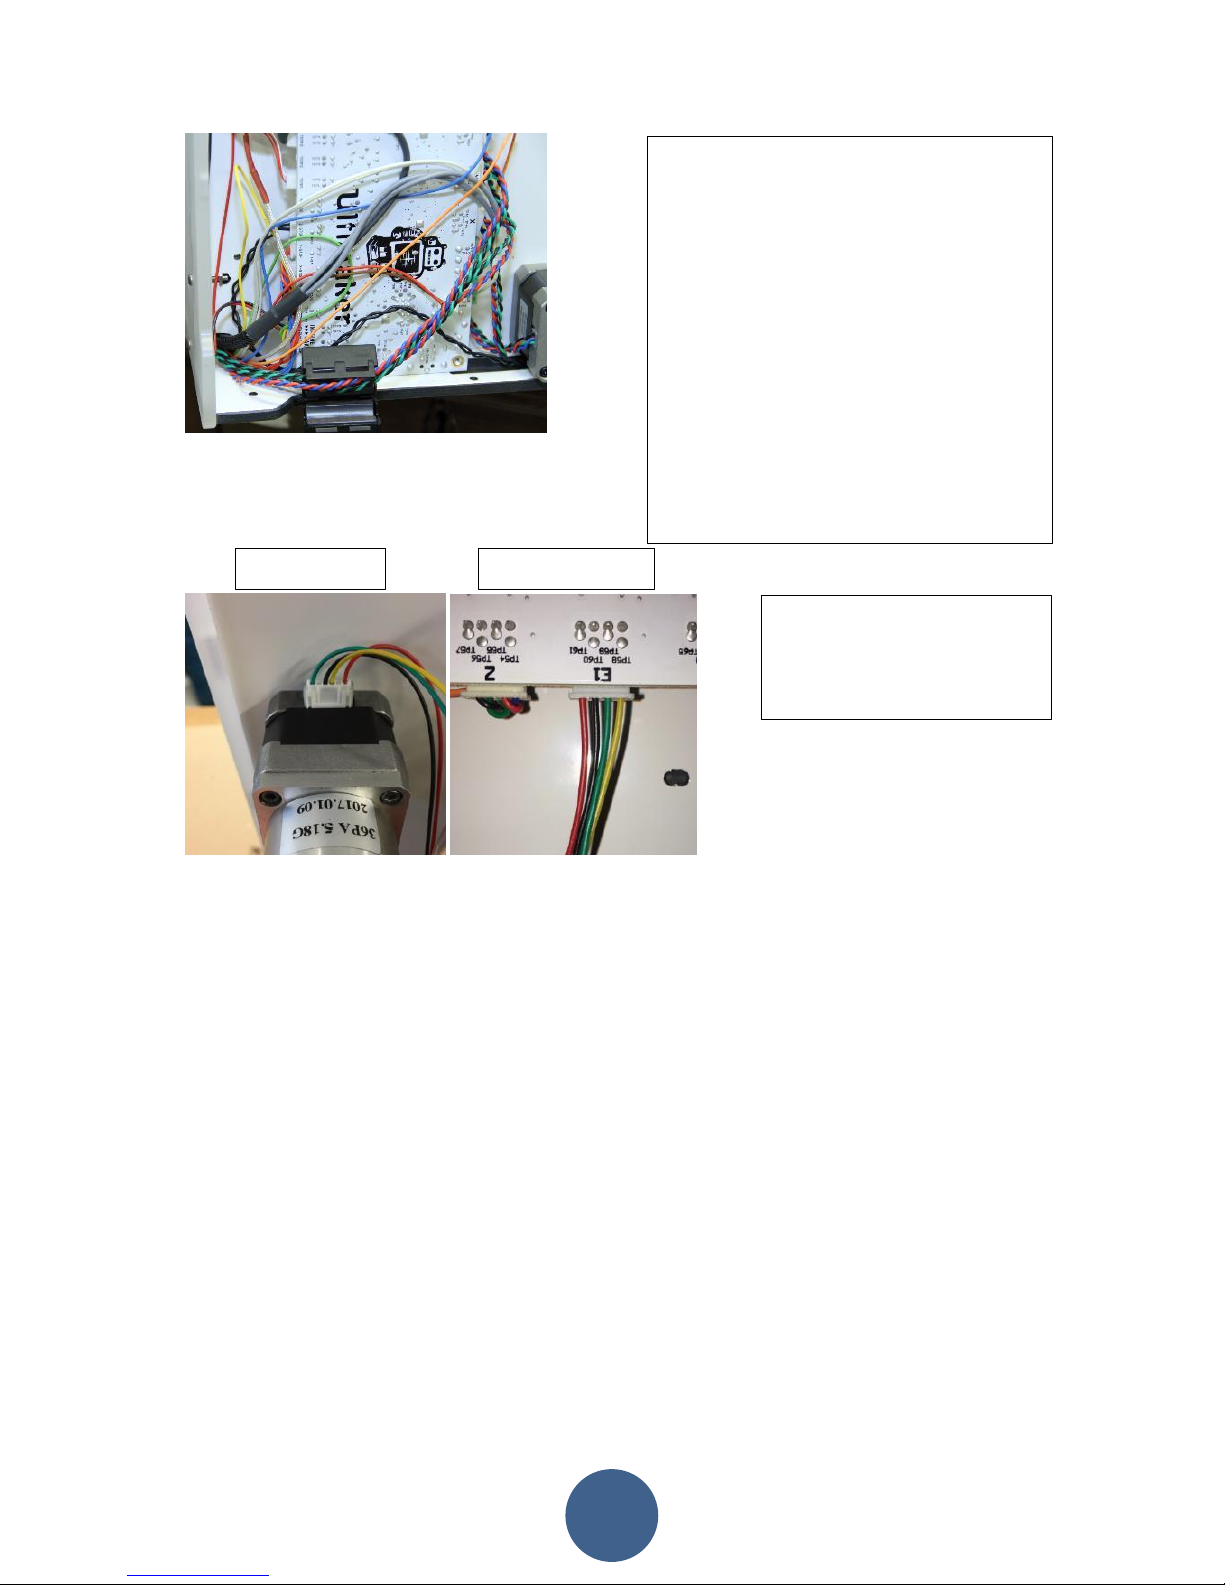
Make sure that the wires on
the cable is connected
according to the photo
Motor-side
Controller-side
Open the ferrite core and place it aside.
Disconnect the old extruder cable on the
controller.
Route the new cable from the hole on
the back plate through the printer and
down to the controller, connect the cable
in the EXT1 port (for single extruder)
Place the stepper cables inside the
ferrite core and close it.
Install the cover for the controller board.
Page 7
Ultimaker Installation manual QR V2.3 2019-02-18
7
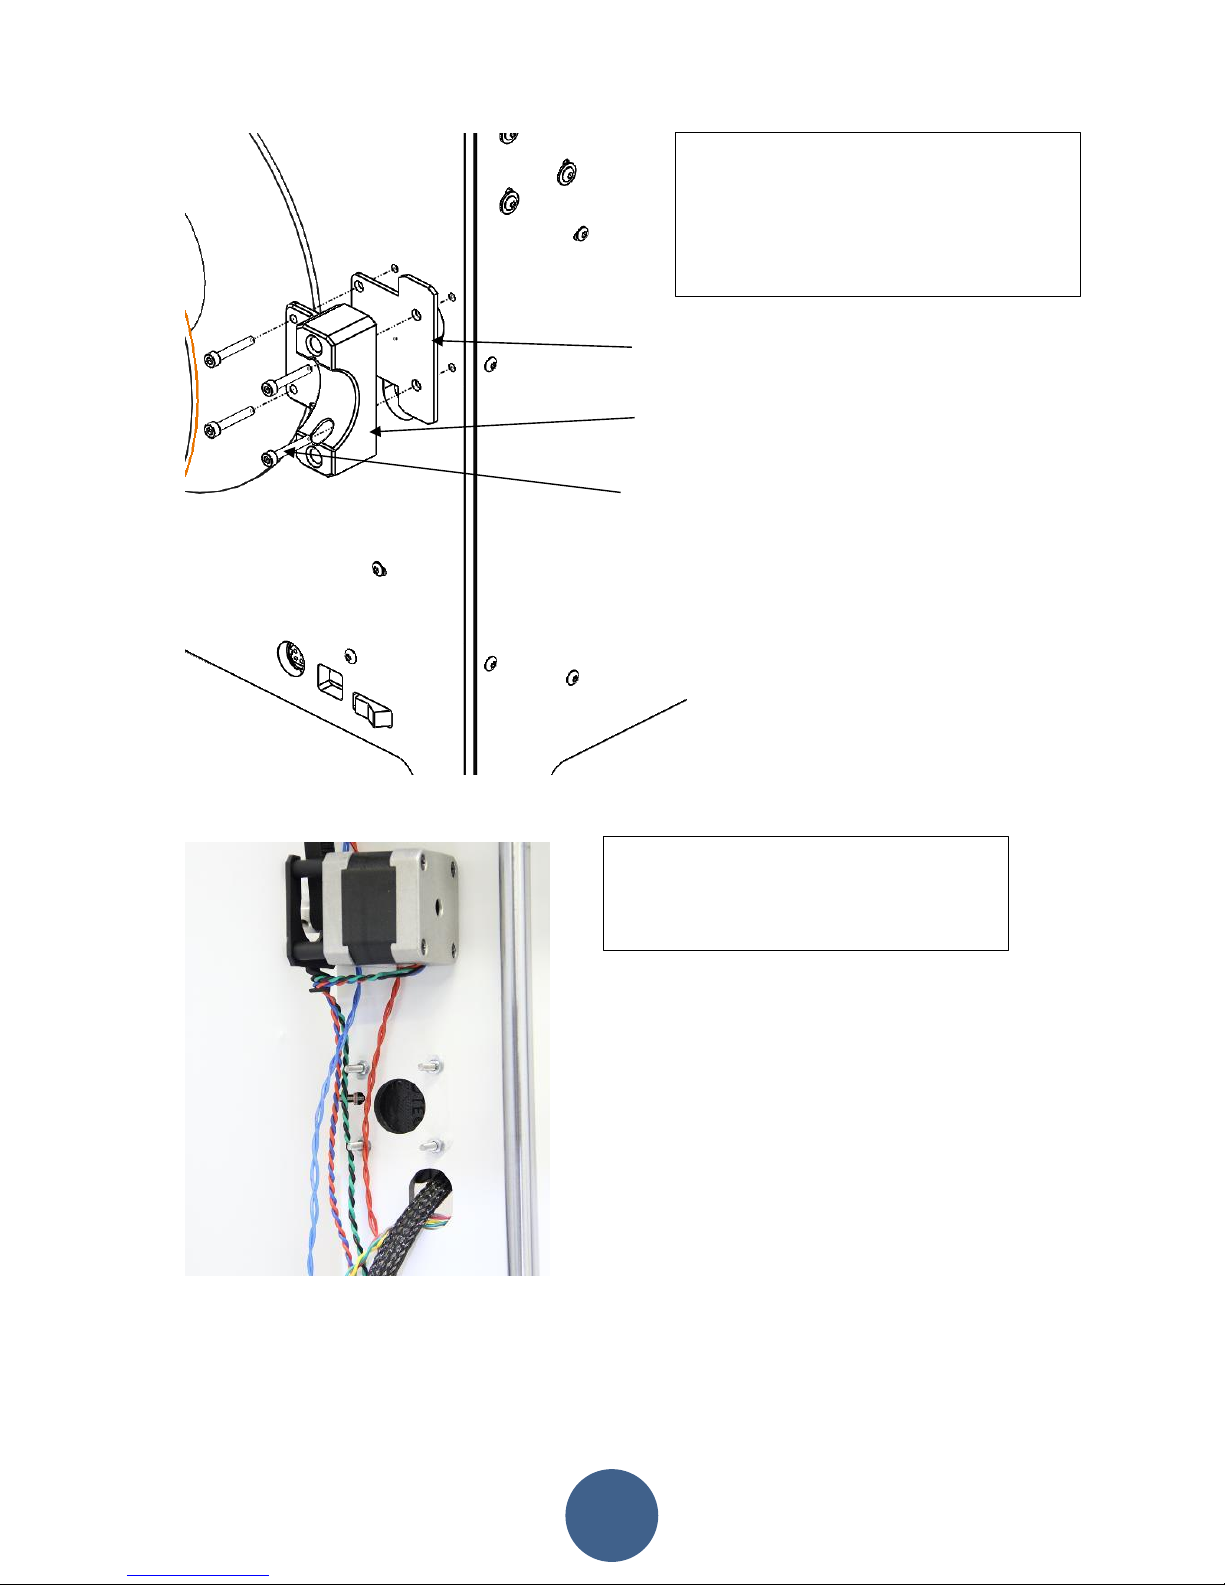
Place the the damping plate and the
bottom part of the holder against the rear
back plate and insert the M3x20 mm
bolts through the mount and into the
chassis
Dampening plate
Bottom mount
M3x20 screw
Use a washer and a M3 nut on the inside
to secure the mounting screws.
Page 8
Ultimaker Installation manual QR V2.3 2019-02-18
8
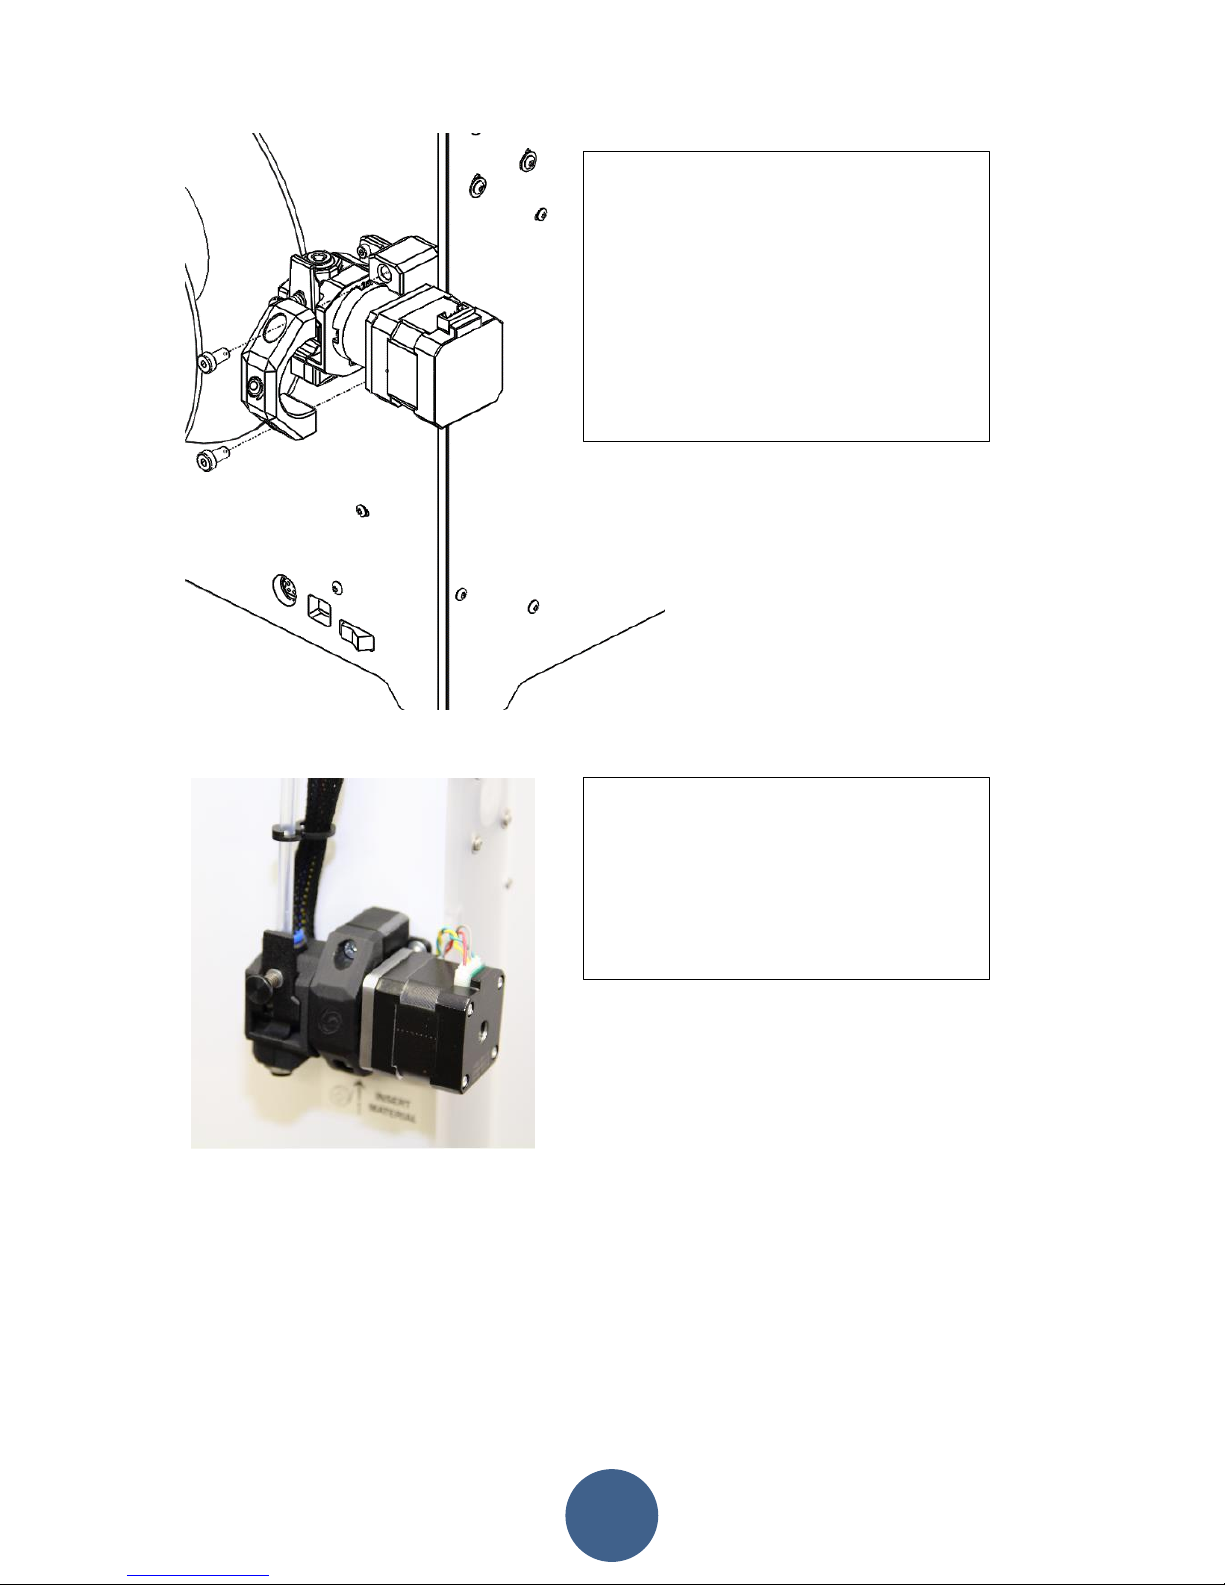
Place the Bondtech Extruder in the
holder, use the top-clamp and the 2 M5
screws to secure the extruder, please
take not of the orienting tab of the top
clam, it shall fit inside the cutout on the
gearbox. Use the black foam insulator
between the motor and the mount, it can
either be installed on the motor or
delivered separately.
Connect the cable and the bowden tube,
make sure the bowden tube is pressed
down all the way into the extruder
housing, place the clip underneath the
plastic collar to prevent movement of the
bowden tube.
Page 9
Ultimaker Installation manual QR V2.3 2019-02-18
9
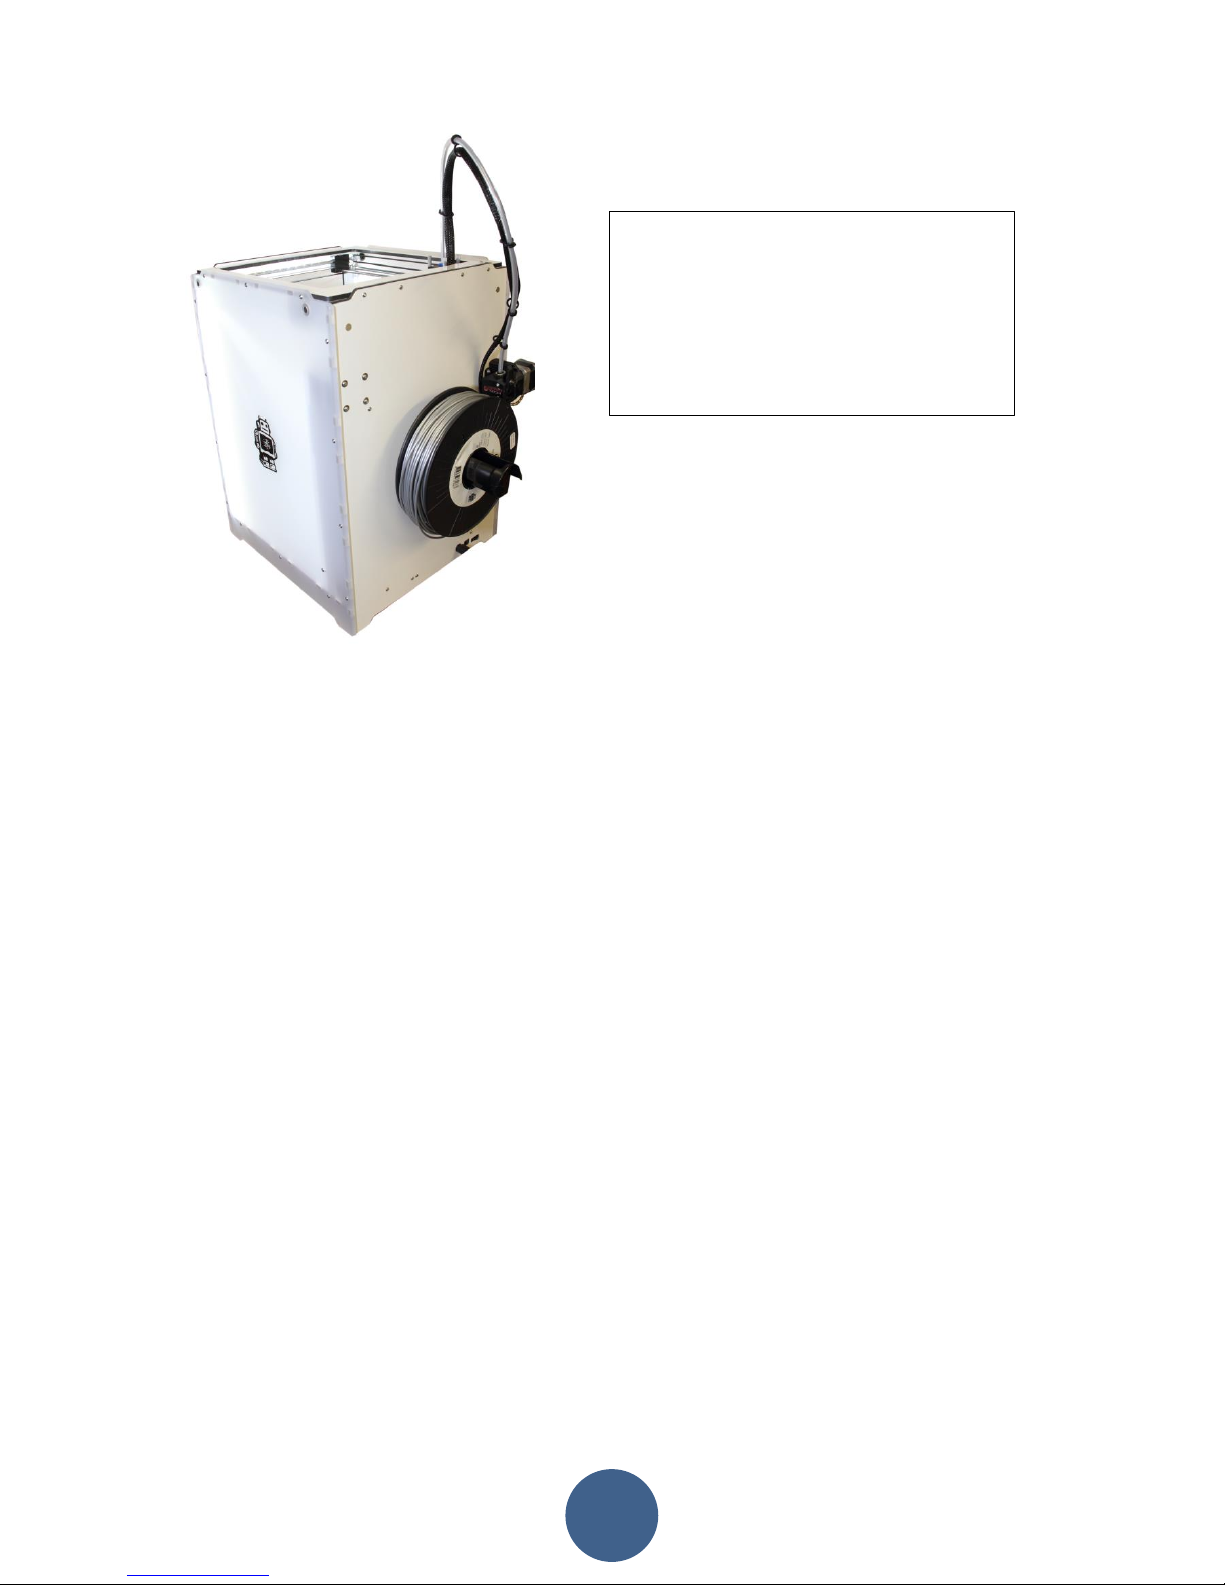
Remount the cable cover from the inside
and secure it with the two m3 screws.
Make sure that no cable is pinched
between the cover and the plates.
Re-attach the spool holder.
Page 10
Ultimaker Installation manual QR V2.3 2019-02-18
10
Software Configuration
The Ultimakers firmware needs to be changed since the new feeder uses another E-step value and
also the speed for loading/unloading material needs to be lowered in order not to stall the new
motor. The reason for this is that the Bondtech QR uses a planetary gearbox with 5.18:1 gearing ratio
making the motor turn faster than standard, this gives the advantage that the extrusion will have
higher resolution and the extruder gets much stronger in order to push the material with higher
force.
Below you will find links to the latest firmware that is based on original Ultimaker2.1 firmware.
The following is changed when compared to the original.
E-step is now 492.45, Loading speed is 50 mm/sec, Rotation direction is as for UM2 (ungeared)
Please make sure that you use the correct version for Ultimaker2 or Ultimaker2 Extended, if you load
the firmware for Ultimaker2 Extended into a Ultimaker 2 you will crash the head into the printing
surface.
Also use Cura version 15.04.06 to upload the firmware, later versions does not upload it to the
printer. It is available here: https://ultimaker.com/en/products/ultimaker-cura-software/list
Firmware for Bondtech QR for Ultimaker2
Firmware for Bondtech QR for Ultimaker2 with reversed rotation direction
Firmware for Bondtech QR for Ultimaker2 Extended
Once you have downloaded the firmware use Cura to install the new custom firmware in your
printer. By using the function Machine/install custom firmware and select the firmware file you have
downloaded.
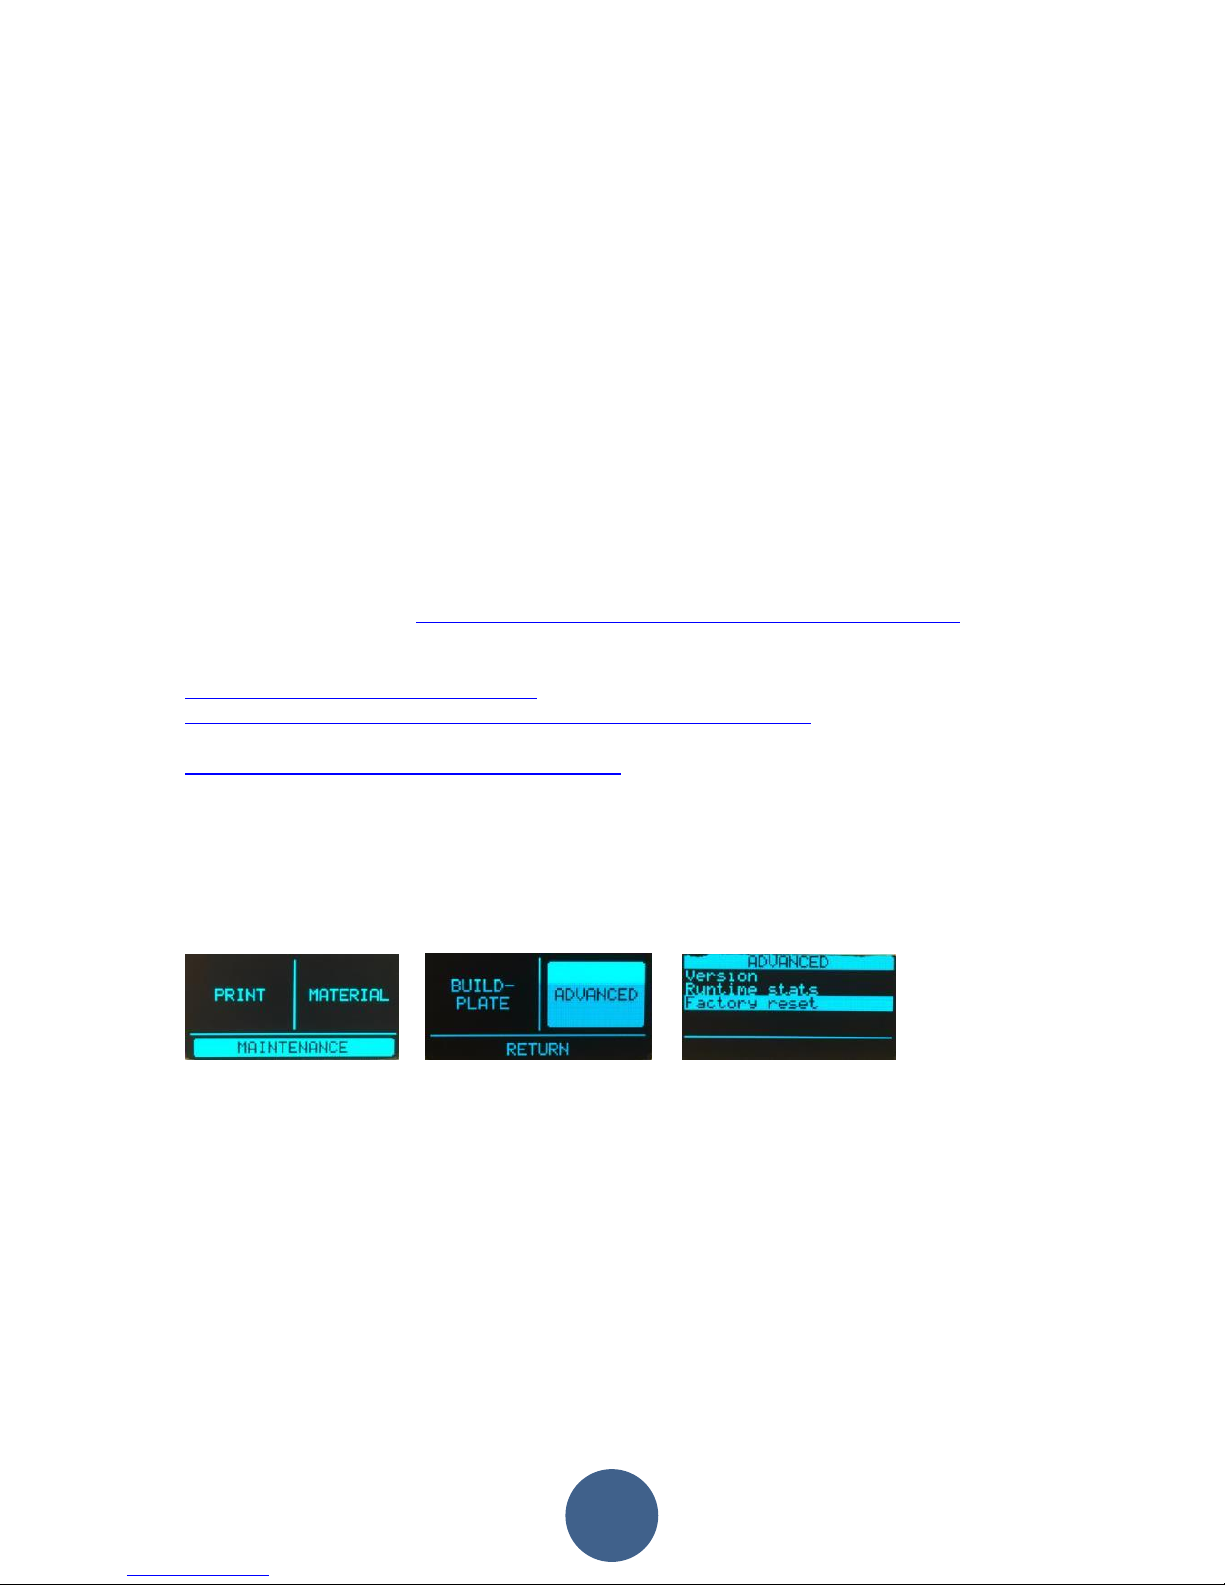
After the firmware has been installed you need to perform a “Factory reset” on the printer to ensure
that the printer uses the new values in the firmware.
-> ->
Aft the restore to factory settings is complete you will have to level your build plate and load material
(the same procedure as when the printer was new)
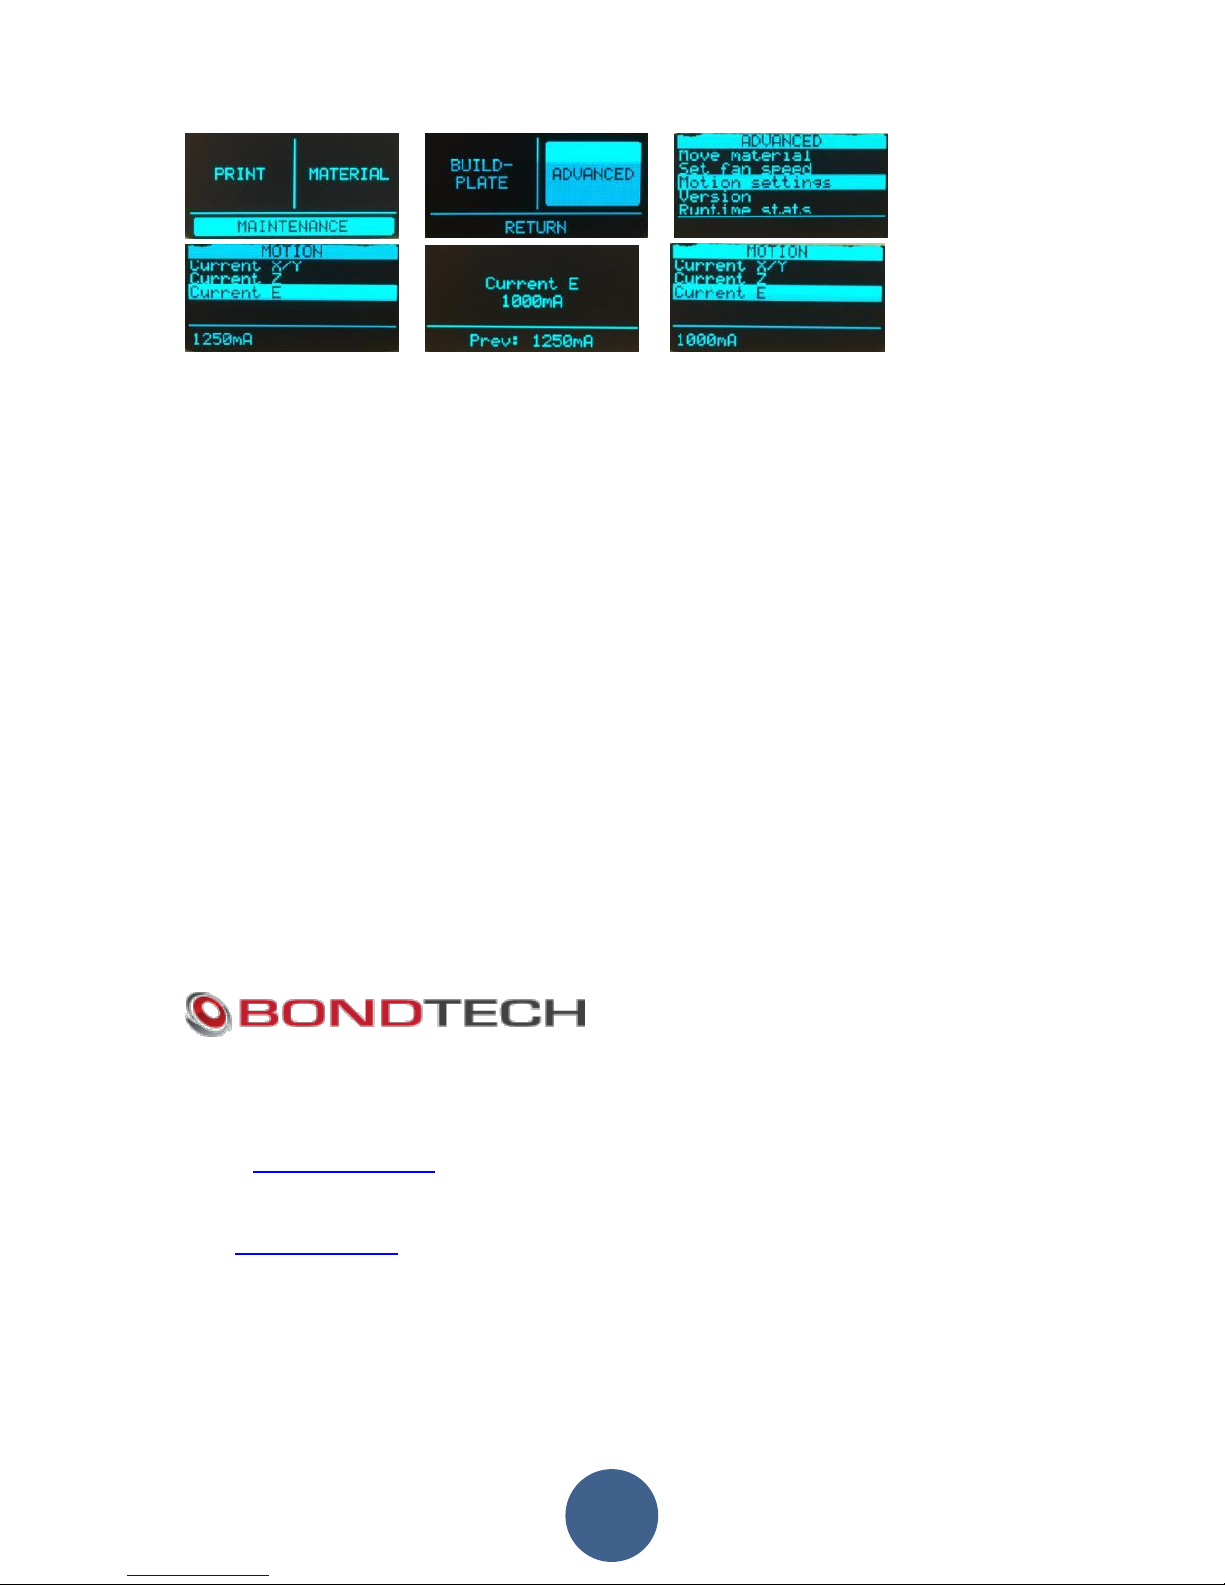
After this is completed enter the Advanced menu and navigate to motion settings where you need to
change the Current for the Extruder to 1000 mA, max current is 1200 mA for this motor but in order
to keep the motor cooler we recommend to use 1000 mA.
Page 11
Ultimaker Installation manual QR V2.3 2019-02-18
11
-> -> ->
-> - >
Simplify3D
If you are using Simplify3D as a slicer you will need to change a line in the start script section
that say M907 E1450 to M907 E1000.
If you are printing a part with extremely much retracts the motor can get quite hot, in order to
lower the temperature of the stepper motor you can lower the current to 1000 mA, the
pushing force of the extruder is more than enough also on this setting.
Good luck with your Bondtech Extruder!
If you have any questions, please contact us by email or telephone.
Lummervägen 5
33155 Värnamo
Sweden
e-mail: [email protected]
phone: +46702220193
paypal: [email protected]
web: www.bondtech.se
VAT-registration number: SE556995564301
 Loading...