

Page 1

Bome's Midi Translator
Tutorial: SCS.3 Quick Start
Page 2
Bome's Midi Translator: Tutorial: SCS.3 Quick Start 1 Overview
1 Overview
This is a tutorial for Bome's Midi Translator and Stanton SCS.3 devices.
2 Plugin SCS.3 Devices
Plugin SCS.3 devices and open Bome´s Midi Translator. Then save the
project as SCS.3 quick start.
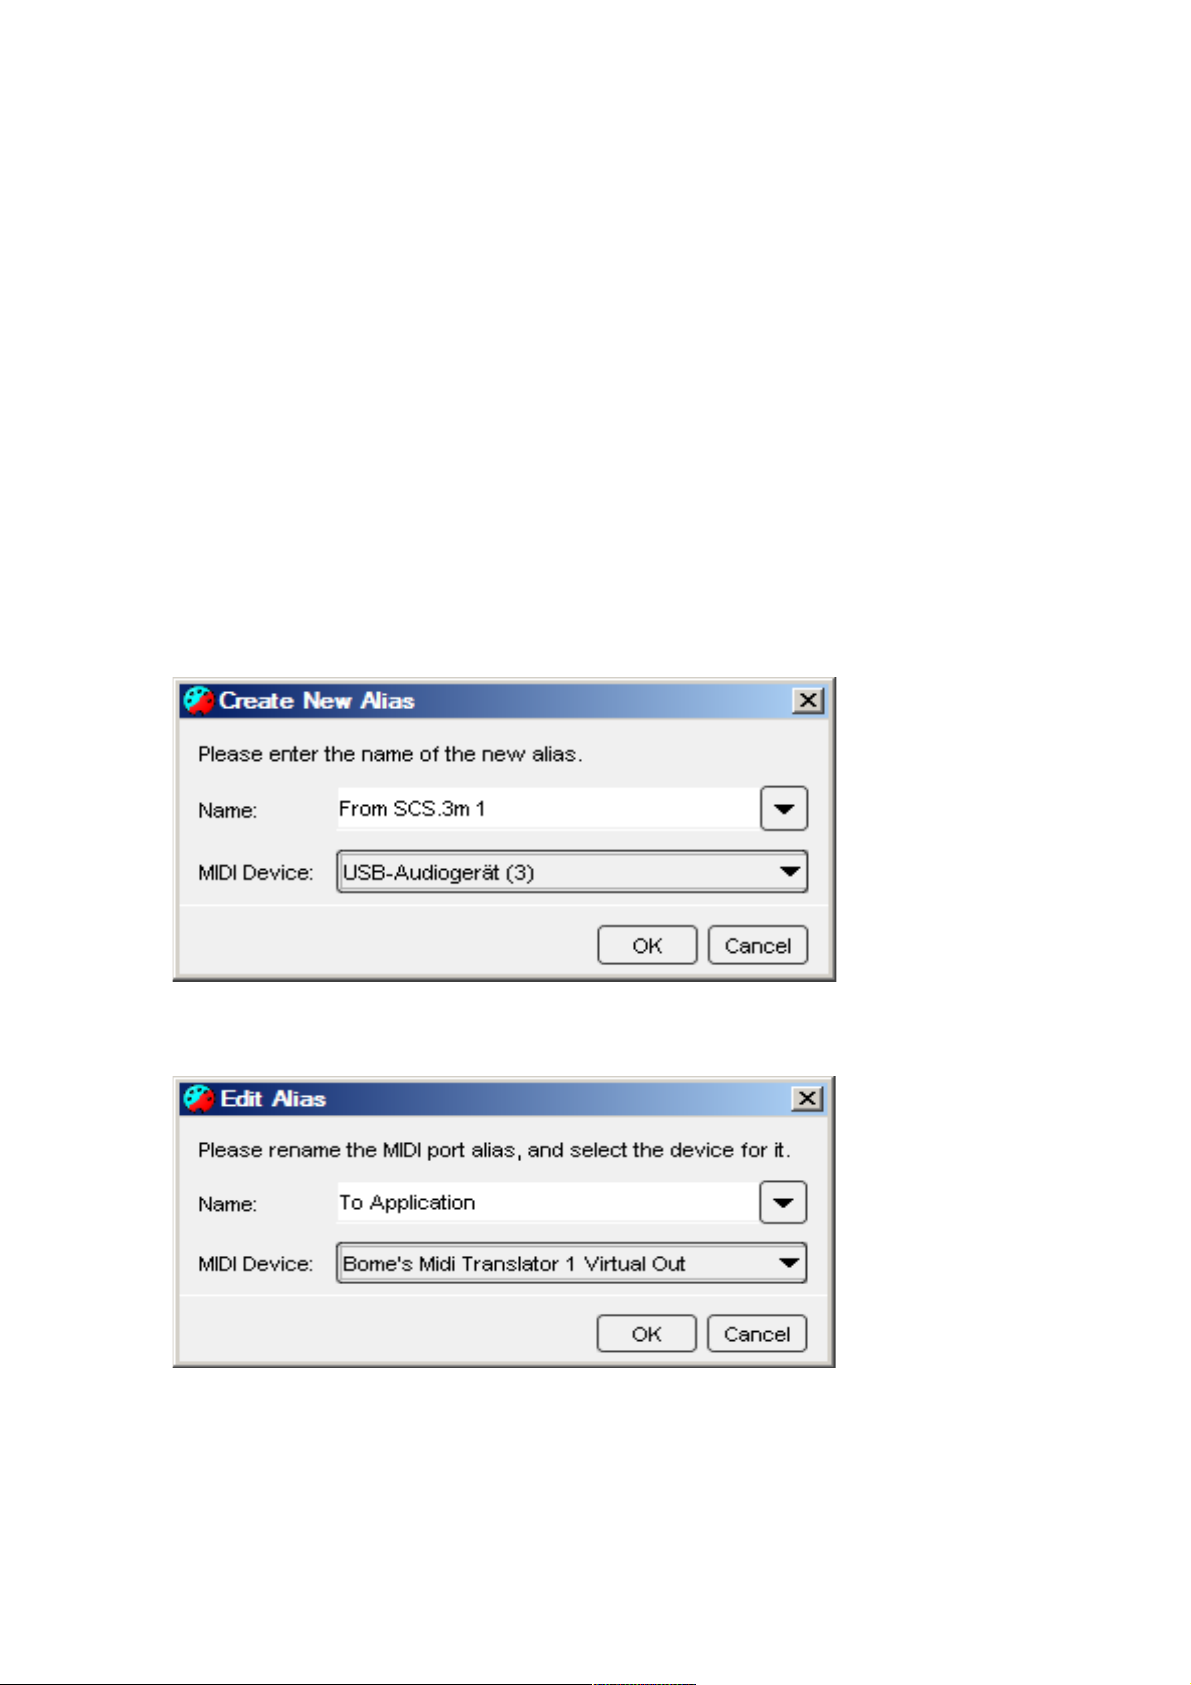
3 Create aliases
Go to Project-->Properties-->Project Default Midi Ports and create the
Aliasas for the Devices for in and out communication.
And one for the output communication to the Midi target aplication:
(c) 2010 by Bome Software Page 1/14
Page 3
Bome's Midi Translator: Tutorial: SCS.3 Quick Start 3 Create aliases
In the result, you should have this (don´t edit the names. For running in
DaRouter [see chapter 6] the names must be as described here):
Alias Type Device Description
From SCS.3d 1 MIDI INPUT SCS.3 Deck 1 MIDI from Deck 1
From SCS.3d 2 MIDI INPUT SCS.3 Deck 2 MIDI from Deck 2
From SCS.3m 1 MIDI INPUT SCS.3 Mixer 1 MIDI from Mixer
To SCS.3d 1 MIDI OUTPUT SCS.3 Deck 1 MIDI to Deck 1
for controlling
LED´s
To SCS.3d 2 MIDI OUTPUT SCS.3 Deck 2 MIDI to Deck 2
for controlling
LED´s
To SCS.3m 1 MIDI OUTPUT SCS.3 Mixer 1 MIDI to Mixer 1
for controlling
LED´s
To Application MIDI OUTPUT Virtual MIDI
Device
MIDI to target
Application
(c) 2010 by Bome Software Page 2/14
Page 4
Bome's Midi Translator: Tutorial: SCS.3 Quick Start 4 Start Preset editing
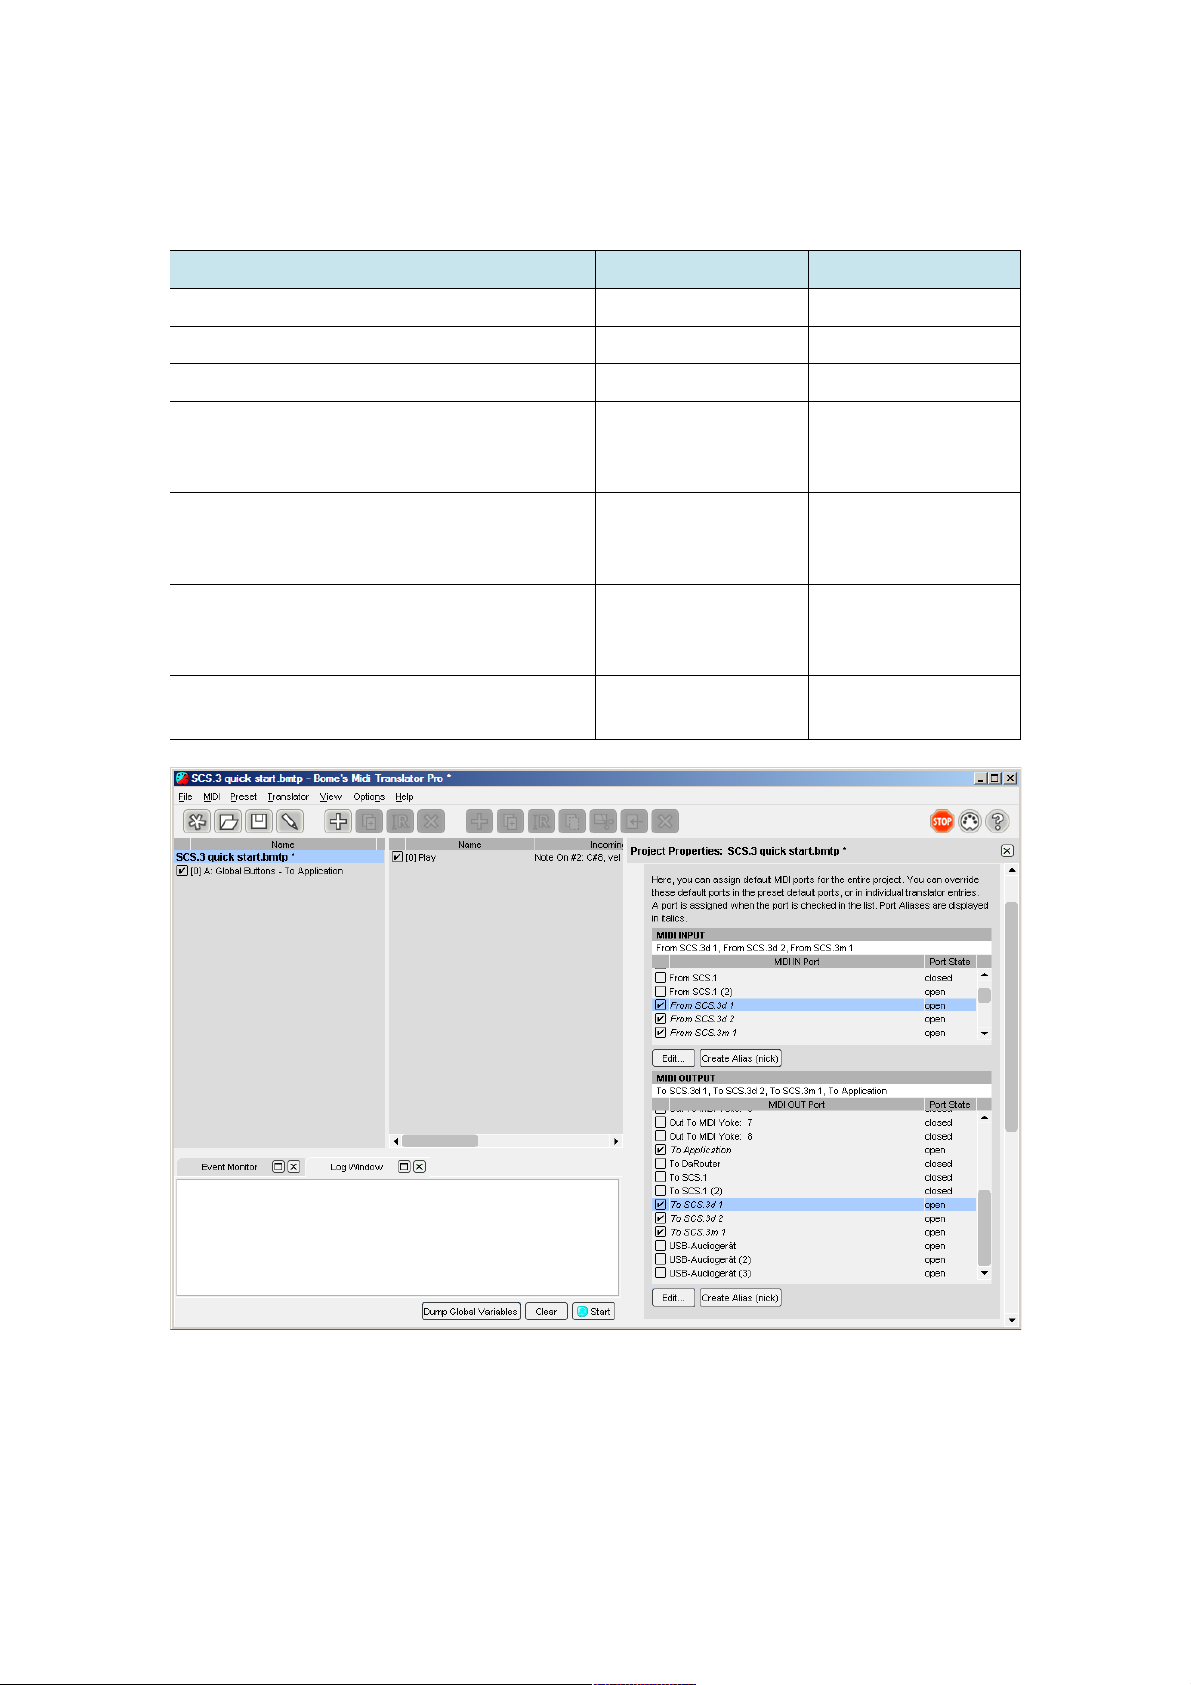
4 Start Preset editing
4.1 Play Deck A:
1. Create a Preset with name: A: Global Buttons - To Application
2. Then, you have to overwrite the Alias settings for this Preset:
You have to do this, because we want the Preset only to react on ONE
SCS.3d.
3. Create a Translator: Play
4. Edit Translator: Go to: Translator-->Edit translator
5. Select Incoming Action: MIDI
6. Capture MIDI and Press Button Play
7. As Outgoing Action we select KeyStroke Out, cause we have no
target MIDI Application at this point. Enter: A: Play Return
(c) 2010 by Bome Software Page 3/14
Page 5

Bome's Midi Translator: Tutorial: SCS.3 Quick Start 4 Start Preset editing
(c) 2010 by Bome Software Page 4/14
Page 6

Bome's Midi Translator: Tutorial: SCS.3 Quick Start 4 Start Preset editing
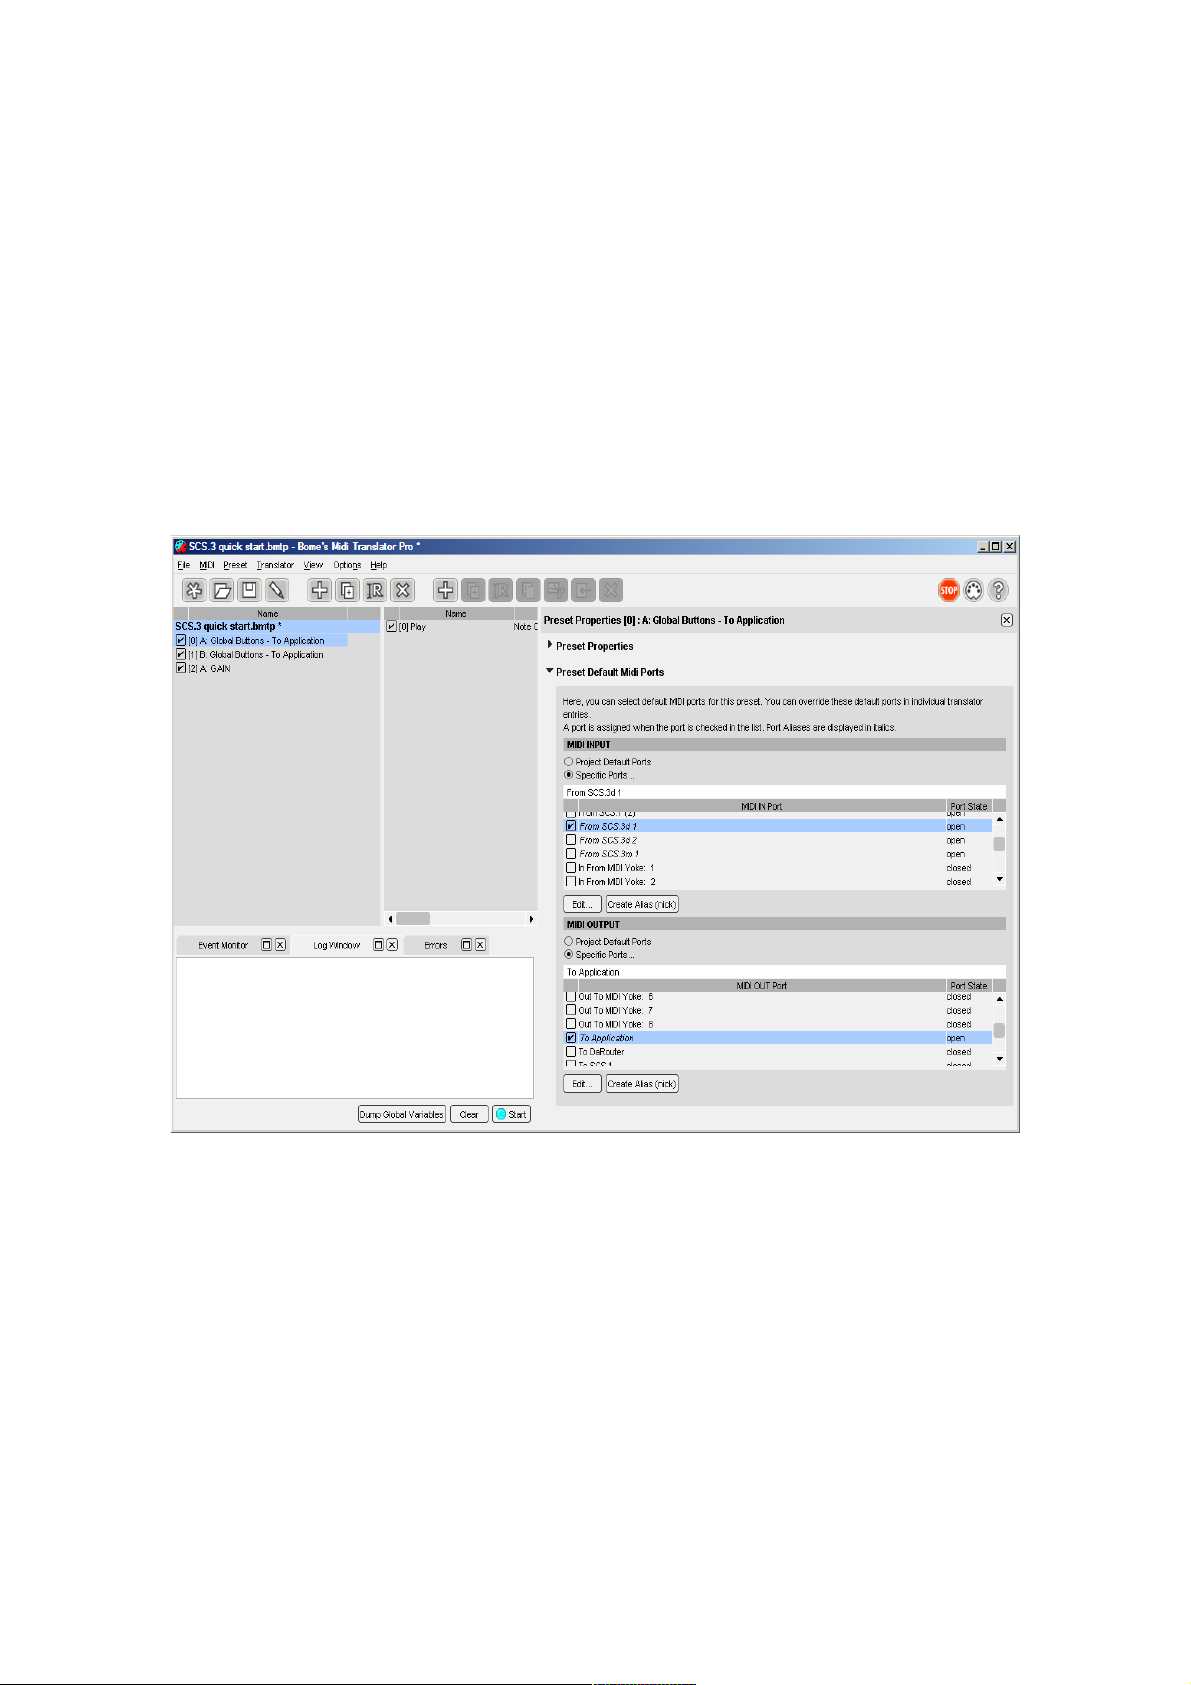
4.2 Play Deck B:
1. Duplicate First Preset: Select the Preset and Go to: Preset->Duplicate
2. Rename to: B: Global Buttons - To Application
3. Edit Preset Aliases: Select the Deck B now and delselect Deck A
4. Edit outgoing keystroke action: Enter: B: Play Return
4.3 Test first 2 Presets/Translators
Open a text editor and Press Play on Deck A and Deck B
(c) 2010 by Bome Software Page 5/14
Page 7

Bome's Midi Translator: Tutorial: SCS.3 Quick Start 4 Start Preset editing
4.4 Change to MIDI out and Test
After the test is ok, you know that the 2 decks are working correctly. So
you can change the outgoing actions to any value you want. We take 90 11
01 for Play Deck A and 91 11 01 for Deck B. Now open a MIDI test
programm for test. In Windows you can take Bome`s send SX
(http://www.bome.com/products /sendsx/ ). Open it and take the Virtual
Port as Midi In Port you have choosen as Alias "To Application" .
As an alternative for OS X you can use: Midi Monitor(
http://www.snoize.com/MIDIMonitor/ )
(c) 2010 by Bome Software Page 6/14
Page 8

Bome's Midi Translator: Tutorial: SCS.3 Quick Start 4 Start Preset editing
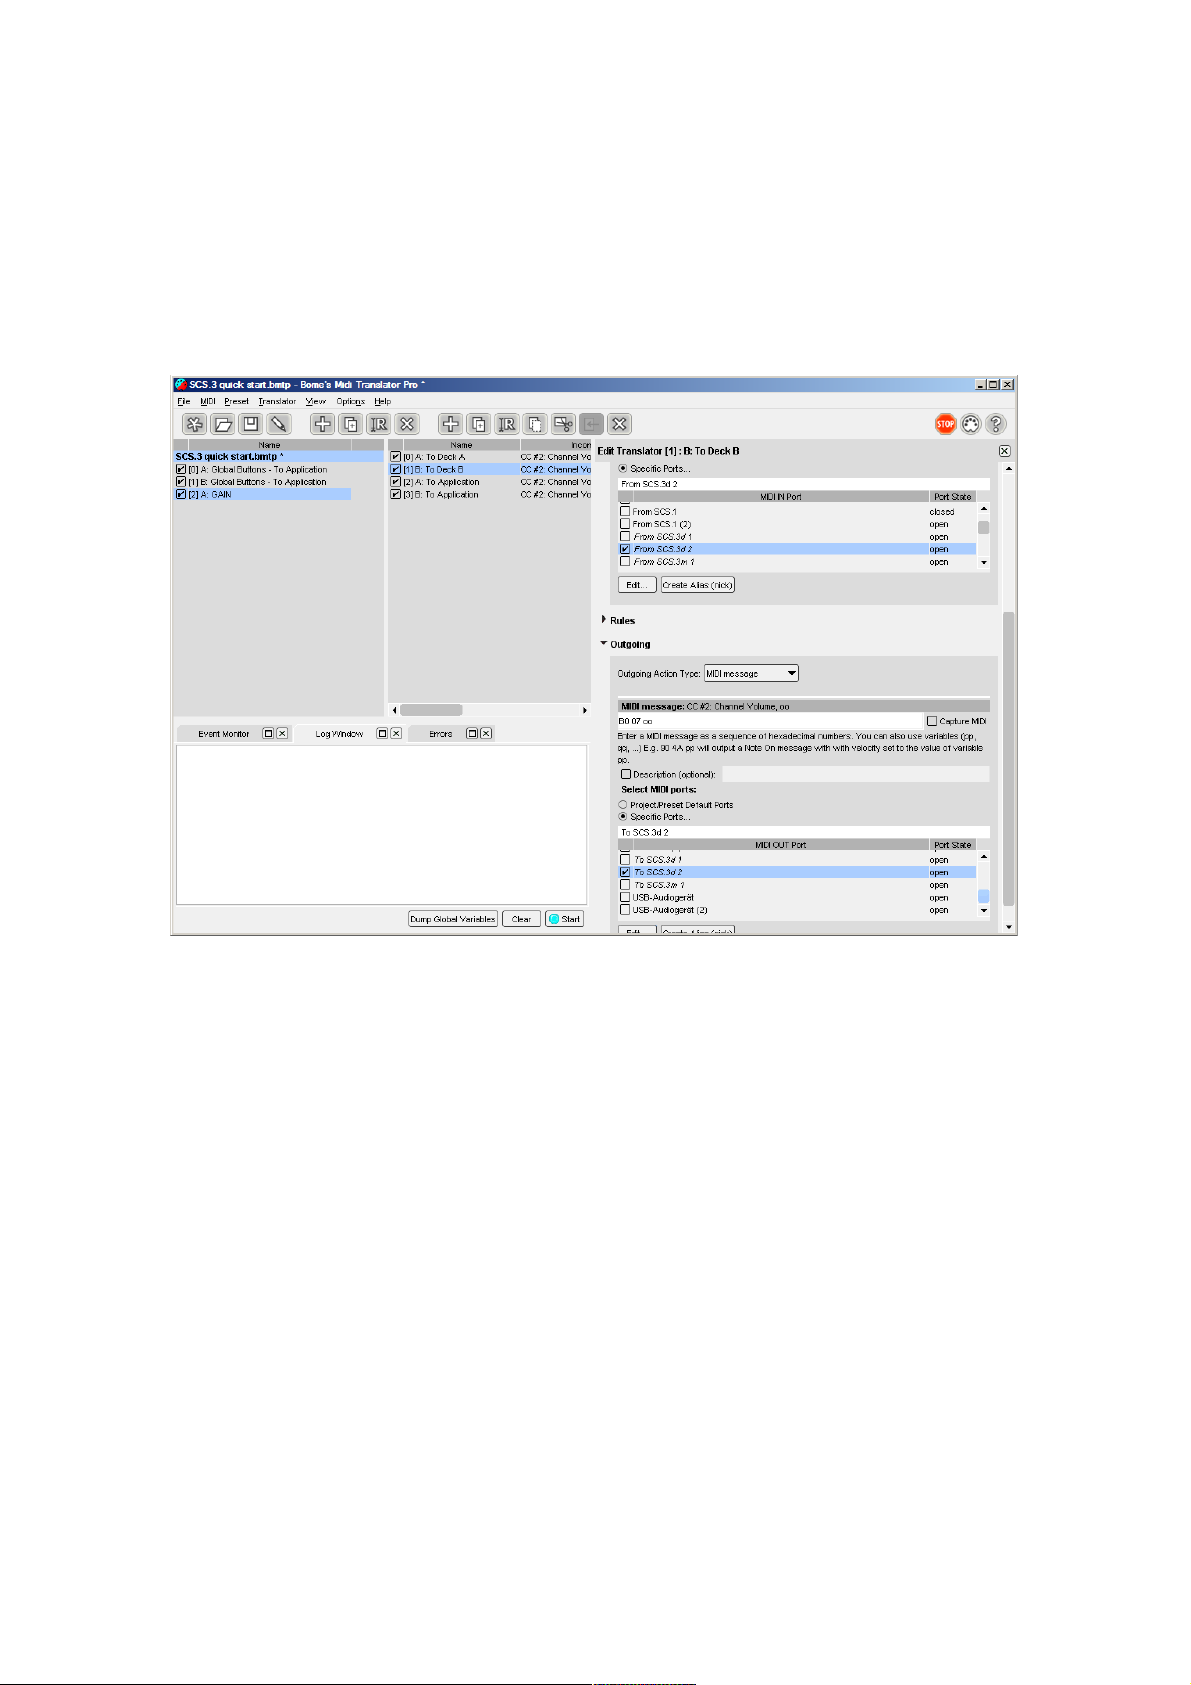
4.5 Gain: A: To Deck A
This translator will do a simple LED feedback to DECK A.
1. Create a translator with name: A: To Deck A
2. Override Aliases in the Translator now ( here you can see that you
can override Alias settings in Preset AND in Translator options!)
3. Set B0 07 oo as MIDI incoming message and B0 07 oo as MIDI
outgoing message.
4. Create rules for LED feedback.
(c) 2010 by Bome Software Page 7/14
Page 9
Bome's Midi Translator: Tutorial: SCS.3 Quick Start 4 Start Preset editing
4.6 GAIN: B: To Deck B
This translator will do a simple LED feedback to DECK B.
1. Duplicate Translator and rename it to: B: To Deck B
2. Change Alias settings:
(c) 2010 by Bome Software Page 8/14
Page 10

Bome's Midi Translator: Tutorial: SCS.3 Quick Start 4 Start Preset editing
4.7 GAIN: A: To Application
This Translator sends the gain to the target application.
1. Create a Translator with name: A: To Application
2. Edit Aliases. Now the outgoing port is "To Application"
3. Set B0 07 oo as MIDI incoming message and 90 22 oo as MIDI
outgoing message.
(c) 2010 by Bome Software Page 9/14
Page 11

Bome's Midi Translator: Tutorial: SCS.3 Quick Start 4 Start Preset editing
4.8 GAIN: B: To Application
1. duplicate Translator: A: To Application and rename it to : B: To
Application
2. Edit Aliases:
(c) 2010 by Bome Software Page 10/14
Page 12

Bome's Midi Translator: Tutorial: SCS.3 Quick Start 5 Test All
5 Test All
Open Bome´s SendSX and Press Play Deck A, Play Deck B. Then GAIN Deck
A and GAIN Deck B.
Your result should be:
6 What we have done
Gain: B0 07 oo
2
GAIN Feedback:
Deck A/B B0 07 oo
Midi Translator
1
Play: 90 6D 01
(c) 2010 by Bome Software Page 11/14
GAIN: Deck A: 90 22 oo
GAIN: Deck B: 91 22 oo
Target Application
Play: Deck A: 90 11 01
Play. Deck B: 91 11 01
Page 13

Bome's Midi Translator: Tutorial: SCS.3 Quick Start 7 Running in DaRouter
7 Running in DaRouter
Download DaRouter
(http://www.enterthesystem.com/downloads/darouter.php), and load the
Preset you have saved.
All 3 Devices should be activated and the output should be the same like in
chapter 4. Only the "To application" virtual device should be "From
DaRouter".
8 Links
Bome´s Midi Translator: http://www.bome.com/products/miditranslator
Bome´s Send SX: http://www.bome.com/products/sendsx
SCS.3d: http://www.enterthesystem.com/system/scs3d/
DaRouter: http://www.enterthesystem.com/downloads/darouter.php
Stanton Forum: http://forums.stantondj.com/viewforum.php?f=7
(c) 2010 by Bome Software Page 12/14
 Loading...