

Page 1
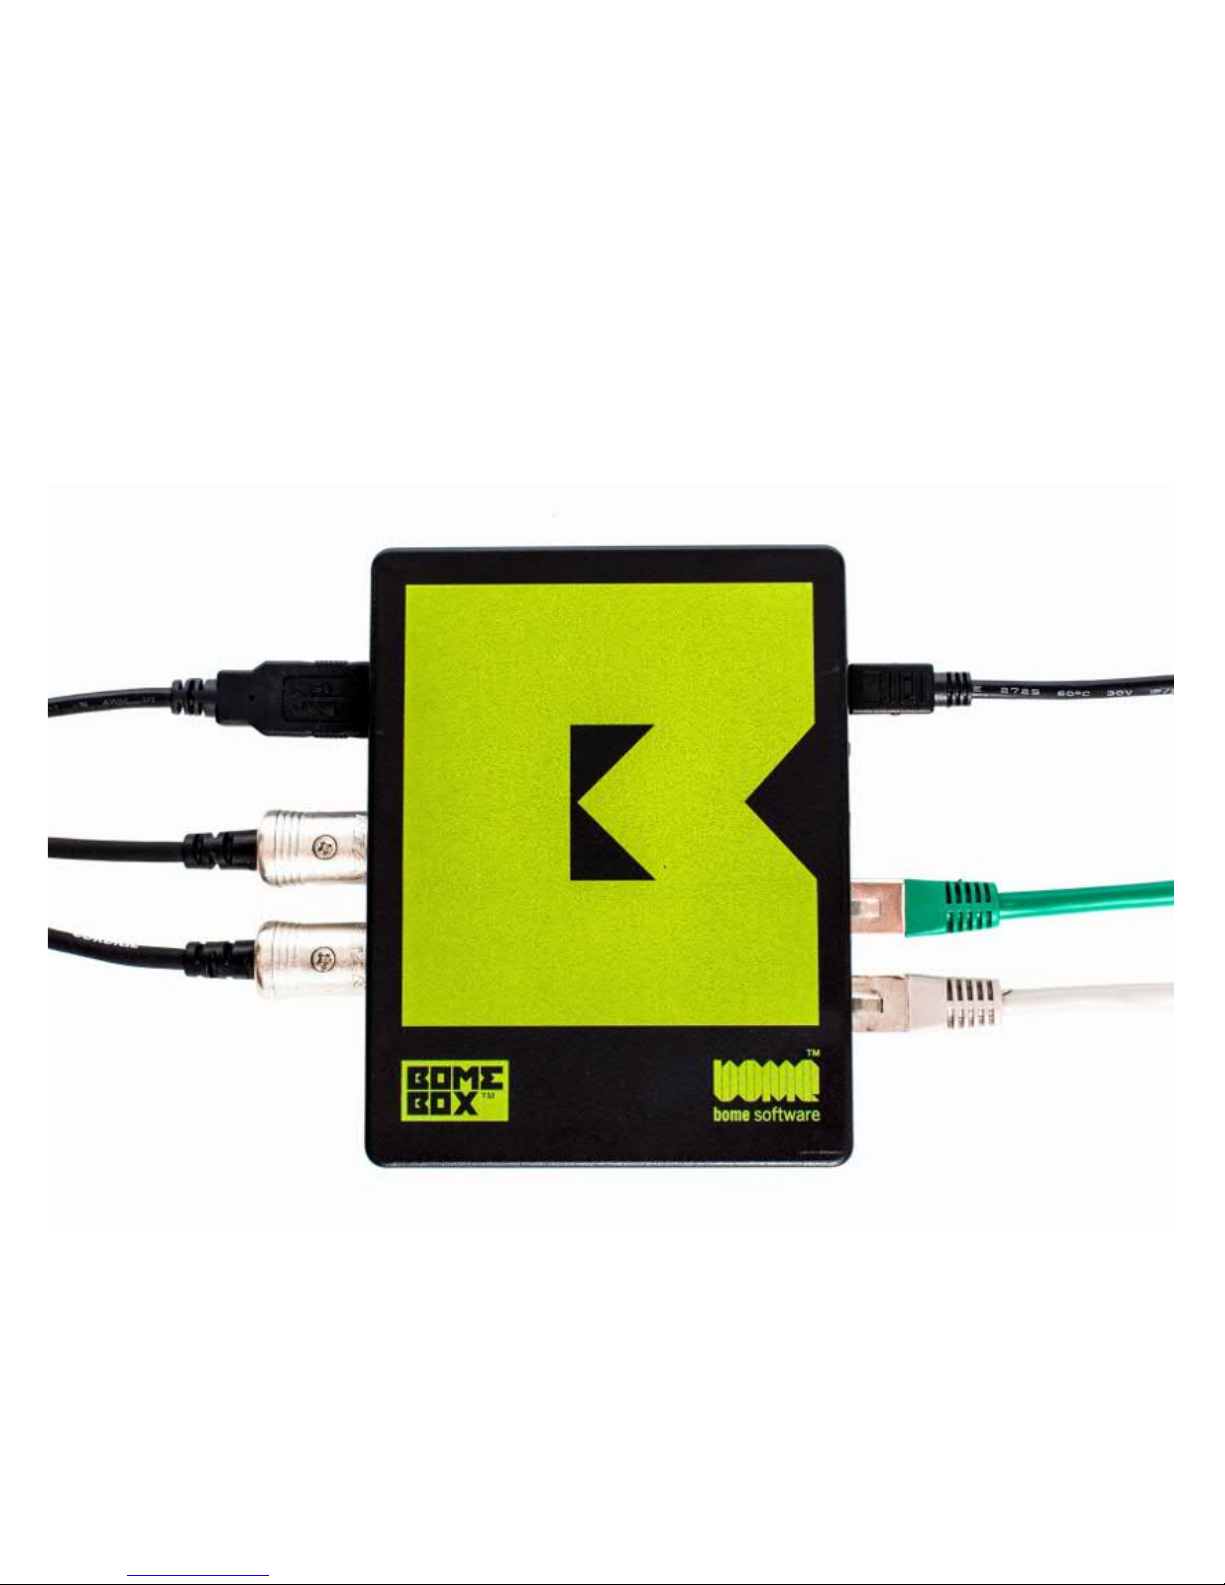
BomeBox™ Instructions
The Bome Team appreciates your purchase of the BomeBox, a
versatile MIDI and network connection and translation box.
Thank you very much!
Page 2
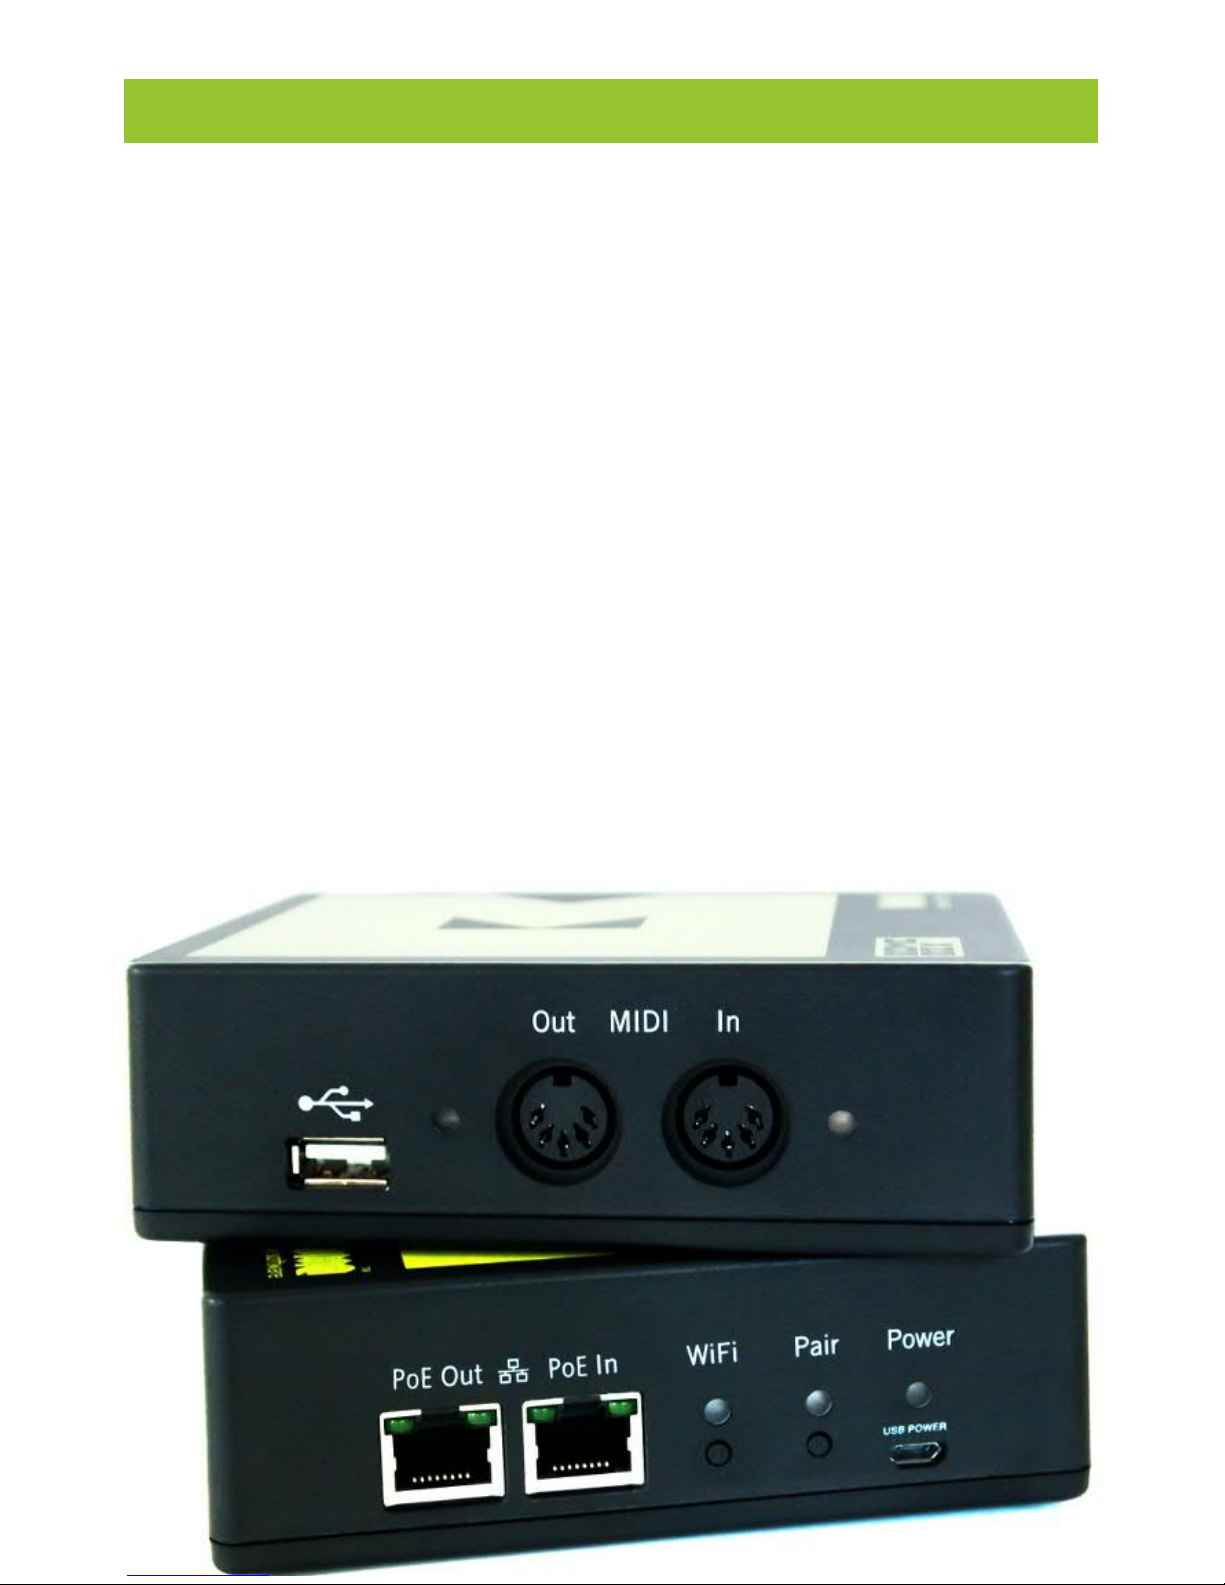
Table of Contents
Important Safety Instructions............................................3
Assistance.......................................................................4
Before you get started......................................................5
Power Up!.......................................................................6
Initial Configuration..........................................................7
Register your BomeBox...................................................10
Power Options................................................................11
MIDI Connections...........................................................11
Bluetooth / BLE-MIDI......................................................14
Networking....................................................................14
MIDI Translator..............................................................18
Allen & Heath Mixers.......................................................20
Serial Ports....................................................................24
Keystroke Input..............................................................25
LEDs.............................................................................27
Troubleshooting..............................................................28
Environmental Information...............................................30
Legal Notices..................................................................31
Manufacturer Information................................................32
Page 3
Important Safety Instructions
Before using the BomeBox, thoroughly read the following instructions for important information needed for setting up and
using your BomeBox safely. Keep this document in a safe
place for further reference.
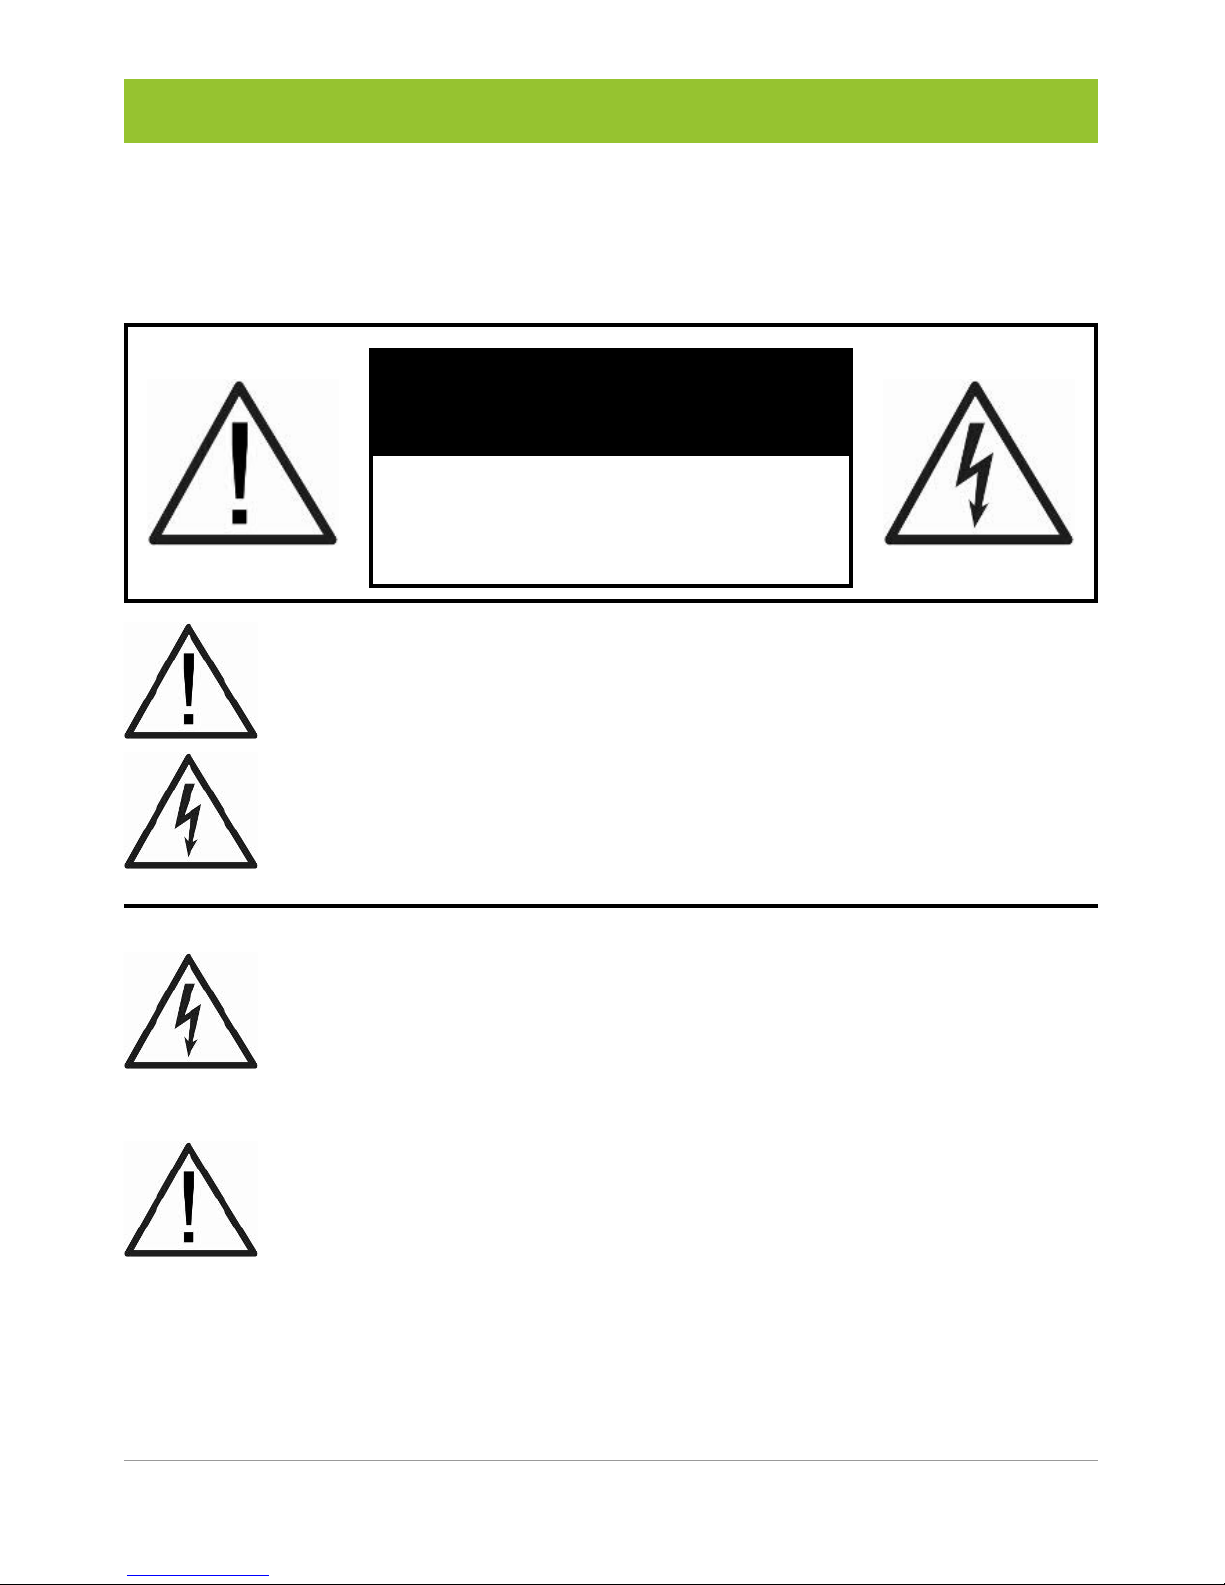
WARNING
RISK OF ELECTRIC SHOCK
DO NOT OPEN
This symbol is intended to alert you to the presence
of important operating and maintenance instructions in the literature accompanying the product.
This symbol is intended to alert you to the presence
of uninsulated dangerous voltage inside the enclosure that may cause personal injury.
WARNING: To reduce the risk of fire or electric
shock, do not expose the device to rain, moisture,
dripping or splashing liquids. No objects filled with
liquids, such as drinking glasses, shall be placed on
the device.
CAUTION: When using the device, make sure that
connected cables cannot cause a trip hazard.
3
Page 4

Safety Instructions
ᴑ Make sure you understand and follow these instructions.
ᴑ Do not expose the BomeBox to water or moisture.
ᴑ Only clean the BomeBox using a soft, dry cloth.
ᴑ Never keep the BomeBox near any heat sources (e.g., radia-
tors, stoves, amplifiers). Avoid direct exposure to sunlight.
ᴑ After exposure to cold temperatures, let the BomeBox warm
up slowly to room temperature before use.
ᴑ Before moving the BomeBox, remove power and all con-
nected cables.
ᴑ Refer all servicing to qualified personnel. Do not open the
BomeBox or attempt to disassemble or modify any internal
parts.
ᴑ Do not use excessive force on buttons and connectors.
ᴑ Do not place heavy objects on top of the BomeBox.
Assistance
We won't leave you alone! If you ever get stuck, or you have a
question related to our products, please:
1) Consult our support team in the Q&A discussion forum:
https://www.bome.com/support
2) Or contact us directly:
https://www.bome.com/contact
4
Page 5

Before you get started...
Video Tutorials
We provide a growing collection of video tutorials for using the
BomeBox. Please visit our YouTube channel and select the
BomeBox Tutorials playlist:
https://www.youtube.com/bomesoftware
In particular, the tutorial BomeBox Unpacking and Initial
Setup should get you started quickly.
Bome Network Tool
The Bome Network Tool is an application for Windows
and macOS, which allows you to connect to a BomeBox (Network MIDI) and to invoke the Web Config directly. It
is a free download here:
https://www.bome.com/products/bomenet
After installation, it appears as a green icon in the tray (Windows) or menu bar (macOS). Clicking on the icon shows the
drop down menu.
Web Config
The BomeBox is configured via the Web Config. Just use a
standard Internet browser like Safari, Firefox, Edge, or
Chrome to access the Web Config from a computer, smartphone, or tablet. The Web Config allows you to set name and
password; configure Ethernet and WiFi operation; setup MIDI
ports and MIDI routes; connect it to other BomeBoxes; upload/manage/start MIDI Translator Pro projects to be executed
on the BomeBox; create and restore backups; load new
firmware.
5
Page 6
Power Up!
There are multiple ways to power your BomeBox.
Micro USB
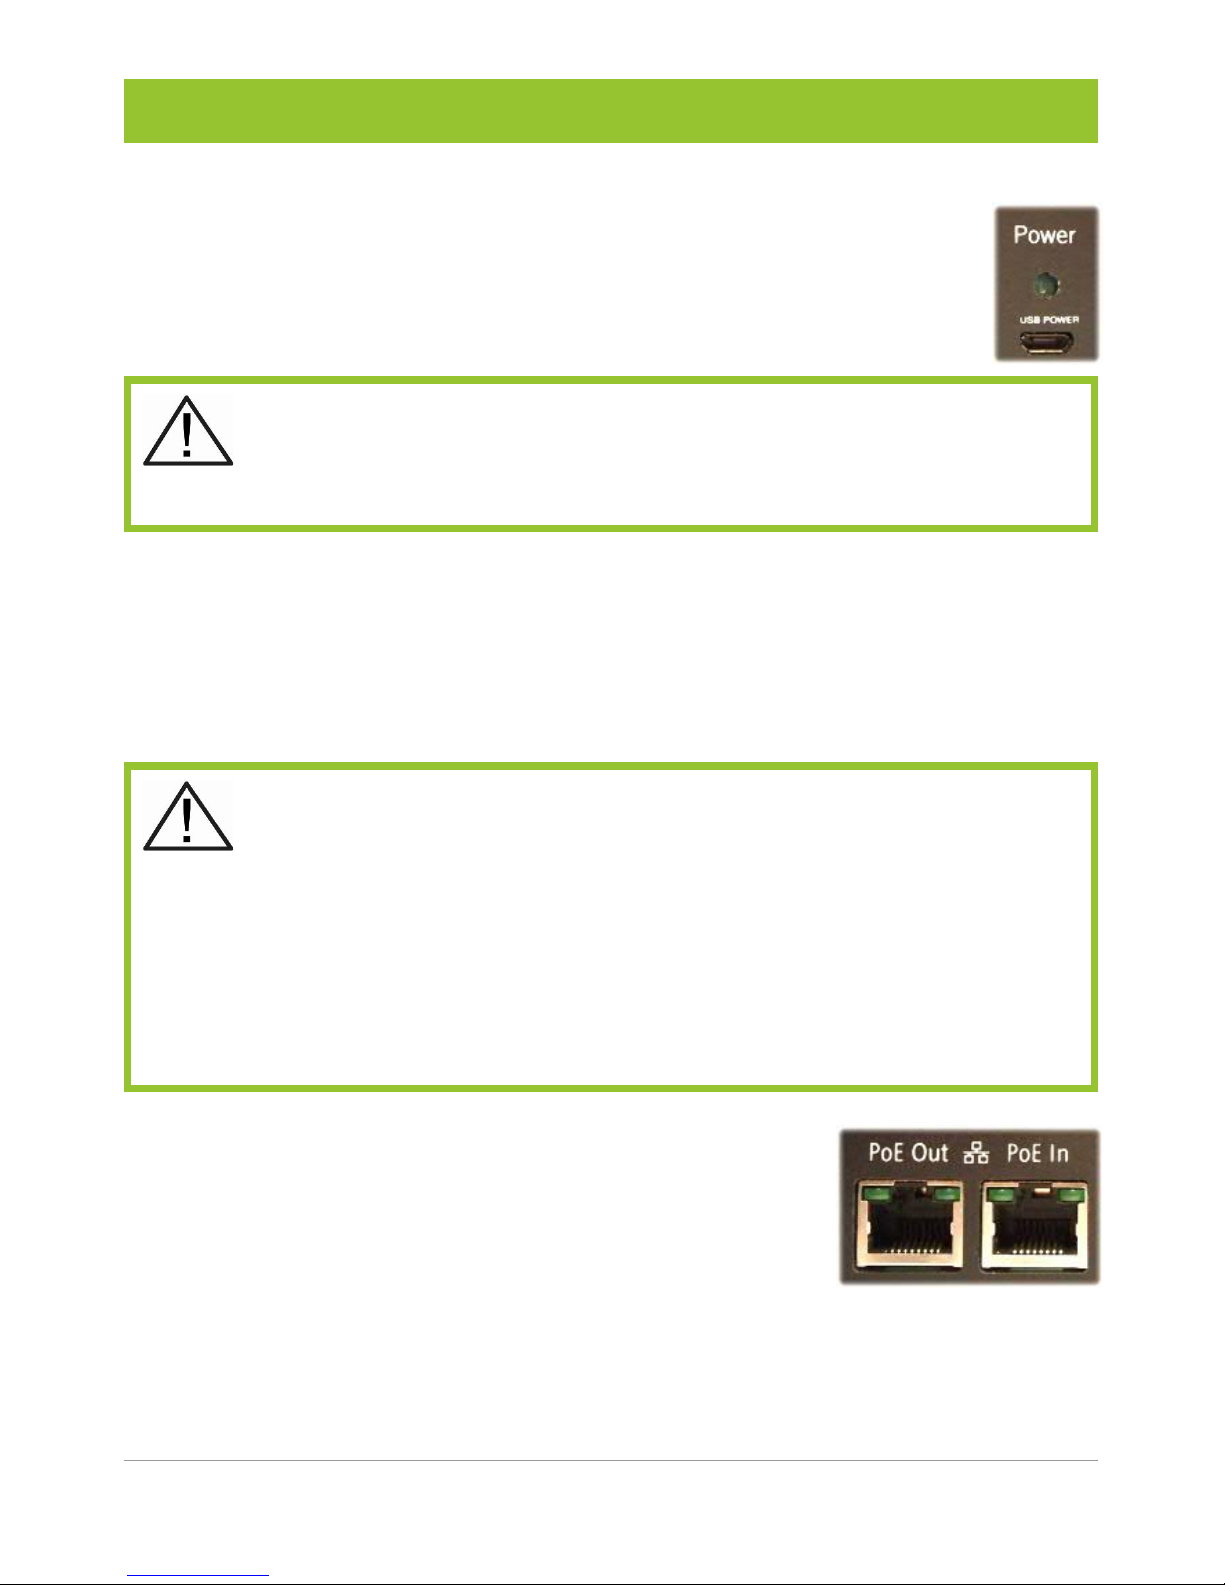
The port marked USB Power allows you to use the included micro USB cable to power the BomeBox.
The Micro-USB connector is used for power only
and does not allow for data transfer between the
BomeBox and a computer or another USB host.
Sources for Micro-USB power include:
ᴑ a powered USB hub
ᴑ an external cell phone power battery pack
ᴑ a Micro USB cable connected to a computer
ᴑ a standard cell phone charger
Quality of cell phone chargers and powered USB
hubs vary a lot. If the BomeBox restarts on its own,
or does not properly power an attached USB device, please
try with a different power source. As a rule of thumb, the
higher the output current, the better the quality (e.g., 2A).
Fast charge ports on USB hubs often do not provide consistent power and should generally be avoided.
Power over Ethernet (PoE)
With a Power over Ethernet (PoE) source
like a PoE Ethernet Switch or a 48V PoE Injector, you can power the BomeBox via the
PoE In port. PoE is more stable than Micro-USB.
Note: the PoE Out port will provide power to another BomeBox
via daisy chaining (see page 11).
6
Page 7
Initial Configuration
Web Config via WiFi
For configuring your BomeBox for the first time, the
easiest approach is to use WiFi to access the Web
Config:
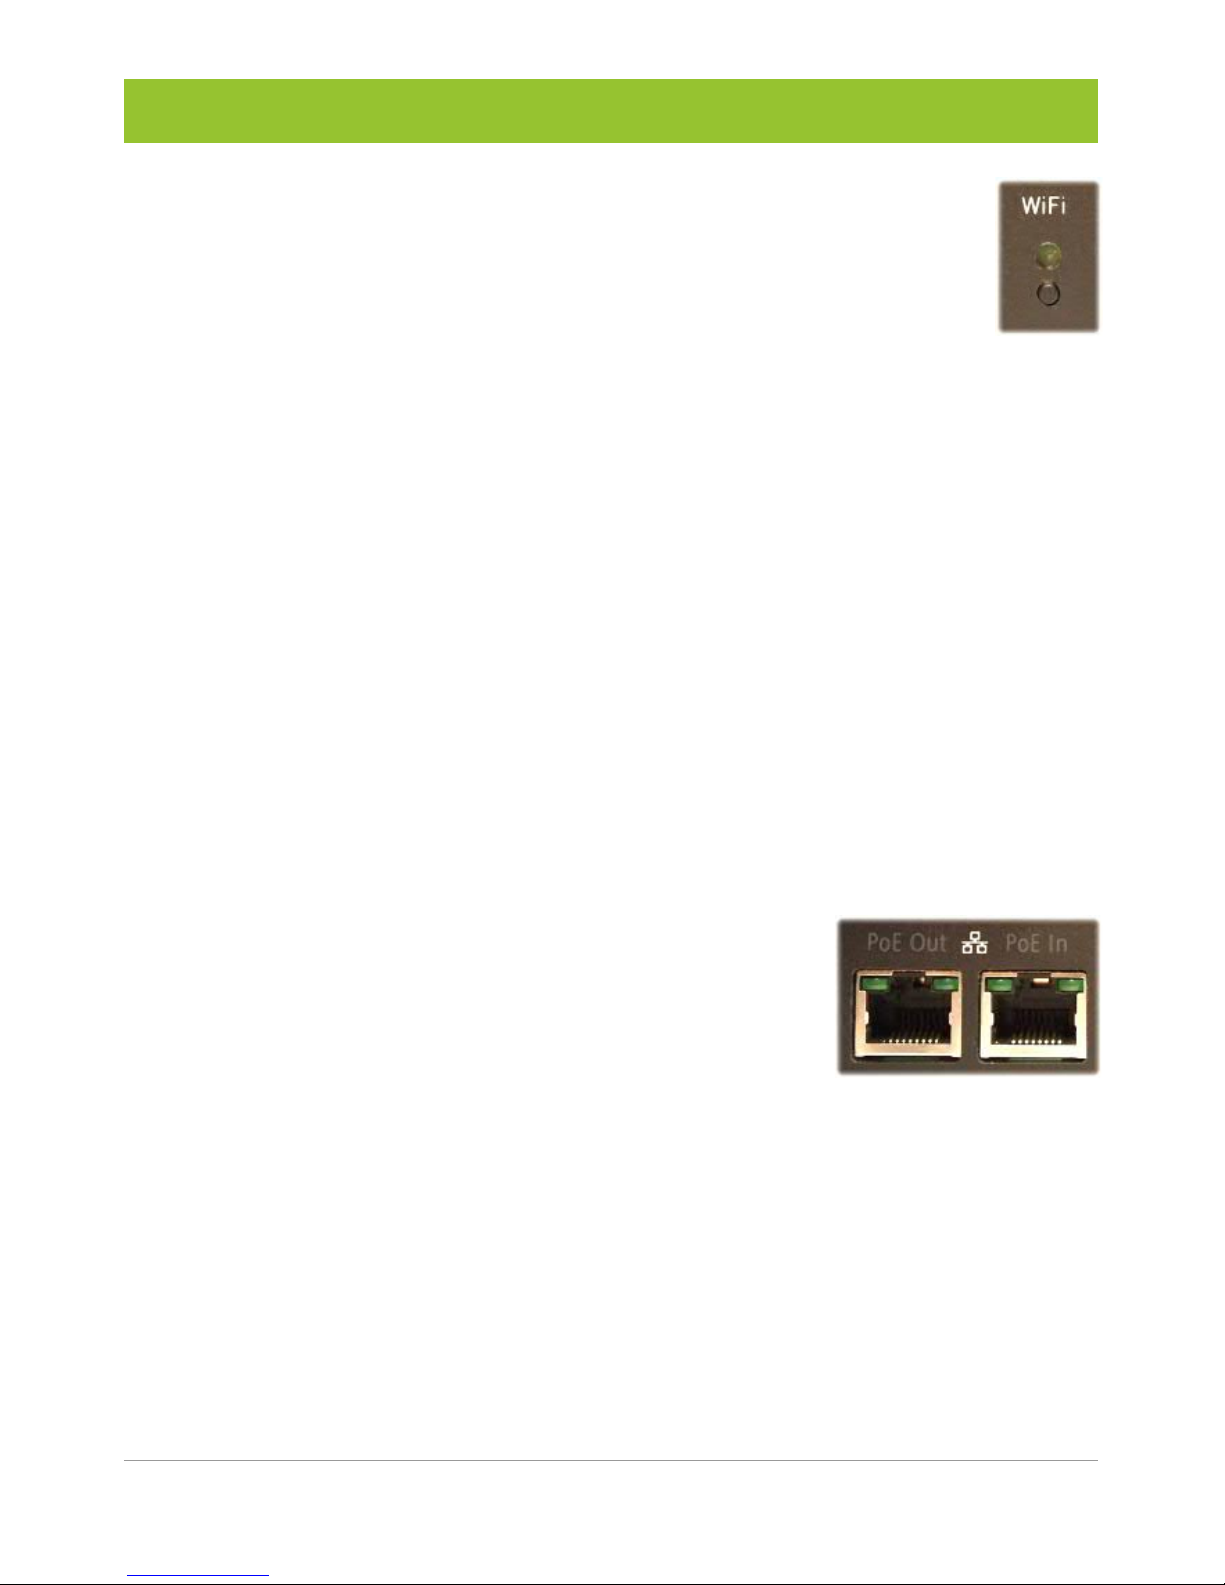
1. Press the WiFi button to enable the BomeBox wireless LAN.
2. Once the WiFi LED is on, use a laptop, tablet, or smart
phone to connect: go to WiFi settings and select the
HotSpot “BomeBox” (SSID).
3. Then, if you are on a computer with Bome Network installed (see above), click on the green B icon and in the
menu, select Web Config BomeBox - Net.→
4. Otherwise, start a web browser like Safari, Chrome, or
Firefox, and enter 192.168.153.1 in the address bar to
connect to the Web Config (you can bookmark it).
5. Now you should see the login page of the Web Config in
the web browser. Proceed with the chapter Web Config
Password below.
Web Config via Ethernet
For configuring the BomeBox via a cabled
Ethernet connection, follow these steps:
1. On your computer, install and start the
Bome Network tool (as explained above).
2. Plug an Ethernet Cat-5 cable into either PoE Out or PoE In.
3. Plug the other end of the Ethernet cable in an unused port
of your Internet router. Make sure that your computer is
connected to the Internet router via Ethernet or via WiFi.
4. Or, if you don't have one, you can also try to plug the Ethernet cable directly into your computer.
7
Page 8
5. On the computer, click on the green B icon of the Bome
Network tool and in the menu, select Web Config Bome→ -
Box – Net.
6. Now you should see the login page of the Web Config in
the web browser. Proceed with the next chapter.
Web Config Password
Now that you see the Web Config login page, look at the bottom of your BomeBox: on the sticker, the serial number is
the default password. Enter it with all leading zeroes.
You can reset it to the serial number using a special procedure, as outlined in the section Password Reset on page 29.
It is important to not remove the serial number
sticker from the bottom so that you can look up the
serial number if you need to know the default Web Config
password again. Registering your BomeBox (see page 10)
will also allow you to retrieve your serial number in your account.
Web Config Settings
After you log into the Web Config, you see the overview page
with general status information. At top, the main menu allows
you to access all pages of the Web Config. To access the Settings, invoke the settings menu item from the main menu.
We recommend these settings:
1. One of the first things you should do is to name your
BomeBox. When using multiple BomeBoxes, you will only
be able to connect them if they have different names. The
name is also the name of the WiFi HotSpot.
8
Page 9

2. Select your country from the WiFi regulation drop-down
menu. This makes sure that the built-in WiFi follows your
country's regulation and, maximizing performance.
3. Change the Web Config password. We recommend to
change the Web Config password to prevent unauthorized
or even malicious access to your BomeBox. Make sure to
use a password which is not easy to guess, but which you
don't forget. This is the password required to administer
and change the settings of your BomeBox and is not the
same as the WiFi password discussed later.
4. If you're on a computer, click on the Password Reset File
button to download a small file which will allow you to reset the Web Config password if you ever forget it.
5. Click on the Save button at bottom.
6. Now you may need to log into the Web Config again – this
time with the new password. Also, if you've changed the
name and you're connected via WiFi, you'll need to re-connect to the BomeBox' WiFi HotSpot, which now appears
under the new name.
WiFi Password
We also recommend to set the WiFi password using the following steps:
1. In the Web Config, use the menu to go to the Settings
page.
2. Click on the tab WiFi.
3. In the HotSpot section, enter a password. It must have at
least 8 letters or numbers.
4. Click on the Save button at bottom.
5. If you're connected via WiFi, you'll need to re-connect to
the BomeBox' WiFi HotSpot with the new password.
If you ever forget the WiFi password, use the instructions for
Network Reset on page 28.
9
Page 10

Update Firmware
We regularly improve the firmware of the BomeBox to add
new features or to improve existing functionality. Therefore,
we recommend to update to the latest firmware. The update
process will not change any settings and it will not remove any
uploaded project or other files.
To update, follow these steps:
1. Using an Internet browser, download the latest firmware
here (a .bxfw file):
https://www.bome.com/products/bomebox
2. Log into the Web Config
3. Go to the Settings page using the main menu
4. Go to the Backup & Firmware tab
5. In the Update BomeBox Firmware section, press the
Browse button and navigate to your Downloads folder. Select the downloaded .bxfw firmware file.
6. Back in the Web Config, press the Update… button
7. After a short while, you should see a verification page. You
can compare the MD5 checksum to the one displayed on
the download page.
8. Press the Proceed button.
9. Wait until the BomeBox restarted and the power LED stops
blinking. That first start after a firmware update takes approximately 2 minutes.
Register your BomeBox
Now is a good time to register your BomeBox at the following
Internet URL:
https://www.bome.com/register
Registering will give you access to software, firmware updates
and notifications related to your BomeBox.
10
Page 11
Power Options
Daisy Chaining
If your BomeBox is powered via PoE, you can use the PoE Out
connector to power another BomeBox. You can daisy chain up
to 3 BomeBoxes via PoE. The PoE Out will not provide power if
you're powering the BomeBox via Micro-USB.
You can also use the USB host connector marked to power one
other BomeBox. Do not daisy chain more than one BomeBox
via USB host.
Powering USB-MIDI Gear
The USB host port (type A) provides a maximum of 1A to connected devices (depending on
power supply). The BomeBox consumes up to 0.3A.
If the sum of the current of all connected devices exceeds 1A,
or if you have other power problems with USB-MIDI devices
(e.g., device does not work), use a powered USB hub (which
can also power the BomeBox!).
When using PoE, the USB host port always provides full 1A
with stable voltage.
MIDI Connections
MIDI DIN Ports
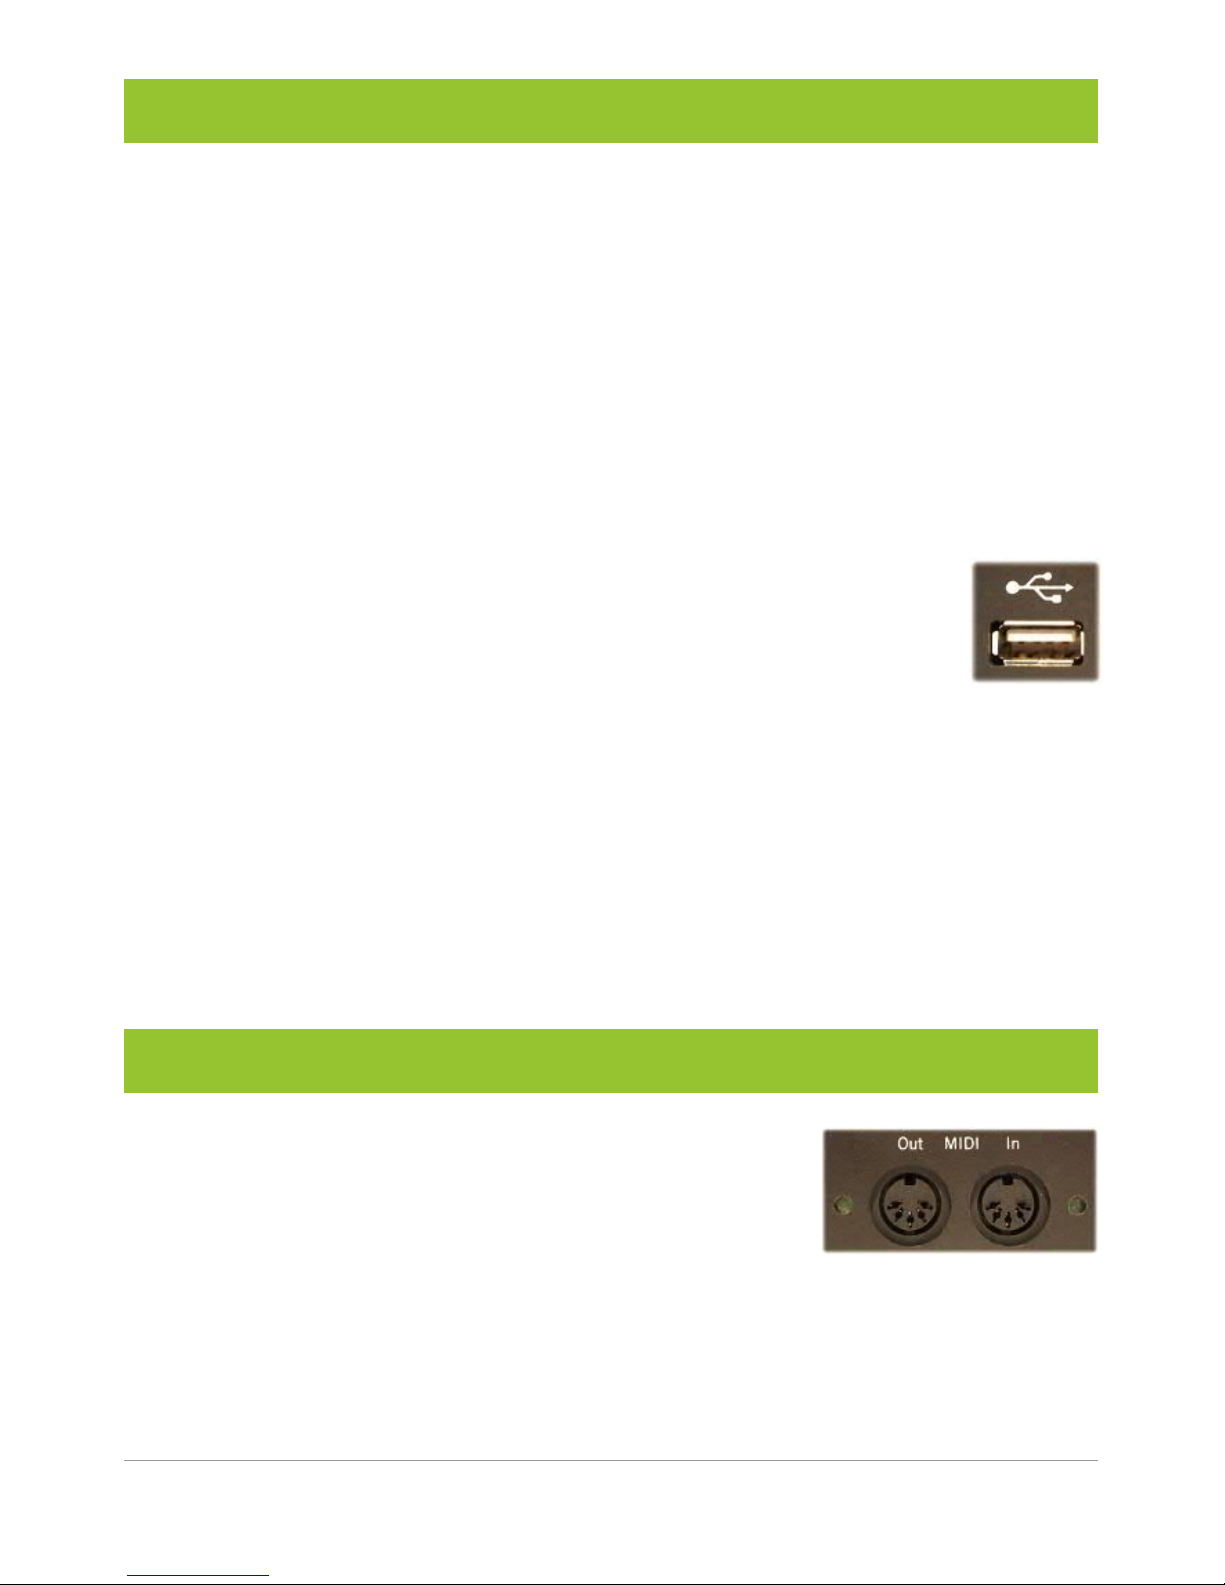
The BomeBox provides a standard MIDI
DIN input and output port, which can be
routed to and from the other MIDI connections. By default,
they are routed to all other ports except to itself. The routing
configuration can be changed by the user, if desired.
11
Page 12

USB Host Port
The USB host connector marked allows you to
plug in and power your USB-MIDI gear. Use a USB
hub to connect multiple USB-MIDI devices. If you encounter
power issues, a powered USB hub will help. Or use a PoE
power supply for the most reliable power.
MIDI Routes
By default, every MIDI port is routed to all other ports, except
to itself. All available MIDI ports (MIDI DIN, plugged USB-MIDI
devices, Network MIDI) can be routed using the MIDI Router
in the Web Config.
A route consists of a MIDI SOURCE and a MIDI DESTINATION.
Any active route will forward the MIDI stream received on the
MIDI SOURCE port to the route's MIDI DESTINATION port.
This creates a MIDI Thru connection, allowing you to merge
and duplicate MIDI streams. You can save your current collection of routes as a Route Set and load back such Route Sets
later on.
The MIDI routing is persistent across restarts. If you are running a project file, the project file will define the MIDI routing.
Network MIDI
The BomeBox implements the Bome Network MIDI protocol for
low latency and low jitter MIDI connectivity from BomeBox to
BomeBox and to computers (it does not currently support RTPMIDI, but support is planned to be provided with a firmware
update in the future).
For a MIDI connection from a computer to a BomeBox, first install the Bome Network Tool on the computer (see page 5).
For setting up a Network MIDI connection, follow these steps:
12
Page 13
1. Connect the two BomeBoxes (A and B) or BomeBox A and
computer B via Ethernet or WiFi.
2. Make sure that A and B have different names.
3. In the Web Config of BomeBox A, go to the Network MIDI
page.
4. In the list of Network MIDI devices, find device B and click
on the Connect button next to its name.
5. If you're connecting to BomeBox B, approve the pairing by
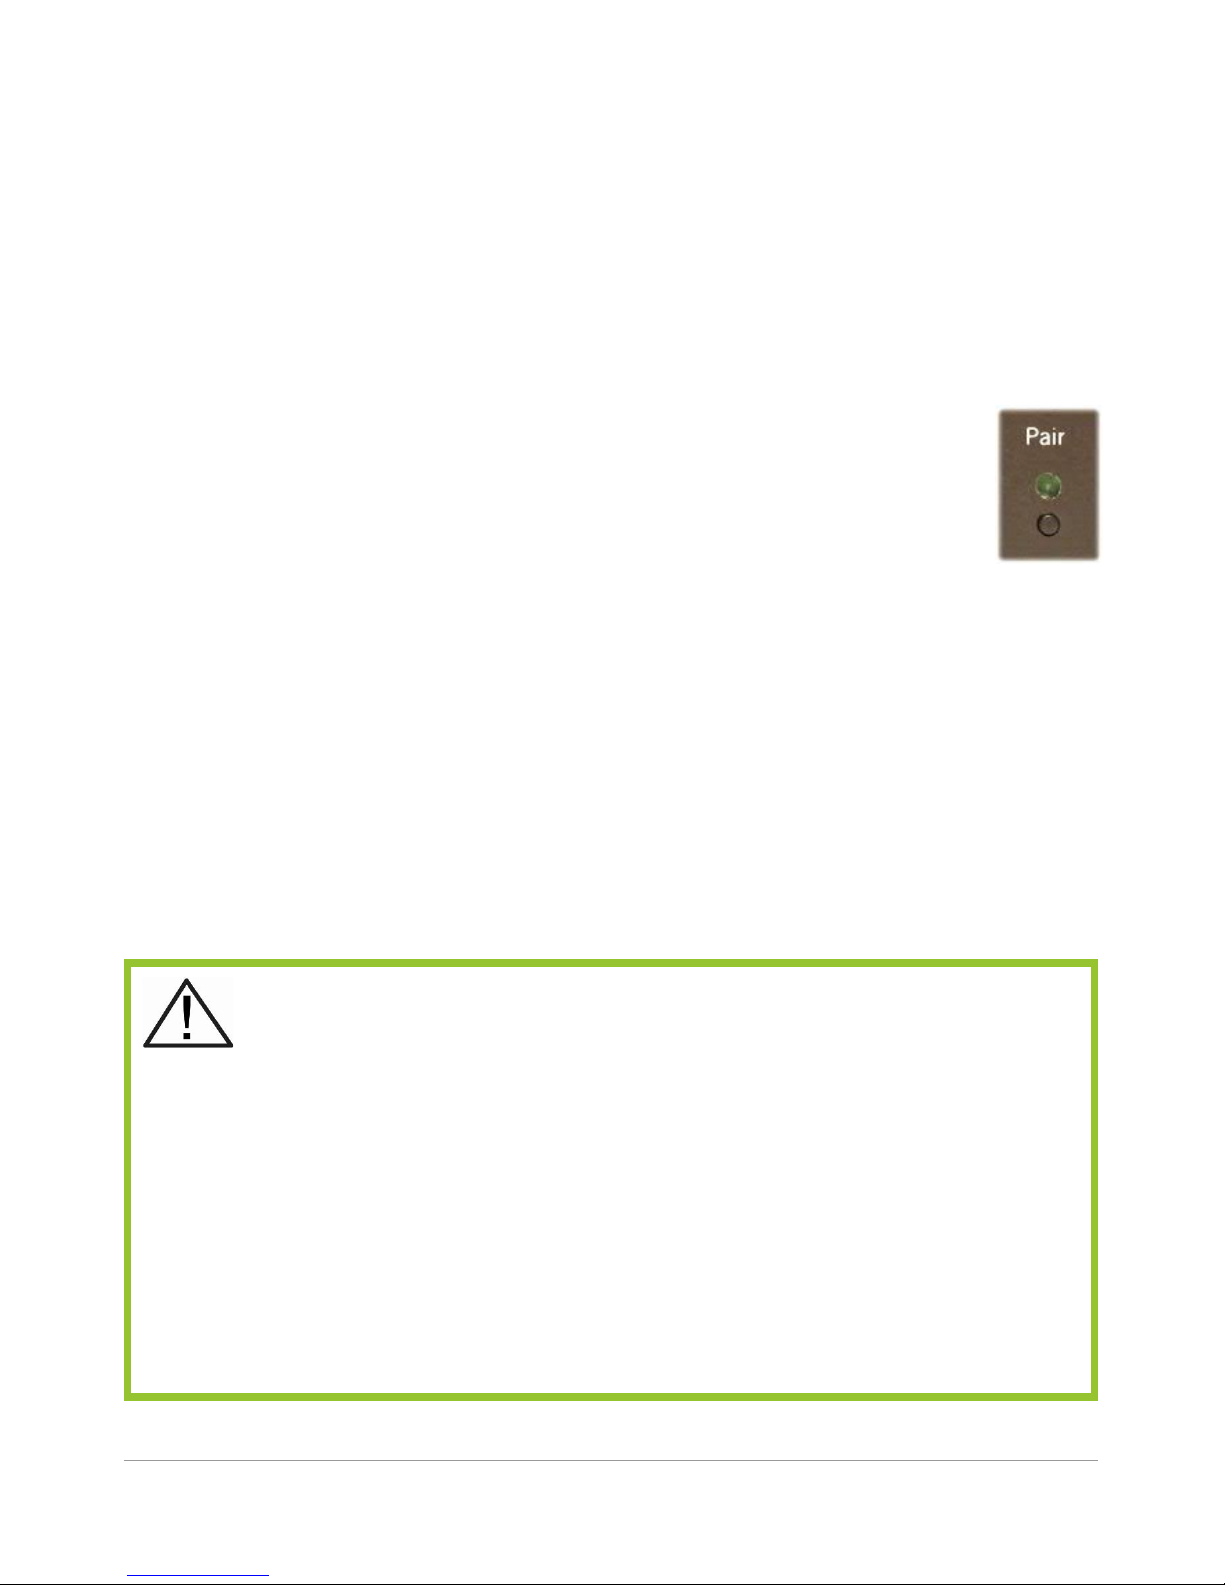
pressing the blinking Pair button on BomeBox B.
Alternatively, you can also approve the pairing in
the Web Config of BomeBox B.
6. If you're connecting to a computer B, approve the
pairing on the pop-up window on computer B.
7. Pairings are maintained and remembered until manually
disconnected or canceled.
8. Note: the Bome Network tool can also be used to initiate a
pairing.
You can also connect to another BomeBox or computer by entering the IP address directly. This advanced option is necessary, if the device to connect to is not in the same subnet as
this BomeBox.
As of firmware version 1.3, a Network MIDI connec-
tion provides exactly one MIDI stream between the
two paired devices. Any routed MIDI ports are merged and
you can only MIDI channels mapping to separate streams
from different MIDI ports. A future firmware update will allow multiple MIDI streams over one pairing to access remote MIDI ports directly. Until this feature is available,
please inquire in our support forum at
www.bome.com/support and we can assist with other alternatives to work around this limitation.
13
Page 14

Bluetooth / BLE-MIDI
The BomeBox does not have a built-in Bluetooth radio, so you
cannot directly use BLE-MIDI (Bluetooth Low Energy) devices
with the BomeBox.
WIDI BUD
However, there is a trick: you can use CME's WIDI BUD to
connect one standard BLE-MIDI device to the BomeBox by
plugging the WIDI BUD into the USB host port of the BomeBox. Note: not only CME devices work, we have tested with
many different BLE-MIDI devices from different manufacturers.
You will need to pair the WIDI BUD with the BLE-MIDI device
once on a computer using the WIDI PLUS software available
from CME, too. Then the pairing is stored in the WIDI BUD and
you can use it on the BomeBox.
More information here:
https://www.cme-pro.com/widi-bud/
USB Bluetooth Dongles
We are working on a technical solution to support generic USB
Bluetooth dongles to be used with the BomeBox for using BLEMIDI devices without resorting to the WIDI BUD. That will be a
firmware update.
Networking
Ethernet
The two Ethernet connectors on the BomeBox work as a 2-port Ethernet switch: both
connectors work the same for networking.
14
Page 15

The BomeBox will also pass through any other Ethernet data,
such as Artnet, OSC, and more.
By default, the BomeBox Ethernet is set up as Ethernet Client,
for connecting to an existing network with DHCP router.
To configure the Ethernet ports, go to the Web Config, page
Settings, tab Ethernet. You have these options:
ᴑ Ethernet Client: the default Ethernet setting. Use it for
connecting to an existing router. Internally, the BomeBox is
using a DHCP client to retrieve the IP address from a DHCP
server on the network.
In this setting, the BomeBox also activates the APIPA mode
(Automatic Private IP Addressing / link local), which allows
connecting the BomeBox directly with a Cat-5 cable to a
computer's Ethernet port.
ᴑ Ethernet Master: in this mode, the BomeBox activates a
DHCP server which provides naming and IP addresses to all
other connected DHCP clients on the network – effectively
replacing a router.
Note that there should only be one DHCP router in a given
network. So for a network of BomeBoxes/computers, configure one BomeBox as Ethernet Master, and all other BomeBoxes as Ethernet Client. Computers are typically configured
as DHCP client.
In Ethernet Master mode, the BomeBox is configured as IP
address 192.168.1.1. Client addresses are assigned IP addresses in the same subnet (192.168.1.x where x is the address of each attached device on the subnet).
ᴑ Fixed IP Address: for advanced users! Define a fixed IP
address. Note that the automatic discovery only works for
BomeBoxes and computers in the same subnet.
The Web Config displays the current IP address for the Ethernet port.
15
Page 16

WiFi
Press the WiFi button to enable the BomeBox wireless
LAN. Activating the wireless network takes a few seconds, during which the WiFi LED blinks. Once the WiFi
LED stays on, the wireless network is ready.
The BomeBox is a full WiFi router, so you can also use it for
connecting computers and other gear to each other.
We recommend to set a WiFi password (see page 9), so that
all wireless traffic is encrypted. Also, when powering on the
BomeBox, it will only activate WiFi at startup when a WiFi
password is set.
To configure the wireless network, go to the Web Config, page
Settings, tab WiFi. You have these options:
ᴑ HotSpot: this is the default WiFi setting. It creates its own
WiFi network and allows other BomeBoxes, smartphones,
tablets, and computers to connect to the BomeBox. The
SSID (wireless network name) is the same as the name of
the BomeBox. See Web Config Settings on page 8 for how to
change the name. In HotSpot mode, the BomeBox provides
a DHCP server, so it assigns an IP address for all connected
devices. In this mode, the BomeBox itself has the IP address
192.168.153.1 and assigns client IP addresses in the same
subnet (192.168.153.x, assigned device address is 'x').
ᴑ WiFi Client: use this setting to connect to an existing WiFi
router, or to another BomeBox set up as HotSpot or Access
Point. Make sure to not misspell the SSID and the password!
The BomeBox is configured as DHCP client, i.e., it gets an IP
address via the given wireless HotSpot.
Recommendation: before configuring the BomeBox as WiFi
Client, make sure (and test) that you can also access the
Web Config via Ethernet. Just in case you misspelled something...
16
Page 17
ᴑ WiFi Access Point: this setting is like HotSpot, but it relays
the wired Ethernet network instead of creating its own DHCP
server. It uses the same configuration and IP address as the
Ethernet network.
If Ethernet is configured as Master, any WiFi clients connecting to this Access Point will be assigned an IP address by the
Ethernet DHCP server.
If Ethernet is configured as Client, connected WiFi clients will
get an IP address by the same remote DHCP server connected via Ethernet (e.g., another BomeBox configured as
Ethernet Master).
In WiFi Access Point + Ethernet Client mode, if a
DHCP server is not reachable via Ethernet, connected WiFi clients will not get an IP address and there
won't be wireless connectivity!
If Ethernet is configured as fixed IP address, all WiFi clients
connecting wirelessly to this BomeBox should also be configured as fixed IP address in the same subnet as the Ethernet
IP address. Otherwise, there will be no connectivity!
Advanced Configuration
The advanced configuration will allow you to tune every aspect
of the network configuration of your BomeBox. The advanced
configuration is accessed via the small link at the very bottom
of every page of the Web Config.
Please use the Advanced Configuration with care,
and only if you know what you are doing!
17
Page 18
In case of Network Problems...
You can reset the network settings to their defaults and remove the WiFi password. Please see Network Reset on page
28 in the Troubleshooting chapter.
MIDI Translator
For advanced MIDI mappings and translations, you
can upload MIDI Translator Pro project files into the
BomeBox on the MIDI Translator page in the Web
Config.
Only project files saved in a licensed version of
Bome MIDI Translator Pro can be uploaded to the
BomeBox. The trial version will not work to create translation projects for the BomeBox.
For more information about MIDI Translator Pro, visit the following web page:
https://www.bome.com/products/miditranslator
Selecting a Project
When you select a project, all MIDI actions, Rules, timer actions, preset actions, and MIDI Routes are executed exactly
the same as MIDI Translator Pro running on a computer. Also
Incoming Keystroke actions and Serial Port actions work with
respective USB devices. You can use the Execute File Outgoing
Action to switch to a different project file on the BomeBox.
Uploading a Project File
To add a MIDI Translator Pro project file, follow these steps:
1. Go to the MIDI Translator page in the Web Config.
18
Page 19

2. In the Project File Upload section at bottom, click the
Browse... button and select the project file you want to
add.
3. Click the Upload Project File... button.
4. Now that project file should appear in the list of projects.
5. Click the Select button in the list next to the name to activate and load this project.
Project MIDI Routes
Selecting a project file will reset all MIDI routes to the routes
stored in the project. If the project does not define MIDI
routes, all previous routes are removed. Closing the project
file will remove all MIDI routes and close all used MIDI ports.
Project MIDI Ports and MIDI Aliases
MIDI Aliases and ports used in the project are assigned by
name: if a MIDI port matches an existing port or alias on the
BomeBox, it is used directly. Otherwise, you can (and should)
assign that alias on the MIDI Ports page in the Web Config.
BomeBox Auto MIDI Aliases
In addition to any USB-MIDI devices plugged into the USB
port, the following MIDI ports and aliases are available on the
BomeBox:
BomeBox"DIN The physical MIDI DIN port (input and output)
Network"1 Auto-Alias for the first Network MIDI port
Network"2...
Auto-Alias for the second Network MIDI port
USB"1 Auto-Alias for the first USB-MIDI device
connected via USB
USB"2...
Auto-Alias for the second USB-MIDI device...
Network MIDI ports can also be accessed by name. A paired
connection to a BomeBox with name “My other BB” will autocreate a MIDI port with name “My other BB”.
19
Page 20

Assigning MIDI Port Aliases
Every MIDI Port Alias referenced in an uploaded and selected
MIDI Translator project will appear in the list of MIDI ports on
the MIDI Ports page of the Web Config.
If an alias is not assigned, the respective row will be read and
a warning will appear at top of the Web Config.
Each alias in the list has a drop-down list in the Assignment
column. The drop-down list has the following entries:
ᴑ (none): select this to not select a MIDI port for this alias.
All translations in the project which use this alias will be disabled.
ᴑ (none – ignore): selecting this for an alias is the same as
(none), but the Web Config will not prompt you to assign
this MIDI Port Alias anymore.
ᴑ MIDI Port: selecting an actual MIDI Port from the drop-
down list will assign this alias to that MIDI Port. All translations using this alias will now use the selected MIDI Port.
To finalize the alias assignments, click the Save button at bottom of the list. MIDI Port Alias assignments are stored indefinitely, even if you select other MIDI Translator projects or
power cycle the BomeBox. So you only need to assign a given
MIDI Port Alias the very first time it appears in a project.
Allen & Heath Mixers
The BomeBox has built-in support for Allen & Heath digital
mixers of the dLive, GLD, Qu, SQ, and iLive series via Ethernet. To activate, go to the Allen & Heath page in the Web Config and check “Use Allen & Heath”.
20
Page 21
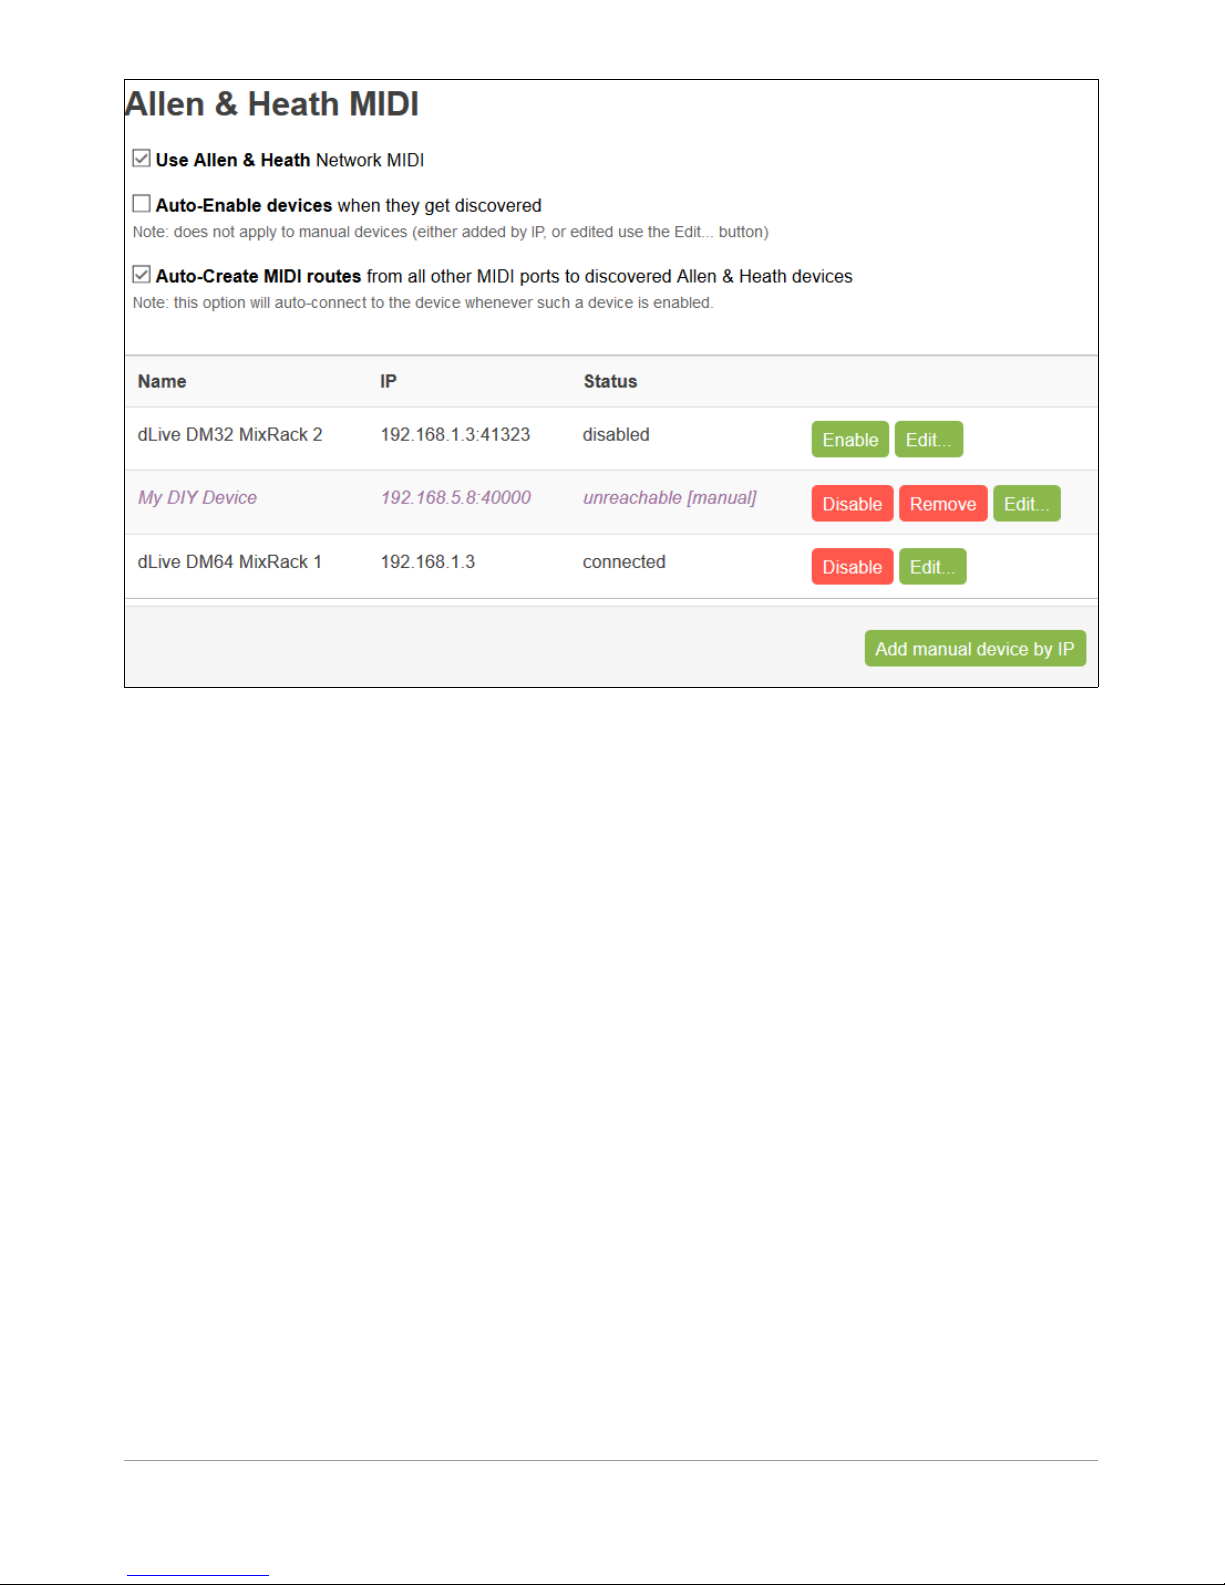
The list at bottom shows all auto-detected A&H mixers, and
already connected mixers, and manually added devices.
For each device, you have the following options:
ᴑ With the Enable button, you connect to this mixer device
and you start using it. This will make available a new pair of
associated MIDI Input and Output ports, with the name of
this mixer. You can use these ports in MIDI routes and in a
MIDI Translator translation project.
ᴑ For a connected mixer, you can press the Disable button to
disconnect. The associated MIDI ports will disappear.
ᴑ Press the Edit button to rename the device locally, i.e., in
the BomeBox that device is then referenced by that new
name. The associated MIDI ports will be renamed, too. Editing the name will change a device to manual mode (see
Manual A&H Devices on page 23).
21
Page 22

ᴑ For devices in manual mode, you'll also find a Remove but-
ton. This will remove this manual entry in the list of devices.
If the corresponding device was an edited auto-detected device, the device will reappear under its own name.
You also have the following global settings:
ᴑ Auto-Enable devices: if this option is checked, all auto-de-
tected A&H mixers are automatically enabled whenever they
are detected. This setting is useful if you know that you
want to use all A&H mixers that are connected to the BomeBox via Ethernet. Manual devices are not auto-enabled.
Auto-enabled devices cannot be disabled.
ᴑ Auto-Create MIDI routes: if checked (the default), every
connected/enabled device will be fully routed via MIDI. In
the MIDI router, you will find routes which connect all other
non-A&H MIDI ports to this mixer, so that you can access it
from any other MIDI port. These Auto Routes can be disabled, but not deleted, in the MIDI Routes Web Config page.
You can still add other manual routes using the A&H device
MIDI ports.
This setting is recommended if you mainly use the BomeBox
to access your A&H device(s) via MIDI.
ᴑ Add manual device by IP: press this button to add a man-
ual device (see Manual A&H Devices on page 23). You are
prompted to enter the IP address or network name of the
device to add. The default port number is 51325. You can
specify a non-default port number by appending it with a
colon. For example, to add a manual device at IP address
1.3.5.7 with port number 51327, enter “1.3.5.7:51327”.
Auto-Detected A&H Devices
Most newer A&H mixer devices are automatically detected and
appear in the list of devices. By default, they appear under
22
Page 23
their own name, which you can change using the Allen &
Heath Director software.
Once you have enabled such an auto-detect device, it is stored
under its name. So when you power cycle the BomeBox, it will
look for an auto-detect A&H mixer of the stored name. If you
rename your A&H device using the Director software, the
BomeBox will recognize this mixer as a new device and will
keep on looking for an A&H mixer of the old name (state
“pending”).
The match-by-name mode for auto-detected A&H devices is
particularly useful if using DHCP, where a device can change
IP address. The BomeBox will still recognize the device by
name, even if it appears under a new IP address.
Once you rename an auto-detect device using the Edit button,
the device will stored in manual mode.
Manual A&H Devices
Devices added using the “Add manual device by IP” button, or
renamed auto-detect devices are stored in the BomeBox as a
manual device. These devices are matched by IP address, so
when you power cycle the BomeBox, it will try to restore this
device by connecting to the given IP address.
Manual devices are useful when you've configured your A&H
devices with fixed IP address, or when your A&H device is not
auto-detected. You can also manually connect devices which
are not in the same subnet.
A manual device will connect to the given IP / port
using a plain TCP stream. So it can also be used to
connect to other brands and types of devices which have
a built-in TCP server for MIDI data.
23
Page 24

Serial Ports
The BomeBox allows you to plug one or more USB serial port
adapters (RS-232) into the USB host port (or an attached USB
hub). Note that while the most common brands of serial port
adapters work with the BomeBox, there might be particular
serial port adapters which do not work with the BomeBox.
Mapping Serial Ports to MIDI
At this point, serial ports can only be used from MIDI Translator projects. Use Bome MIDI Translator Pro on a computer to
create translations to and from one or more serial ports. Then
upload the project file to the BomeBox (see page 18), select it,
and assign the Serial Port alias(es).
Assigning Serial Port Aliases
In a MIDI Translator project, serial ports are referenced by an
alias name. When you select a project with such a Serial Port
Alias, go to the Serial Ports page in the Web Config. In the list
of serial ports, you will all plugged-in serial ports, plus one entry for each Serial Port Alias used in the project.
Red rows in the list mean that you should assign the respective Serial Port Alias.
For all Serial Port Aliases, you will find a drop-down list in the
Assignment column. The drop-down list has the following entries:
ᴑ (none): select this to not select a device for this serial port
alias. All translations in the project which use this serial port
will be disabled.
ᴑ (none – ignore): selecting this for an alias is the same as
(none), but the Web Config not prompt you to assign this
serial port alias anymore.
24
Page 25
ᴑ Serial Port Device: selecting an actual serial port device
(with awkward internal names like “/dev/ttyUSB0”) will assign this alias to that serial port device.
To finalize the alias assignments, click the Save button at bottom of the list. Serial Port Alias assignments are stored indefinitely, even if you select other MIDI Translator projects or
power cycle the BomeBox. So you only need to assign a Serial
Port Alias the very first time it appears in a project.
Keystroke Input
By attaching a standard computer keyboard (“QWERTY”), or
USB number pads and similar, you can use it in a MIDI Translator project to convert keystrokes to MIDI.
Some USB computer keyboards cannot be attached
directly to the BomeBox. If it does not work directly,
connect a USB hub to the BomeBox USB host port, and then
plug the keyboard into the hub.
You can also use wireless keyboards if they come with an
own USB dongle (not Bluetooth!).
At this point (firmware version 1.3), you can use multiple
QWERTY keyboards with the BomeBox, but you will not be
able to use different mappings per device.
Standard Keystroke Mappings
The BomeBox ships with two standard keystroke-to-MIDI
mappings. You enable them on the MIDI Translator page in
the Web Config by selecting the corresponding, pre-installed,
project.
25
Page 26

Keystroke_to_MIDI_simple.bmtp
This project maps every key on a standard QWERTY computer keyboard to MIDI notes.
Keystroke_to_MIDI_by_channel.bmtp
This project maps every key on a standard QWERTY computer keyboard to MIDI notes. You can use modifiers like
SHIFT and CONTROL for selecting one of 16 MIDI Channels.
See the following web page for more information and complete
list of which keys are mapped to which MIDI message:
https://www.bome.com/keystroke-to-midi
The web page also links to a third standard mapping, which
sends the MIDI messages to different MIDI ports, depending
on which modifier key is pressed.
Creating Own Keystroke Mappings
Use Bome MIDI Translator Pro (licensed version) to create
your own custom mappings from Keystroke Input to MIDI Output (or other actions available in MIDI Translator projects).
You can load the standard keystroke mappings into MIDI
Translator, too, and modify as needed.
The Keystroke-to-MIDI page also has a link with a Video Tutorial for creating keystroke mappings in MIDI Translator Pro
and uploading them to the BomeBox:
https://www.bome.com/keystroke-to-midi
26
Page 27
LEDs
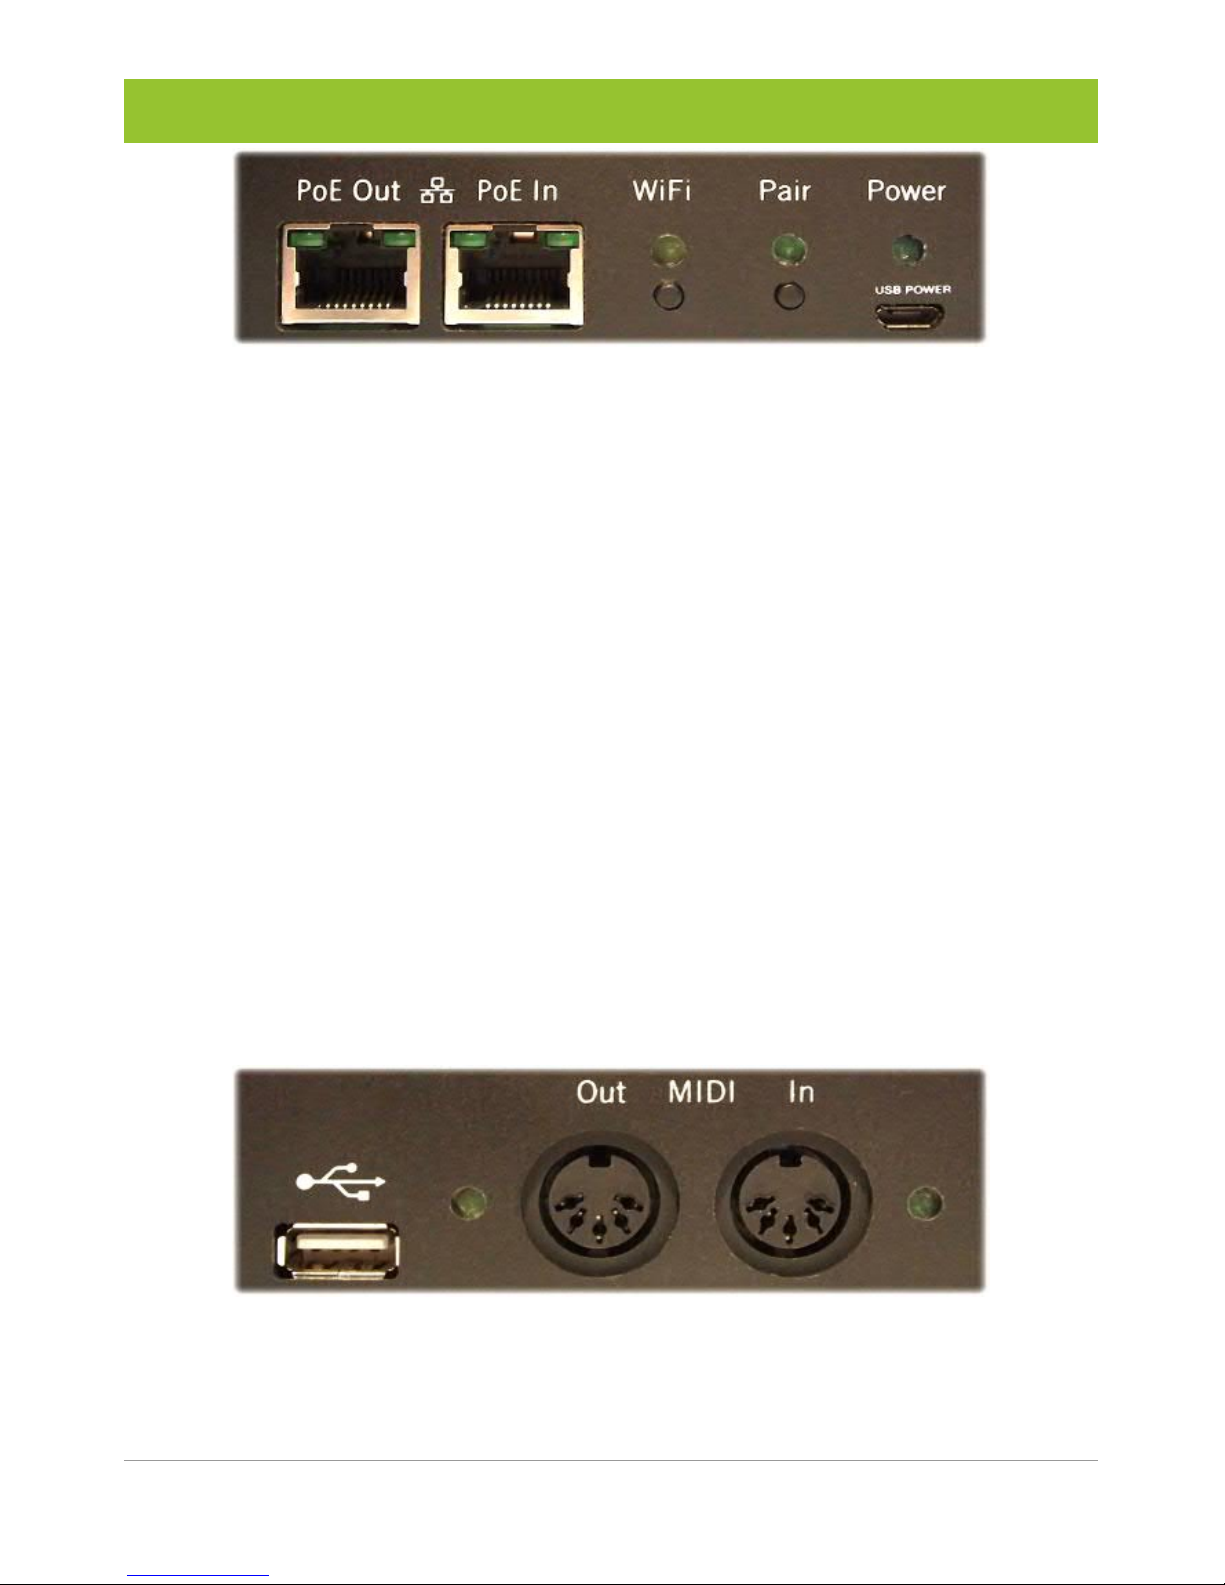
Power This LED indicates that the BomeBox is on. It is
blinking during boot and during a firmware update.
Pair Pair LED on: at least one Network MIDI connec-
tion is established (paired).
Blinking slowly: waiting for a remote BomeBox or
computer to approve a connection (press to cancel).
Blinking fast: another BomeBox or computer
wants to connect to this box (press to approve).
WiFi On if WiFi is enabled. Press to enable or disable. It
is blinking when transitioning between states.
PoE In The left LED indicates network activity. The right
LED indicates that it is powered via PoE.
PoE Out The left LED indicates network activity. The right
LED indicates that PoE power is available for powering another BomeBox.
MIDI OUT This LED indicates outgoing MIDI data (only if a
MIDI cable is connected to a MIDI In).
MIDI IN This LED indicates incoming MIDI data.
27
Page 28

Troubleshooting
Online User Support
In case of questions or problems, please consult our support
team in the Q&A discussion forum:
https://www.bome.com/support
Network Reset
It's possible to misconfigure the BomeBox network setup and
entirely lose connectivity. If that happens to you, please follow
the following instructions. All your other settings, project files,
and Web Config password remain the same.
1. Prepare a USB thumb drive to reset the network settings:
it must be FAT formatted, and not exceed 16GB in size.
2. Copy an arbitrary text file to the root folder of the thumb
drive, and rename it to:
{serial}_reset_network.txt
Replace {serial} with the serial number of that BomeBox,
as printed on the sticker at the bottom. For example, if the
serial number of your BomeBox is 00012345, then the
name of the file would be 00012345_reset_network.txt.
3. Attach that prepared thumb drive to the USB host connector of the BomeBox and power it up.
4. During the power-up process, Ethernet and WiFi are reset
to factory defaults. You may need to start up the BomeBox
a second time (by unplugging power, and replugging it) to
make it effective.
5. Now Ethernet is set up as Client, and WiFi is configured as
HotSpot with no password.
6. Don't forget to unplug the thumb drive when done.
28
Page 29

Password Reset
If you have forgotten your password for the Web Config, you
can reset it in a similar manner to resetting the network (see
previous chapter). All other settings, network configuration,
WiFi password, and project files remain the same.
1. Prepare a USB thumb drive to reset the password: it must
be FAT formatted, and not exceed 16GB in size.
2. Copy an arbitrary text file to the root folder of the thumb
drive, and rename it to:
{serial}_reset_password.txt
Replace {serial} with the serial number of that BomeBox,
as printed on the sticker at the bottom.
For example, if it is 00012345, then the name of the file
will be 00012345_reset_password.txt.
3. Attach that prepared thumb drive to the USB host connector of the BomeBox and power it up.
4. During the power-up process, the password is reset. You
may need to repeat this procedure once.
5. Now you can log into the BomeBox by using the default
password: the serial number.
6. Don't forget to unplug the thumb drive when done.
Reset to Factory Defaults
To remove all user files and reset all settings to their factory
defaults, you can use the Reset to Factory Defaults function:
1. Log into the Web Config, go to the Settings page
2. Go to the Backup & Firmware tab
3. In the Reset To Factory Defaults section, press the Perform
Reset button and acknowledge the security question with
OK.
4. Wait until the BomeBox restarted and the power LED stops
blinking. That first start takes approx. 2 minutes.
29
Page 30

Environmental Information
Disposal of the Product
This product is subject to the provisions of the
European directive 2002/96/EC. Should the product become damaged beyond repair, or if you
wish to dispose of it, it must be disposed of separately from the municipal waste system via
designated collection facilities appointed by the
government or the local authorities. For countries outside of
the European Union, observe the regulations of your area and
country that relate to the disposal of electronic products.
RoHS Information
This product conforms, where applicable, to the European
Union's Directive 2002/95/EC on Restrictions of Hazardous
Substances (RoHS) as well as the following sections of California law which refer to RoHS, namely sections 25214.10,
25214.10.2, and 58012, Health and Safety Code; Section
42475.2, Public Resources Code.
FCC and IC Compliance Information
Contains FCC ID Z9W-CM2 and IC 11468A-CM2.
This device complies with part 15 of the FCC Rules. Operation
is subject to the following two conditions: (1) This device may
not cause harmful interference, and (2) this device must accept any interference received, including interference that may
cause undesired operation.
This class B digital apparatus complies with Canadian ICES-
003. Cet appareil numérique de la classe B est conforme à la
norme NMB-003 du Canada.
30
Page 31

Legal Notices
GNU Public License
The firmware of the BomeBox is based on the open source
project OpenWRT, which is based on the Linux kernel. Most of
that software is licensed under the GNU Public License (GPL)
version 2. Consequently, we publish all source code modifications to OpenWRT and to the Linux kernel in an online repository hosted on github.com. You can use that repository to create your own firmware for the BomeBox. Note that this repository does not include BomeBox specific tools and scripts. Installing your own firmware requires SSH access.
To learn more, please follow these links:
OpenWRT: https://openwrt.org
Linux Kernel: https://www.kernel.org
GPL License v2: https://www.gnu.org/licenses/gpl-2.0.html
BomeBox
sources: https://github.com/bome/openwrt-bomebox
Disclaimer
Bome Software GmbH & Co. KG cannot be held responsible for
damage or lost or destroyed data caused by improper use or
modification of the product.
Trademarks
Bome and BomeBox are trademarks of Bome Software GmbH
& Co. KG, registered in Germany.
Other company names, product names and logos in this document are the trademarks or registered trademarks of their respective owners.
31
Page 32
Manufacturer Information
Bome Software GmbH & Co. KG
Petra-Kelly-Str. 15
80797 Munich
Germany
Contact: https://www.bome.com/contact
Registration Court: Munich HRA95502
VAT ID: DE271182542
WEEE-Reg.-Nr.: DE43133930
LUCID Reg.-Nr.: DE1521939353284
Liability held by:
Bome Komplementär GmbH
CEO: Florian Bömers
Registration Court: Munich HRB185574
32
 Loading...