

Page 1

HHHH
GGGG
OOD
OOD
OODOOD
HHHH
AUSHALTS
AUSHALTS
AUSHALTSAUSHALTS
----
DDDD
UNSTABZUGSHAUBE
UNSTABZUGSHAUBE
UNSTABZUGSHAUBEUNSTABZUGSHAUBE
DU
DU
DUDU
65
657777
6565
HHHH
OUSEHOLD
OUSEHOLD
OUSEHOLDOUSEHOLD
GGGG
////
DU
DU
DUDU
----
CCCC
OOKER
OOKER
OOKER OOKER
666655558888
Bedienungsanleitung/Garantie
Bedienungsanleitung/Garantie
Bedienungsanleitung/GarantieBedienungsanleitung/Garantie
Instruction Manual
Instruction Manual
Instruction ManualInstruction Manual
Page 2

DDDDEUTSCH
EUTSCH
EUTSCHEUTSCH
Inhalt
Inhalt
InhaltInhalt
Einleitung....................................................................................................................................................Seite 3
Allgemeine Hinweise…………………………………………………………………………….…………..…….Seite 3
Spezielle Sicherheitshinweise für dieses Gerät……………………………………………………….………..Seite 4
Auspacken des Gerätes………………………………………………………………………………..………….Seite 5
Geräteübersicht…………………………………………………………………………………………………….Seite 5
Installation…………………....…………………………………..…………………………………..…..…………Seite 6
Inbetriebnahme / Betrieb…………………..….………………..……………………………….………….……..Seite 9
Reinigung und Wartung….....…………………………………..…………………………….………....………Seite 10
Reparaturen……………………………………………………………………….……………………………....Seite 12
Störungsbehebung……………………………………………………………………….….……...………...….Seite 12
Technische Daten……………………………………………………………….………………………………..Seite 13
Garantie………………………………………………………….………….....................................................Seite 14
Entsorgung…………………..…………...…………………....……….………………………….…..……..…..Seite 16
ENGLISH
ENGLISH
ENGLISHENGLISH
Contents
Contents
ContentsContents
Introduction...............................................................................................................................................Page 17
General Notes…………………………………………………………………..……………………….….…….Page 17
Special safety Information for this Unit…………………………………………….……………………..........Page 18
Unpacking the Appliance…………………………………………………………………….……………..……Page 19
Overview of the Appliance…………….……………………………………………….…………….…..……...Page 19
Installation…………….……...…………………………………….……..……………………………...……….Page 19
Startup / Operation………....…………………………………..………….…………………………..……...…Page 22
Cleaning and Maintenance….....………………………………….…..……………………………..……..…..Page 24
Repairs……………………………………………………………………….…………………………………....Page 25
Troubleshooting………………………………………………………………………..….……...…………...….Page 25
Technical Data……………...…………………………………..…………….………………………..…………Page 26
Disposal….…………………..…………...…………………....……….…………….………………..……..…..Page 28
2
Page 3
DDDDEUTSCH
Vielen Dank, dass Sie sich für unser Produkt entschieden haben. Wir wünschen Ihnen viel Freude mit dem
Symbole in dieser Bedienungsanleitung
Symbole in dieser BedienungsanleitungSymbole in dieser Bedienungsanleitung
Symbole in dieser Bedienungsanleitung
Wichtige Hinweise für Ihre Sicherheit sind
dingt, um Unfälle und Schäden am Gerät zu vermeiden:
Warnt vor Gefahren für Ihre Gesundheit und zeigt mögliche Verletzungsrisiken auf.
Weist auf mögliche Gefährdungen für
Hebt Tipps und Informationen für Sie hervor.
Lesen Sie vor Inbetriebnahme dieses Gerätes die Bedienungsanleitung sehr sorgfältig durch und bewahren
auf. Falls Sie das Gerät an Dritte weitergeben, geben Sie auch die Bedi
Benutzen Sie das Gerät ausschließlich für den privaten und den dafür vorgesehenen Zweck. Dieses Gerät
ist nicht für den gewerblichen Gebrauch bestimmt.
r in der Art und Weise benutzt werden, wie es in dieser Bedienungsanleitung beschrieben ist.
Jede andere Verwendung gilt als nicht bestimmungsgemäß und kann zu Sachschäden
Betreiben Sie das Gerät nur im ordnungsgemäß
Benutzen Sie das Gerät nicht im Freien. Halten Sie es vor Hit
tigkeit fern. Benutzen Sie das Gerät nicht mit feuchten Händen.
unbeaufsichtigt.
aus, ziehen Sie den Netzstecker
schalten Sie die Sicherung ab, wenn Sie das Gerät nicht benutzen, zur Reinigung oder bei Störung.
das Netzkabel müssen regelmäßig auf Zeichen von Beschädigunge
den. Wird eine Beschädigung festgestellt, darf das Gerät nicht mehr benutzt werden.
Umbauten oder Veränderungen am Gerät sind aus Sicherheitsgründen nicht zulässig.
Zur Sicherheit Ihrer Kinder lassen Sie keine Verpackungsteile
Lassen Sie kleine Kinder nicht mit Folie spielen. Es besteht
besonders gekennzeichnet. Beachten Sie diese Hinweise unb
ze, direkter Sonneneinstrahlung
(ziehen Sie am Stecker, nicht am Kabel) oder
(Plastikbeutel, Karton, Styropor, etc.) e
EUTSCH
EUTSCHEUTSCH
Gerät.
Einleitung
Einleitung
EinleitungEinleitung
WARNUNG:
WARNUNG:
WARNUNG:WARNUNG:
ACHTUNG
ACHTUNG::::
ACHTUNGACHTUNG
HINWEIS
HINWEIS:
HINWEISHINWEIS
:
: :
Sie diese und den Kassenbon gut
nungsanleitung mit.
•
• Es darf nu
das Gerät oder andere Gegenstände hin.
Allgemeine Hinweise
Allgemeine Hinweise
Allgemeine HinweiseAllgemeine Hinweise
e-
e-
oder sogar zu Per-
sonenschäden führen.
•
•
• Betreiben Sie das Gerät nicht
nicht
nichtnicht
• Schalten Sie das Gerät
• Das Gerät und ggf.
•
•
reichbar liegen.
WARNUNG:
WARNUNG:
WARNUNG:WARNUNG:
eingebauten Zustand.
eingebauten Zustand.
eingebauten Zustand.eingebauten Zustand.
Erstickungsgefahr!
Erstickungsgefahr!
Erstickungsgefahr!Erstickungsgefahr!
3
und Feuch-
n untersucht wer-
r-
Page 4

Spezielle Sicherheitshinweise für dieses Gerät
Spezielle Sicherheitshinweise für dieses Gerät
Spezielle Sicherheitshinweise für dieses GerätSpezielle Sicherheitshinweise für dieses Gerät
• Es muss für ausreichende Belüftung im Raum gesorgt werden, wenn die Dunst-
haube gleichzeitig mit Geräten betrieben wird, welche Gas oder andere Brennstoffe verbrennen.
• Vorsicht:
Vorsicht: Berührbare Teile des Gerätes können heiß werden, wenn sie mit Koch-
Vorsicht:Vorsicht:
geräten benutzt werden.
• Flambieren Sie nicht unter der Dunstabzugshaube! Fritiert werden darf unter der
Haube wegen Brandgefahr nur unter ständiger Beobachtung.
• Öffnen Sie bei Gasherden die Gaszufuhr erst, wenn Kochgeschirr auf dem Herd
steht. Brandgefahr!
Brandgefahr! Der Filter kann beschädigt werden.
Brandgefahr!Brandgefahr!
• Lebensmittel beim Braten sollten ständig überwacht werden. Durch überhitztes Öl
kann eine Brandgefahr
Brandgefahr entstehen.
BrandgefahrBrandgefahr
• Prüfen Sie niemals den Filterzustand, wenn die Dunsthaube in Betrieb ist.
• Das Gerät NIE ohne befestigte Aluminium-Dunstfilter benutzen.
• Bei gleichzeitigem Betrieb der Dunstabzugshaube im Abluftbetrieb und Feuerstät-
ten darf im Aufstellraum der Feuerstätte der Unterdruck nicht größer sein als 4 Pa
(4x10⁻⁵ bar).
• Bei der Ableitung der Abluft sind die Vorschriften der zuständigen örtlichen Be-
hörden einzuhalten.
• Befolgen Sie die Montageanweisung. Beachten Sie die Anweisungen, die wir Ih-
nen im Kapitel „Installation“ dazu geben.
• Dieses Gerät kann von Kindern
Kindern ab 8 Jahren und darüber und von Personen mit
KindernKindern
reduzierten physischen, sensorischen oder mentalen Fähigkeiten oder Mangel an
Erfahrung und/oder Wissen benutzt werden, wenn sie beaufsichtigt oder bezüglich des sicheren Gebrauchs des Gerätes
Gebrauchs des Gerätes unterwiesen wurden und die daraus re-
Gebrauchs des GerätesGebrauchs des Gerätes
sultierenden Gefahren verstanden haben.
• Kinder
Kinder dürfen nicht mit dem Gerät spielen.
KinderKinder
• Reinigung und Benutzer
Benutzer----Wartung
BenutzerBenutzer
Wartung dürfen nicht durch Kinder
WartungWartung
Kinder durchgeführt werden,
KinderKinder
es sei denn, sie sind älter als 8 Jahre und werden beaufsichtigt.
4
Page 5

• Das Gerät
muss regelmäßig gereinigt werden. Beachten Sie die Anweisungen,
die wir Ihnen im Kapitel „Reinigung und Wartung“ dazu geben. Es besteht
wenn die Reinigung nicht nach Angaben der Anweisung ausgeführt wird.
Reparieren Sie das Gerät nicht selbst,
Fachmann auf. Um Gefährdungen zu vermeiden, ein defektes Netzkabel nur vom
Hersteller, einem qualifizierten Techniker oder dem Kundendienst durch ein
gleichwertiges Kabel ersetzen lassen. Wenn Kabel oder Stecker besch
dürfen Sie das Gerät nicht mehr benutzen.
Nehmen Sie das Gerät aus seiner Verpackung.
Entfernen Sie sämtliches Verpackungsmaterial, wie Folien, Füllmaterial, Kabelhalter und Kartonverp
erät auf eventuelle Transportschäden, um Gefährdungen zu vermeiden.
Im Schadensfall nehmen Sie das Gerät nicht in Betrieb. Wenden Sie sich an Ihren Fachhandel.
Am Gerät können sich noch Staub oder Produktionsreste befinden. Wir empfehlen Ihnen, das Gerät
“ beschrieben
vom Originalgerät abweichen.
Bohrschablone
sondern suchen Sie einen autorisierten
1 x äußerer Kaminschacht ohne Belüftungsschlitze
1 x innerer Kaminschacht mit Belüftungsschlitzen
gefahr
gefahr
gefahrgefahr
•
Auspacken des Gerätes
Auspacken des Gerätes
Auspacken des GerätesAuspacken des Gerätes
Bran
Brand-
d-
BranBran
d-d-
ädigt sind,
1.
2.
ckung.
3. Überprüfen Sie das G
4.
HINWEIS
HINWEIS::::
HINWEISHINWEIS
„Reinigung und Wartung
HINWEIS
HINWEIS:::: Die Abbildung kann
HINWEISHINWEIS
zu säubern.
Geräteübersicht
Geräteübersicht
GeräteübersichtGeräteübersicht
a-
wie unter
1 Teleskopschacht, 2-teilig
2 Bedienfeld
3 Glasschirm
4 Aluminium-Dunstfilter
5 Beleuchtung
Lieferumfang
Lieferumfang
LieferumfangLieferumfang
1 x Glasschirm
2 x Rückschlagklappe
Montagematerial inkl.
5
Page 6

Ein Sicherheitsabstand zwischen der Abstellfläche der Kochgefäße auf der Kochmulde und dem untersten
Teil der Dunstabzugshaube ist unbedingt erforderlich:
Der Abstand sollte
55
5555
55
Wenn die Installationsanweisungen für die Gaskochgeräte einen größeren Abstand vorschreiben, ist
Sie können die Dunstabzugshaube in zwei Möglichkeiten betrei
Die Abluft darf nicht in einen Schornstein geleitet werden, der für Abgase von G
räten benutzt wird, die mit Gas oder anderen Brennstoffen betrieben werden.
Bei der Ableitung der Abluft sind die Vorschriften der zuständigen
Die Haube verfügt über einen oberen Luftaustritt zum Ableiten der Küchengerüche nach außen.
Meist wird die Abluft ve
tikal abgeführt. Falls über
Ihrer Küche ein geeign
tes Dachgeschoss liegt,
Oberschrank und
Dachboden zum Dachfürst geleitet werden.
Wenn Sie keine direkte Abzugsöffnung nach außen haben;
(d. h. ohne Abzugsöffnung nach außen; die gefilterte Luft wird wieder in den Raum abgegeben). In diesem
zusätzlich
Die Aktivkohlefilter sind nicht im Lieferumfang enthalten. Bestellen Sie die K
www.bomann.de
www.bomann.dewww.bomann.de
www.bomann.de
der Montage und/oder beim Einsetzen der Dunstfilter sowie der Kohlefilter
der Abstand mindestens
der Abstand mindestensder Abstand mindestens
der Abstand mindestens
Falls in Ihrer Küche eine
Leitung unter den Obe
schänken vorhan
kann der Abzugsschacht so
uft waagerecht durch die
auch im Umluft
Aktivkohlefilter für Umluftbetrieb einsetzen“
ohlefilter bei Ihrem Händler
erenznummer, die Sie unter
darf das Gerät nicht mit
Der Abstand sollte zwischen
Der Abstand sollte Der Abstand sollte
tragen.
tragen.
tragen. tragen.
zwischen 45
zwischen zwischen
45 ––––
4545
dieser Abstand zu berücksichtigen.
Wahl des Wrasenausgangs
Wahl des Wrasenausgangs
Wahl des WrasenausgangsWahl des Wrasenausgangs
Installation
Installation
InstallationInstallation
cm betragen
cm betragen. Bei Gasgerä
cm betragencm betragen
. Bei Gasgeräten muss
. Bei Gasgerä. Bei Gasgerä
ten muss
ten muss ten muss
65
65 cm b
cm be-
6565
cm bcm b
e-
e-e-
Abluftbetrieb
Abluftbetrieb
AbluftbetriebAbluftbetrieb
WARNUNG:
WARNUNG:
WARNUNG:WARNUNG:
•
•
hörden einzuhalten.
•
kann die Abluft durch einen
ben:
e-
örtlichen Be-
r-
e-
verlegt werden, dass die Abl
Wand abgeleitet werden kann.
•
r-
den ist,
Umluftbetrieb
Umluftbetrieb
UmluftbetriebUmluftbetrieb
Fall müssen zwei Aktivkohlefilter
ben, eingesetzt werden.
in unserem Online Zubehör-Shop
„Technische Daten“ finden.
Montage
Montage
MontageMontage
WARNUNG
WARNUNG::::
WARNUNGWARNUNG
• Bei
dem Netzstrom verbunden sein.
wie unter „
. Verwenden Sie dabei die Ref
kann die Haube
6
betrieb arbeiten
beschrie-
oder
Page 7
ng der Befestigungsvorrichtung
Prüfen Sie vor der Montage die Wand auf Tragfähigkeit der Abzugshaube.
Bohrlöcher in der Wand stets
schen Leitungen oder andere verdeckte Gegenstände zu beschädigen.
Achten Sie darauf, dass die Lüftungsöffnungen freiliegen und nicht verdeckt werden.
: Empfehlungen für Vorbereitungsarbeiten
: Empfehlungen für Vorbereitungsarbeiten: Empfehlungen für Vorbereitungsarbeiten
: Empfehlungen für Vorbereitungsarbeiten
bei der Installation eine weitere Person zur Hilfe hinzu.
Tragen Sie Schutzhandschuhe, um Verletzungen an möglichen scharfen Kanten zu vermeiden.
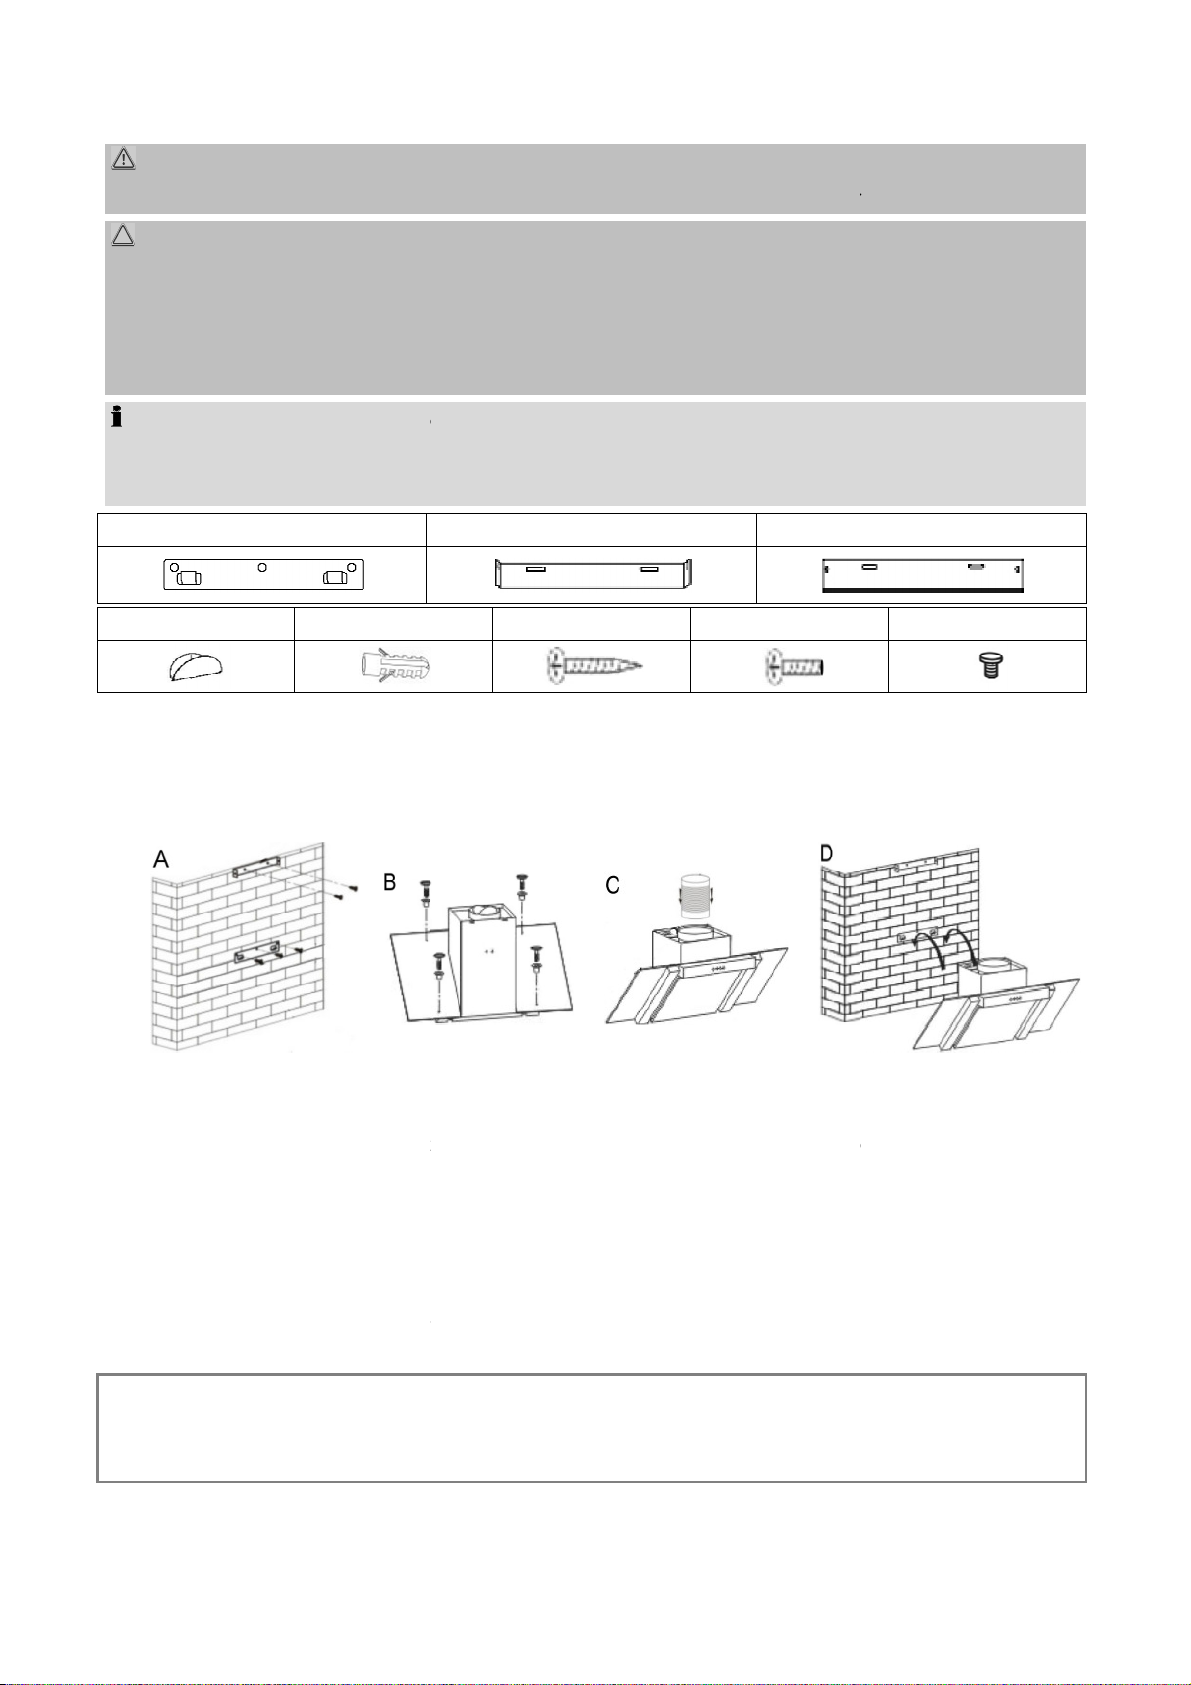
Bestimmen Sie die Position der Dunstabzugshaube mittig über der Kochstelle in Übereinstimmung
vorgegebenen Sicherheitsabständen.
Markieren Sie die für die Wandmontage notwendigen Bohrungen
diese mit einer Wasserwage.
Bohren Sie für die jeweiligen Halterungen (1+2+3) B
Sie darin die Dübel (5) und befestigen Sie die Hal
Aufhängevorrichtung
am oberen Abschluss parallel zur Schiene (1) an (
vorab die Auszugslänge der Schachtabdeckung!
der Dunsthaube:
Glasschirm mit den Schrauben (7) im Schraubeneinsatz aus Gummi samt Unterlegscheiben
Haubenkörper befestigt (Abb.
Rückschlagklappen (4)
Abluftschlauch
mit der Abzugsöffnung nach außen
führen.
darauf, keine bereits vorhandenen elektr
mit Hilfe der beiliegenden Bohrschablone
8 mm in die Wand. Versenken
.
sowie die Befestigungsschiene mit Winkel
bluftkanal eingesetzt.
150 mm Innendurchmesser
WARNUNG
WARNUNG::::
WARNUNGWARNUNG
• Die Nichtbeachtu
ACHTUNG:
ACHTUNG:
ACHTUNG:ACHTUNG:
•
• Achten Sie beim Erstellen der
•
HINWEIS
HINWEIS
HINWEISHINWEIS
• Ziehen Sie
•
1
4 5
•
kann zur Stromschlaggefahr
Stromschlaggefahr
StromschlaggefahrStromschlaggefahr
2
6 7
i-
3
8
mit den
•
und überprüfen Sie
•
• Bringen Sie die
(2) für die Schachtabdeckung
• Vor dem Einhängen
- wird der
auf dem
- werden die
Für den Abluftbetrieb:
Für den Abluftbetrieb:
Für den Abluftbetrieb:Für den Abluftbetrieb:
efestigungslöcher Ø
terungen mit den Schrauben (6)
(1) für den Haubenkörper,
B).
durch leichtes biegen von oben auf den A
Abb. A). Bestimmen Sie
• Hieran ist ein flexibler
zu befestigen (Abb. C) und
(nicht im Lieferumfang enthalten) mit Ø
zu verbinden.
7
Page 8

•
Hängen Sie die Abzugshaube in die Aufhängevorrichtung
Halt und die waagerechte Position.
Schutzfolie von den Teleskopschächten
Fixieren Sie den äußeren (unteren) Schacht mit der Befestigungsschiene
der Schachtinnenseite an den dafür vorgesehenen Bohrungen befestigt. Drehen Sie zwei Blec
Abb. E
Schacht samt Schiene
ne (3) parallel zu den Halterungen (1+2) an der Wand.
Schieben Sie den inneren (oberen) Schacht längs der Einschubvorrichtung in den äußeren (unteren)
Achten Sie darauf, dass der innere Schacht mit den Lüftungsöffnungen oben angesetzt wird.
stimmen Sie die Auszugslänge der Schachtabdeckung
in den äußeren Schacht zurück schieben.
Für den Abluftbetrieb bringen Sie den flexiblen
Ziehen Sie die innere Schachtabdeckung hinauf und fixieren Sie die Schachteinheit seitlich mit der zuvor
indem Sie die Blechschrauben (8) eindrehen
Aktivkohlefilter für Umluftbetrieb einsetzen
Aktivkohlefilter für Umluftbetrieb einsetzenAktivkohlefilter für Umluftbetrieb einsetzen
Aktivkohlefilter für Umluftbetrieb einsetzen
Dunstfilter.
Kohlefilter an die Ansaugöffnung
gungsstifte am Abluftkanal in die Befestigungsschlitze des Kohlefilters eingreifen. Drehen Sie den
sinn, bis er einrastet.
filter wieder ein.
ohlefilter binden Gerüche und müssen abhängig vom Verbrauch,
(1) ein (Abb. D). Kontrollieren Sie den sicheren
ohne Winkel
auf die Abzugshaube (Abb.
indem Sie den inneren Schacht hinauf ziehen oder
chlauch (nicht im Lieferumfang enthalten) in die
des Abluftkanals. Stellen Sie sicher, dass die Befest
filter wieder ein.
jedoch mindestens alle
• Entfernen Sie die
•
wird von
schrauben (8) von hinten ein (
• Setzen Sie den äußeren
Schie
•
Schacht.
.
(3). Die Schiene
h-
).
(3)
F). Befestigen Sie die
Be-
,
•
richtige Position.
•
angebrachten Schiene (2),
• Entnehmen Sie den Aluminium-
• Setzen Sie die
gen Filter im Uhrzeiger
• Setzen Sie den Aluminium-Dunst
HINWEIS
HINWEIS::::
HINWEISHINWEIS
Die Aktivk
Monate gewechselt werden.
Ablufts
en
(Abb. G).
i-
jeweili-
sechs
8
Page 9

Elektrischer Anschluss
Die Installation an das Stromnetz muss gemäß den lokalen Gesetzen und Vorschriften erfolgen.
Ein unsachgemäßer Anschluss kann zu einem
Gerätenetzanschlussstecker nicht!
mann ersetzen, wenn diese für den Gerätenetzstecker nicht geeignet ist.
Die Zugänglichkeit des Netzsteckers muss gewährleistet sein, um das Gerät im Notfall sofort von der
e, ob die Netzspannung, die Sie benutzen wollen, mit der des Gerätes übereinstimmt. Die Ang
ben hierzu finden Sie auf dem Typenschild des Gerätes.
Schließen Sie das Netzkabel an eine vorschriftsmäßig installierte Schutzkontakt
Informationen zur Verringerung der Umweltauswirkung beim Kochen
Informationen zur Verringerung der Umweltauswirkung beim Kochen Informationen zur Verringerung der Umweltauswirkung beim Kochen
Informationen zur Verringerung der Umweltauswirkung beim Kochen
(gem. VO (EU) Nr. 66/2014 Anhang I, Nr. 2)
(gem. VO (EU) Nr. 66/2014 Anhang I, Nr. 2)(gem. VO (EU) Nr. 66/2014 Anhang I, Nr. 2)
(gem. VO (EU) Nr. 66/2014 Anhang I, Nr. 2)
und Pfannenboden soll mit der Größe der Kochstelle übereinstimmen.
und Töpfe mit ebenen Böden, unebene Böden erhöhen den Energieverbrauch.
Achten Sie auf ausreichend Zuluft beim Betrieb der Dunstabzugshaube.
Passen Sie die Lüfterstufenintensität der Dunstentwicklung des Kochvorgangs an.
unstabzugshaube erzeugt wird,
bringen Sie diese gemäß der Installationsanweisung an. Hierzu ist der
Abstand zwischen Oberkante des Herdes und Unterkante der Dunstabzugshaube einzuhalten.
Reinigen Sie in regelmäßigen Abständen den Fettfilter / Geruchsfilte
Kontrollieren Sie in regelmäßigen Abständen den Aktivekohlefilter und erneuern Sie diesen nach Bedarf.
Schalten Sie die Dunstabzugshaube nach Gebrauch ab.
Sofern ihre Dunstabzugshaube über eine Ausschaltverzögerung verfügt, aktivieren Sie diese Funktio
Schalten Sie die Beleuchtung nach dem Kochvorgang aus.
Wir empfehlen zur Reinigung der Filter biologische Reiniger.
Informationen an professionelle Nutzer zur Demontage
Informationen an professionelle Nutzer zur Demontage Informationen an professionelle Nutzer zur Demontage
Informationen an professionelle Nutzer zur Demontage
(gem. VO (EU) Nr. 66/2014 Anhang I, Nr. 2)
(gem. VO (EU) Nr. 66/2014 Anhang I, Nr. 2)(gem. VO (EU) Nr. 66/2014 Anhang I, Nr. 2)
(gem. VO (EU) Nr. 66/2014 Anhang I, Nr. 2)
rstörungsfreien Demontage zu Wartungszwecken
Bitte entfernen Sie die Filter und Leuchtmittel wie in der Bedienungsanleitung beschrieben.
Weitere Schritte der Demontage zur Instandhaltung sind nicht vorgesehen.
Sofern Sie einen Austausch von defekten Baue
Lassen Sie die Netzsteckdose durch einen Fac
Steckdose an.
lementen wünschen, wenden Sie sich bitte an unseren Ku
Elektrischer Anschluss
Elektrischer AnschlussElektrischer Anschluss
WARNUNG:
WARNUNG:
WARNUNG:WARNUNG:
•
•
• Verändern Sie den
•
Stromversorgung zu trennen.
• Prüfen Si
•
Dunstabzugshauben
Dunstabzugshauben
Dunstabzugshauben Dunstabzugshauben
Der Durchmesser von TopfVerwenden Sie Pfannen
elektrischen Schlag
elektrischen Schlag führen!
elektrischen Schlagelektrischen Schlag
Inbetriebnahme
Inbetriebnahme / Betrieb
InbetriebnahmeInbetriebnahme
/ Betrieb
/ Betrieb/ Betrieb
h-
a-
-
Damit die optimalste Wirkung der D
Dunstabzugshauben
Dunstabzugshauben
DunstabzugshaubenDunstabzugshauben
Informationen zur ze
r.
n.
dendienst.
9
n-
Page 10
Akkumulatoren sind nicht enthalten.
Informationen zur Demontage in Bezug auf Recycling, Rückgewinnung und Entsorgung am Ende der L
Überprüfen Sie ob das Gerät vom Str
Bei Kaminabzugshauben entfernen Sie erst den Kaminschacht.
Achten Sie bei der Demontage der Dunstabzugshaube darauf, dass Sie immer zuerst die unteren und danach
Befestigungsschrauben lösen.
Für das Recycling und die Rückgewinnung von Ressourcen geben Sie das Gerät, die Leuchtmittel und die
eine kommunale Sammelstelle der öffentlich rechtlichen Entsorgungsträger
Entsorgungsbetrieb, der ein Rücknahmesystem anbietet
einen ortsansässigen Elektrohändler, der freiwillig Elektrogeräte zurücknimmt
Die Bedienung der Dunstabzugshaube erfolgt über Tastschalter.
den entsprechenden
beginnt bei niedriger Geschwindigkeit zu laufen. Diese Schaltstufe eignet sich für das Kochen auf
kleiner Flamme und für Gerichte, bei denen kein oder nur geringer Dampf auftritt, um die Küche zu durchlü
mittlerer Geschwindigkeit. Diese Einstellung
Der Motor läuft mit hoher Geschwindigkeit. Die Einstellung eignet sich, wenn große Mengen Rauch und
Dampf abgesaugt bzw. gefiltert werden sollen
Bei sehr starker Dunstentwicklung sollten Sie das Gebläse nach dem Kochen noch einige Minuten weiterla
fen lassen. Lassen Sie das Gebläse nur gezielt laufen, da sonst unnötig Energie verbraucht wird.
Durch regelmäßige Reinigung Ihrer Dunstabzugshaube sowie der Filter, erhalten Sie das Gerät und den B
trieb im Bestzustand. Auch aus hygienischen Gründen sollte die Dunstabzugshaube und die Zubehörteile
omnetz getrennt ist, bevor Sie alle Filter aus der Dunstabzugshaube
Die einzelnen Gebläsestufen
den normalen Kochbetrieb.
bensdauer des Gerätes
entfernen.
e-
die oberen
verschiedenen Filter an:
-
- einen herstellereigenen
-
leuchtung sind mit
kleinste Gebläsestufe
mittlere Gebläsestufe
Leistungs
Leistungs---- Schaltstufe:
LeistungsLeistungs
Schaltstufe:
Schaltstufe:Schaltstufe:
Der Motor
ten.
Leistungs
Leistungs---- Schalts
LeistungsLeistungs
Der Motor läuft mit
Leistungs
Leistungs---- Schaltstufe:
LeistungsLeistungs
Schaltstufe
SchaltsSchalts
Schaltstufe:
Schaltstufe:Schaltstufe:
tufe:
tufetufe
:
: :
Tasten ein- und auszuschalten.
höchste Gebläsestufe
Beleuchtung
eignet sich für
, sowie die Be-
f-
HINWEIS
HINWEIS::::
HINWEISHINWEIS
(z. B. beim Frittieren).
Reinigung und
Reinigung und Wartung
Reinigung und Reinigung und
Wartung
WartungWartung
regelmäßig gereinigt werden.
10
u-
e-
Page 11

WARNUNG:
und Wartungsarbeiten das Gerät grundsätzlich abschalten und den Netzstecker ziehen
oder Sicherung abschalten bzw. herausdrehen.
Warten Sie bis das Gerät vollständig abgekühlt ist!
Das Gerät nie mit Dampfreinigungsgeräten reinigen. Feuchtigkeit
Heißer Dampf kann zu Schäden an Kunststoffteilen führen. Das Gerät muss trocken
sein, bevor Sie es wieder in Betrieb nehmen.
Benutzen Sie keine Drahtbürste oder andere scheuernde Gege
scharfen oder scheuernden Reini
Verwenden Sie für die Reinigung der Gehäuseoberfläche ein mildes Reinigungsmittel und ein weiches
Tuch, um Verkratzungen zu vermeiden.
Nachdem alles gründlich getrocknet wurde, können
Wenn Sie Ihre Dunstabzugshaube im Umluftbetrieb nutzen, wechseln Sie regelmäßig die Aktiv
Aktivkohlefilter auswechseln
filters
filtersfilters
filters
Brandgefahr!
Brandgefahr!Brandgefahr!
Brandgefahr!
Fettrückstände im Aluminium
ist es wichtig, dass der Dunstfilter regelmäßig gereinigt
Filter sammeln sich Fette und Dämpfe und kö
hlen Ihnen den Dunstfilter monatlich
Dunst
dabei den Filter leicht nach unten drücken und nach vorne herausnehmen.
ilter in einer Lösung aus warmen Wasser und
mit einer weichen Bürste reinigen,
lter auch in der
nigung im Geschirrspüler können leichte Verfärbungen auftreten. Das hat keinen Einfluss auf die Funktion
ohlefilter binden Gerüche und müssen abhängig vom Verbrauch,
Bestellen Sie die K
Sie dabei die Ref
könnte in elektrische Bauteile gelangen.
Sie das Gerät wieder in Betrieb nehmen.
Dunstfilter können sich bei großer Hitzeeinwirkung
er Reinigung zusetzen.
in der Griffmulde zurück schieben,
Neutralreiniger. Weichen Sie den
gründlich mit warmem Wasser nachspülen
gereinigt werden.
jedoch mindestens alle sechs
oder in unserem Online Zubehör
Technische Daten
WARNUNG:
WARNUNG:WARNUNG:
• Vor Reinigungs-
•
•
Stromschlaggefahr!
Stromschlaggefahr!
Stromschlaggefahr!Stromschlaggefahr!
ACHTUNG
ACHTUNG::::
ACHTUNGACHTUNG
•
• Benutzen Sie keine
•
•
•
(siehe „
Reinigung des Aluminium
Reinigung des Aluminium----Dunst
Reinigung des AluminiumReinigung des Aluminium
WARNUNG:
WARNUNG:
WARNUNG:WARNUNG:
Dunst
DunstDunst
nstände.
gungsmittel.
kohlefilter
“).
entzünden. Deshalb
tauscht wird.
Im
empfe
• Entfernen Sie den Aluminium-
• Spülen Sie den Dunstf
Dunstfilter darin ein.
• Anschließend
lassen.
• Alternativ kann der Dunstfi
der Dunstfilter.
Aktivkohlefilter auswechseln
Aktivkohlefilter auswechseln
Aktivkohlefilter auswechselnAktivkohlefilter auswechseln
Die Aktivk
nnen diesen bei nicht regelmäßig
zu reinigen:
filter, indem Sie den Verschluss
Geschirrspülmaschine (bis 60°C)
/ ausge-
Wir
und trocknen
Bei der Rei-
Monate gewechselt werden.
Shop www.bomann.de
www.bomann.de. Verwenden
www.bomann.dewww.bomann.de
ohlefilter bei Ihrem Händler
erenznummer, die Sie unter „
11
-
“ finden.
Page 12

• Siehe „Aktivkohlefil
ter für Umluftbetrieb einsetzen“
die alten Kohlefilter, indem Sie die Filter gegen den Uhrzeigersinn drehen.
Lassen Sie die Lampen abkühlen, bevor Sie
Verwenden Sie das richtige Leuchtmittel:
vorsichtig mit
wieder auf.
Eine falsch bzw. nicht fachgerecht durchgeführte Reparatur bringt Gefahr für den Benutzer und führt zu einem
Geräten dürfen ausschließlich nur von einem hierfür qualifizierten Fac
beschädigte Netzanschlussleitung darf nur von einer Elektrofachkraft ausgewechselt
sich an den Kundenservice wenden oder
sich an den Kundenservice wenden odersich an den Kundenservice wenden oder
sich an den Kundenservice wenden oder
Mögliche Ursache
Mögliche UrsacheMögliche Ursache
Mögliche Ursache
Hat das Gerät keine Stromversorgung?
Haben Sie eine Leistungsstufe eingestellt?
Haben Sie die richtige Leistungsstufe g
filter verschmutzt?
Sind die für den Umluftbetrieb benötigten
Kohlefilter (richtig) eingesetzt?
Abluftbetrieb benötigte Luf
Das Leuchtmittel ist defekt,
nicht fest in der Fassung.
Der Dunstfilter ist verschmutzt.
Es besteht Verbrennungsgefahr!
Es besteht Verbrennungsgefahr!Es besteht Verbrennungsgefahr!
Es besteht Verbrennungsgefahr!
einen Fachmann hinzu rufen
einen Fachmann hinzu rufeneinen Fachmann hinzu rufen
einen Fachmann hinzu rufen
ie den Netzstecker richtig ein.
Kontrollieren Sie die
Überprüfen Sie die Einstellung.
Überprüfen Sie die Einstellung. Die Küche
ist nicht ausreichend belüftet.
Reinigen Sie den Dunst
gung des Aluminium
Überprüfen Sie die Kohlefilter (siehe „Akti
auswechseln“).
Überprüfen Sie den Luftauslass.
Überprüfen Sie das Leuchtmittel (siehe
Leuchtmittel auswechseln
Reinigen Sie den Dunst
.
• Entfernen Sie
Leuchtmittel auswechseln
Leuchtmittel auswechseln
Leuchtmittel auswechselnLeuchtmittel auswechseln
WA
WARNUNG:
RNUNG:
WAWA
RNUNG:RNUNG:
•
• Entfernen Sie den Lampenring
• Wechseln Sie das Leuchtmittel.
• Setzen Sie den Lampenring
Verlust des Garantieanspruchs.
Reparaturen an elektrischen
ausgeführt werden. Eine
werden.
das Leuchtmittel auswechseln.
2 x 2
2 x 20000 WWWW Halogenlampen (Typ G4)
2 x 22 x 2
Halogenlampen (Typ G4)
Halogenlampen (Typ G4)Halogenlampen (Typ G4)
einem geeigneten Werkzeug.
Reparaturen
Reparaturen
ReparaturenReparaturen
hmann
Bevor Sie
Bevor Sie
Bevor Sie Bevor Sie
Störung
Störung
StörungStörung
Das Gerät arbeitet
nicht bzw. nicht
richtig
Das Gerät arbeitet
nicht effizient
Die Beleuchtung
funktioniert nicht
-
-
wählt?
- Ist der Dunst
-
- Ist der für den
auslass frei?
eingesetzt, sitzt
Störungsbehebung
Störungsbehebung
StörungsbehebungStörungsbehebung
Behebung
wurde falsch
e-
t-
Behebung
BehebungBehebung
- Setzen S
-
-
-
kohlefilter
-
„
Haussicherung.
filter (siehe „Reini-
-Dunstfilters“).
v-
“).
Öl tropft vom Gerät herunter
filter.
12
Page 13

HINWEIS
Falls Sie nach dem Durcharbeiten der obigen Schritte immer noch Probleme mit Ihrem Gerät haben sollten,
wenden Sie sich an Ihren Fachhandel oder den Kundenservice
Technische und gestalterische Änderungen im Zuge stetiger Produktentwicklungen vorbehalten.
Produktdatenblatt für Haushaltsdunstabzugshauben nach Verordnung (EU) Nr. 65/2014
Produktdatenblatt für Haushaltsdunstabzugshauben nach Verordnung (EU) Nr. 65/2014Produktdatenblatt für Haushaltsdunstabzugshauben nach Verordnung (EU) Nr. 65/2014
Produktdatenblatt für Haushaltsdunstabzugshauben nach Verordnung (EU) Nr. 65/2014
Effizienzklasse des Fettabscheidegrads
Garantieabwicklung
70,0
) Set: 2 Stück
DU 657 G / DU 658 G
DU 657 G / DU 658 GDU 657 G / DU 658 G
DU 657 G / DU 658 G
HINWEIS::::
HINWEISHINWEIS
Model
Modelllll
ModelModel
Wandesse
Spannungsversorgung
Beleuchtung, Halogen
Leistungsaufnahme
Schutzklasse
Geräte-Abmessung H x B x T
Schacht-Abmessung H x B x T
Nettogewicht
Übersicht der Abmessungen,
Angaben in mm
(siehe „
Technische Daten
Technische Daten
Technische DatenTechnische Daten
Glasschirm 90 cm breit
220-240 V~, 50 Hz
2 x 20 W (Typ G4)
50,0 x 90,0 x 34,5 cm
70,0 – 94,0 x 30,2 x 26,7 cm
DU 6
DU 655557 G
7 G
DU 6DU 6
7 G7 G
230 W
ca. 14,8 kg
“).
DU 65
DU 658 G
8 G
DU 65DU 65
8 G8 G
Glasschirm 60 cm breit
220-240 V~, 50 Hz
2 x 20 W (Typ G4)
230 W
I
I
50,0 x 60,0 x 34,5 cm
– 94,0 x 30,2 x 26,7 cm
ca. 13,6 kg
Aktiv-Kohlefilter für Umluftbetrieb
(nicht im Lieferumfang enthalten)
Brand
Brand
BrandBrand
Modell
Modell
ModellModell
Jährlicher Energieverbrauch (AEC
Jährlicher Energieverbrauch (AEC
Jährlicher Energieverbrauch (AECJährlicher Energieverbrauch (AEC
Energieeffizienzklasse
Energieeffizienzklasse
EnergieeffizienzklasseEnergieeffizienzklasse
Fluiddynamische Effizienz (FDE
Fluiddynamische Effizienz (FDE
Fluiddynamische Effizienz (FDEFluiddynamische Effizienz (FDE
Fluiddynamische Effizienzklasse
Fluiddynamische Effizienzklasse
Fluiddynamische EffizienzklasseFluiddynamische Effizienzklasse
Beleuchtungseffizienz (LE
1)
1)
1)1)
hood
hood
hoodhood
2)
2)
2)2)
)
hood
Beleuchtungseffizienzklasse3)
Fettabscheidegrad
hood
hood
hoodhood
KF 561 (Art.-Nr. 256 100
Bomann
Bomann
BomannBomann
))))
kWh/Jahr 111.0
C
))))
19.5
C
lx/W 9 / 10
E
% 57.6
4)
E
13
Page 14

Luftstrom bei min. Geschwindigkeit im Normalbetrieb m³/h 456.2
Luftstrom bei max. Geschwindigkeit im Normalbetrieb m³/h 648.9
Luftstrom bei Betrieb auf der Intensivstufe oder Schnellstufe m³/h -
A-bewertete Luftschallemissionen im Normalbetrieb
- bei min. Geschwindigkeit dB 64
- bei max. Geschwindigkeit dB 71
A-bewertete Luftschallemissionen im Betrieb auf der Intensivstufe
dB -
oder Schnellstufe
Leistungsaufnahme im Aus-Zustand (PO) W -
Leistungsaufnahme im Bereitschaftsmodus (PS) W 0.42
1) A+ (höchste Effizienz) bis F (geringste Effizienz) 3) A (höchste Effizienz) bis G (geringste Effizienz)
2) A (höchste Effizienz) bis G (geringste Effizienz) 4) A (höchste Effizienz) bis G (geringste Effizienz)
Hinweis zur Richtlinienkonformität
Hinweis zur Richtlinienkonformität
Hinweis zur RichtlinienkonformitätHinweis zur Richtlinienkonformität
Hiermit erklärt der Hersteller, dass sich die Geräte DU 657 G und DU 658 G in Übereinstimmung mit den folgenden Anforderungen befinden:
Europäische Niederspannungsrichtlinie 2014/35/EU
EU-Richtlinie für elektromagnetische Verträglichkeit 2014/30/EU
Ökodesign Richtlinie 2009/125/EG
RoHS-Richtlinie 2011/65/EU
Garantie /
Garantiebedingungen
Garantiebedingungen
GarantiebedingungenGarantiebedingungen
Garantie / Kundendienst
Garantie / Garantie /
Kundendienst
KundendienstKundendienst
1. Voraussetzung für unsere Garantieleistungen ist der Erwerb des Gerätes bei einem unserer Vertragshänd-
ler.
2. Gegenüber Verbrauchern gewähren wir bei privater Nutzung des Gerätes eine Garantie von 24 Monaten.
Die Garantie beginnt mit dem Zeitpunkt der Übergabe, der durch die Rechnung, Lieferschein oder gleichwertiger Unterlagen nachzuweisen ist. In diesem Zeitraum erstrecken sich die Garantieleistungen über die
Arbeitszeit, die Anfahrt und über die zu ersetzenden Teile. Die Garantiezeit für Verbraucher reduziert sich
auf 6 Monate, sofern sie ein zur gewerblichen Nutzung geeignetes Gerät – auch teilweise – gewerblich
oder gemeinschaftlich nutzen. Ist das Gerät zur gewerblichen Nutzung geeignet, leisten wir beim Kauf
durch Unternehmer für das Gerät eine Garantie von 6 Monaten.
3. Innerhalb der Garantiezeit werden Funktionsfehler, die trotz vorschriftsmäßigem Anschluss, sachgemäßer
Behandlung und Beachtung der gültigen Einbauvorschriften und der Betriebsanleitung auf Fabrikationsoder Materialfehler zurückzuführen sind, durch Reparatur oder Austausch beseitigt.
4. Garantieleistungen werden nicht für Mängel erbracht, die auf Nichtbeachtung der Gebrauchsanweisung
beruhen, durch unsachgemäßen Anschluss oder Installation, unsachgemäßer Behandlung, normale Abnutzung des Gerätes, höhere Gewalt oder sonstige äußere Einflüsse zurückzuführen sind.
14
Page 15

Garantieansprüche sind ferner ausgeschlossen für leicht zerbrechliche Teile, wie zum Beispiel Glas,
Kunststoff oder Leuchtmittel. Der Garantieanspruch erlischt bei Eingriffen durch den Käufer oder durch
nicht autorisierte Dritte.
5. Transportschäden unterliegen nicht der Garantie und müssen unmittelbar nach Feststellung dem Verkäu-
fer gemeldet werden.
6. Die Garantieleistung erfolgt in der Weise, dass mangelhafte Teile nach unserer Wahl unentgeltlich
instandgesetzt oder durch einwandfreie Teile ersetzt werden. Ersetzte Teile gehen in unser Eigentum
über. Die Garantie gilt nur für Geräte, welche sich im Bereich der Bundesrepublik Deutschland bzw. Österreich befinden.
7. Durch Garantieleistungen wird die Garantiezeit nicht verlängert. Es besteht auch kein Anspruch auf neue
Garantieleistungen. Diese Garantieerklärung ist eine freiwillige Leistung von uns als Hersteller des Gerätes. Die gesetzlichen Gewährleistungsrechte (Nacherfüllung, Rücktritt, Schadensersatz und Minderung)
werden durch diese Garantie nicht berührt.
Stand 03 2017
Garantieabwicklung
Garantieabwicklung
GarantieabwicklungGarantieabwicklung
Sollte Ihr Gerät innerhalb der Garantiezeit einen Mangel aufweisen, bitten wir Sie, die Internetseite des Serviceportals
www.sli24.de
aufzurufen. Nach Eingabe des Gerätetyps wird Ihnen angezeigt, wie die Reklamation bearbeitet wird.
C. Bomann GmbH
C. Bomann GmbH
C. Bomann GmbHC. Bomann GmbH
Heinrich-Horten-Straße 17
D-47906 Kempen
15
Page 16

Bedeutung des Symbols „Mülltonne“
Bedeutung des Symbols „Mülltonne“Bedeutung des Symbols „Mülltonne“
Bedeutung des Symbols „Mülltonne“
Schonen Sie unsere Umwelt, Elektrogeräte gehören nicht in den Hausmüll.
Nutzen Sie die für die Entsorgung von Elektrogeräten vorgesehenen Sammelstellen und geben dort Ihre
Elektrogeräte ab die Sie nicht mehr be
Sie helfen damit die potenziellen Auswirkungen, durch falsche Entsorgung, auf die Umwelt und die menschl
Sie leisten damit Ihren Beitrag zur Wiederverwertung, zum Recycling und zu anderen Formen der Verwertung
Altgeräten.
Informationen, wo die Geräte zu entsorgen sind, erhalten Sie über Ihre Kommunen oder die Gemeindeverwa
Entfernen oder zerstören Sie evtl. vorhandene Schnapp
und Riegelschlösser, wenn Sie das
Entsorgung
Entsorgung
EntsorgungEntsorgung
che Gesundheit zu vermeiden.
von Elektro- und Elektronik-
tungen.
WARNUNG:
WARNUNG:
WARNUNG: WARNUNG:
Betrieb nehmen oder es entsorgen.
nutzen werden.
i-
l-
-
Gerät außer
16
Page 17

ENGLISH
Thank you for choosing our product. We hope you will enjoy using the appliance.
Symbols in these Instructions for Use
Symbols in these Instructions for UseSymbols in these Instructions for Use
Symbols in these Instructions for Use
Important information for your safety is specially
order to avoid accidents and prevent damage to the ma
o your health and indicates possible injury risks.
o the machine or other objects.
This highlights tips and information.
Read the operating instructions carefully before putting the appliance into operation and keep the instructions
appliance
The appliance is designed exclusively for private use and for the envisaged purpose. This appliance is not
The appliance is only to be used as described in the user manual. Do not use the appliance for any
purpose. Any other use is not intended and can result in damages or personal injuries.
properly installed.
properly installed.properly installed.
properly installed.
doors. Keep it away from sources of heat, direct sunlight and humidity.
operate the machine without supervision.
When not in use, for cleaning, user maintenance works or with disruption, switch off the appliance and
disconnect the plug (pull the plug itself, not the lead) or turn off the fuse.
the mains lead have to be checke
must not be used.
For safety reasons, alterations or modifications of the
In order to ensure your children’s safety, please keep all packaging (plastic bags, boxes,
Do not allow small children to play with the foil. There is a
marked. It is essential to comply with these instructions in
to other people, please also pass on the operating instructions.
d regularly for signs of damage. If damage
ENGLISH
ENGLISHENGLISH
Introduction
Introduction
IntroductionIntroduction
WAR
WARNING
NING::::
WARWAR
NINGNING
This warns you of dangers t
CAUTION
CAUTION::::
CAUTIONCAUTION
This refers to possible hazards t
NOTE
NOTE::::
NOTENOTE
and the receipt. If you give this
•
fit for commercial use.
chine:
General Notes
General Notes
General NotesGeneral Notes
•
• Operate the appliance only
• Do not use it out
appliance with wet hands.
• Do not
not
not not
•
possibly
• The appliance and if possibly
is found the appliance
•
•
out of their reach.
WARNING:
WARNING:
WARNING:WARNING:
other
Do not use the
if
appliance are prohibited.
polystyrene etc.)
danger of suffocation!
danger of suffocation!
danger of suffocation!danger of suffocation!
17
Page 18

Special safety Information for this U
Special safety Information for this Unit
Special safety Information for this USpecial safety Information for this U
nit
nitnit
• Provision shall be made for adequate ventilation in the room when the cooker
hood is operated simultaneously with appliances that burn gas or other fuels.
• Attention!
Attention! Accessible parts of the appliance may become hot when used with
Attention!Attention!
cooking utensils.
• Do not flambé under the cooker hood! You can fry under the hood due to fire haz-
ard only under constant observation.
• Open the gas supply at gas stoves only when cookware is on the stove. Risk of
fire!
fire! The filter can be damaged.
fire!fire!
Risk of
Risk of Risk of
• Food during frying should be constantly supervised. By overheated oil can arise a
fire hazard
fire hazard.
fire hazardfire hazard
• Do not check the filter condition while the hood is in operation.
• NEVER use the appliance without fixed aluminum grease filter.
• If the cooker hood and other devices which are powered b other forms of energy
as electricity, served together, the pressure in the room should not exceed 4 Pa
(4x10
-5
bar).
• Regulations concerning the discharge of air have to be fulfilled.
• Follow the installation instructions. Note the instructions that we give you in the
chapter “Installation”.
• This appliance can be used by children
children aged from 8 years and above and persons
childrenchildren
with reduced physical, sensory or mental capabilities or lack of experience and
knowledge if they have been given supervision or instruction concerning use of
the appliance
the appliance in a safe way and understand the hazards involved.
the appliancethe appliance
• Children
Children shall not play with the appliance.
ChildrenChildren
• Cleaning and user maintenance
user maintenance shall not be made by children
user maintenanceuser maintenance
children unless they are
childrenchildren
use of
use of use of
older 8 years and supervised.
• The appliance must be cleaned regularly. Follow the instructions that we give you
in the chapter “Cleaning and Maintenance”. There is a risk of fire
risk of fire if cleaning is not
risk of firerisk of fire
carried out according to these instructions.
18
Page 19

•
Do not try to repair the appliance on your own. Always contact an authorized
technician. To avoid the exposure to danger, always have fault
only by the manufacturer, by our customer service or by qualified person and with
Remove the appliance from its packaging.
Remove all packaging material, such as foils, filler, cable
To prevent hazards, check the appliance for any transport damage.
In case of damage, do not put the
Production residue or dust may have collected on the
and Maintenance
original appliance may differ from the appliance pictured here.
Assembly material incl. drill template
There must be a safety distance between the hotplate of the
––––
installation instructions for the gas cooker spe
y cable be replaced
holder and cardboard packaging.
into operation. Contact your distributor.
appliance. We recommend cleaning the appliance a
1 x outer (lower) duct without ventilation slots
1 x inner (upper) duct with ventilation slots
ing pot on the hob and the
cm. For gas appliances, the distance must be at least 65 cm.
cm. For gas appliances, the distance must be at least 65 cm. cm. For gas appliances, the distance must be at least 65 cm.
cm. For gas appliances, the distance must be at least 65 cm.
ify a greater distance, this distance must be taken into consi
a cable of the same type.
Unpacking the Appliance
Unpacking the Appliance
Unpacking the ApplianceUnpacking the Appliance
1.
2.
3.
4.
NOTE
NOTE::::
NOTENOTE
cording to chapter “Cleaning
NOTE
NOTE:::: The
NOTENOTE
appliance
”.
Overview of the Appliance
Overview of the Appliance
Overview of the ApplianceOverview of the Appliance
1 Telescopic duct, 2-part
2 Control panel
3 Glass capture panel
4 Aluminum grease filter
5 Lighting
c-
Supplied parts
Supplied parts
Supplied partsSupplied parts
1 x glass capture panel
2 x non-return valve
extractor hood:
The distance must be between 45
The distance must be between 45
The distance must be between 45 The distance must be between 45
eration.
55
55
5555
Installation
Installation
InstallationInstallation
cook
bottom part of the
If the
c
19
d-
Page 20

Selecting the fume outlet
the extractor hood in two
The extracted air may not be
from appliances which are powered by gas or other fuels.
When venting the extracted air, comply with the regulations of the relevant local
The hood has an upper air outlet to vent
The extracted air is no
mally vented vertically. If
there is a suitable loft
space above your kitch
extracted air is vented through the wall
he roof ridge.
extraction vent to the
side; the
scribed under
sup
. To order, use the
the
Failure to use the mounting fixtures may lead to a
wall
When drilling the holes in the wall always make sure that no existing electrical cable
Make sure that the vents are clear of obstacles and are not covered.
vented into a flue which is used for the waste gas
there is a conduit in your
kitchen under the wall units,
extraction duct can be
routed so that the extracted
orizontally through the wall.
side; the hood can also work in
leased back into the room). In this case, two
bon filter for recirculation mode”, must be
bon filter from your
ber found under “Technical
the
extractor
Selecting the fume outlet
Selecting the fume outletSelecting the fume outlet
You can operate
Extraction mode
Extraction mode
Extraction modeExtraction mode
WARNING:
WARNING:
WARNING:WARNING:
•
•
authorities.
•
en, the
units and the loft floor to t
modes:
cooking odours to the outside.
r-
air can be vented h
• If
the
Recirculation mode
Recirculation mode
Recirculation modeRecirculation mode
If you do not have a direct
without an extraction vent to the out
vated carbon filter as de
used.
The activated carbon filter are not
accessories shop, www.bomann.de
Assembly
Assembly
AssemblyAssembly
WARNING:
WARNING:
WARNING:WARNING:
www.bomann.de
www.bomann.dewww.bomann.de
• When assembling or inserting
connected to the mains.
•
CAUTION
CAUTION::::
CAUTIONCAUTION
• Before mounting, check that the
•
out
filtered air is re
“Installing the activated car
plied. You can order the car
reference num
extraction filter as well as the carbon filter,
risk of electric shock
risk of electric shock.
risk of electric shockrisk of electric shock
has sufficient load capacity to bear the
recirculation mode (i.e.
acti-
dealer or in our online
Data”.
appliance must not be
hood.
s or other objects are
damaged.
•
20
Page 21

NOTE
endations for preparation work
endations for preparation workendations for preparation work
endations for preparation work
person
Wear protective gloves to prevent injuries from any sharp edges.
Determine the position of the extractor hood centrally above the hob in
Mark the necessary holes for the wall mounting by using the supplied drill template and check them with a
screws
for
A).
glass capture panel is fastened to the hood body with the screws (7) in the rubber plugs with
(4)
extraction hose (not supplied) with an inner diameter of Ø 150 mm must be attached
(Fig. C) and connected to the outside by the extraction outlet.
Hook the extractor hood into the suspension rail (1) (Fig. D). Check that it is secure and horizontally lev
Remove the protective plastic from the telescopic duct.
the mounting rail without the bracket (3). The rail is fastened to the holes
provided from the inside of the duct.
formance with the
Insert
as well as the mounting rail with bracket (2) to the top
cover
bending
(Fig.
NOTE:::: Recomm
NOTENOTE
Recomm
RecommRecomm
• When installing, ask another
•
1
4 5
•
safety distances.
•
spirit level.
• Drill Ø 8 mm mounting holes into
to assist.
2
6 7
con
the wall for the respective brackets (1+2+3).
3
8
specified
the dowel pins (5) and
fasten the brackets with the
• Attach the suspension rail (1)
edge parallel to the rail (1) (Fig.
• Before suspending the hood:
- the
washers (Fig. B).
- insert the non-return valves
For extraction mode:
For extraction mode:
For extraction mode:For extraction mode:
• Hereupon a flexible
•
•
(6).
the hood body
Determine the extension length of the duct
onto the extractor duct from above by gently
in advance!
them.
el.
• Fix the outer (lower) duct with
Screw in two plate screws (8) from the back
21
E).
Page 22

• Place the outer duct with the
fixed
Slide the inner (upper) duct along the slide fixture into the outer (lower) duct. Make sure tha
is aligned with the vents at the top.
duct or sliding back into the outer duct.
For extraction mode, correctly position the flexible
nd
(Fig. G)
n filter for recirculation mode
n filter for recirculation moden filter for recirculation mode
n filter for recirculation mode
um grease filter.
Place the carbon filter onto the air intake of the extraction duct. Make sure that the mounting pins on the
extraction duct engage the mounting slots of the carbon filter. Turn the respective filter clockwise until it
um grease filter
odours
The installation to the mains supply must conform to the local
Improper connection may cause to an
plug
The accessibility of the power plug m
Ensure that your mains power corresponds with the specifications of the appliance. The specifications are
le to a properly installed and earthed wall outlet.
Information to reduce the environmental effect of cooking
Information to reduce the environmental effect of cooking Information to reduce the environmental effect of cooking
Information to reduce the environmental effect of cooking
(acc. VO (EU) No. 66/2014 appendix I, No. 2)
(acc. VO (EU) No. 66/2014 appendix I, No. 2)(acc. VO (EU) No. 66/2014 appendix I, No. 2)
(acc. VO (EU) No. 66/2014 appendix I, No. 2)
The diameter of the pot and pan floors should be according to the
rail (3) onto the extractor hood (Fig. F). Fasten the rail (3) to the wall
Determine the extension length of the duct cover by pulling up the inner
previously
months
standards and regulations.
. If the plug does not fit properly to the outlet, let install a proper outlet by
appliance
size of the cooking zone.
parallel to the other rails (1+2).
•
•
• Pull the inner duct cover up a
screwing in the plate screws (8)
IIIInstalling the activated carbo
nstalling the activated carbo
nstalling the activated carbonstalling the activated carbo
• Remove the alumin
•
clicks into place.
• Reinstall the alumin
NOTE
NOTE::::
NOTENOTE
extraction hose (not supplied).
fasten the duct unit on the side to the
.
.
t the inner duct
mounted rail (2) by
The activated carbon filter absorbs
Electrical connection
Electrical connection
Electrical connectionElectrical connection
WARNING:
WARNING:
WARNING:WARNING:
•
•
• Do not modify the appliance
an authorized specialist.
•
supply in case of an emergency.
•
printed on the rating label.
• Connect the mains cab
and must be replaced at least every six
electric shoc
electric shock!
electric shocelectric shoc
k!
k!k!
ust be ensured in order to disconnect the
Startup / Operation
Startup / Operation
Startup / OperationStartup / Operation
regardless of use.
from the power
Cooker hood
Cooker hood
Cooker hood Cooker hood
22
Page 23

Use pans and pots with flat floors, uneven floors increase the energy consumption.
Ensure that there is sufficient supply air for the operation of the cooker hood.
Adjust the fan step intensity of the damp evolution of the cooking process.
To product the optimal effect of the cooker hood, install it according to the installation instructions. Keep the
distance between the upper edge of the cooker and the lower edge of the cooker hood.
Clean the filter regularly.
Controll the active carbon filter regularly and renew it as required.
Switch off the cooker hood after use.
If your cooker hood has a switch-off delay, activate this function.
Switch off the lighting after the cooking process.
We recommend the use of biological cleaners.
Information to professional users for disassembly
Information to professional users for disassembly
Information to professional users for disassembly Information to professional users for disassembly
(acc. VO (EU) No. 66/2014 appendix I, No. 2)
(acc. VO (EU) No. 66/2014 appendix I, No. 2)
(acc. VO (EU) No. 66/2014 appendix I, No. 2)(acc. VO (EU) No. 66/2014 appendix I, No. 2)
Cooker hood
Cooker hood
Cooker hoodCooker hood
Information for non-destructive disassembly for maintenance purposes
Please remove the filter and lamps as described in the manual.
Further steps of disassembly for maintenance are not provided
If you would like to exchange defective components, please contact our customer service.
Accumulators are not included.
Information for disassembly in terms of recycling, recovery and disposal at the end of the life of the appliance
Check that the unit is disconnected from the power supply before removing all filter from the hood.
First remove the chimney.
When disassembling the hood, be sure that you first loosen the lower and then the upper screws.
For the recycling and recovery of resources give the appliance, the lamps and the various filter to:
- a communal collection point of public waste disposal authorities
- a dedicated disposal company, offering a return system
- a resident electric trader, who voluntary withdraws electrical appliances
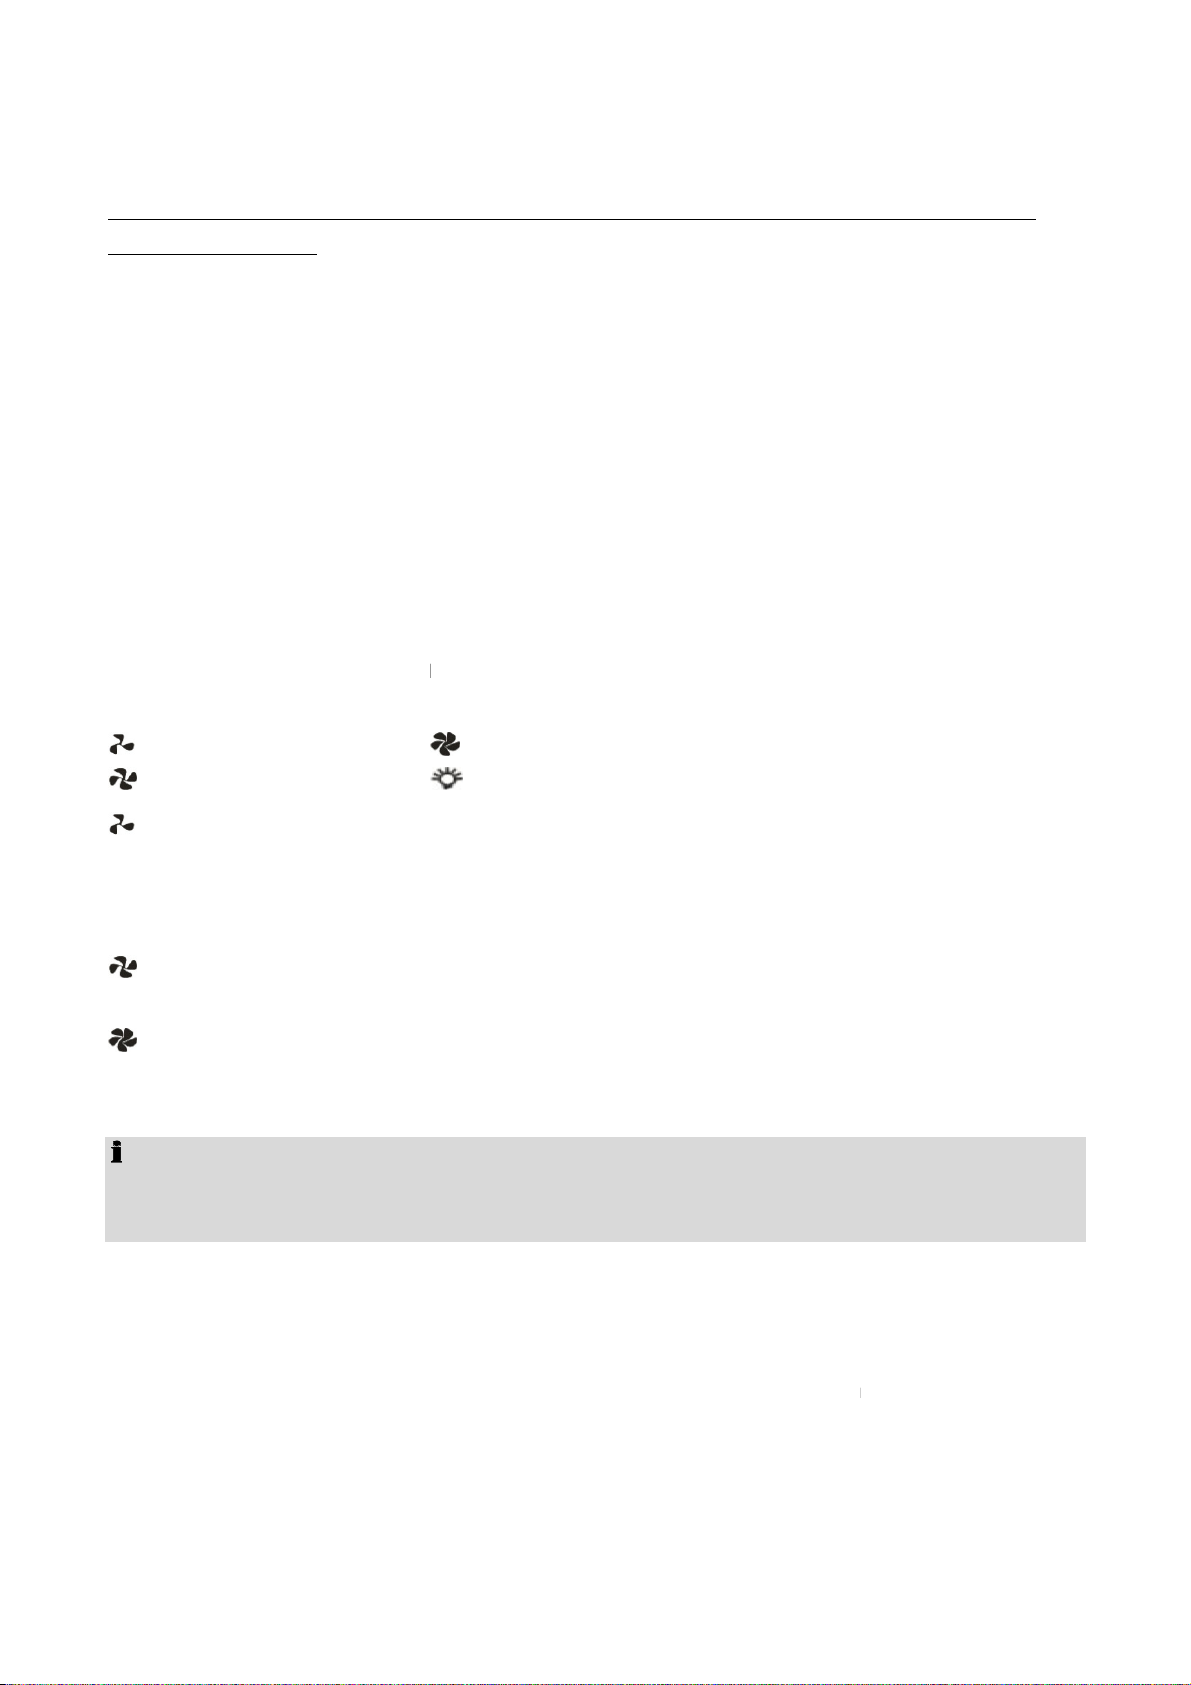
The extractor hood is operated via pushbuttons. The individual fan settings as well as the lighting can be
switched on and off with the corresponding buttons.
Lowest fan setting
Moderate fan setting
Highest fan setting
Lighting
Power level:
Power level:
Power level:Power level:
The motor begins to run at low speed. This setting is suitable for cooking on a low flame and for dishes which
produce no or little steam, in order to circulate the air around the kitchen.
Power level:
Power level:
Power level:Power level:
The motor runs at moderate speed. This setting is suitable for normal cooking.
23
Page 24

Power level
The motor runs at high speed. The setting is
f a lot of vapour is produced, the fan should be left running for a few minutes after cooking. Only leave the fan
running if absolutely necessary, since otherwise unnecessary energy is consumed.
there
tractor hood and
Before cleaning or maintenance wo
fore
Hot steam could dam
Do not use a wire brush or other sharp, abrasive items.
Do not use any acidic or abrasive
housing, use a mild
The appliance can be used again after
tractor hood in recirculation mode, you must
bon
Grease residues in the alumin
peratures. It is therefore important that the grease filter is regularly cleaned / r
filter
filter
solution
rinse
ke and steam need to be
ing of your
accessories should also be cleaned regularly for hygiene reasons.
connect
electrical
age the plastic parts. The device must be dry before restarting oper
vent scratching.
vated
um grease filter may ignite on exposure to high te
cleaned. We
cess,
filter
Power level::::
Power levelPower level
tracted or filtered (e.g. when frying).
NOTE
NOTE::::
NOTENOTE
I
The appliance and the operation
well as the filter. The ex
WARNING:
WARNING:
WARNING:WARNING:
•
switch off the fuse.
• Allow the unit to cool down be
• Do not uses steam cleaners for
electric shock!
electric shock!
electric shock!electric shock!
tion.
CAUTION
CAUTION::::
CAUTIONCAUTION
suitable if large quantities of smo
Cleaning and Maintenance
Cleaning and Maintenance
Cleaning and MaintenanceCleaning and Maintenance
of are best maintained by regular clean
rk, the device should always turn off and dis
cleaning.
cleaning the device; moisture could enter
extractor hood as
the mains plug or
components. Risk of
ex-
Risk of
Risk of Risk of
a-
•
•
• To clean the surface of the
•
• If you use your ex
(see “Replacing the activated car
Cleaning the alumin
Cleaning the aluminum grease filter
Cleaning the aluminCleaning the alumin
WARNING: Risk of fire!
WARNING: Risk of fire!
WARNING: Risk of fire!WARNING: Risk of fire!
placed.
um grease filter
um grease filterum grease filter
Grease and vapours collect in the
clean the grease filter monthly:
• Remove the aluminum grease
cleaners.
detergent and a soft cloth to pre
everything has dried properly.
replace the acti
filter”).
and may accumulate if not regularly
by sliding back the lock in the handle re
carbon filter regularly
m-
e-
recommend that you
push the filter down gen-
tly and pull out towards the front.
• Rinse the grease filter in a
• Then clean with a soft brush,
of hot water and neutral detergent. Soak the
thoroughly with hot water and leave to dry.
24
in the solution.
Page 25

• Alternatively, the grease filter
can
does
odours
dealer
“Technical
carbon
Remove the old carbon filter by turning the filter anti
placing
2 x 20 W
2 x 20 W 2 x 20 W
2 x 20 W
with a suitable tool.
formed repair brings danger to the user.
Repairs to electrical appliances must only be carried out by
must be changed only by a qualified electrician.
Before you contact an authorized specialist
Before you contact an authorized specialistBefore you contact an authorized specialist
Before you contact an authorized specialist
not connected to mains power
Have you set the power level?
60°C).
months,
www.bomann.de
www.bomann.dewww.bomann.de
www.bomann.de
an authorized specialist. A damaged power cord
Insert the plug properly in the contact soc
also be cleaned in the dishwasher (up to
Slight discoloration may
occur in the dishwasher. This
Replacing the activated carbon filter
Replacing the activated carbon filter
Replacing the activated carbon filterReplacing the activated carbon filter
The activated carbon filter absorbs
Order the carbon filter from your
reference number found under
• See “Installing the activated
•
Replacing the lighting
Replacing the lighting
Replacing the lightingReplacing the lighting
WARNING:
WARNING:
WARNING:WARNING:
Allow the lamps to cool before re
• Use the correct lighting:
• Carefully remove the lamp ring
• Change the lamp.
• Replace the lamp ring.
not affect the function of the grease filter.
and must be replaced at least every six
or in our online accessories shop,
Data”.
filter for recirculation mode”.
-clockwise.
the lighting. Risk of burns!
Halogen lamps (Type G4)
Halogen lamps (Type G4)
Halogen lamps (Type G4)Halogen lamps (Type G4)
Risk of burns!
Risk of burns!Risk of burns!
depending on use.
. To order, use the
A wrong or improperly per
Problem
Problem Possible cause
ProblemProblem
The appliance is
not working or
does not work
properly
Possible cause
Possible causePossible cause
- Is the unit
-
Repairs
Repairs
RepairsRepairs
Troubleshooting
Troubleshooting
TroubleshootingTroubleshooting
Solution
Solution
SolutionSolution
? -
et. Check the fuse.
- Check the setting.
k-
25
Page 26

Problem
Have you set the correct power
Is the grease filter dirty?
Are the carbon filter needed for recirculation
(correctly) installed?
Is the air outlet required for extraction mode
The lighting is faulty, was incorrectly installed,
lamp not secure in the fitting.
The grease filter is dirty.
after following the steps abo
Activated carbon filter for recirculation
The right to make technical and design modifications in the course of continuous product development r
Check the setting. The kitchen is not prope
Clean the grease filter (see
aluminum grease filter”).
Check the carbon filter (see “Replacing the
activated carbon filter”).
Check the air outlet.
lighting (see “Replacing the ligh
Clean the grease filter
ve, contact your trader or an authorized technician.
Glass capture panel 6
70.0
) Set: 2 units
Problem Possible cause
ProblemProblem
The appliance
does not run
efficiently
Possible cause
Possible causePossible cause
-
-
-
-
clear?
Solution
Solution
SolutionSolution
level?
-
r-
ly ventilated.
-
“Cleaning the
-
-
The lighting does
not work
Oil dripping from
the appliance
NOTE:
NOTE:
NOTE:NOTE:
If a problem still persists
Model
Model
ModelModel
Wall flue
Power supply
Lighting, halogen
Power rating
Protection class
Appliance dimensions H x W x D
Duct dimensions H x W x D
Check the
ing”).
Technical Data
Technical Data
Technical DataTechnical Data
DU 65
DU 657 G
DU 65DU 65
Glass capture panel 90 cm wide
220-240 V~, 50 Hz
2 x 20 W (Type G4)
50.0 x 90.0 x 34.5 cm
70.0 – 94.0 x 30.2 x 26.7 cm
7 G
7 G7 G
230 W
t-
.
DU 65
DU 658 G
8 G
DU 65DU 65
8 G8 G
0 cm wide
220-240 V~, 50 Hz
2 x 20 W (Type G4)
230 W
I
I
50.0 x 60.0 x 34.5 cm
– 94.0 x 30.2 x 26.7 cm
Net weight
Overview of dimensions,
figures in mm
mode
(not supplied)
mains reserved.
approx. 14.8 kg
KF 561 (Part no. 256 100
26
approx. 13.6 kg
e-
Page 27

Product data sheet for household
Product data sheet for household cooker hoods
Product data sheet for household Product data sheet for household
Brand
Brand
BrandBrand
Model
Model
ModelModel
Annual Energy Consumption (AEC
Annual Energy Consumption (AEC
Annual Energy Consumption (AECAnnual Energy Consumption (AEC
Energy Efficiency class
Energy Efficiency class
Energy Efficiency classEnergy Efficiency class
Fluid Dynamic Efficiency (FDE
Fluid Dynamic Efficiency (FDE
Fluid Dynamic Efficiency (FDEFluid Dynamic Efficiency (FDE
Fluid Dynamic Efficiency class
Fluid Dynamic Efficiency class
Fluid Dynamic Efficiency classFluid Dynamic Efficiency class
Lighting Efficiency (LE
1111))))
hood
)
Lighting Efficiency class3)
Grease Filtering Efficiency
Grease Filtering Efficiency class4)
Air flow at minimum speed in normal use
Air flow at maximum speed in normal use
Air flow in use at intensive or boost setting
A-weighted sound power emission in normal use
- at minimum speed
- at maximum speed
A-weighted sound power emission in use at intensive or boost setting
Power consumption in off mode (PO)
Power consumption in standby mode (PS)
1) A+ (highest efficiency) to F (lowest efficiency) 3) A (highest efficiency) to G (lowest efficiency)
2) A (highest efficiency) to G (lowest efficiency) 4) A (highest efficiency) to G (lowest efficiency)
cooker hoods aaaaccording to
cooker hoods cooker hoods
))))
hood
hood
hoodhood
))))
hood
hood
hoodhood
2)
2)
2)2)
ccording to regulation
ccording to ccording to
regulation (EU) No.
regulation regulation
kWh/a 111.0
lux/W 9 / 10
m³/h 456.2
m³/h 648.9
m³/h -
(EU) No. 65/2014
(EU) No. (EU) No.
65/2014
65/201465/2014
Bomann
Bomann
BomannBomann
DU
DU 657 G / DU 658 G
657 G / DU 658 G
DU DU
657 G / DU 658 G657 G / DU 658 G
C
19.5
C
E
% 57.6
E
dB 64
dB 71
dB -
W -
W 0.42
This appliance has been tested according to all relevant current CE guidelines, such as electromagnetic compatibility and low voltage directives, and has been constructed in accordance with the latest safety regulations.
27
Page 28

Meaning of the “Dustbin” Symbol
Protect our environment; do not dispose of electrical equipment in the domestic waste.
Please return any electrical equipment that you will no longer use to the
This helps avoid the potential effects of incorrect disposal on the environment and human health.
This will contribute to the recycling and other forms of reutilization of electrical and electronic equipment.
Information concerning where the equipment can be disposed of can be obtained from your local authority.
Remove or disable any existing snap and bolt locks, if you take the
collection points provided for their
out of operation or dispose it
Meaning of the “Dustbin” Symbol
Meaning of the “Dustbin” SymbolMeaning of the “Dustbin” Symbol
Disposal
Disposal
DisposalDisposal
disposal.
WARNING:
WARNING:
WARNING:WARNING:
appliance
.
28
Page 29

29
Page 30

30
Page 31

31
Page 32

C. Bomann GmbH
C. Bomann GmbH
C. Bomann GmbHC. Bomann GmbH
www.bomann.de
www.bomann.de
www.bomann.dewww.bomann.de
Made in P.R.C.
32
Stand 03/17
 Loading...