

Page 1
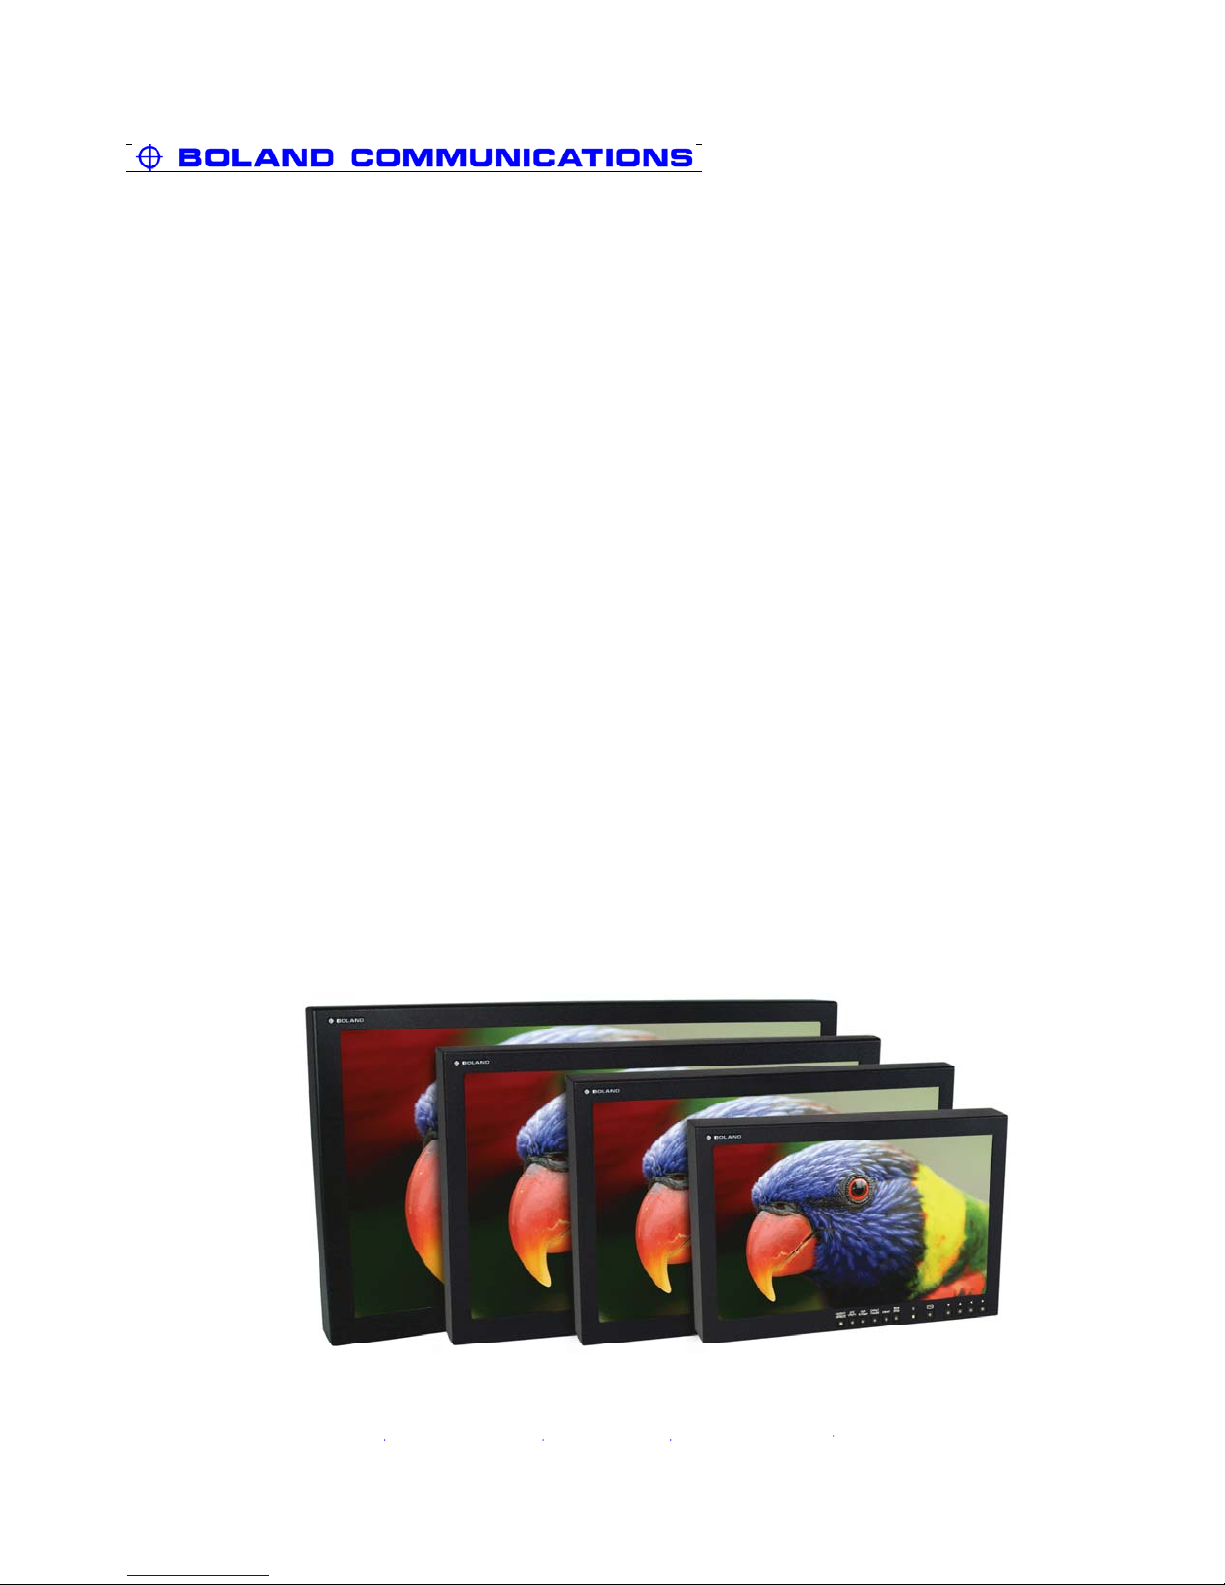
VIEWPORT Monitors
D igita l H D T V LC D V ide o M onitors
HIGH DEFINITION MODELS
HDTV: SDI & YPbPr: 1080/720 i/p/sF (23~60 Hz)
SDTV: NTSC/PAL/SECAM, NTSC4.43/PAL-M
Full PC VGA-DVI Support EGA through WUXGA
4:3, 16:9, Variable Aspect Ratios
H & V Scan Reverse
Picture-in-Picture
User Manual
6.5"- DHD65DB & LED
8.4"- DHD/DVI 84HR & 84DB
9.0" - DHD9W
10.4"- DHD/DVI 10HR
12.1"- DHD/DVI 12 & 12DB & DBLED
15"- DHD/DVI 15, 15W, & 15DB
for Mode ls:
17" & 17" W- DHD/DVI 17W & 17DB
19" & 20"W- DHD/DVI 19 & DB 20W & DB
24" & 26"- DHD/DVI 24 & 26
32" & 37"- DHD/DVI 32 & 37
42" & 47"- DHD/DVI 42 & 47
55"- DHD/DVI 55
including: -x1 , - x2 R a ckmounte d ve rsions
Lake Forest, CA 92630 (800) 918-9090 (949) 465-9911 Fax: (949) 465-9944 www.bolandcom.com
10b VIEWPORT Manual DHD-DVI 121908
Page 2

1 description
• overview
tors come with integral non-glare glass
The BOLAND Combi VIEWPORTS are high
performance LCD video displays for
computer and motion video display. The
display quality is excellent for both
natural and graphic video. The moni-
screens, and are part of the compliment
of 4.0 up to 37"
Video and Computer monitors. All offer
the size, brightness and clarity necessary
for extended daily use.
• standard features (included in all models)
Description
VIEWPORT family of LCD
SR: Scan Reverse. Picture may be
mirror-imaged Horz, Vert, or both for
prompting or other effects. Image may
also be rotated 90°
AR: Aspect Ratio. Display may be
switched between 4:3, 16:9, or adjustable
user settings (1.85, etc.)
UDS: Up/Down AutoScaling. A built-in
scaler automatically accepts any
computer resolution from less than CGA
up to UXGA for full screens.
PiP: Picture-in-Picture. Main image or
window image may each be any two of
the three video and computer inputs.
Moveable, sizeable window.
CF: Comb Filter. Intelligent, adaptive
NTSC Y/C filter provides full resolution
without artifacts.
AS: Automatic TV Standards (Worldwide)
NTSC/PAL/SECAM/NTSC4.43/PALM, all
autodetected.
US: Under Scan. Video mode picture
size fully variable from overscan to
normal to underscan.
PZ: Picture Zoom . Magnify images up
to 1000%. View window is pan-tilt
adjustable.
CT: Color Temperature. Screen
temperature fully variable, in PC and
Video, with four presets.
SDI: Serial Digital Interfaces (Options)
Input 270 Mb or 1.45 Gb digital video, for
standard or HDTV. Auto-detected.
Reclock/regen output(s).
• customer support
Boland provides a full range of support
from sales through installation and
application of our products. We are here to
help. Our office hours are extended, in the
Pacific time zone (GMT+8 in winter, +7
summer). To reach us:
1 VIEWPORT Manual DHD
BOLAND COMMUNICATIONS
(949) 465-9911, or
(800) 918-9090,
(949) 465-9944 [fax]
Lake Forest, CA 92630
Page 3

2 installation
• supplied items
Installation
Supplied with your LCD Monitor is a
desk-top universal 100-250 VAC, 50/60
Hz AC to 12 volt DC regulated power
supply, power and VGA cords, and this
instruction manual. Outside the US, a
• handling
A VIEWPORT display is rugged. As a
precaution though, please consider the
following general characteristics of AMTFT
LCDs. These are not defects or
malfunctions:
Please handle the panel with care. Since
the panel is made of glass, sharp blows to
the screen, failure after dropping onto a
hard surface, etc., are not covered by the
warranty.
local power cord may be needed.
Available options may include: SDI, High
Brightness (1850 nts), Remote Controls,
and VESA-, Rack-, Wall- Mounts, and
Desk Stands.
damage. Extended temperature models
are available. Please also take care to
avoid electrostatic discharges.
When a panel is not installed, place it in its
packing material or place it face down on
a smooth table.
After several thousand hours of operation,
the special internal fluorescent lamps will
eventually taper in their brightness. Please
consult the factory for replacement.
High voltages are present inside the
cabinet for the fluorescent lighting. There
are no fuses or other user-serviceable
parts inside. Do not remove any screws or
disassemble the cabinet to stay safe and
retain the Warranty.
to
Use only factory-specified power supplies
for powering the panel.
A wet, condensing atmosphere (dew or
fog) should be avoided. If you require
routine operation in these conditions,
please consult the factory (optional
cabinets are available).
Note the normal operating and storage
temperatures in the specifications. Do not
place the unit in the sun, as the black
cabinet can absorb a considerable amount
of heat. Extreme temperatures, just as
uncomfortable for people, will cause
degraded performance or permanent LCD
Over long periods of time, some changes
in luminance uniformity or small dots may
become visible, depending on image
content.
Avoid fixed video patterns for extended
periods of time. Some image retention
may temporarily occur. If possible, use an
interesting screen saver or black.
Please handle cables and connectors with
care. Please replace worn cables with
standard, locally-available parts (see
power supply substitution caution).
Note that although most Boland screens
are glass, they are still somewhat sens-
itive to scratching. Please clean with a
soft cloth slightly dampened (not dripping)
with water or, if necessary, Windex
®
type cleaners.
409
®
or
VIEWPORT Manual DHD 2
Page 4

• system requirements
Installation
VIEWPORT monitors operate on DC
power and display PC video with a 15
pin VGA connector, composite video
signal with BNC, or S-Video with a 4-pin
mini-DIN (or "S") connectors.
Monitors will display a composite or SVideo from a 525 or 625 standard video
signal at a nominal 1.0 Vpp (when
properly 75
video is 2.0 Vpp unterminated), and are
? terminated, where source
• physical mounting
When mounting the panel on a flat surface,
allow clearance for any connection cords on
the rear. In the corners on the backside of
monitors are 10-32 threaded inserts for
mounting screws. Use screws that don't
penetrate the cabinet more than ½".
Also on the backside of many models are 75
or 100 mm VESA pattern holes. These
holes may accept no. 6, 8, 10, M4, or M5
screws, depending on a model's size and
weight. The VESA holes are typically used
for wall mounts and desk stands.
for use as connected to all normal
baseband video systems. (The "C"
component of the Y/C signal is 0.7 Vpp
nominal.)
The built-in scaler very cleanly displays PC
images from CGA (320 x 480) to WUXGA
(1920 x 1200) resolutions. Boland models
for high resolutions formats, like HDTV, are
available.
Also, up to 15", a ¼-20 (UNC) threaded
socket is on the bottom side (not for vehicle
use).
The LCD monitors dissipate only a few watts
(see specifications), so no special cooling or
ventilation is usually required (except with DB
models). The mounting location may usually
be enclosed. But avoid any mounting
situations with appliance, environmental, or
solar heat sources that may cause the
monitor's operating location to exceed
122°F/50°C.
• power and video connections
VIEWPORT LCD monitors connect like
CRT-type monitors. The connections are
video and power:
Power Connection - 12 Volts DC
Insert the barrel or XLR plug from the
desk-top power supply into the jack on
the back of the panel. The AC side of
the power supply will accept 100-240
VAC, 50/60 Hz. Some monitors have
3 VIEWPORT Manual DHD
an optional 9 to 36 VDC feature built-in.
Video Connections
Most
connectors for composite, 4-pin for S-
Video and one VGA input video source
per screen (most screens have auto-
terminating loop-thru 75
Computer Connections (next page)
VIEWPORT monitors have BNC
? BNCs)
Page 5
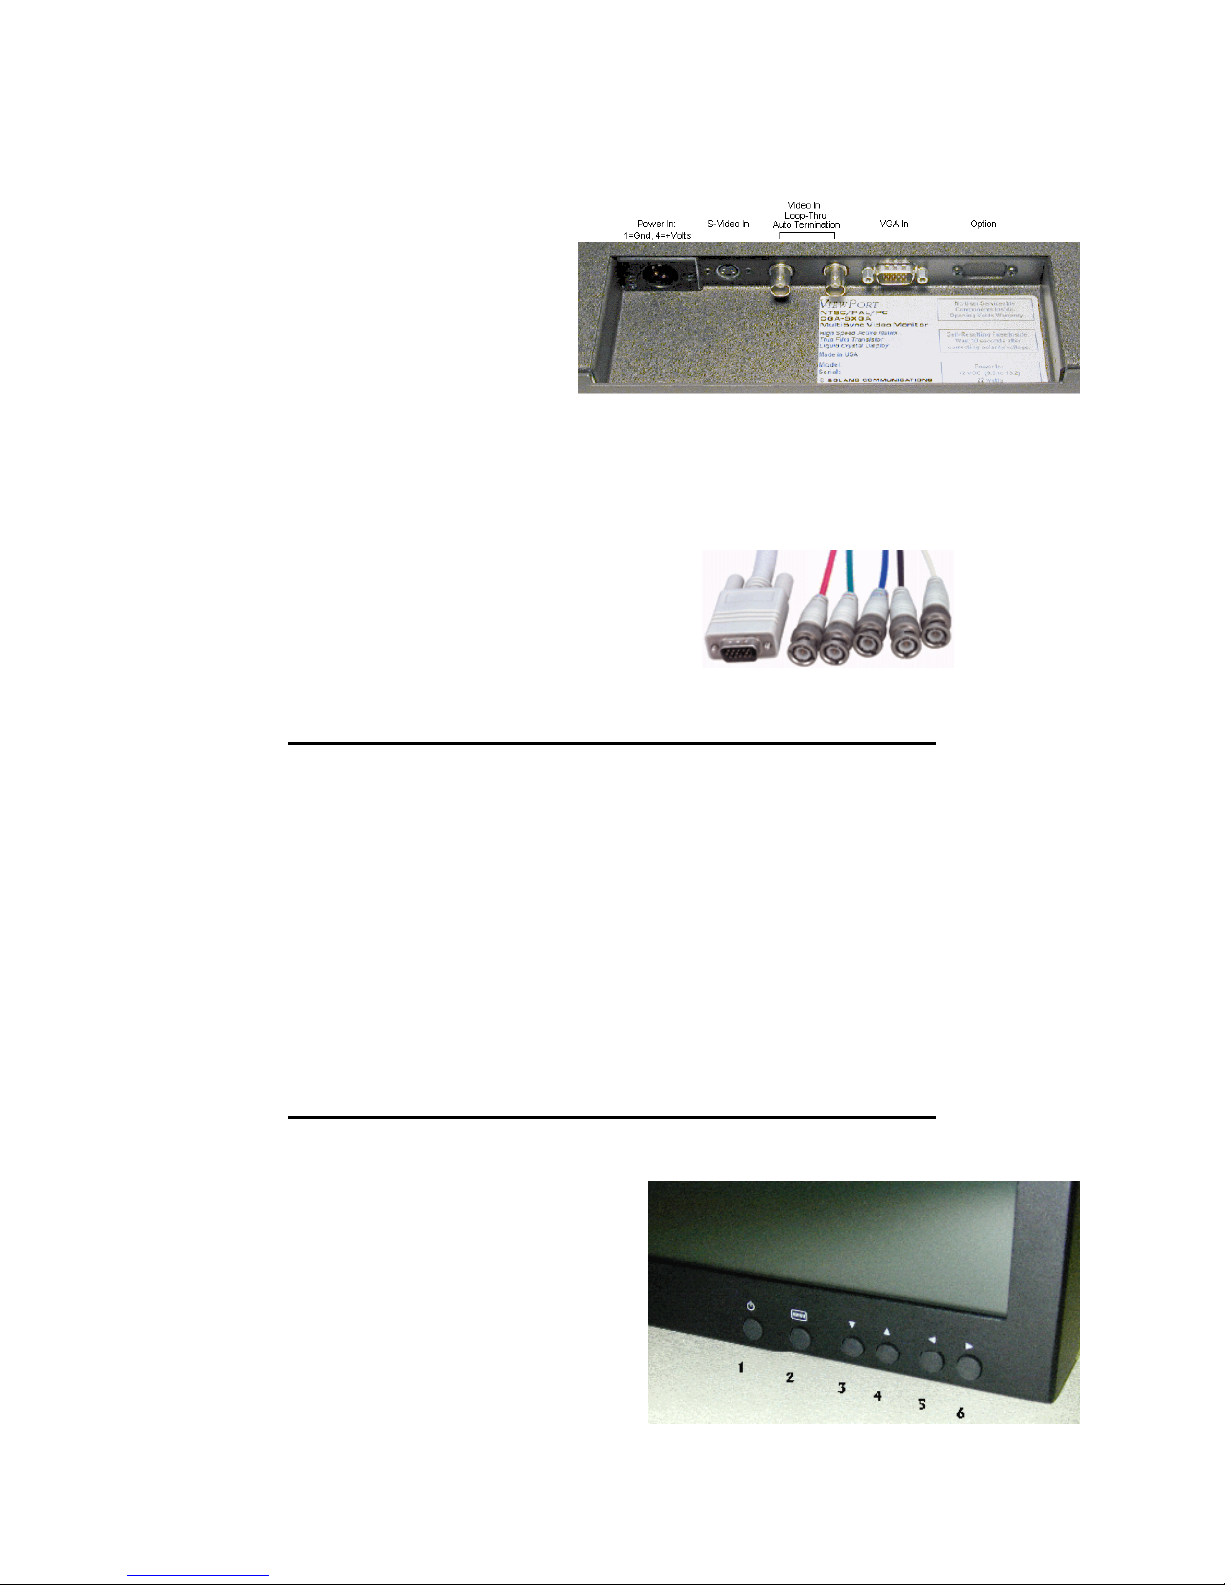
• computer connections
The "VGA" connection may be made
with the supplied cord, plugging a cord
into the back of the monitor and into
the (back) of the computer. Supply
the monitor with a CGA (320 x 480)
up to a WUXGA (1920 x 1200) signal.
A built-in processor will adjust the
image automatically to fit the screen.
See Page 10 for operation of the fan
switch located here.
YPbPr is connected into the VGA
input on some smaller models, and
optionally on all models. Use the R,
G,and B connectors of the supplied
VGA-5BNC cable shown.
Installation
Connector Well, typical of 10.4 to 20" Monitors
Breakout Cable, VGA to 5 BNCs. VGA input also accepts YPbPr.
3 Operation
Your VIEWPORT Monitor's On-Screen
menu provides for normal operational
adjustments. These user adjustments
are stored (memorized) separately for
VGA, Composite, and Y/C S-Video, and
separately for both NTSC and PAL
modes.
Push the menu button to bring up the
menu and to step down through the
icons. Starting on the subsequent pages
are all the menu choices and a
description of each item.
For normal operation, set the Brightness
to just be able to see the blackest
portions of the video image, then
Contrast to bring the whitest areas of an
image to just less than wash-out. Then
set Color and Tint [NTSC] for pleasing
flesh tones.
VIEWPORT Manual DHD/DVI/AHD 4
Page 6

Controls and Connections
Operation
Monitor Front Side:
1 Power On/Off
When power is applied, the monitor will
come on. This button then turns the
monitor on and off.
2 Menu On/Off
This button is used to bring up the
controls menu. Upon Exit the menu
clears from the screen, saving the new
settings chosen (or wait 10 seconds).
3 Select Down / Contrast -
Advance down the menu list with this
button.
Without pushing the
this button is Direct Access 2 to reduce
Contrast (lower whites level).
MENU button first,
4 Select Up / Contrast +
This is used to move up through the
menu list.
Monitor Back Side:
1 Input Connector Well, Power
(Recessed wiring location for all cables)
Place the plug from the world-wide AC
power supply (included) into the DC 12V
connector. Input power to the monitor
from any other source must be within the
DC Voltage range marked on the monitor
label or backside markings. (Some
monitors will accept 9~36 VDC).
2 Input BNCs, S-Video, and VGA
Connectors
Attach the video cord(s) from cameras,
VCRs, PC or other sources to the BNC,
Y/C (S-Video), or VGA connectors. When
two BNCs are present, connect a source to
either. A second cable will allow further
connection to another display or device.
The internal 75
automatically switched off.
? termination is
Without pushing the
this button is Direct Access 2 to increase
Contrast (raise whites level).
MENU button first,
5 Decrement / PC
Use to reduce (-) the amount of the
highlighted item. For some items, this
selects 'No' or 'Off'.
Without pushing the
this button is Direct Access 1 to select
the next active/available video source in
the list..
MENU button first,
6 Increment (Enter) / Video
Pushing this button increases (+) the
amount of the chosen item. For some
types of items, the button will chose 'Yes'
or 'Accept'.
Without pushing the
this button is Direct Access 1 to select
the next active/available video source
input in the list.
MENU button first,
3 Optional Audio and Speaker(s)
Audio inputs are high impedance. Some
monitors may have a jack to feed
external speakers.
4 Threaded Mounting Sockets
The corner threaded sockets are for
mounting the monitor. You may mount
monitors in any orientation. The screw
must not insert deeper than ½" (12 mm).
The threads are 10-32. See page 3 above
regarding VESA mounting.
5 ¼-20 Threaded Mounting Socket
For flexibility in mounting small models,
this bottom-side threaded socket for
locating the monitor on a tripod (like an
SLR or video camera, or other CCTV
mounting arm or device). Do not insert
the screw head deeper than 3/8" (8 mm).
5
VIEWPORT Manual DHD
Page 7
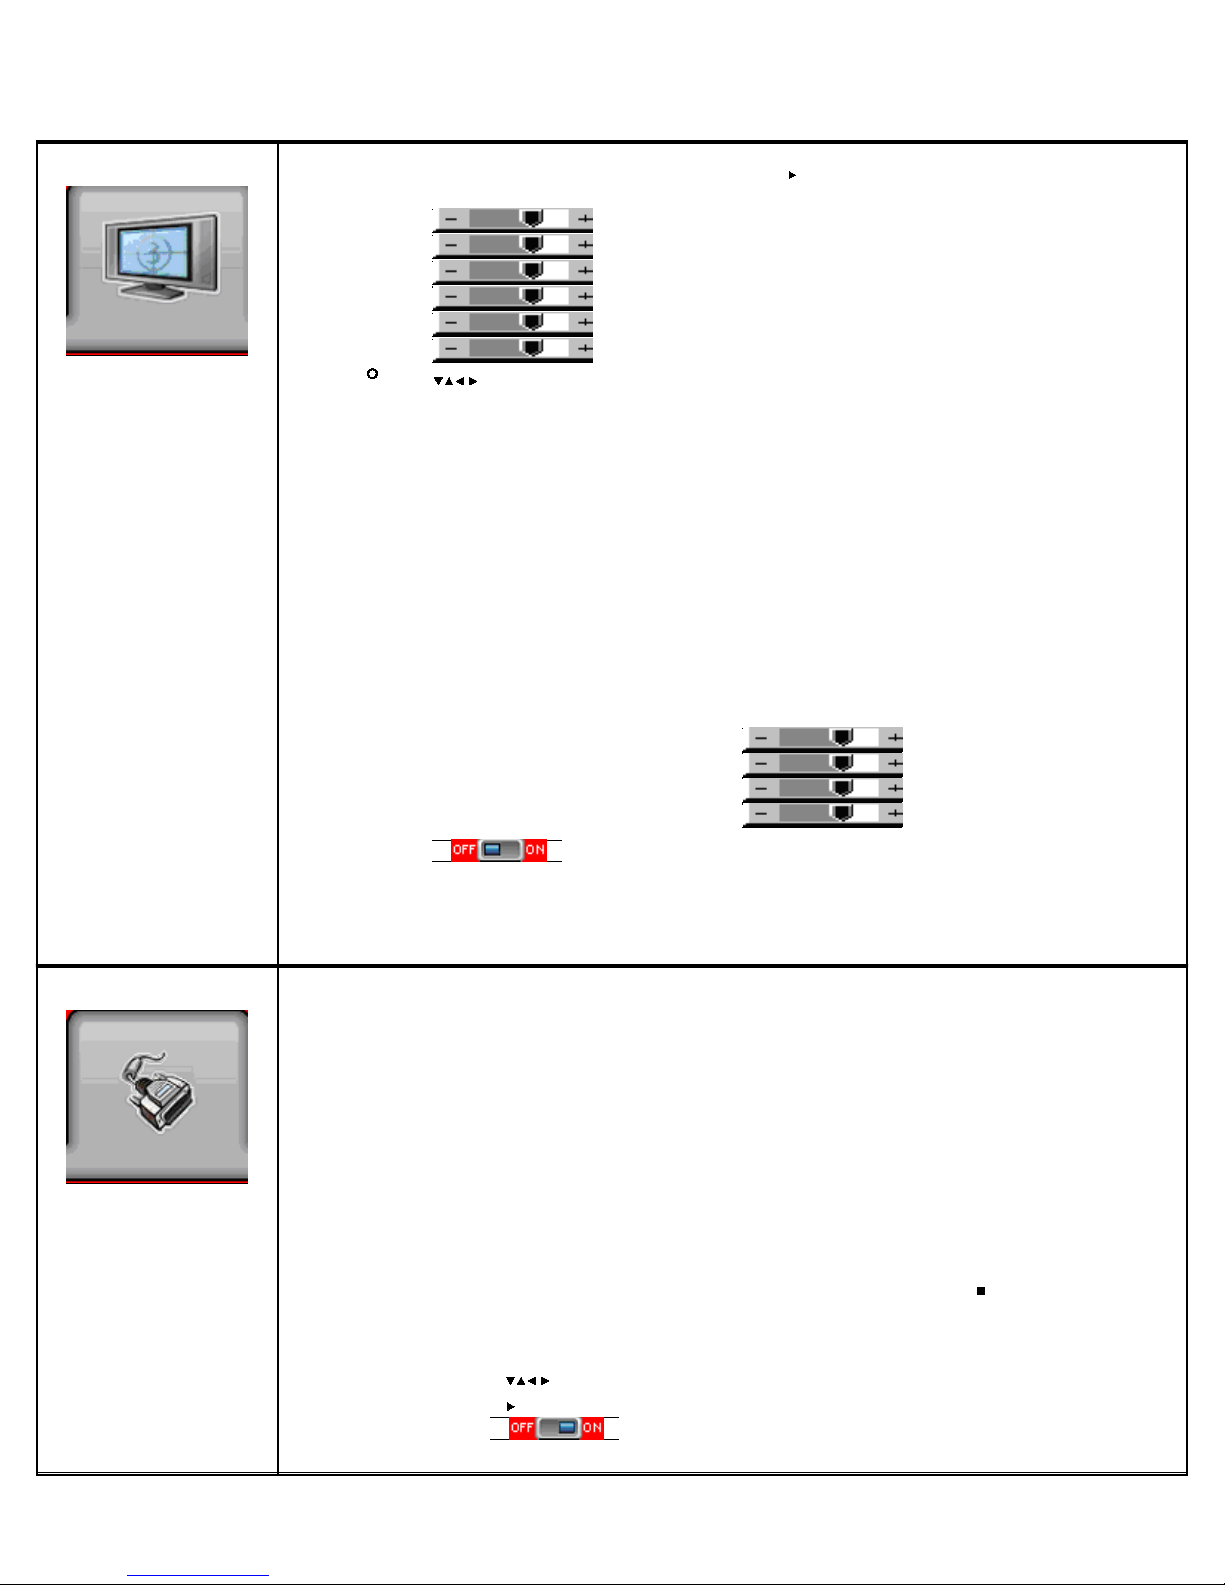
O S D M e nu F unctions Note: Software updates may enhance these menu offerings (0.45.70 and later).
Picture M e nu Note: ">" indicates a sub-menu (use but ton to Enter)
Brightness brightness level (picture blacks level) (100 steps)
Contrast contrast level (picture whites level) (100 steps)
Saturation colors saturation (100 steps)
Hue hue of colors (flesh tones) (100 steps)
Sharpness* sharpness of picture (30 steps)
Left M e nu
NOTE:
Monitor factory signal
calibration settings
are:
50 / 50 / 50 / 0 / 0
Backlight slider can
be used to calibrate
monitor brightness to
SMPTE 25 footlamberts value.
Many menu functions
can have speed
access with Hot Keys
(see HK1 and HK2 in
Utilities Menu).
Backlight panel lamp brightness (10 steps)
Position > Arrow Keys : Adjust image position on screen (VGA input only)
Aspect S iz e > Fill Screen : Enable full screen expansion for lower resolutions
Fill to Aspect Ratio: Enable automatic screen sizing according to
source image's aspect ratio (height or width)
4:3 : sizes image to 4:3 format
16:9 : sizes image to 16:9 format
16:10 : sizes image to 16:10 format
2.35:1 : sizes image to 2.35:1 ratio format
2:1 : sizes image to 2:1 ratio format
1:1 : displays the image in native image resolution with-
out image expansion/reduction (pixel-for-pixel)
Custom Sizing :
Overscan : Image is magnified, edges of image not displayed
Normal : All of image content is visible on the screen
Custom/Underscan : I mage size is variable, shifted
(Displayed for HD- or SD-SDI, Composite, and S-Video sources)
H Size
V Size
H Pan
V Pan
Blue O nly Turns off the red and green channels for calibration of
Saturation and Hue using test signal (75% SMPTE color
bars or equivalent).
*
Displayed for HD- or SD-SDI, Composite, and S-Video sources
Input S e le ct M e nu Push Menu button twice within 1/2 second to directly access this menu.
Note: Only installed inputs for this monitor model are displayed, and then only
HD/SD SDI 1
HD/SD SDI 2
VGA
DVI
HD C ompone nt
Ce nte r M e nu
Center Menu selects
the main and PiP
inputs.
PiP Source is Inserted
video for both Picture in
Picture [PiP] and Picture
by Picture [PbP] modes)
Composite 1
Composite 2
S-Video
PiP >
PiP Source (See PiP group selection limitations note on page 9
OFF / HD/SD SDI 1 / HD/SD SDI 2 / VGA / DVI / HD Component / Composite 1 / Composite 2 / S-Video / SD Component / OFF
PiP Size > Off / Small / Medium / Large / PbP (Picture by Picture)
PiP Position> Arrow Keys: Adjust PiP window position within screen
Pip Swap > [Enter], Trades contents of main screen and PiP window
Pip Auto Off Auto remove PiP window if signal is lost (10 sec)
10b VIEWPORT Manual hd/xd/d 122008 66
if enabled in the Utilities Menu under Setup, Auto Source Seek.
)
Page 8
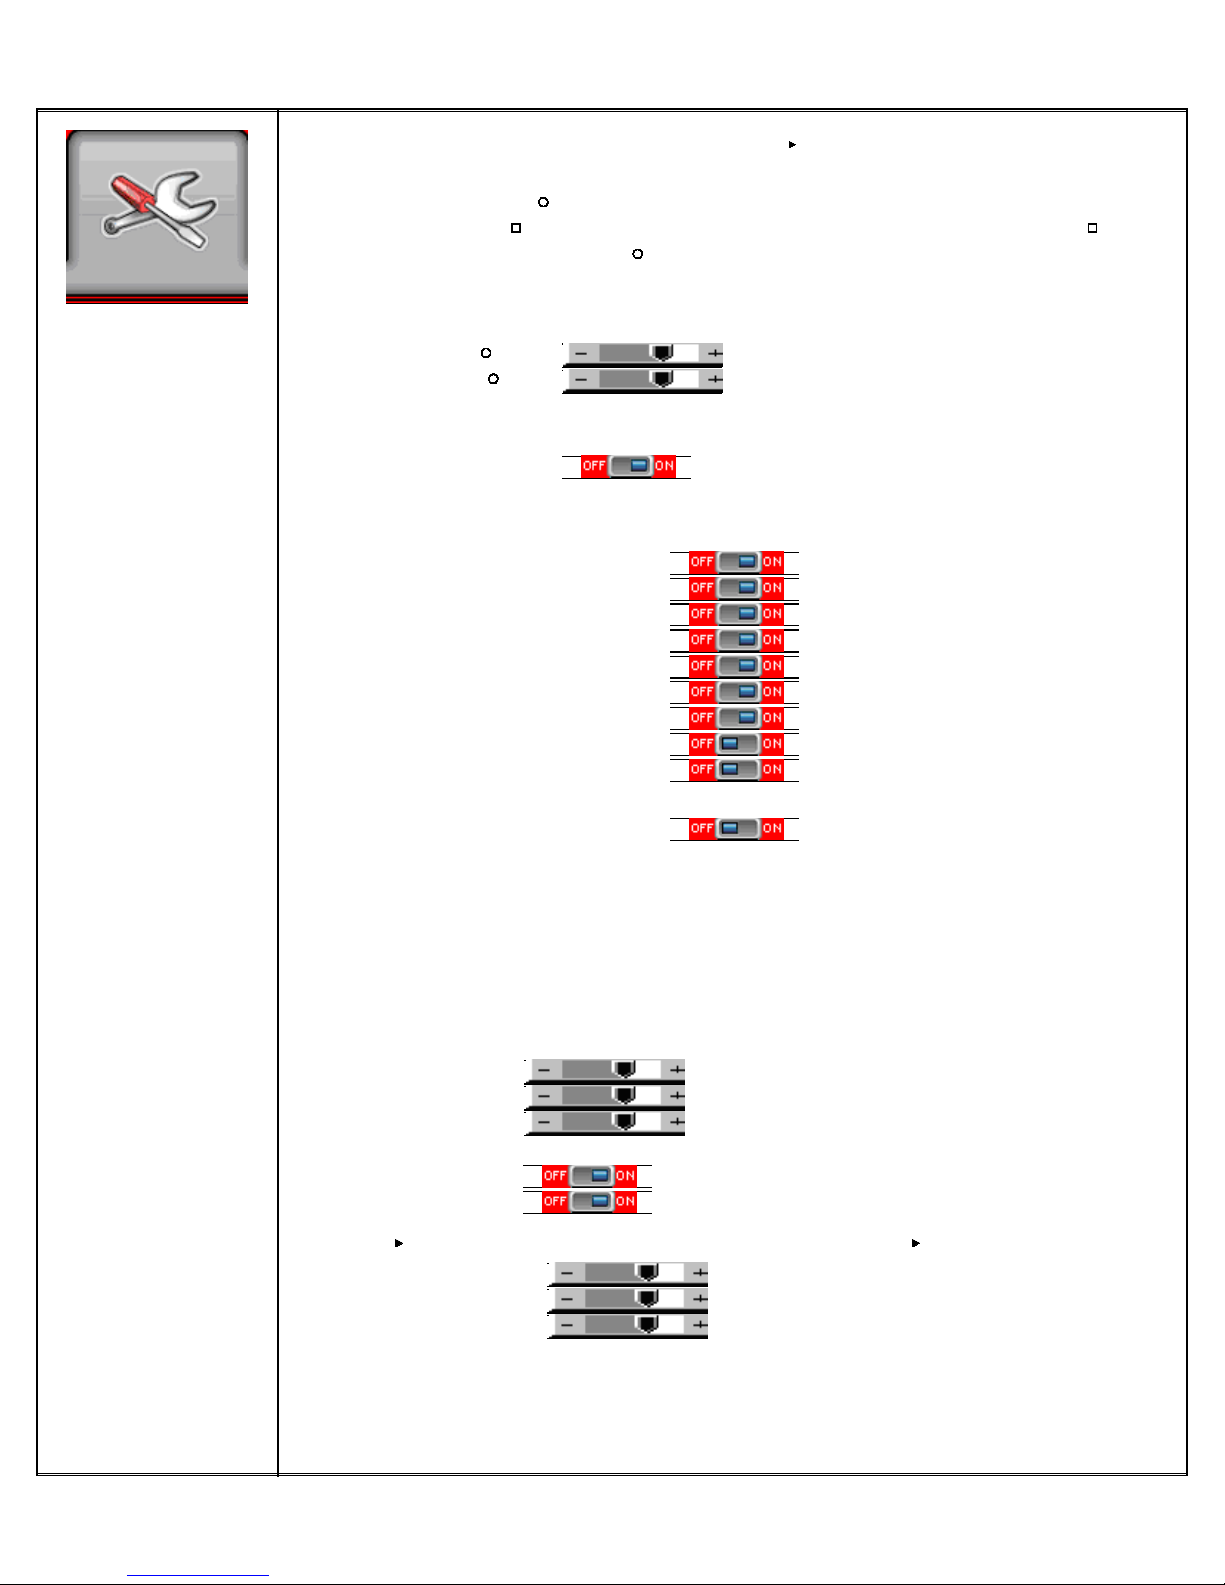
Utilitie s M e nu Note: ">" indicates a sub-menu (use butt on to Enter)
Right M enu
Utilities Menu is used
at installation to set
up basic monitor
behavior.
Note: Not all inputs
are installed in all
models (see back
panel for available
input connectors).
Setup >
Auto Picture Setup:
Auto Color Gain:
Auto adjust the image position, phase and size
Auto Color Calibration (RGB white levels)
Wide Screen Mode detection : Choose which aspect wVGA mode to use:
- Off
- 1280x768 Widescreen
- 1366x768 Widescreen 16:9
Manual Clock : Adjust the image horizontal size
Manual Phase : Adjust image quality (fine tune the data
sampling position)
Auto Source Seek >
Auto
ON: The monitor will Seek another input if a signal is lost or missing.
OFF: Seek function is disabled (No inputs will change except by choice)
Setup >
HD/SD SDI 1
Choose to display and Auto Detect
HD/SD SDI 2 signals (if ASS=On) for these inputs.
VGA
DVI
HD Component
Composite 1
Composite 2
S-Video
SD Component
Note: only the names set to ON will display within the Input Select Menu.
Auto Power > (also known as: DPMS)
(Automatic monitor power Off for missing signals; power auto On when signal returns)
ON: Enable soft power off in absence of an input signal
OFF: Disable soft power function
Video Standard (SD)* > Auto / NTSC / NTSC 4.43 / PAL / PAL M / SECAM**
Image Orientation > Normal / Horizontal Flip / Vertical Flip / Rotate
Gamma > 1.8 / 1.9 / 2.0 / 2.1 / 2.2 / 2.2 / 2.3 / 2.3 / 2.4 / 2.5 / 2.6
OSD > (
On Screen Display menu system)
** Standard Definition
OSD Position >
H POS move the OSD menu box horizontally
V POS move the OSD menu image vertically
OSD Timeout > OSD menu timeout period, 5 to 60 seconds
Note: Selecting "0" time keeps display ON until Menu button is used to exit.
Transparency Sets OSD to Transparent or Opaque background.
Display Input Enables source ID in upper right corner for 10 sec.
Freeze [Enter] Green dot indicates frozen image; push again to unfreeze.
Zoom > Zoom Level 0 - 100 Magnifies the image.
Horiz Pan -100 - +100 Moves the view window L/R.
Vertical Pan -100 - +100 Moves the view window U/D.
Reset Returns Zoom and Pan to off.
7 122008 10b VIEWPORT Manual hd/xd/d
Page 9
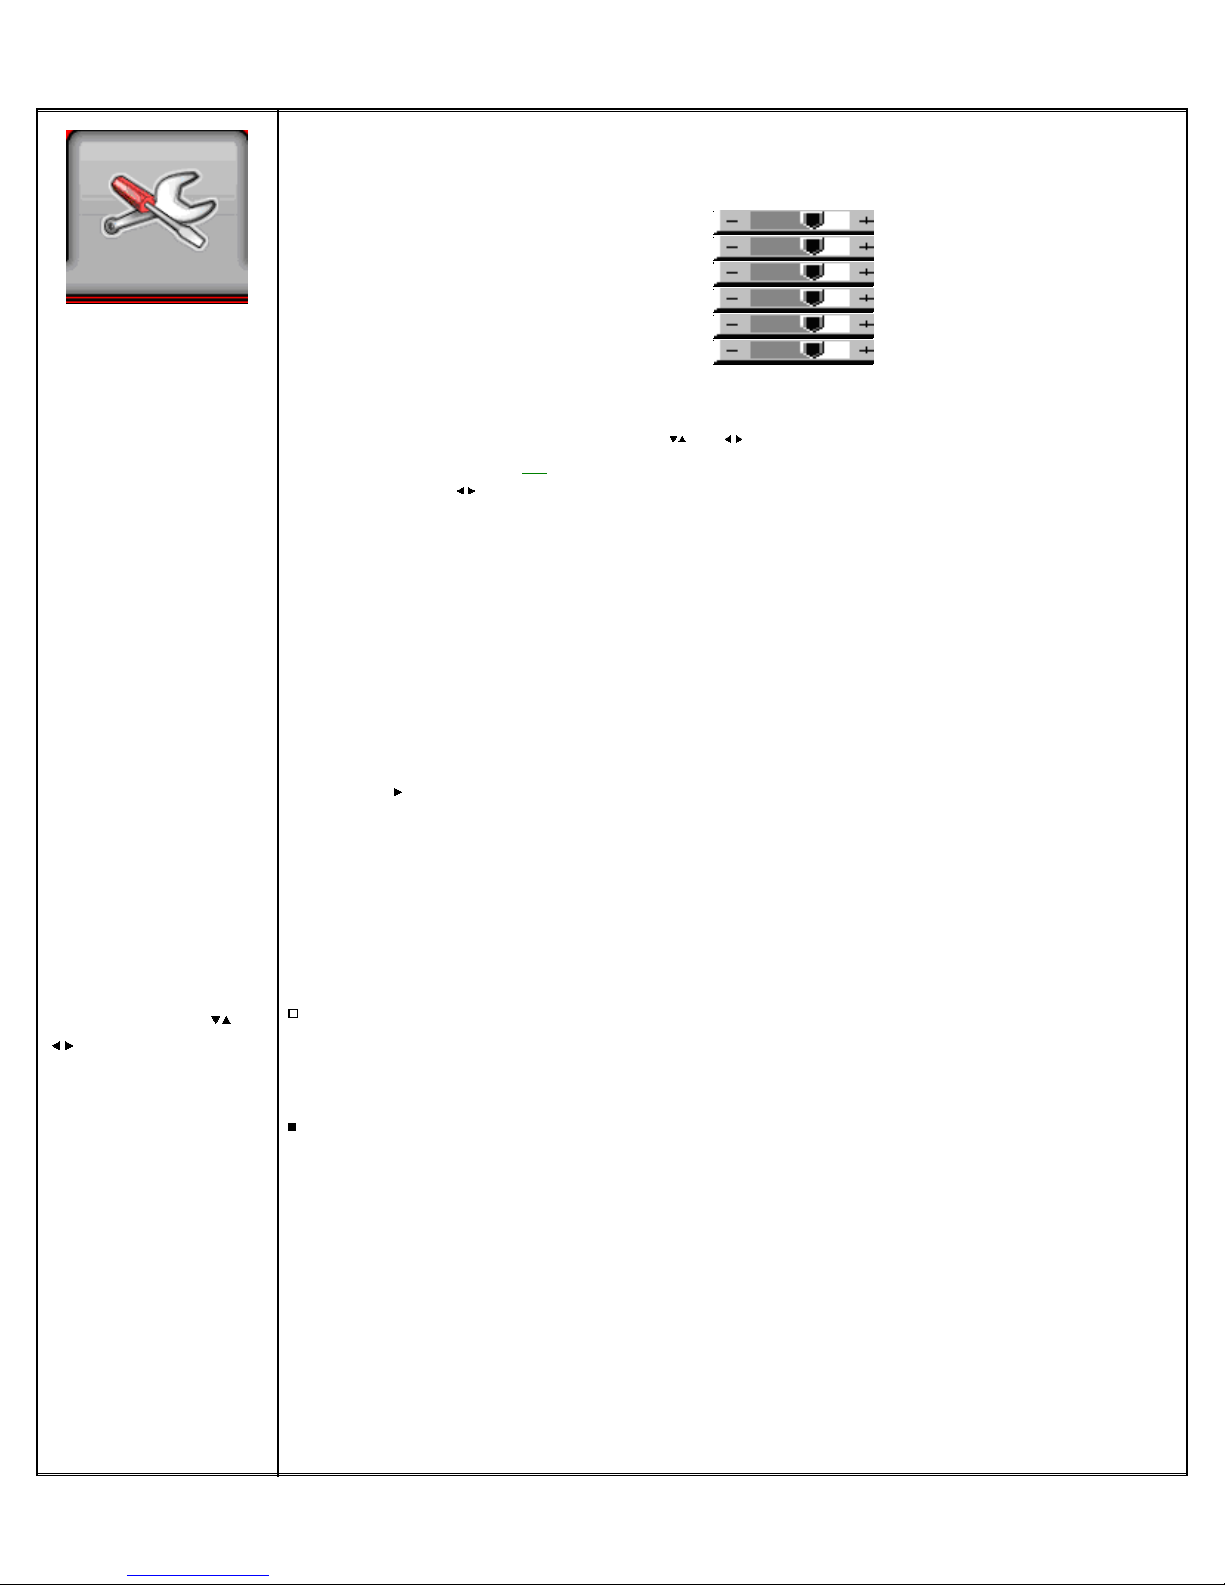
Utilitie s M e nu (continued)
Right M enu
Utilities Menu is used
at installation to set
up basic monitor
behavior.
Color Temperature is
used to calibrate
screen white point.
Each temperature
has an individual
RGB Gain/Bias
submenu.
Hot Ke ys:
Assignable shortcut
keys can give quick
access to your
favorite menu
functions without
having to open and
navigate the full
menu. Use the two
arrow key pairs ,
, to directly access
several functions
listed at right.
Color Temperature >
Note: settings are remembered separately for each input source by name.
Red Gain 0-100
5000 K > Green Gain 0-100
6500 K > Blue Gain 0-100
8000 K > Red Bias -50 - +50
9300 K > Green Bias -50 - +50
Blue Bias -50 - +50
Load Defaults : Restores initial factory Color Temperature value sets.
Hot Keys > Sets operation of button pairs ( [ 2], [1]) to access functions directly when OSD
menu is not
Use arrow keys to rotate through available choices of functions. Use Menu to select:
visible.
Hot Key 1: Brightness / Contrast / Input / Aspect / Zoom / Freeze / PIP Size / PIP Swap /
Image Orientation / Saturation / Hue / Backlight / Auto Pix Setup /
Hot Key 2: Brightness / Contrast / Input / Aspect / Zoom / Freeze / PIP Size / PIP Swap /
Image Orientation / Saturation / Hue / Backlight / Auto Pix Setup /
Monochrome Mode: (Color picture is converted to monochrome (Y) and displayed in one primary.)
Red Monochrome (mono picture is displayed in shades of red)
Green Monochrome (mono picture is displayed in shades of green)
Blue Monochrome (mono picture is displayed in shades of blue)
Reset to Factory Defaults
Use key to initiate a Reset, returning monitor settings to factory original.
CAUTION: All above previous user menu choices are lost!
* Not displayed for all input signal types, appears only as appropriate.
Displays in VGA mode only.
°
Displays in VGA and HD Component modes only. To initiate Auto Color Mode, connect and view a
known signal containing large areas of pure black and pure white. Monitor will adjust R, G, and B gains
for equal level channel match and set blacks to match zero levels. Subsequently, Color Temperature can
be set for this input (although values are usually the same as for other inputs).
PiP Group Note: Four possible input group combinations that can be selected for PiP:
a) VGA / HD-component
b) DVI
c) HD/SD SDI
d) Composite / S-Video / SD-component
Main and PiP must be from two different groups. Those input group combinations not allowed are
grayed-out in the menu. Not all inputs are present on all models.
10b VIEWPORT Manual hd/xd/d 122008 88
Page 10
Operation
High Bright Monitors
Description
The High Brite Option is a factory-installed accessory for an LCD video monitor to boost
its brightness to full daylight readability. The 6, 8, 12, 15 an 19"" displays are specified
at 2150, 1400, 1650, 2100, and 1650 nts (cd/m²) respectively.
Operation
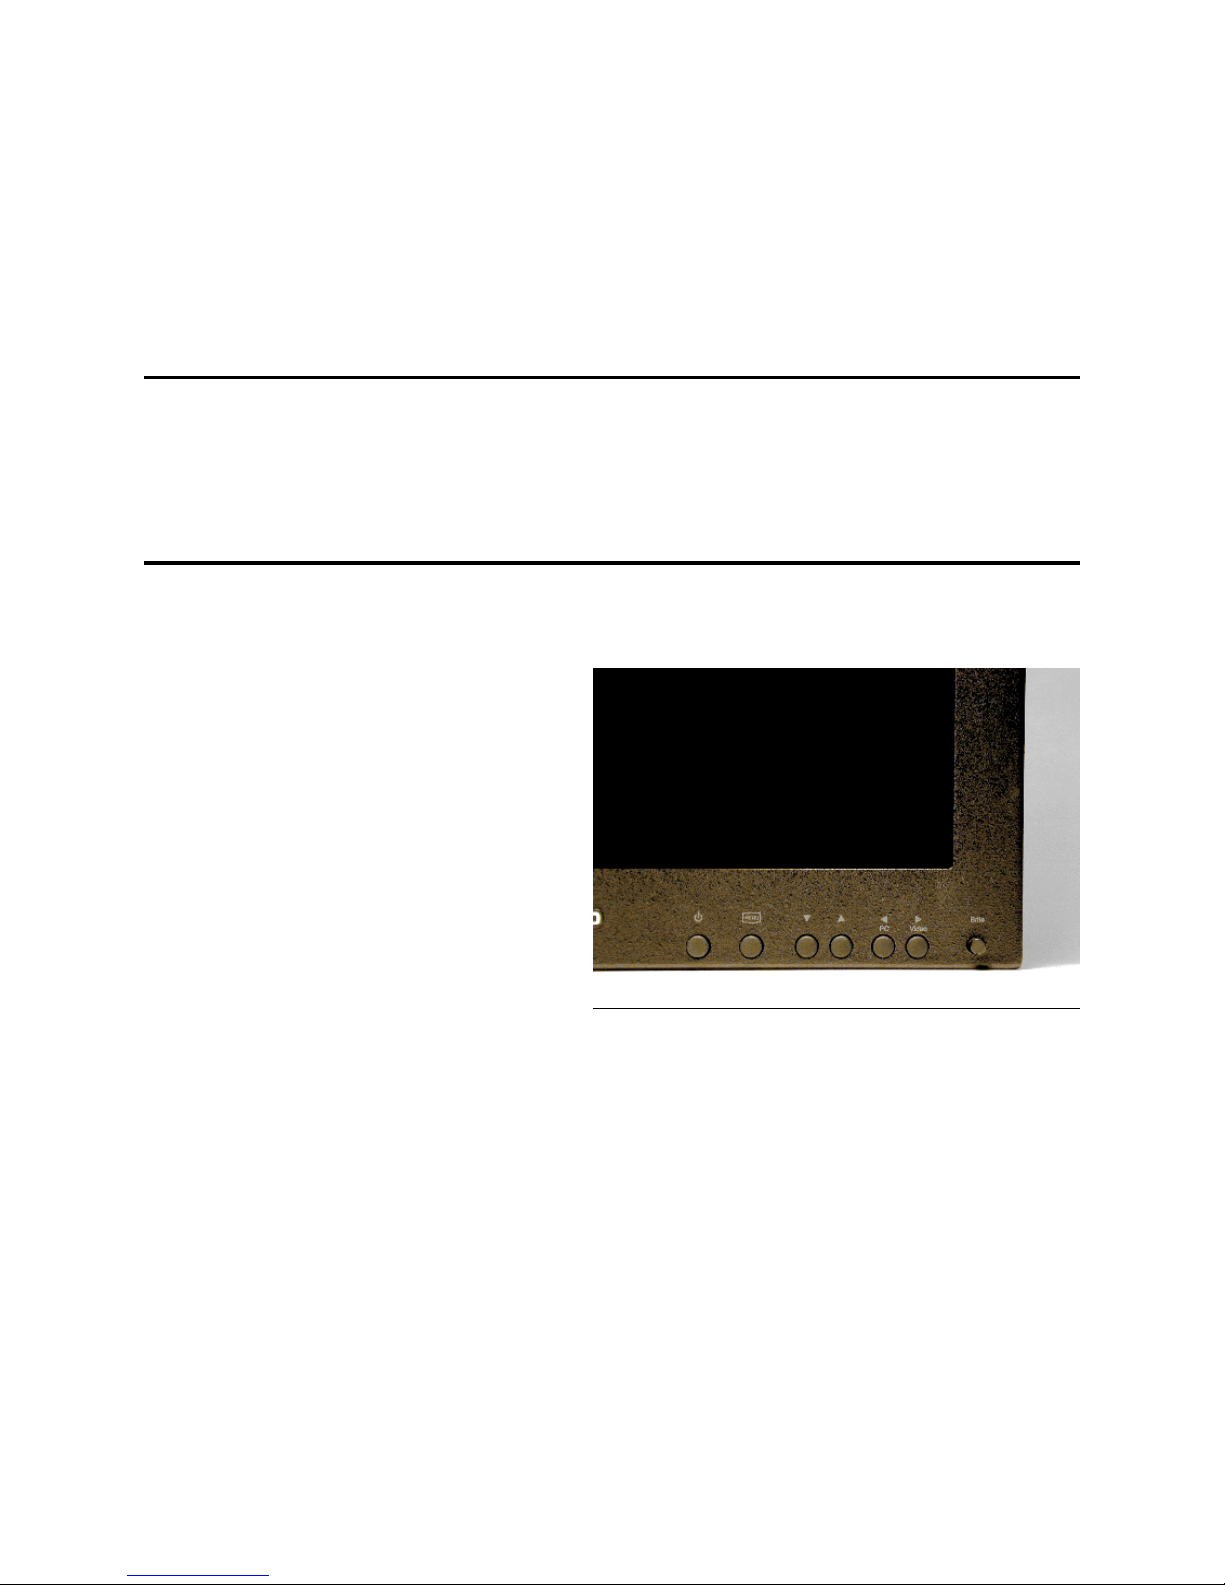
In addition to the standard button
controls of a normal monitor, the menu,
a button, or optionally a knob may be
found on the front panel to control the
brightness of the internal lamps. With a
range of nearly 100:1, the brightness can
be adjusted to outdoor daylight
conditions down to minimum for night
use. Power consumption is quickly
reduced at less than the full setting. The
brightness can be set to any value
without having to change the electronic
video adjustments in the menu
(Brightness in the menu means the video
adjustment of the glow in the black areas
of the picture. Contrast is used to set
the whiteness of the lightest areas of the
picture.)
Note: DayBrite models usually have a fan switch located in the backside/well area. Use
the fan switch to keep the cabinet cool enough to touch. For example, with the bright
knob full clockwise, at noon in the sun, you will need the HI setting. Without sunshine
or full CW, LO or OFF may be sufficient to keep the cabinet cool.
9 V IEWPORT Manual DHD/DVI/AHD
Page 11

4 Maintenance
A VIEWPORT display requires no
regular/periodic maintenance.
Maintenance
• Cleaning
The standard cabinet finish is semi-gloss
black paint over aircraft aluminum, or the
aluminum cabinet itself is mil-spec blackdye anodized.
• Factory Service
After about fifty thousand hours of service
(as long as 10 years, even if used often,
depending on the Boland model), it may
be possible to notice the screen
brightness start to fall to half or less of its
original level. Or, the internal fluorescent
lamps may not come on at all, or stay on
properly, especially when
Up to 20" screens are non-glare glass. A
damp (not dripping) cleaning cloth with a
small amount of spray cleaner (such as
®
, or Windex®) may be used to remove
409
dust or fingerprints. You will not want to
have enough moisture on the outside of
the cabinet that liquid would run inside
through the cracks.
the temperature is cold. In these cases,
the full brightness may be restored by
replacing the special type of internal
fluorescent lamps (not user serviceablethese require extreme care in a very clean
environment). Please contact
COMMUNICATIONS
for factory
BOLAND
replacement.
• Warranty (Note: opening the cabinet voids the warranty)
VIEWPORT Video Displays are warranted
for two years against defects in materials
or workmanship (see the
Agreement
, page 15).
Consequential damages are not covered.
Units requiring attention will
VIEWPORT Manual DHD 10
Warranty
need to be returned to the factory for
correction. Telephone for a tracking/RA
number before shipping. Units will be
returned UPS Ground pre-paid. Warranty
correction is at best an inconvenience, so
every reasonable effort will be made by
BOLAND to smooth the process. Via email,
contact us at: [email protected].
Page 12

BOLAND COMMUNICATIONS
WARRANTY AGREEMENT
All products, including hardware, software, firmware, and documentation are subject to the terms
below. Opening the monitor cabinet in any manner for any purpose voids the warranty.
1 .
Boland Communications (Boland) warrants the
are provided to be free from defects under normal use. Parts are covered for a period of two (2)
year s and Labor is covered for one (1) year from the date of delivery to you.
2 .
In the event of a repair under this warranty, Boland's sole obligation is to replace or repair, at
Boland's option, any Product free of charge. Any replaced parts shall become Boland's property.
3 .
Warranty claims must be made during the warranty period and within seven (7) days of the
observation of the defect, accompanied by any necessary evidence satisfactory to Boland. Prior
to returning any Product to Boland, you must obtain a Return Authorization (RA) Tracking Number
and receive shipping instructions from Boland. Shipme nts w ithout an RA are subject to re fusal
at Bola nd dock. All Products returned to Boland contain glass and shall be adequately packed
(200 lb. corrugated carton and 2" foam on all six sides of product, minimum) and shipped w ith
freight and insurance sender-prepaid or the warranty coverage will be void and are subject to
return unrepaired. Boland will return all repaired units in double cartons and cushion packaging
via pre-paid UPS Ground, Insured. Customer may pr ovide ow n shipping number or ar range an
upgrade for a faster return.
VIEWPORT LCD Monitors and their accessories
Warranty
VIEWPORT warranty 01-04-09
4 .
Except as stated above, there is NO OTHER WARRANTY, REPRESENTATION, OR
CONDITION REGARDING BOLAND'S PRODUCTS, SERVICES OR PERFORMANCE,
EXPRESSED OR IMPLIED, INCLUDING, BUT NOT LIMITED TO, THE IMPLIED WARRANTIES
OF MERCHANTABILITY AND FITNESS FOR A PARTICULAR PURPOSE.
5 .
Boland is not responsible for any delays beyond its control, and where possible will advise of any
such delays. Boland's entire liability for damages to you or any other party for any cause
whatsoever, whether in contract or in tort, including negligence, shall not exceed the price you
paid for the unit of Product that is the subject matter of the dispute. In no event will Boland be
liable for any damages caused by your failure to perform your obligations, or for any loss of data,
profits, savings, or any other consequential and incidental damages, even if Boland has been
advised of the possibility of damages, or for any claims by you based on any third-party claim.
 Loading...