

Page 1
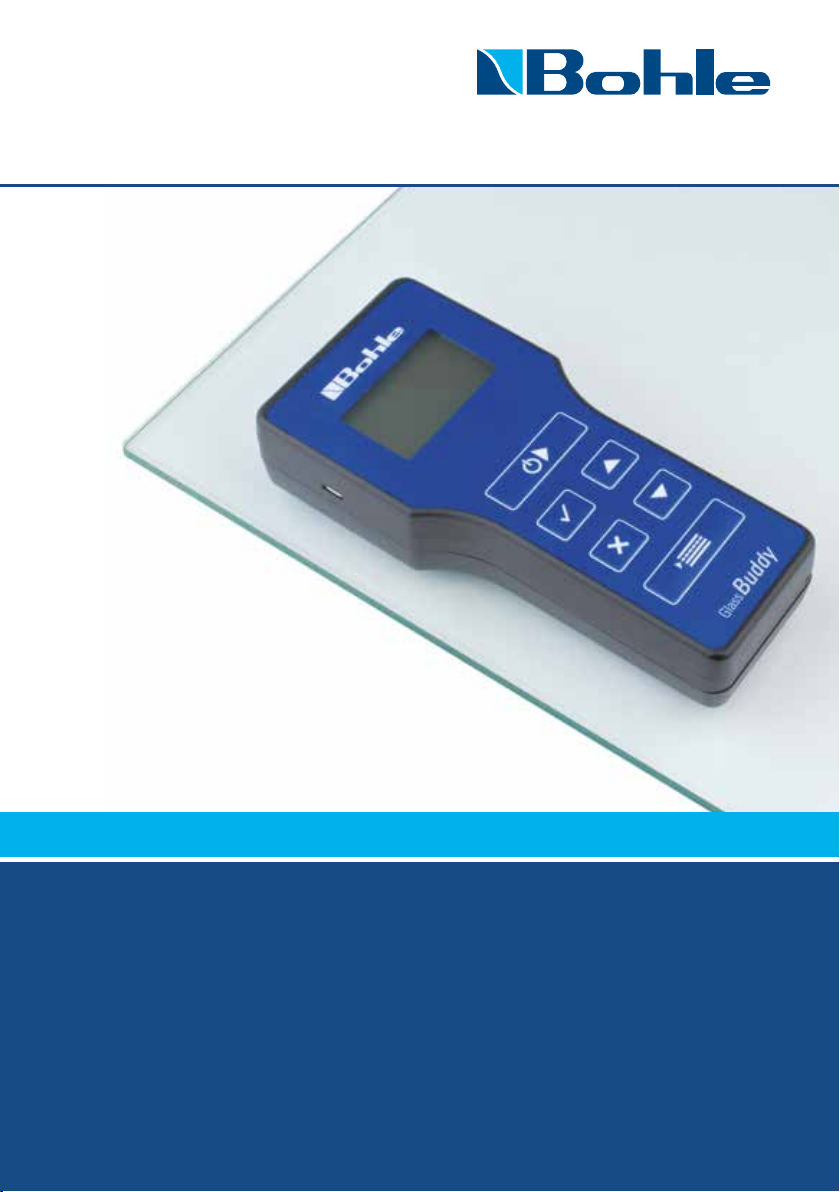
GlassBuddy Basic
GlassBuddy Plus
Page 2
Table of Contents
01 Contents of the Box 23
02 Features of the GlassBuddy 23
03 The Keypad 23
04 The Display 24
05 First Steps – Basic Information about Working with the GlassBuddy 24
06 Analysing Glass with the GlassBuddy 27
07 Reading the Measurement Results 27
08 Error and Warning Messages 28
09 Charging the Battery 29
10 Care and Maintenance 29
11 Installation and Operation of the GlassBuddy Software 30
12 Glass Types and Measuring Ranges 35
13 Firmware Update 36
14 Technical Data 37
15 Technical Support 37
16 Tips and Tricks 37
20
Page 3

Thank You
for purchasing the GlassBuddy, a top quality measuring device for analysing flat glass. Regardless of
whether you analyse single-pane, laminated or insulated glass units, fitted or not, you deal with monolithic
glass, or 1-gap or 2-gap insulating glass – with the press of a button the laser technology in the device will
provide you with information about glass thickness, the composition of the glazed units, coatings, interlayers
and their position, all with only one measurement and an accuracy of +/- 0.1 mm. Please read the operating
instructions carefully to familiarise yourself with the operating procedures and allow you to get the most out
of your new GlassBuddy.
Intended Use
The GlassBuddy is an optical measuring device for determining the thickness of monolithic glass compounds,
1-gap and 2-gap insulating glass, also when already installed. Additionally, up to three highly reflective coatings can be detected. Especially in case of coatings which do not interact sufficiently with the used laser
wavelength or in case of glazed units which strongly deviate from the standards, erroneous results may occur
in individual cases. For this reason, the measured results must always be checked with the required expertise. The GlassBuddy Plus model moreover also detects most of the standardly available fire protection glass
types with interlayers consisting of fire protection gel as monolithic unit or as 1-gap insulating glass. The
maximum glass thickness which can be measured, depending on the air gaps between glass panes, amounts
to 50 mm for GlassBuddy Basic and 100 mm for GlassBuddy Plus (see also chapter 12). The
GlassBuddy is not suitable for detecting and measuring plastic panes (acrylic glass, polycarbonate, etc.), neither as glazed unit nor as individual pane. The GlassBuddy is a high-precision device which can determine
the thickness and the composition of glazed units by means of an optical evaluation of laser beam reflections
and light refraction. This procedure requires that the GlassBuddy is previously set to detecting certain specifications. Additionally, also coatings and their position, as detected with the laser used, can
be displayed. We strive to regularly update the software with new compound types in order to guarantee a
reliable mea suring result. The GlassBuddy is designed for interior use.
Safety Instructions
This manual must be printed and kept in the vicinity of the device for the entire duration of its service life. The
manual forms part of the device and must be handed over to every subsequent owner or user. The device and
its accessories are exclusively intended for commercial use and must be kept out of the reach of children
(especially toddlers). The operator must be conversant with the relevant procedures to be observed according
to the prevalent accident prevention regulations. Every person entrusted with operating the device must have
read and understood this instruction manual and especially the safety instructions. All safety instructions
contained in this manual and the safety instructions on the device must be observed. The device must only be
operated in an impeccable condition. Modifications of the construction of the device are inadmissible. Opening the device terminates all statutory warranty entitlements. Only Bohle AG is entitled to perform repair
works on the device. Please contact your dealer. For determining the glass thickness, the GlassBuddy uses a
class 2M laser source (<1mW). Please bear in mind the prevalent accident prevention regulations. Never look
directly or with optical instruments into the laser beam. Make sure when using the device that no person(s) in
the immediate surroundings is (are) harmed by the laser beam or its reflections.
EN
The device must always be stored in the supplied carrying case.
The rigidly installed accumulator must only be charged with the supplied USB cable, A / Micro B.
Charge current: 5V, 500mA. Disconnect the cable as soon as the battery is completely charged.
21
Page 4

Disposal
Waste electrical equipment must not be disposed of together with the standard, unsorted municipal waste
for reasons of environmental protection and in order to enable a high recycling rate of electronic waste.
Please arrange the professional disposal of the GlassBuddy and its accessories at the end of their service
lives. You can send the parts back to Bohle AG for proper disposal. Please contact your dealer.
WEEE Reg. No. DE33122269
EC Declaration of Conformity
In accordance with the Electromagnetic Compatibility Directive 2004 / 108 / EC
Bohle AG
Dieselstr. 10
D-42781 Haan
We hereby declare that the delivered model of the product
Name GlassBuddy Basic / GlassBuddy Plus
Type BO 5164760 / BO 5164755
Year of manufacture starting from 05 / 2013
complies with the relevant provisions of the Electromagnetic Compatibility Directive 2004/108/EC.
Applicable harmonised standards:
EN 61326-1:2006
“Electrical equipment for measurement, control, and laboratory use – Electromagnetic Compatibility – Part 1:
General requirements”
EN 55022:2010 Class B
Information technology equipment – Radio disturbance characteristics – Limits and methods of measurement
Authorised Representative for the Compilation of Technical Documentation: Edgar Höhn
Haan, 26 April, 2013
22
Page 5
01 Contents of the Box
n
1 x GlassBuddy
n
1 x Carrying case
n
1 x Brief operating instructions
n
1 x USB stick with operating
instructions and PC software
n
1 x USB cable 2.0, A / Micro B
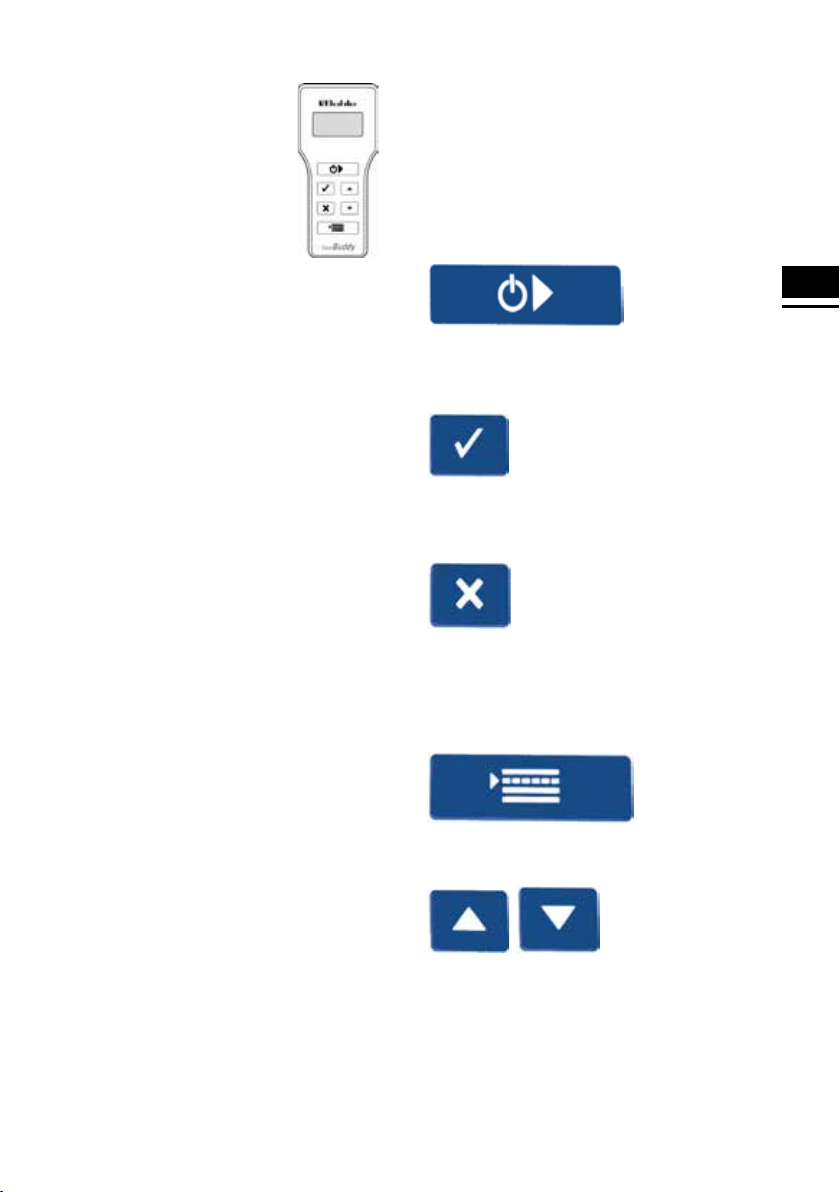
03 The Keypad
Despite the numerous functions of the GlassBuddy,
only a few keys are needed. The user interface is
intuitive and can be learned quickly and easily. This
chapter explains the functions of the individual keys.
Press
02 Features of the
GlassBuddy Basic /
GlassBuddy Plus
n
Destruction-free analysis of glass, even when
installed
n
Measuring monolithic glass with a thickness
between 2.6 mm and 19 mm
n
Analysis of laminated glass, multi-laminated
glass, fire protection glass (GlassBuddy Plus
only), 1-gap and 2-gap insulating glazed units
n
Measuring glass compounds of 50 mm
(GlassBuddy Basic) or 100 mm
(GlassBuddy Plus), see also chapter 12
n
Recognition of PVB films (up to a max. of 8 films
per compound), indication of their thickness and
position
n
Recognition of up to 3 coatings and
determination of the coating position
n
Accuracy: 0.1 mm, tolerance: 1% on measuring
range
n
Storage of up to 250 measuring results
n
USB interface
n
Simple and self-explanatory menu operation,
graphic display
n
High quality Li-ion battery for up to 8 hours of
continuous operation
n
to switch the GlassBuddy on
n
to start measuring
n
to save the results after the measurement
n
to confirm input
n
to delete the current result
n
to quit the menu
n
to interrupt the deletion of saved data
n
to delete error messages
n
to go to the menu
EN
See chapter 12 Glass Types and Measuring Ranges
n
to scroll through the measuring results
n
to scroll through the menu
n
to adjust date and time
n
to switch on the light
23
Page 6
04 The Display
Explanation of the symbols used
4 or 4.2 Glass thickness, film thickness or air
gaps between panes in mm or inch or
as inch fraction
« or » Coating position, the direction of the
arrow indicates the position
! Signal indicating that not all proper-
ties could be detected unequivocally.
G1, G2, … Glass pane with position
G 1.1, G 1.2 Glass pane with position in laminated
compound
SZR1, SZR2 Air gap and its position
Film 0.38 Thickness of the film used within the
compound
Gel 1.4 Thickness of the fire protection gel
used within the compound
(Glass Buddy Plus only)
Layer 1.6 Thickness of the interlayer used within
the compound
05 First Steps
Basic Information about Working with the
GlassBuddy
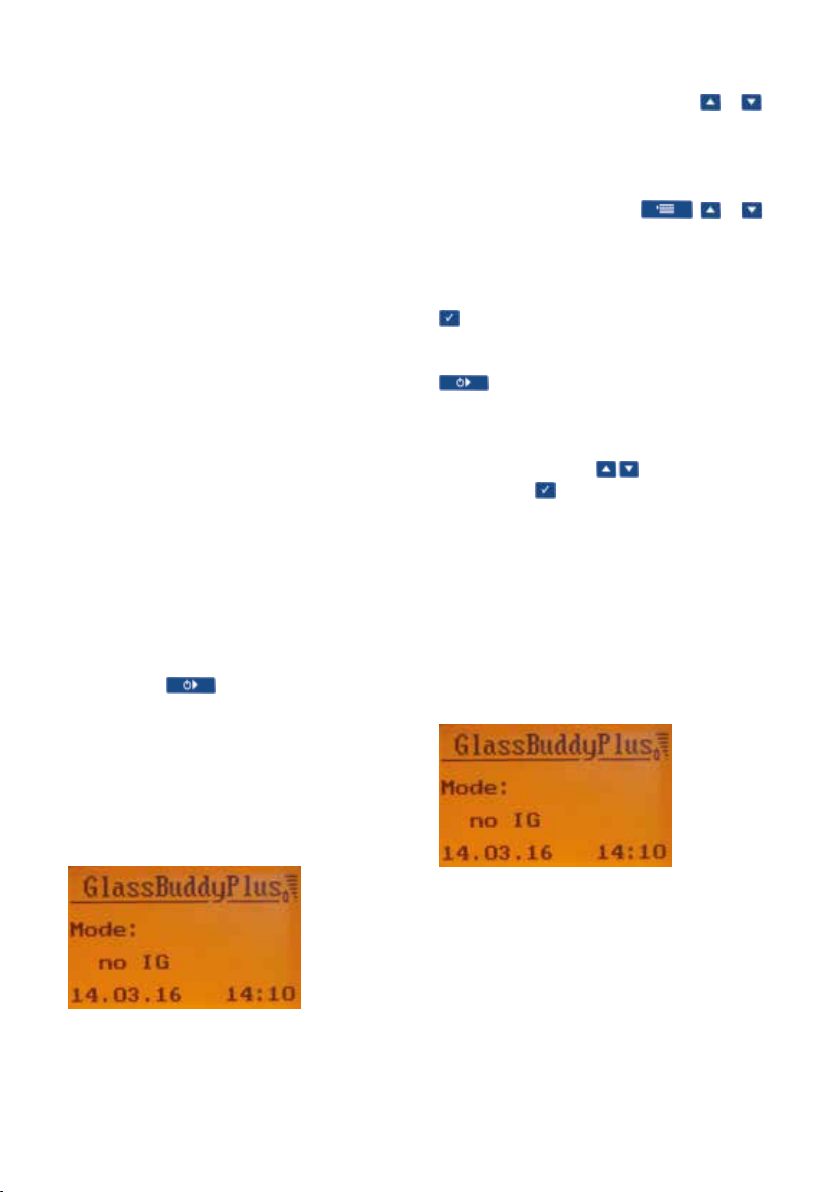
Press and hold for approximately 2 seconds
to switch the GlassBuddy on. Choose the glass type
you wish to analyse on the four-line illuminated display (see also subitem “GLASS TYPE”).
For energy-saving reasons, the display lighting will
switch off after approximately 60 seconds; however,
it can be switched on again by pressing or .
The GlassBuddy will switch off automatically after
about 10 minutes if no keys have been pressed.
Explanation of the Menu Items
The menu can be accessed via ; or
allow you to select between the various menu
items: The respectively active menu item is located
in the centre and bordered by arrows to the right
and left sides. For selecting a menu item, press the
button.
Off
This button will switch the GlassBuddy off.
Glass Type
Here you can select the type of glass you wish to
analyse by pressing the keys. Confirm your
selection with .
n
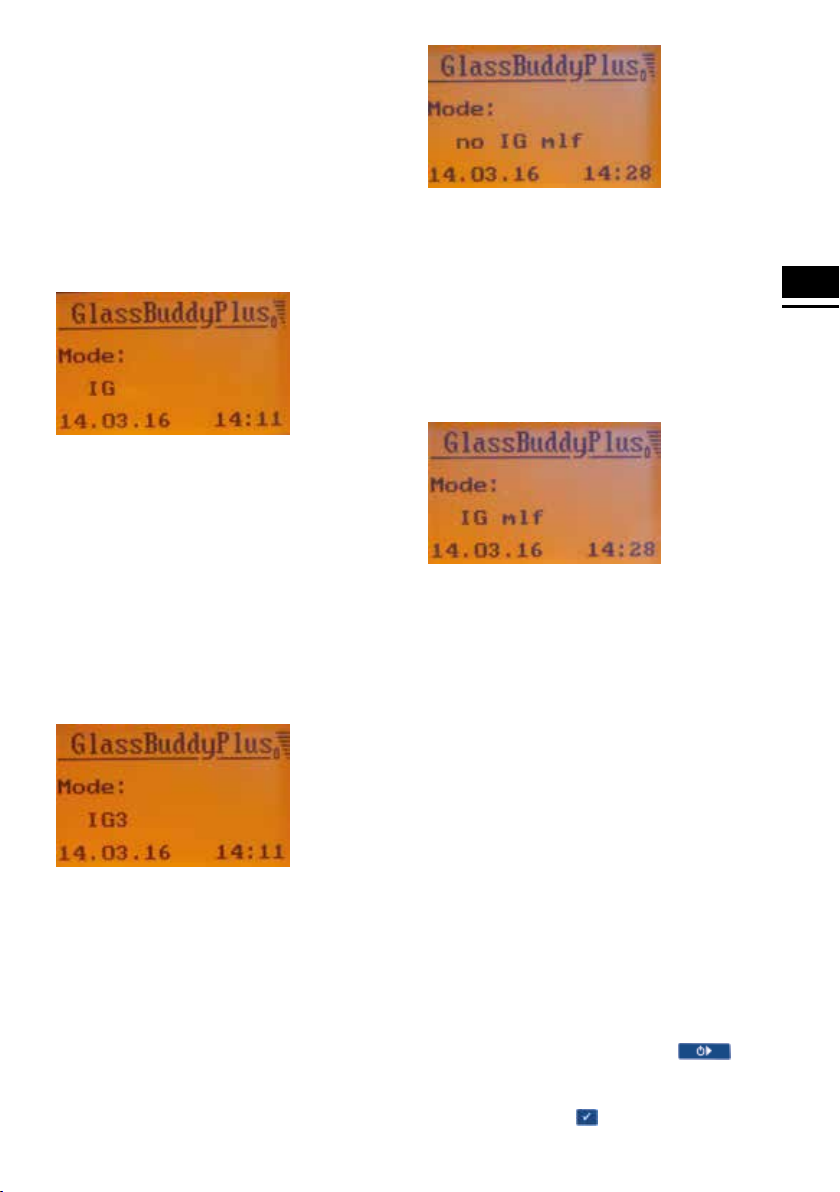
No insulating glass (menu display: no IG)
– for the analysis of 2.6 mm to 19 mm
monolithic glass
– for the analysis of monolithic laminated and
laminated safety glass (lam and lam-safety)
– for the analysis of monolithic multi-laminated
glass (multi-lam), with the exception of fire
protection glass
After choosing, the GlassBuddy will inform you
about today’s date, the time and the selected glass
type.
24
Note: If you measure other glass types with this
setting, this can lead to erroneous measuring
results.
Page 7
n
Insulating glass (menu display: IG)
– for the analysis of 1-gap insulating glass made
of 2 x monolithic glass
– for the analysis of 1-gap insulating glass with
laminated glass
– for the analysis of 1-gap insulating glass with
laminated safety glass
– for the analysis of 1-gap insulating glass with
multi-laminated glass, with the exception of
fire protection glass
Note: If you measure other glass types with this
setting, this can lead to erroneous measuring
results.
n
IG3 glass (menu display IG3)
– for the analysis of 2-gap insulating glass made
of 3 x monolithic glass
– for the analysis of 2-gap insulating glass with
laminated glass
– for the analysis of 2-gap insulating glass with
laminated safety glass
Note: If you measure other glass types with this
setting, this can lead to erroneous measuring
results.
n
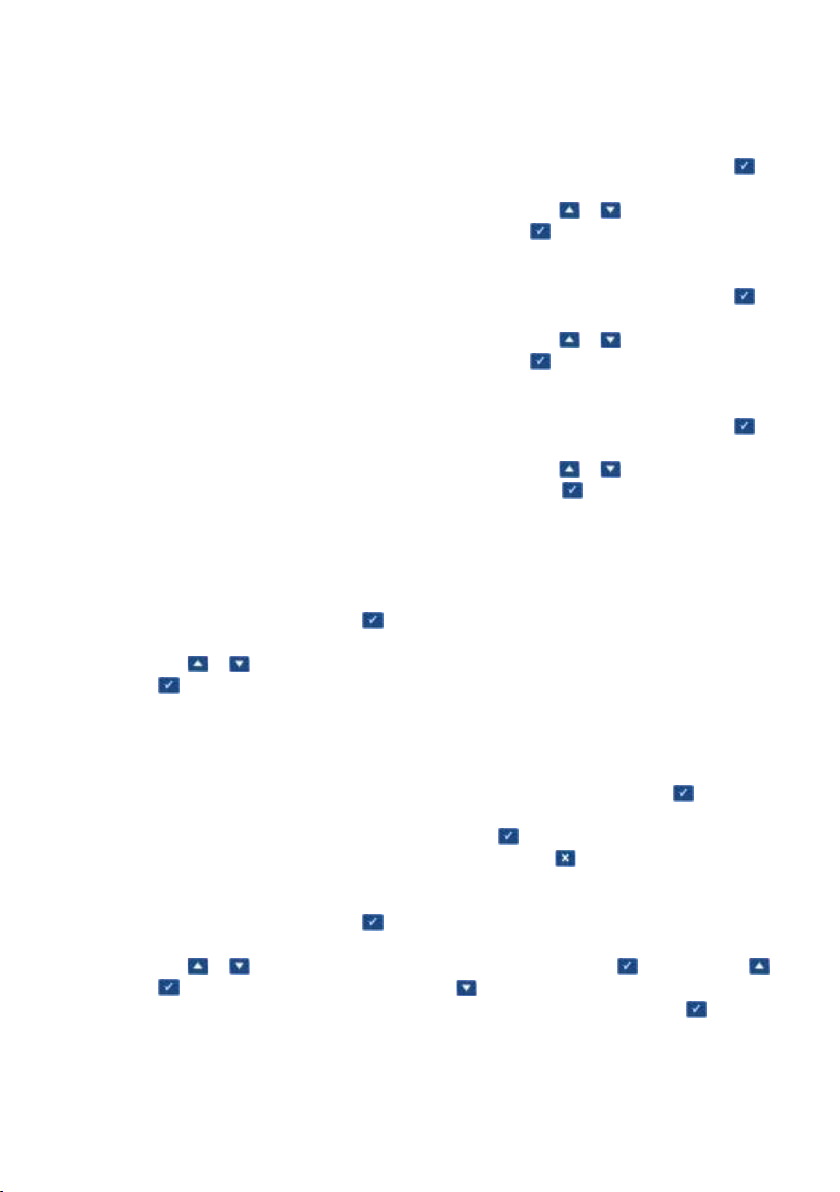
IG with fire protection glass (GlassBuddy Plus
only) (Menu display: IG mlf)
– for the analysis of 1-gap insulating glass with
multi-laminated glass as fire protection glass
Note: If you measure other glass types with this
setting, this can lead to erroneous measuring
results.
The selected glass type setting is displayed in the
menu.
EN
Note: If you measure other glass types with this
setting, this can lead to erroneous measuring
results.
n
Not IG fire protection glass (GlassBuddy Plus
only) (Menu display: not IG mlf)
– for the analysis of monolithic multi-laminated
glass (multi-lam) as fire protection glass
Note: The GlassBuddy will automatically return to
the default settings once the device is switched
off. When switching it on again, you must select the
glass type again.
Average
In order to carry out an average measurement, you
must first select the correct glass type. You can activate the average measurement in the menu under
the menu item “Average”. The Ø sign next to the
glass type indicates that the average measurement
is activated. Up to 19 individual measurements can
be used in order to generate an average measuring
result. The individual measurements are carried
out one by one by repeatedly pressing and
sorted alphabetically. After completing 2 to 19
individual measurements, the arithmetic mean is
calculated by pressing . For a better overview, the
25
Page 8
average measurements displayed in the
“Display data” mode are marked with a space after
the first two numbers. The individual measurements
are named consecutively beginning with “a“.
Example:
03a310113_1415
03b310113_1416
03c310113_1417
03_310113_14:18
The first two numbers stand for the number of
the measurement. The third item indicates the
sequence of individual measurements. The
following numbers are reserved for date and time.
If the third item has an underscore _, this indicates
the calculated average value.
As all individual and average measurements can be
saved if desired, unrealistic measured values can
still be detected ahead of time.
Version
Displays the serial number of the device and the
device firmware version.
Date
Here you can reach the submenu by pressing
after making a selection. You can change the
settings using the or keys. Confirm your
changes with .
Time
Here you can reach the submenu by pressing
after making a selection. You can change the
settings using the or keys. Confirm your
changes with .
Font Size
Here you can reach the submenu by pressing
after making a selection. Here you can change the
settings using the or keys . Confirm
your changes with .
Settings
You can adjust the following settings here:
Language
Here you can reach the submenu by pressing
after making a selection. You can change the
settings using the or keys. Confirm your
changes with .
Note: In order to prevent an inadvertent, permanent
change of the language, the GlassBuddy changes
back to the previously chosen language when
switching the device on again. In order to permanently change the language, connect the
Glass Buddy to the PC and then adjust the lan-
guage as described above.
Units
Here you can reach the submenu by pressing
after making a selection. You can change the
settings using the or keys. Confirm your
changes with .
Note: In order to prevent an inadvertent, permanent
change of the units, the GlassBuddy changes back
to the previously chosen unit when switching the
device on again. In order to permanently change the
unit, connect theGlassBuddy to the PC and then
adjust the unit as described above.
26
Note: In the symbol language, the font size cannot
be changed to a smaller size.
Information About the Device
Display of the device information which can be
saved in the device as customised entries such as
company name and address. This information can be
entered with the aid of the PC software (see chapter
11).
Delete Data
Here you will be asked if you really want to delete
all measuring results after pressing . It is not
possible to delete only individual measurements. By
pressing again, all saved measuring results will
be deleted. Press to return to the menu without
deleting the data.
Show Data
Here you can display a list of your previously saved
measurements by pressing . By pressing the
or keys you can select the measurement result of
your choice and display it by pressing .
Page 9
06 Analysing Glass with the
GlassBuddy
The glass must always be clean and dry. Even a
finger print can cause unwanted refraction and consequently incorrect measurement results. Glass
that is laid flat should always be placed on a dark,
non-reflecting base (e.g. a black felt cloth) for analysis, as incorrect results can occur on reflective
bases. Already installed insulated glass panes
should be preferably analysed in the marginal areas.
Switch on the GlassBuddy, select the glass type
(see point 5) and place it on top of the glass surface
in a way that all plastic feet touch the glass and
keep the device from slipping. Press . The
light turns off and on the display of the GlassBuddy
appears the following message:
Measuring –
please wait …
Note: The GlassBuddy should not be moved during
the measuring procedure as this could lead to
inaccurate measuring results. After 1-2 seconds, the
light will turn on again and you can remove the
GlassBuddy from the glass.
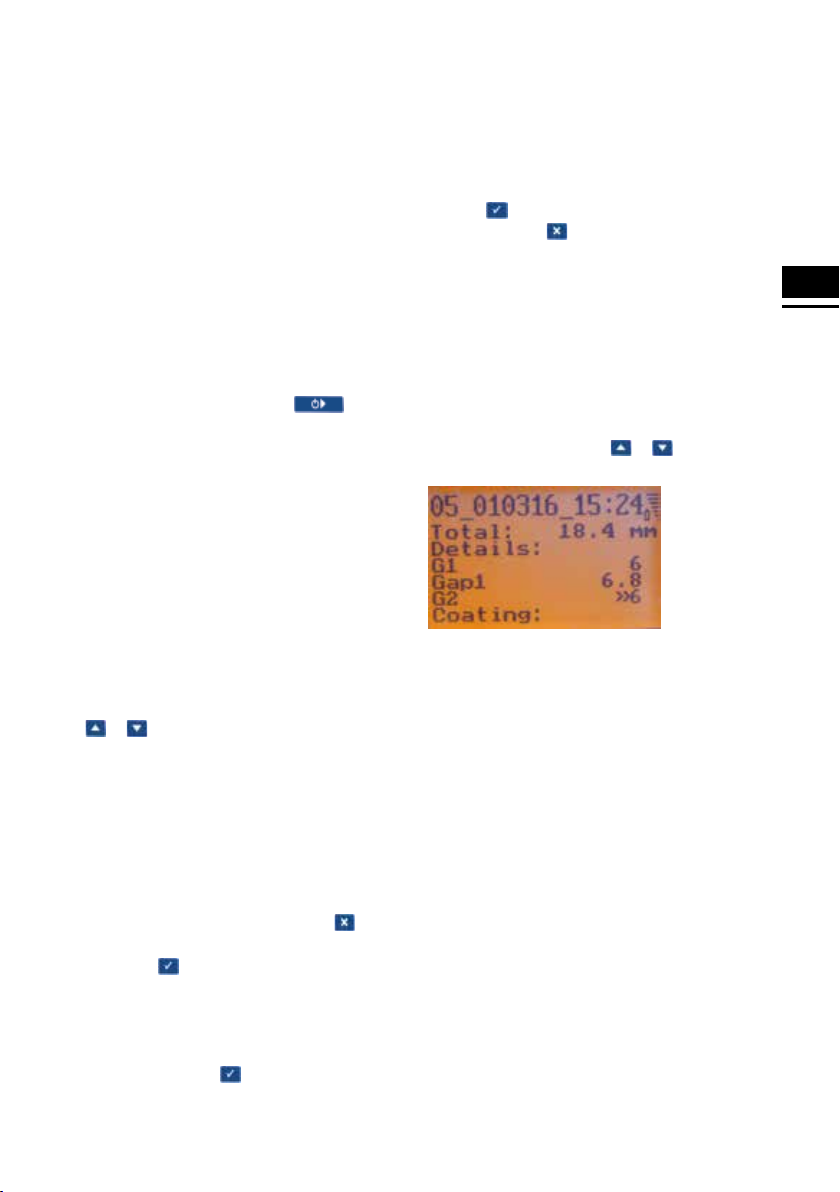
The measurement result is shown on the display.
Use or to scroll through the measuring
results. After the rounded individual measurements,
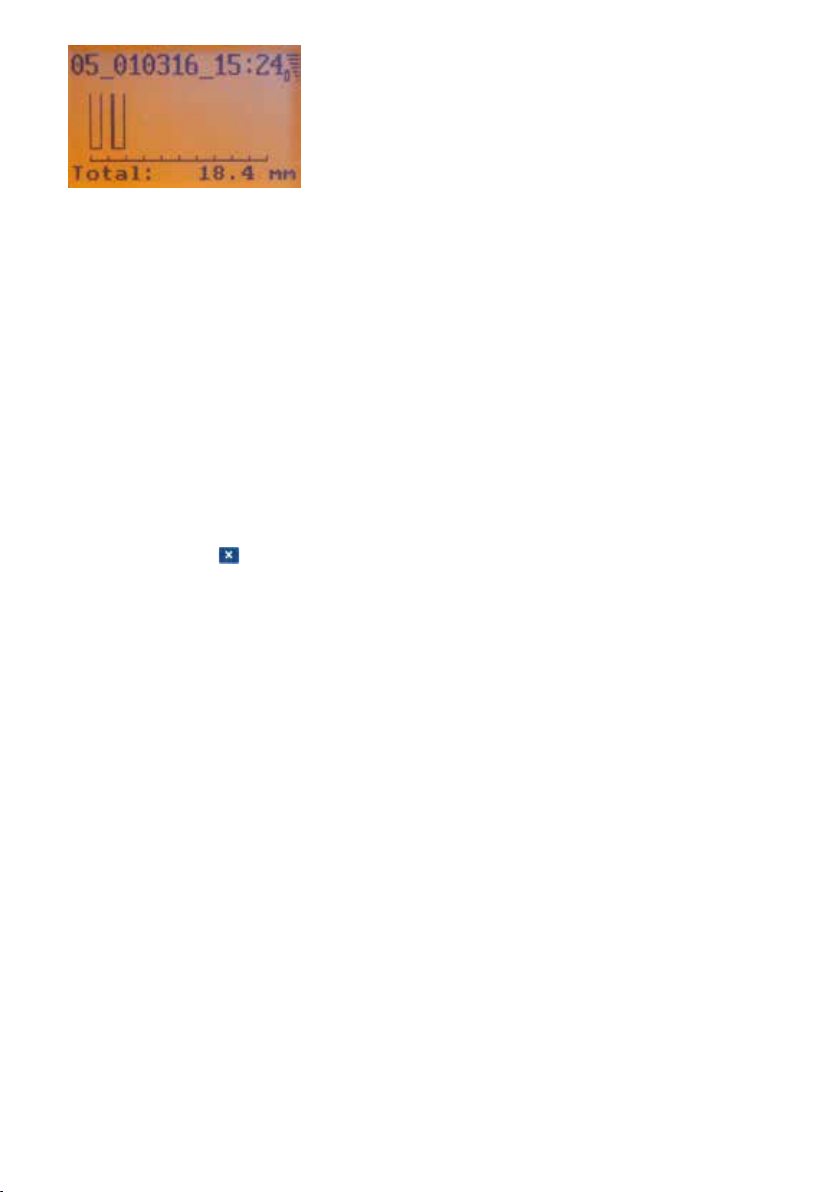
the single values (accurate to +/-0.1 mm) are displayed. Afterwards the structure of the glass pane is
shown graphically. The graphical display shows the
structure from left to right as analysed by the GlassBuddy. The measuring results are shown in a scrolling display.
The measuring result can be rejected with .
When pressing , you can choose between the
following options:
Save
The current measuring result can be saved in the
GlassBuddy by pressing . The result is saved
under the number shown in the top left of the
GlassBuddy display together with the result.
Hint: If in individual cases the message
“Measurement not possible” appears on the display
after measuring, even this result can be saved, also
see chapter 8.
Reject
You can delete the current measuring result by
pressing . You can always directly delete the
result by pressing .
07 Reading the
Measurement Results
After the measuring procedure described above, the
GlassBuddy shows the result on the illuminated
display. You can page up and down the measuring
results row by row with the or keys.
In the first row, the GlassBuddy shows the position
under which the measuring result is saved (here
position 05; there are a total of 99 memory slots
available). After this you can see the date and the
time of the measurement.
In the second line, the GlassBuddy displays
the measured total thickness of the measured
object.
The details of the pane composition, rounded to
trading thicknesses, are displayed starting from the
third line. Afterwards the measuring results of the
individual layers are displayed, followed by the
graphical presentation of the configuration of panes.
The measuring results are shown in a scrolling
display.
EN
27
Page 10
08 Error and Warning
Messages
Reason: A very light coloured base on which the
glass is lying can give off an additional
reflection.
Solution: Place the glass for analysis on a dark
non-reflecting base.
n
Details not available
– This message appears if the GlassBuddy is
able to measure the total thickness but cannot
determine any further details about the
configuration of panes.
Please make sure that the GlassBuddy is able to
measure correctly. The GlassBuddy uses the reflection of a laser beam for measuring and calculating
the result. Everything which has an influence on the
individual interlayers, also has an influence on the
calculated result.
The GlassBuddy uses a number of messages to
notify you of errors or warn you about the battery
status. All information is shown in plain text and can
be deleted by pressing .
n
“Measurement not possible”
– This message appears if the object you are
measuring does not generate any reflections
which the GlassBuddy can convert into a
reading.
– This message also appears if the total thick-
ness of a glass pane is less than 2.6 mm.
– The message “Measurement not possible”
does not mean that the measurement has
not taken place. The GlassBuddy was just
not able to calculate a reasonable result.
Therefore, a measurement was carried out.
This measurement can also be saved.
By sending the file in .gdm format to
[email protected], you can assist us
with troubleshooting and further developing
the device. Analysing the data records is not
possible with the supplied PC programme
and can only be done by Bohle.
– This message appears if the GlassBuddy
receives an odd number of reflections from the
measuring procedure.
Reason: e. g. a tinted pane, where only the surface
gives off a reflection and the laser cannot
penetrate to the underneath of the pane
28
n
“No IG”
– This message can appear for the setting
“no IG”, if you try to analyse a glass structure
other than no IG.
Solution: Please check the settings and change
them if necessary.
n
“No IG”
– This message can appear for the setting IG, if
you try to analyse a glass structure other than
IG.
Solution: Please check the settings and change
them if necessary.
n
“No IG3”
– This message can appear for the setting
“ISO3”, if you try to analyse a glass structure
other than 2-gap insulating glass.
Solution: Please check the settings and change
them if necessary.
n
“Battery empty”
– This message appears if the battery charging
status is below 5%.
Solution: Please charge the battery. To be able
to continue measuring, charging for
5 to 10 minutes will suffice.
n
“Glass too highly reflective”
– This message can appear when analysing
highly reflective glass.
Page 11

Solution: Not every highly reflective or mirrored
glass can be measured. The measurement
might be successful from the rear side of
the glass.
n
“Memory full”
– This error message appears when all 250
memory slots are full. If you have saved the
average measurements, they will occupy
several storage locations!
Solution: Before saving more data, you should
transfer the saved measurement results to
your PC and then delete all data saved in
the GlassBuddy (see section 5).
n
“Glass outside measuring range”
– This error message appears if the complete
structure of the pane exceeds the measuring
range of 50 mm. (This message will only
appear on the GlassBuddy Basic version).
Solution: Software upgrade to GlassBuddy Plus
n
“Error”
– This error message appears if there is an
internal error in the GlassBuddy.
Solution: If the message Error is repeated, the
GlassBuddy should be returned to the
manufacturer for inspection.
n
“No Data”
– This message appears if there is no data in the
memory that can be shown.
n
“Measurement in Basic mode not possible”
– This error message appears if types of
glass are being analysed which can only be
measured with GlassBuddy Plus.
Solution: Software upgrade to GlassBuddy Plus
09 Charging the Battery
When the battery is fully charged, the device can
work permanently for at least 8 hours. When
charged, the battery usually lasts for one to two
weeks under normal conditions of use. At a battery
status of approximately 10%, you will be shown the
message “Charge battery”. Measurements can still
be taken but the GlassBuddy should be charged as
soon as possible to ensure problem-free operation.
For charging the battery, connect the GlassBuddy
with the supplied USB cable to a suitable USB port.
The USB port used must be able to provide 5V,
500mA.
When the battery is almost empty, it takes approximately 120 minutes to charge it to 100% again
(if the GlassBuddy remains switched on during
charging, the charging time is longer). The
GlassBuddy will indicate when the charging
process is over. The display will then show PC con-
nection - battery is charged. Nevertheless the
GlassBuddy has to be switched on for displaying
this message.
The GlassBuddy contains a permanently installed
top quality Li-ion rechargeable battery with a very
long service life. If the performance of the battery
diminishes over the years, Bohle can replace it.
10 Care and Maintenance
To avoid damage or malfunctions of your
Glass Buddy, please strictly observe the following:
n
The GlassBuddy must always be stored in the
supplied carrying case as this is the only way to
effectively prevent damages.
n
To avoid damage, the GlassBuddy must only be
operated and/or stored at temperatures between
+5°C and +40°C.
n
The GlassBuddy must not be exposed to vibra-
tions or impacts.
n
The GlassBuddy is neither dust- nor waterproof.
Therefore keep it away from the relevant
sources of contamination.
n
Only clean the display window and casing with a
dry, clean and soft cloth. Under no circumstan ces
must cleaning liquids, thinning or abrasive
agents be used for cleaning.
n
The laser opening and the sensor slit may only
be cleaned carefully (!) with a dry, clean and soft
brush or with clean compressed air.
EN
29
Page 12
n
Never remove the plastic feet from the device. If
one foot or several feet become loose, the
device must be sent to Bohle AG for installing
new feet and calibrating the device accordingly.
These repair works involve costs. Please contact
your dealer.
n
Repairs may only be performed by the manufac-
turer, please contact your dealer.
11 Installation and Operation
of the GlassBuddy
Software
Installation of the GlassBuddy software must be
done with full administrative rights to the computer.
The enclosed software, suitable for PC and laptop
with an operating system starting from Windows
2000 or later, allows you to comfortably store your
measuring results.
Pane List
The measurements transferred from the GlassBuddy are listed here according to the sequential
number. The date of the measurement, the time, the
total thickness of the glass structure as well as the
measuring mode are also shown.
Installation
To install the software, connect the supplied USB to
your computer and start the programme setup.exe in
the Explorer.
The programme will then be installed onto your
computer. After installation you will need to restart
your computer.
Programme Start
To start the GlassBuddy programme, double-click
the GlassBuddy programme icon on your desktop.
Programme Description
This programme allows you to transfer data from the
memory of the GlassBuddy to your computer.
To do this, the device needs to be connected to your
PC via the supplied USB cable.
In addition, you can also call up any previously
imported and saved data using the programme
without a connection to the GlassBuddy.
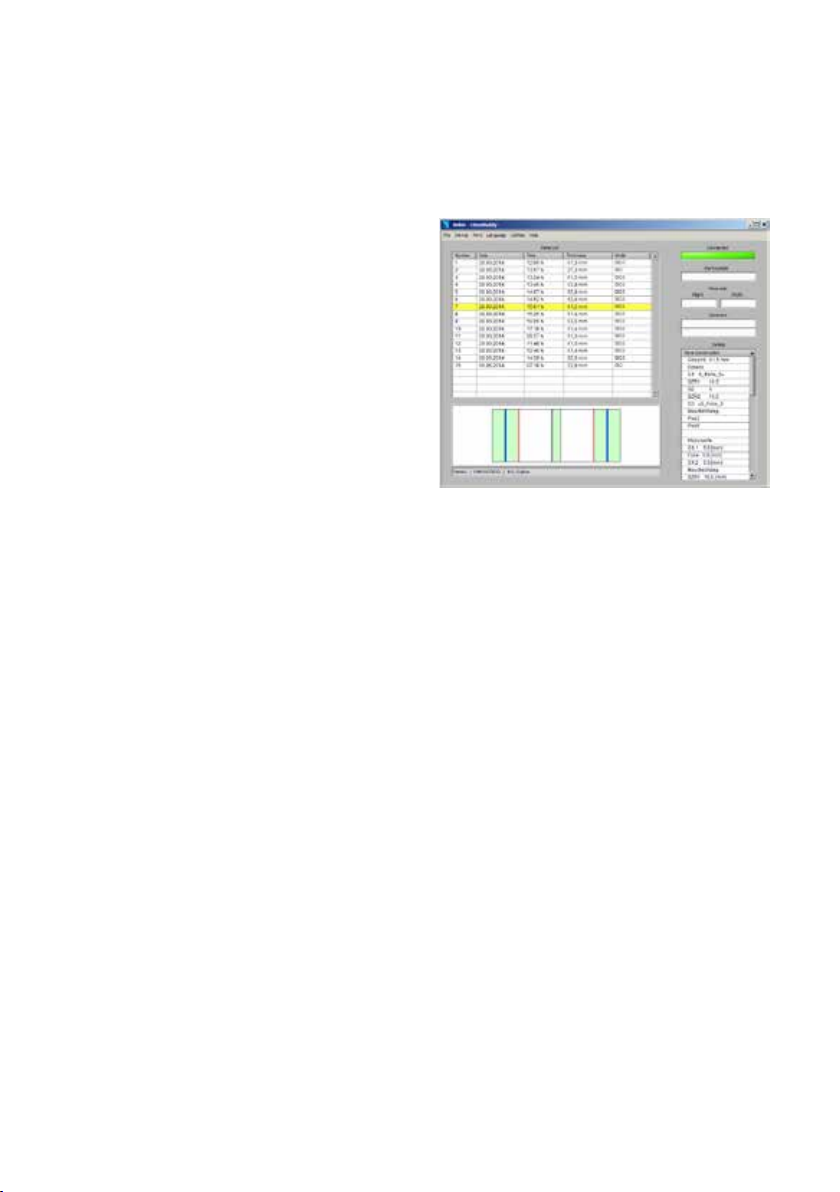
Programme Screen
Once the programme has started, you will see the
empty programme screen with the following areas:
The graphic shows you the pane composition of the
selected glass in the corresponding list. The results
for glass (green), film (blue), fire protection gel
(yellow) and layer (purple) are highlighted in different colours.
The field below the graphic shows the following
information about the device: name (if applicable),
serial number and model number of the device
firmware.
Connected
This field is dark green if the GlassBuddy is not connected to the programme and light green if the
GlassBuddy is connected to the programme.
Component Number
Here you can assign a component number for the
selected measurement.
Pane Size
Here you can indicate pane width and height for the
selected measurement.
Comments
If you have selected a measurement from the pane
list, you can add an individual comment to this
measurement.
30
Page 13
Details
If you have selected a measurement from the pane
list, all the results will be shown in detail here.
Data Transfer from the GlassBuddy
To transfer the data stored on your GlassBuddy to
your computer, first connect the device to your computer using the supplied USB cable. Use the micro
USB slot on the GlassBuddy and a free USB slot on
your PC. Switch the GlassBuddy on. The display
of the GlassBuddy will show “PC connection” and
“Battery charging” or “Battery charged”. The
GlassBuddy is now connected to your PC.
EN
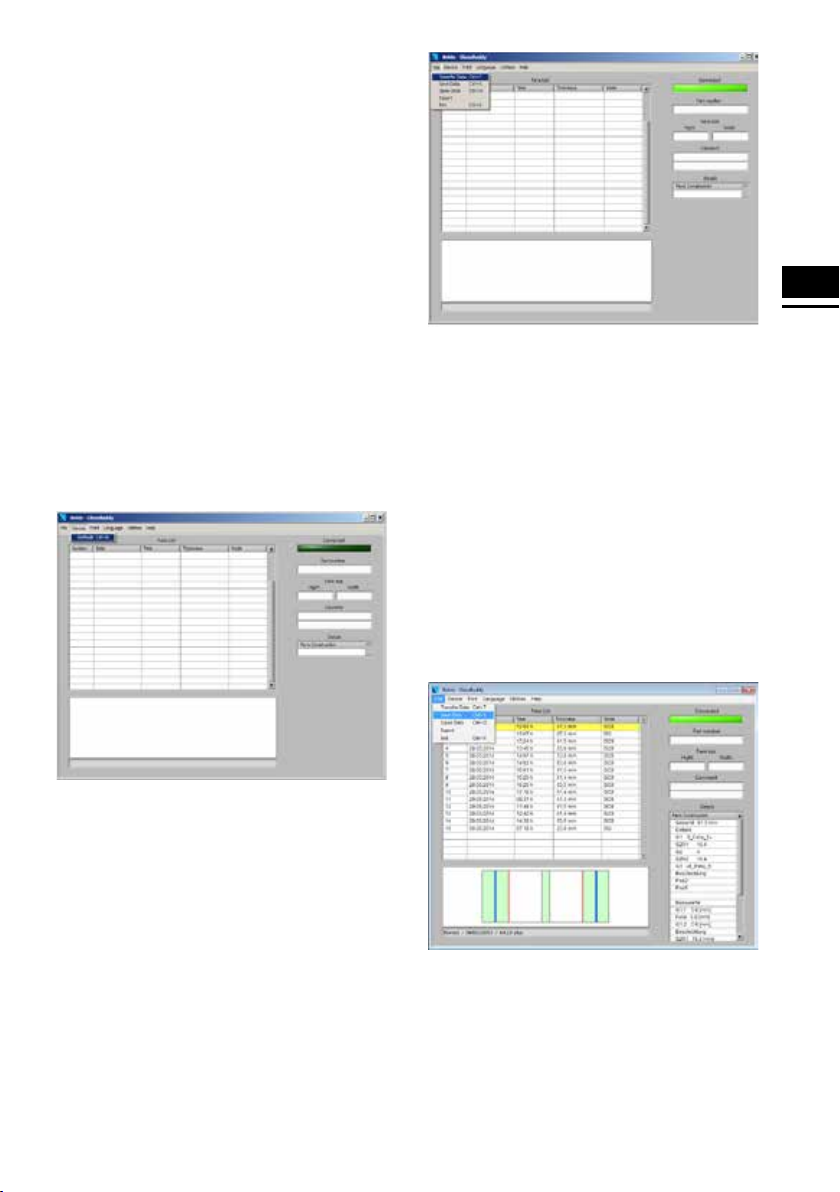
Start the GlassBuddy PC application. In the programme screen you will see the field “Connected”,
which is shown in dark green. The programme is
not yet connected to the GlassBuddy. To connect,
please click on the menu item “Devices” and then
select “Update” in the drop-down menu.
The programme is now connected to the
Glass Buddy. Once the connection has been
established, the field “Connected” in the
programme screen will turn light green. If
this field does not turn light green, click on
“Devices – Update” again.
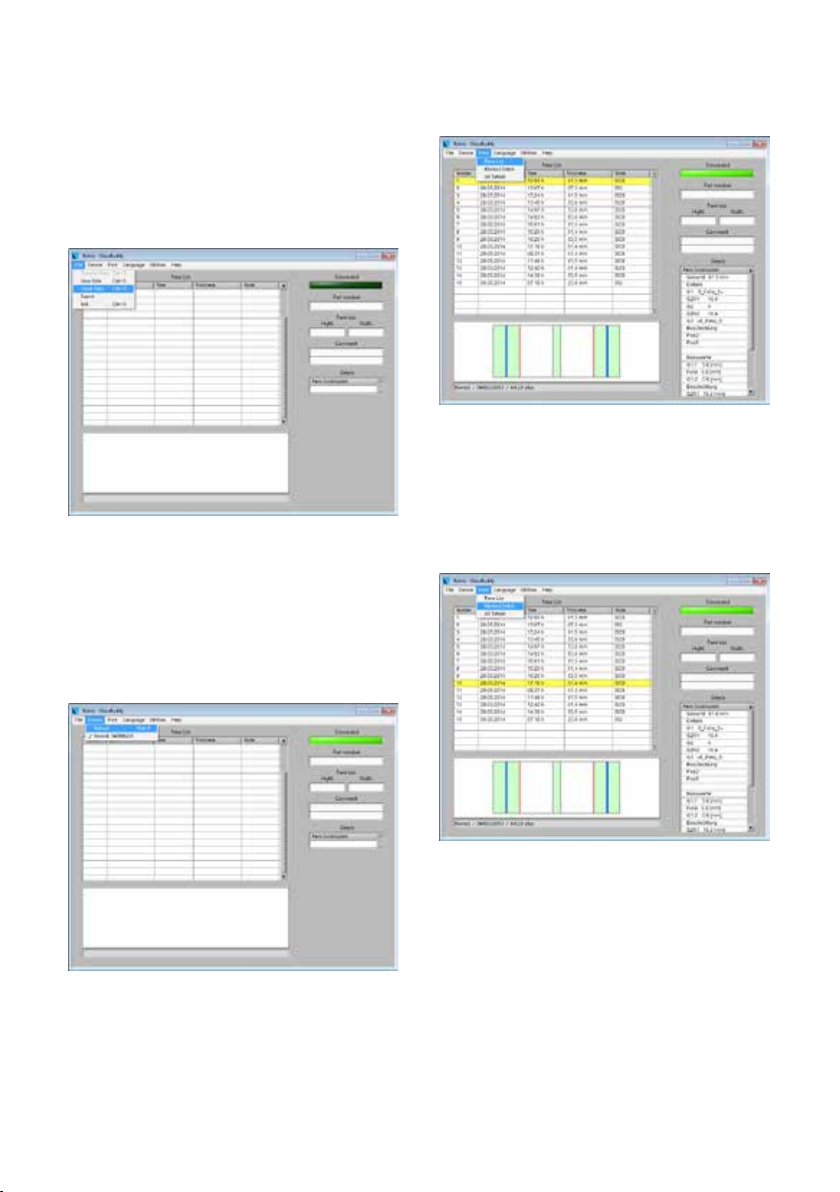
The transferred measurements can be stored on
your PC. To do this, click on the menu item “File”
and then on “Save Data” in the drop-down menu.
You can then save the measurements under a file
name of your choice. To finally save the file, please
confirm, after entering the file name, by pressing
Return or by clicking on “Save”. Please use the
menu item “Save Data” as standard saving method.
A .gdm file is generated which can be called and
displayed also by the PC application. Use the menu
item “Export” for exporting the data in .csv format.
The .csv file can subsequently be edited in a spreadsheet. We recommend saving the data in .gdm format for archiving them.
To transfer the data stored in the GlassBuddy,
click on the menu item “File” and then on “Transfer
Data” in the drop-down menu. After the data has
been successfully transferred, the measurement
results will appear in the pane list.
31
Page 14
Calling Up Saved Data
The .gdm files saved on the PC can neither be called
nor displayed, nor can a comment or the pane size
be added and saved again. To do this, click on the
menu item “File” and then on “Open Data” in the
drop-down menu. Select a saved series of measurements and double-click on the file name or click on
“Open”.
Devices
Under the menu item “Devices”, you find the submenu “Update”. If you are using several devices,
this is a way of switching between the different
Glass Buddys. Only one GlassBuddy can commu-
nicate with the programme at a time.
Pane List
Here, all listed measurements from the pane list will
be printed as a list.
Marked Detail
If you have selected a measurement from the
pane list, you can print the details relating to
the measurement with any comments and any
additional information you might want to add.
Print
You have a number of options for printing the
measurement results. The results are printed on
the standard printer which is set in the operating
system.
32
All Details
This option allows you to print all measurements
stated in the pane list including the respective
details. One page with details and comments and
any other information you have added is printed per
measurement.
Page 15
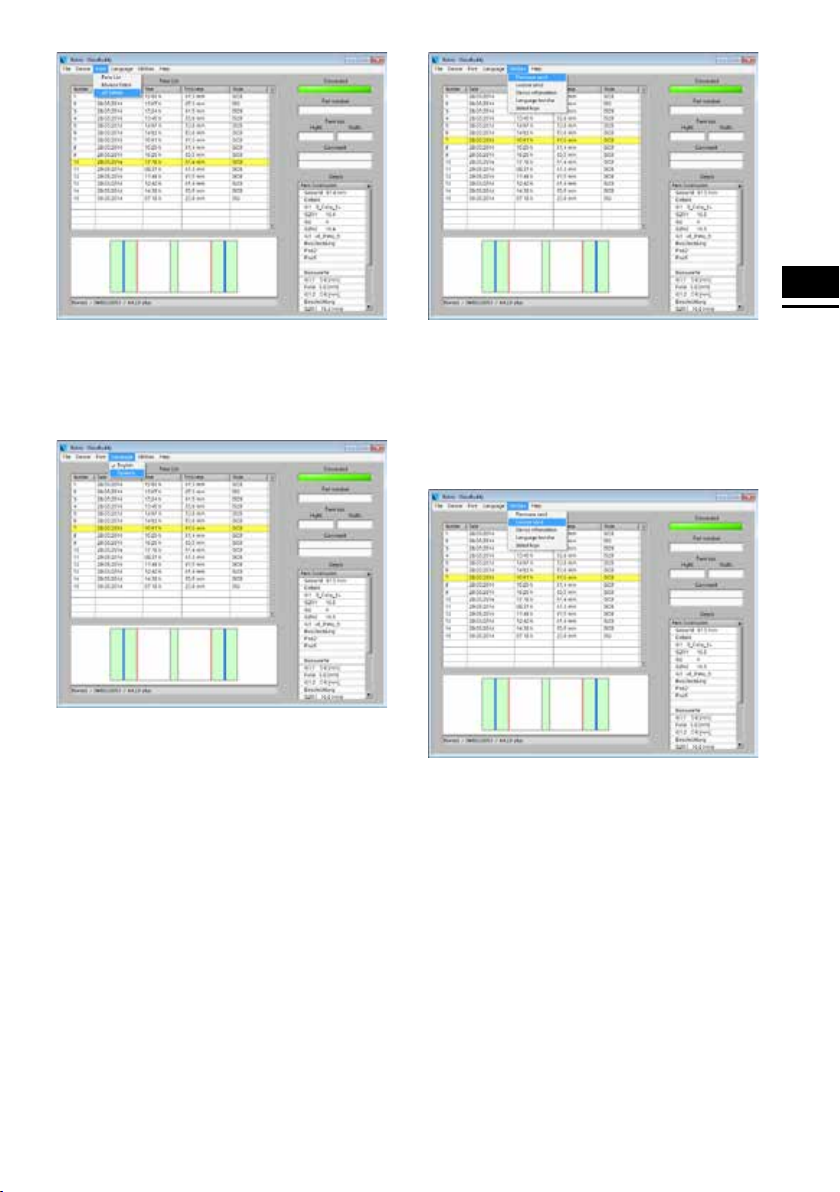
Language
In the “Language” menu you can choose between
English and German.
Auxiliary Options
Under the menu item “Auxiliary Options”, you
can now find the following entries:
Send Firmware
In this way, the firmware of the connected
GlassBuddys can be updated (see point 13).
EN
Device Information
Here the user can customise the GlassBuddy
settings.
You can enter the desired information into the dropdown menu. This information is then permanently
saved to the GlassBuddy and can only be changed
together with the corresponding PC programme.
33
Page 16
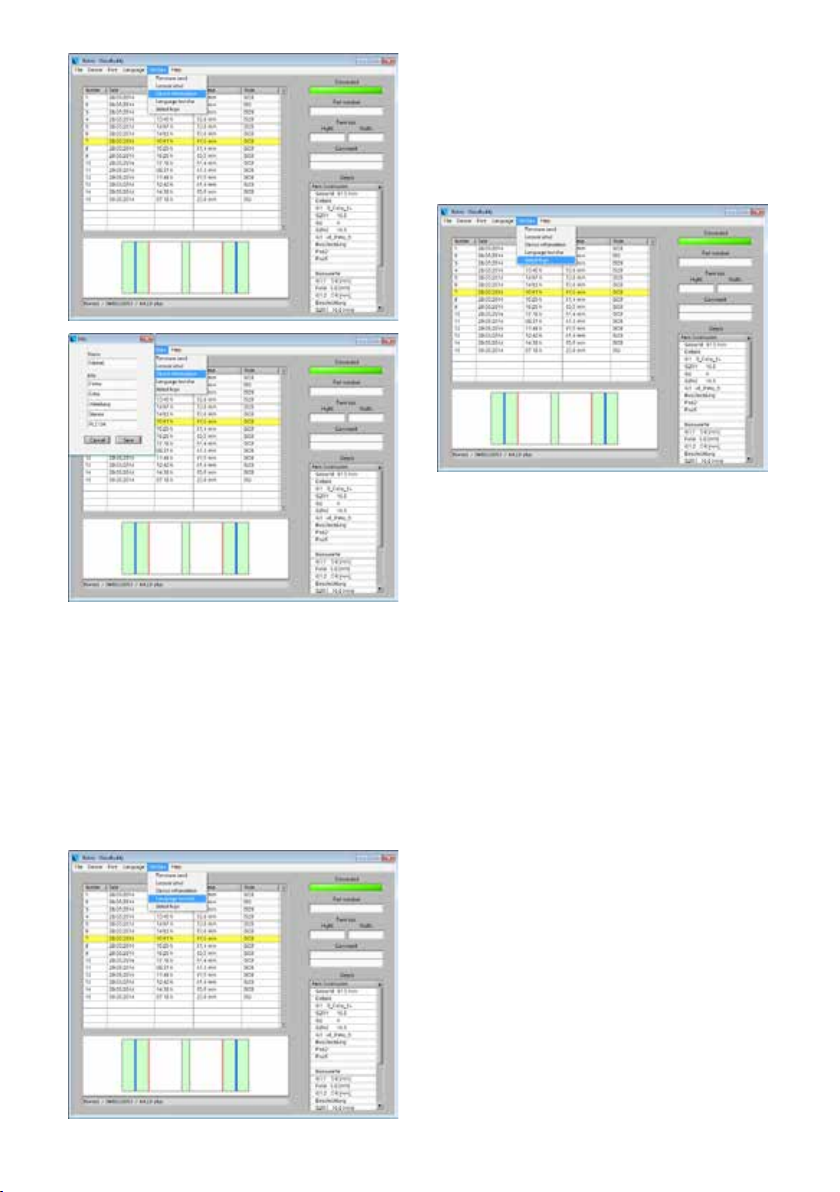
Select Logo
You can replace the standard “Bohle” logo with your
own logo. For this purpose, the new logo must be
available as .bmp file with a maximum width of 300
pixels and a maximum height of 90 pixels and saved
in a folder on your hard disk.
Transfer Languages
With this menu item, the graphical languages
(Russian, Corean, Chinese) are transferred from the
PC or laptop to the GlassBuddy. The corresponding
language file must previously be requested from
Bohle and saved to your computer or laptop. The
graphical languages are not included in delivery.
Please contact [email protected] if you are
interested.
34
Page 17
12 Glass Types and Measuring Ranges
Specification
GlassBuddy Basic GlassBuddy Plus
Monolithic glass yes yes
Monolithic laminated glass (lam) yes yes
Monolithic laminated safety glass (lam-safety) yes yes
Monolithic multi-laminated glass (multi-lam) yes yes
Monolithic multi-laminated glass for fire protection no yes
1-gap insulating glass made of 2 x monolithic glass yes yes
1-gap insulating glass with laminated glass yes yes
1-gap insulating glass with laminated safety glass yes yes
1-gap insulating glass with multi-laminated glass no yes
1-gap insulating glass with multi-laminated glass as
no yes
fire protection glass
2-gap insulating glass made of 3 x monolithic glass yes yes
2-gap insulating glass with laminated glass yes yes
2-gap insulating glass with laminated safety glass yes yes
Detection of interlayers yes yes
Identification of position and thickness of the
yes yes
interlayer
Graphic display of measured results yes yes
PC software with graphic display yes yes
Software update online yes yes
Multiple languages yes yes
Art. no. BO 5164760 BO 5164755
EN
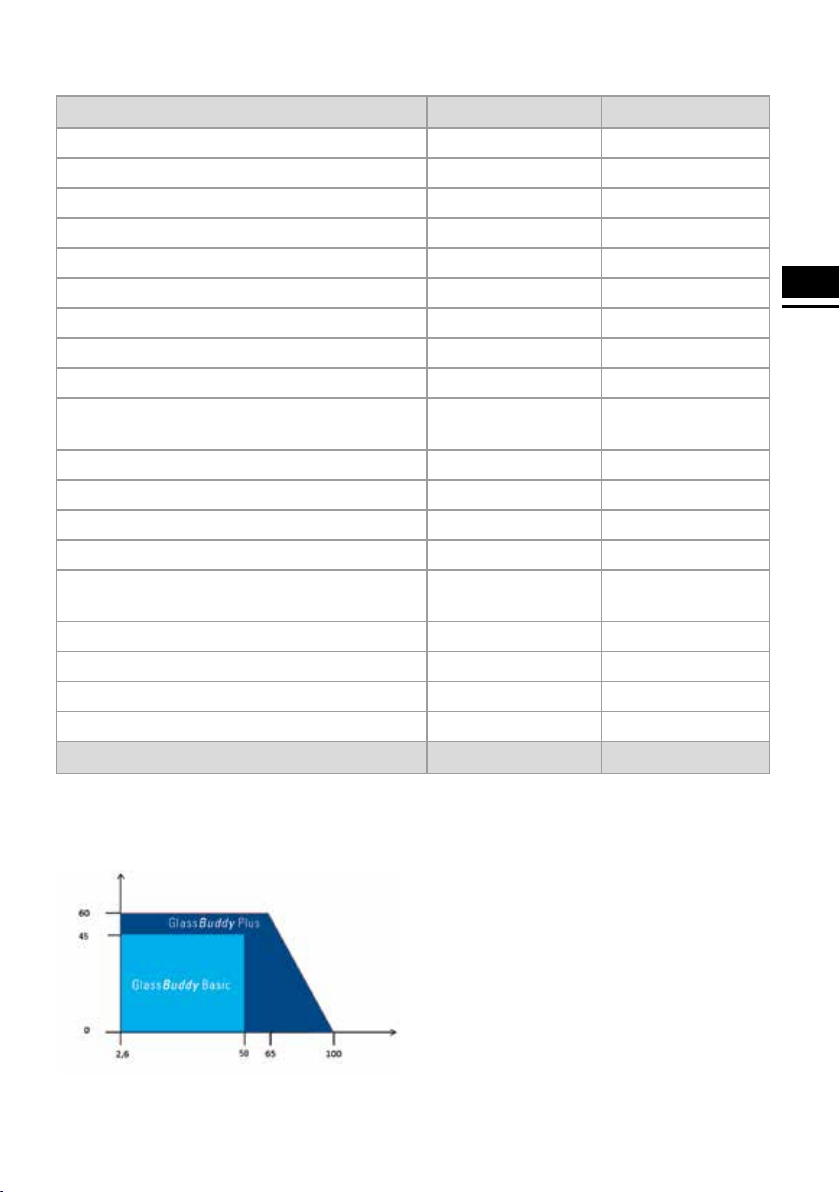
Measuring range depending on gap between
panes
Gap between panes mm
Maximum total thickness
depending on gap in mm
The following glass types or structures cannot
be measured or only to a limited extent:
– Strongly dispersing glass like e.g. satin-finished or
sandblasted glass, cast glass
– Strongly absorbing glass such as e.g. laminated
glass with matt or coloured interlayers, entirely
coloured glass
– Glass with interference coating
– Highly reflective glass like e.g. solar control glass
– All basic glass products deviating from
DIN EN 572 Part 2
35
Page 18
Notes:
For making a reliable analysis of the structure of the
measured object, we recommend taking several
measurements at different points and from both
sides. In case of dealing with very large measuring
units or if the results obtained are very unreliable,
we recommend carrying out average measurements
on at least 4 spots distributed over the whole surface of the glass pane.
The analysis of glass retrofitted with solar reflective
films or splinter protection films can lead to incorrect
results.
In the case of insulated glazed units, measurements
should always be taken 5 cm away from the edge, as
the panes tend to “bend” depending on surface and
air pressure conditions, which means that measurements taken from the centre may be inaccurate.
When analysing resin laminated glass, with resin
having the same refraction index as the glass, the
GlassBuddy will calculate the total thickness.
If the GlassBuddy cannot exactly indicate the pane
composition, you will receive the additional message
“Details not available”.
this purpose, the updated version found under
Downloads must be saved on your PC.
You can freely choose the storage location on the
hard disk of your PC or laptop. Please do not change
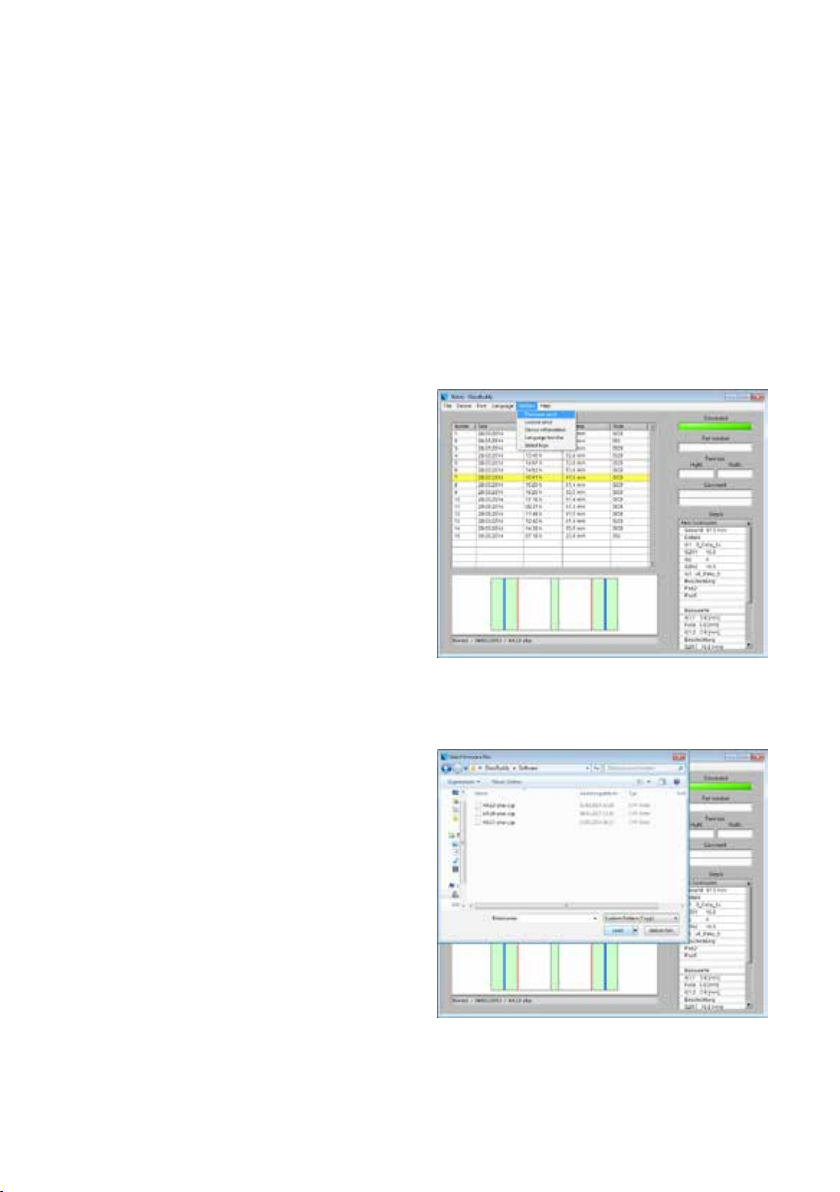
the file name in order to make sure that the update
is correctly recognised.
Please connect your GlassBuddyBasic or
GlassBuddy Plus to your PC or laptop and connect
the device to the PC software (see point 6).
Click on “auxiliary options” for installing the update
and choose the submenu “send firmware”.
In a very small number of cases, the detailed
analysis of laminated or laminated safety glass is
not possible. In this event, the GlassBuddy displays
an exclamation mark in front of the individual result.
If the GlassBuddy cannot exactly indicate the pane
composition, you will receive the additional message
“Details not available”. In the graphic display of the
GlassBuddy and in the PC software, results of this
kind are indicated by two horizontal lines. To achieve
better measuring results, we recommend a new
analysis on the opposite side.
13 Firmware Update
A firmware update is available both for GlassBuddy
Basic and GlassBuddy Plus.
Troubleshooting updates can be carried out by
the user. They can be found on our website
www.bohle-group.com in irregular intervals with
the article numbers BO 5164760 for GlassBuddy
Basic and BO 5164755 for Glass Buddy Plus. For
36
Now you have to choose the previously stored firmware version.
Confirm the completed download to the GlassBuddy
with ”OK”.
Page 19
Then disconnect the GlassBuddy from your PC or
laptop and switch the GlassBuddy off. For activating
the updates press the and keys
simultaneously and hold them for approx. 4 seconds.
In this way you reach the boot loader menu.
You can now choose between two firmware versions
which are displayed with their respective version
numbers. You can choose the desired version by
pressing the or keys and activate it by
pressing .
A maximum of two firmware versions can be saved
to the GlassBuddy. When transferring a new version to your device, the version which is currently
not activated will be overwritten.
14 Technical Data
16 Tips and Tricks
The GlassBuddy works with a laser wavelength
of 650 nm. Due to its conceptual design, the
Glass Buddy cannot detect the characteristics of
glass und glazed units which cannot be displayed
with this wavelength.
All factors which have an influence on the reflection
of the laser beam on different surfaces, also have
an influence on the measuring result und thus the
evaluation. In individual cases this leads to additional information, such as “!” or “Details not avail-
able” to be displayed together with the result.
In some cases, an insufficient reflection on one
or several surfaces can generate the message
“Measurement not possible”. The correct result can
usually be obtained by repeating the measurement.
EN
Type V4.0
Power supply Lithium-ion – rechargeable
battery
Laser < 1 mW; class 2M
Laser wavelength 650 nm
Measuring range GlassBuddy Plus
up to 100 mm
GlassBuddy Basic
up to 50 mm
Accuracy 0.1 mm
Measuring tolerance 1% on measuring range
Display 64 x 128 pixels
Dimensions 180 x 83 x 42 mm
Weight 350 g
Working temperature + 5° C to + 40° C
15 Technical Support
Please address any technical questions, comments
or suggestions by e-mail to glassbuddy@bohle.de.
If you have questions concerning the measurements
you have carried out, please make available the
corres ponding .gdm file.
It often already suffices to thoroughly clean the
accessible glass surfaces in order to improve their
reflection properties.
The weather-related steaming up of the sensor slit,
e. g. due to a quick transfer from a cold into a warm
environment, can lead to measuring errors. Please
wait for a few minutes until the device has adjusted
to ambient temperature.
Depending on the light conditions, it might also be
helpful to change the position of the GlassBuddy
on the glass surface. The GlassBuddy does not
necessarily need to be positioned vertically for
achieving correct measuring results. Only make sure
that all the four feet rest firmly on the surface to
be measured and that the GlassBuddy is not moved
while performing the measurement.
The GlassBuddy is supplied readily calibrated. A
new calibration is usually not required. If you detect
a permanent malfunctioning of your GlassBuddy,
a calibration (involving additional costs) might be
necessary. Please contact your dealer.
37
Page 20

Germany
Bohle AG – Head Office
Dieselstraße 10
D-42781 Haan
[email protected]
Hungary
Bohle GmbH - Forgalmazás HU
Lemböckgasse 63/2/1
A-1230 Wien
[email protected]
Sweden
Bohle Scandinavia AB
Pyramidbacken 3
SE-14175 Kungens Kurva
[email protected]
Austria
Bohle GmbH
Lemböckgasse 63/2/1
A-1230 Wien
[email protected]
United Kingdom and Ireland
Bohle Ltd.
Fifth Avenue
Tameside Park · Dukinfield
Cheshire · SK16 4PP
[email protected]
Estonia
Bohle Baltic OÜ
Punane 42 - 101
EE-13619 Tallinn
[email protected]
France
Bohle AG
Département français
Dieselstraße 10
D-42781 Haan
[email protected]
Italy
Bohle Italia s.r.l.
Via Cavallotti 28
I-20081 Abbiategrasso
[email protected]
Netherlands
Bohle Benelux B.V.
Nieuweweg Noord 314 B - 20
NL-3905 LX Veenendaal
[email protected]
Spain
Bohle Complementos del Vidrio S.A.U
Mare de Deu de Bellvitge, 312
E-08907 L‘Hospitalet
Barcelona
[email protected]
South Africa
Bohle Glass Equipment (Pty) Ltd.
Unit 3, Graphite Industrial Park
Fabriek Street,
Strijdom Park 2125, Gauteng
[email protected]
United States
Bohle America, Inc.
10924, Granite Street
Suite 200
Charlotte, NC 28273
[email protected]
Russia
Bohle Moscow
Leninsky Rayon
Business Center Rumjanzevo
Bldg. 1, Block A, Office 721 A,
RU-142784 Moscow
[email protected]
Bohle – St. Petersburg
Ul. Bumazhnaya 9, korp. 1/A
Office 433
RU-198020 St. Petersburg
[email protected]
10-2794 · 05-10 · 0,15 Na · D, GB, F, IT, ES, NL, SE
BX 64754
 Loading...