

Page 1
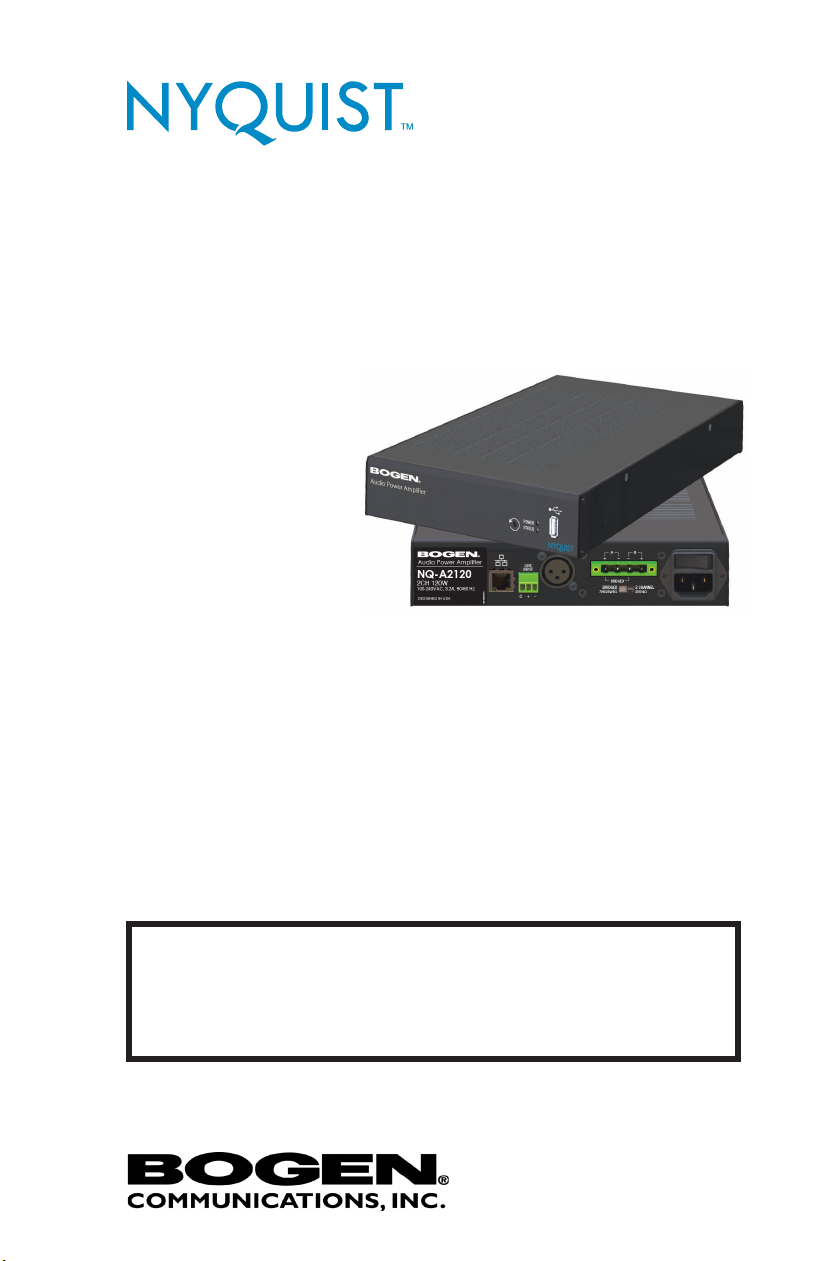
NQ-A2060, NQ-A2120
Audio Power Ampliers
Installation and Use
These networked
Audio Power Ampliers
support a full range
of commercial paging
and public address
applications, regardless
of the venue size. Both
the NQ-A2060 and the
NQ-A2120 can operate
in 2-channel mono or single channel bridged mode, depending
on the application need.
Each networked audio power amplier is a half-rack 1RU
high enclosure containing a Class D audio power amplier,
a universal switched-mode power supply, an RJ45 network
jack, a USB port, and pluggable Phoenix style terminals for
loudspeaker and Line-Out connections. Optionally, Line-Out
can be connected using the available XLR connector.
This equipment is not suitable for use in locations
where children are likely to be present.
Equipment is intended for use only
in a restricted access area.
Publication Number 740-00054A
1807
Page 2

WARNING: To reduce the risk of re or electric shock, do not
expose this apparatus to rain or moisture.
Avertissement: pour réduire le risque d’incendie ou de choc
électrique, ne pas exposer cet appareil sous la pluie et
l’humidité.
The apparatus shall not be exposed to dripping or splashing
and that no objects lled with liquids, such as vases, shall be
placed on apparatus.
L’appareil ne doit pas être exposé aux écoulements ou aux
éclaboussures et aucun objet ne contenant de liquide, tel qu’un
vase, ne doit être placé sur l’objet.
The mains plug is used as disconnect device. The mains plug
of apparatus should not be obstructed OR should be easily
accessed during intended use. To be completely disconnect
the power input, the mains plug of apparatus shall be
disconnected from the mains.
La prise du secteur est utilisé pour déconnecter le système.
La prise du secteur ne doit pas être obstruée ou doit être
facilement accessible pendant son utilisation. Pour être
complètement déconnecté de l’alimentation d’entrée, la prise
doit être débranchée du secteur.
When rack-mounted, allow 1RU spacing (1.75 inches) between
units for proper ventilation.
- Lorsqu’il est monté en rack, permettez l’espace de 1RU (1.75
pouces) entre les unités pour une ventilation adéquate.
The ventilation should not be impeded by covering the
ventilation openings with items, such as newspapers,
tablecloths, curtains, etc.
1200 MacArthur Blvd. Suite 304, Mahwah, NJ 07430
1-800-999-2809
© Copyright 2018, Bogen Communications, Inc.
2
Page 3
- il convient que l'aération ne soit pas gênée par l'obstruction
des ouvertures d'aéra
No naked ame sources, such as lighted candles, should be
placed on the apparatus.
- il convient de ne pas placer sur l'appareil de sources de
ammes nues, telles que des bougies allumées
The use of apparatus in moderate climates.
- si l'appareil est destiné à être utilisé sous un climat tempéré.
Important Safety Information
WARNING: To
reduce the risk
of re or electric
shock, do not
expose this
apparatus to rain
or moisture.
Always comply
with the following
basic safety precautions when installing and using the unit:
1. Read these instructions.
2. Keep these instructions.
3. Heed all warnings.
4. Follow all instructions.
5. Clean only with dry cloth.
1200 MacArthur Blvd. Suite 304, Mahwah, NJ 07430
1-800-999-2809
© Copyright 2018, Bogen Communications, Inc.
3
Page 4

6. DO NOT install near any heat sources such as
radiators, heat registers, stoves, or other apparatus
(including ampliers) that produce heat.
7. DO NOT defeat the safety purpose of the polarized or
grounding-type plug. A polarized plug has two blades with
one wider than the other. A grounding-type plug has two
blades and a third grounding prong. The wide blade, or the
third prong, are provided for your safety. If the provided
plug does not t into your outlet, consult an electrician for
replacement of the obsolete outlet.
8. Protect the power cord from being walked on and/or
pinched, particularly at plugs, convenience receptacles,
and the point where they exit from the apparatus.
9. Only use attachments/accessories that are specied by
the manufacturer.
10. Unplug this apparatus during lightning storms or when
unused for long periods of time.
11. Refer all servicing to qualied service personnel. Servicing
is required when the apparatus has been damaged in any
way, such as power-supply cord or plug is damaged, liquid
has been spilled or objects have fallen into the apparatus,
the apparatus has been exposed to rain or moisture, does
not operate normally, or has been dropped.
1200 MacArthur Blvd. Suite 304, Mahwah, NJ 07430
1-800-999-2809
© Copyright 2018, Bogen Communications, Inc.
4
Page 5

WARNING:
The apparatus shall be connected to a mains socket
outlet with
a protective earthing connection.
To reduce the risk of re or electric shock, do not expose this apparatus to rain or moisture.
The apparatus shall not be exposed to dripping or
splashing and no objects lled with liquids, such as
vases, shall be placed on the apparatus.
Where the mains plug or an appliance coupler is used
as the disconnect device, the disconnect device shall
remain readily operable.
Installation
To install the Audio Power Amplier:
1. Ensure the POWER switch is in the off position.
2. Connect the universal mains power line cord into the
amplier.
3. Connect a Cat5 type cable into the amplier’s Ethernet port
and ensure the other end of the cable is correctly connected
to your network.
4. Set the Amplier Mode switch to the desired setting.
This amplier can be congured for single-channel bridged
mode (aka bridged-tied load) operation for 70V/25V/8Ω
applications, or 2-channel (mono) operation for 25V/8Ω/4Ω
applications. The Amplier Mode switch is used in
conjunction with the Bridged Signal routing setting in the
system console.
1200 MacArthur Blvd. Suite 304, Mahwah, NJ 07430
1-800-999-2809
© Copyright 2018, Bogen Communications, Inc.
5
Page 6

Bridged mode is typically used when higher power,
single channel operation with a high impedance
loudspeaker load is desired. A typical use-case would
be for 70V or 25V loudspeaker runs, where the total
load is no less than 8Ω.
2 Channel mode is typically used for 8Ω or 4Ω
loudspeakers runs. This mode allows the two amplier
channels to operate independently.
5. Connect the loudspeaker wires to the Amplier
Output Terminals, which are labeled A +/- and B +/-,
as appropriate for the desired mode of operation (see
Figures 1 and 2).
Figure 1. Bridged Wiring Diagram
Bridged mode operation requires the speaker wires to
be connected across a single, different terminal on each
channel (A+ and B-). (See Figure 1.)
1200 MacArthur Blvd. Suite 304, Mahwah, NJ 07430
© Copyright 2018, Bogen Communications, Inc.
6
1-800-999-2809
Page 7

If two channel mode is used, then Channel A is connected to the
A+ and A- terminals and B channel is connected to the B+ and
B- terminals. (See Figure 2.)
Figure 2. Two-Channel Wiring
Notice
The minimum impedance of a Bridged 70V/25V/8Ω High
Impedance system should not be less than 8Ω.
The minimum impedance of a 2CH 25V/8/4Ω system
should not be less than 4Ω per channel.
1200 MacArthur Blvd. Suite 304, Mahwah, NJ 07430
1-800-999-2809
© Copyright 2018, Bogen Communications, Inc.
7
Page 8

The combined total power of each speaker tap must not
exceed 80% of the rated amplier power in either Bridged
70V/25V/8Ω mode or 2CH 25V/8/4Ω mode.
Failure to observe minimum speaker impedance will cause
the amplier to self protect until the speaker conguration
is corrected.
6. If using Line Input, route the input.
The amplier uses a balanced line level (up to 2V RMS) analog audio input. You can use either XLR or Phoenix (but not
both) as the input.
This input can be routed to either or both amplier channels,
depending on the setting of the Amplier Mode switch.
7. Plug the power line cord into the power source.
8. Toggle the Power switch to the On position.
9. For information about conguring the amplier for the
Nyquist system, refer to the Nyquist Audio Power Ampliers
Conguration Manual.
Power Ratings
The NQ-A2060 can provide 60 Watts into two separate chan-
nels into 25V, 8Ω, or 4Ω, or 120 Watts Bridged (one channel) into
70V, 25V, or 8Ω load congurations.
The NQ-A2120 can provide 120 Watts into two separate chan-
nels into 25V, 8Ω, or 4Ω, or 240 Watts Bridged (one channel) into
70V, 25V, or 8Ω load congurations.
1200 MacArthur Blvd. Suite 304, Mahwah, NJ 07430
1-800-999-2809
© Copyright 2018, Bogen Communications, Inc.
8
Page 9

Viewing and Understanding LEDs
Two LEDs appear on the front of the amplier. One is labeled
POWER and appears as solid red during initial power up,
ashes green during a boot sequence, and appears solid green
when fully booted.
The STATUS LED uses the following indicators to provide
information about the appliance:
• Flashing red – No network connection found.
• Solid blue – The amplier is in an uninitialized state and is
not associated to a server. (The server may be in a discovery
mode.)
• Solid green – The
amplier is registered to
a Nyquist server and is in
normal operation.
• Flashing green – The
amplier has an IP
address but is not
registered with the
Nyquist server.
• Solid red – The amplier needs to be rebooted or reset so
that the Nyquist application can resume.
• Flashing blue – The amplier is updating.
Clipping, Protection, and Temperature Indicators
In addition to the LEDs that appear on the actual appliance,
separate amplier module signal clipping, protection mode,
and temperature status indicators appear in the Nyquist
1200 MacArthur Blvd. Suite 304, Mahwah, NJ 07430
1-800-999-2809
© Copyright 2018, Bogen Communications, Inc.
9
Page 10

amplier’s web-based user interface. For more information
about these status indicators, refer to the Nyquist NQ-A2060,
NQ-A2120 Audio Power Ampliers Conguration Manual.
Using the Reset Button
The Reset button allows you to restart the appliance or to reset
the appliance’s conguration settings to the factory default
settings. For more information about resetting conguration
settings, refer to the Nyquist Audio Power Ampliers
Conguration Manual.
Notice
Every effort was made to ensure that the information in this
manual was complete and accurate at the time of printing; however, all information is subject to change.
Compliance
NOTE: This equipment has been
tested and found to comply with
the limits for a Class A digital
device, pursuant to Part 15 of
the FCC rules. These limits are
designed to provide reasonable protection against harmful
interference when the equipment
is operated in a commercial
environment. This equipment generates, uses and can radiate radio
frequency energy and, if not installed and used in accordance with
the instruction manual, may cause harmful interference to radio
communications. Operation of this equipment in a residential area
is likely to cause harmful interference in which case the user will be
1200 MacArthur Blvd. Suite 304, Mahwah, NJ 07430
1-800-999-2809
© Copyright 2018, Bogen Communications, Inc.
10
Page 11

required to correct the interference at his own expense.
Limited Warranty, Exclusion of Certain Damages
The NQ-A2120 and the NQ-2060 are warranted to be free from de-
fects in materials and workmanship for ve (5) years from the date
of sale to the original purchaser. Any part of the product covered by
this warranty that, with normal installation and use, becomes defec-
tive (as conrmed by Bogen upon inspection) during the warranty
period will be repaired or replaced by Bogen, at Bogen’s option, with
new or refurbished product, provided the product is shipped insured
and prepaid to: Bogen Factory Service Department: 4570 Shelby Air
Drive, Suite 11, Memphis, TN 38118, USA. Repaired or replacement
product(s) will be returned to you freight prepaid. This warranty does
not extend to any of our products that have been subjected to abuse,
misuse, improper storage, neglect, accident, improper installation
or have been modied or repaired or altered in any manner whatsoever, or where the serial number or date code has been removed or
defaced.
THE FOREGOING LIMITED WARRANTY IS BOGEN’S SOLE AND
EXCLUSIVE WARRANTY AND THE PURCHASER’S SOLE AND EXCLUSIVE REMEDY. BOGEN MAKES NO OTHER WARRANTIES OF ANY
KIND, EITHER EXPRESS OR IMPLIED, AND ALL IMPLIED WARRANTIES OF MERCHANTABILITY OR FITNESS FOR A PARTICULAR PURPOSE ARE HEREBY DISCLAIMED AND EXCLUDED TO THE MAXIMUM
EXTENT ALLOWABLE BY LAW. Bogen’s liability arising out of the
manufacture, sale or supplying of products or their use or disposition, whether based upon warranty, contract, tort or otherwise, shall
be limited to the price of the product. IN NO EVENT SHALL BOGEN
BE LIABLE FOR SPECIAL, INCIDENTAL OR CONSEQUENTIAL DAMAGES (INCLUDING, BUT NOT LIMITED TO, LOSS OF PROFITS, LOSS
OF DATA OR LOSS OF USE DAMAGES) ARISING OUT OF THE MANUFACTURE, SALE OR SUPPLYING OF PRODUCTS, EVEN IF BOGEN HAS
BEEN ADVISED OF THE POSSIBILITY OF SUCH DAMAGES OR LOSS-
ES. Some States do not allow the exclusion or limitation of incidental
or consequential damages, so the above limitation or exclusion may
not apply to you. This warranty gives you specic legal rights, and
you may also have other rights which vary from State to State.
1200 MacArthur Blvd. Suite 304, Mahwah, NJ 07430
1-800-999-2809
© Copyright 2018, Bogen Communications, Inc.
11
Page 12

Products that are out of warranty will also be repaired by Bogen Factory Service Department -- same address as above or call 201-934-
8500, at owner’s expense. Returned products which do not qualify
for warranty service, may be repaired or replaced at Bogen’s option
with a previously repaired or refurbished items. The parts and labor
involved in these repairs are warranted for 90 days when repaired by
the Bogen Factory Service Department. All parts and labor charges
as well as shipping charges will be at the owner’s expense.
All returns require a Return Authorization number. For most efcient
warranty or repair service, please include a description of the failure.
7/2018
1200 MacArthur Blvd. Suite 304, Mahwah, NJ 07430
1-800-999-2809
© Copyright 2018, Bogen Communications, Inc.
12
 Loading...