

Page 1
Inspecting and Replacing Brushes in Bodine Type 24A Permanent
Magnet DC (PMDC) Motors or Gearmotors
The permanent magnet DC (PMDC) motors and gearmotors manufactured by Bodine Electric Company are
unique compared to other DC motors and gearmotors in many ways. This is because the primary objectives in
the design of all Bodine products are long life, quiet operation, and no lubricant leakage. The long life
carbon brushes in your Bodine 24A motor or gearmotor are subject to routine wear and will need to be
inspected and replaced periodically to provide continued optimal operation of the motor or gearmotor.
Installing bushes and springs correctly is critical. Incorrect installation can cause brushes to wear faster, or
ultimately could damage the product.
By following these instructions when inspecting and replacing the brushes in a Bodine type 24A motor or
gearmotor, the user can be assured of long brush life, and desired motor or gearmotor performance.
TOOLS NEEDED:
Medium size
slotted tip
screwdriver
Safety glasses
STEP #1 – Disconnect Power
Disconnect the motor wires from the power source before working on the motor. The motor or gearmotor should be
cooled off to room temperature.
Failure to disconnect the motor wires from the power
source before inspecting or replacing brushes can result
WARNING
in personal injury.
STEP #2 – Remove Two Brush Caps
Refer to Figure 1 for the location of the two brush holders. The plastic brush caps are held in place with screw threads.
Unscrew the brush caps as in Figure 2 using an appropriately sized slotted tip screwdriver and remove them.
Fig 1 Fig 2
The brush caps are made of plastic and are installed
CAUTION
tightly. Using too small a screwdriver to remove them
could damage the slot.
Inspecting and Replacing Brushes in a Bodine Type 24A Motor or Gearmotor. Lit. P/N 07481065.A © Bodine Electric Company 2007 Page 1 of 2
851-636 Rev. A
Page 2
STEP #3 – Remove Brushes and Springs
g
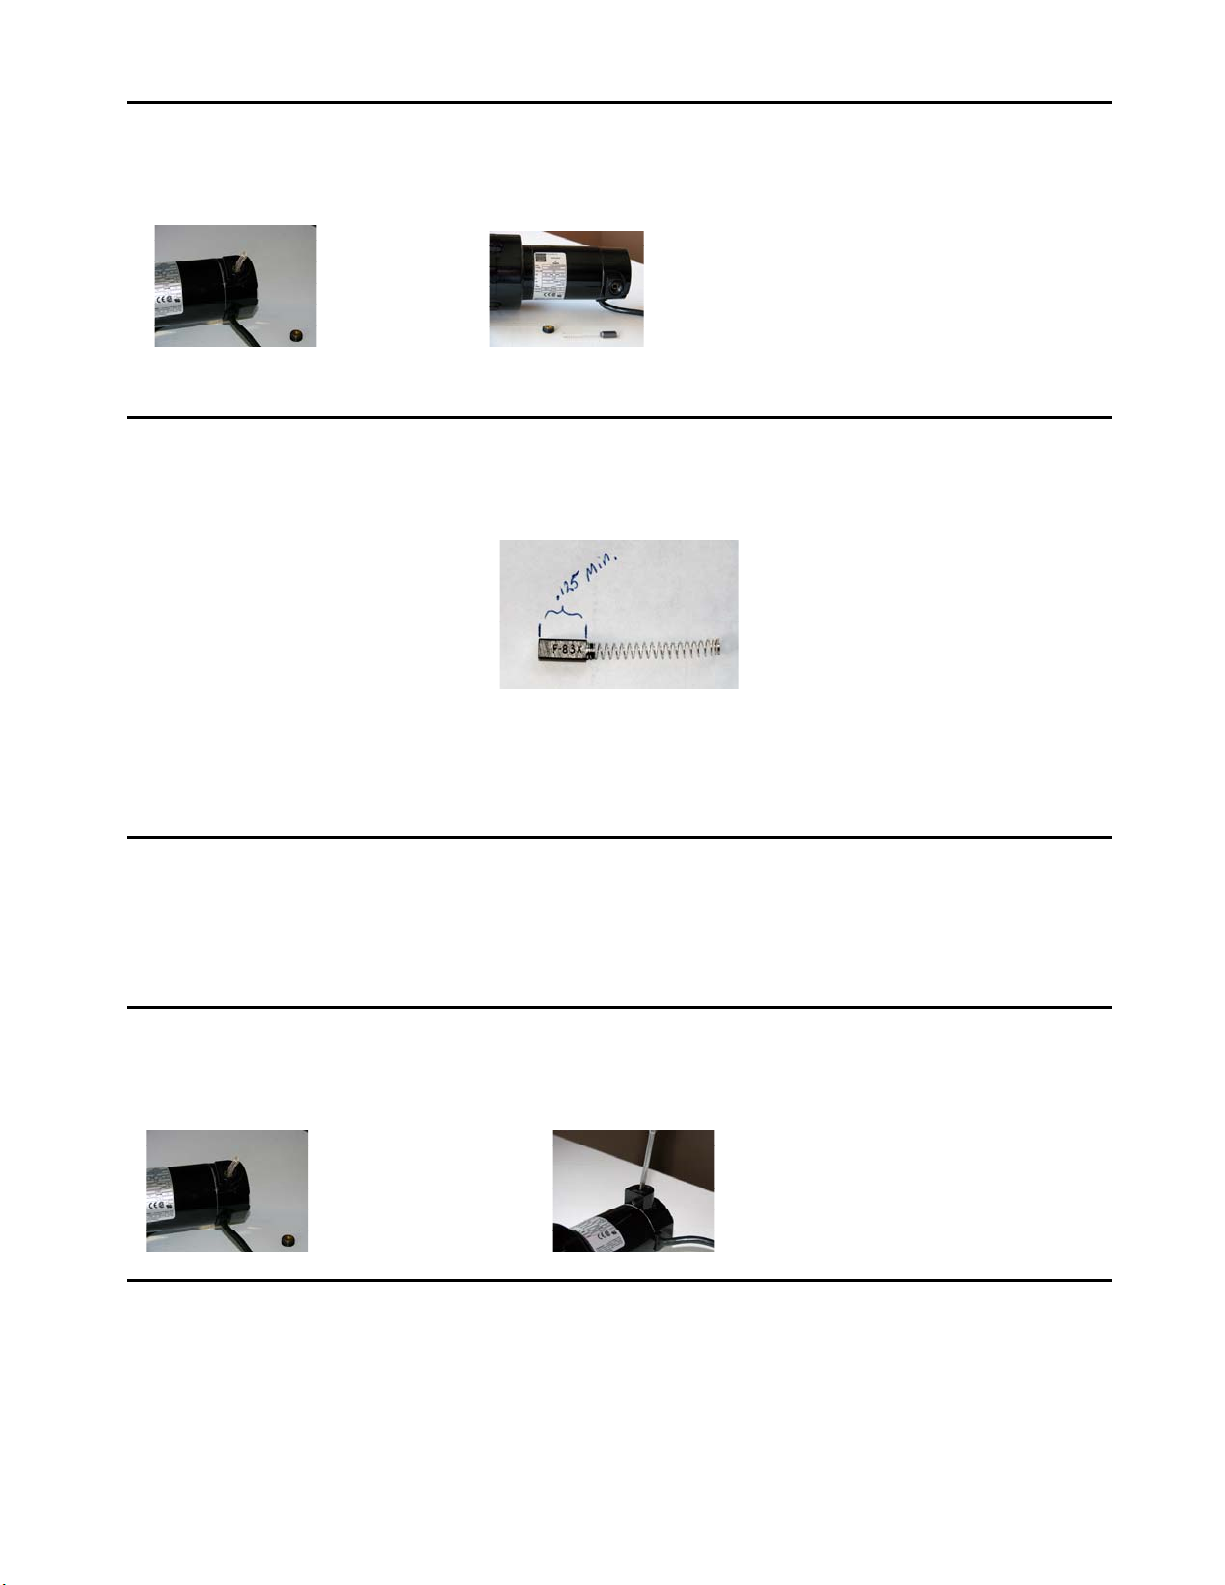
After the brush caps are removed from each side of the motor, the brush springs will be plainly visible as in Figure 3.
Simply grasp the spring and pull the brush and spring out of the motor. The spring will be attached to brush as seen in
Figures 4 and 5.
Fig 3 Fig 4
Flat part of sprin
STEP #4 – Inspect Brushes
Brush wear rate can vary, depending on the application duty cycle, load, speed and ambient environment. The brushes
should be inspected at frequent intervals to determine an appropriate inspection schedule. Brushes should be replaced
before the total length is less than .125 inch (3.2 mm). See Figure 5.
Fig 5
Repeat the inspection procedure for the other brush. If new brushes are required, record the motor type and serial number
from the motor nameplate. Contact your supplier, any Authorized Bodine Distributor, or our Service Department. You
will find more information on how to contact us on Bodine Electric’s website at: www.bodine-electric.com
STEP #5 – Clean Out Brush Dust
Excessive carbon dust will accumulate inside the motor endshield over time and should be removed periodically to allow
normal operation. Partial disassembly and cleaning is best. However, carefully applying compressed air alternately
through each of the open brush cap holes may provide adequate cleaning. Do not use solvents as they may damage nonmetallic parts and adversely affect subsequent brush commutation.
STEP #6 – Install New Brushes
Insert the new brush and spring into the brush holder as in Figure 6. Position the brush cap on the exposed end of the
spring, fitting the spring end into the recess on the brush cap. Gently and carefully compress the brush spring beneath the
brush cap. Screw the cap into place and tighten with screwdriver, Figure 7.
Fig 6 Fig 7
STEP #7 – Connect to Power
Reconnect the drive to the power source, and test for proper operation. New brushes may be seated by running the motor
or gearmotor in at no load. Proper seating is required for lowest brush noise level.
All information and data contained in this document are subject to change without notice. Please contact our Technical
Support staff in Chicago, or an Authorized Bodine Service Center, if you have any questions about these instructions.
Web: www.bodine-electric.com Tel.: 773-478-3515 E-Mail: [email protected]
Inspecting and Replacing Brushes in a Bodine Type 24A Motor or Gearmotor. Lit. P/N 07481065.A © Bodine Electric Company 2007 Page 2 of 2
851-636 Rev. A
 Loading...