

Page 1
Guide
Attaching a lens
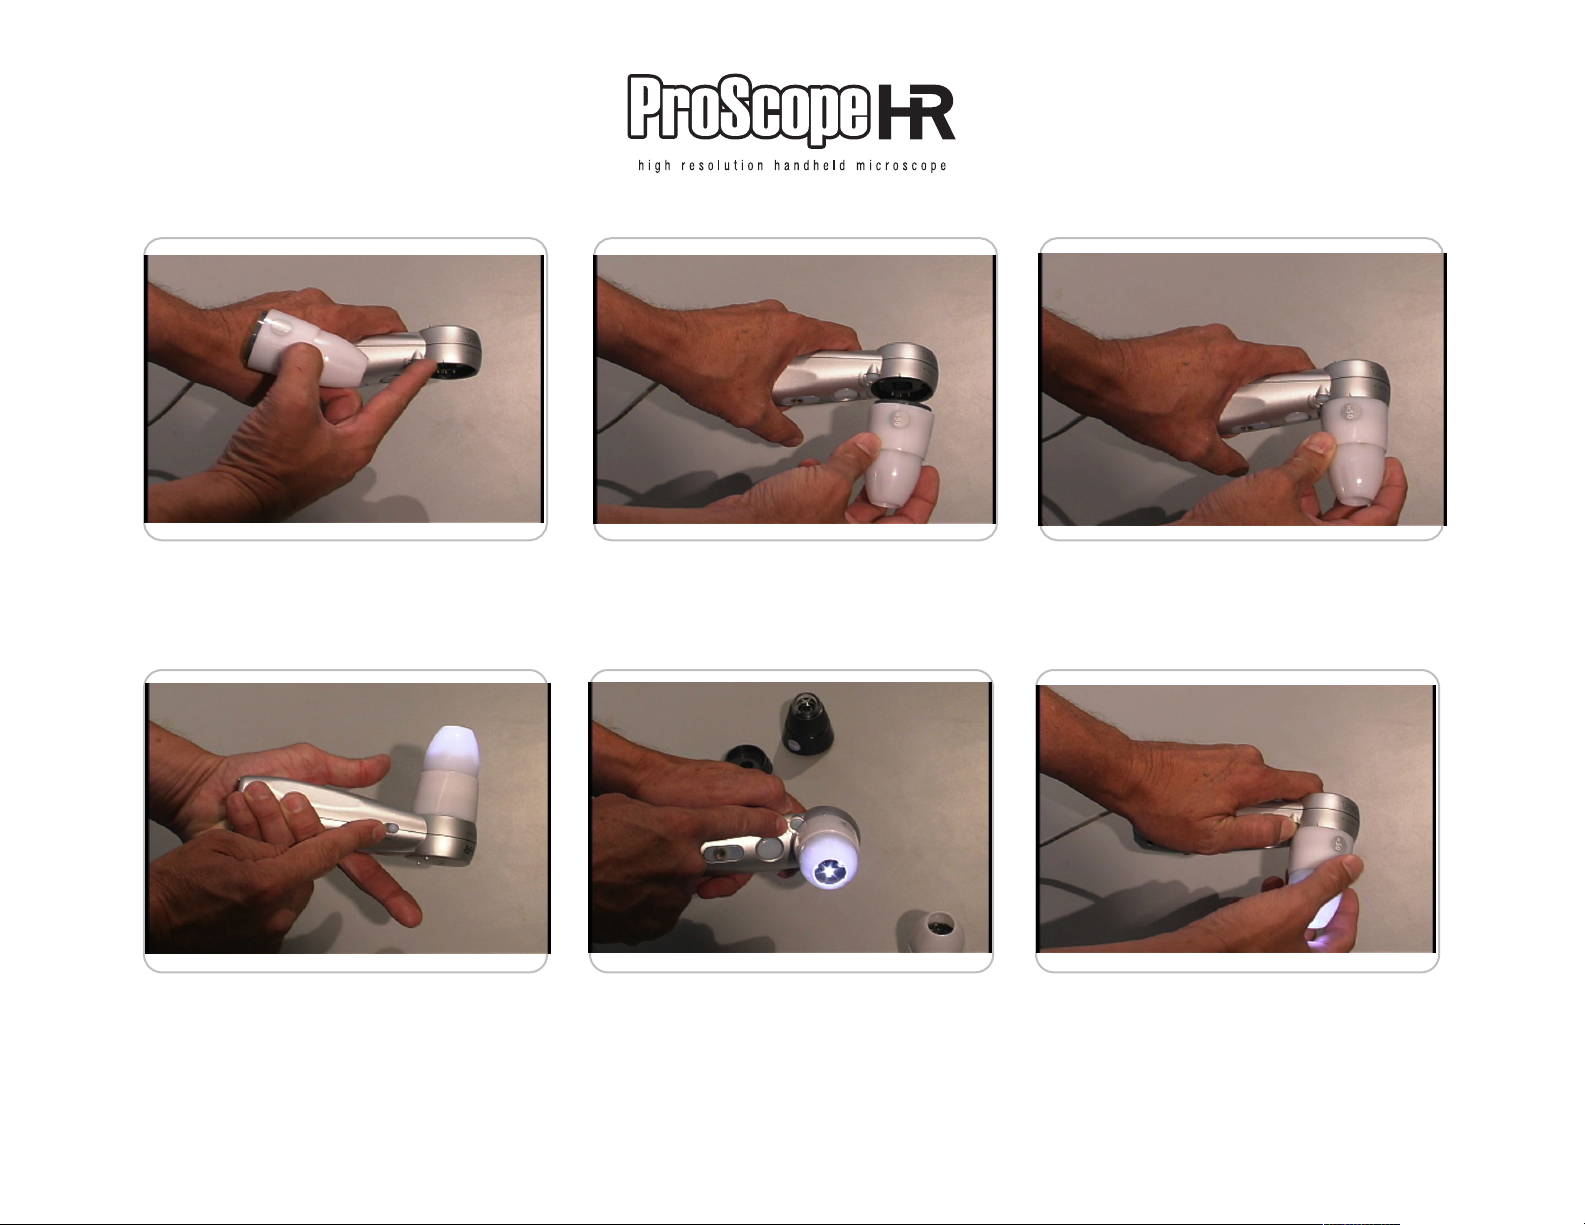
To attach a lens, line up the mark on
the side of the base...
with the dot on the side of the lens. Turn the lens clockwise until it clicks.
Removing a lens
Turn on the lens lighting to make sure
the lens is properly attached.
! !
!
To remove a lens, press and hold the
lens release button...
while turning the lens counter clockwise. Line up the lens dot and mark on
the base to remove the lens.
Page 2
Guide
Focus
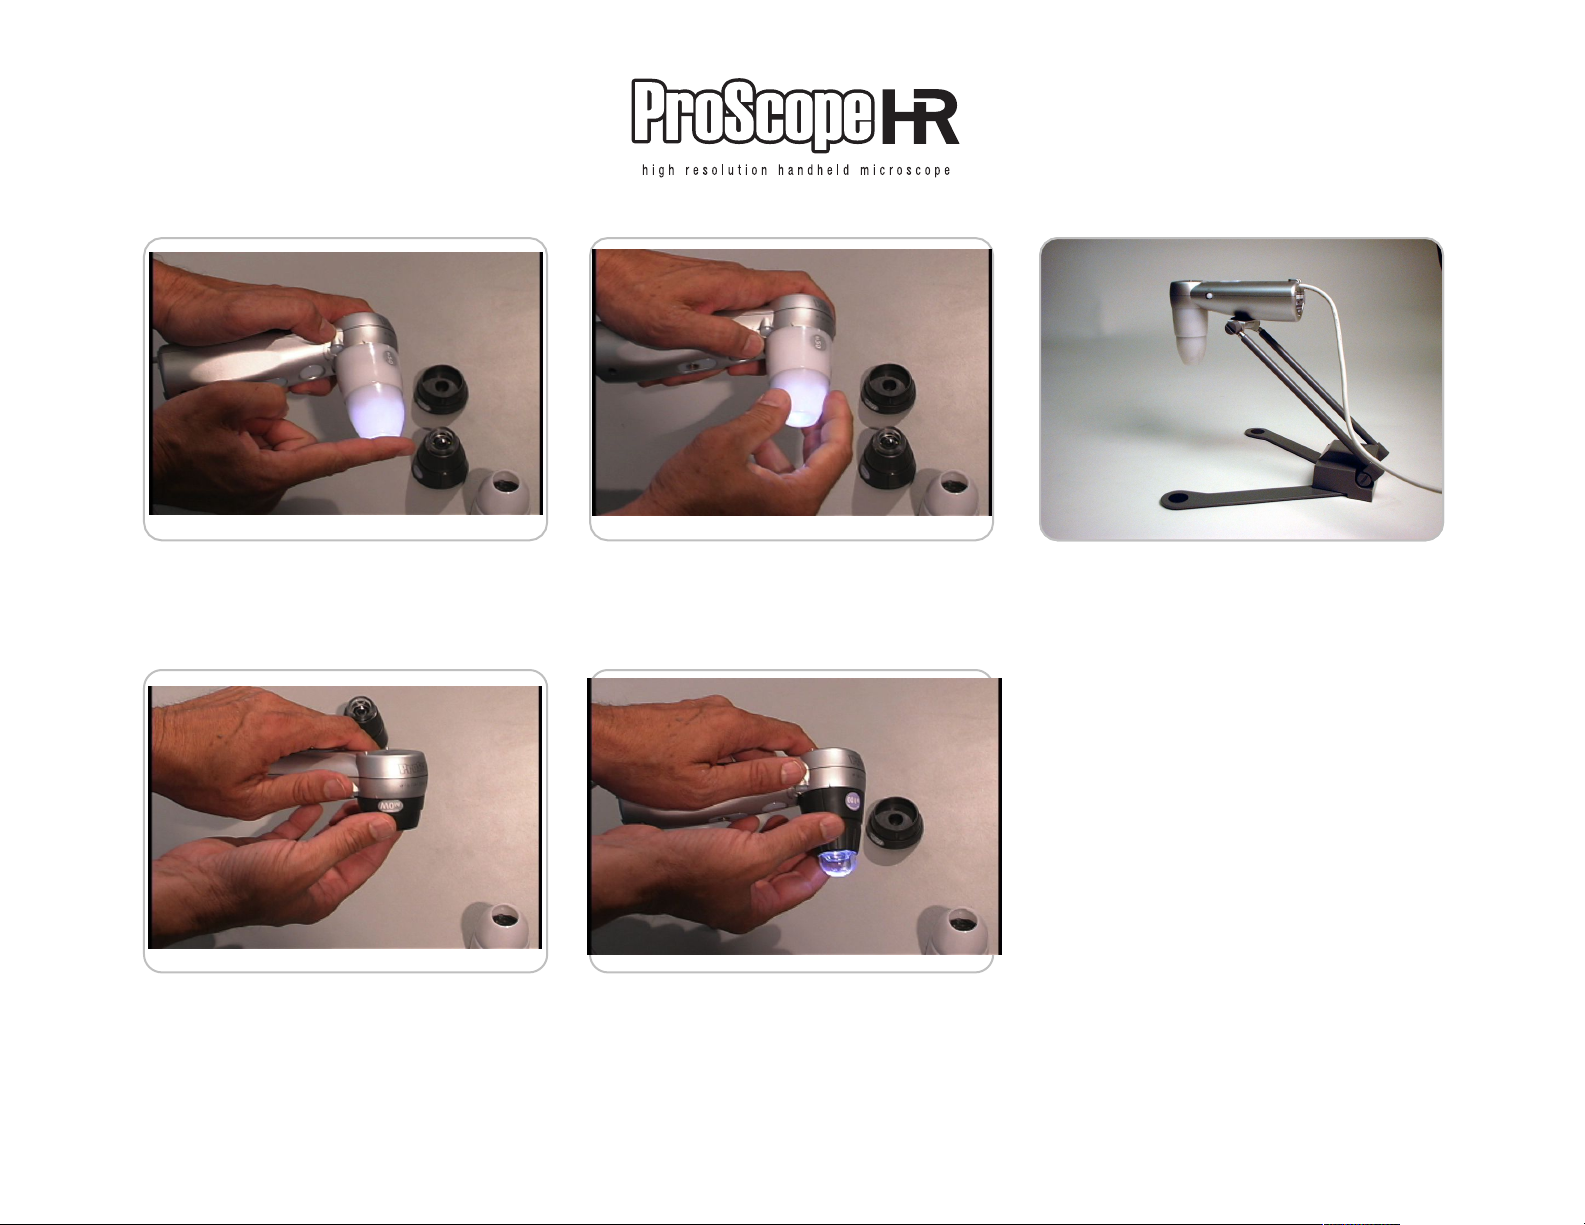
When the lens tip is fully extended, or
counter clockwise, the focal point is at
the end of the lens and is called Touch
View. You simply touch the object.
The 1-10X lens only works at Distance
View and can be adjusted in focus
from 1 to 10X. Perfect for use as a still,
video or time lapse camera or as a
dissecting scope.
! !
!
You can adjust each lens to a 1/2 inch
distance from the object by turning
the end of lens tip clockwise until it
stops. This is called Distance View.
The 100X, 200X and 400X lenses can
all be adjusted from Touch View to
Distance View by turning the forward
part of the lens cone. Unlike the 50X
or 30N lens there is not a locked position for Touch View or Distance View.
When using the ProScope HR at Distance View, focus may be difficult to
achieve by hand. The ProScope HR
stand will be very helpful to lock the
ProScope HR in a stable position for
distance view work. You can adjust
the stand to many different positions.
NOTE: Distance View is primarily used
when viewing deep uneven surfaces.
It is also used in law enforcement to
avoid contamination of evidence or
when viewing delicate objects that
cannot be touched.
Page 3
Guide
Adapting your old microscope into a digital microscope.
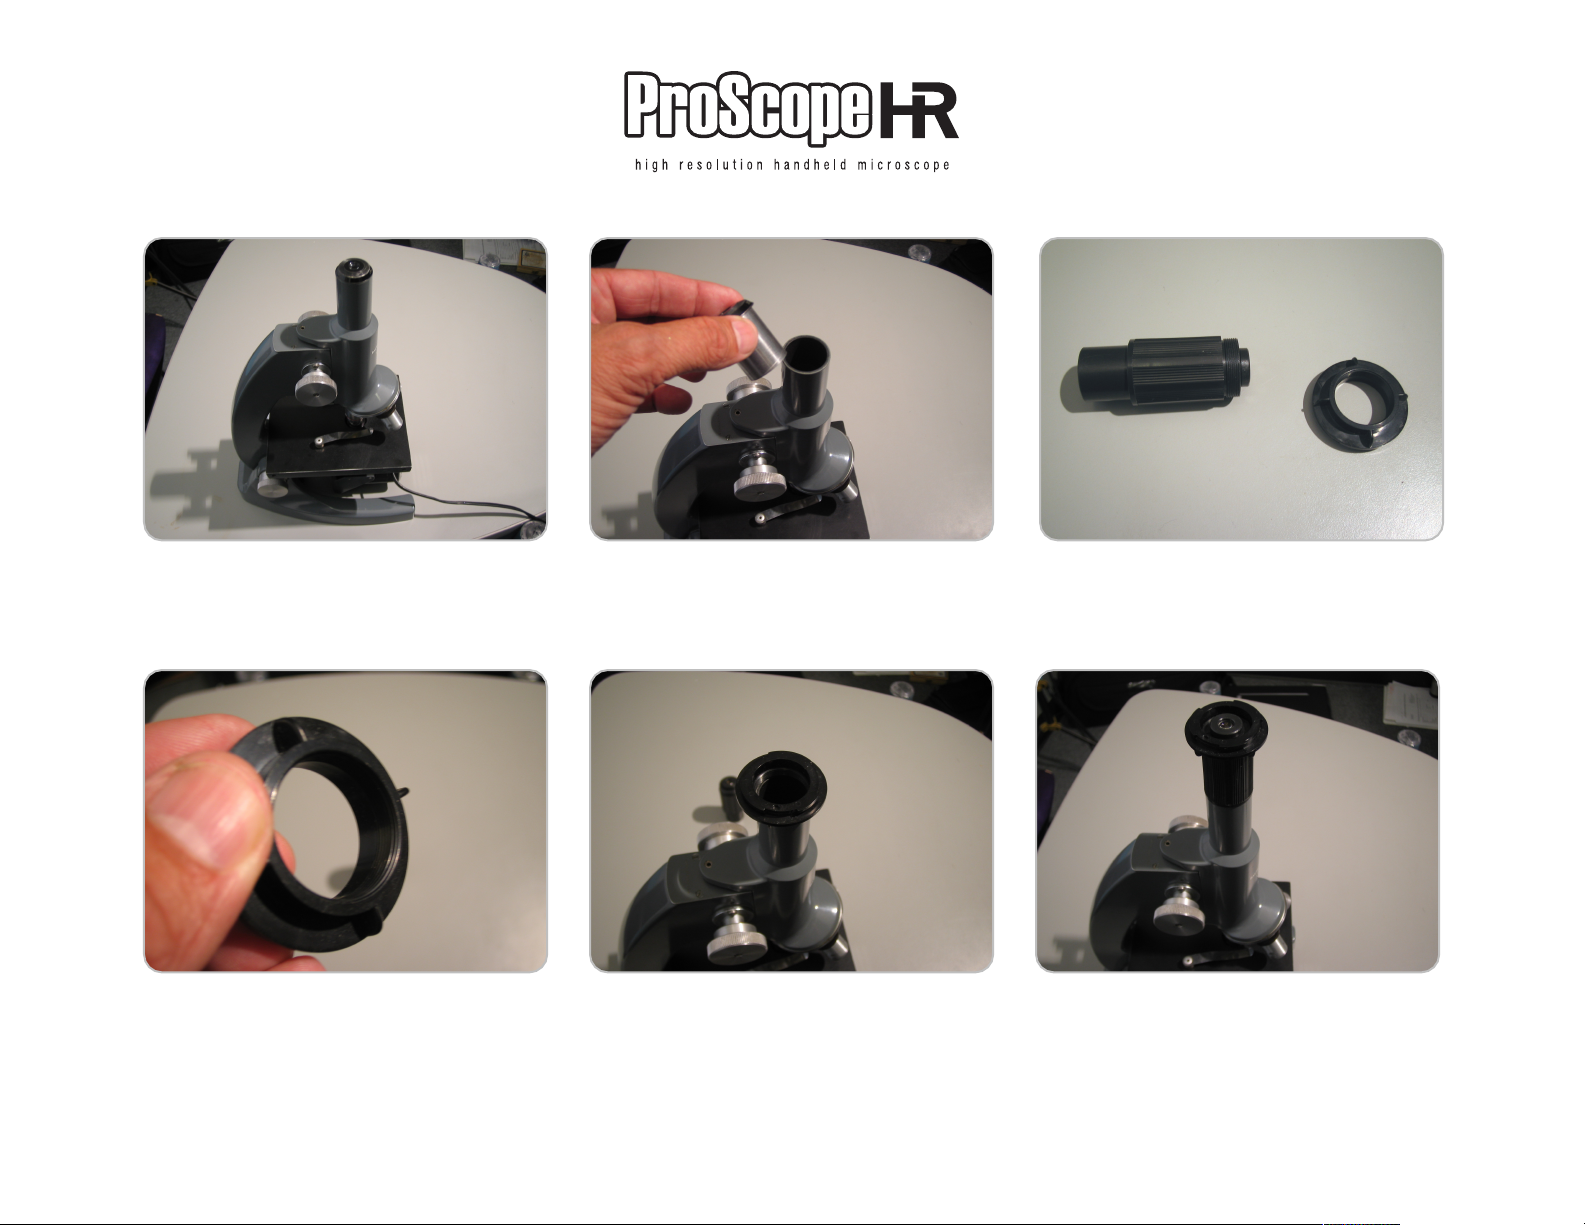
Your old microscope. Remove the ocular or eyepiece. On
binocular models this would be the
left ocular.
This is the C-mount adapter. If you have tiny C-mount threads un-
der the ocular then you only need the
C-mount adapter.
! !
!
Depending on if your microscope has
a C (camera) mount or not, you may
need to use one or both adapters.
If you don’t have C-mount threads
then you’ll need the Lens Tube adapter
with C-mount adapter.
Page 4
Guide
4
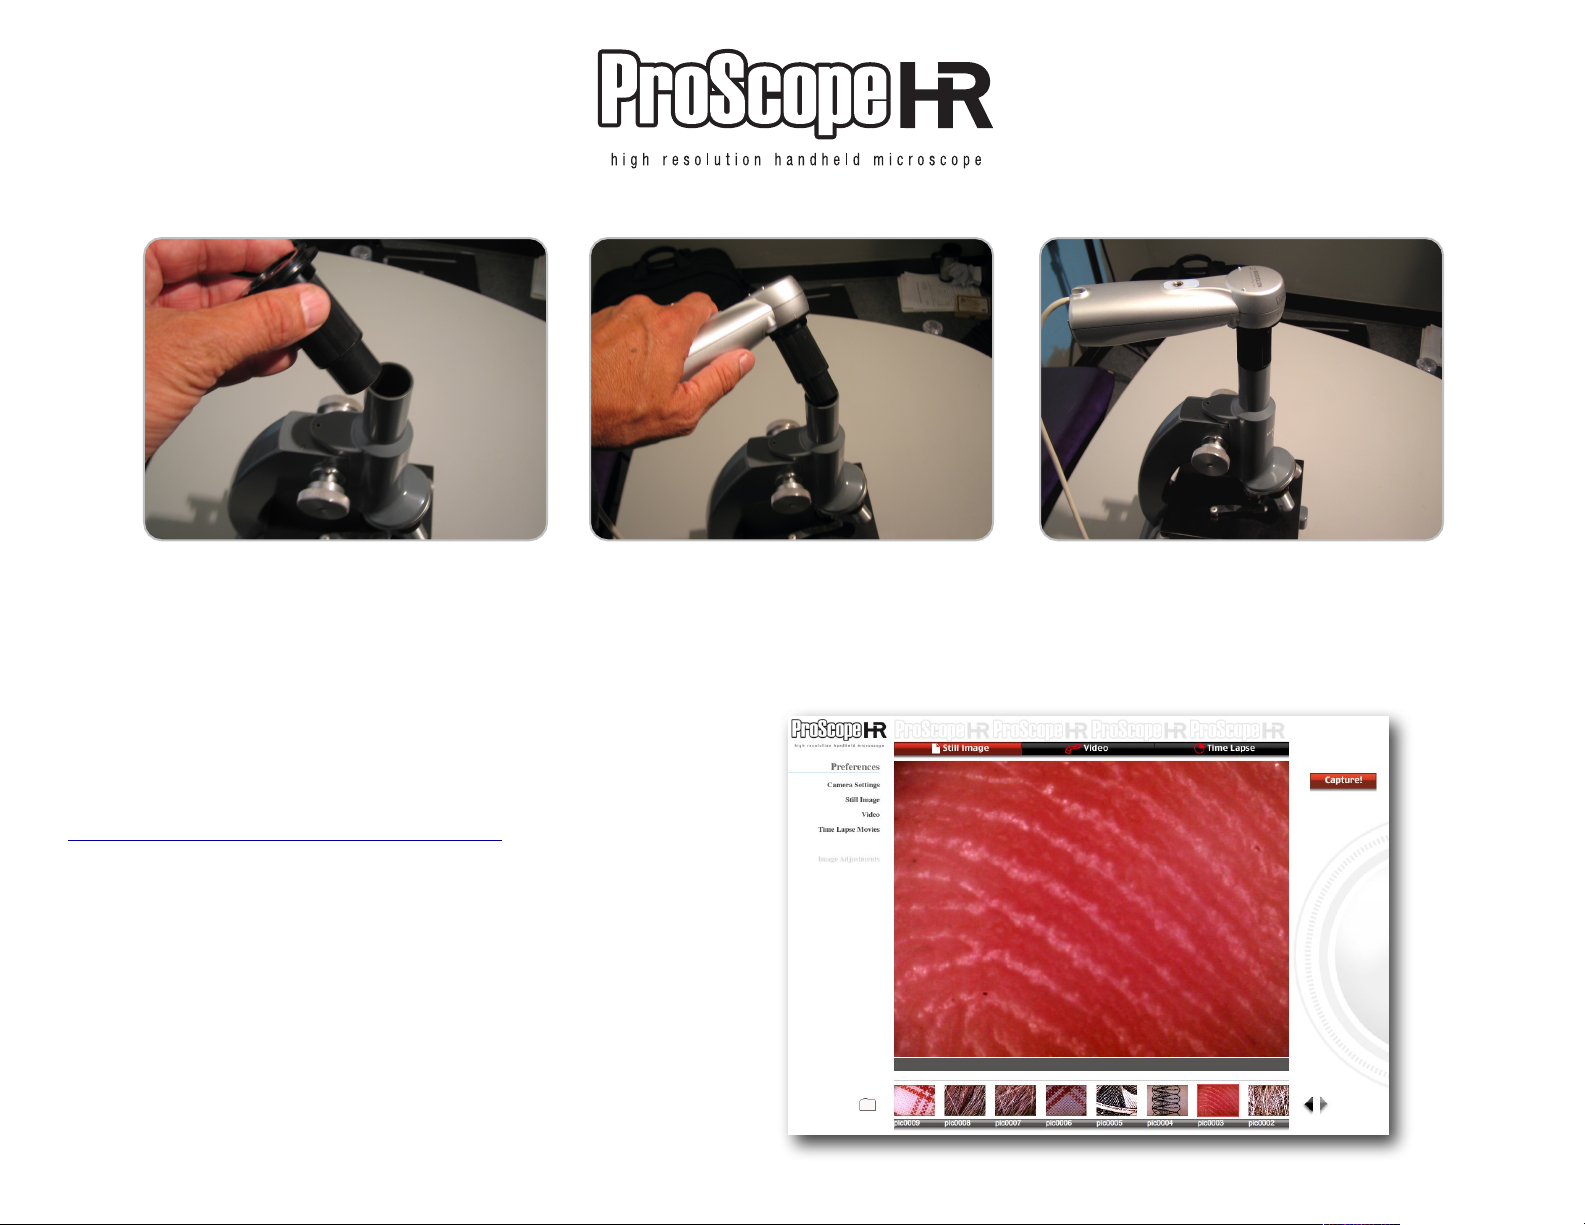
You simply thread the C-mount
adapter to the Lens Tube adapter...
and connect them to the ProScope HR
like you would any ProScope HR lens.
For details on using the ProScope HR
software, refer to the software guide:
http://www.proscopehr.com/support.html
For tech support email: [email protected]
! !
!
Now your ProScope HR receives the
image from your microscope and you
can see it on your computer screen
using our ProScope HR software.
 Loading...