

BOB OMA23 User Manual
.
.
.
.
.
.
.
.
spor
spor
t utility strtr
oller Wea
ther Shield instrtr
uctions
t utility s
(800) 893-2447 www.bobgear.com email- info@bobgear.com Ph: (208) 375-5171
Fax: (208) 375-5172, BOB Trailers, Inc. 5475 Gage St. Boise, ID 83706
oller Wea
ther Shield ins
uctions
Congratulations on your purchase of the BOB Weather
Shield. It is designed to provide your child with protection
from inclement weather. Proper installation and care will
provide years of reliable service.
Before attempting to use or attach your new Weather
Shield, read and understand these instructions
completely to insure proper assembly and operation.
If you are unclear on any point, contact your dealer or
BOB before use.
Warnings
.
This product is designed exclusively for use with BOB
Sport Utility, Sport Utility DLux and Ironman strollers. It
is not intended for use with other strollers or products.
.
The Weather Shield is made of a non-breathable material.
To avoid danger of suffocation and excessive temperatures,
follow all assembly instructions.
.
Always make sure all vents are unobstructed, as indicated
in Fig.1.
.
The Weather Shield is not designed to work with optional
Infant Car Seat Adapter and car seat.
.
Do not use Weather Shield when temperatures exceed
65oF/18oC. Use in higher temperatures can cause unsafe
conditions inside the Weather Shield.
.
Never leave child unattended.
.
When not in use, keep out of reach of children.
.
When the Weather Shield is used, the rear canopy flap
must be in correct position as described below. This will
insure proper airflow and avoid danger of suffocation.
Rear
Vents
Fig. 1 Vents unobstructed
Rear
Canopy
Flap
Aft Canopy Support
Fully Rotated Back
Fig. 2 Canopy Supports
in positon.
Side
Vents
Front
Vent
Forward
Canopy
Support
Align
seam
with
forward
Elastic
cord
end
loop
canopy
support
Fig. 6 Shield placed on canopy
Loop Around
Black Knob
Elastic Under
Black Knob
Fig. 7 Elastic under knob
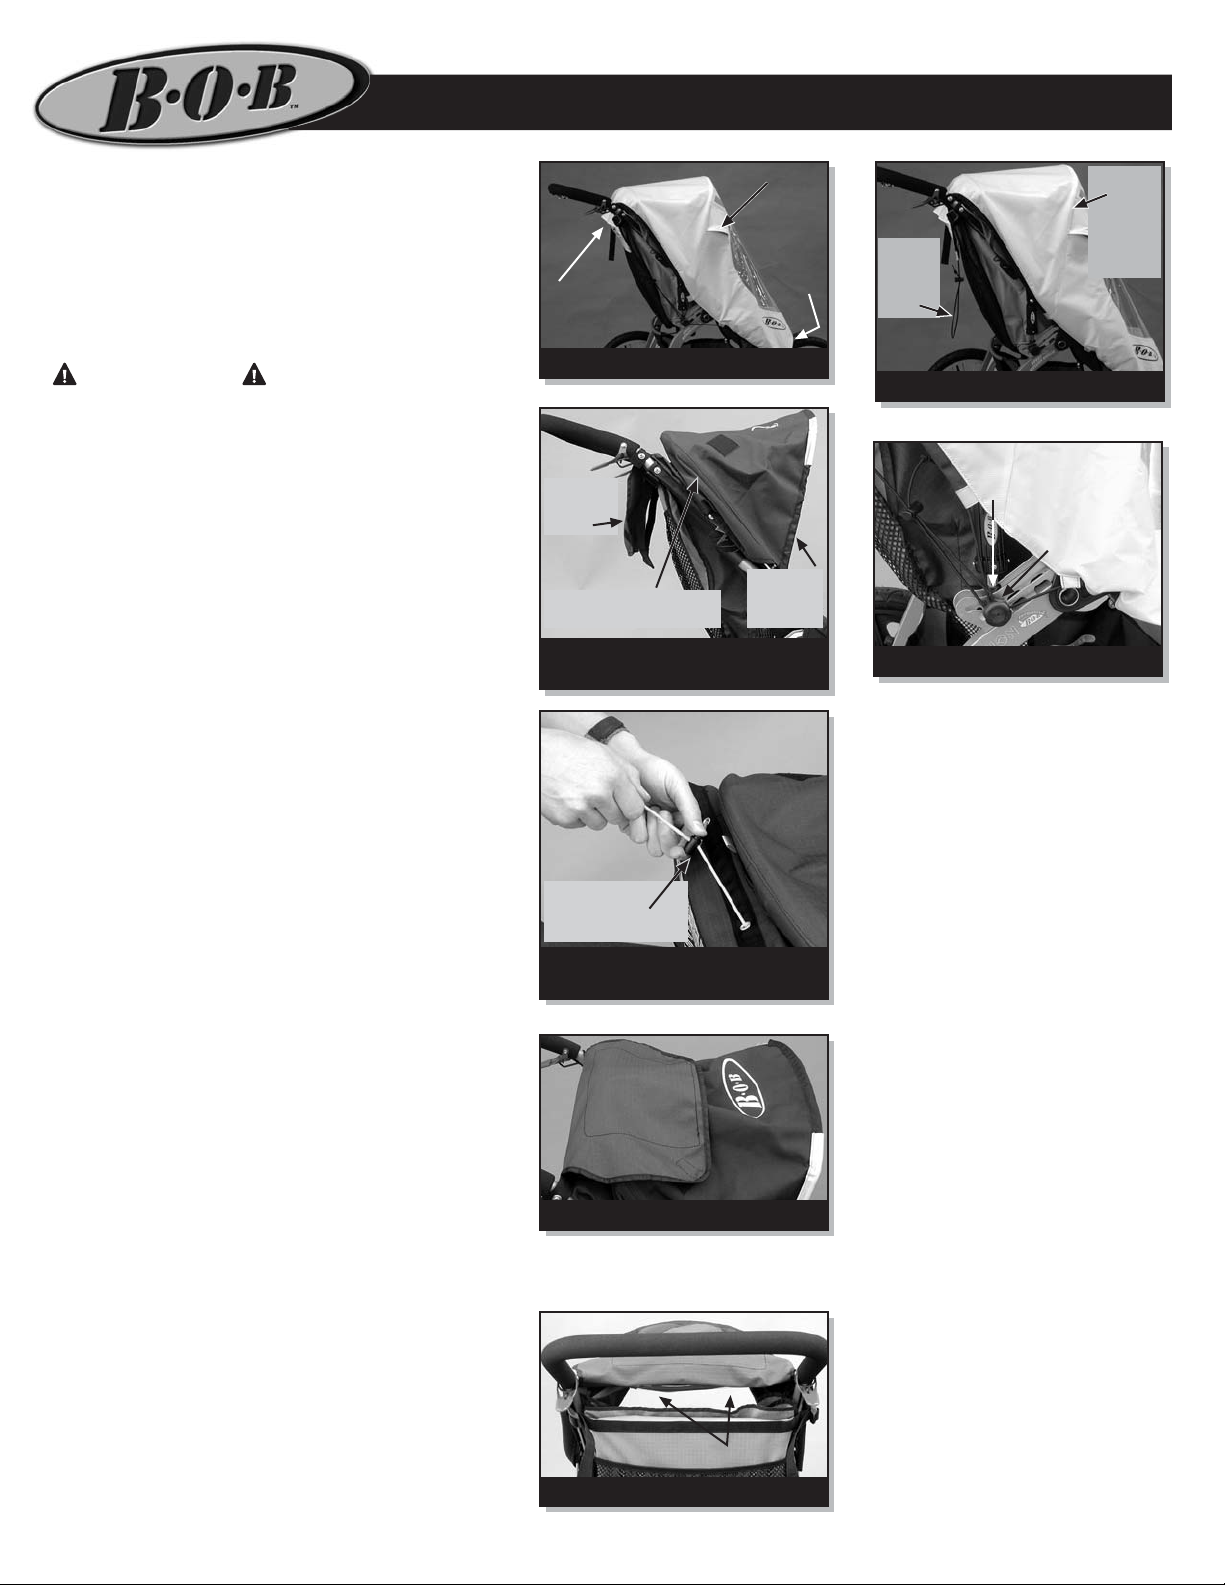
INSTALLATION INSTRUCTIONS:
1. Set stroller Parking Brake (refer to Parking Brake section
of stroller Owners Manual). Place sun canopy into position
to receive the Weather Shield as shown in Fig.2.
2. Pull each canopy drawstring in order to gather extra
material under canopy. Cinch cord lock against canopy to
retract and hold material, as shown in Fig. 3.
Very important: when the Weather Shield is used, the rear
canopy flap must be in correct position as described below.
This will insure proper airflow and avoid danger of suffocation.
3. Locate rear canopy flap and fold forward. Attach canopy
flap Velcro on flap to respective Velcro mate on top outboard
sides of canopy as shown in Fig. 4. Warning tag on rear
canopy flap also describes and illustrates this critical step.
4. Inspect opening at back of stroller to make sure the air
passage between top of seat back and canopy are
unobstructed (see Fig. 5). We recommend reclining seat
back slightly to optimize airflow (refer to Reclining Seat
section of stroller Owners Manual).
5. Place Weather Shield on the stroller so the rear flap
drapes over back (between the handlebars) and the seam
above the window is aligned with the forward Sun Canopy
supports (see Fig. 6).
6. Stretch the elastic cord on each side under each respective
black shock knob as shown in Fig. 7. There is an opening
mid way up each side (with silver reflective fabric on each
Cinch Cord
Lock tight
against Canopy
Fig. 3 Canopy Drawstring
Adjustment
Fig. 4 Canopy Flap in Position
Air Passage
Fig. 5 Rear Vent Unobstructed
OMA23
P1
end) where the elastic cord is exposed.
.
.
.
.
.
.
.
.
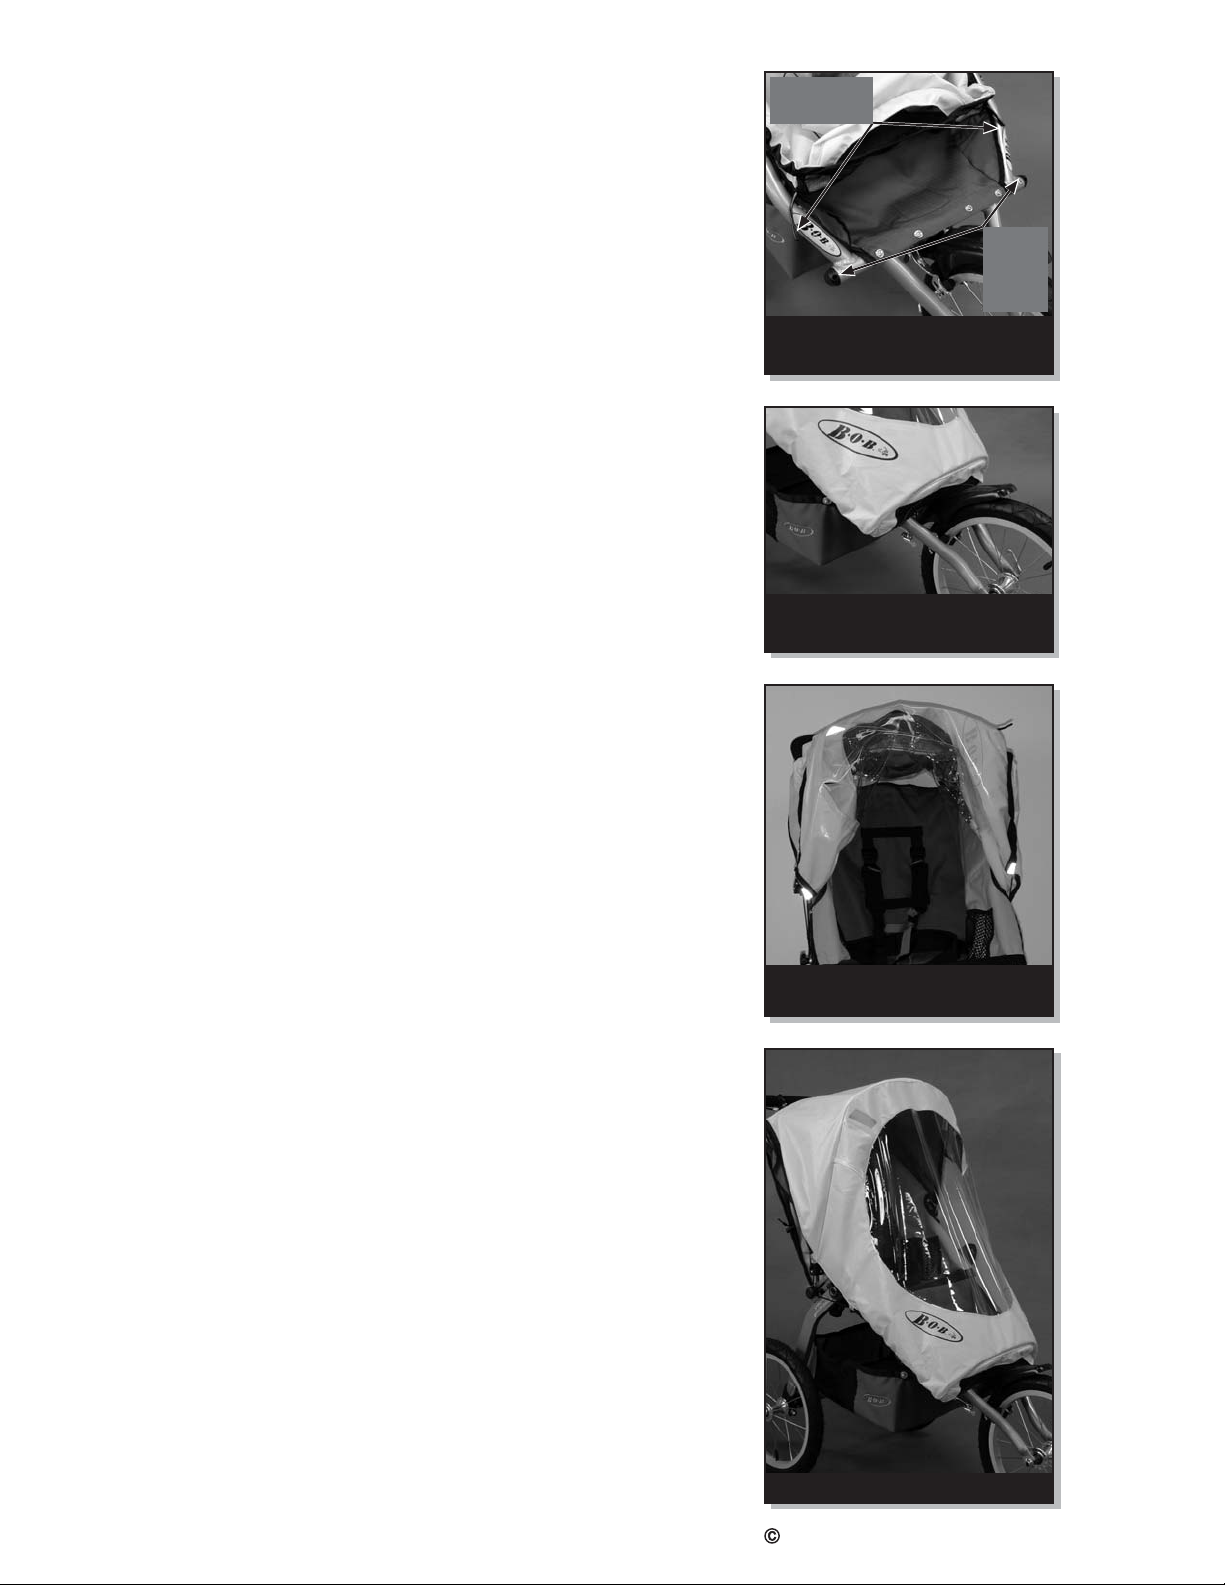
7. Attach each looped end of the elastic cords (protruding out sides of back flap) around
each black shock knob on respective side of stroller, as shown in Fig. 7 (right side
shown). The cord locks allow the loop to be enlarged or reduced, thereby adjusting the
tension.
8. Locate black plastic end plugs at outboard ends of stroller. Note hole on top of each
plug. Locate metal wire stay at front of Weather Shield (see Fig. 8). Pull Weather Shield
forward and insert ends of metal stay into holes on the black plastic plugs.
9. Stretch the elastic edges of the Weather Shield and route under sides of stroller
frame as shown in Fig. 9.
10. Align vents on rear flap of Weather Shield with air passages between top of seat
back and canopy flap. Make sure air opening is not obstructed (Fig. 5).
11. To place child in the stroller, pull the front of the Weather Shield off the front of
stroller, then lift up, stretch and roll over the forward edge of stroller canopy as shown
in Fig. 10. This will temporarily hold the Weather Shield out of your way while you place
the child into the seat.
12. Once your child is secured in the safety harness (refer to your strollers Owners
Manual, Seat Safety Harness section), release the Weather Shield from canopy and
re-secure wire stay into holes on end plugs and elastic under frame sides. Fig. 11
shows a Weather Shield correctly installed.
Ends of
metal Stay
plastic
Plugs
with
holes
Fig. 8 Front attachment:
Insert Stay ends into holes.
CARE INSTRUCTIONS:
Hand wash cold and hang dry. Do not dry clean, iron, or place in dryer.
LIMITED WARRANTY:
BOB Trailers Inc. takes pride in its workmanship and strives to manufacture the best
products possible. Therefore, we warranty the Weather Shield against defects in material
and workmanship subject to the conditions listed below. Since no product is indestructible,
it does not cover defects attributable to or resulting from normal wear, abuse or alteration.
.
The Weather Shield is warranted for one year from the date of original purchase.
.
Warranty is only valid for the original purchaser.
.
Proof of purchase is required to exercise this warranty.
.
Labor and freight charges are not included.
.
Normal wear, neglect, abuse, accidents, improper use are not covered by this warranty.
.
Warranty claims must be made through an authorized dealer.
.
This warranty is limited to the repair or replacement of the defective part. BOB shall
in no event be responsible for consequential or special damages.
.
This limited warranty is the only express or implied warranty applicable to BOB. Any
implied warranties, including warranties of merchantability and fitness shall be limited
in scope and duration in accordance with this limited warranty.
Fig. 9 Elastic properly routed
under frame sides and ends.
Fig. 10 Shield placed on
forward edge of canopy
OMA23
Fig. 11 Shield correctly installed
BOB Trailers, Inc. 2006
P2
 Loading...