

BOB AA000001 User Manual
Infant Car Seat
Adapter Instructions
Congratulations on your
purchase of the BOB Infant
Car Seat Adapter (ICSA).
It is designed to allow the
attachment of an Infant
Car Seat to your BOB
Stroller. Please refer to the
tables at right for details
of compatible strollers and
car seats.
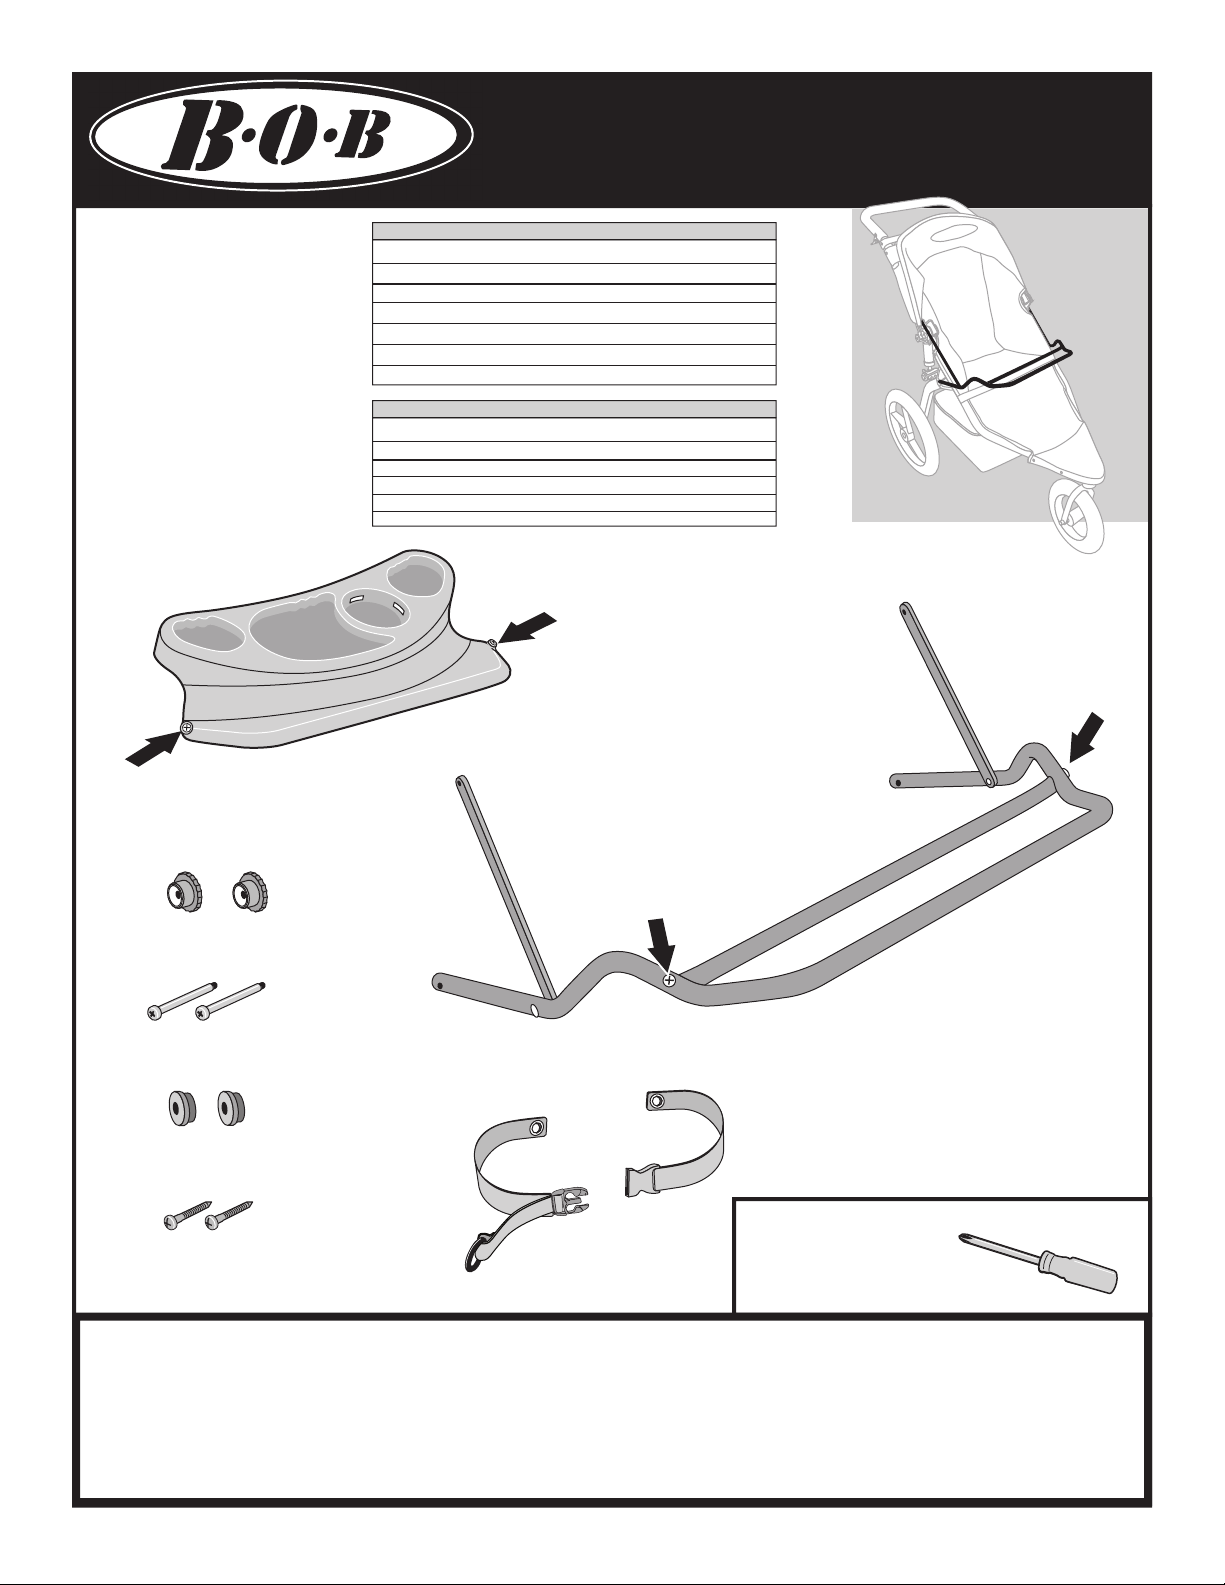
Tray
Long Screw (installed)
BOB Stroller Model Year Compatibility
Model Year(s) Model Serial Number
2005 and newer Sport Utility Stroller AA000001 and higher
2005 and newer Sport Utility Stroller D’Lux AB000001 and higher
2005 and newer Ironman AC000001 and higher
2005 and newer Revolution AF000001 and higher
2005 and newer Stroller Strides AG000001 and higher
2007 and newer Revolution 12” AK000001 and higher
Car Seat Compatibility
Brand Model Year(s)
Britax® Companion® 2003 and newer
Graco® Snug Ride® 2003 and newer
Graco® SafeSeat™ 2006 and newer
Peg Pérego® Primo Viaggio® 2003 and newer
Peg Pérego® Primo Viaggio SIP™ 2006 and newer
Long Screw
(installed)
Arm
Arm
Accessory Bar
Accessory Bar
Short Screw
(installed)
Short Screw
(installed)
Pivot Nut 2x
Main Bar
Pivot Screw 2x
Restraint
Pivot Plug 2x
Restraint
Belt F
Belt M
Sharp Screw 2x
TOOLS NEEDED:
Phillips screwdriver.
TAKE TIME - READ AND UNDERSTAND INSTRUCTIONS COMPLETELY!
Before attempting to assemble or use your new ICSA, read and understand these assembly
instructions completely, as well as the warnings at the end of this document, to insure proper
assembly and safe operation.
If you are unclear on any point, contact your dealer or BOB before use.
OMA09D P1

Pivot
Bracket
ATTACH MAIN BAR
Pivot
Bracket
Pivot
Bracket
SET PARKING BRAKE. See the “Parking Brake” section of your stroller owner’s manual.
POSITION ARMS
Rotate arms into an
upright position.
POSITION ICSA
Holding pivot screw and
pivot plug in place with
hand, position ends of main
bar over pivot brackets.
ASSEMBLE SCREW, PLUG AND BAR
Insert one pivot screw through one end of main bar
and into pivot plug.
Pivot Screw
Main Bar
Pivot Plug
INSERT PIVOT
PLUG AND SCREW
Pivot
Slip pivot plug into
opening on pivot
Bracket
bracket and push
pivot screw ush
against bar.
INSERT PIVOT PLUG
ON OPPOSITE SIDE
Slip pivot plug
under end of
main bar and
into opening on
pivot bracket.
INSTALL PIVOT NUT
Reach under fabric seat.
Thread pivot nut onto
pivot screw as shown.
Pivot
Bracket
Insert pivot screw
through main bar,
pivot plug and into
opening on pivot
bracket.
TIGHTEN PIVOT NUT
Use a Phillips
screwdriver to tighten
pivot screw clockwise,
while holding pivot nut.
INSERT PIVOT SCREW
Pivot
Bracket
REPEAT STEPS 8 AND 9
FOR OTHER SIDE.
OMA09D P2
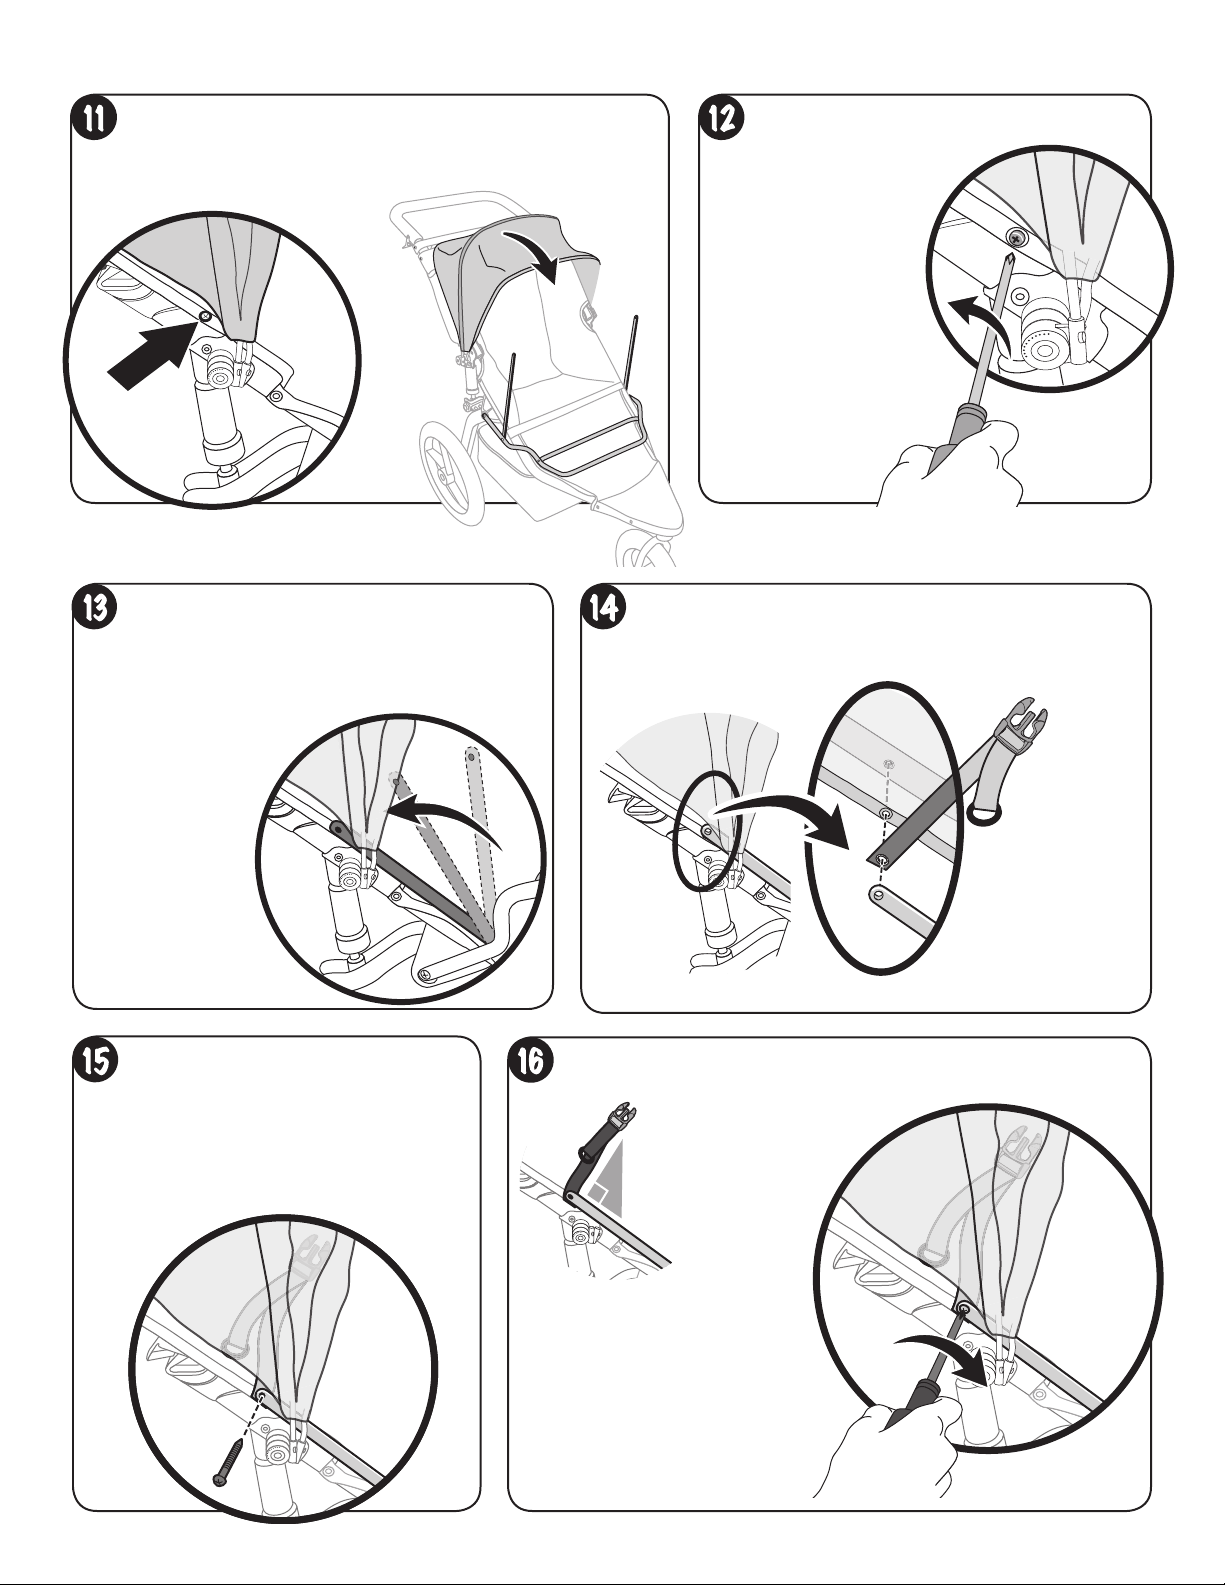
ATTACH RESTRAINT BELT M/F AND ARMS
LOCATE FABRIC SCREWS REMOVE FABRIC SCREW
Extend canopy to expose
lower fabric screw.
Remove screw with
Phillips screwdriver,
exposing fabric
grommet and
rivet nut.
Repeat on other side.
ATTACH RESTRAINT BELT M
POSITION ARM
Position arm between canopy and frame.
Align arm hole over
fabric grommet
and rivet nut.
INSERT SHARP SCREW
Insert sharp screw through end of
arm, restraint belt grommet, fabric
grommet and into rivet nut.
POSITION RESTRAINT BELT M
Slide restraint belt M grommet between
end of arm and fabric grommet.
Red pull ring
should face out.
TIGHTEN SHARP SCREW
Hold strap at a 90
degree angle.
90°
Tighten rmly with
Phillips screwdriver.
Note:
If screw does not turn easily,
unscrew and start again.
OMA09D P3

ATTACH RESTRAINT BELT F
90°
BUCKLE BELT
Connect restraint belt F
to restraint belt M.
INSERT SHARP SCREW
Insert sharp screw through end of
arm, restraint belt grommet, fabric
grommet and into rivet nut.
Position arm between canopy
and frame.
Align arm hole over fabric
grommet and rivet nut.
POSITION ARM
POSITION RESTRAINT BELT F
Slide restraint belt F
grommet between end of
arm and fabric grommet.
TIGHTEN SHARP SCREW
Hold strap at a 90 degree angle.
Tighten rmly with
Phillips screwdriver.
Note:
If screw does not turn easily,
unscrew and start again.
PREPARE STROLLER FOR INFANT CAR SEAT INSTALLATION
SET PARKING BRAKE
See the “Parking Brake”
section of your stroller
owner’s manual.
POSITION CANOPY
Position canopy
against handle bar.
Unbuckle restraint belt.
Place ends outside seat.
UNBUCKLE
RESTRAINT BELT
OMA09D P4
 Loading...