

Page 1
BMM® System Manual
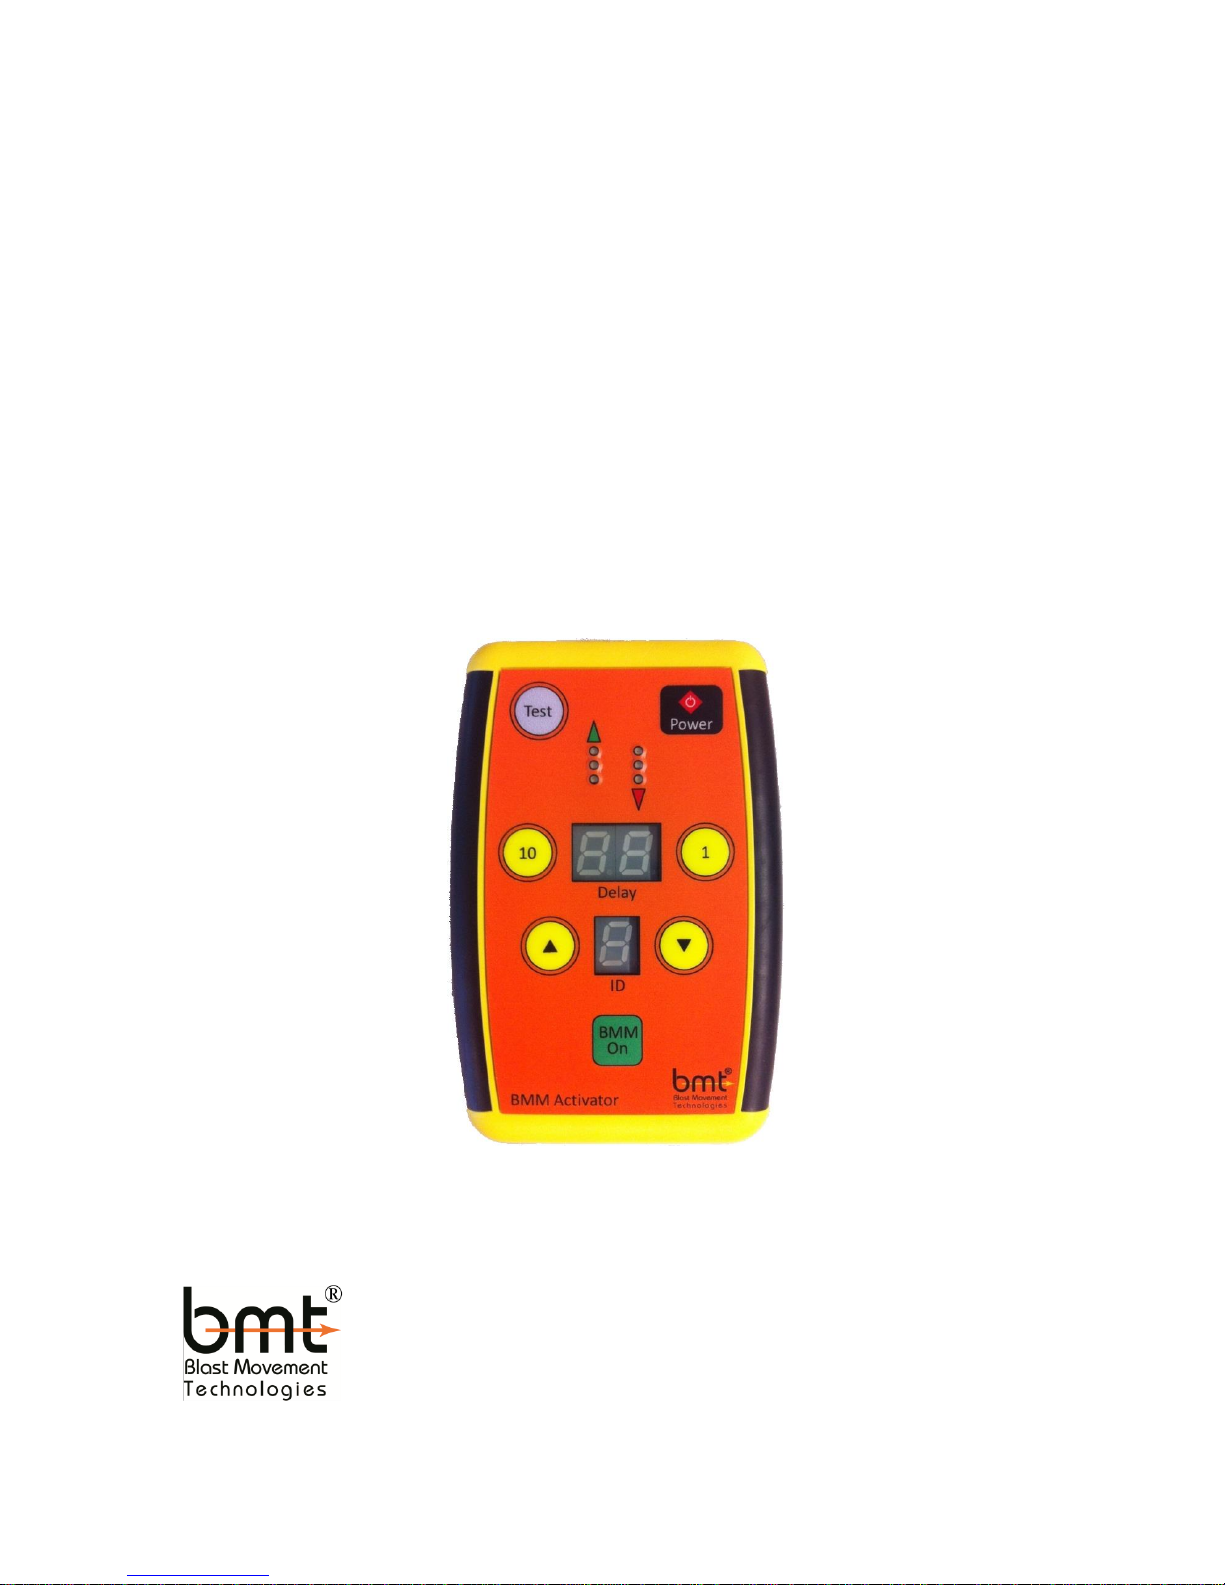
BMM Activator
Type 5
Solutions to Reduce Ore Loss and
Page 2

BMM® System Manual – BMM Activator i
Activator Type 5-Manual_1211_A4_FCC November 2012
TABLE OF CONTENTS
BMM® System Manual _____________________________________________________________ 1
BMM Activator ___________________________________________________________________ 1
1 Introduction _________________________________________________________________ 1
2 Using the BMM activator ______________________________________________________ 1
2.1 Hardware .......................................................................................................................... 1
2.2 Quick Start ........................................................................................................................ 2
2.3 Test Button........................................................................................................................ 3
2.4 Delayed Start-up .............................................................................................................. 3
2.5 Miscellaneous ................................................................................................................... 3
3 Troubleshooting _____________________________________________________________ 4
4 Specifications ________________________________________________________________ 4
Page 3
BMM® System Manual – BMM Activator
1
www.bmt.com.au
1 INTRODUCTION
Blast Movement Monitors (BMM®s) are delivered to site with the transmitter in a low power
hibernation state. The BMM® transmitter must be switched on before installation into the
blast.
The BMM® can only be switched on by a specially coded signal which eliminates accidental
activation. The BMM Activator (Activator) is a remote control device that provides the signal
to turn a BMM® on and to also assign a delayed start-up time if required. It is also useful to
quickly determine if a BMM® is transmitting.
The signal from the Activator is low power to limit its range to approximately 0.5 m. This is to
control which BMM®s are switched on.
WARNING All BMM®s that are within range of the Activator will
switch on when the BMM On button is pressed. Ensure
other BMM®s are well out of range (several metres to be
certain) of the BMM® to be turned on or programmed. Do
not play with the Activator anywhere near BMM®s.
Store BMM®s in a separate location to the Activator
2 USING THE BMM ACTIVATOR
2.1 Hardware
The Activator consists of a tough ABS plastic case with a
sealed low-profile keypad. The battery compartment can
be accessed by pressing and sliding a section at the back
of the case. Use a good quality 9 V alkaline or
rechargeable Nickel Metal Hydride (NiMH) battery.
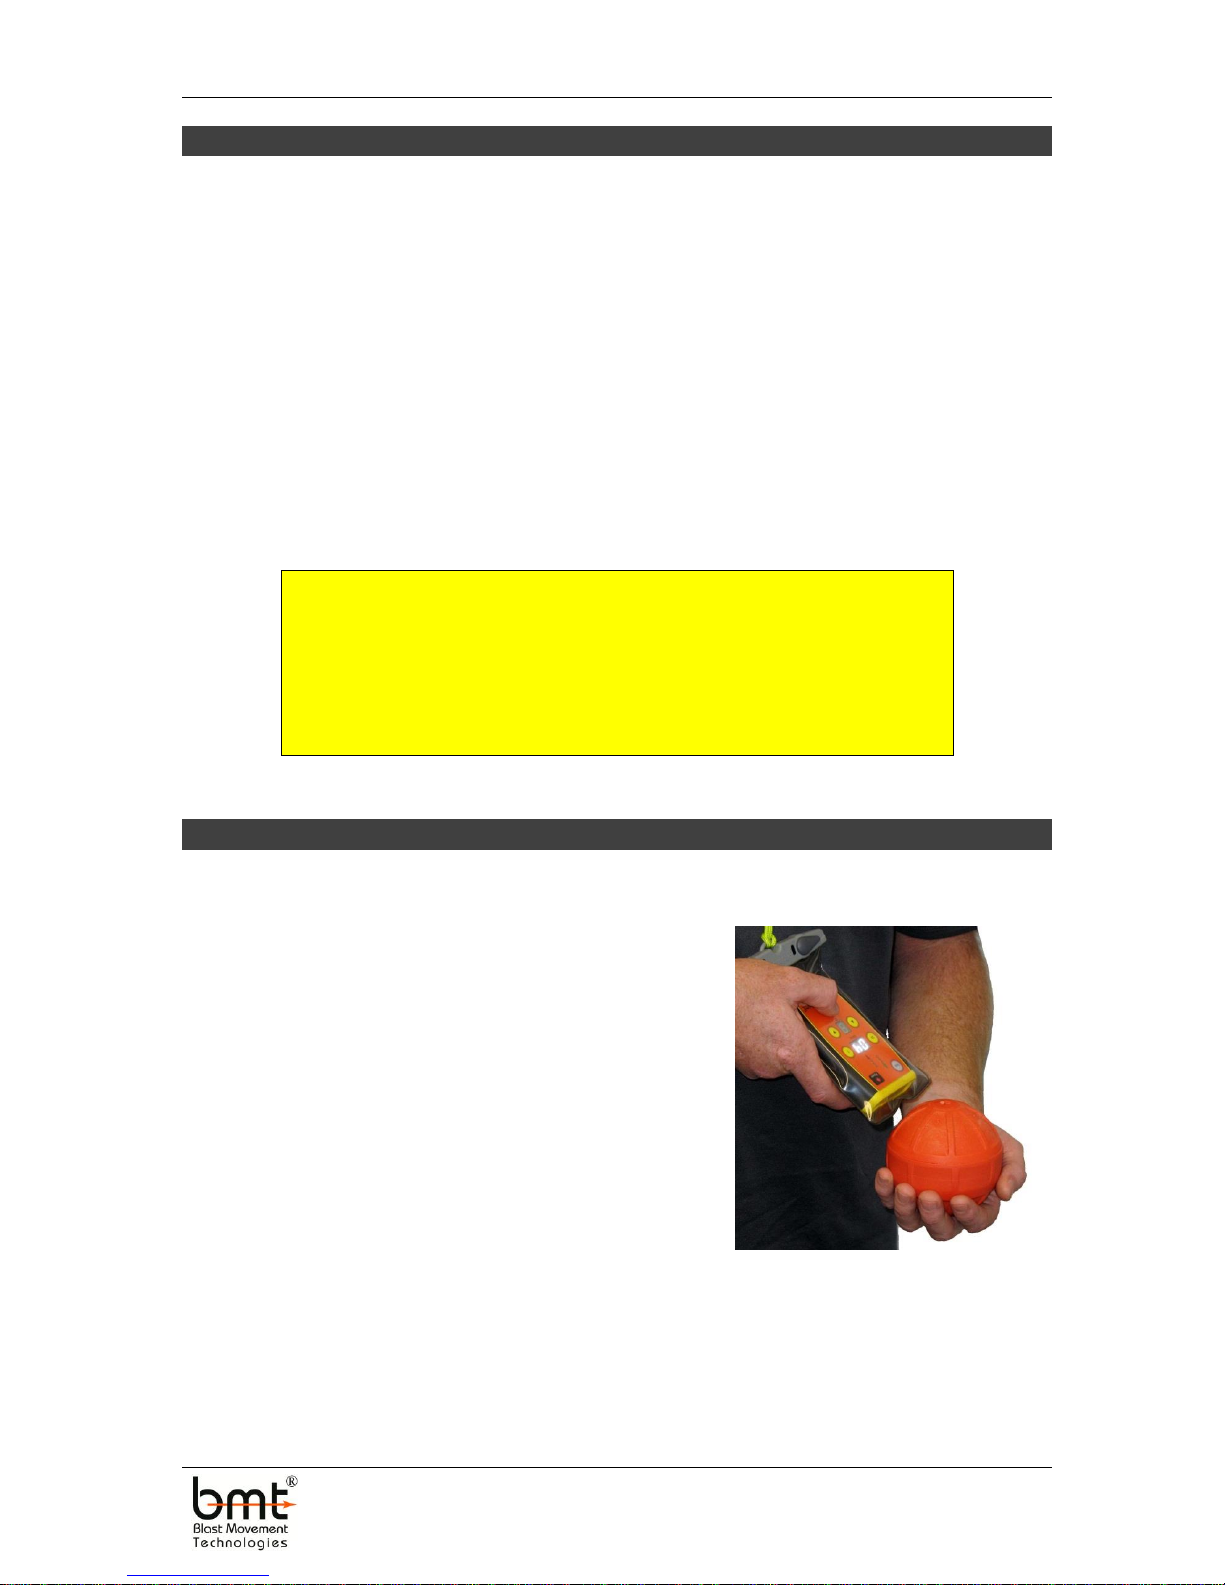
The BMM® System kit is supplied with an Aquapak. It is
a transparent case that is 100% waterproof when closed. It
has a cord for hanging around the user’s neck, which
frees up hands for other tasks and eliminates the chance
of dropping the Activator into a blast hole.
It is strongly advised that the Activator be placed inside the supplied
Aquapak and hung around the user’s neck.
Page 4
BMM® System Manual – BMM Activator
2
www.bmt.com.au
2.2 Quick Start
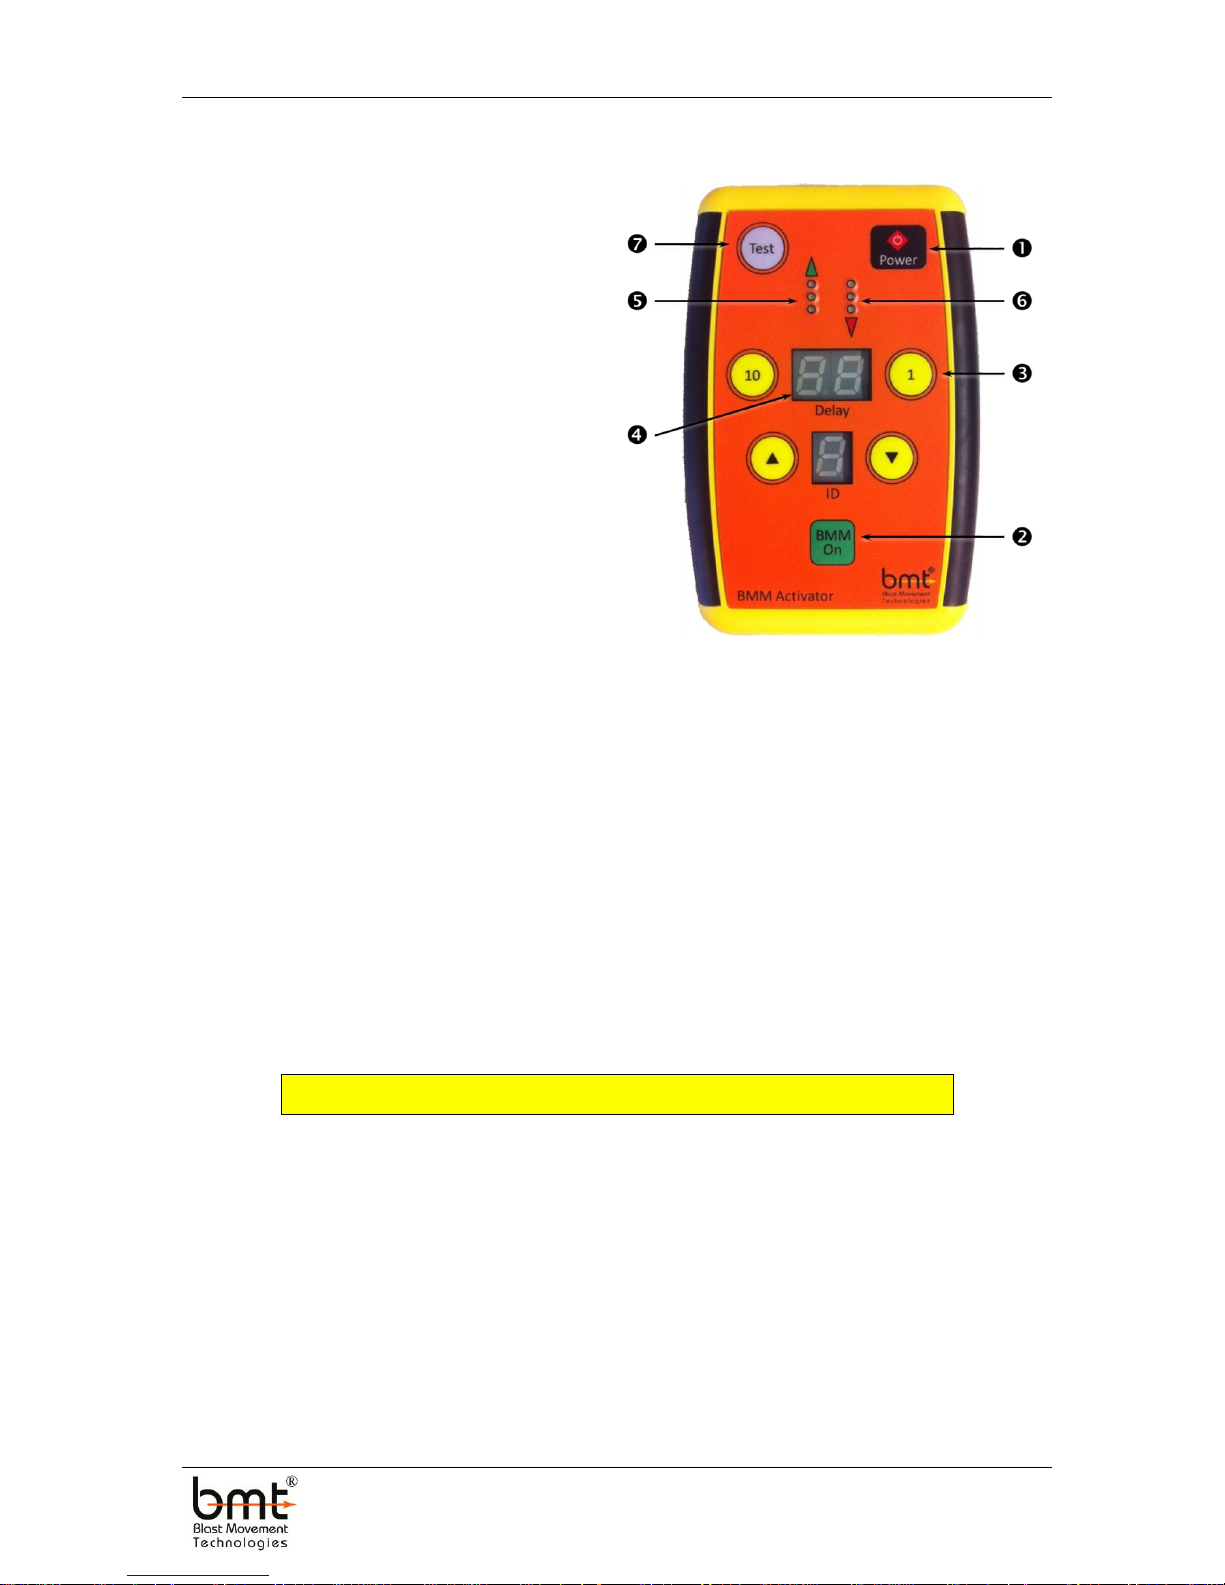
Turn the Activator on by pressing the
Power button ❶. The digital display
❹ will quickly show the battery
voltage, and then show “00”. Once
less than 8.5, it is close to flat so have
a spare battery available.
Press the yellow 1 or 10 button ❸ to
select the desired start-up delay time
in multiples of 4 hours up to a
maximum of 36 hours. The display
❹ shows the actual delay in hours.
Position the Activator close to the
BMM® to be switched on (within
100 mm), and press the green BMM
On button ❷ briefly – the green
(transmit) LEDs ❺ will illuminate briefly. Activation is more reliable if the Activator is
pointing down at the BMM® (approx. 45) as shown in the photo in Section 2.1.
If the transmitter switches on, the red (receive) LEDs ❻ will illuminate and an audible
tone will be generated at regular intervals (beep, beep, beep, beep…).
Keep the Activator within range of the BMM
®
for at least ten seconds, to make sure the
BMM® continues to transmit. As a final check to make sure the BMM® is still
transmitting, move the Activator out of range of the BMM® and then back within
range.
If the BMM
®
does not turn on, the respective transmit and receive aerials may be
unfavourably orientated, so move the Activator around the BMM® by 90° and try
again.
WARNING The BMM® cannot be switched off once activated
In the future, the BMMs will be able to be assigned an ID code that
will make each one uniquely identifiable in a blast. The Type 5
Activator has been designed with this feature but it is not enabled at
this time.
Page 5

BMM® System Manual – BMM Activator
3
www.bmt.com.au
2.3 Test Button
The Test function only confirms that the BMM
®
is functioning by
turning it on briefly. It is not necessary to use this during normal use
and it is best to avoid using this function onsite.
If Test Mode has to be used to confirm a BMM® is functioning, position the activator as
previously described and press the grey Test button ❼ (the display ❹ can be any number).
The BMM® will then transmit for about five seconds and then turn off, ready to be switched
on normally.
2.4 Delayed Start-up
The BMM® transmits at constant power for about 10 – 12 hours so to accurately calculate the
depth of the BMM®s after the blast, they must be located within this period. The BMM® will
continue to transmit for about 24 hours beyond this time (total ~36 hrs) but the signal will
slowly decrease and eventually switch off. If the BMM® is located after the initial 10 hr period,
its horizontal location will be accurate but not its depth. The delayed start-up feature was
specifically designed for mines that could not access the muckpile immediately after blasting
due to light and/or safety reasons. It can also be used to install the BMM®s well before the
blast for operational reasons.
Once activated with a delayed start-up, the BMM® with transmit for approximately 15
minutes before switching off and sleeping for the requested period. At the end of the delay
period, it will transmit normally until the battery goes flat – just as it does with zero delay.
Refer to the “Monitoring Procedure Manual” for more information about how the delayed
start may be used.
Delays can be set in multiples of 4 hours, up to 36 hours. The displayed number is the actual
delay in hours, which is different to the old Type 4 Activator.
WARNING Once a BMM® is activated for delayed start-up it cannot
be changed. That is, it cannot be switched off nor be made
to switch on earlier or later.
2.5 Miscellaneous
The BMM Activator is also useful to quickly determine if a BMM® is transmitting since the red
receive LED ❺ will illuminate intermittently with sound whenever a BMM® signal is
detected.
Page 6
BMM® System Manual – BMM Activator
4
www.bmt.com.au
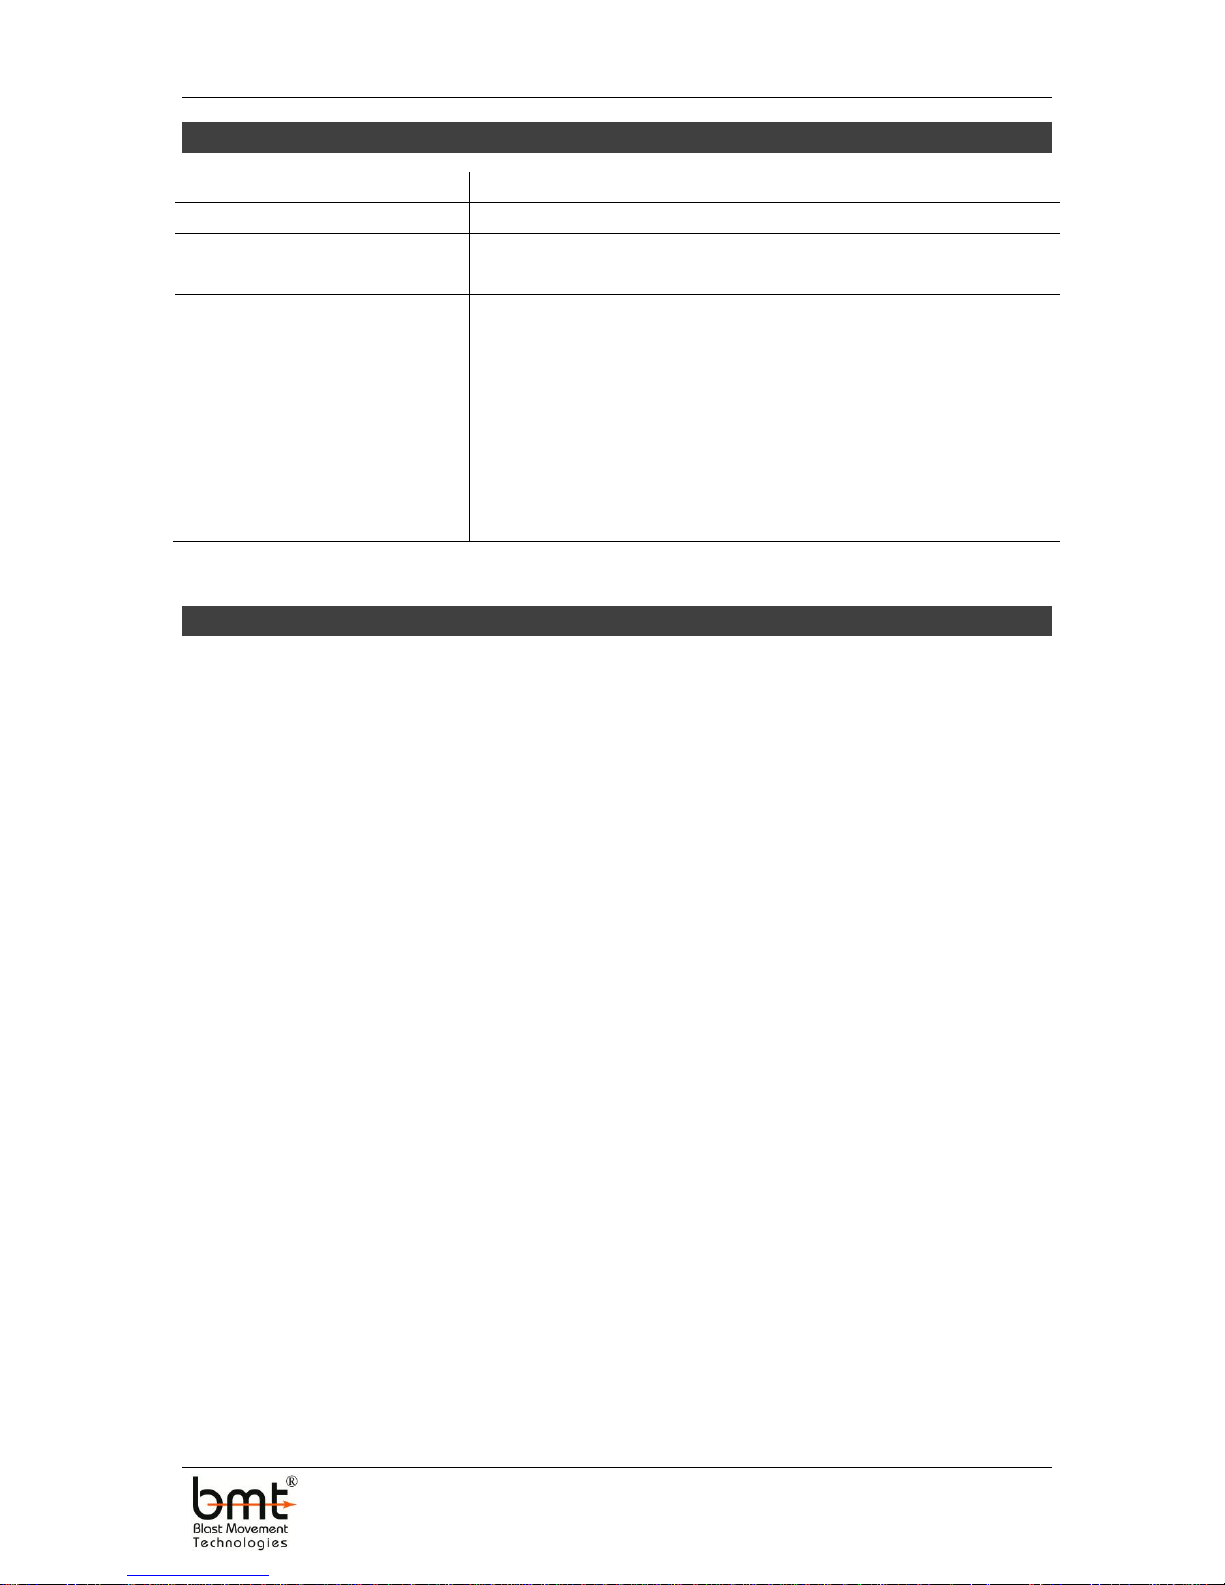
3 TROUBLESHOOTING
Fault
Solution
The Activator won’t turn on
Check the status of the battery and replace as necessary.
The display turns off during
operation
Low battery – replace
BMM® won’t turn on
Change proximity of Activator and transmitter and try
again…and again.
Confirm that the green button is depressed until the transmit
LEDs flash.
Install an appropriate fresh battery. The transmit power may be
below the required threshold.
The BMM
®
transmitter may be faulty. Set it aside, mark it
appropriately and contact BMT.
4 SPECIFICATIONS
Battery Type: 9V PP Alkaline or rechargeable NiMH
Transmission frequency: 111.1 KHz
Equivalent Isotropically Radiated Power (EIRP): 2.5 µW
Page 7

Copyright 2005-2012 Blast Movement Technologies
All rights reserved.
This document contains proprietary information that is protected by copyright. Apart from
any use as permitted under the Copyright Act 1968, no part may be reproduced by any
process without written permission from Blast Movement Technologies, PO Box 73,
Bellbowrie, Queensland, Australia.
This device complies with part 15 of the FCC rules. Operation is subject to the following two
conditions: (1) This device may not cause harmful interference, and (2) This device must
accept any interference received, including interference that may cause undesired operation.
Changes or modifications not expressly approved by the manufacturer could void
the user’s authority to operate the equipment.
DISCLAIMER
While every effort has been made to ensure the BMM Activator functions as specified in this
manual, Blast Movement Technologies makes no guarantee to its continued function, except
that should it cease to function as specified, a replacement unit will be provided.
Please read the operating manual prior to using the BMM activator.
Page 8
Blast Movement Technologies
PO Box 73
Bellbowrie Qld 4070
AUSTRALIA
CONTACT DETAILS:
www.bmt.com.au
Phone: +61 (0)7 3202 9499
Fax: +61 (0)7 3202 9472
Email: [email protected]
 Loading...