

BMR Suspension TR002 User Manual
NON-ADJUSTABLE TOE RODS
TR002 – 2010-present Camaro
RECOMMENDED TOOLS:
Hydraulic Jack and stands
Wrenches: 10mm, 22mm
Sockets: 18mm, 22mm
INSTALLATION:
1. Lift vehicle and support with stands under the frame rails.
2. Remove the rear wheels/tires.
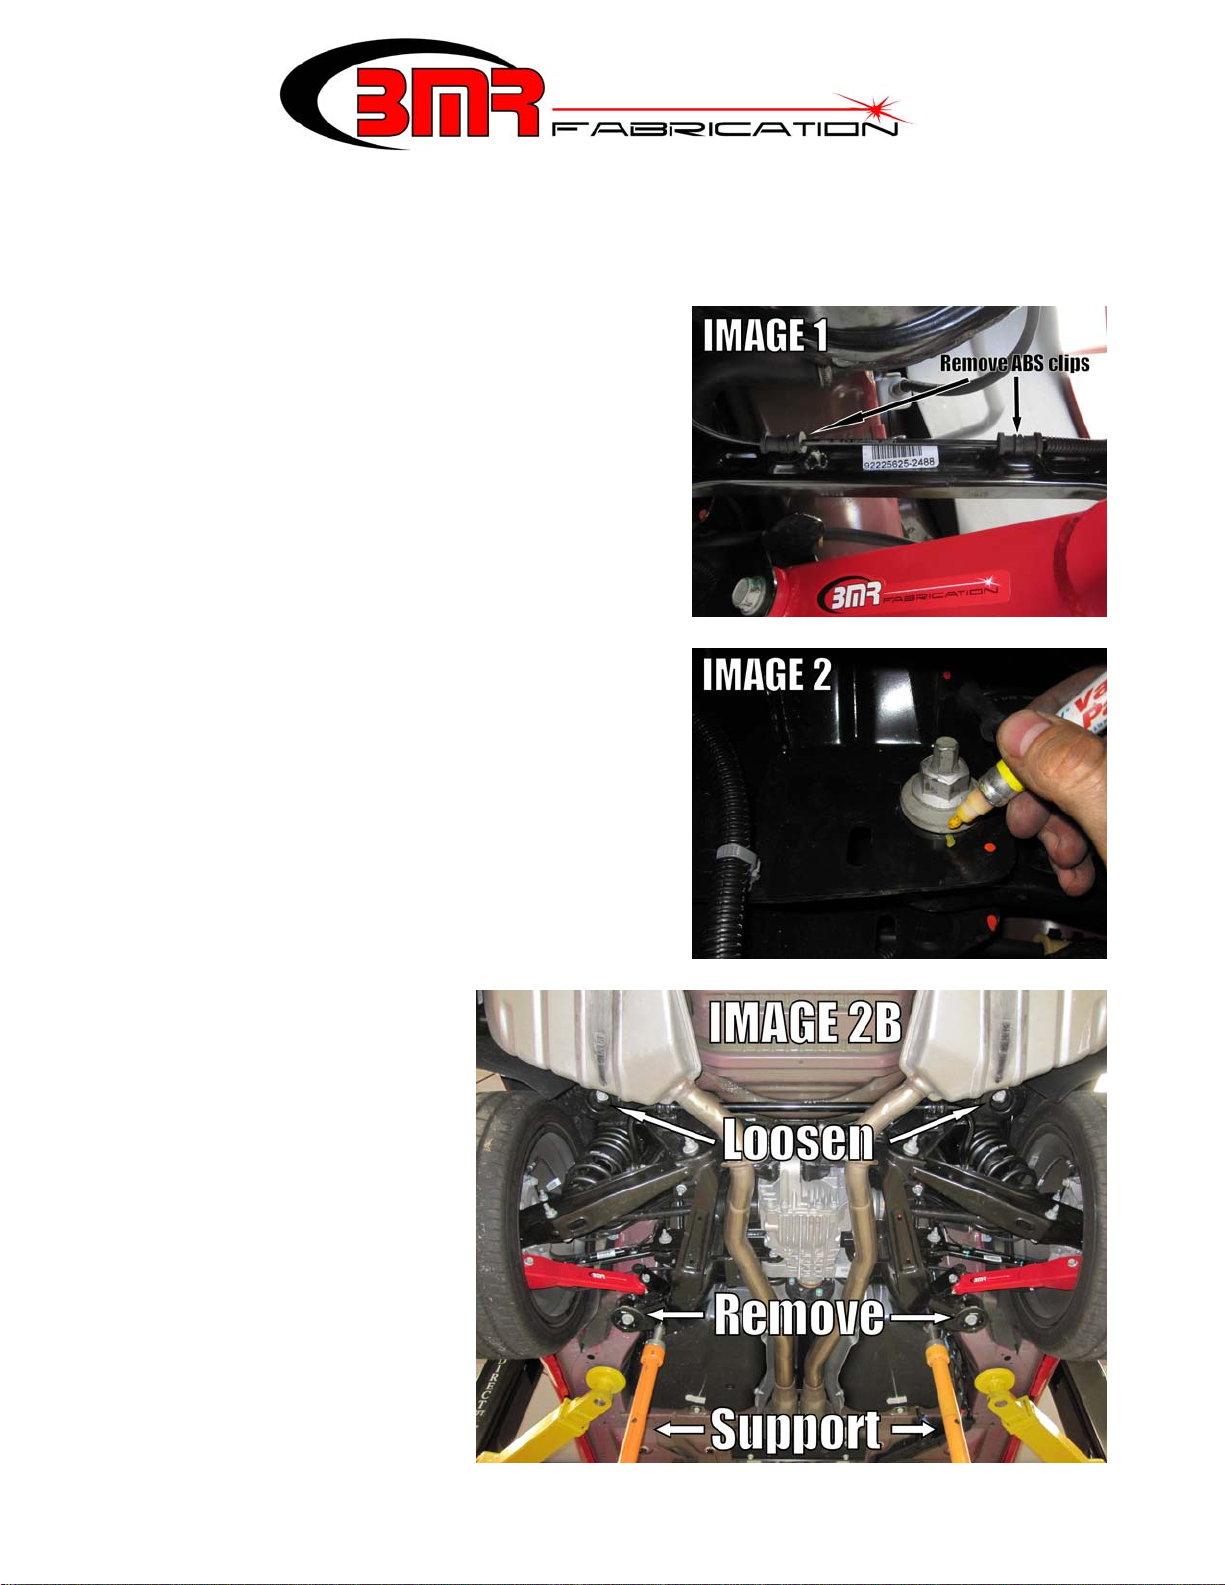
3. Pop the ABS wire loose from the OE toe rod by squeezing the
retaining clips from the backside. (Image 1)
4. The inner bolt of the toe rod controls alignment and must be
marked before loosening in order to maintain proper alignment
settings during re-assembly. Using a paint marker or chalk, mark
the cam washer and subframe as shown in Image 2.
5. Due to fuel tank interference, the drivers’ side inner toe rod bolt
cannot be removed without lowering the cradle. Support the
cradle as shown in Image 2b below. Using a 15/16” socket,
remove the front two cradle bolts and loosen the rear bolts. The
cradle should lower enough to remove the bolts.
6. Using a 22mm wrench and 22mm
socket, remove the inner bolt.
7. Using an 18mm socket remove the
outer bolt and then remove the toe rod.
8. Install the BMR Toe Rod using the OE
bolts. The ABS mounting tab should
be on top and grease fittings pointing
down.
9. Re-install the front cradle bolts and
tighten all four to 130 ft/lbs.
1
NON-ADJUSTABLE TOE RODS (Cont.)
TR002 – 2010-present Camaro
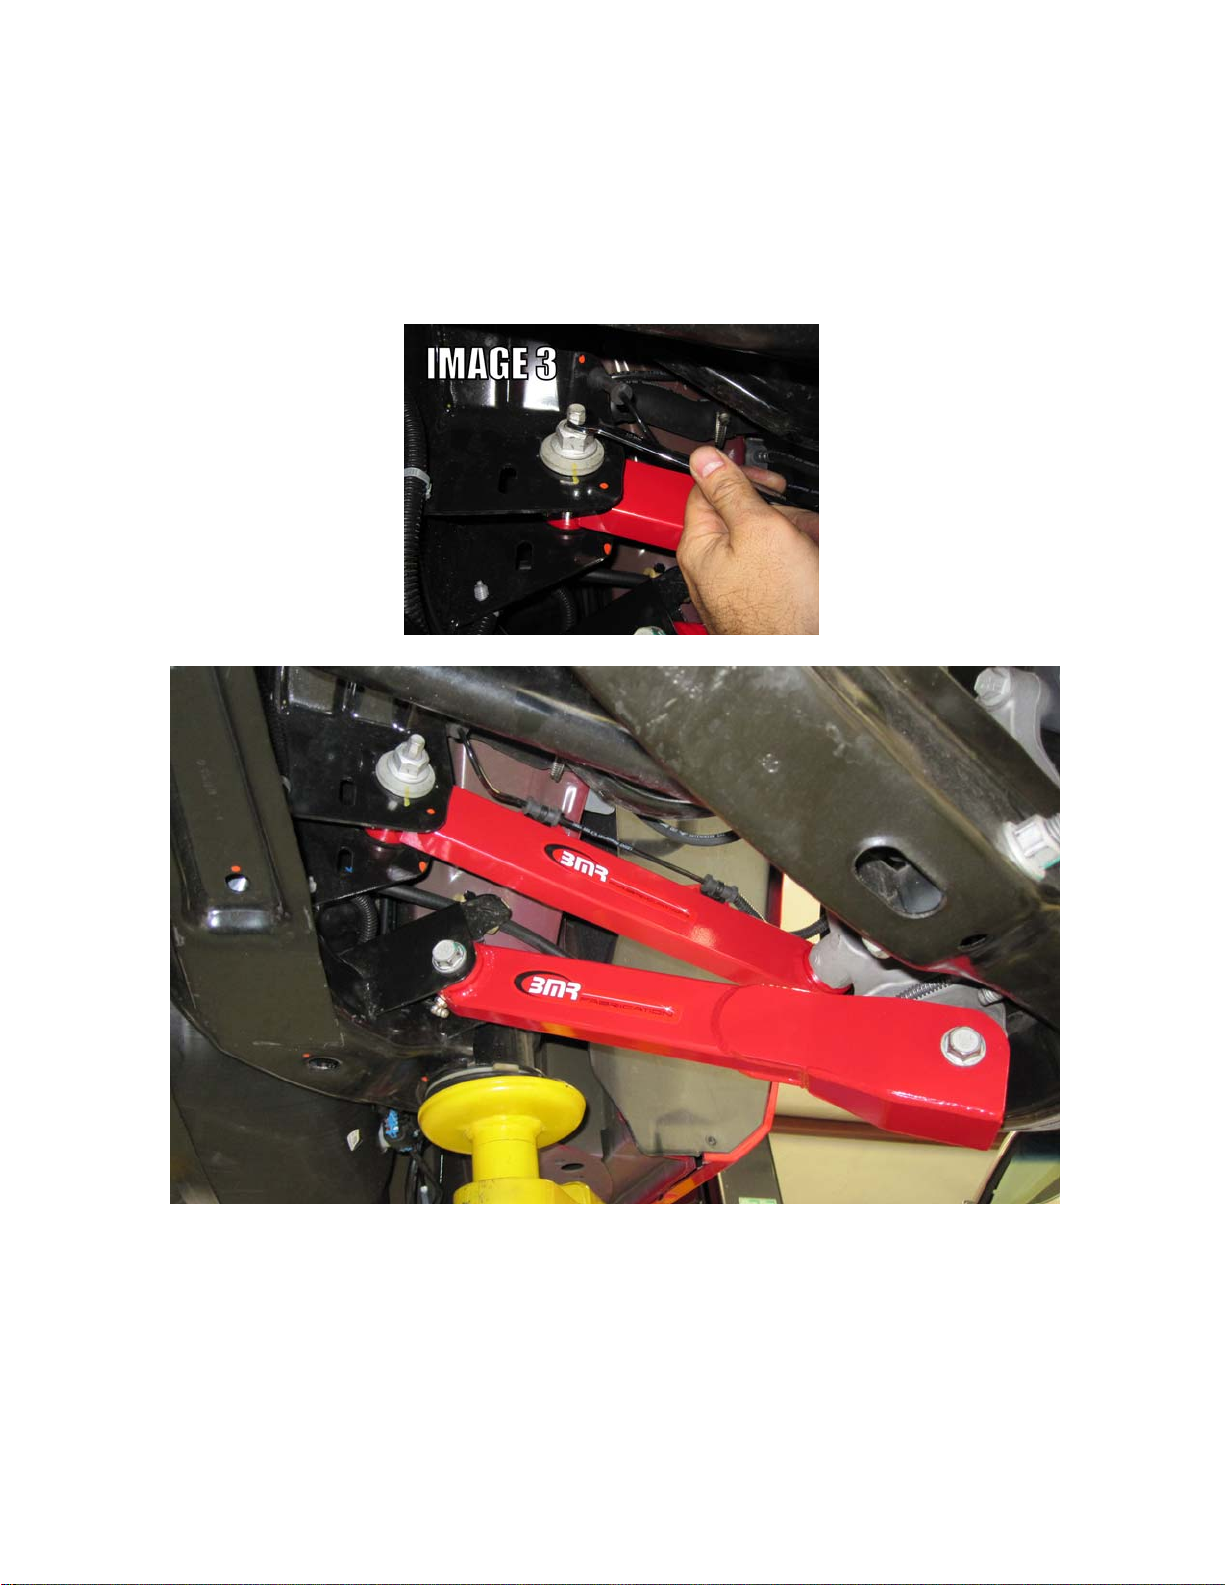
10. Using a 10mm wrench rotate the inner bolt until the cam washer lines up with the mark made previously. Tighten to 85
ft/lbs. Tighten the outer bolt to 95 ft/lbs. (Image 3 on the following page)
11. Snap the ABS clips into the tabs on top of the BMR Toe Rod.
12. Grease each bushing with a silicone based grease.
13. Re-install the wheels/tires. Lower vehicle.
BMR Toe Rod and Trailing Arm
WWW.BMRFABRICATION.COM
This product is an aftermarket accessory and not designed by the vehicles manufacturer for use on this vehicle. As such, buyer assumes all risk of
any damage caused to vehicle/person during installation or use of this product.
2
 Loading...