

BMR Suspension STB012 User Manual
STRUT TOWER BRACE
STB012 – 2008-PRESENT PONTIAC G8
Tools required:
o 3/8” drive
ratchet
o 10mm socket
o 13mm socket
o 9/16” socket
o 10mm wrench
o 9/16” wrench
o 7mm nut driver
Installation:
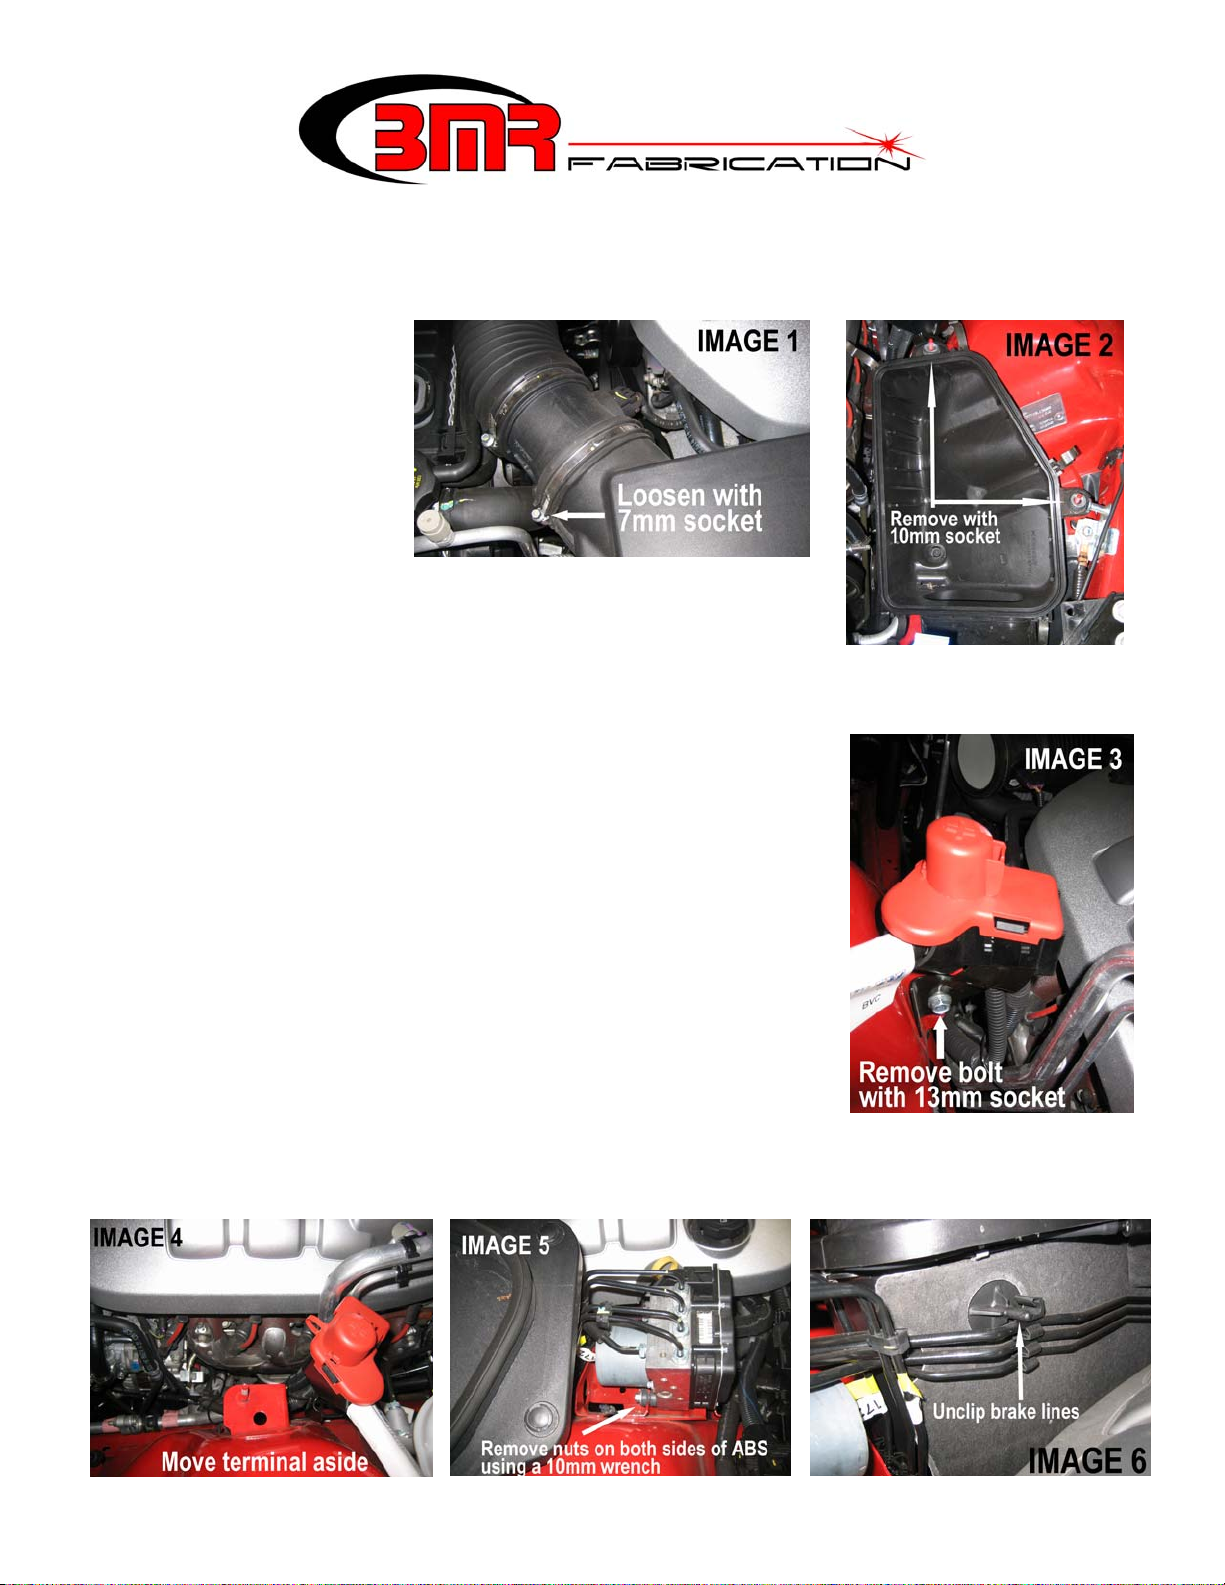
1. Using a 7mm socket or nut driver, loosen the hose clamp on the
air filter housing where it attaches to the mass airflow sensor. (IMAGE 1)
2. Release the 5 clips that retain the upper portion of the air cleaner housing. Remove the air
filter and the upper housing and set aside.
3. Using a 10mm socket, loosen and remove the two nuts that
retain the lower air filter housing. Remove the housing. (IMAGE
2)
4. Using a 13mm socket, remove the bolt located on the backside
of the positive battery terminal retention bracket. (IMAGE 3)
5. Position the cable and bracket assembly aside, out of the work
area as shown. (IMAGE 4)
6. Move over to the passenger side and, using a 10mm wrench,
remove the two nuts that retain the ABS unit. (IMAGE 5)
7. Unclip the brake line retainer as shown. (IMAGE 6)
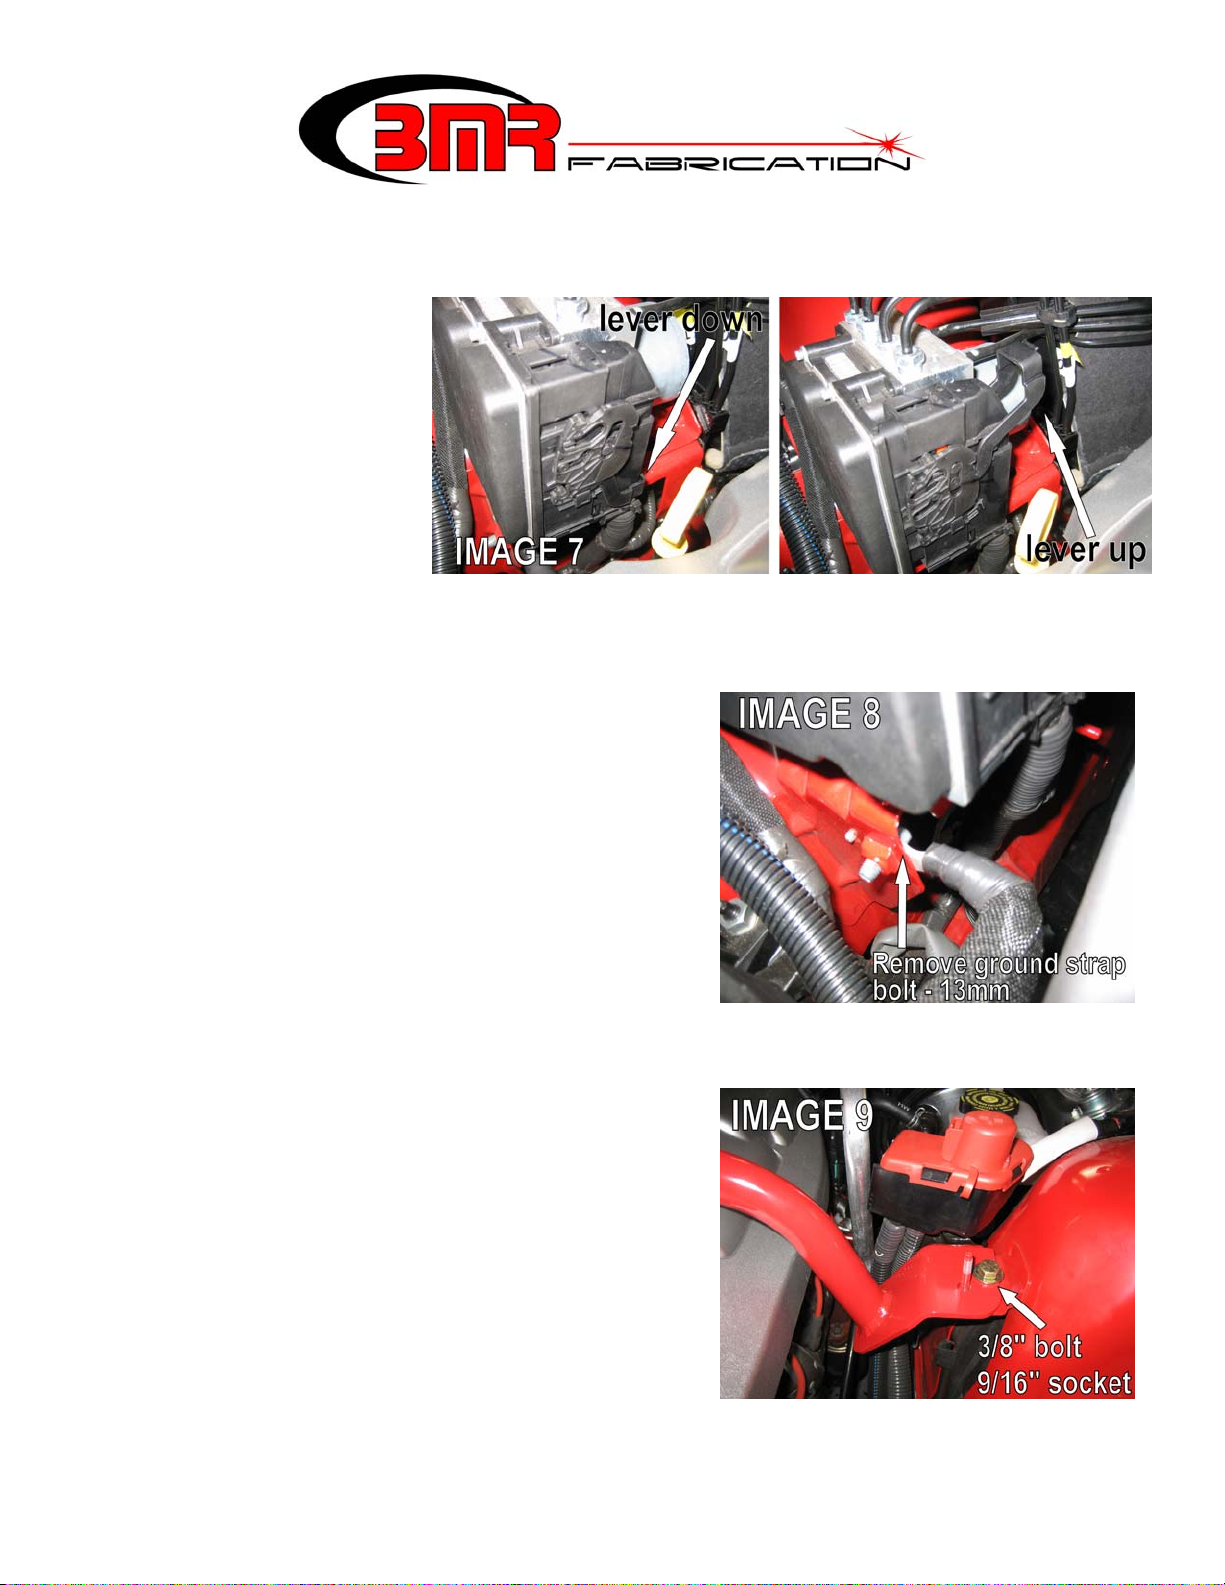
8. Unclip the ABS harness as shown. There is a lever on the harness that releases the harness
clip. It is down in the locked position and up in the released position. (IMAGE 7 – next page)
1
9. Unplug the harness and position it forward, out of the way. NOTE: do not turn the ignition key
while this harness is unplugged. Doing so will set an ABS code that requires dealer service to
clear the code.
10. Pull up on the ABS unit
to gain access to the
mount below. NOTE:
The unit only needs to
be lifted approximately
½” – ¾” to gain access
to the bolt holes
underneath the ABS unit.
11. Position the BMR strut tower brace into place, first sliding the passenger side under the ABS
unit, then the drivers’ side down over the strut tower bracket.
12. Insert the provided 3/8” x ¾” bolts into the passenger side holes first. Position the threaded
backing plate (provided with your strut tower brace)
under the mount from the backside and finger
tighten the bolts from above. NOTE: Accessibility is
very limited in this area. It may be necessary to
remove the ground strap that is bolted to the bracket
directly under the ABS and/or reposition the ABS
harness to gain access. This bolt can be removed
using a 13mm stubby wrench or small ratchet.
(IMAGE 8)
13. Insert the provided 3/8” x ¾” bolt, nut, and washer
into the drivers’ side upper bolt hole. (IMAGE 9)
Tighten using a 9/16” wrench and 9/16” socket.
14. Re-position the positive battery cable and bracket and insert the factory bolt. Tighten with the
13mm socket.
15. Re-install the air filter lower housing and tighten the
two 10mm nuts. Replace the air filter and upper air
filter housing. Re-connect the mass airflow sensor
to the air box and verify that the seal is secure.
Tighten clamp.
16. Proceed to the other side. Tighten the two 9/16”
head bolts on the passenger side using an open
end combination wrench.
2
 Loading...