

MM004 – INSTALLATION INSTRUCTIONS
2010-2015 CAMARO V8
TOOLS REQUIRED:
Hydraulic jack and stands
Wrenches and sockets: 15mm, 18mm, 19mm
INSTALLATION:
1. Remove the air box assembly on the motor to allow the
motor to be raised during the installation process.
2. Lift vehicle and support safely with jack stands under
the frame rails.
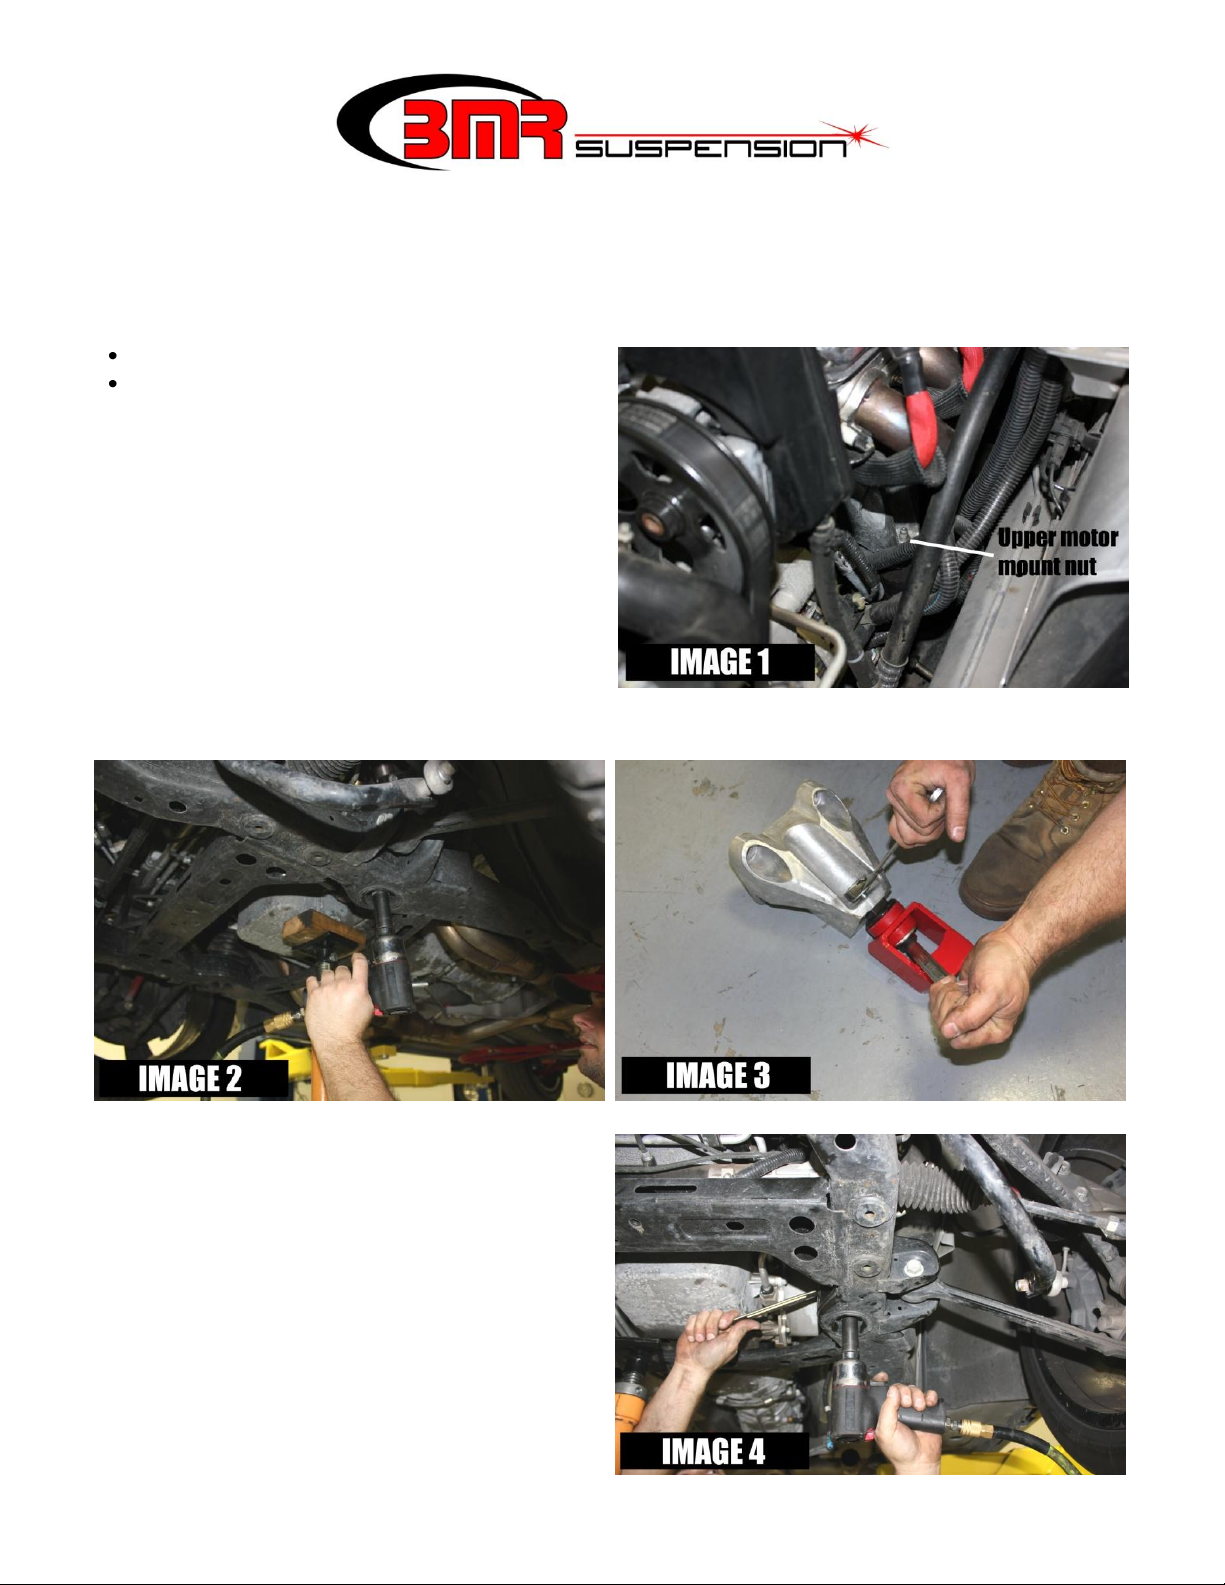
3. Using an 18mm socket, loosen the nuts on the top of the
factory motor mounts as seen in IMAGE 1 to the right.
4. Using the same socket, loosen the nuts on the bottom of
the factory motor mounts as shown in IMAGE 2 below.
5. Place the jack under the oil pan and lift slightly to
remove the weight of the motor off of the factory frame stands. NOTE: some aftermarket headers may not allow access to the
motor stand bolts. In this case, the header must be removed before the stands can be removed.
6. Using a 15mm socket, loosen the (4) bolts on the motor
mount stands then remove the stands from the motor.
7. Assemble the BMR motor mount as shown in IMAGE
3. Once assembled, bolt the BMR mount to the factory
stand using the supplied 12mm x 80mm bolts. Tighten
the bolt and nut until the bushings just start to bulge.
CONTINUED
MM004 – INSTALLATION INSTRUCTIONS
CONTINUED
8. Mount the stand/BMR mount assembly to the block using the OE mounting hardware. Torque the bolts to 45 ft/lbs.
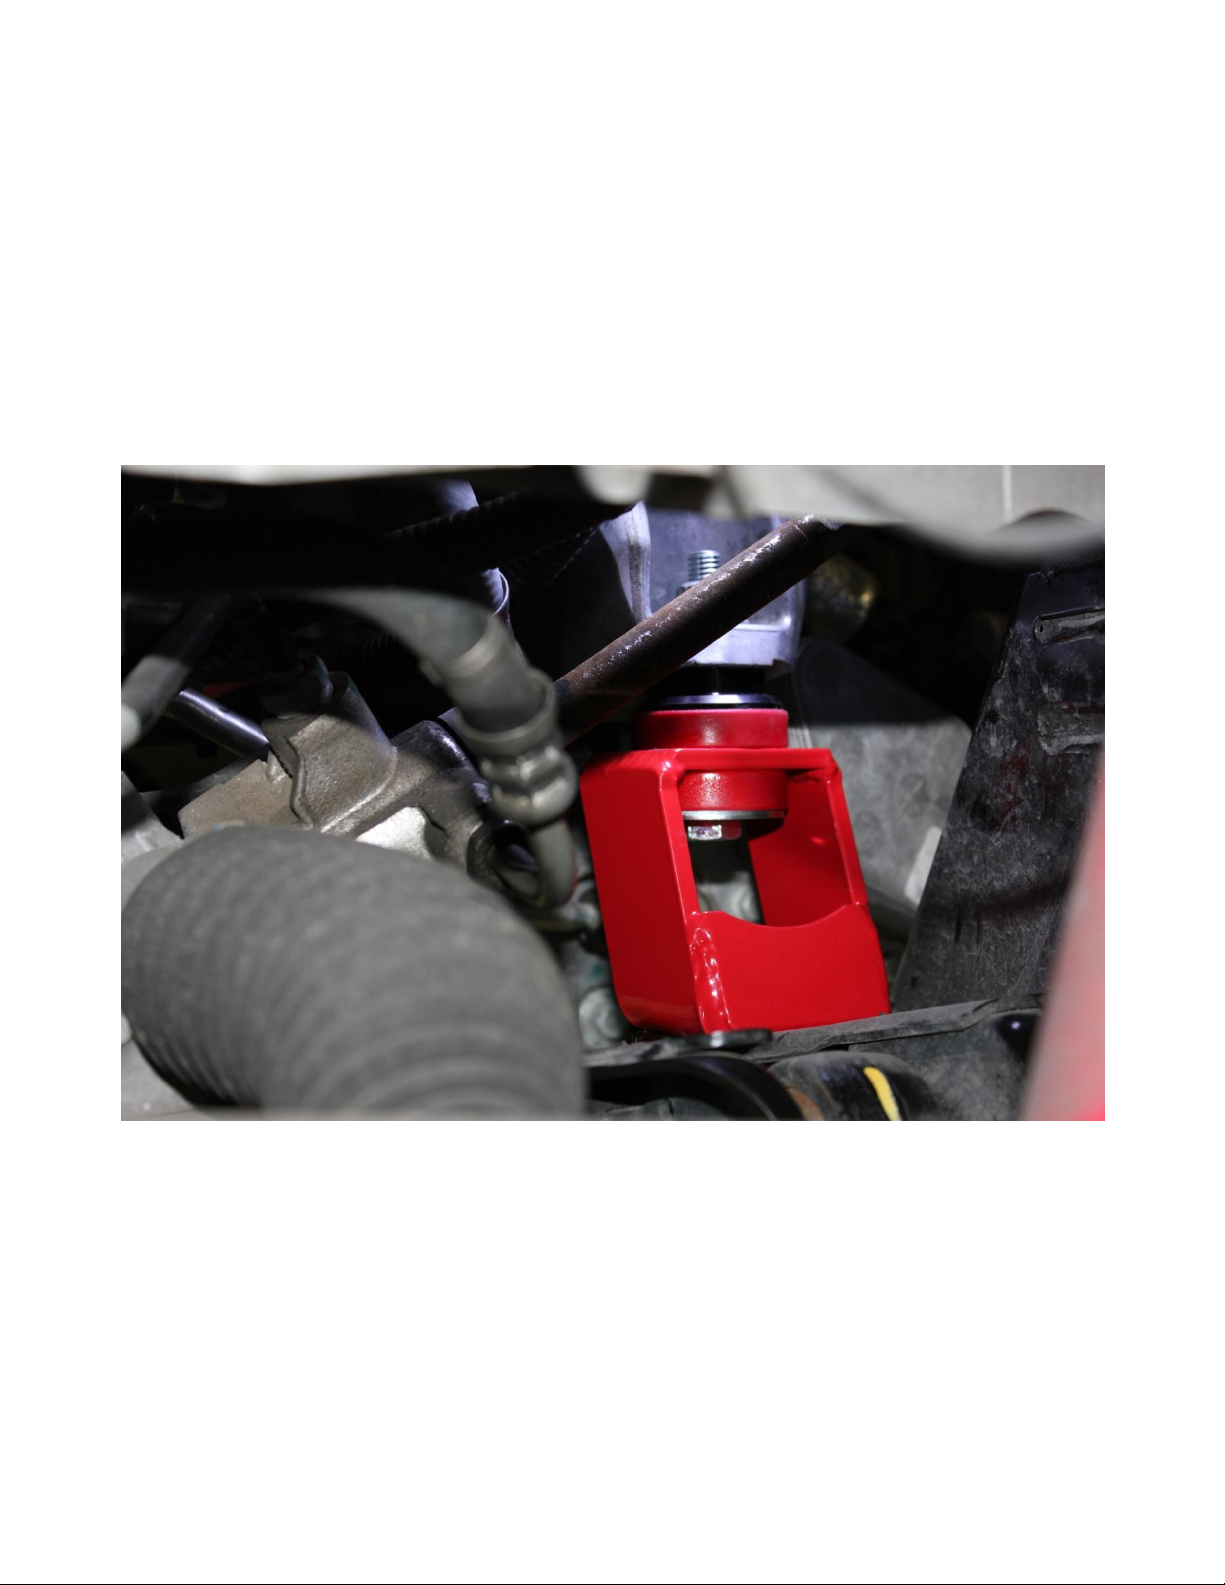
9. Lower the motor back down until the mounts are sitting on the sub-frame. NOTE: Your BMR motor mounts will
automatically lower the motor ¼”, providing extra hood clearance for blowers and a lower center of gravity. If you do not
wish to lower your motor, use the provided ¼” aluminum spacer between the motor mount and engine cradle. Insert the
provided 12mm x 90mm bolts from the top, down through the BMR mount and sub-frame. NOTE: you may need to use an
alignment punch or screwdriver to align the holes. Tighten to 75 ft/lbs using an18mm and 19mm wrench.
10. Re-install the air box assembly. Lower vehicle.
WWW.BMRSUSPENSION.COM
This product is an aftermarket accessory and not designed by the vehicles manufacturer for use on this vehicle. As such, buyer assumes all risk of
any damage caused to vehicle/person during installation or use of this product.
2
 Loading...