

BMR Suspension DSL017 User Manual
DRIVESHAFT SAFETY LOOP INSTALLATION
DSL017– 2011 Mustang
RECOMMENDED TOOLS:
9/16” wrench
15mm, 18mm, 9/16” sockets
3/8” drive ratchet or impact
Hydraulic jack and jack stands or Hydraulic service lift
INSTALLATION:
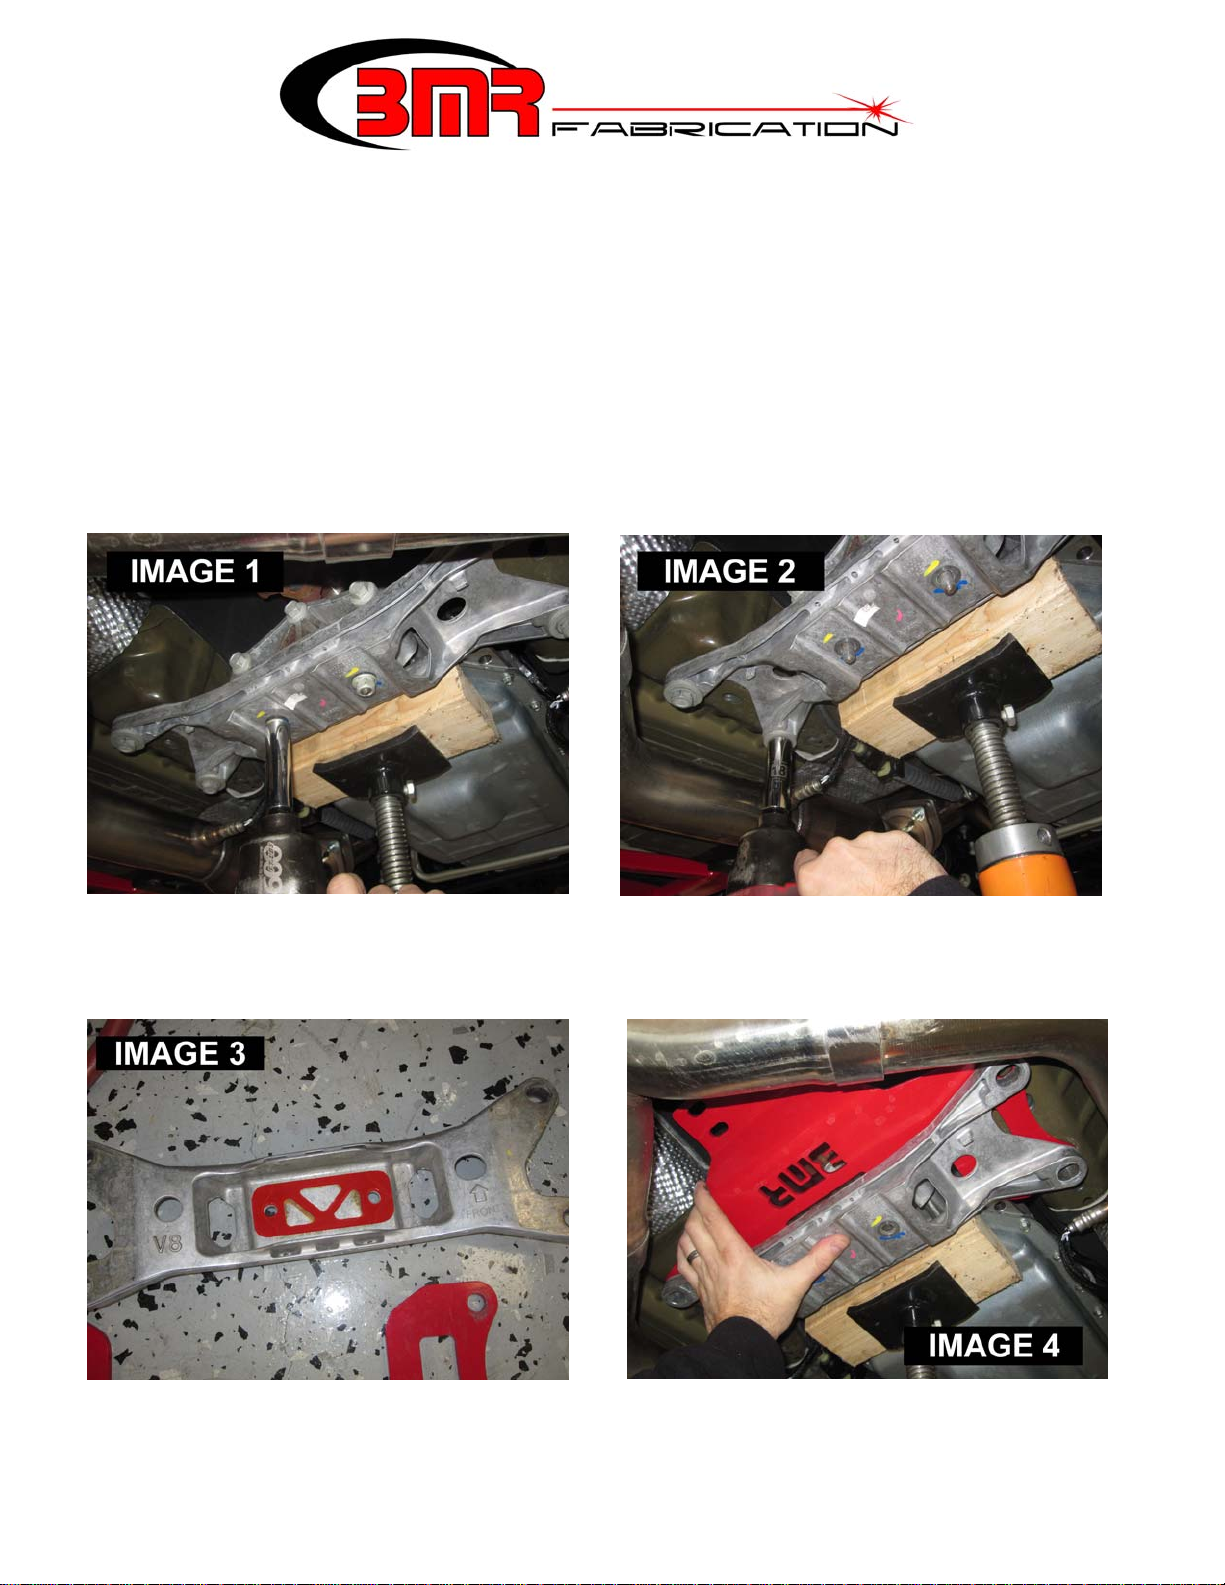
1. Lift vehicle and support safely under frame rails.
2. Support the transmission using a jack stand or jack.
3. As shown in IMAGE 1, loosen the (2) transmission mounting nuts using a 15mm socket.
4. Using a 18mm socket, remove the (4) crossmember bolts as shown in IMAGE 2. Remove the crossmember.
5. Insert the provided transmission mount spacer into the crossmember as shown in IMAGE 3.
6. Hold the BMR driveshaft loop mounting plate and the OE crossmember up into place with the BMR driveshaft loop
mounting plate positioned between the OE crossmember and the floorpan. Insert the provided 60mm bolts and washers then
tighten to 85 ft/lbs. See IMAGE 4.
1
DRIVESHAFT SAFETY LOOP INSTALLATION (Continued)
7. Thread the supplied half nuts and lock washers onto the exposed threads of the transmission mount then tighten to 25 ft/lbs .
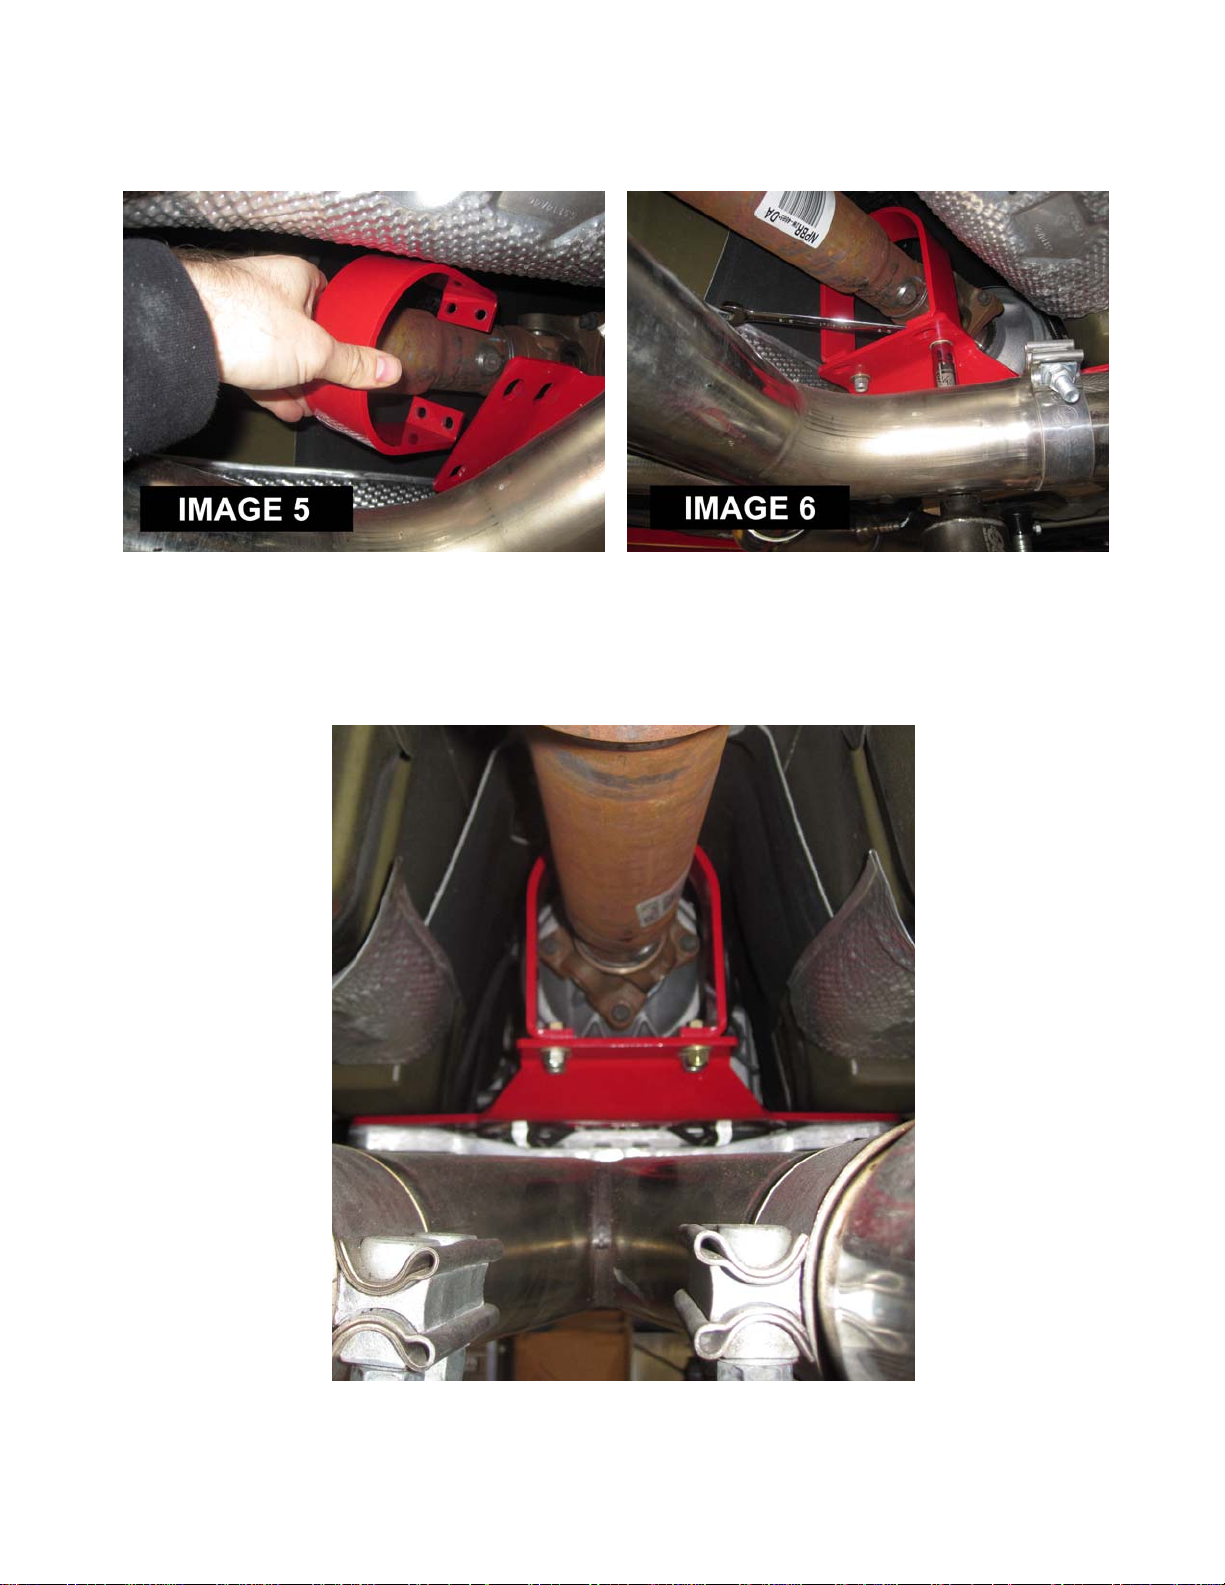
8. Install the driveshaft loop by positioning it over the small diameter portion of the driveshaft as in IMAGE 5. Once positioned
insert the supplied 3/8” bolts through the (4) holes. Center the loop over the driveshaft then place a washer and nut on the
bottom side of each bolt. Tighten to 40 ft/lbs. See IMAGE 6. NOTE: if using an aftermarket one-piece driveshaft, it may
be necessary to shim the loop for adequate driveshaft clearance.
9. Lower vehicle.
WWW.BMRFABRICATION.COM
This product is an aftermarket accessory and not designed by the vehicles manufacturer for use on this vehicle. As such, buyer assumes all risk of
any damage caused to vehicle/person during installation or use of this product.
2
 Loading...