

BMR Suspension BK010 User Manual
Front Radius Rod Bushings
BK010
Required Tools:
• Hydraulic jack and 2 stands (lift optional but recommended)
• Wrenches – 18mm
• Sockets – 18mm, 21mm
• Pry-bar
• Brass hammer
Installation:
1. Lift vehicle and support with stands
under the rocker jack points or Kmember.
2. Remove both front wheels/tires.
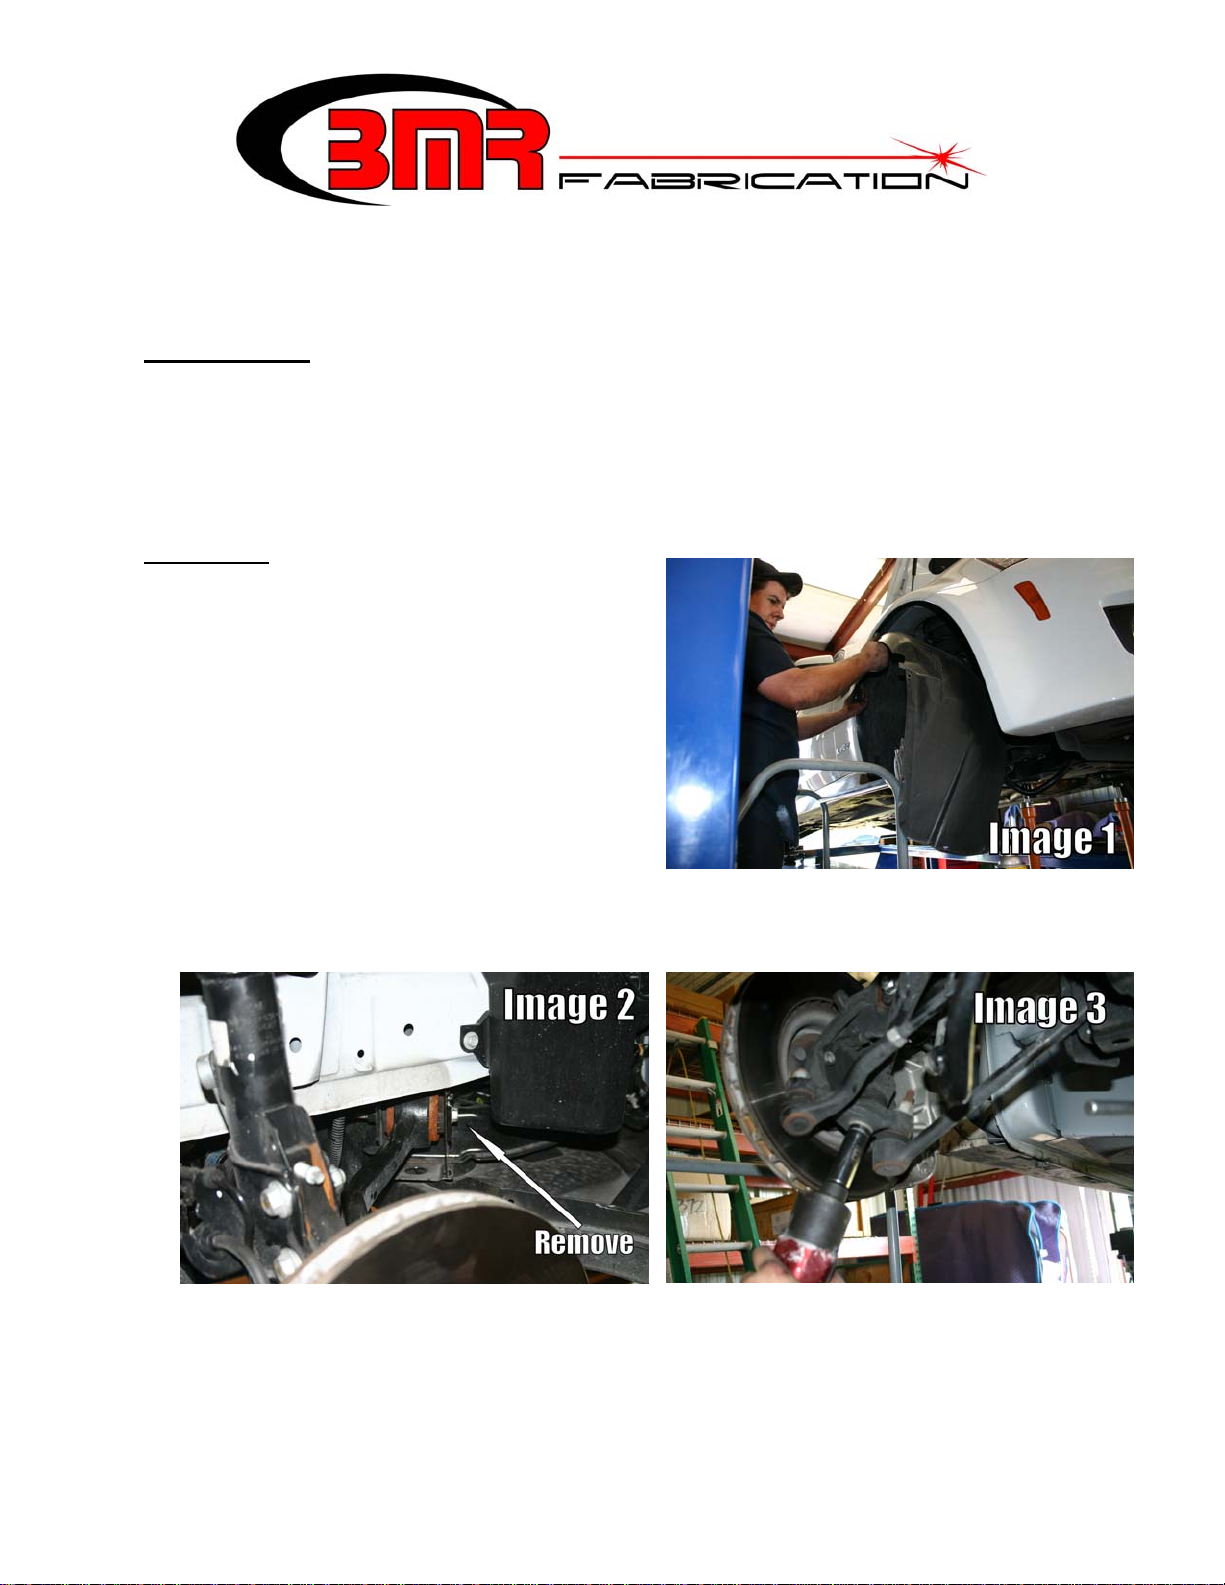
3. Remove the (2) Phillips head screws
and (10) plastic clips that retain the
plastic inner wheel well. A small
screwdriver will “pop” the clips out
by prying the center of the clip out
then removing the clip. See Image 1.
4. Using an 18mm socket and wrench, remove the inner mounting bolt on the lower
radius rod. See Image 2.
5. Using a 21mm socket, remove the outer ball joint nut. See Image 3 above.
6. Knock the ball joint loose from the spindle using a brass hammer or equivalent.
7. Remove radius rod.
1
Front Radius Rod Bushings
BK010 (Continued)
8. Using a bushing removal tool or hydraulic press, remove the OE rubber bushing
and sleeve from the radius rod. See
Image 4.
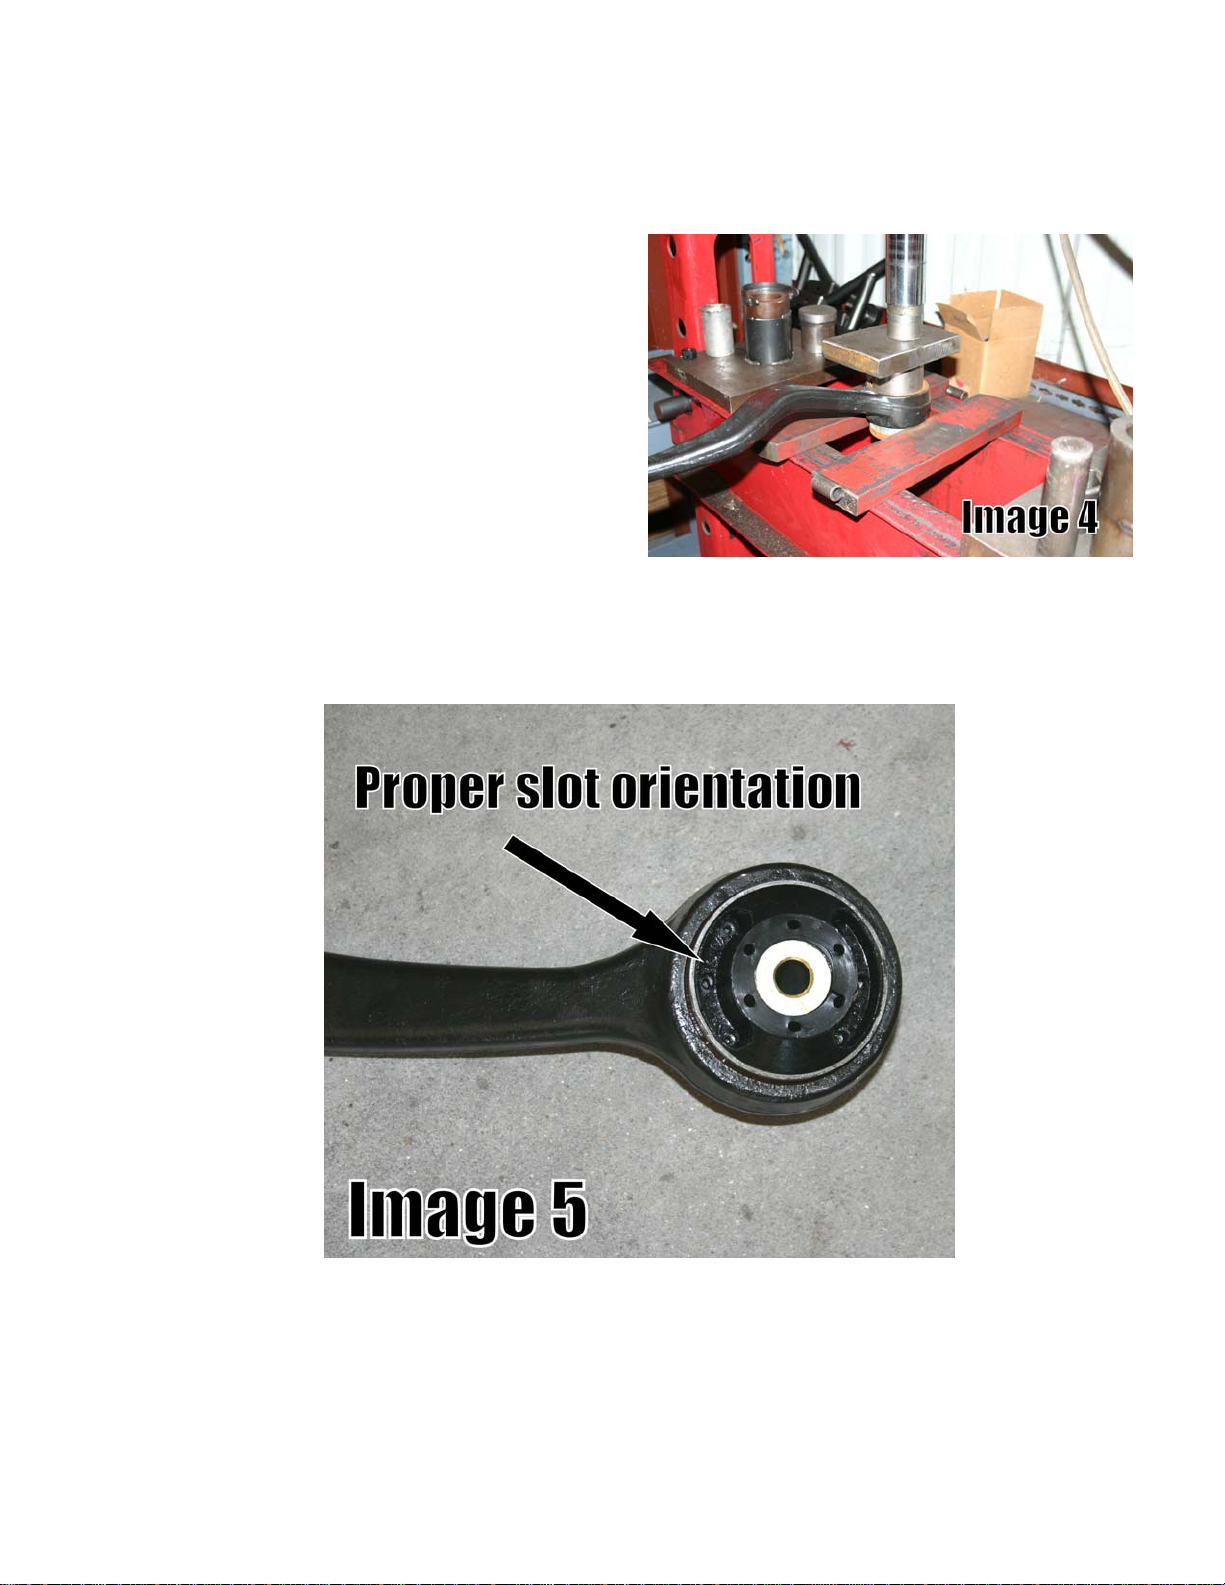
9. Align the BMR polyurethane
bushing as shown in Image 5
below and press the new bushing
into place. Lube the inside of the
bushing and insert the center
sleeve. NOTE: due to the nature of
movement, it is important that the
bushing be installed correctly as
shown in the image below to
prevent pre-mature bushing wear
and suspension bind.
10. Re-install the radius rod duplicating the above steps. Tighten the inner mounting
bolt to 85 ft/lbs.
11. Install wheels/tires. Lower vehicle.
WWW.BMRFABRICATION.COM
This product is an aftermarket accessory and not designed by the vehicles manufacturer for use on this vehicle. As
such, buyer assumes all risk of any damage caused to the vehicle/person during installation or use of this product.
2
 Loading...