

Page 1

AX515 user manual
Version: 2.0.0
2012- 7-24
Preface
Thank you for purchasing this mobile phone. This device will provide you with high quality
mobile communication and entertainment based on our exceptional technology and high standards.
This user manual has been specially designed to guide you through the functions and features of
your device.
Page 2

Preface............................................................................................................................................... 1
Get to know your device ................................................................................................................... 4
Phone appearance ...................................................................................................................... 4
Install SIM card , memory card and battery .............................................................................. 4
Charge the battery ..................................................................................................................... 6
Getting started ................................................................................................................................... 7
Getting to know the idle screen ................................................................................................. 7
Lock or unlock the touch screen and keys ................................................................................ 7
Synchronize data ....................................................................................................................... 7
Access recent applications ........................................................................................................ 7
Opening the Notifications panel ................................................................................................ 7
Phone status icons ..................................................................................................................... 8
Enter text ........................................................................................................................................... 8
Android keyboard type .............................................................................................................. 8
Phone calls ........................................................................................................................................ 9
Making calls .............................................................................................................................. 9
Answer a call ............................................................................................................................. 9
Reject a call ............................................................................................................................... 9
Call an international number ..................................................................................................... 9
Use the headset........................................................................................................................ 10
Use options during a voice call ............................................................................................... 10
View call logs.......................................................................................................................... 10
Contacts........................................................................................................................................... 10
Create a contact ....................................................................................................................... 10
Find a contact .......................................................................................................................... 11
Create a group of contacts ....................................................................................................... 11
Copy contacts .......................................................................................................................... 11
Import or export contacts ........................................................................................................ 11
Downloads ...................................................................................................................................... 11
Messaging ....................................................................................................................................... 12
Email ............................................................................................................................................... 13
Gmail .............................................................................................................................................. 13
Send an email message ........................................................................................................... 14
View email messages .............................................................................................................. 14
Organise email by labels ......................................................................................................... 14
Account Synchronize ...................................................................................................................... 14
Configuring account sync and display options ....................................................................... 14
Browse ............................................................................................................................................ 16
Twitter ............................................................................................................................................. 16
Facebook ......................................................................................................................................... 16
Skpye .............................................................................................................................................. 16
WhatsApp ....................................................................................................................................... 17
Ebuddy ............................................................................................................................................ 17
Maps ................................................................................................................................................ 17
Page 3

Latitude ........................................................................................................................................... 18
Navigation ....................................................................................................................................... 18
Places .............................................................................................................................................. 18
Analog compass .............................................................................................................................. 18
Talk ................................................................................................................................................. 19
Camera ............................................................................................................................................ 19
Camcorder ....................................................................................................................................... 20
YouTube .......................................................................................................................................... 21
Gallery............................................................................................................................................. 22
Music Player ................................................................................................................................... 23
FM Radio ........................................................................................................................................ 23
Sound Recorder ............................................................................................................................... 24
Calendar .......................................................................................................................................... 24
Clock ............................................................................................................................................... 25
Calculator ........................................................................................................................................ 25
File Manager ................................................................................................................................... 26
Menu Toolkit ................................................................................................................................... 26
Market ............................................................................................................................................. 26
Download applications from Android Market ........................................................................ 26
Settings ............................................................................................................................................ 26
Wireless and network .............................................................................................................. 26
Call settings ............................................................................................................................. 27
Audio profiles ......................................................................................................................... 28
Display .................................................................................................................................... 28
Location .................................................................................................................................. 29
Security ................................................................................................................................... 29
Applications ............................................................................................................................ 29
Account &sync ........................................................................................................................ 30
Privacy .................................................................................................................................... 30
storage ..................................................................................................................................... 30
Language & Keyboard ............................................................................................................ 30
Voice input and output ............................................................................................................ 30
Accessibility ............................................................................................................................ 31
Date & time ............................................................................................................................. 31
Schedule power on/off ............................................................................................................ 31
About phone ............................................................................................................................ 31
Search .............................................................................................................................................. 31
Safety precautions ........................................................................................................................... 32
Battery information ................................................................................................................. 32
Operating environment ........................................................................................................ 32
Electronic devices ................................................................................................................ 33
Pacemaker .................................................................................................................... 33
Hearing aids .................................................................................................................. 33
Other medical devices ................................................................................................. 33
Page 4
Vehicles .......................................................................................................................... 33
Potentially dangerous situations ........................................................................................ 33
Care and maintenance ................................................................................................................ 34
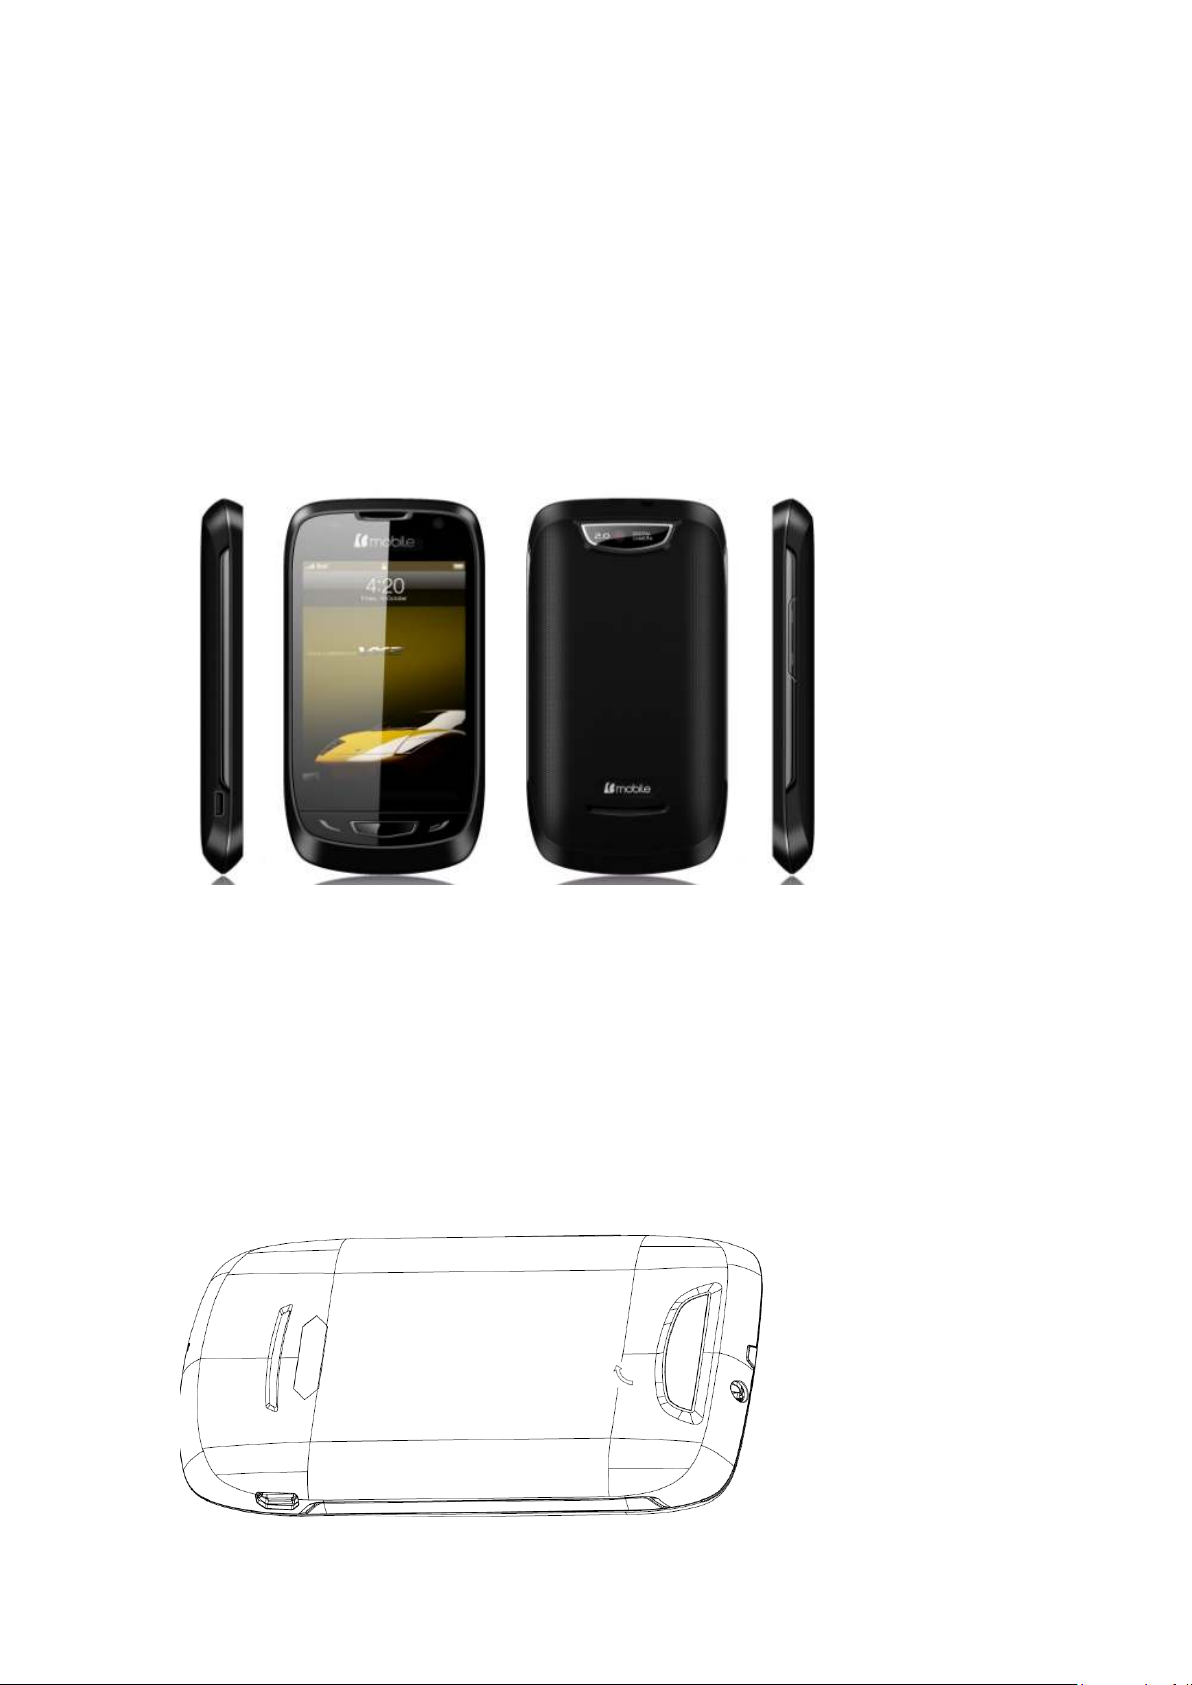
Get to know your device
Phone appearance
Install SIM card , memory card and battery
When you subscribe to a cellular service, you will receive a Subscriber Identity Module (SIM)
card, with subscription details, such as your personal identification number (PIN) and optional
services.
1. If the device is on, press and hold power key and select Power off
2. Remove the back cover.
Power off to turn it off.
Power off Power off
Page 5
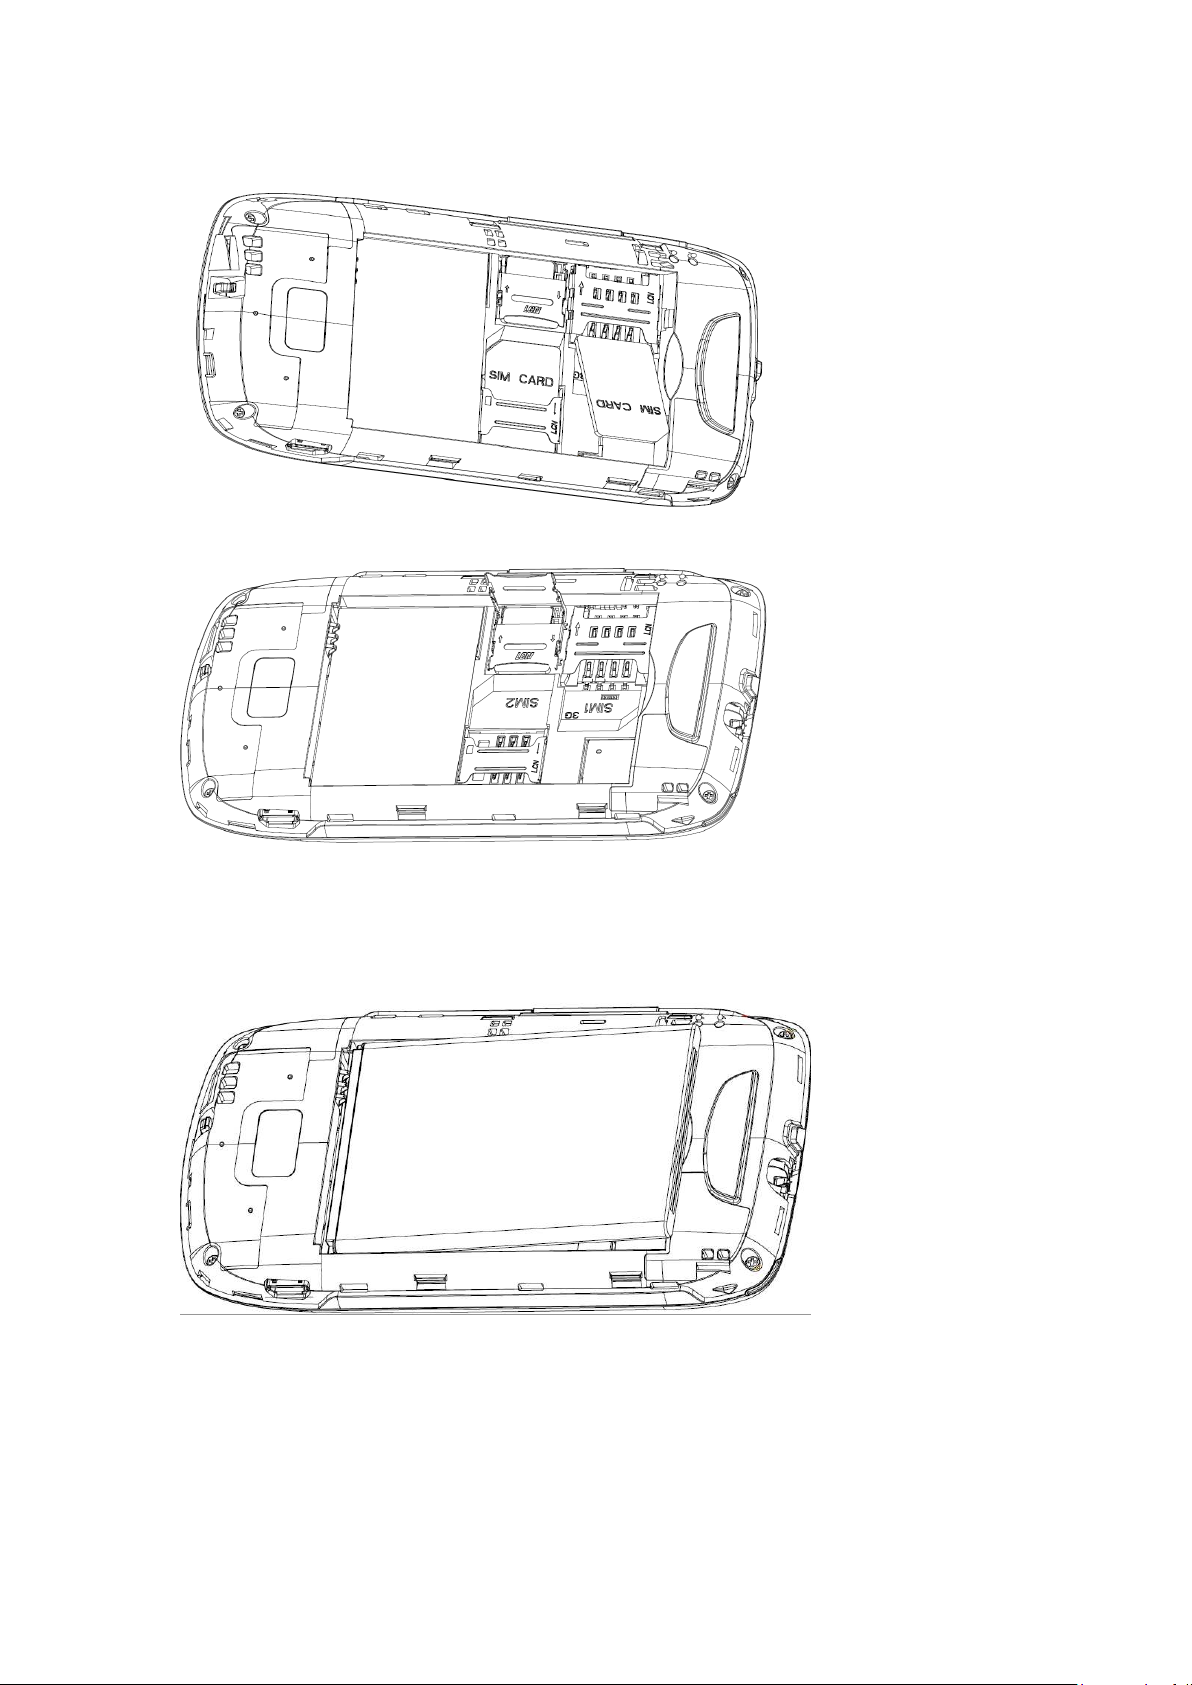
3. Insert the SIM card
4.
Insert memory card
5.
Insert the battery.
6. Replace the back cover.
Page 6
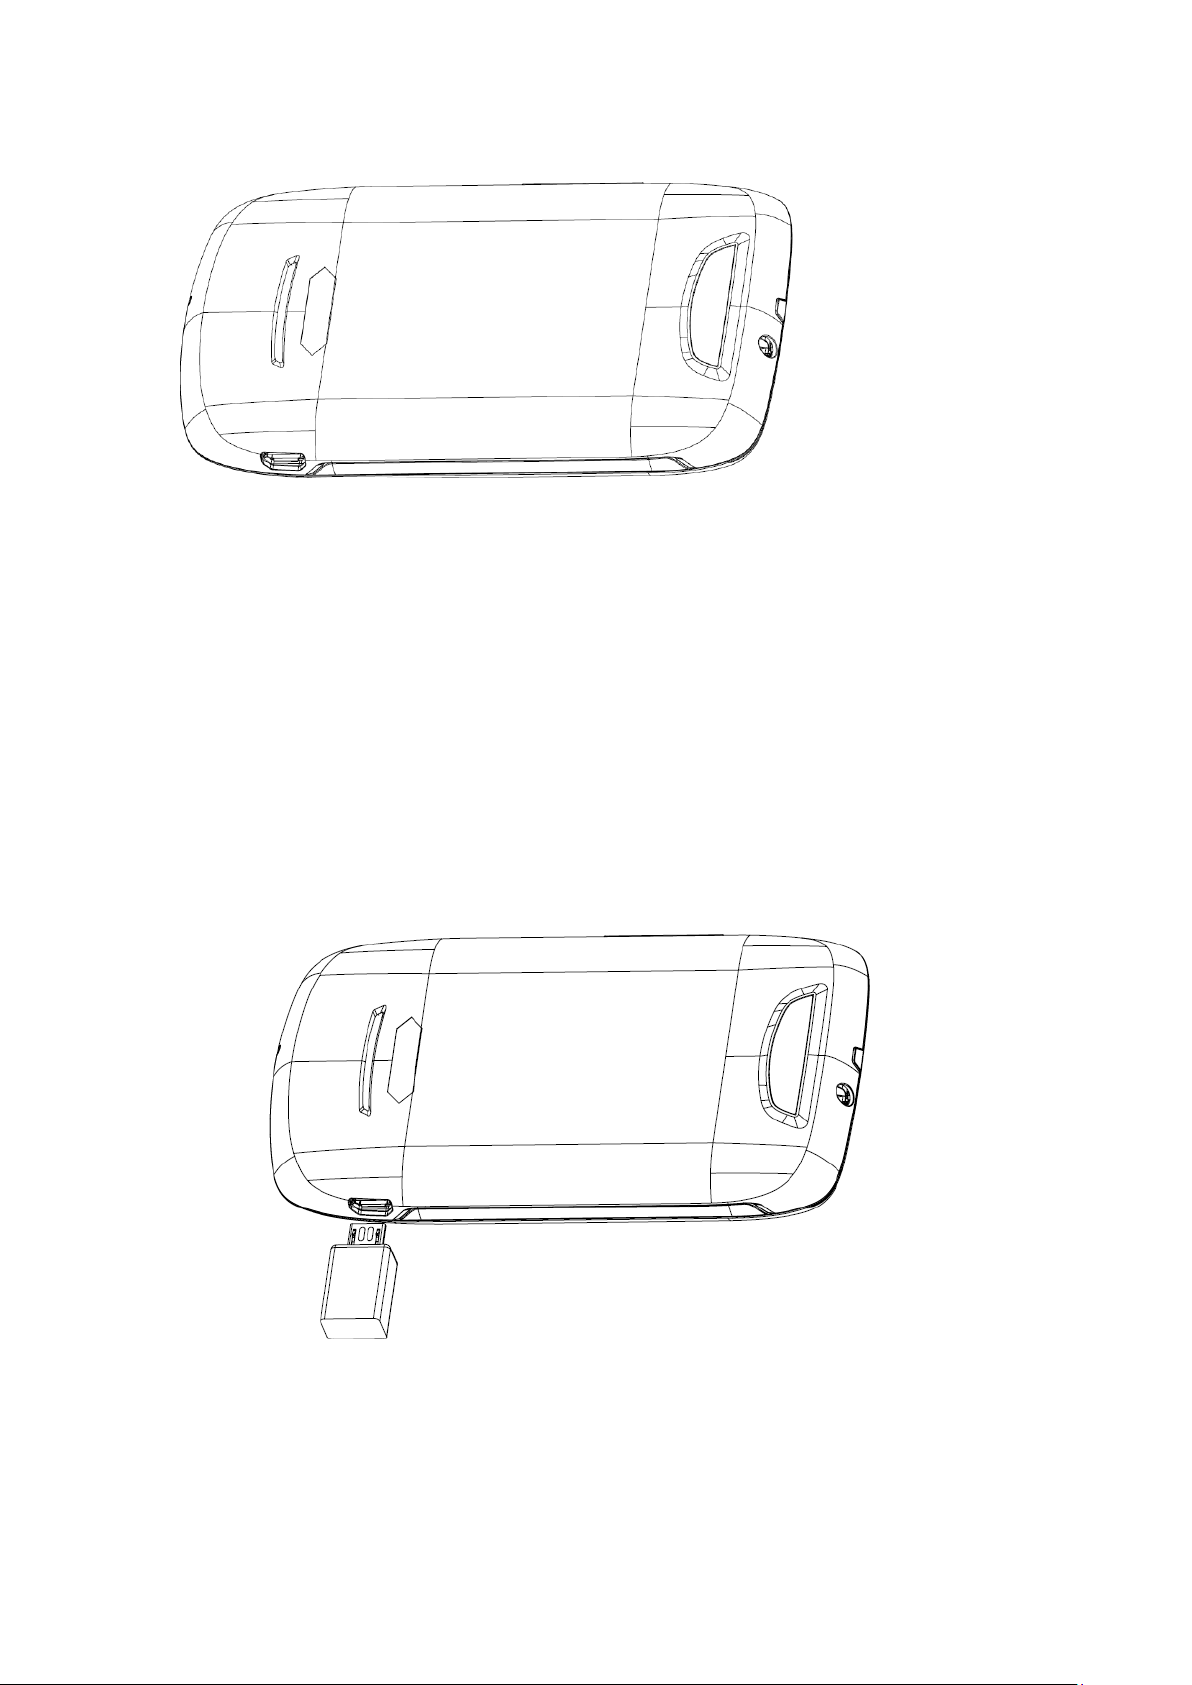
Charge the battery
Before using the device for the first time, you must charge the battery. You can charge the device
with the provided travel adapter or by connecting the device to a PC with a PC data cable.
NOTE:
low battery message. The battery icon will also be empty and turn red. If the battery
level becomes too low, the device will automatically power off. Recharge your
to continue using your device.
Charge with the travel adapter
1. Open the cover to the multifunction jack on the top of the device.
2. Plug the small end of the travel adapter into the multifunction jack.
When your battery is low, the device will emit a warning tone and display a
battery
3. Plug the large end of the travel adapter into a power outlet.
4. When the battery is fully charged (the battery icon is no longer moving), unplug the travel
adapter from the device and then from the power outlet.
Charge with the PC data cable
Before charging, ensure that your PC is turned on.
1. Open the cover to the multifunction jack on the top of the device.
Page 7

2. Plug one end (micro-USB) of the PC data cable into the multifunction jack.
3. Plug the other end of the PC data cable into a USB port on a PC.
4. When the battery is fully charged (the battery icon is no longer moving), unplug the PC data
cable from the device and then from the PC
Getting started
Getting to know the idle screen
The Home screen extends beyond the screen width to provide more space for adding icons,
widgets, and more.
Navigating the Home screen
You can go to the extended Home screen by sliding your finger horizontally across the screen to
go to the left or right side of the Home screen. While on an extended Home screen, press HOME
to return to the main Home screen.
Directly going to a particular screen using Leap view
1. On any Home screen, pinch the screen to show the Leap view that shows all 7 screens as
thumbnails.
On the main Home screen, you can press HOME to show the Leap view.
3. Tap the screen you want to open.
Lock or unlock the touch screen and keys
You can lock the touch screen and keys to prevent any unwanted device operations.
To lock, press power key. To unlock, turn on the screen by pressing power key, and then flick the
icon with your finger.
Synchronize data
You can synchronize data with various web servers and back up or restore your data. Once the
synchronization is completed, your device stays connected to the web. If any change is made on
the web, the updated information will appear on your device and will automatically begin
synchronization, and vice versa.
Access recent applications
1. Press and hold the Home key to open the list of applications you have accessed recently.
2. Select an application to access.
Opening the Notifications panel
Notification icons on the status bar report the arrival of new messages, calendar events,
alarms set and ongoing settings such as when call forwarding is on or the current call status.
You can open the Notifications panel to open the message, reminder, or event notification
and see the mobile operator name.
When a new notification icon displays in the status bar, press and hold the status bar, then
Page 8
slide your finger downward to open the Notifications panel.
If you have several notifications, you can scroll down the screen to view more notifications.
Phone status icons
These are the icons that may appear on the phone status area of the status bar
Icon Function
Wired microphone headset connected
Missed call
Bluetooth is on
Connected to a Bluetooth device
Alarm is set
Airplane mode
No storage card installed on the phone
Battery is full
Battery is charging
Phone connected to computer via USB cable
Downloading data
Enter text
You can enter text by selecting characters on the virtual keypad. You cannot enter text in some
languages. To enter text, you should change the writing language to one of the supported
languages.
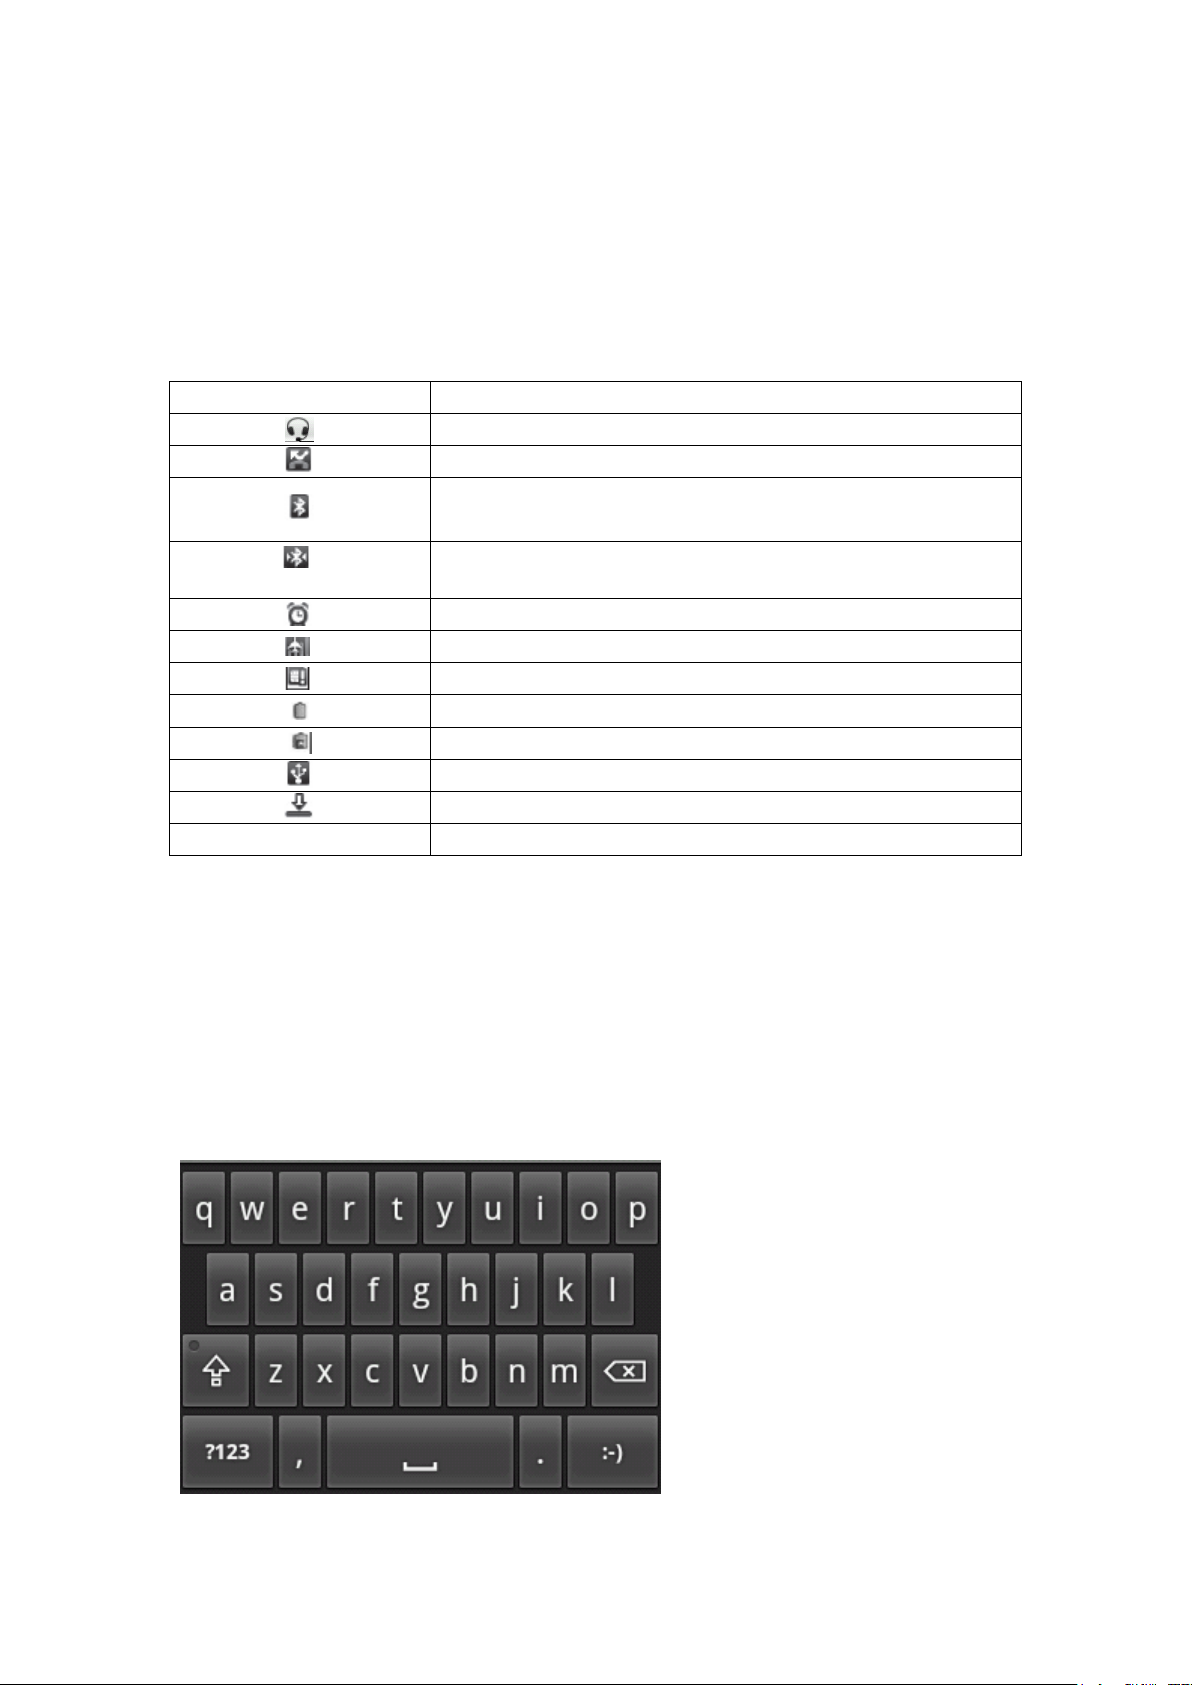
Android keyboard type
Page 9

- Switch between Number and Symbol mode.
- Switch between capital letter and lowercase.
- delete characters.
Press the back key to withdraw the virtual keypad.
Copy and paste text
While you are entering text, you can use the copy and paste feature to use text in other
applications.
1. Place the cursor where you want to start.
2. Tap and hold the text input field.
3. Select the Select text from the option list.
4. Drag your finger across the text you want to highlight.
5. Select Copy to copy, or Cut to cut the text onto the clipboard.
6. In another application, tap and hold the text input field..
7.Select Paste to insert the text from the clipboard into the text field.
Phone calls
Making calls
You can use the buttons or the touch screen when you make, accept, end or reject calls.
Make a call
1. In Idle mode, open the application list, select phone, enter an area code and a phone number.
2. Select to make a call.
3. To end the call, select End call.
Answer a call
1.When a call comes in, touch answer .
When the device is ringing, press the Volume key to mute the ringtone.
2.To end the call, select End call.
Reject a call
When a call comes in, touch reject.
To send a message when you reject incoming calls, select options send messsage.
Call an international number
1. In Idle mode, open the application list and select Phone
character.
2. Enter the complete number you want to dial (country code, area code and phone number), and
Phone, and tap and hold 0 to insert the +
PhonePhone
Page 10

then select to dial the number.
Use the headset
By plugging the supplied headset into the device, you can answer and control calls hands-free
• To answer a call, press the headset button.
• To reject a call, press and hold the headset button.
• To place a call on hold or retrieve a held call during a call, press and hold the headset button.
• To end a call, press the headset button.
Use options during a voice call
You can use the following options while a voice call is in progress
• To adjust the voice volume, press the Volume key up or down.
• To place a call on hold or retrieve a held call, select Hold
To dial a second call, select Add call and then dial a new number.
• To answer a second call, touch answer when a call waiting tone sounds. The device asks
whether to end or hold the first call. You must subscribe to the call waiting service to use this
feature.
• To open the dialing screen, select Dialpad.
• To activate the speakerphone feature, select Speaker.
To turn off the microphone so that the other party cannot hear you, select Mute.
• To listen and talk to the other party via a Bluetooth headset, select Headset.
• To switch between the two calls, select Swap.
• To make a multiparty call (conference call), make or answer a second call and select Merge
when connected to the second party. Repeat to add more parties. You must subscribe to the
multiparty call service to use this feature.
View call logs
You can view logs of your calls filtered by their types.
1.In Idle mode, open the application list and select phone →call log.
From the call logs, you can make a call or send a message directly to a contact by quickly flicking
the contact to the left or right.
3. Select a log to view its details.
From the detail view, you can dial the number, send a message to the number or add the number to
the phonebook or reject list.
Contacts
Create a contact
1. In Idle mode, open the application list and select Contacts.
2. Select “+”
3. Select a memory location.
Page 11

4. Enter contact information.
5. Select Save to add the contact to memory.
You can also create a contact from the dialing screen.
1. In Idle mode, open the application list and select Phone → Keypad.
2. Enter a phone number.
3. Select the icon Add to Contacts
4. Select a memory location.
5. Enter contact information.
6. Select Save to add the contact to memory.
Find a contact
1 In Idle mode, open the application list and select Contacts.
2 Scroll up or down on the contact list.
3 Select a contact’s name.
Create a group of contacts
By creating groups of contacts, you can manage multiple contacts and send messages or email to
an entire group.
Start by creating a group.
1.In Idle mode, open the application list and select Contacts, Press menu key →Groups→Add
Group
2.Input group name
3.Select OK to save it
Copy contacts
You can copy contacts to and from the SIM or SD card.
1. In Idle mode, open the application list and select Contacts.
2. Press menu key→more →Import/Export → Import from SIM card
3. Select contacts to copy and select Import or Export.
4. For exporting contacts, select Yes to confirm.
Import or export contacts
You can save all of your contacts as vcf files in a memory card, and export them from a memory
card.
1. In Idle mode, open the application list and select Contacts.
2. Press menu key → Import/Export → Import from SD card or Export to SD card.
3. For importing contacts, select an importing location.
For exporting contacts, select OK to confirm.
Downloads
It is a shortcut to the downloads files.
Page 12

Messaging
Learn to create and send text (SMS) or multimedia (MMS) messages, and view or manage
messages you have sent or received. You may incur additional charges for sending or receiving
messages while outside your home service area. For details, contact your service provider.
Send a text message
1. In Idle mode, open the application list and select Messaging →compose new message.
2. Select Contacts.
Note: You can enter a number manually or select one from the logs or contact groups by selecting
another button.
3.Select the check boxes next to contacts and select Add.
4. Select Type to compose and enter your message text.
To insert emoticons, press menu key → Insert smiley.
5 .Select Send to send the message.
Send a multimedia message
1. In Idle mode, open the application list and select Messaging →compose new message.
2. Select Contacts.
Note: You can enter a number manually or select one from the logs or contact groups by selecting
another button.
3.Select the check boxes next to contacts and select Add.
Note: When you enter an email address, the device will convert the message as a multimedia
message.
4. Select Type to compose and enter your message text.
To insert emoticons, press menu key→ Insert smiley.
5. Press menu key→ Attach → an option and add an item.
You can select a file from the file list or create a new photo, video, or sound.
6.Press menu key→ Add subject and add a subject for the message.
7. Select Send to send the message.
View a text or multimedia message
1. In Idle mode, open the application list and select Messaging.
Your messages are grouped into message threads by contact, like a messenger.
2. Select a contact.
3. Select a text or multimedia message from the message thread.
Listen to voice mail messages
If you have set missed calls to be diverted to the voice mail server, callers may leave voice
messages when you do not answer incoming calls. To access your voice mail inbox and listen to
voice mail messages.
1. In Idle mode, open the application list and select Phone → Keypad and then tap and hold 1.
2. Follow the instructions from the voice mail server.
Note: You must save the voice mail server number before accessing the server. Your service
provider can give you the number.
Page 13

Email
Learn to send or view email messages via your personal or company email account.
Set up an email account
1. In Idle mode, open the application list and select Email.
2. Enter your email address and password.
3. Select Next (for general email accounts, such as Google Mail and Yahoo) or Manual setup (for
other company email accounts).
4. Follow the on-screen instructions.
When you are finished setting up the email account, the email messages are downloaded to your
device. If you have created more than two accounts, you can switch between email accounts; Press
menu key→ Accounts and select one you want to retrieve messages from.
Send an email message
1. In Idle mode, open the application list and select Email→ an email account.
2.Press menu key → Compose.
3. Select Contacts.
You can enter an email address manually or select one from the recent recipients or groups by
selecting another button.
4. Select the Cc/Bcc field to add more recipients.
5. Select the subject field to enter a subject.
6. Select the text input field to enter your email text.
7. Select Attach and attach a file.
8. Select Send to send the message.
View an email message
When you open an email account, you can view previously retrieved emails offline or connect to
the email server to view new messages. After retrieving email messages, you can view them
offline.
1. In Idle mode, open the application list and select Email→ an email account.
2. Press menu key→ Refresh to update the message list.
3. Select an email message.
From the message view, use the following options:
• To reply to the message, press menu key→ Reply.
• To forward the message to other people, press menu key→Forward.
• To delete the message, press menu key→ Delete.
• To view an attachment, select the attachment area. You can also save it to your device.
Gmail
You can retrieve new email messages from Gmail to your Inbox. When you access this application,
the Inbox screen appears. The total number of unread messages displays in the title bar and unread
messages display in bold. If you have labeled a message, its label appears in a colored rectangle
on the message.
• This feature may be unavailable depending on your region or service provider.
• This Gmail menu may be labeled differently depending on your service provider.
Page 14

Send an email message
1. In Idle mode, open the application list and select Gmail.
2.Press menu key→ Compose.
3. Enter a name or address in the recipient field.
4 Enter a subject and message.
5 To attach an image file, press menu key→ Attach → a file.
6 Select Send to send the message.
View email messages
1. In Idle mode, open the application list and select Gmail.
2. Select an email message.
From the message view, use the following options:
• To reply to the message, select Reply.
• To reply to the message including all recipients, select Reply to all.
• To forward the message to other people, select Forward.
• To view an attachment, select Preview. To save it to your device, select Download.
• To archive the message, select Archive.
• To delete the message, select Delete.
• To move to the previous or next message, select forward or back icon.
Organise email by labels
You can organise your email by labeling your messages or adding stars to mark important
messages. You can sort messages by label filter.
Add a label to a message
1. From the Inbox screen, tap and hold a message.
2. Select Change labels.
3. Select a label to add and select OK.
Add a star to a message
1. From the Inbox screen, tap and hold a message.
2. Select Add star. The star icon next to the message is activated.
Filter messages
1. From the Inbox screen, press menu key→ Go to labels.
2. Select the label of the messages you want to view.
Account Synchronize
Configuring account sync and display options
You can configure background data use and synchronization options for all of the applications on
your phone. You can also configure what kinds of data you synchronize for each account. Some
applications, such as Gmail and Calendar, have their own synchronization settings. Some
applications, such as Contacts, Gmail, and Calendar, can sync data from multiple applications.
Page 15

Others sync data only from the first Google Account you sign into on your phone, or from an
account associated specifically with that application. For some accounts, syncing is
two-directional; changes that you make to the information on your phone are made to the copy of
that information on the web. Your Google Account works this way. Other accounts support only
one-way sync; the information on your phone is read-only.
To configure general sync settings
1. Open the Accounts & Sync Settings screen
2. Check or uncheck Background data to control whether applications and services can transmit
data when you are not working with them directly (that is, when they are running in the
background). If you uncheck this option, Gmail stops receiving new mail, Calendar stops syncing
events, and so on, until you touch the Refresh menu item or send an email
2. Check or uncheck Auto-sync to control whether changes you make to information on the
phone or on the web are automatically synced with each other. For example, when this option
is checked, changes that you make in Contacts on the phone are automatically made in Google
Contacts on the web. If you uncheck this option, you may be able to use an application’s tools
to sync data manually.
To change an account’s sync settings
1 Open the Accounts & Sync Settings screen.
2 Touch the account whose sync settings you want to change.
The Data and Synchronization screen opens, displaying a list of the kinds of information the
account can sync.
Checked items are configured to sync to your phone.
3. Check or uncheck the kinds of information you want to sync to the phone. The Unchecked
option does not remove the information from your phone; it simply stops it from being kept in
sync with the version on the web. To remove the information previously synced for the
Page 16

account, you must remove the account.
Browse
While browsing the web page, use the following options:
• To zoom in or out, double-tap the screen. You can also use the two finger zoom; Place your two
fingers on the screen and slowly pinch or spread apart.
• To open a new window, press menu key → windows→New window.
• To view the currently active windows, press menu key → Windows. You can open multiple
pages and switch back and forth between them.
• To go to a next page in history, press menu key→ Forward.
• To bookmark the current web page, press menu key → bookmarks→ Add bookmark.
• To add the RSS feed, press menu key → More→ Add RSS feeds. You can read RSS feeds
using Google Reader.
• To search for text on the web page, press menu key→ More→ Find on page.
• To view the web page details, press menu key → More →Page info.
• To send the web address (URL) of the web page to others, press menu key → More → Share
page.
• To view the download history, press menu key → More →Downloads.
• To customize the browser settings, press menu key→ More → Settings.
Opera Mini requests web pages through Opera Software's servers, which process and compress
them before sending them to the mobile phone, speeding up transfer by two to three times and
dramatically reducing the amount of data transferred, chargeable on many mobile phone data
plans. The pre-processing increases compatibility with web pages not designed for mobile phones.
And it support low-memory device.
Twitter
View trends, browse your interests and see suggested users in several categories, including fashion,
entertainment and travel, or search to find out what people are saying about topics you care about,
such as politics or big sporting events.
share photos, videos and web pages, real-time search, view maps, trends, and follow.
Facebook
Facebook is a social utility that connects people with friends and others who work, study and live
around them. Also you can share photos to your friends, and keep up with you friends.
Skpye
Make internet calls for free with Skype. Call friends and family on any phone with Pay As You Go
and Pay Monthly subscriptions.
Page 17

WhatsApp
Whatsapp messenger will send a one time SMS message to verify your phone number.
Ebuddy
Chat on multiple MSN, Facebook, Yahoo, AIM, ICQ, GTalk, MySpace & Hyves accounts
Chat everywhere with eBuddy Messenger. Stay always connected with all your friends and family
on MSN (Windows Live Messenger or WLM), Facebook, Yahoo!, MySpace, Gtalk (Orkut), ICQ,
AIM (AOL) and Hyves.
Maps
Learn to use Google Maps to find your location, search the online map for streets, cities, or
countries, and get directions.
• This feature may be unavailable depending on your region or service provider.
• Do not touch the internal antenna area or cover this area with your hands or other objects while
using the GPS functions.
• To receive better GPS signals, avoid using your device in the following conditions:
–– between buildings, in tunnels or underground passages, or inside buildings
–– in poor weather
–– around high voltage or electromagnetic fields
Activate location services to use with Google Maps
You must activate location services to find your location and search the map.
1.In Idle mode, open the application list and select Settings → Location and security.
2. Adjust the following settings to activate location services:
Options Function
Use wireless networks Set to use or mobile networks for finding your
location..
Use GPS satellites Set to use the GPS satellite for finding your
location. You can view locations at street level.
Search for a specific location
1. In Idle mode, open the application list and select Maps.
The map will display your current location.
2. Press menu key → Search.
3. Enter a keyword for the location and select .
• To zoom in or out, select or .
• To add layers to the map, press → Layers → an option.
Get directions to a specific destination
1. In Idle mode, open the application list and select Maps.
Page 18

2. Press menu key→ Directions.
3. Enter the addresses of the starting location and the ending location.
To enter an address from your contact list or point the location on the map, select → Contacts
or Point on map.
4. Select a travel method (car, bus, or walk) and select Go.
5. Select a travel route to view details of your trip (if necessary).
6. Select Show on map.
7. When you are finished, press menu key →Clear Map.
Latitude
Share your location via Google Latitude
Learn to share your location with your friends and view friends’ locations via Google Latitude.
1. In Idle mode, open the application list and select Latitude. The device automatically joins
Latitude.
2. Press menu key→ Add friends → Select from Contacts or Add via email address.
3. Select friends you want to add or enter an email address, and select Add friends → Yes.
When your friend accepts your invitation, you can share locations.
4 Press menu key→ See map.
Your friends' locations are marked with their photos on the map.
Navigation
Navigation is a shortcut menu from the Map or Latitude. In Idle mode, open the application list
and select Navigation, you can get directions to a specific destination.
Places
Places is a shortcut menu from the Map or Latitude, search for a place around you.
This feature may be unavailable depending on your region or service provider.
1. In Idle mode, open the application list and select Places.
2. Select a category.
Your device searches for places around your current location that are related to the category.
3. Select a place name to view its details.
4. To view the place on the map, select .
To view the route to the place, select .
Analog compass
Use the analog compass to guide your trip. Press the menu key, there are many styles and
Page 19

backgrounds to choose from.
Talk
Learn to chat with friends and family via Google Talk.
Note: This feature may be unavailable depending on your region or service provider.
Add friends to your friend list
1. In Idle mode, open the application list and select Talk. The friend list shows all of your
Google Talk contacts at a glance.
2. Press menu key → Add friend.
3. Enter an email address of the friend and select Send invitation.
When your friend accepts the invitation, the friend is added to your friend list.
Start a chat
1. In Idle mode, open the application list and select Talk.
2. Select a friend from the friend list. The chat screen opens.
3. Enter your message and select Send.
To insert emoticons, press menu key→ More → Insert smiley.
4 To switch between active chats, press menu key → Switch chats.
5 To end the chat, press menu key→ End chat.
Camera
The camera displays in landscape view only. You’ll find the following controls on the
Viewfinder screen:
Page 20

number function
1
2
3
zoom button
Tap to display or hide the onscreen zoom bar.
See “Zooming” for details.
White balance
Adjust the color balance according to lighting
conditions.
Store location
Select on, GPS will locate the photo, select off,
GPS can’t locate the photo.
Change the camera settings.
4
5
Change the camera settings.
6
Take photos button
7
Capture a photo.
8
Switch to the camcorder.
9
Tap to open the Photos application so you can
browse through and view the photos and videos
in your storage card.
See the Photos chapter for details.
Camcorder
The camcorder displays in landscape view only. You’ll find the following controls on the
Viewfinder screen:
Page 21

Number Function
1
2
3
4
5
6
7
8
zoom button
Tap to display or hide the onscreen zoom bar.
See “Zooming” for details.
Adjust the color balance according to lighting
conditions.
Change the camcorder camera settings.
Change the camcorder camera settings.
Record or stop recording
Switch to the camera
Record a video.
View the video you recorded last.
YouTube
YouTube is a free online video streaming service. Learn to view and share videos via YouTube.
Note: This feature may be unavailable depending on your region or service provider.
Page 22

Watch videos
1. In Idle mode, open the application list and select YouTube.
2. Select a video from the list.
3. Rotate the device anti-clockwise to landscape view.
Share videos
1 In Idle mode, open the application list and select YouTube.
2 Tap and hold a video.
3 Select Share → an option.
Gallery
Learn to view photos and play videos saved in your device's memory and memory card.
View a photo
1. In Idle mode, open the application list and select Gallery.
2. Select a folder.
3. select menu key to change the view mode.
4. Select a photo (with no icon) to view.
While viewing a photo, use the following options:
• To view more photos, scroll left or right.
• To zoom in or out, select or . You can also tap the screen with two fingers and spread
them apart (move your fingers closer together to zoom out).
• To start a slideshow images in the selected folder, select Slideshow. Tap the screen to stop the
slideshow.
Play a video
1. In Idle mode, open the application list and select Gallery.
2. Select a video (with the icon) to play.
3. Rotate the device anti-clockwise to landscape view.
Page 23

4. Control playback with the virtual keys.
Share images or videos
1. In Idle mode, open the application list and select Gallery.
2. Select a folder.
3. Select an image or video.
4. Press and hold the image or video Select Share → a sharing option.
Music Player
Learn to listen to your favourite music while on the go with the music player. You can also play
music files in the following formats if you open them from My Files, multimedia messages, or on
the web browser
• Some file formats are not supported depending on the software of the device.
• If the file size exceeds the available memory, an error can occur when you open files.
Play music
After transferring music files to your device or memory card,
1. In Idle mode, open the application list and select Music Player.
2. Scroll left or right to a music category.
3. Select a music file.
4. Control playback with the following icons:
Icon Function
Adjust the volume.
Go to the music list
Activate Shuffle mode.
Change the repeat mode (off, repeating
a file, or repeating all files).
Skip backwards; Scan backward in a file
(tap and hold).
Pause playback; Select to resume
playback.
Skip forward; Scan forward in a file (tap
and hold).
FM Radio
Learn to listen to music and news on the FM radio. To listen to the FM radio, you must connect
the supplied headset, which serves as the radio antenna.
Listen to the FM radio
1. Plug the supplied headset into the device.
2. In Idle mode, open the application list and select FM Radio.
Page 24

3. Select to turn on the FM radio (if necessary).
The FM radio scans and saves available stations automatically.
The first time you turn on the FM radio, you will be prompted to start automatic tuning.
4. Control the FM radio with the following keys:
Change the frequency by 0.1 MHz.
Search for an available radio station.
let FM radio get speaker or headset
Press the VOLUME UP and VOLUME DOWN buttons on the side of the phone to adjust the
volume.
Press MENU to set more FM Radio options.
Sound Recorder
Learn to operate your phone’s sound recorder.
Record a voice memo
1. In Idle mode, open the application list and select sound Recorder.
2. Select Record to start recording.
3. Speak into the microphone.
4. When you are finished, select Stop.
5. To record more voice memos, select Record again.
Play a voice memo
In Idle mode, go to File Manager, open the record file and select Voice Recorder to play
Calendar
Learn to create and manage daily, weekly or monthly events, and set alarms to remind yourself of
important events. On your phone, sign in to your Google Account so you’ll be able to sync your
phone’s Calendar with your Google Calendar online.
Create an event
1. In Idle mode, open the application list and select calendar.
2.Select Tap to create or press menu key → Create.
3. Enter the details of the event as required.
4. Select Done to save.
View events
To change the calendar view,
1.In Idle mode, open the application list and select Calendar
2. Select a view mode from the top of the calendar.
To view events of a specific date,
1. In Idle mode, open the application list and select Calendar.
2. Select a date on the calendar. In month view, days with scheduled events are indicated by a
small rectangle
Page 25

To move to a specific day by entering a date manually,
press menu key → Go to, enter the date by selecting + or -, and select Set.
To select today's date, press menu key → Today.
3 Select an event to view its details.
Stop an event alarm
If you set an alarm for a calendar event, the event alarm
icon will appear at the specified time.
1. Open the shortcuts panel from the top of the screen.
2. Select a reminder to view more details about the event.
3. To snooze or dismiss the reminder, select Snooze all or Dismiss all.
Clock
The Clock application is more than just a regular date and time clock. It functions as a desk
clock that shows the date, time, and weather information, and it can turn into a night clock or
screensaver.
Set a new alarm
1. In Idle mode, open the application list and select Clock→ Alarm.
2. Select Add alarm.
3. Set alarm details.
4. When you are finished, select Save.
Stop an alarm
When the alarm sounds,
• To stop the alarm, select Dismiss.
• To repeat the alarm after a specified length of time, select Snooze.
Delete an alarm
1.In Idle mode, open the application list and select Clock → Alarm.
2.Touch and hold the alarm→ Delete.
3. Select alarms to delete.
4. Select Delete
Calculator
Learn to perform mathematical calculations directly on your device like a typical hand-held or
desktop calculator.
Perform the calculation
•Enter numbers and arithmetic operators on the basic screen.
•Drag the basic screen to the left to open the advanced screen.
•Touch & hold the Calculator’s display to open a menu where you can copy what you’ve entered
and access other tools.
•Touch CLEAR to delete the last number or operator you entered. Touch & hold
CLEAR to delete everything in the display.
Page 26

File Manager
·Create Folder
·Edit
·Sort: By type, name, size, and time.
Menu Toolkit
If your SIM card supports STK function, the phone can display different first level menu
according to different STK card. This function needs the network provider support. If user finds
STK function can't operate normally, please contact the network provider. If the network provider
does not support this function, we do not claim any responsibility whatsoever
Market
Download applications from Android Market
Based on the Android platform, your device’s functionality can be extended by installing
additional applications. Android Market provides you an easy and quick way to shop for games
and mobile applications.
Install an application
1. In Idle mode, open the application list and select Market.
2. Select Accept when the terms and conditions appears.
3. Select an item category → an item.
4. Select Install (for free items) or Buy.
If you select Install, select OK to download the item immediately.
If you select Buy, you need to enter your credit card information. Follow the on-screen
instructions.
Uninstall an application
1. From the Android Market home screen, select Downloads.
2. Tap and hold the item you want to delete and select Uninstall.
3. Select an option and select OK.
Settings
Wireless and network
Airplane mode
Disable all wireless functions on your device. You can use only non-network services.
Wi-Fi settings
• Wi-Fi: Turn the WI-FI feature on or off
• Network notification: Set the device to notify you when an open network is available.
Bluetooth settings
• Bluetooth: Turn the Bluetooth wireless feature on or off.
• Device name: Set a Bluetooth name for your device.
Page 27

• Discoverable: Set your device to be visible to other Bluetooth devices.
• Discoverable timeout: Set how long device will be discoverable.
• Advanced settings: Setup Bluetooth service.
• Scan for devices: Search for available Bluetooth devices.
VPN settings
Set up and manage Virtual Private Networks (VPNs).
Mobile networks
• Data enabled : Uncheck to prevent your phone from transmitting data on any mobile network.
This is useful if you are traveling in an area where you do not have a mobile data plan and want to
avoid charges for data use on local carriers’ mobile networks. Unchecking this setting does not
prevent your phone transmitting data on other wireless networks, such as Wi-Fi or Bluetooth..
• Data roaming : Uncheck to prevent your phone from transmitting data on other carriers’ mobile
networks when you can’t access your own carrier’s mobile networks.
• Data usage: Only available if your carrier enforces a mobile network data use policy. Displays
the amount of data you’ve transmitted over the mobile network in the current period, the data
threshold (the amount of data you can transmit before the policy is enforced), and the time when
the next period starts. If you touch this setting, the Data Usage screen opens, with more details
about your mobile network data use, the period in which it’s measured, and the way in which the
carrier will enforce the policy if you exceed the data threshold for the period. Contact your carrier
for more information about its mobile network data use policy.
• Access Point Names: Opens the APNs screen, where you can select mobile access point
configurations or press Menu key to add a new APN. Consult your carrier about how to use the
tools on this screen.
• Networks mode: GSM/WCDMA(auto mode).
• Network operators: Opens a screen that searches for and displays mobile networks that are
compatible with your phone. Consult your carrier to understand the billing implications of
selecting another carrier.
Call settings
Voice call
Voice mail
Opens a dialog where you can select your carrier’s voicemail service or another service, such as
Google Voice.
Call forwarding
Call diverting is a network feature to send incoming calls to another number that you specify. You
can set this feature separately for several conditions when you are not able to answer calls, such as
when you are already on the phone or when you are outside of the service area.
Call barring
Check the options as the voice call barring settings.
Additional settings
Caller ID: Opens a dialog where you can set whether your phone number is displayed to the
people you call.
Page 28

Call waiting: Call waiting is a network feature to alert you of an incoming call while you are on a
previous call.
Video call
Check the options as the video call settings.
Other settings
Fixed Dialing Numbers
• Enable FDN: Activate or deactivate FDN mode to restrict calls to numbers in the FDN list. You
must enter the PIN2 supplied with your SIM or USIM card and reboot the device.
• Unblock PIN2 : Change the PIN2, which is used to protect the primary PIN. If the SIM card is
locked, this menu changes to Unblock PIN2.
• FDN list: Set up a list of contacts for fixed dialing.
Call cost
You can see Call cost information as the options.
Cell broadcost
Minute reminder
Send message
Audio profiles
Change the settings for various sounds on your device, there are General, Silent, Meeting, Outdoor
profiles .
• Silent mode: Activate the silent mode to mute all sounds except media sounds and alarm
ringtones.
• Vibrate: Set the device to vibrate to alert you to incoming calls.
• Volume: Adjust the volume level for call ringtones, media, alarm ringtones, phone system sound,
and notification ringtones.
Phone ringtone: Select a ringtone to alert you to incoming voice calls.
Notification ringtone: Select a ringtone to alert you to events, such as incoming messages, missed
calls, and alarms.
Audible touch tones: Check to hear tones when you use Phone to dial a number.
Audible selection: Check to play a sound when you touch buttons, icons, and other onscreen items
that react to your touch.
Screen lock sounds: Check to play a sound when the screen is locked or unlocked.
Haptic feedback: Check to have the phone vibrate briefly when you touch soft buttons and
perform other actions.
Display
Brightness: Set the brightness of the display.
Auto-rotate screen: Check to automatically switch the orientation of the screen as you turn the
phone sideways or even upside down
Animation: Set the device to display animation when you switch between windows.
Screen timeout: Set the length of time the device waits before turning off the display's backlight.
Page 29

Location
Change the settings for securing your device and the SIM card, and GPS functionality.
• Use wireless networks: Set to use WI-FI and/or mobile networks for finding your location.
• Use GPS satellites: Set to use the GPS satellite for finding your location. You can view
locations at street level.
• GPS EPO assistance: Set to use the GPS assistance data (EPO) to speed up GPS positioning.
• EPO settings: Click to modify EPO configurations.
• A-GPS: Check or uncheck it.
• A-GPS settings: Set up A-GPS settings.
Security
• Set up screen lock: Set the unlock security code. When you have set your security code, this
option changes to change screen lock.
--None: Disable the screen lock.
-- Pattern: Set an unlock pattern to unlock the screen.
-- PIN: Set a PIN (numeric) to unlock the screen.
-- Password: Set a password (alphanumeric) to unlock the screen.
• Set up SIM card lock:
-- Lock SIM card: Activate or deactivate the PIN lock feature to require the PIN before using the
device.
-- Change SIM PIN: Change the PIN used to access SIM data.
• Visible passwords: By default, the device displays your password as · for security. Set the
device to display your password as you enter.
• Select device administrators: View device administrators installed on your device. You can
activate device administrators to apply new policies to your device.
• Use secure credentials: Use certificates and credentials to ensure secure use of various
applications.
• Install from SD card: Install encrypted certificates that are stored on a memory card.
• Set password: Create and confirm a password for
accessing credentials.
• Clear storage: Erase the credential contents from the
device and reset the password.
Applications
Change the settings for managing installed applications.
• Unknown sources: Select to download applications from any source. If you do not select this
option, you can download applications only from Android Market.
• Manage applications: Access the list of the applications installed on the device and check the
application information.
• Running services: View the services you are using and access them to manage.
• Storage use: View storage used by applications.
•Battery use: what has been using the battery.
Page 30

• Development:
--USB debugging: Select to connect your device to a PC by using a PC data cable. This is for
application development.
-- Stay awake: Set the device’s screen to stay on while charging the battery.
--Allow mock locations: Allow mock locations and service information to be sent to a Location
Manager service for testing. This is for application development.
Account &sync
Change the settings for the auto sync feature or manage accounts for synchronization.
• Background data: Select this setting to use the auto sync feature. The auto sync will run in the
background without opening applications and synchronize data.
• Auto-sync: Set the device to synchronize contact, calendar, and email data automatically.
Privacy
Change the settings for managing your settings and data.
• Back up my data: Back up your device’s settings to the Google server.
• Automatic restore: Set the device to restore applications' data you backed up when they are
installed in your device.
•DRM reset: Deletes all RDM licenses.
• Factory data reset: Reset your settings to the factory default values.
storage
Check memory information of memory cards and your device, and format the external or internal
memory.
Language & Keyboard
Select language: Opens the Language screen, where you can select the language to use for the text
on your phone.
User dictionary: Opens a list of the words you’ve added to the dictionary. Touch a word to edit or
delete it. Press Menu and touch Add to add a word.
Android keyboard: For phones with physical keyboards, uncheck to disable the onscreen
keyboard.
Select input method: Android keyboard.
Voice input and output
Change the settings for the voice recognizer and the text to-speech feature.
Text-to-Speech settings screen
If you don’t have speech synthesizer data installed, only the Install voice data setting is available.
Listen to an example: Plays a brief sample of the speech synthesizer, using your current settings.
Always use my settings: Check to use the settings on this screen in place of speech synthesizer
settings available in other applications.
Page 31

Default engine: Opens a dialog where you can set the text-to-speech application you want to use,
if you have more than one installed.
Install voice data: If your phone does not have speech synthesizer data installed, connects to
Android Market and guides you through the process of downloading and installing the data. This
setting is not available if the data is already installed.
Speech rate: Opens a dialog where you can select how quickly you want the synthesizer to speak.
Language: Opens a dialog where you can select the language of the text you want the synthesizer
to read. This is particularly useful in combination with the Always Use My Settings setting, to
ensure that text is spoken correctly in a variety of applications.
Engines: View the text-to-speech engines downloaded from Android Market.
Accessibility
Check to enable all installed accessibility plug-ins.
Date & time
Access and alter the following settings to control how time and date are displayed on your device:
• Automatic: Automatically update the time when you move across time zones.
• Set date: Set the current date manually.
• Select time zone: Set your home time zone.
• Set time: Set the current time manually.
• Use 24-hour format: Set to the time to be displayed in 24-hour format.
• Select date format: Select a date format.
Schedule power on/off
You can set schedule power on/off.
About phone
Access information about your device, check the device’s status, and learn how to use your device.
Search
Change the Google Search settings.
• Google search:
-Show web suggestions: Set the device to display suggestions while you are entering a keyword.
• Searchable items: Select the types of items to include in your search.
• Clear shortcuts: Clear the information from recent searches.
Page 32

Safety precautions
Battery information
Your device is powered by a rechargeable battery.
The battery can be charged and discharged hundreds of times but it will eventually wear
out. When the talk and standby times are noticeably shorter than normal, please buy a
new battery.
Use only the approved batteries, and recharge your battery only with approved chargers
designated for this device.
Unplug the charger from the electrical plug and the device when not in use. Do not leave
the battery connected to a charger. Overcharging may shorten its lifetime. If left unused, a
fully charged battery will lose its charge over time.
Warning
Do not drop, knock, or shake the device. Rough handling can shorten the life of the
battery.
Do not make short-circuit occur to the battery.
The battery put in hot or cold places, such as in a closed car in summer or winter, will
reduce the capacity and lifetime of the battery.
Do not put the battery near flammable or explosive goods.
Do not dispose of batteries in a fire!
Never use any charger or battery that is damaged.
Use the battery only for its intended purpose.
Dispose of batteries according to local regulations. Please recycle when possible. Do not
dispose as household waste.
Operating environment
Remember to follow any special regulations in force in any area and always switch off
your device when its use is prohibited or when it may cause interference or danger. Use
the device only in its normal operating positions. Do not keep the device near credit cards
and other magnetism medium, some accessories can bring magnetism that may be delete
Page 33

the data.
Electronic devices
Some electronic devices are not adequately shielded from external RF energy.
Pacemaker
Pacemaker manufacturers recommend that a minimum separation of 6in (20cm) should
be maintained between a wireless phone and a pacemaker to avoid potential interference
with the pacemaker. These recommendations are consistent with the independent
research by and recommendations of Wireless Technology Research. To minimize the
potential interference, persons with pacemakers should do as below:
Always keep the device more than 6 in (20 cm) from their pacemaker when the device is
switched on.
Not carry the device in a breast pocket.
Hold the device to the ear opposite the pacemaker.
If you have any reason to suspect that interference is taking place, switch off your device
immediately.
Hearing aids
Some digital wireless devices may interfere with some hearing aids. If interference occurs,
consult your service provider.
Other medical devices
Operation of any radio transmitting equipment, including wireless phones, may interfere
with the functionality of inadequately protected medical devices. Switch off your phone in
health care facilities when any regulations are posted in these areas instructing you to do
so.
Vehicles
RF signals may affect improperly installed or inadequately shielded electronic systems in
motor vehicles. For more information, check with the manufacturer or its representative of
your vehicle or any equipment that has been added.
Potentially dangerous situations
Switch off your device when in any area with a potentially explosive atmosphere and obey
all signs and instructions. Sparks in such areas could cause an explosion or fire resulting
in body injury even death.
Page 34

Switch off the device at refueling points such as near gas pumps at service stations.
Observe restrictions on the use of radio equipment in fuel depots, storage, and distribution
areas, chemical plants or where blasting operations are in progress.
Areas with a potentially explosive atmosphere are often but not always clearly marked.
They include below deck on boats, chemical transfer or storage facilities, vehicles using
liquefied petroleum gas (such as propane or butane), and areas where the air contains
chemicals or particles such as grain, dust or metal powders.
Care and maintenance
Your device is a product of superior design and craftsmanship and should be treated with
care. The suggestions below will help you protect your warranty coverage and enjoy your
device for many years.
Keep your phone and all accessories out of the reach of small children.
Keep the device dry.
Do not use or store the device in dusty, dirty areas. Its moving parts and electronic
components can be damaged.
Do not store the device in hot areas. High temperatures can shorten the life of electronic
devices, damage batteries, and warp or melt certain plastics.
Do not store the device in cold areas. When the device returns to its normal temperature,
moisture can form inside the device and damage electronic circuit boards.
Do not attempt to open the device other than as instructed in this guide.
Do not drop, knock, or shake the device. Rough handling can break internal circuit boards
and fine mechanics.
Do not contact the device by wet hands, the electric current may strike and damage it.
Precipitation, humidity, and all types of liquids or moisture can contain minerals that will
corrode electronic circuits.
Do not use harsh chemicals, cleaning solvents, or strong detergents to clean the device.
Do not paint the device. Paint can clog the moving parts and prevent proper operation.
All of the above suggestions apply equally to your device, battery, charger, or any
enhancement. If any device is not working properly, take it to the nearest authorized
service facility for service.
This device complies with Part 15 of the FCC Rules. Operation is subject
to the following two conditions: (1) This device may not cause harmful
interference. (2) This device must accept any interference received, including
interference that may cause undesired operation.
NOTE: Changes or modifications not expressly approved by the party
responsible for compliance could void the user's authority to operate the
equipment.
NOTE: This equipment has been tested and found to comply with the
limits for a Class B digital device, pursuant to Part 15 of the FCC Rules. These
limits are designed to provide reasonable protection against harmful interference
in a residential installation. This equipment generates uses and can radiate radio
Page 35

frequency energy and, if not installed and used in accordance with the
instructions, may cause harmful interference to radio communications. However,
there is no guarantee that interference will not occur in a particular installation.
If this equipment does cause harmful interference to radio or television
reception, which can be determined by turning the equipment off and on, the
user is encouraged to try to correct the interference by one or more of the
following measures:
---Reorient or relocate the receiving antenna.
---Increase the separation between the equipment and receiver.
---Connect the equipment into an outlet on a circuit different from that to
which the receiver is connected.
---Consult the dealer or an experienced radio/TV technician for help.
Body-worn Operation
This device was tested for typical body-worn operations. To comply With
RF exposure requirements, a minimum separation distance of 1.5cm must be
maintained between the user’s body and the handset, including the antenna.
Third-party belt-clips, holsters, and similar including the antenna. Third-party
belt-clips, holsters, and similar accessories used by this device should not
contain any metallic components. Body-worn accessories that do not meet these
requirements may not comply with RF exposure requirements and should be
avoided.
Specific Absorption Rate (SAR) information:
This wireless phone meets the government's requirements for exposure to radio waves. The
guidelines are based on standards that were developed by independent scientific organizations
through periodic and thorough evaluation of scientific studies. The standards include a substantial
safety margin designed to assure the safety of all persons regardless of age or health.
FCC RF Exposure Information and Statement The SAR limit of USA (FCC) is 1.6 W/kg averaged
over one gram of tissue. Device types: A515 (FCC ID: ZSW-AX510-AX515) has also been tested
against this SAR limit. The highest SAR value reported under this standard during product
certification for use at the ear is 0.635W/kg and when properly worn on the body is 0.964W/kg.
This device was tested for typical body-worn operations with the back of the handset kept 1.5cm
from the body. To maintain compliance with FCC RF exposure requirements, use accessories that
maintain a 1.5cm separation distance between the user's body and the back of the handset. The use
of belt clips, holsters and similar accessories should not contain metallic components in its
assembly. The use of accessories that do not satisfy these requirements may not comply with FCC
RF exposure requirements, and should be avoided.
 Loading...