

Page 1
Front Suspension Assembly
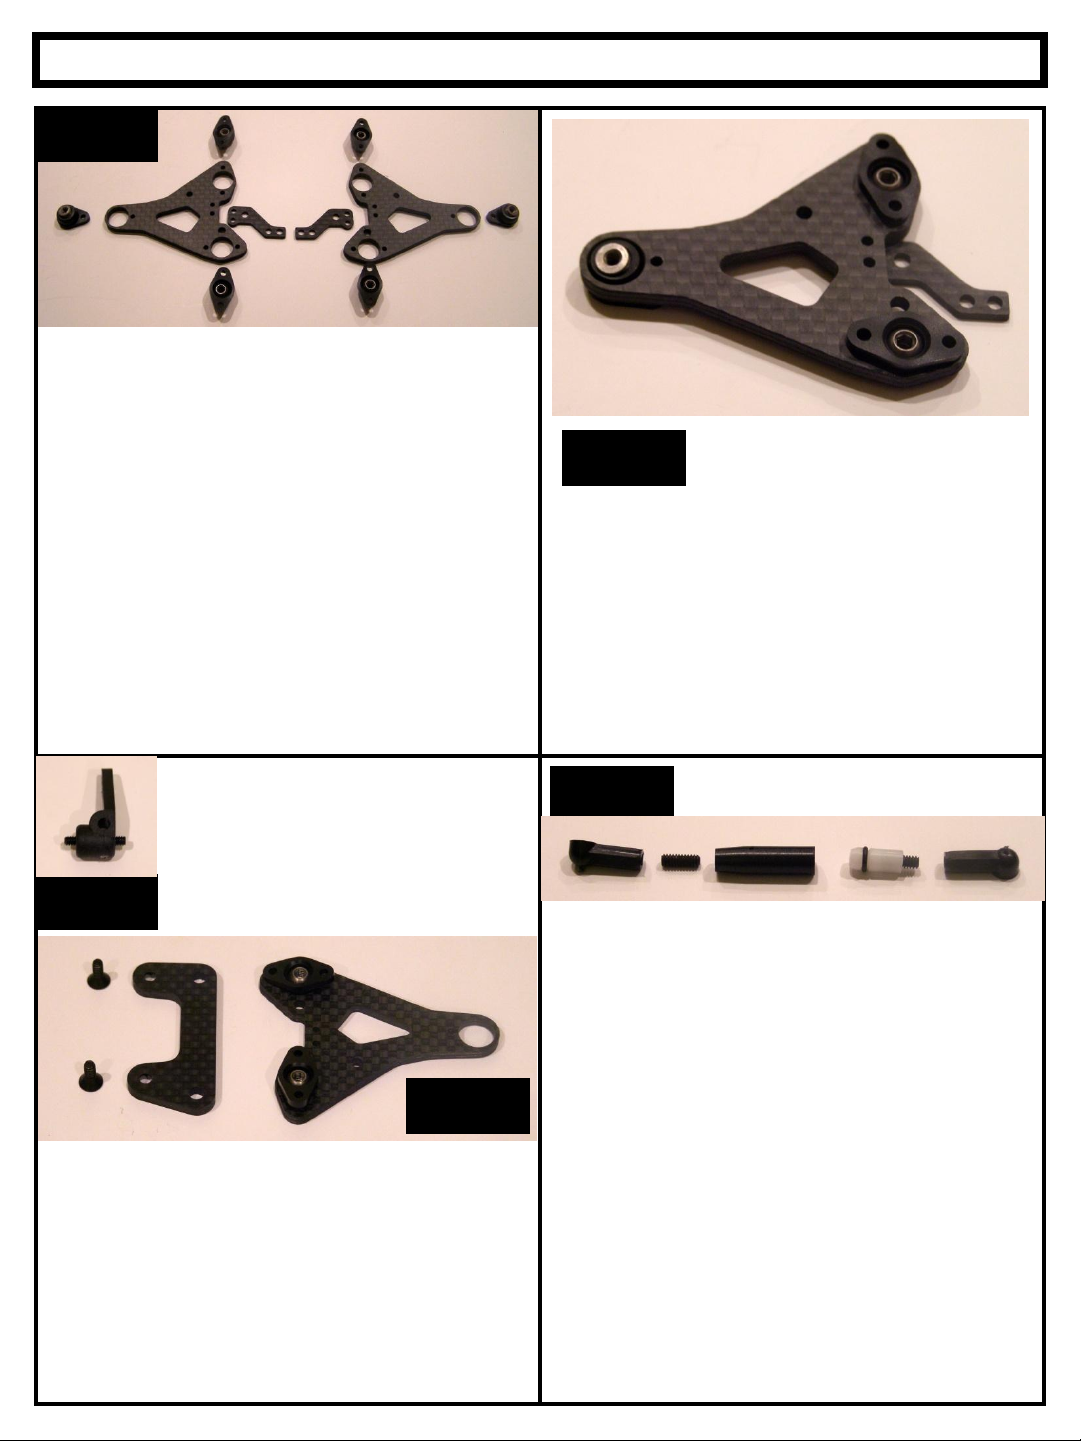
Step 1
Locate your lower front suspension arms, flex
plates,4 pivot ball housings with balls installed, and
14 2-56 x 3/16 button head screws. Note that the
arms are symmetrical. At this time you must pick
which one will become the left and right arms as
this will determine how you insert the housings into
the arms.
Step 2
There are 2 types of pivots. 4 of them use 2 screws
to mount and 2 use 1 screw to mount. The 1 hole
mount pivots go on the steering block end of the
arm. Insert into arms as shown and install screws.
The flex plates mount to the underside of the arm
as do the outer pivots. The other 4 pivots mount
from the top of the arm.
Special Note: Do not over tighten the 2-56 screws.
Over tightening may pinch the pivot ball.
Install a 4-40 x 5/8 set screw through
the steering spindle so that the same
amount is protruding from each end of
the spindle
Step 3
Step 4
Mount arms to sub plates using 2 4-40x1/4 inch
screws. They screw into the pivot balls. Note the
direction of the sub plate. This is with the
countersinks in the plate facing down.
This is how everything mounts to the arms. Please
check the direction of the pivots to insure proper
mounting. Once mounted, install 1 4-40x5/16
setscrew into each flex plate using the inward
hole(stiff position). Also install 1 4-40x5/15
setscrew into each arm. This will be used as a
droop screw. It is the hole located middle of the
arm by the rear pivot.
Step 5
Cut ball cups for damper tube to .400-.425 long.
After they are cut to size using a sharp exacto
knife, screw a 4-40 x 5/16 setscrew into each one.
Screw them in until they bottom out but do no over
tighten. Now screw 1 into the piston and one into
the body until they bottom out but again, do not
over tighten. Coat the piston with 15,000 weight
differential oil or #4 shurlube and then slowly install
piston into body. I like to spin the tube as it is
installed.
Page 2
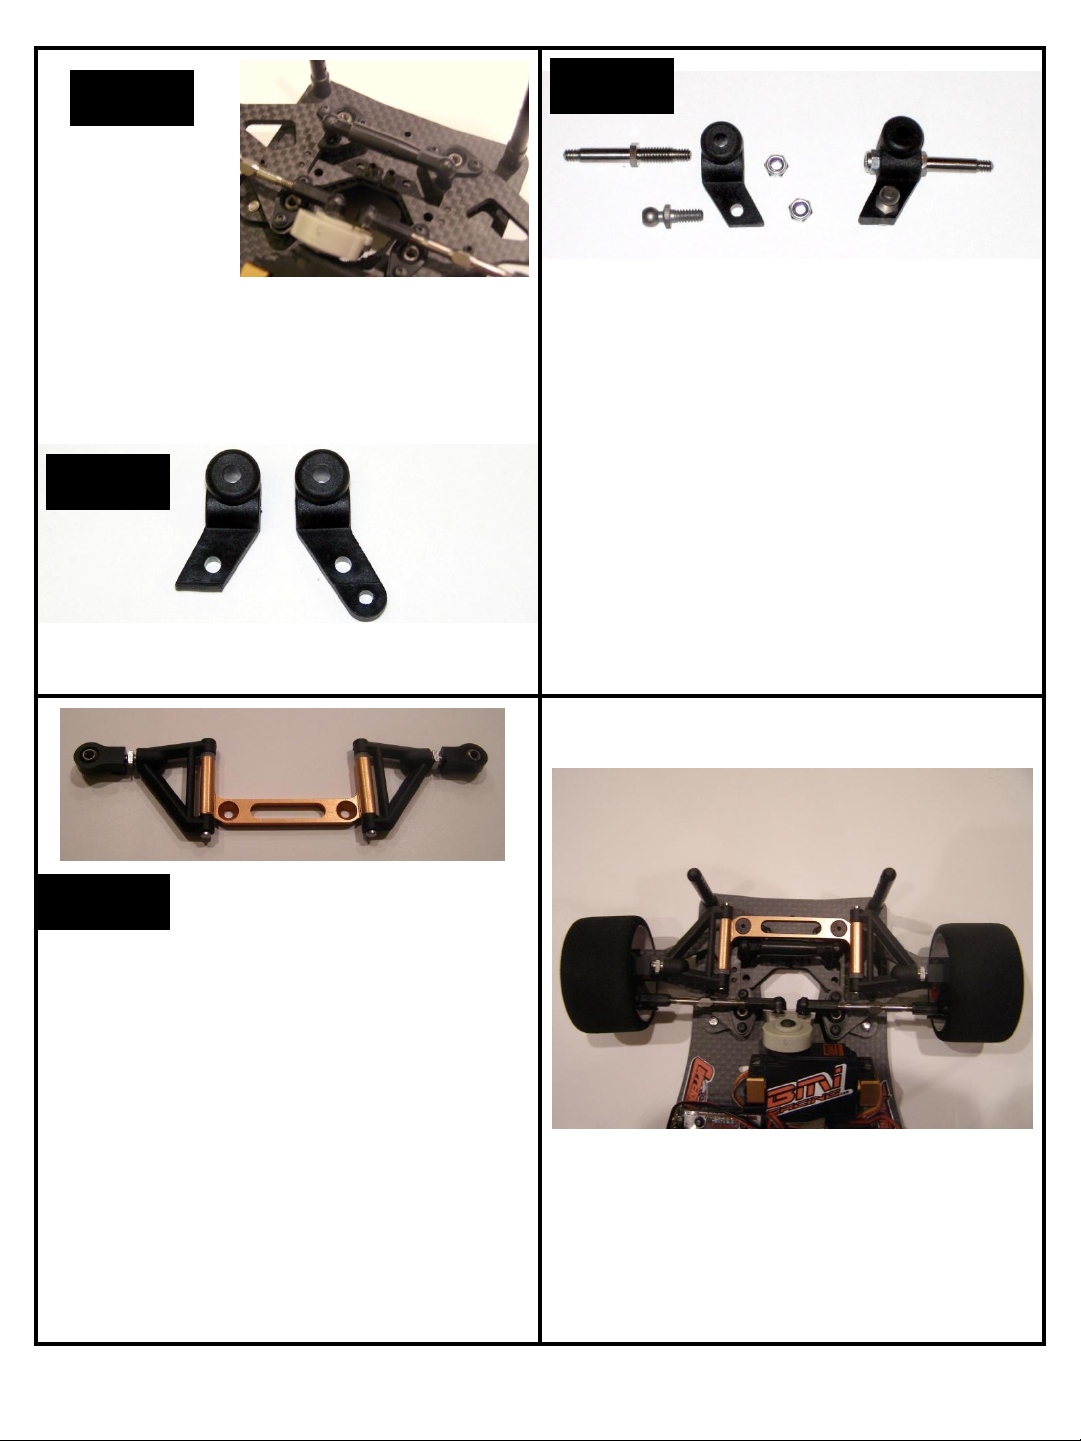
Step 6
Install 2 black ball
studs into lower
arms and secure
with supplied
aluminum lock
nuts. Then attach
arm assemblies to
chassis and snap
the damper tube
onto the ball studs
Step 7
Locate the left and right steering spindles. Trim the
steering arms length to the line molded on the part as
shown.
Step 8
Locate the titanium front axles, four 4-40 alloy lock
nuts, and two alloy pivot balls.
Thread the titanium axles into the steering
spindles. Note that the threads on the axles that
go into the spindles are left hand. After the axles
are fully seated tighten an alloy 4-40 lock nut onto
the threaded stub coming out the back of the
spindle.
Thread the alloy pivot balls into the holes on the
steering arms and secure them with alloy 4-40 lock
nuts. Remember these are alloy pivot balls so
make the nuts snug. They are strong enough to
last a few racing seasons; but if you crank them
down, you can snap them.
Step 9
Locate 2 steel 1/8” king pins,10 1/8” shims, 4 eclips and 2 .020” springs.
Assemble upper arms as shown. Make sure that
the turnbuckle threads into the arm and eyelet very
straight. If it is not straight, this will mess up your
caster settings so be very careful. In testing on
carpet, we liked running 2 shims to the rear of the
block which will give you 6 degrees of caster.
Page 3

Step 10
Put the 2 enclosed gray standoffs on top of the inner front pivot balls as shown. Lay the upper hinge pin block
on top of them and attach using 2 4-40 x ½ inch flathead screws. Then install steering blocks by threading the
upper and lower pivot balls onto the set screw running through the steering blocks. The picture in the top right
side shows the way it should look when completed.
CONGRATULATIONS!! YOU ARE DONE!!
Go out and race. Check out the setup tips below
Suspension Adjustment
To set your ride height, back the droop screws
out so they do not touch the sub plates. Then
use the set screws in the flex plates to adjust
your ride height. Tightening the set screws in
the flex plates will raise your ride height and
loosening them will lower it. Once you adjust
your ride height, then you want to tighten your
droop screws just enough so that you have your
desired amount of up travel. Do not use the
droop screws to adjust your ride height as this
will preload your flex plates and you will lose all
of your droop.
Once you have your ride height set and your
droop roughly set, You will now want to fine tune
and accurately set your droop. I normally run .51mm of up travel for droop. When your car is
race ready and at ride height, slide the tip of
your exacto blade under the center of the front
of the car. Slowly lift the front of the car with
your exacto blade. What you want is for the
wheels to leave the ground at the exact same
time. You can adjust the droop screws until this
happens. Once complete, recheck your ride
height and up travel.
Set Up For Carpet:
1.5mm flex plates with set screw in stiff position
#4 shurlube in damper tube
3.25mm ride height
.75mm up travel for droop
1 degree camber
6 degrees caster(2 shims to back)
Angled servo and set for no bumpsteer
 Loading...