

Page 1
User’s Guide
Page 2

USER’S GUIDE
Table of Contents
SECTION 1: SAFETY INSTRUCTIONS
SECTION 2: GET STARTED
Hardware Buttons and Ports
Switch the Tablet On or Off
Use the Lock Screen
Charge the Battery
SECTION 3: MAIN USER INTERFACE
Change the Wallpaper
Arrange and work with Apps
Use folders
SECTION 4: MEMORY STORAGE
Use a Micro SD Card
Use a USB Storage
SECTION 5: INTERNET CONNECTION
Connect to a Wi-Fi network
Use a USB 3G Dongle
Page 3
SECTION 1: SAFETY INSTRUCTIONS
CAUTION: TO PREVENT AN ELECTRICAL SHOCK, DO NOT REMOVE ANY COVER SCREWS.
THERE ARE NO USER SERVICEABLE PARTS INSIDE. REQUEST AN AUTHORIZED SERVICE
PERSON TO PERFORM SERVICING. WARRANTY BECOMES VOID IF YOU TAMPER WITH
THE TABLET AND/OR BREAK THE WARRANTY STICKER.
Please read all safety instructions before you use this Tablet.
• Do not use this Tablet near water. Do NOT use in wet or moist areas such as bathrooms, steamy kitchens or near swimming pools. Do not use this Tablet when condensation may occur.
• To clean the Tablet, use a soft dry cloth. Do NOT use solvents or petrol based uids.
To remove severe stains, you may use a damp cloth with dilute detergent.
• Do not cover or block any ventilation opening. When placing the Tablet on a shelf,
leave 5 cm (2”) free space around the whole Tablet.
• Don’t step on or pinch the power cord. Be very careful, particularly near the plugs
and the cable’s exit point. Do not place heavy items on the power cord, which may
damage it. Keep the entire Tablet out of children’s reach! When playing with the power
cable, they can seriously injure themselves.
• Unplug this Tablet during lightning storms or when unused for a long period.
• Keep the Tablet away from heat sources such as radiators, heaters, stoves, candles
and other heat-generating products.
• Avoid using the Tablet near strong magnetic elds.
• Avoid placing the Tablet on any surfaces that may be subject to vibrations or shocks.
• When the Tablet is not in use for long periods, unplug the AC power cable for safety
reasons.
• If the Tablet will not be used for an extended period, please charge the battery at least
once per month to maintain battery life.
• Do not interrupt the connection when the Tablet is formatting or transferring les.
Otherwise, data may be corrupted or lost.
BEFORE SENDING YOUR TABLET TO OUR SERVICE CENTER DO NOT FORGET TO BACKUP
YOUR DATA. THE SUPPLIER IS NOT LIABLE FOR ANY DATA LOSS OR DAMAGE CAUSED
BY MALFUNCTION, MISUSE, MODIFICATION OF THE TABLET OR BATTERY REPLACEMENT.
Disclaimer:
Actual product and packaging may not be exactly like in the manual. The screenshots shown as an example in
this manual may differ from the actual screen display.
Page 4
SECTION 2: HARDWARE BUTTONS AND PORTS
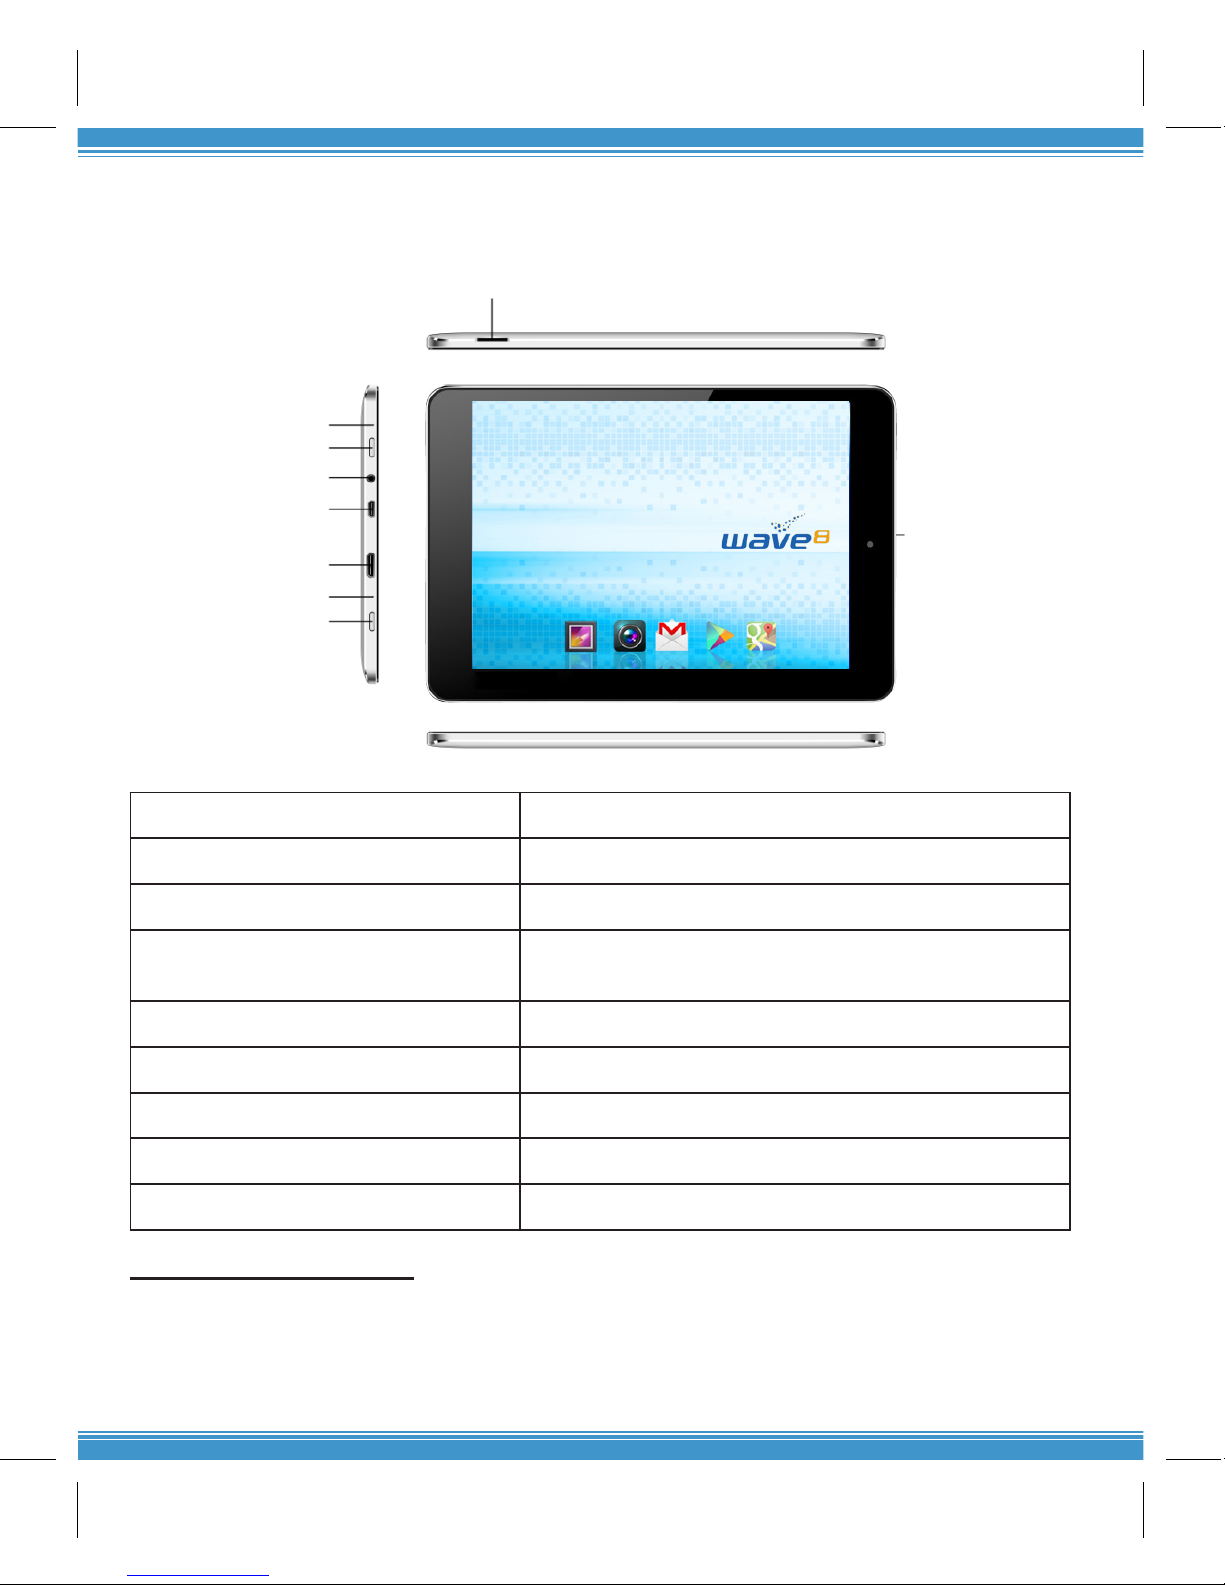
Hardware Buttons and Ports
1
2
3
4
5
6
7
8
9
1. Microphone Built-in microphone
2. Power Button Turn the Tablet On or Off
3. Earphone Port Connect 3.5mm earphone for audio
4. USB Interface/ Charging port Connect to PC to transfer les or charge the battery
with power adapter
5. Mini HDMI Port Connect HDMI cable to high resolution screen
6. Reset Reboots the system
7. Back Hard button for Back
8. TF Card slot Increase memory with Micro SD card
9. Camera Lens for photos
Switch the Tablet On or Off
To turn on the Tablet, press the power button for three (3) seconds
To turn off the Tablet, press the power button for three (3) seconds. Click Power Off > Click OK.
To go to standby mode or screen saver, press the power button briey
To force shutdown, press the power button for twelve (12) seconds
Page 5
Use the Lock Screen
To protect personal information, adjust the Tablet’s lock settings:
From the Home or All Apps screen, touch the Settings icon.
Scroll down and tap Security > Screen Lock > Type of lock you’d like to use. After you set a
lock here, a lock screen displays whenever your screen wakes up, requesting the pattern, PIN,
or password.
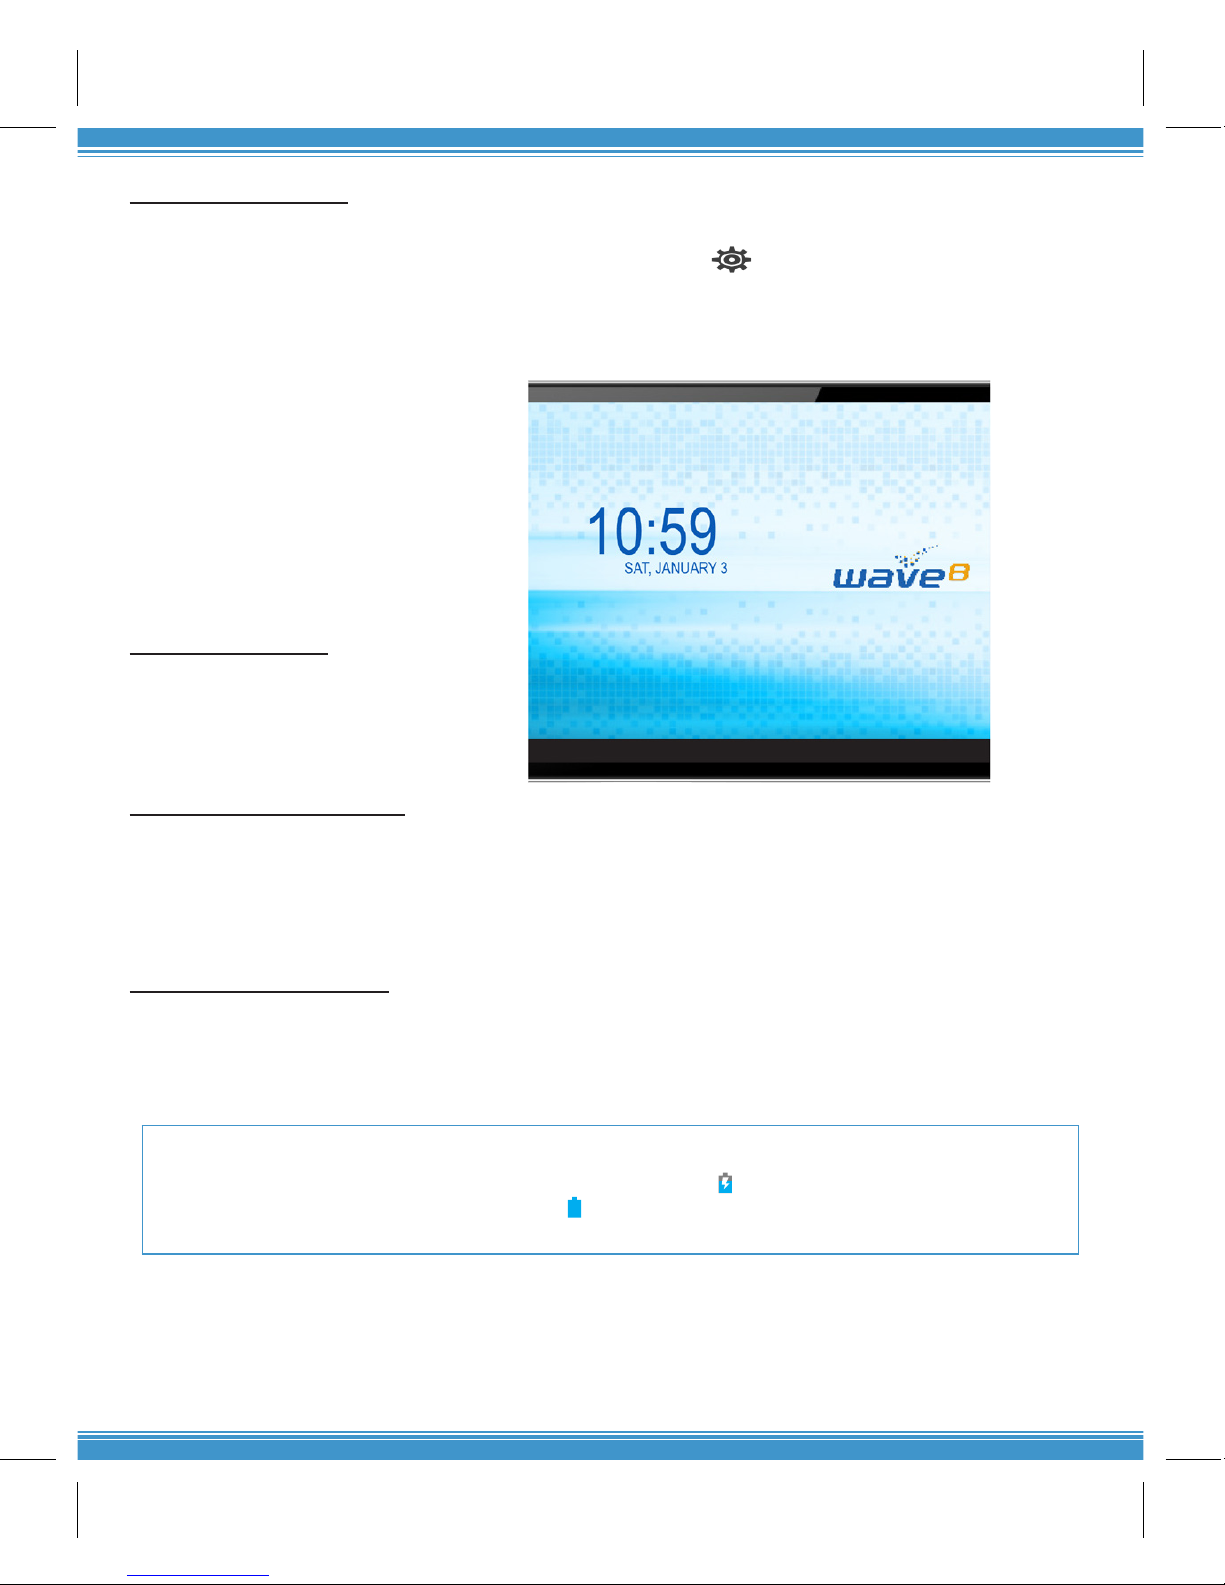
For the slide option, drag the lock icon
to the right to unlock.
Screen lock options are listed in the
appropriate order of the strength of
their security. If your Tablet is playing
music when the screen locks, you
can continue listening or pause the
selection without unlocking.
Charge the Battery
There are two ways to charge the
battery: via Power Adapter and PC/
Notebook.
Charge via Power Adapter
1. Make sure that the power adapter is in good condition. The power cable should be intact
and not have any physical damage to it.
2. Plug the power adapter in 220v outlet.
3. Insert the power adapter securely to the charging port of the Tablet
Charge via PC/Notebook
1. Ensure that the PC/notebook is running.
2. Attach the USB cable to the USB port of PC or notebook.
3. Insert the USB cable securely to the USB port of the Tablet.
Do not use any other power adapters to avoid damaging the baery . When using the Tablet for the rst me, charge the
baery for 8 hours or unl 100% full. Drain the baery fully before charging again. Regular charging may take 4-6 hours.
A baery icon with a lightning symbol indicates that the baery is charging.
A full-charged baery displays a solid blue-colored icon.
Page 6
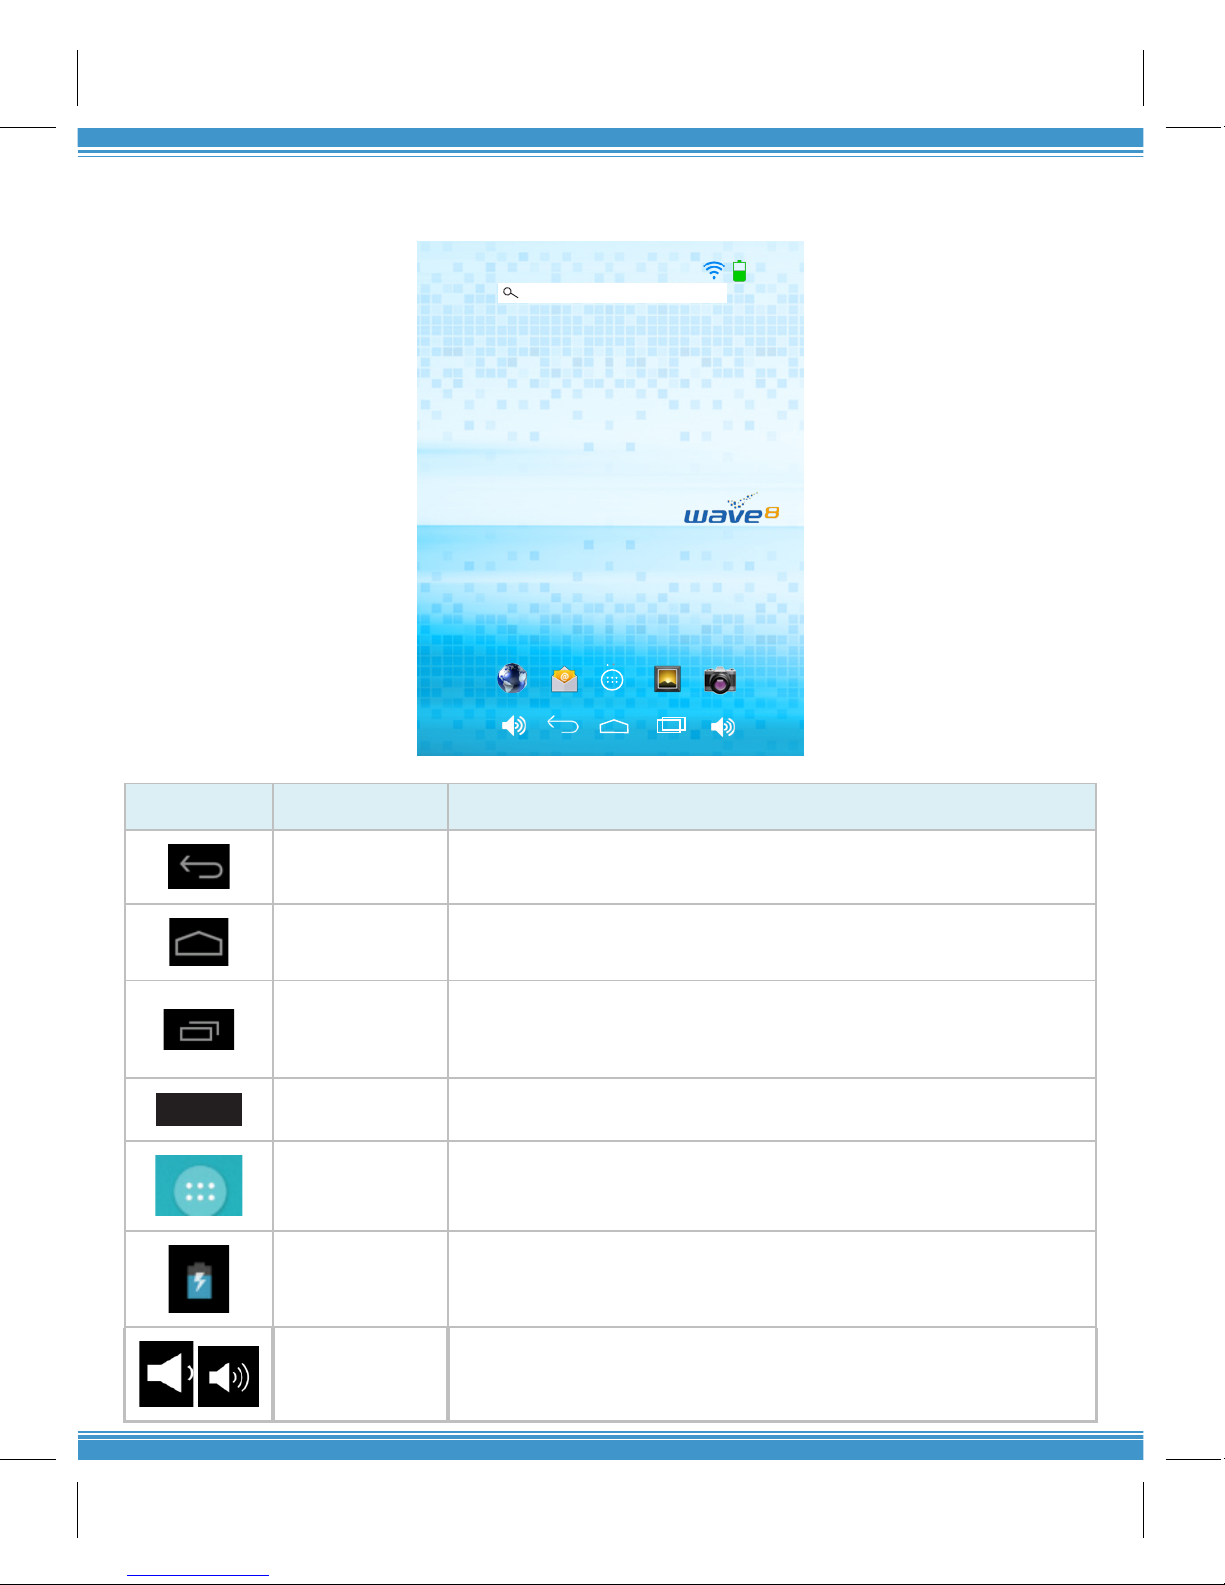
SECTION 3: MAIN USER INTERFACE
Icon Name Descripon
Back
Opens the previous screen you were working in. Once you back up
to the home screen, you can’t go back any further in your history.
Home
Opens the central home screen if you’re viewing a le or right home
screen.
Recent Apps
Opens a list of thumbnail images of Apps you’ve worked with
recently. To open an app, tap it. To remove a thumbnail, swipe le
or right.
12:21
Time Current me set on the Tablet.
All Apps Displays all apps in the Tablet
Baery
Indicator
Baery status: low, charging, full charge
Volume
Adjustment
Decreases or increases the volume of the Tablet
Page 7
SECTION 4: MEMORY STORAGE
Use a Micro SD Card
1. To install, gently insert the SD card on the TF Card slot. When the notication saying
“Preparing mass storage” is gone, the SD Card is ready for use.
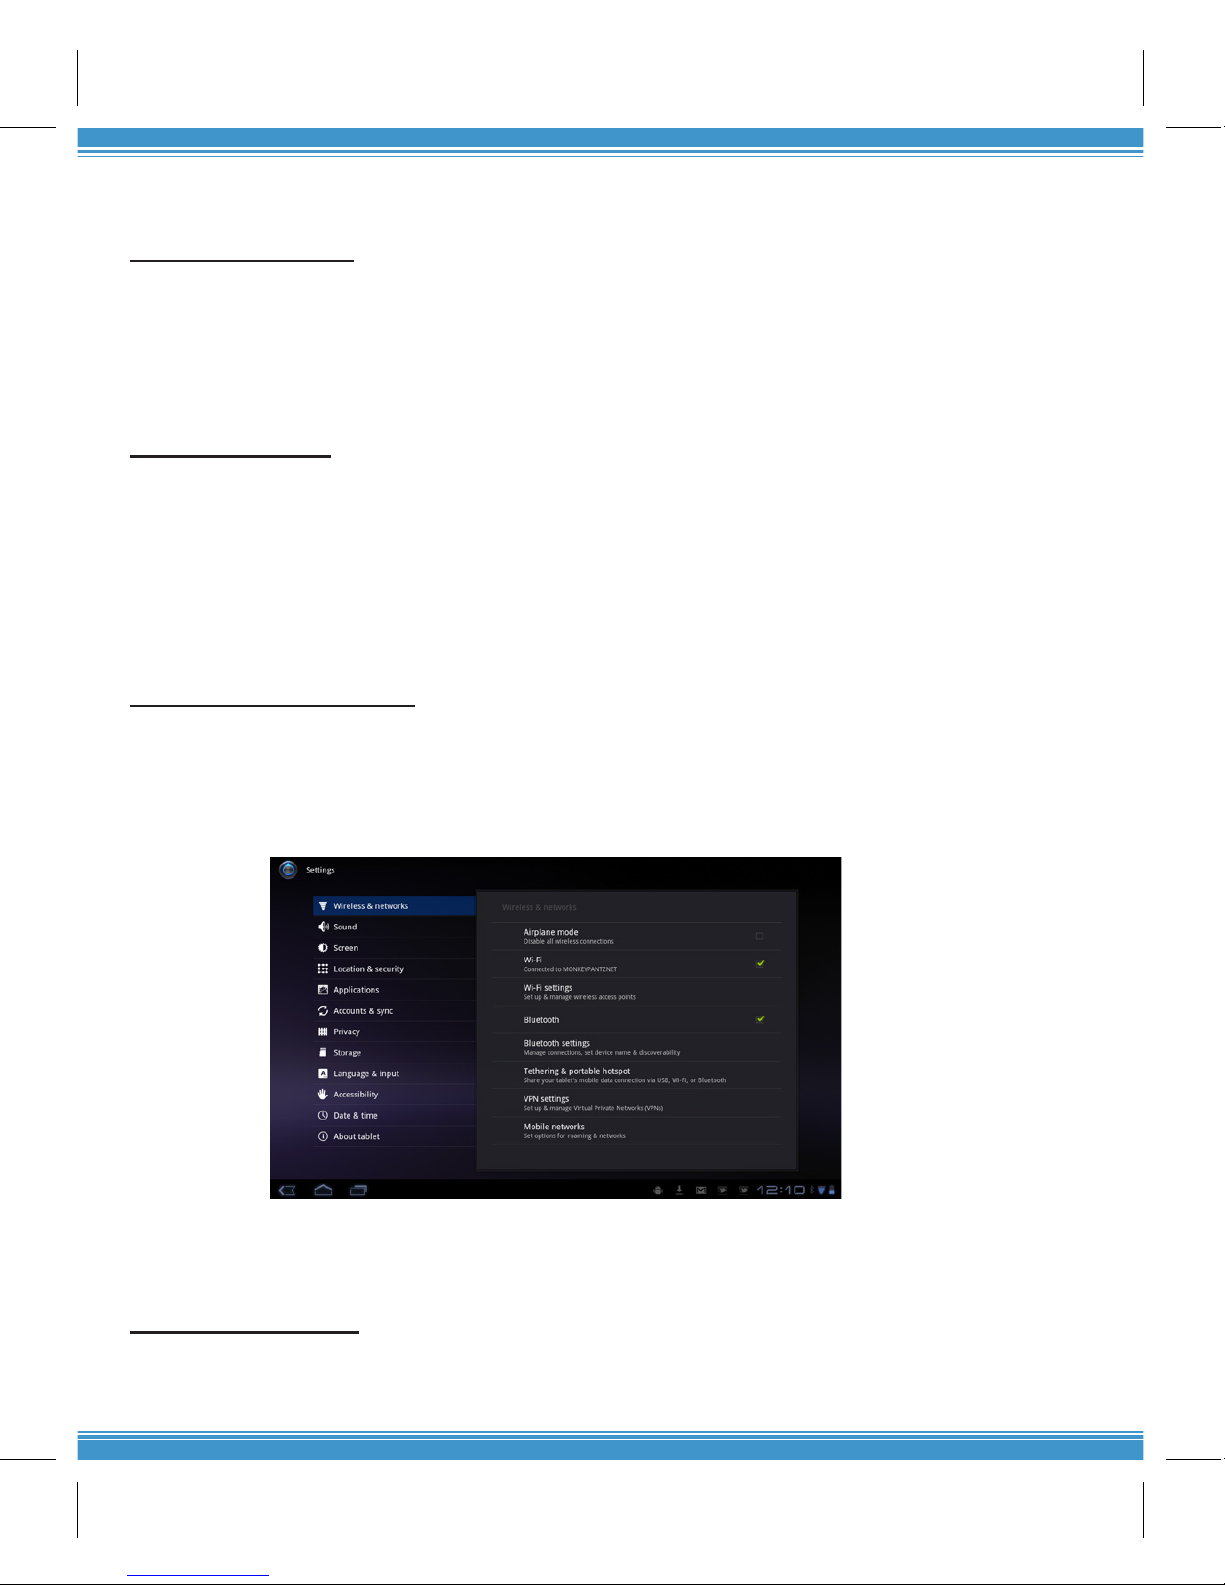
2. To eject, go to Settings > Storage > Unmount storage (Under SD Card) > Ok When
the indicator “Storage safe to remove” appears, you may gently press the SD Card
from the TF Card slot to remove from the Tablet.
Use a USB Storage
1. To install, connect the USB adapter to the Tablet and the other end of the USB ash
disk. . When the notication saying “Preparing mass storage” is gone, the USB
storage is ready for use.
2. To remove, go to Settings > Storage > Unmount storage (Under SD Card) > OKWhen the indicator “Storage safe to remove” appears, you may remove the USB.
SECTION 5: INTERNET CONNECTION
Connect to a Wi-Fi network
1. To connect, go to Settings and slide the Wi-Fi tab to ON. Choose from a list of
hotspots where you want to connect. If you select an open network, you will be
automatically connected. If you select a network that is secured with WEP, a
password will be required to connect.
2. To disconnect, slide the Wi-Fi tab to OFF.
3. To connect to another network, you have to disable the previous connection. Se-
lect the previous connection then touch Forget to deactivate connectivity. Choose
another network to connect.
Use a USB 3G Dongle
Insert the USB Dongle through the OTG cable into the USB host port. Wait a few minutes until a
3G icon appears to connect to the internet.
 Loading...