

Page 1
Page 2
General Information
Thank you for purchasing a BlueSpot product, you can find further information
on our range at www.bluespot.uk.com. Please ensure that you are using the
product correctly and that all guidance and cautions are followed in accordance
with the instructions. Please retain these instructions for future reference.
Introduction and Specification
This tool is designed to break various types of chain. The tool is suitable for use with
drive or cam chains ranging from #35 to #630. Supplied with three breaking tips: 2.2,
2.9 and 3.80.
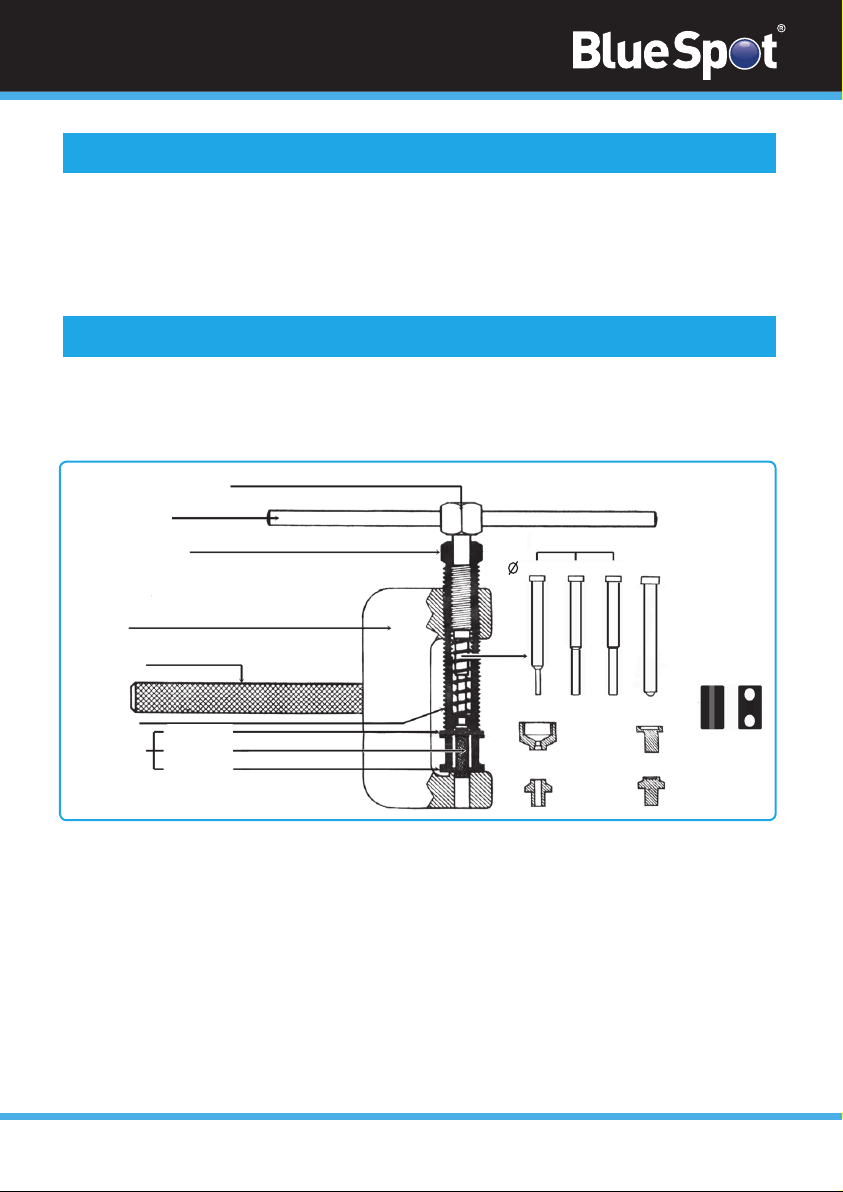
Push (Extractor) Bolt
Lever
Alignment Bolt
Bolt
Breaking Tips
2.20 2.90 3.80
RIVET
Tip
Handle
Spring
Chain
fig.1
Side Plate
Link Pin
Side Plate
01
Upper Guide
Lower Guide
Press Plates
Large Anvil
Small Anvil
Page 3
How to use
It is very important to note when breaking chains #520 and higher that
the breaking tip can potentially snap if the existing chain pin is not
ground flush to the face of the chain body. In the event that the chain is
not properly prepared for breaking we are unable to provide replacement
pins under the BlueSpot Tools lifetime guarantee.
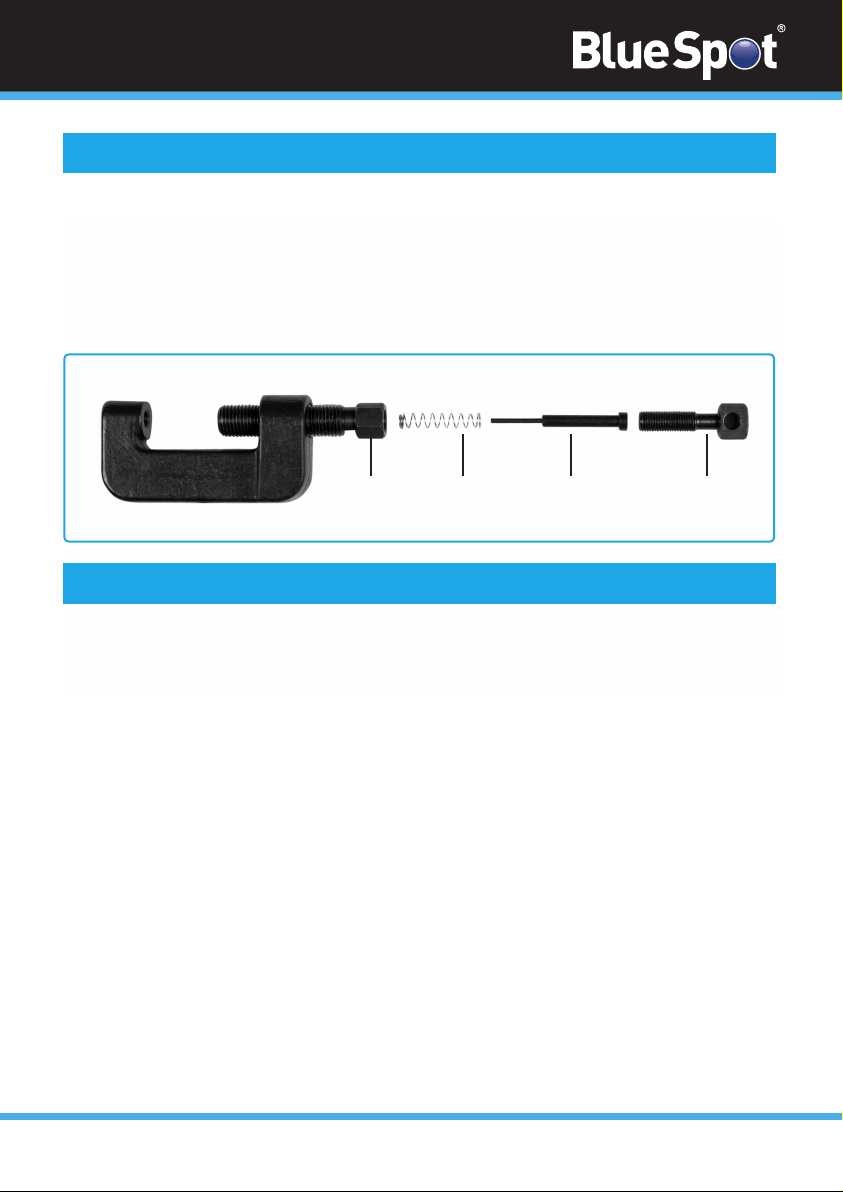
fig.2
1
Alignment Bolt
2
Spring
3
Breaking Tip
4
Bolt
Extracting chain link pin
1. To break the chain you must first grind the existing rivet down as stated
above (for chains #520 and higher). This is the most important step of the
whole process in order to achieve a successful outcome.
2. Prepare the tool as instructed in fig 2.
3. Select the breaking tip to be used with the chain (fig 2.3) and proceed to
remove the push bolt from the breaker body. Place the spring (fig 2.2) over
the breaking tip and then into the alignment bolt (fig 2.1) followed by the
push bolt (fig 2.4) as shown above in fig 2.
NOTE
When using the smallest tip in the set (2.2mm) you must utilise the upper and lower
guides so that you don’t damage the breaking tip. The 2.2mm tip should be used with
cam chains, 2.9mm pin #25 or #35 chain and 3.8mm pin for most motorcycle chains.
4. Please make sure that the breaking tip is withdrawn a minimum of 2mm into
the alignment bolt.
5. Put the body of the breaker over the chain and begin to wind the push bolt
through the chain link pin. The existing chain link pin will drop from the
bottom of the tool.
02
Page 4

NOTE
If you find that extreme force is required please repeat step 4 above make sure that the
breaking tip is aligned with the chain link pin otherwise you risk damaging the breaking
tip. The breaking tip if misaligned could be pushing against the body of the chain and
this will result in a failure.
6. Once you have successfully removed the old chain link pin you can
disassemble to the tool.
Installing chain link pin
1. Place the rivet tip and anvil in the tool.
2. Assemble the chain ready for the new link pin to be riveted. At this stage you should
not re use the old link pin as it will be weakened also do not use clip type connecting
links.
3. Take care that the side plates with pins attached lines up with the grooved press
plate.
4. Begin to tighten the push bolt. Carry this out until you can see that the link pins are
protruding.
5. Once you have completed the above remove the tool from the chain and check that
the procedure has been successful.
Contact
Find out more about the Bluespot® Lifetime Guarantee at www.bluespot.uk.com
Tel: 0800 093 0115
Email: [email protected]
Orme Business Centre,
Greenacres Road,
Oldham,
OL4 3NT
03
 Loading...