

Page 1
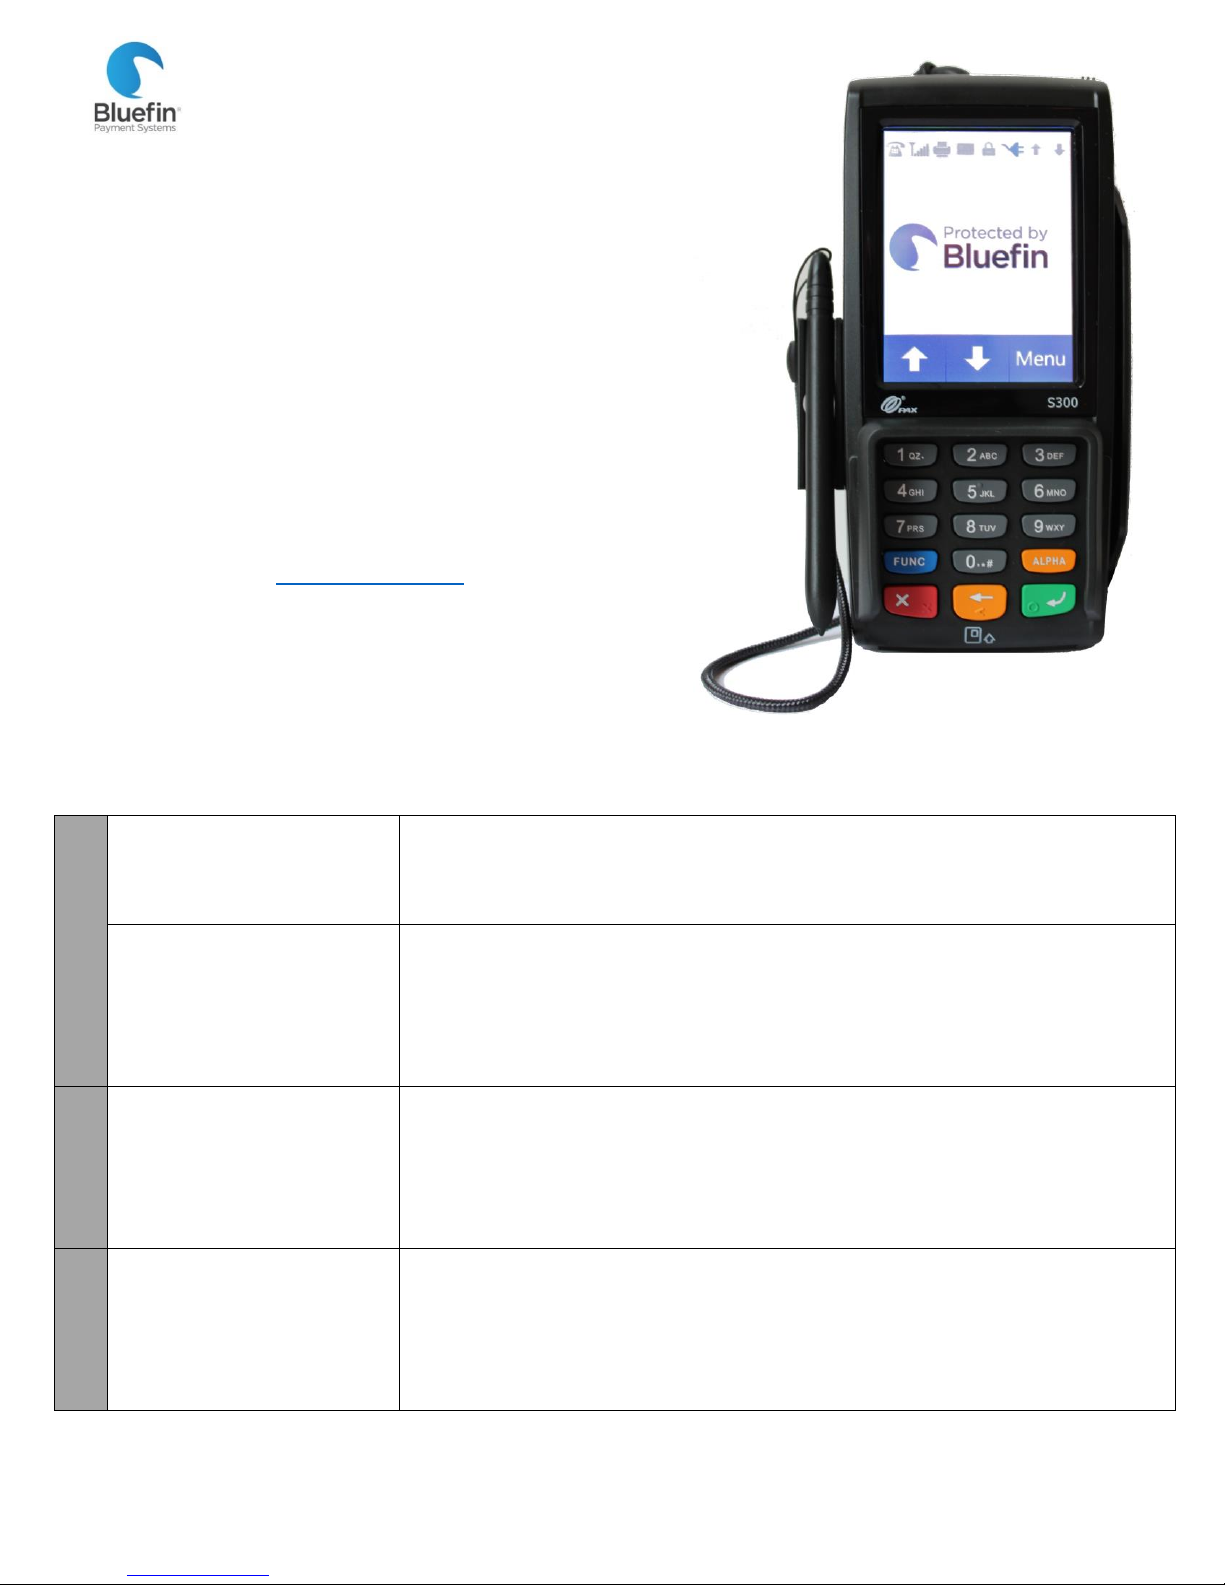
PAX S300
Quick Reference Guide
SETUP
Your terminal is preprogrammed and ready for use
as soon as it is connected to your software or POS
system! Once that part is completed, follow these
steps:
1) Plug into Ethernet
2) Plug into wall
3) Turn on
TERMINAL PASSWORD: Default password is the
number 1
SUPPORT
PHONE: 800-675-6573
EMAIL: [email protected]
HOURS:
Monday- Friday 7 AM – 6 PM Central
Saturday 8 AM – 4:30 PM Central
BASI
CS
SALE
Swiped transaction
1) Initiate transaction in software or POS, terminal will ask for card to be
swiped
2) Swipe card
Keyed transaction
1) Initiate transaction in software or POS, terminal will ask for card to be
swiped
2) Enter card number, expiration date, and additional info as prompted (varies
depending on programming).
NOTE: if it asks for the address you only need to enter the street number
V/SALE
Void a transaction
Prevents sale from settling,
use in place of refund if
transaction has not batched
out
1) Initiate void in software or POS, terminal will ask for transaction number
2) Enter transaction number
3) Press the green Enter button on the keypad
NOTE: These steps can vary slightly depending on software-specific
programming
RETURN
Refund a transaction
Only refund transactions that
were not run the same day
1) Initiate return in software or POS
2) Enter amount in terminal
3) Swipe or key card
NOTE: These steps can vary slightly depending on software-specific
programming
PROCESSING
©Bluefin Payment Systems, 2016
All Rights Reserved
Page 2

AUTH
Authorization
Authorizations do not settle
unless manually captured.
1) Initiate transaction in software or POS, terminal will ask for card to be
swiped
2) Swipe or key card
FORCED
Force sale
Manually capture an existing
authorization.
1) Initiate transaction in software or POS, terminal will ask for card to be
swiped
2) Swipe or key card
3) Enter auth code into terminal
4) Press the green Enter button on the keypad
BATCH
Closing a batch
NOTE: Batches are closed
within Bluefin’s PayConex
backend system, these
instructions are to clear
transactions out of the
terminal
1) Press “Menu” on the screen
2) Enter “1” for password (unless you’ve changed it)
3) Press the green Enter button on the keypad
4) Press “4” for “Host Settings”
5) Enter “1” for password (unless you’ve changed it)
6) Press the green Enter button on the keypad
7) Press the down arrow on the screen
1) Press “1” for “Batch Close”
SECURITY
Make certain
transaction types
password protected
1) Press “Menu” on the screen
2) Enter “1” for password (unless you’ve changed it)
3) Press the green Enter button on the keypad
4) Press 2 for “Merchant Settings”
5) Press 1 for “Authorization”
6) Enter “1” for password (unless you’ve changed it)
7) Press the green Enter button on the keypad
8) Press 1 for “Transaction Types”
9) Choose the transaction type you want to make password-protected; on the next
screen you will specify further
10) Choose whether returns, sales, etc. should be password protected
11) Press 3 for “Pswd Protected”
Enabling or disabling
address verification
(AVS) settings
1) Press “Menu” on the screen
2) Enter “1” for password (unless you’ve changed it)
3) Press the green Enter button on the keypad
4) Press the down arrow on the screen
5) Press “1” for “System Settings”
6) Press “3” for “Working Mode”
7) Enter “1” for password (unless you’ve changed it)
8) Press the green Enter button on the keypad
9) Press “2” for “Fraud Control”
10) Select the option you want to change – most likely “3” for “AVS On CardNotPrsnt”
11) On the next screen select the card types you want to include – most likely 1 for “All”
12) Select which items you want to turn AVS on for on the following screen
GENE
RAL
Disable or enable
the beeping noise
1) Press “Menu” on the screen
2) Enter “1” for password (unless you’ve changed it)
3) Press the green Enter button on the keypad
4) Press 3 for “Operations Settings”
SETTINGS
©Bluefin Payment Systems, 2016
All Rights Reserved
Page 3

5) Press 1 for “Buzzer Setup”
6) Select the buzzer you want to disable
7) Follow the prompt to turn it off or on
Put in demo mode
or remove from
demo mode for
training or testing
1) Press “Menu” on the screen
2) Enter “1” for password (unless you’ve changed it)
3) Press the green Enter button on the keypad
4) Press 3 for “Operation Settings”
5) Press 2 for “Operation Mode”
6) Enter “1” for password (unless you’ve changed it)
7) Press the green Enter button on the keypad
8) Press “1” to put in normal mode or “2” to put in demo mode
9) On the next screen when it says “Are you sure?”press 1 for “Yes”
Change logo on
image screen
1) Create a version of your logo that is exactly 320x80 pixels
2) Email to [email protected] and specify that you want it added to the programming
for your PAX S300 terminal
3) When you receive confirmation that it has changed, turn terminal off and back on
NOTE: If you do not know how to change the image size, just send us your logo and we will
crop it for you
Changing the time
or date on the
device
1) Press “Menu” on the screen
2) Enter “1” for password (unless you’ve changed it)
3) Press the green Enter button on the keypad
4) Press the down arrow on the screen
5) Press “1” for “System Settings”
6) Press “1” for “Date/Time Setup”
7) If the date is already correct, press the green button to bypass the screen, if it is
incorrect, press the “X” button on the keypad and then enter the date in the format
of DDMMYYYY
8) Press the green Enter button on the keypad
9) The time screen will come up next, if it is already correct press the green button to
bypass the screen, if it is incorrect, press the “X” button on the keypad and then enter
the time in the form of HHMMSS
Changing if/when
backlight turns
on/off
1) Press “Menu” on the screen
2) Enter “1” for password (unless you’ve changed it)
3) Press the green Enter button on the keypad
4) Press “3” for “Operation Settings”
5) Press “3” for “Screen Backlight”
6) Press “1” for it to always be off, “2” for it to be on but turn off after 60 seconds, or “3”
to always be on
©Bluefin Payment Systems, 2016
All Rights Reserved
 Loading...