

FROM FLAT
TO FABULOUS
IN NO TIME
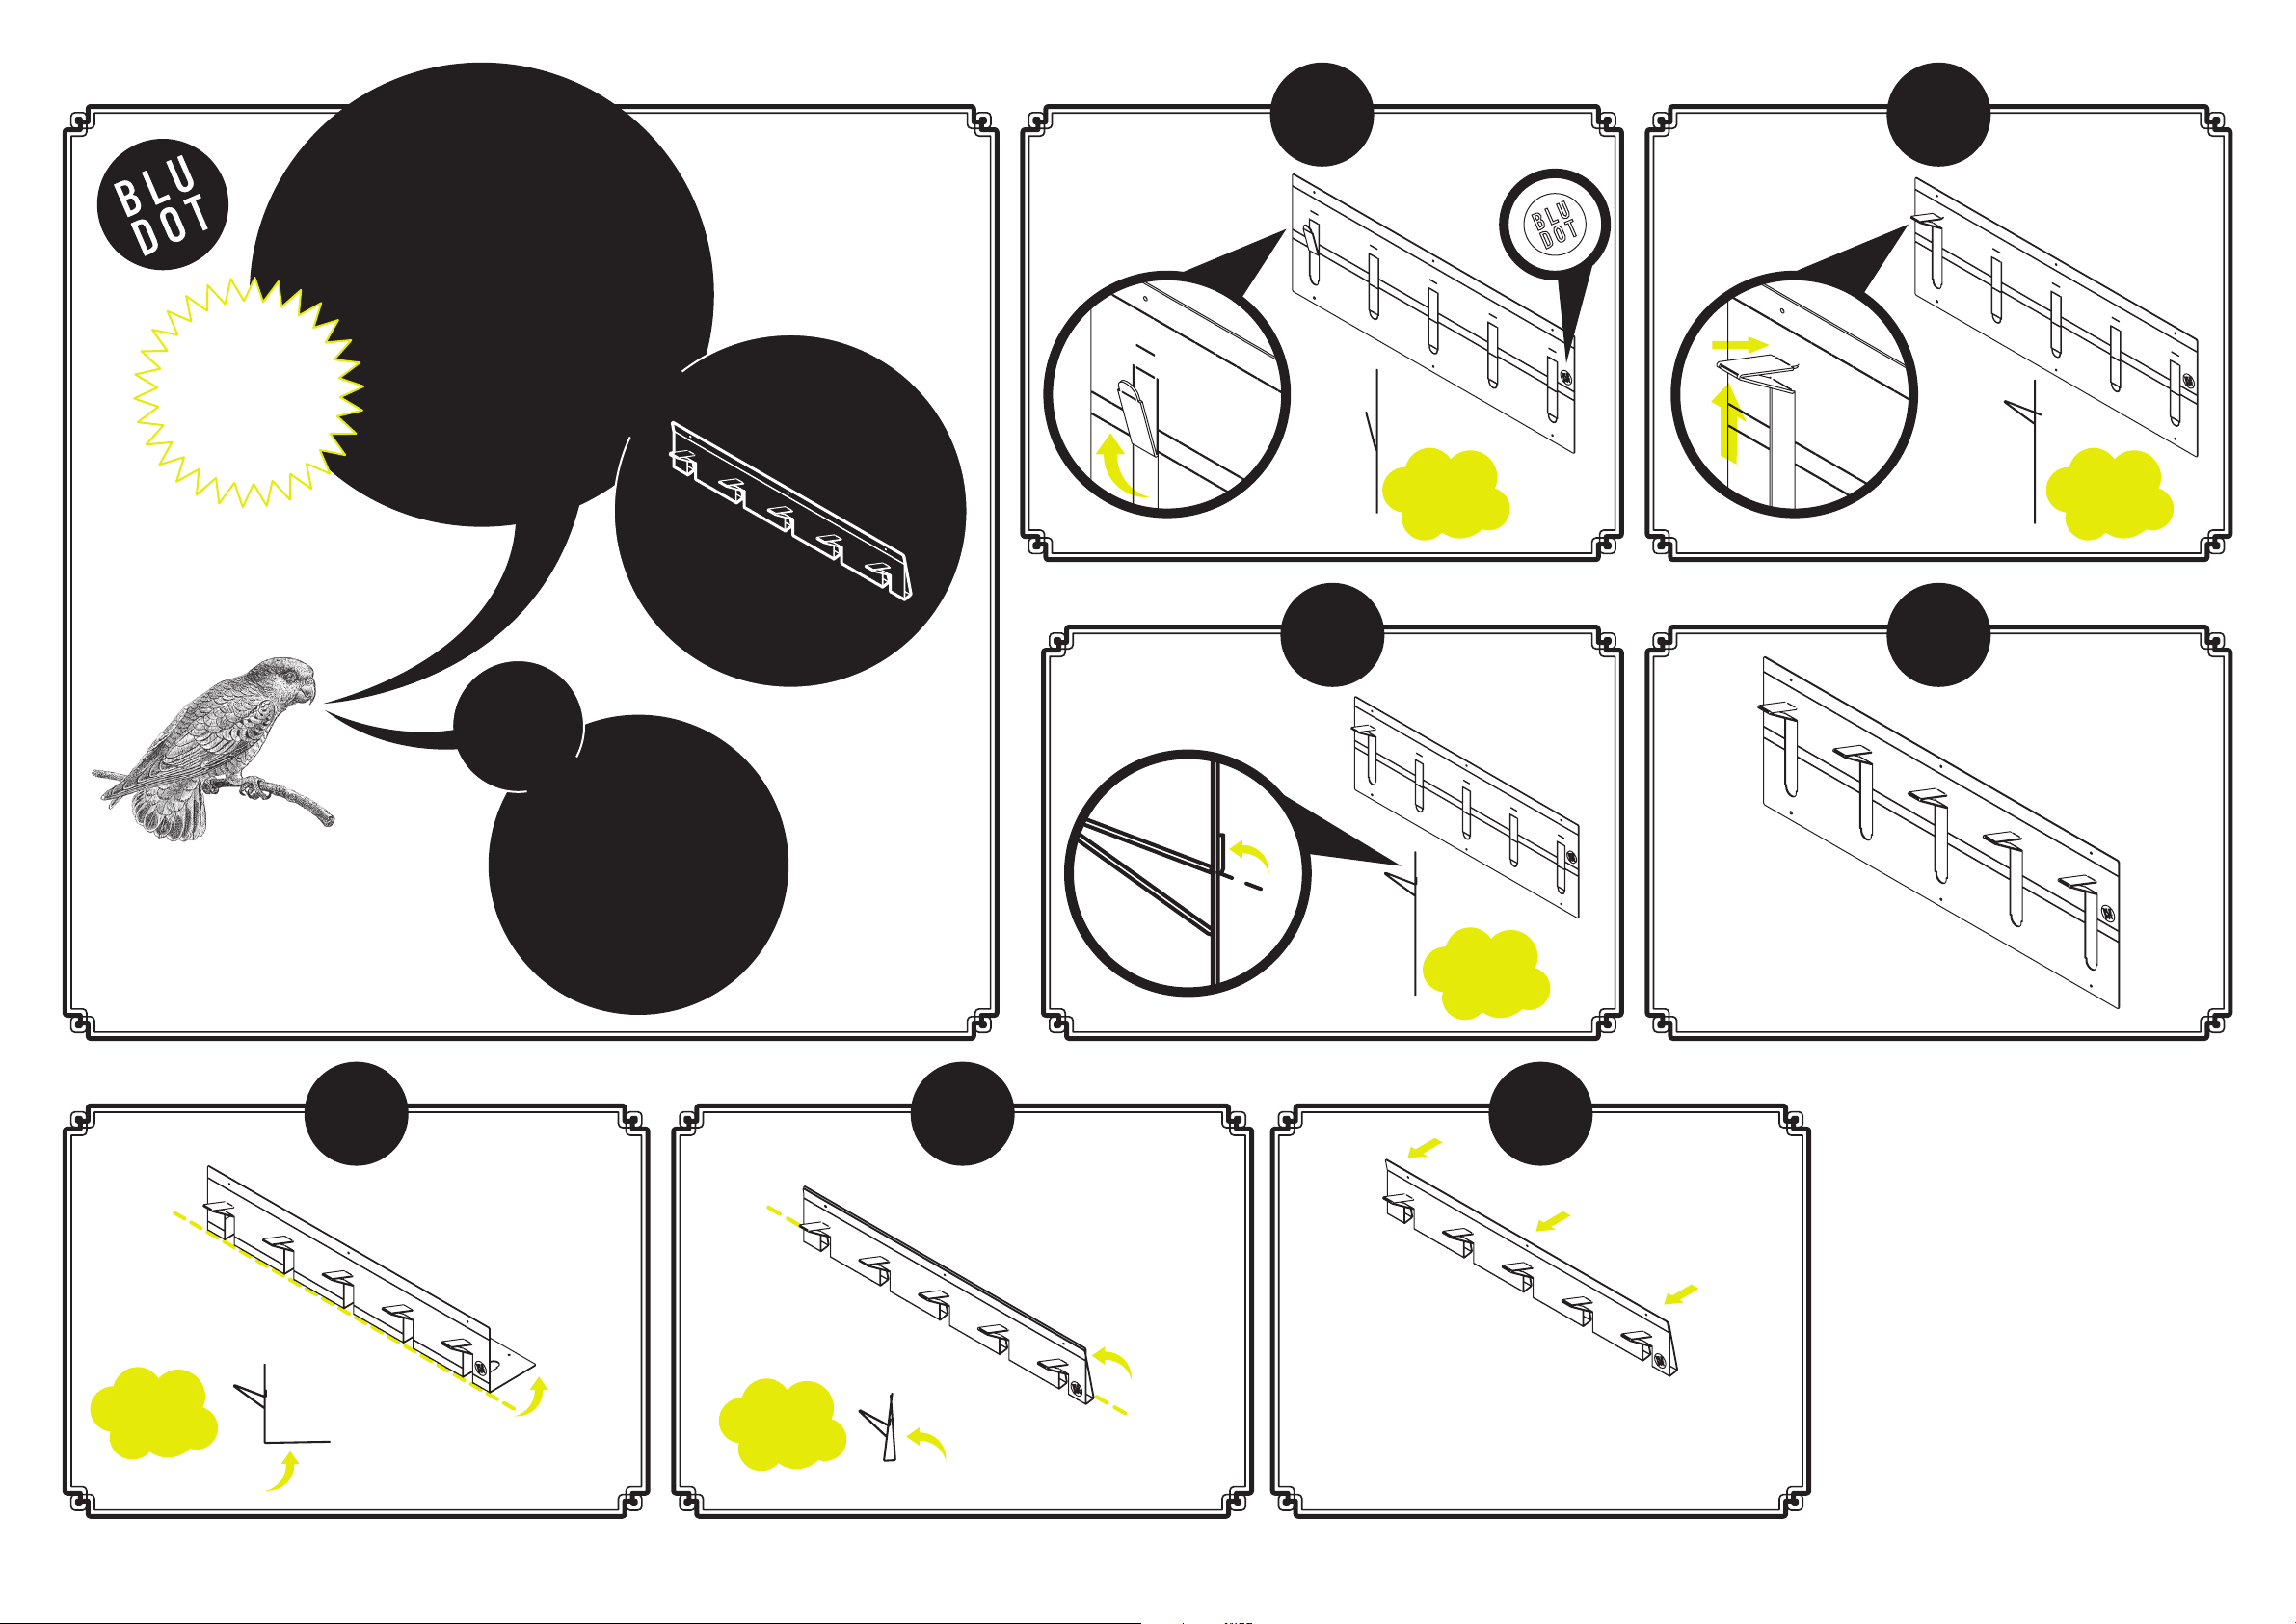
1
Bend up to from the
coat “hook.” Put tab
through slot.
2
2d3d
COAT RACK
ASSEMBLY NOTES
side view side view
CARE
Clean with a soft cloth or
sponge using a mild
detergent, such as dish
soap, and warm water.
Wipe completely dry with
a soft cloth.
Bend along lower dotted line
to make a 90 degree angle.
Bend tab up to secure.
65
Bend along the other dotted
line, in the same direction, 90
degrees to complete the rack.
3
side view
4
Repeat 4 more times to
complete remaining hooks.
MOUNTING YOUR COAT RACK TO THE WALL
7
Position the rack where you’d like it to be and
mark the center screw holes with a pencil (it is
best of this is lined up with a stud in the wall.
Drill a 3/16” hole and hammer the blue plastic
anchor until it is flush with the wall.
Place center screw hole over the blue anchor
and insert screw. Stand back to level the rack
(like hanging a picture). Once level, mark
the other two holes. Remove rack from wall.
Drill two remaining holes, insert blue plastic
side view
WWW.BLUDOT.COM 2D3D: COAT RACK — PAGE 1 OF 1 REV.01
side view
You will need to bend the top flange
slightly, along the dotted line, so it is
flush with the back panel.
anchors, and reinstall rack. Tighten screws
until snug.
 Loading...