

Page 1
2016-02
blubathworks.com
®
TX210
INOX
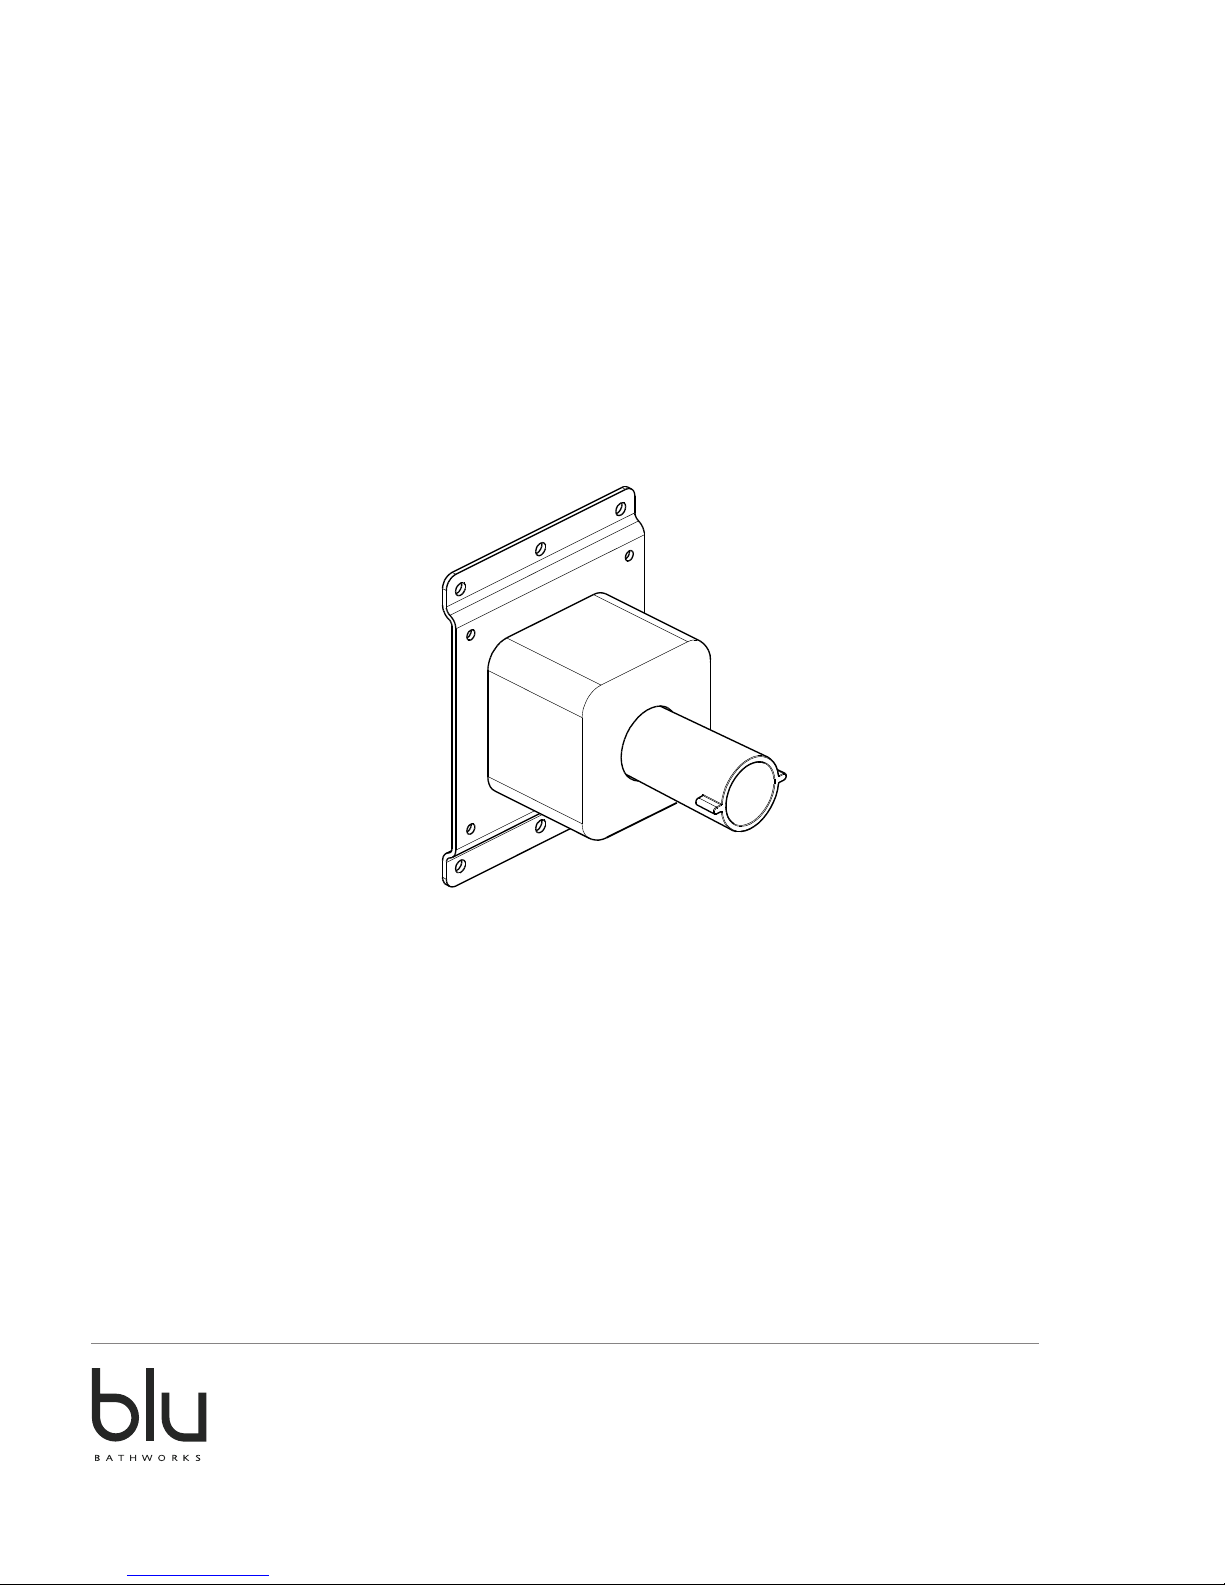
Rough-in for Wall-Mount Basin/Tub Spouts &
Handshower
Installation Guide - Guida D’installazione - Guia de Instalacion - Guide D’installation
Page 2

1
Attention – Before Installation
1. Inspect this product to ensure you have all parts as shown that are required for proper installation.
2. The valve cartridge has been factory tested and adjusted – DO NOT TAKE THE CARTRIDGE APART.
Taking the cartridge apart will void the warranty.
3. Ensure that both hot and cold water feeds are properly connected to the marked lav connecting.
4. This product must be installed by a professional contractor.
5. Refer to the specification and assembly drawings attached for installation directions.
6. Flow Pressure – Min. 25 PSI, Max. 80 PSI. Recommended pressure – 50 to 60 PSI.
Installation Requirements
Please read the instructions carefully so as to avoid any damage to the fixture.
1. To ensure this product is installed properly, you must read and follow these guidelines.
2. The owner/user of the faucet must keep this information for future reference.
3. Be sure your installation conforms to local codes.
4. Refer to the specification and assembly drawings attached. Faucet is sold partially assembled but shown fully
disassembled for illustrative and service purposes only.
5. Inspect this product to ensure you have all parts required for proper installation.
6. Use only a strap wrench or protected/smooth-jaw wrench on any finished surface.
7. If possible, install the faucet assembly on the sink or mounting surface before setting.
8. Do NOT use putty during this installation.
Cleaners For Fittings And Accessories
To avoid damaging the surface and working components of the fittings, certain precautions must be taken in terms of
usage and subsequent cleaning as many cleaning agents contain acids for general cleaning and removing calcium
deposits. When caring for your fittings and accessories, please note the following:
- Only apply cleaners which are expressly intended for the use
- Never use any cleaner containing hydrochloric acid, formic acid or acetic acid on or near the fitting, as they can
cause considerable damage
- Do not use cleaners containing phosphoric acid
- Do not use cleaners containing chlorine bleach solutions
- Never mix or combine cleaning agents
- Do not use abrasive cleaners and unsuitable scouring agents such as scouring pads
2016-02
blubathworks.com
®
Technical Support Assistance
If further assistance is required, please contact:
Product support at 1.866.907.0122 (09:00 - 17:00hrs PST) or email [email protected]
North America
Blu Bathworks Inc.
188 Smithe Street, Vancouver BC, Canada, V6B 6A9
T+1.604.299.0122 F+1.604.299.0125
Please refer to blubathworks.com for warranty, terms & conditions under warranty & procedure for warranty service.
Page 3
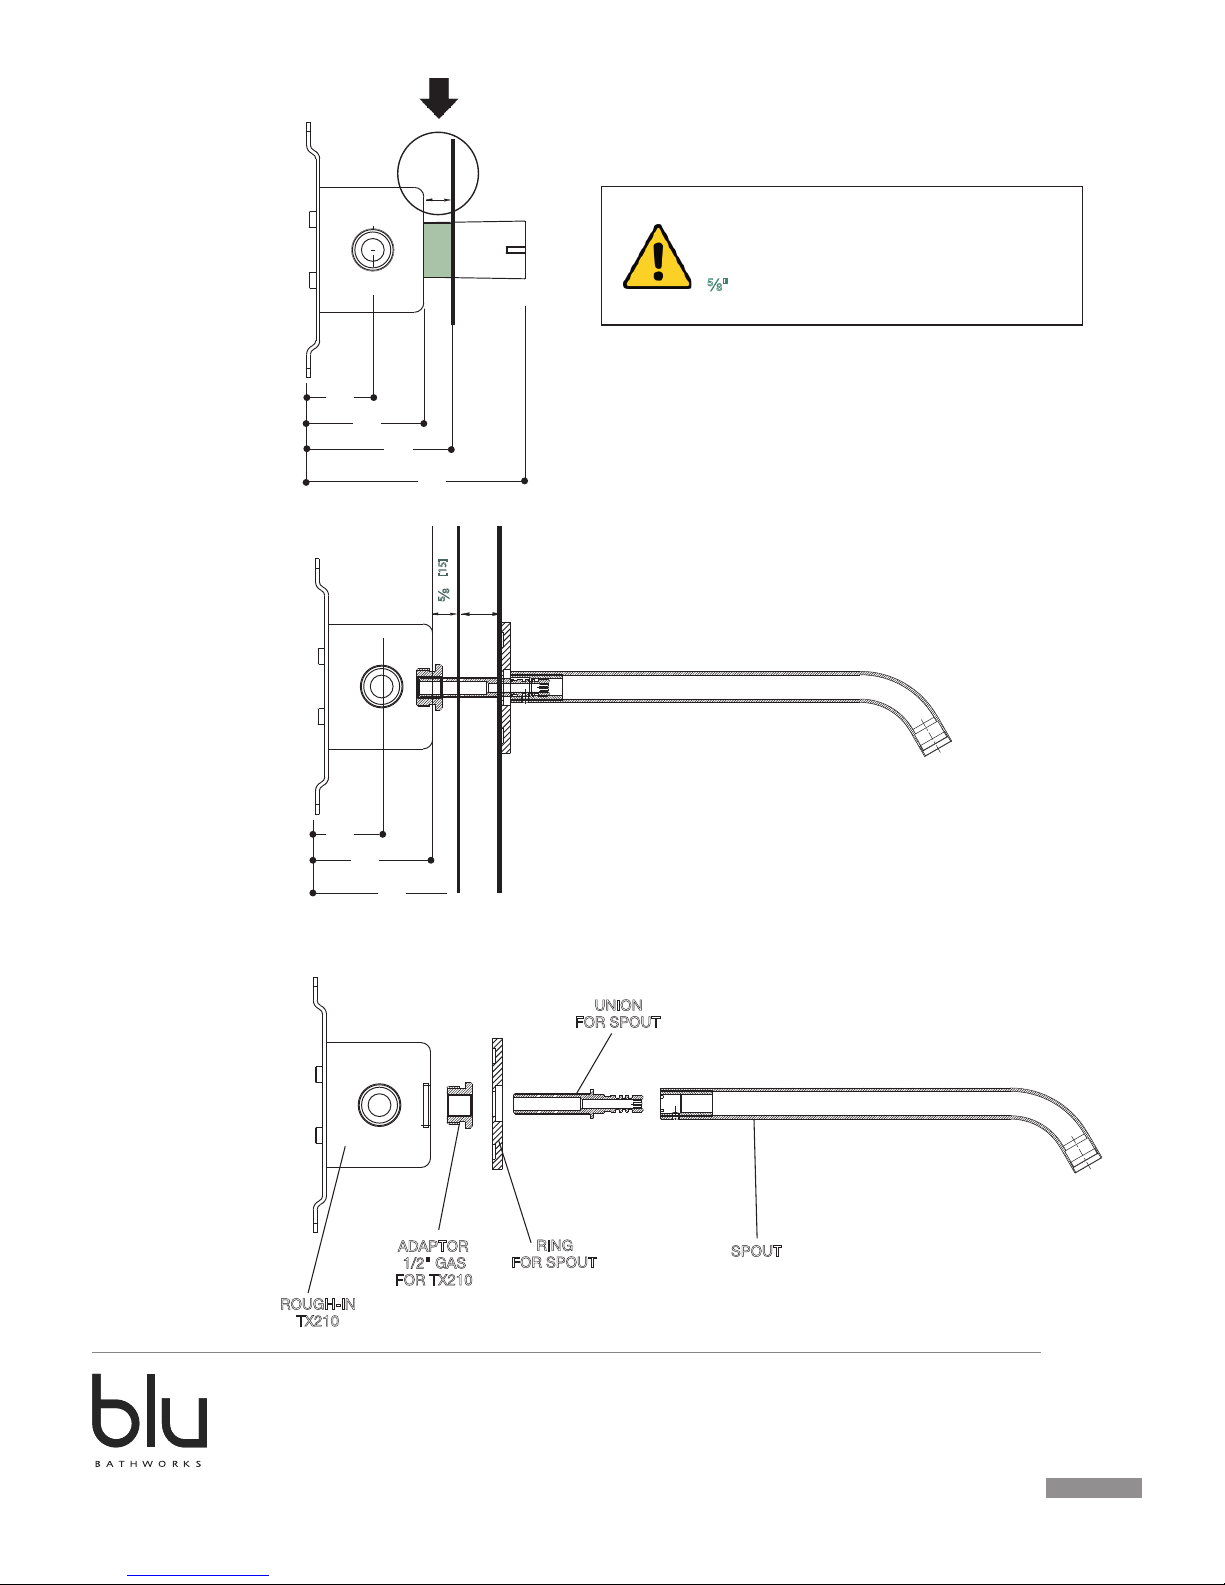
WALL ROUGH
WALL FINISHED
d"
ATTENTION
VERY IMPORTANT
PLACE THE ROUGH-IN
d"
INSIDE THE WALL ROUGH
ROUGH-IN
TX210
ADAPTOR
1/2" GAS
F
OR TX210
RING
FOR SPOUT
UNION
F
OR SPOUT
SPOUT
2
2016-02
blubathworks.com
®
MIN
MAX
4"
[102]
2¼"
[60]
1¾"
[45]
1"
[25]
1¾"
[45]
1"
[25]
2¼"
[60]
13
16
"
/
*
*
*
*
*
*
*
*
* Spouts TOX200/TOX210/TOX215/TOX217 are sold separately
[20]
[15]
d"
[15]
Page 4
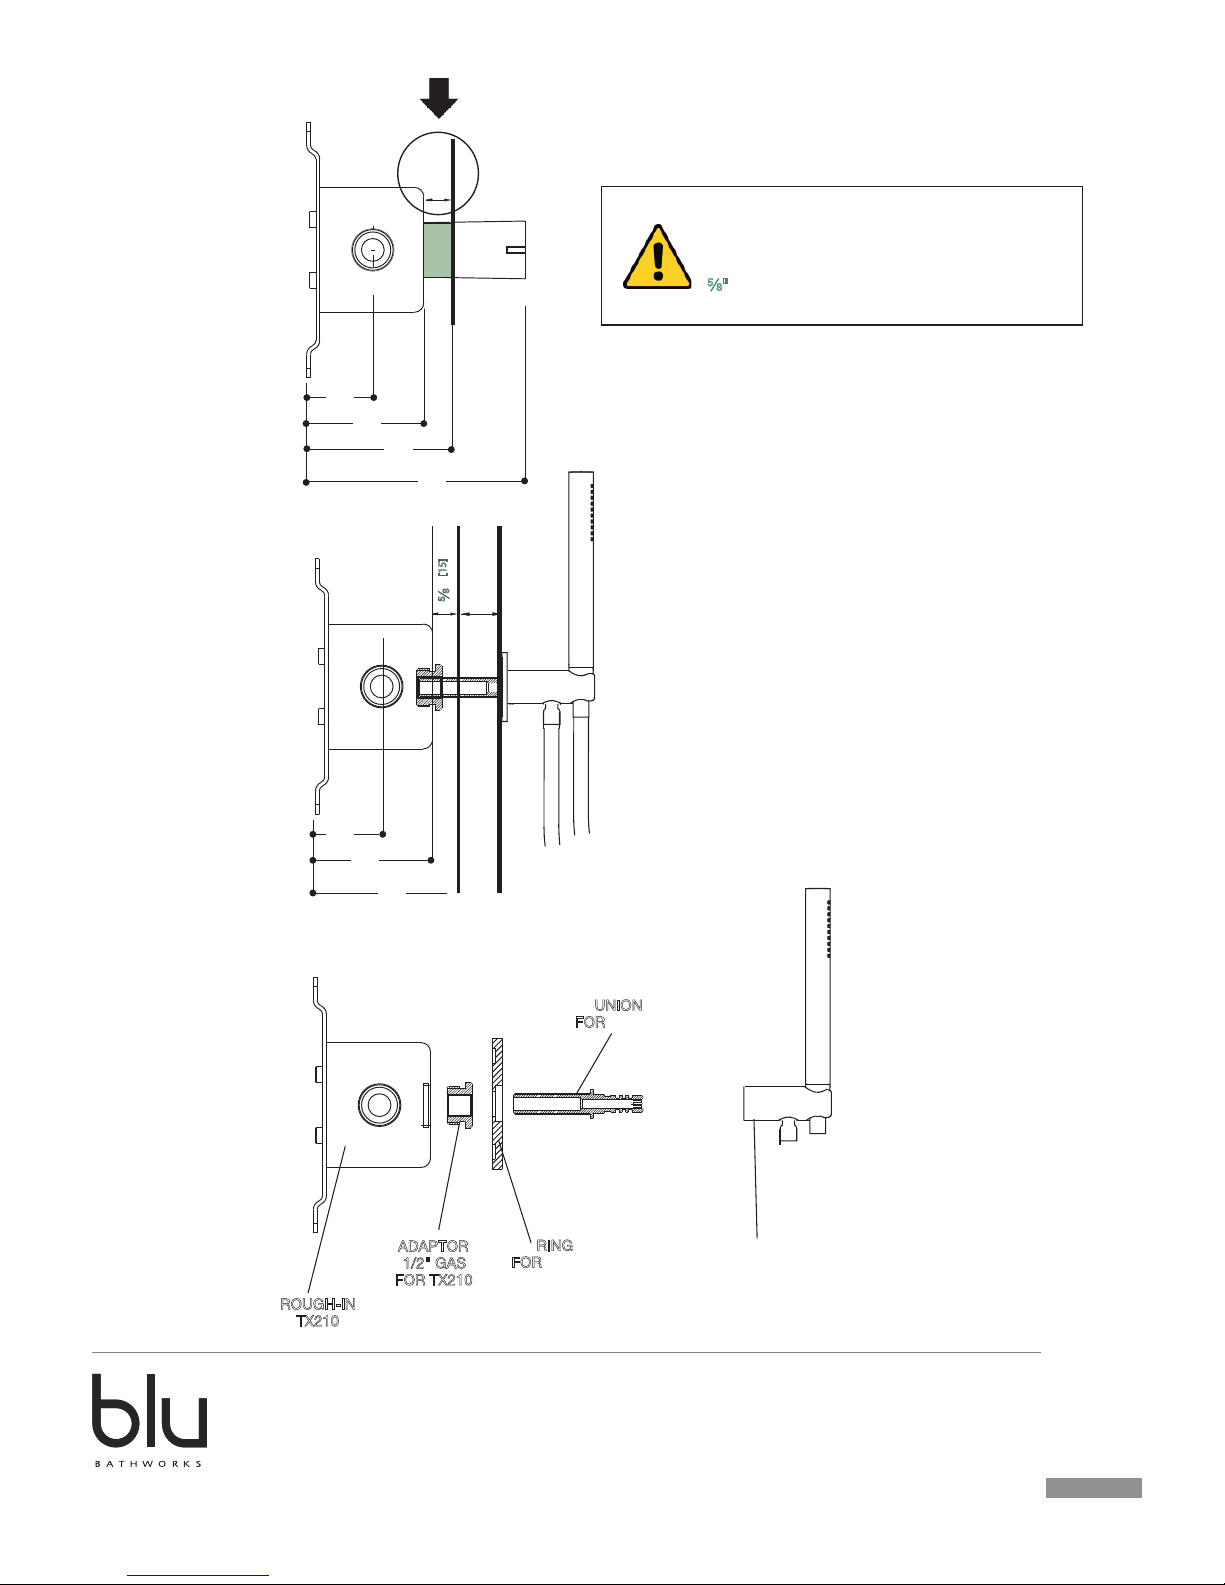
WALL ROUGH
WALL FINISHED
d"
ATTENTION
VERY IMPORTANT
PLACE THE ROUGH-IN
d"
INSIDE THE WALL ROUGH
ROUGH-IN
TX210
ADAPTOR
1/2" GAS
F
OR TX210
RING
FOR
UNION
F
OR
3
2016-02
blubathworks.com
®
MIN
MAX
4"
[102]
2¼"
[60]
1¾"
[45]
1"
[25]
1¾"
[45]
1"
[25]
2¼"
[60]
13
16
"
/
*
*
*
*
*
* Handshower TOX117 sold separately
[20]
[15]
d"
[15]
HANDSHOWER
HANDSHOWER
HANDSHOWER
Page 5
3
2016-02
blubathworks.com
®
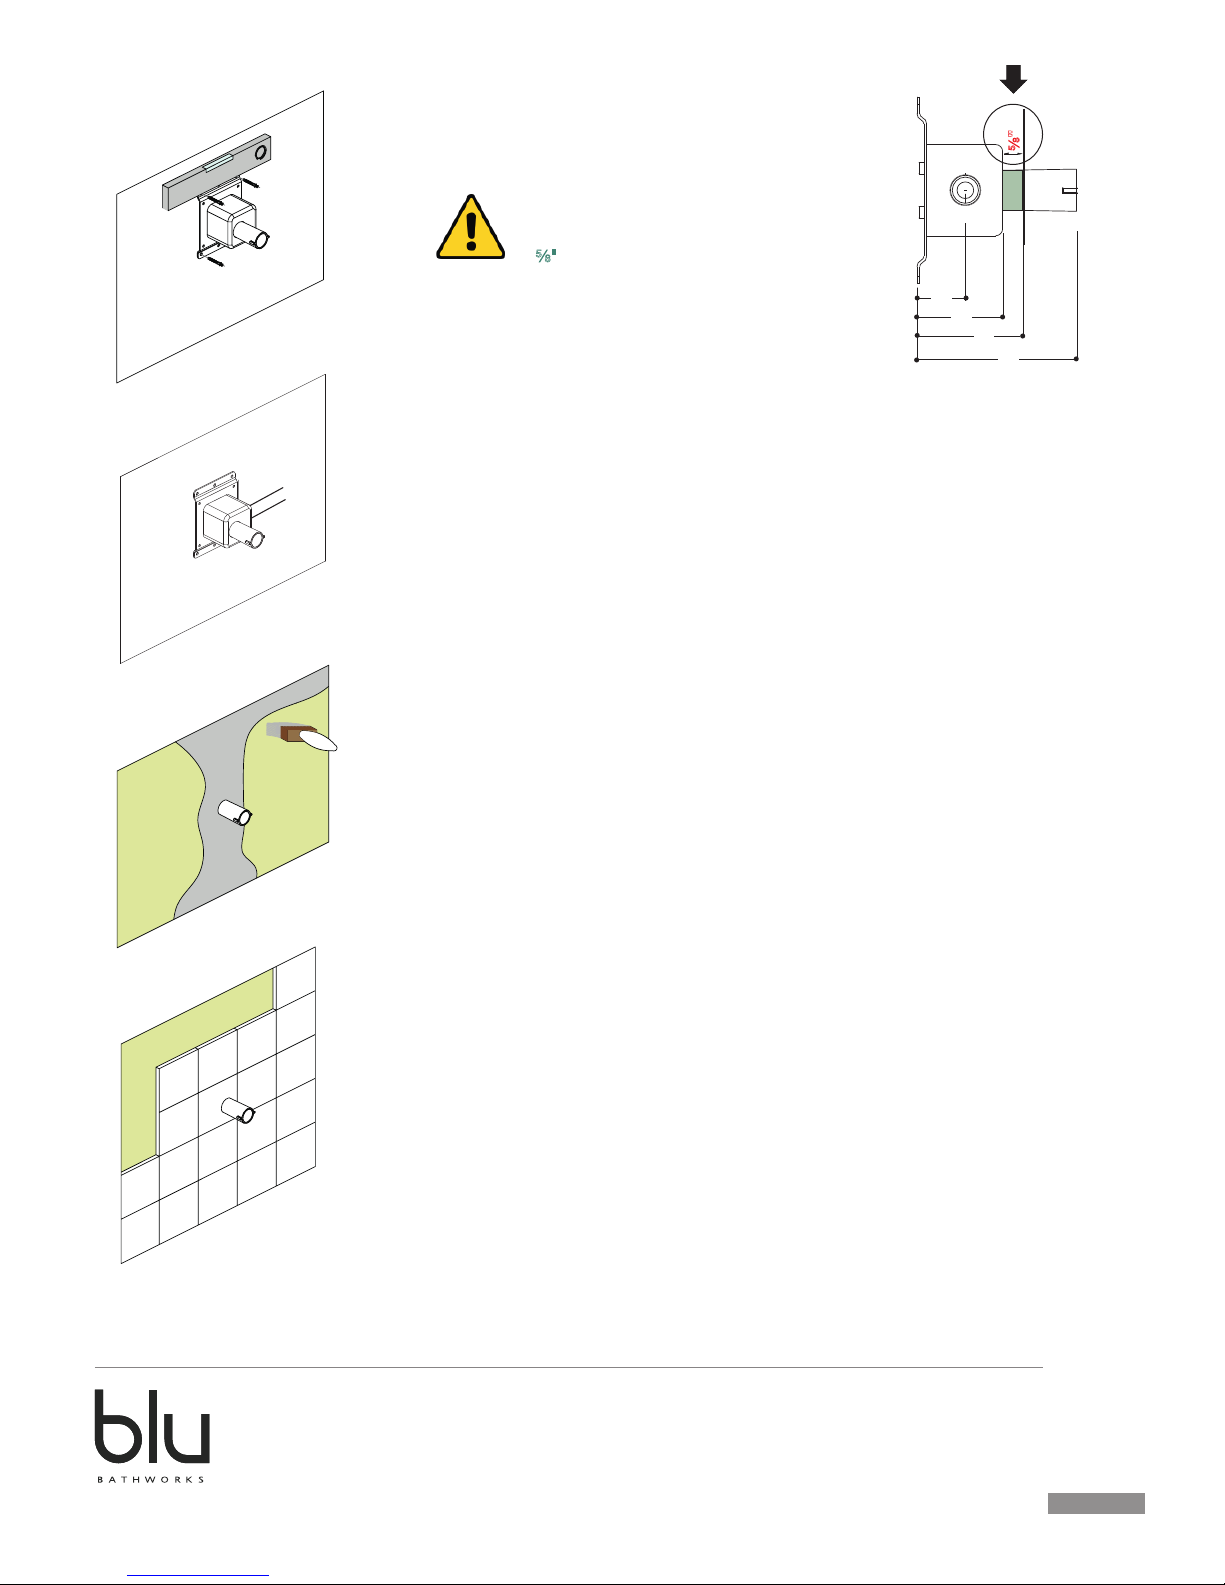
EN - INSTALLATION GUIDE
Place the rough In on the wall, respecting the measurement indicated previously.
At the time of fixing, check that the rough-in part is perfectly level.
Proceed with the connection to the water system.
Before proceeding with coverings it is advisable to apply the liquid membrane as a wall insulation.
Apply the wall covering, paying particular attention when making the holes in the tiles which must
adhere closely to the plastic tap.
ITA - GUIDA D’INSTALLAZIONE
Posizionare il corpo incasso sul muro grezzo rispettando le misure indicate.
Procedere al fissaggio verificando che il corpo incasso sia perfettamente in bolla.
Procedere con l’allacciamento all’impianto idrico.
Si consiglia prima della posa dei rivestimenti di eseguire sulla parete una stesura di guaina liquida
come isolazione fondo della parete.
Procedere con la posa del rivestimento della parete facendo bene attenzione e cura all’esecuzione dei
fori sulle piastrelle che devono essere strettamente aderenti al tappo in plastica.
ES - GUIA DE INSTALLACION
Posicionar el cuerpo empotrado en el muro con las mediciones indicaron.
En el momento de l sujecion, verificar que el cuerpo empotrado esté perfectamente nivelado.
Proceder con la conexion a la instalacion hidrica.
Aconsejamos, antes de proceder con la instalacion de los rivestimientos, extender en la pared una
vaina liquida como aislante del fondo de la pared.
Proceder con la instalacion del revestimiento de la pared poniendo mucha atencion y cuidado en la
ejecucion de los agujeros sobre los azulejos, que tienen que ser perfectamentes a las coberturas de
plastico.
FR - GUIDE D’INSTALLATION
Positionner le corps à encastrement sur le mur brut avec les mesures indiquées
précédemment.
Au moment du fixage, vérifier que le corps à encastrement soit parfaitement nivelé.
Procéder au branchement à l’installation hydrique.
Nous conseillons avant de procéder à la pose des revetements, de réaliser sur le mur un étalement de
gaine liquide comme isolation fond de mur.
Procéder à la pose du revetement du mur, en faisant bien attention à la realisation soignée
des trous sur les carreaux, qui doivent etre strictement adhérents aux couvertures en plastique.
ATTENTION
VERY IMPORTANT
PLACE THE ROUGH-IN
d"
INSIDE THE WALL ROUGH
4"
[102]
2¼"
[60]
1¾"
[45]
1"
[25]
d"
[15]
Page 6
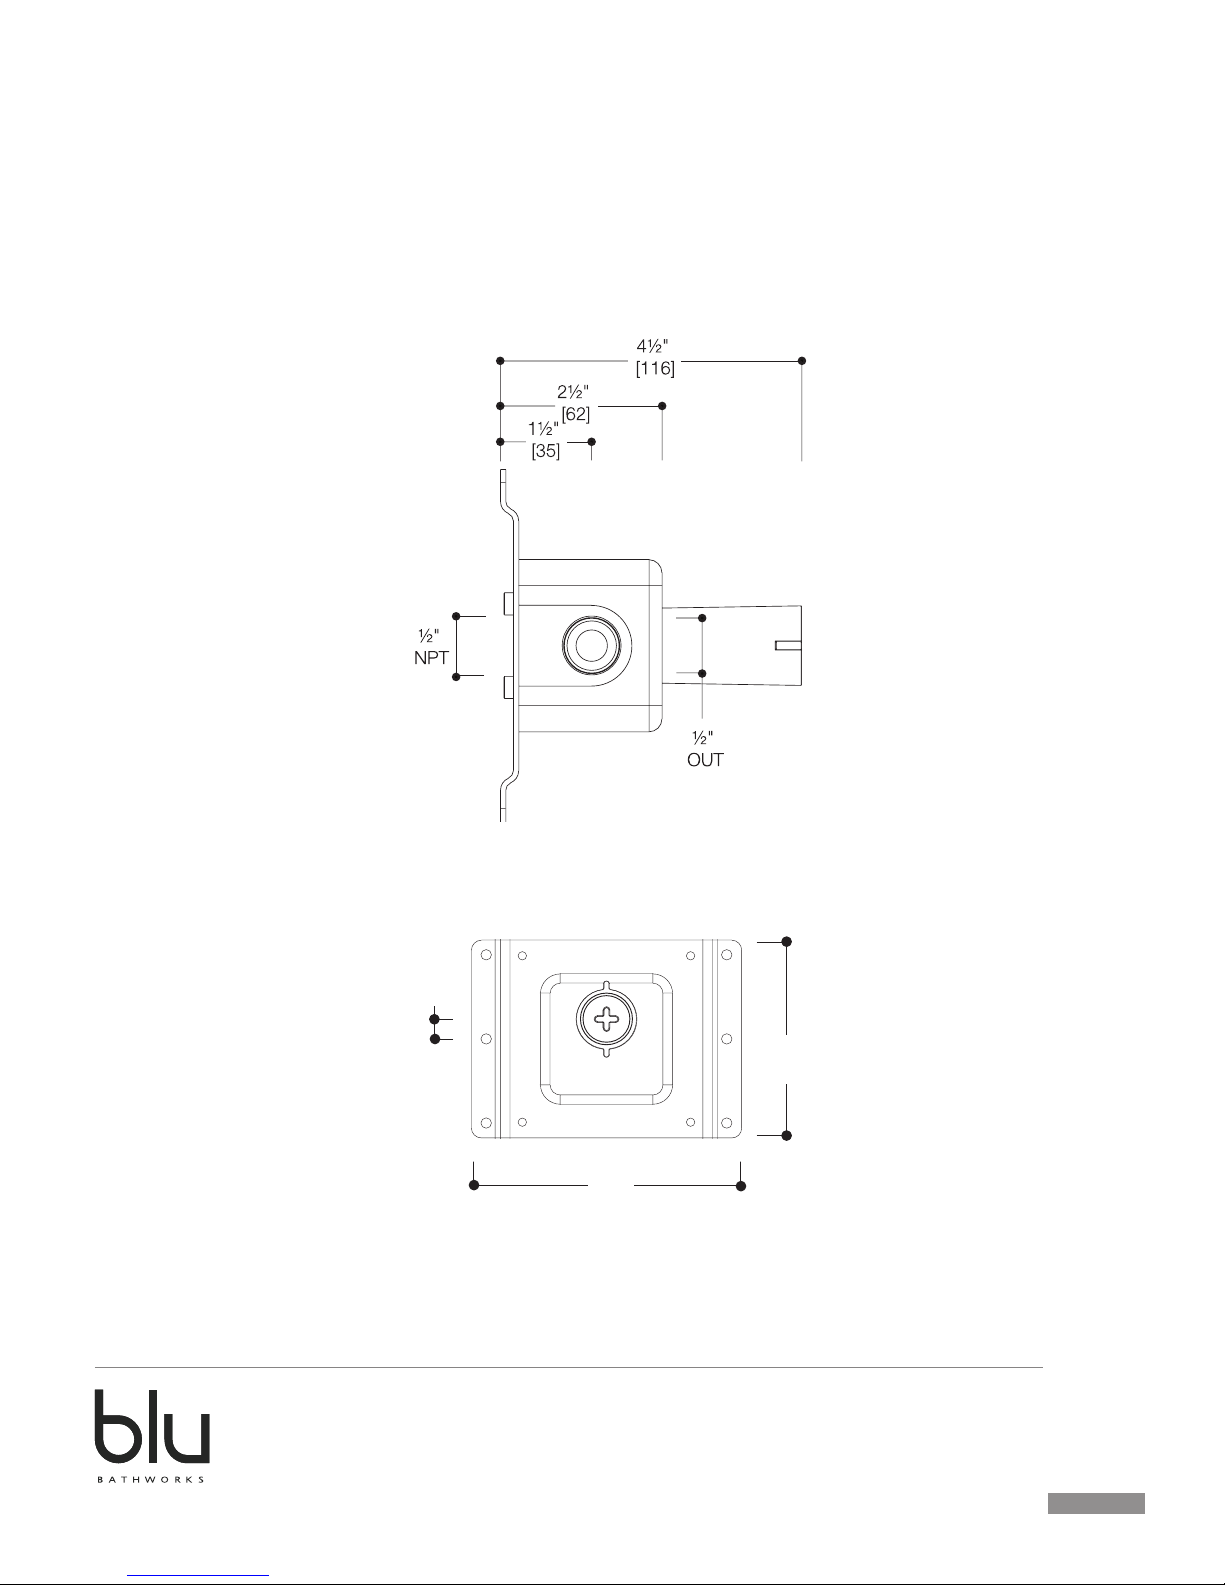
TX210
4
2016-02
blubathworks.com
®
4"
[100]
½"
[10]
5½"
[135]
Page 7

5
2016-02
blubathworks.com
®
TX210
TOX-PIASTRA1
TOX-BCL
TOX-KITVITE
TOX-T-PLASTICA
 Loading...