

Page 1

1
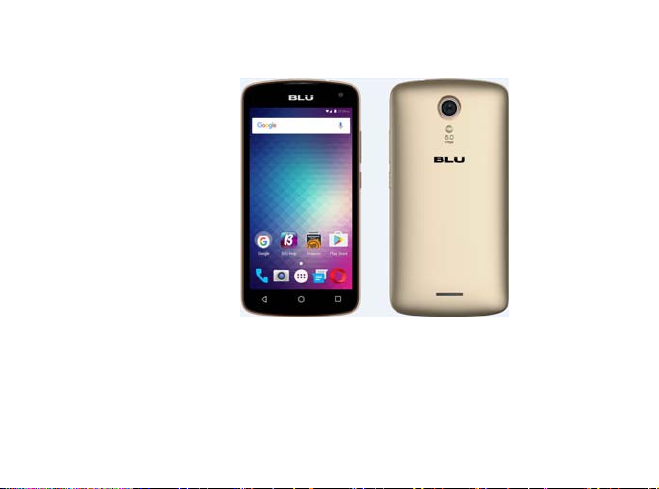
Studio G2 HD
QuickGuide
Page 2
2
Page 3

3
o For
instructions or any questions pertaining to phone usage, please click on the BLU Help icon
on the home screen of the phone. Also included in BLU Help is a product registration link and
technical support. You may also access the BLU help page by visiting the following address:
manuals.bluproducts.com
o Par
a obtener instrucciones o preguntas relacionadas con el uso del teléfono, por favor haga
clic en el icono de BLU Help en la pantalla principal del teléfono. También se incluye en BLU
Help un enlace para registro del producto y soporte técnico. Usted también puede acceder la
página de BLU Help visitando la siguiente dirección: manuals.bluproducts.com
o Para obter instruções ou perguntas relacionadas ao uso do telefone, por favor, clique no
ícone BLU Help na tela principal do telefone. Também incluído no BLU Help um link para
registrar o produto e suporte técnico.
V
ocê também pode acessar a página de BLU Help
visitando o seguinte endereço: manuals.bluproducts.com
o Pour
des instructions ou pour toutes questions sur l'utilisation du téléphone, veuillez cliquer
sur l'icône Aide BLU sur l'écran d'accueil du téléphone. L'Aide BLU comprend un lien pour
enregistrer le produit et pour le soutien technique. Vous pouvez aussi accéder à la page aide
BLU en visitant l'adresse suivante : manuals.bluproducts.com
Page 4

4
S
AFETY INFORMATION
Transportation Safety
Please observe all transportation laws and regulations.
PLEASE DRIVE RESPONSIBLY - DO NOT TEXT & DRIVE
Hospital Safety
Please follow hospital rules and limitations.
Please turn off your mobile phone when near medical instruments.
Airport Safety
Remember to follow all airport and flight safety regulations.
Water Hazard
Your phone is not waterproof. Keep your phone away from water or liquid to avoid damage.
Emergency Calls
Make sure your mobile phone is switched on and in a service area. On home screen, tap the phone key and
dial the emergency number.
Battery Usage
For better performance and longer battery life, it is recommended that you charge the battery fully before
using the mobile phone for the first time and that you initially complete two to three charge cycles.
BLU
_
S
0270UU
_
V05
Page 5
5
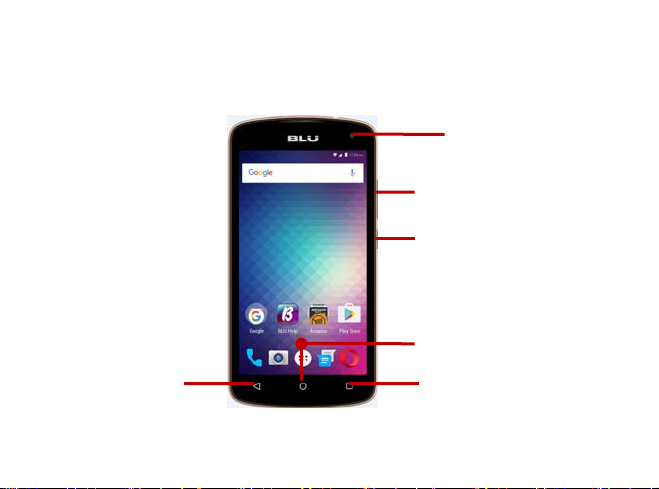
KEY
FUNCTIONS
Vol ume
Power On / Off
Back
Home
Recent Apps
Front Camera
Page 6
6
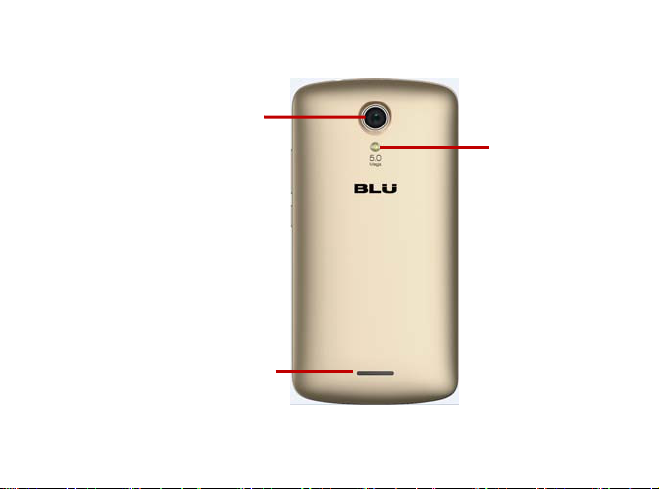
Re
ar Camera
Flash
Speaker
Page 7

7
Power
On / Off
Used to power on/off the device and to lock the screen.
» Long pr
ess the power button to power on
»
While the phone is powered on, long press to access the power off menu or click to lock the screen
Vo
lu me
Adjus
ts the ringer volume, call volume, and multimedia volume.
Home
The home button pauses any current action and returns to the home screen.
R
ecent Apps
O
pens a list of recently opened applications that allows you to switch conveniently between them. This
option can also close any open applications by swiping to the side.
Back
Returns to the previous screen; Closes the keyboard, any open program, or any menu option.
USB Port
C
harges the device and transfers data such as documents, music, and video between your device and a
PC.
H
eadset Port
Connect earphones to this port for hands-free capabilities. You may also to listen to music or FM radio.
Front Camera
A
high-resolutio n front camera to take pictu res and video. This option is ideal for self-portraits.
Rear Camera
A high-resolution rear camera to take pictures and video.
Flash
Provides light for pictures in low-light conditions. It also may be used as a flashlight.
Page 8
8
INTR
ODUCTION
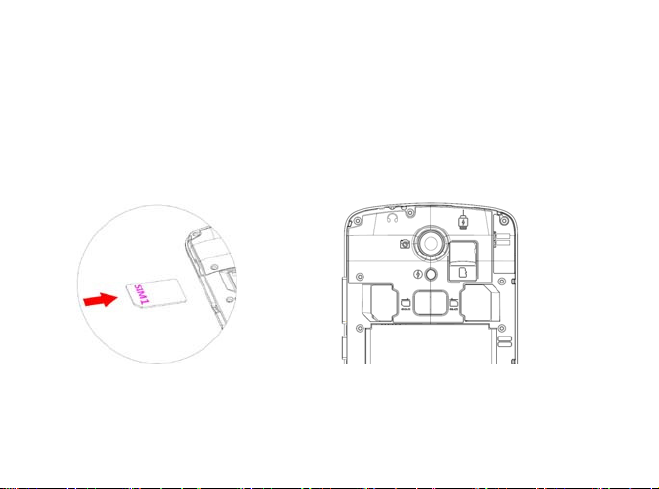
Installation of the SIM Card
Wa
rning : Please keep the SIM card out of the reach of children. The SIM card and its contact are easily
damaged due to scratching or bending. Please use caution when carrying, installing, or taking out the SIM
card. Note: Please contact your cellular phone service provider directly to obtain your SIM card.
To insert SIM card:
| R
emove the rear cover. Insert the SIM card.
| I
nsert the SD card (For additional storage capacity)
| Replace t
he rear cover and power on the phone.
SIM
Card Slot
Memory
Card Slot
Page 9

9
DEVICE C
ONFIGURATION
When you initially power on your phone, there will be a series of steps to set up basic features.
INSERT SIM
Insert your SIM card so the phone can register to the network.
SELECT LANGUAGE
While on the Welcome screen, please scroll to select your language.
SELECT WI-FI
This process allows the device to connect to the internet. Click on the desired W i-Fi network that the device
that will be connected. Please note that any unsecured Wi-Fi networks can be connected to without
credentials and any secured Wi-Fi networks require a password for credentials prior to connection. It is
recommended that you connect to a Wi-Fi network to check for software updates prior to startup.
A
DD YOUR ACCOUNT
Sign in to your Google
TM
account
in order to keep accounts streamlined with Google services. Your Gm ail
TM
account will be used for some Google programs that include Google Play
TM
S
tore, Google Drive
TM
, Go
ogle
+
TM
and G
oogle Wallet
TM
.
If you do not have a Google account, click to create a new account.
G
OOGLE SERVICES
Click to add or remove Google services that include Backup, Location Service, and Google Now
TM
. In
this
step, you can also setup payment info if desired.
RESTORE APPS & DATA
You can restore your previous applications and data that was stored from another device. You also have
the option to setup the phone as a brand new device.
Googl
e, Google Play and other marks
are trademarks of Google Inc.
Page 10

10
FCC Cautio
n:
Any
Changes or modifications not expressly approved by the party responsible for compliance could void
the user's authority to operate the equipment.
This device complies with part 15 of the FCC Rules. Operation is subject to the following two
conditions:
Page 11

11
—Connect t
he equipment into an outlet on a circuit different from that to which the receiver is connected.
—Consult the dealer or an experienced radio/TV technician for help.
Specific Absorption Rate (SAR) information
SAR tests are conducted using standard operating positions accepted by the FCC with the
phone transmitting at its highest certified power level in all tested frequency bands, although
the SAR is determined at the highest certified power level, the actual SAR level of the phone
while operating can be well below the maximum value
 Loading...