

Page 1

OPERATOR’S MANUAL
WHEEL FELLER
BUNCHER
OPERATOR’S MANUAL 2470 2570 2670
SITE PREP TRACTOR
2864C
Part No. SEBU9024
June 2014
Rev. 02
SP4 - 1 and Up
Part No. 30009235
Rev. No. 0503, 0904
©Blount Inc. 2006. All Rights Reserved.
Page 2
i02653977
Important Safety Information
Most accidents that involve product operation, maintenance and repair are caused by failure to observe
basic safety rules or precautions. An accident can often be avoided by recognizing potentially hazardous
situations before an accident occurs. A person must be alert to potential hazards. This person should also
have the necessary training, skills and tools to pe rform these functions properly.
Improper operation, lubrication, maintenance or repair of this product can be dangerous and
could result in injury or death.
Do not operate or perform any lubrication, maintenance or repair on this product, until you have
read and understood the operation, lubrication, maintenance and repair information.
Safety precautions and warnings are provided in this manualand on the product. If these hazard warnings
are not heeded, bodily injury or death could occur to you or to other persons.
The hazards are identified by the “Safety Alert Symbol” and followed by a “Signal Word” such as
“DANGER”, “WARNING” or “CAUTION”. The Safety Alert “WARNING” label is shown below.
The meaning of this safety alert symbol is as follows:
Attention! Become Alert! Your Safety is Involved.
The message that appears under the warning explains the hazard and can be either written or pictorially
presented.
Operations that may cause product damage are identified by “NO TICE” la bels on the product and in
this publication.
Prentice cannot anticipate every possible circumstance that might involve a potential hazard. The
warnings in this publication and on the product are, therefore, not all inclusive. If a tool, procedure,
work method or operating technique that is not specifically recommended by Prentice is used,
you must satisfy yourself that it is safe for you and for others. You should also ensure that the
product will not be damaged or be made unsafe by the operation, lubrication, maintenance or
repair procedures that you choose.
The information, specifications, and illustrations in this publication are on the basis of information that
was available at the time that the publication was written. The specifications, torques, pressures,
measurements, adjustments, illustrations, and other items can change at any time. These changes can
affect the service that is given to the product. Obtain the complete and most current information before you
start any job. Prentice dealers have the most current information available.
When replacement parts are required for this
product Prentice recommends using Prentice
replacement parts or parts with equivalent specifications including, but not limited to, physical
dimensions, type, strength and material.
Failure to heed this warning can lead to premature failures, product damage, personal injury or
death.
Page 3

SEBU9024 3
Table of Contents
Table of Contents
Foreword.............................. ............................. 4
Safety Section
Safety Messages (Site Prep-Type Tractor).... ... 6
Additional Messages ................... ................... 15
General Hazard Information .............. ............. 18
Crushing Prevention and Cutting Prevention . 21
Burn Prevention....................... ....................... 21
Fire Prevention and Explosion Prevention ... .. 22
Fire Safety ........................... ........................... 25
Fire Extinguisher Location ............... ............... 26
Tire Information........................ ....................... 27
Before Operation ...................... ...................... 34
Machine Operation ..................... .................... 37
Engine Starting ........................ ....................... 87
Parking ............................. .............................. 91
Transportation Information............... ............... 94
Towing Information .................... ..................... 99
Engine Starting (Alternate Methods) ...... ...... 101
Maintenance Section
Tire Inflation Information................ ............... 102
Lubricant Viscosities and Refill Capacities .. . 104
Maintenance Support .................. ..................111
Maintenance Interval Schedule .......... ...........115
Electrical Storm Injury Prevention ......... ......... 27
Before Starting Engine ................. .................. 27
Visibility Information.................... .................... 28
Engine Starting ........................ ....................... 28
Before Operation ...................... ...................... 28
Operation............................ ............................ 29
Work Tools........................... ........................... 30
Parking ............................. .............................. 30
Equipment Lowering with Engine Stopped... .. 31
Sound Information and Vibration Information. 31
Operator Station ....................... ...................... 32
Product Information Section
Warranty Section
Warranty Information.................. .................. 171
Reference Information Section
Reference Materials .................. ................... 172
Index Section
Index............................... .............................. 174
Identification Information ................ ................ 33
Operation Section
Page 4

4
Foreword
SEBU9024
Foreword
Literature Information
This manual should be stored in the operator's
compartment in the literature holder or seat back
literature storage area.
This manual contains safety information, operation
instructions, transportation information, lubrication
information and maintenance information.
Some photographs or illustrations in this publication
show details or attachments that can be different from
your machine. Guards and covers might have been
removed for illustrative purposes.
Continuing improvement and advancement of
product design might have caused changes to your
machine which are not included in this publication.
Read, study and keep this manual with the machine.
Whenever a question arises regarding your machine,
or this publication, please consult your Cat dealer for
the latest available information.
Safety
The safety section lists basic safety precautions. In
addition, this section identifies the text and locations
of warning signs and labels used on the machine.
Read and understand the basic precautions listed in
the safety section before operating or performing
lubrication, maintenance and repair on this machine.
Operation
The operation section is a reference for the new
operator and a refresher for the experienced operator.
This section includes a discussion of gauges,
switches, machine controls, attachment controls,
transportation and towing information.
Photographs and illustrations guide the operator
through correct procedures of checking, starting,
operating and stopping the machine.
Operating techniques outlined in this publication are
basic. Skill and techniques develop as the operator
gains knowledge of the machine and its capabilities.
Maintenance Intervals
Use the service hour meter to determine servicing
intervals. Calendar intervals shown (daily, weekly,
monthly, etc.) can be used instead of service hour
meter intervals if they provide more convenient
servicing schedules and approximate the indicated
service hour meter reading. Recommended service
should always be performed at the interval that
occurs first.
Under extremely severe, dusty or wet operating
conditions, more frequent lubrication than is specified
in the maintenance intervals chart might be
necessary.
Perform service on items at multiples of the original
requirement. For example, at every 500 service hours
or 3 months, also service those items listed under
every 250 service hours or monthly and every 10
service hours or daily.
California Proposition 65 Warning
Diesel engine exhaust and some of its constituents
are known to the State of California to cause cancer,
birth defects, and other reproductive harm.
Battery posts, terminals and related accessories
contain lead and lead compounds. Wash hands after
handling.
Certified Engine Maintenance
Proper maintenance and repair is essential to keep
the engine and machine systems operating correctly.
As the heavy duty off-road diesel engine owner, you
are responsible for the performance of the required
maintenance listed in the Owner Manual, Operation
and Maintenance Manual, and Service Manual.
It is prohibited for any person engaged in the
business of repairing, servicing, selling, leasing, or
trading engines or machines to remove, alter, or
render inoperative any emission related device or
element of design installed on or in an engine or
machine that is in compliance with the regulations (40
CFR Part 89). Certain elements of the machine and
engine such as the exhaust system, fuel system,
electrical system, intake air system and cooling
system may be emission related and should not be
altered unless approved by Caterpillar.
Maintenance
The maintenance section is a guide to equipment
care. The Maintenance Interval Schedule (MIS) lists
the items to be maintained at a specific service
interval. Items without specific intervals are listed
under the "When Required" service interval. The
Maintenance Interval Schedule lists the page number
for the step-by-step instructions required to
accomplish the scheduled maintenance. Use the
Maintenance Interval Schedule as an index or "one
safe source" for all maintenance procedures.
Machine Capacity
Additional attachments or modifications may exceed
machine design capacity which can adversely affect
performance characteristics. Included would be
stability and system certifications such as brakes,
steering, and rollover protective structures (ROPS).
Contact your Cat dealer for further information.
Page 5
SEBU9024
Cat Product Identification Number
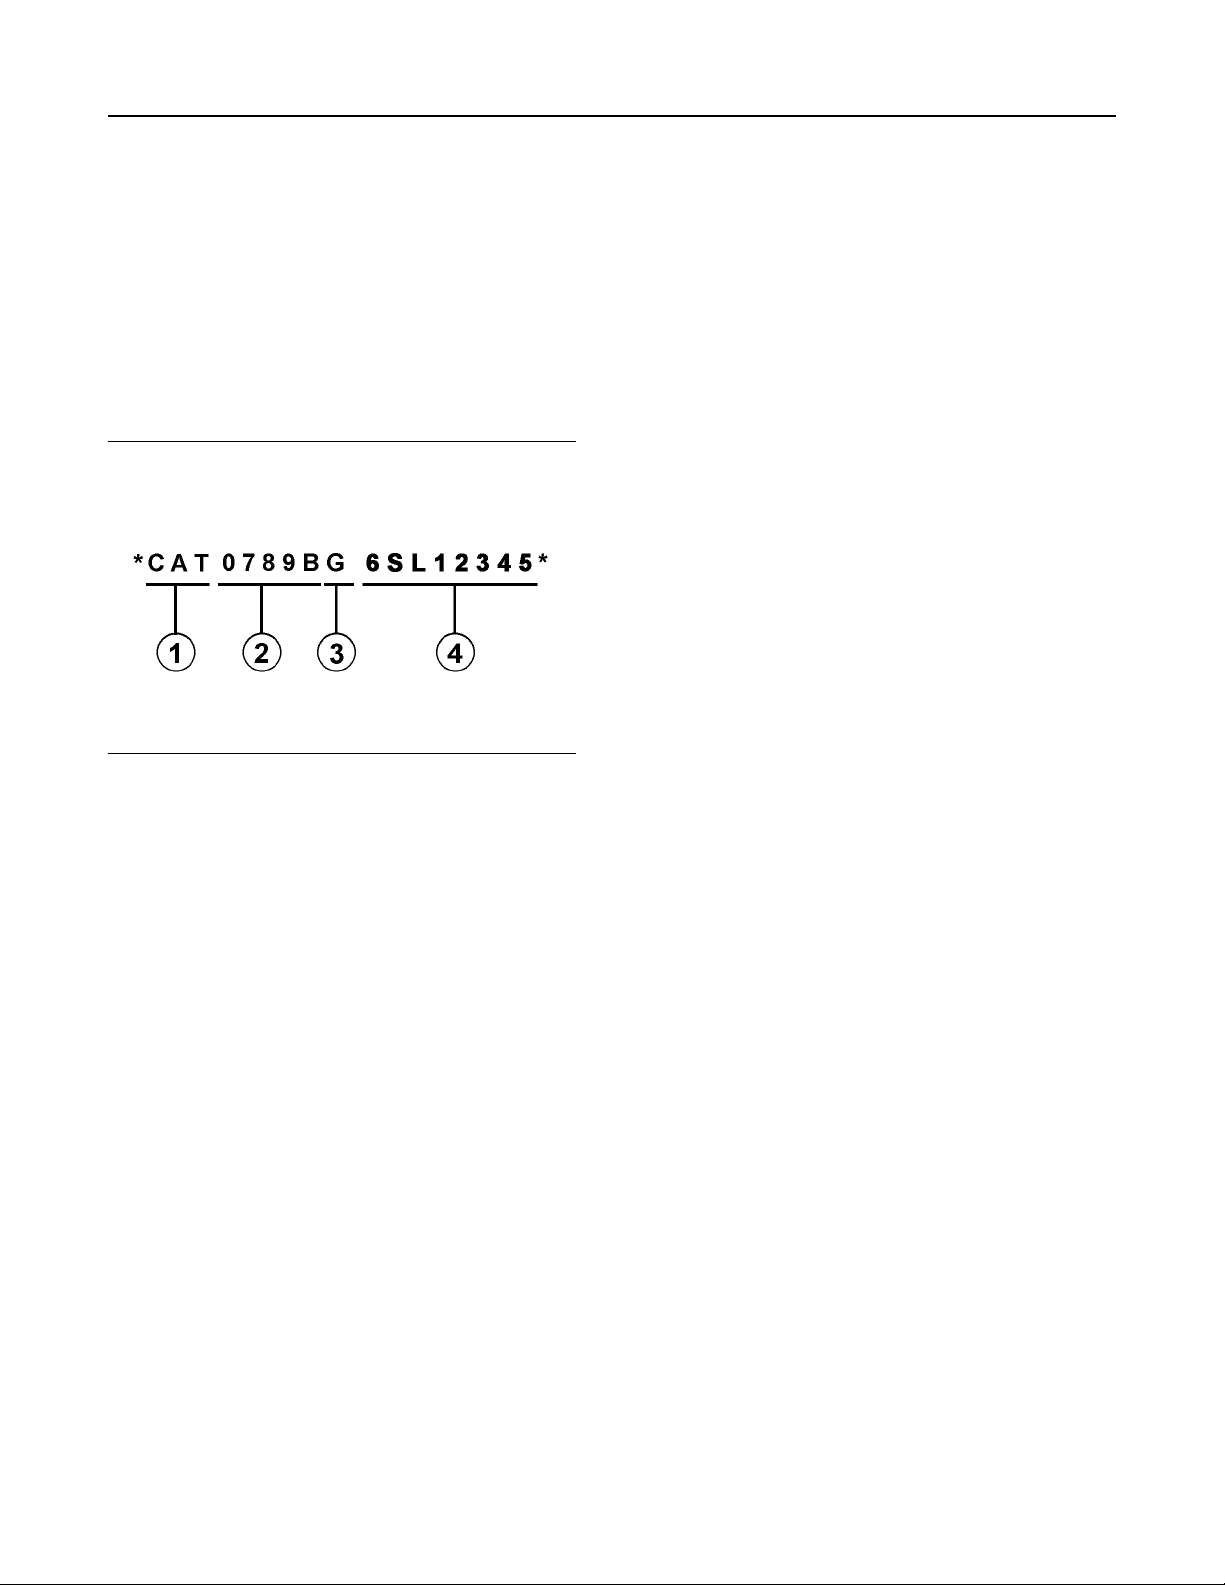
Effective First Quarter 2001 the Cat Product
Identification Number (PIN) has changed from 8 to 17
characters. In an effort to provide uniform equipment
identification, Caterpillar and other construction
equipment manufacturers are moving to comply with
the latest version of the product identification
numbering standard. Non-road machine PINs are
defined by ISO 10261. The new PIN format will apply
to all Cat machines and generator sets. The PIN
plates and frame marking will display the 17 character
PIN. The new format will look like the following:
5
Foreword
Illustration 1 g00751314
Where:
1. Caterpillar's World Manufacturing Code (characters
1-3)
2. Machine Descriptor (characters 4-8)
3. Check Character (character 9)
4. Machine Indicator Section (MIS) or Product
Sequence Number (characters 10-17). These were
previously referred to as the Serial Number.
Machines and generator sets produced before First
Quarter 2001 will maintain their 8 character PIN
format.
Components such as engines, transmissions, axles,
etc. and work tools will continue to use an 8 character
Serial Number (S/N).
Page 6

6 SEBU9024
Safety Section
Safety Messages
Safety Section
i05770531
Safety Messages
(Site Prep-Type Tractor )
SMCS Code: 7000
Page 7
SEBU9024
7
Safety Section
Safety Messages
Illustration 2 g03686527
Page 8
8 SEBU9024
Safety Section
Safety Messages
Illustration 3 g03686528
Page 9
SEBU9024 9
Safety Section
Safety Messages
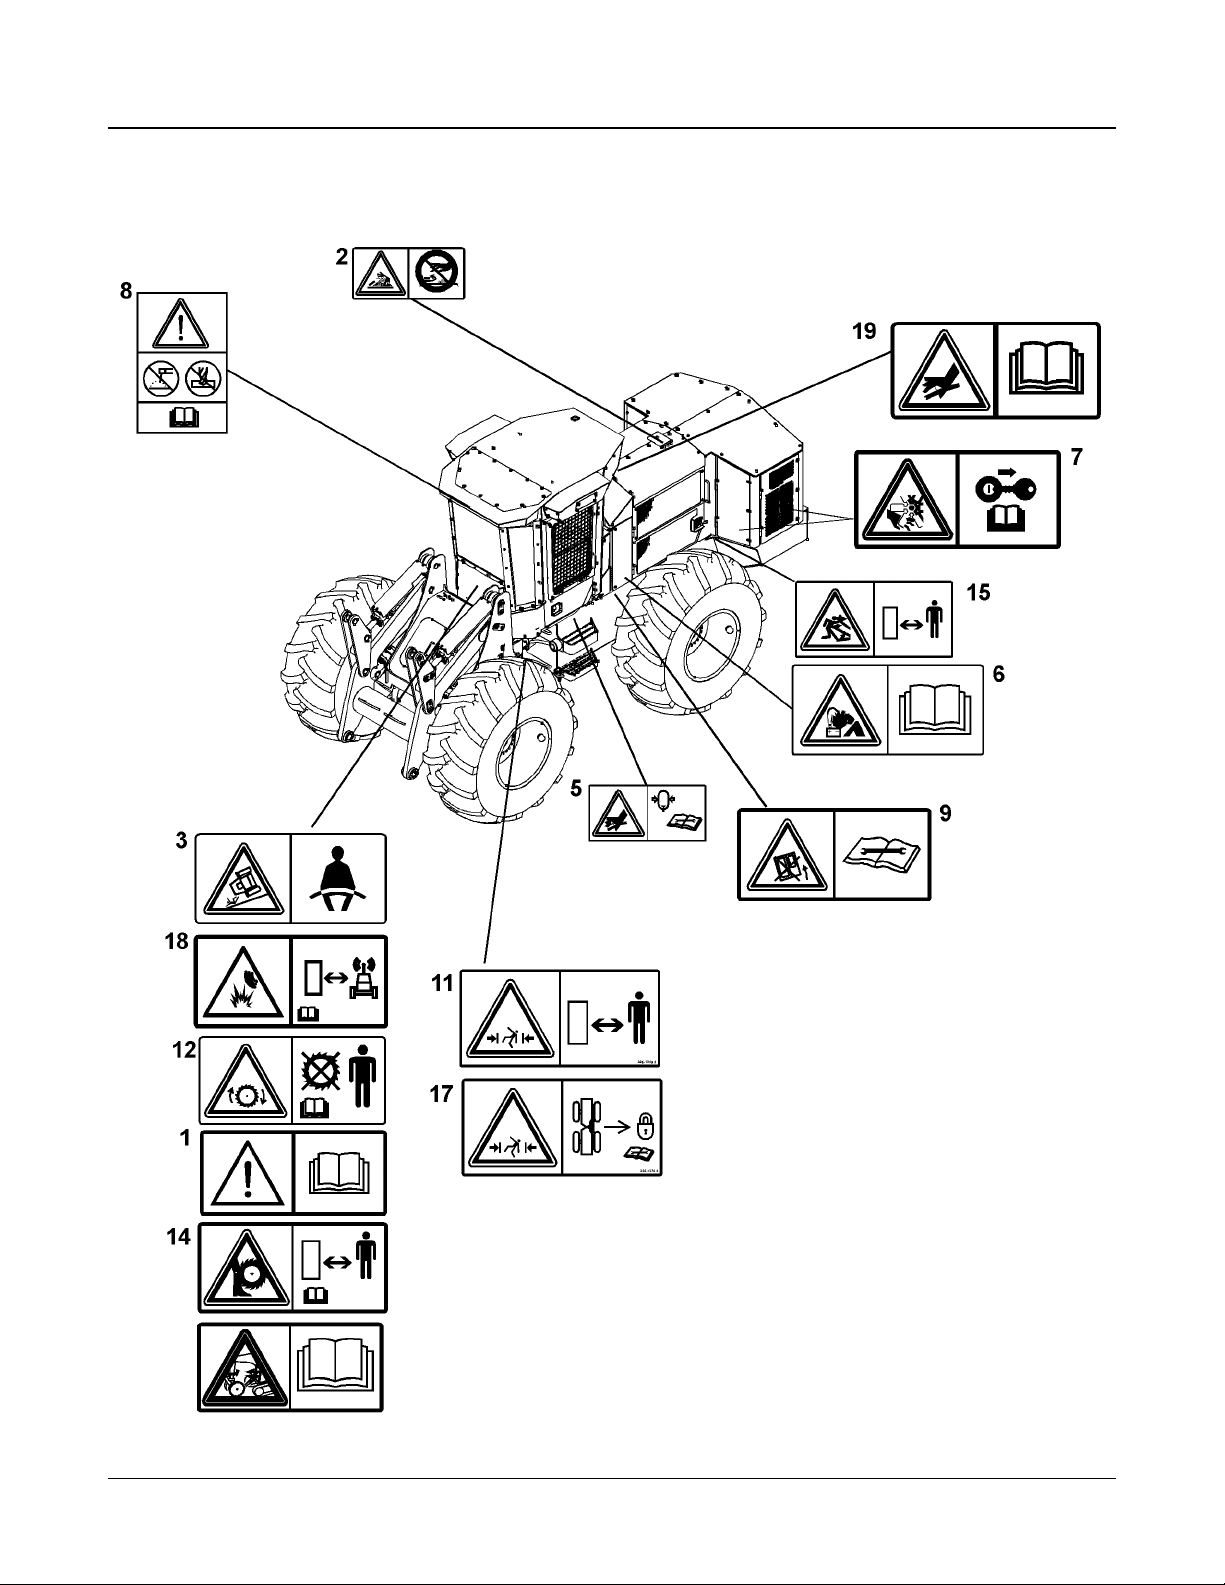
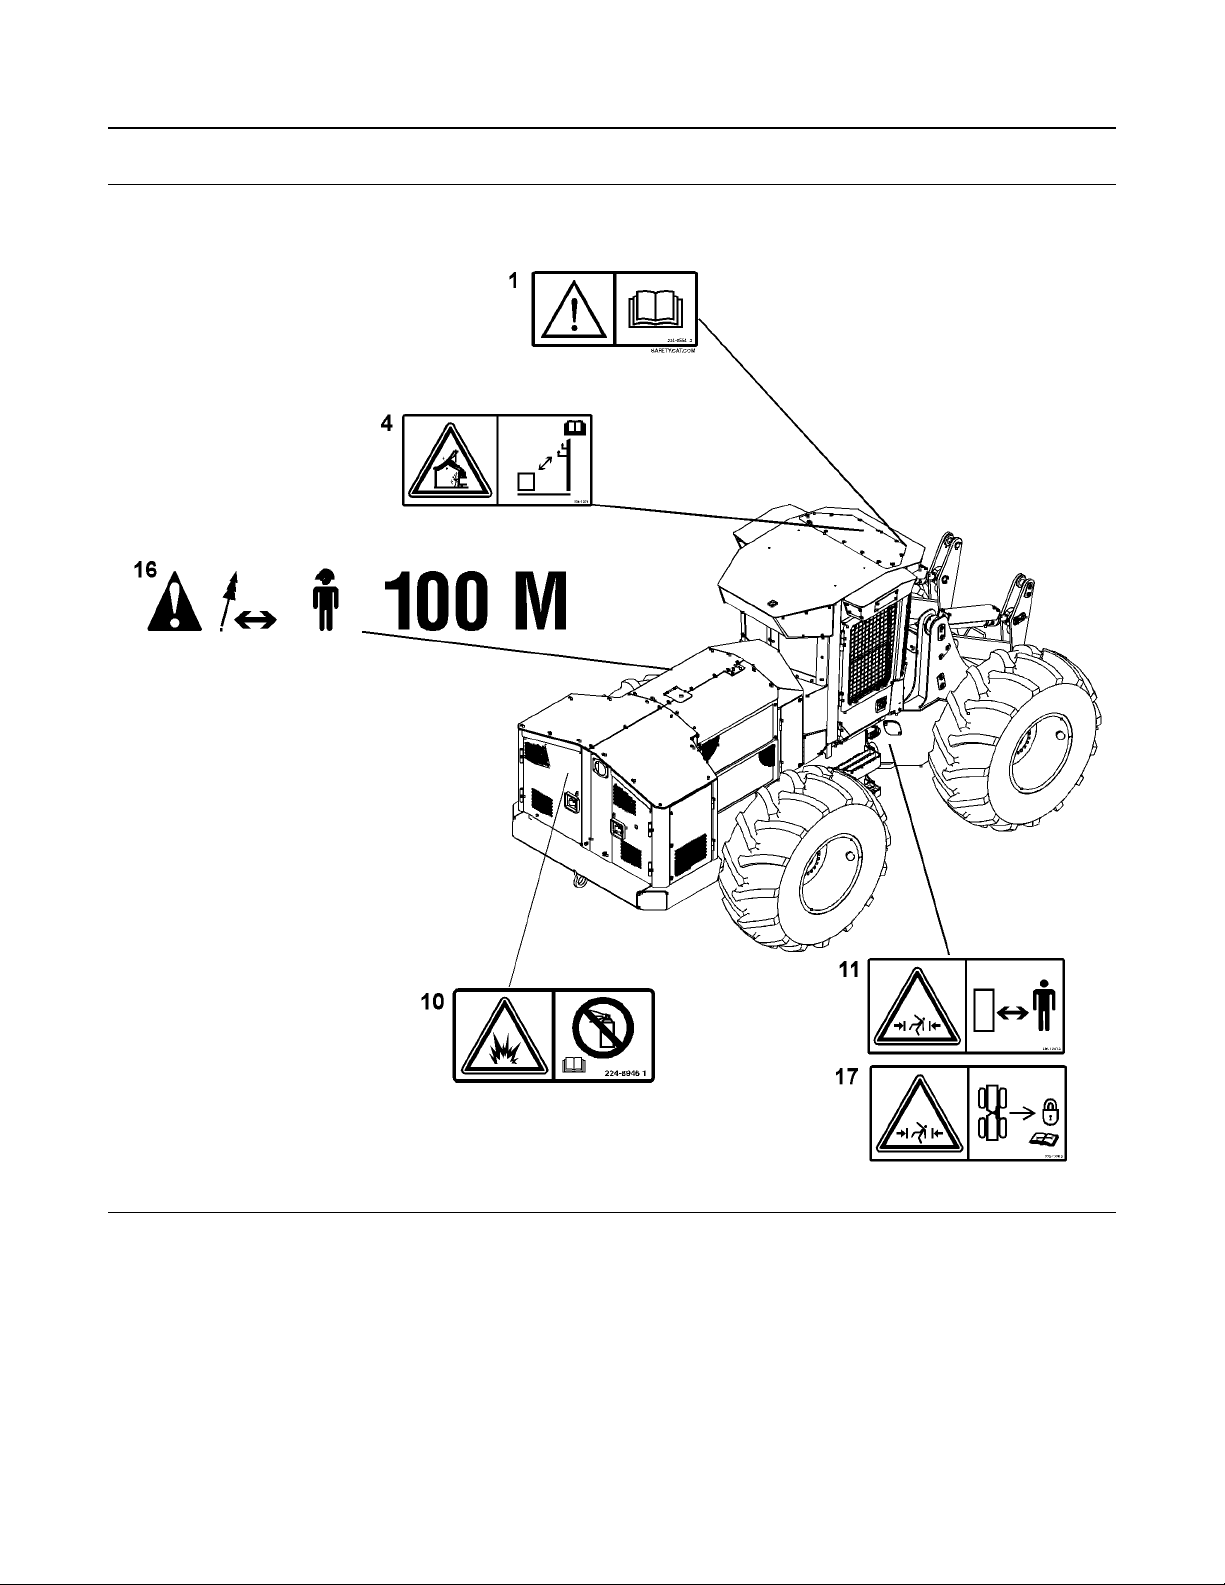
There are several specific safety messages on this
machine. The exact location of the hazards and the
description of the hazards are reviewed in this
section. Become familiarized with all safety
messages.
Make sure that all of the safety messages are legible.
Clean the safety messages or replace the safety
messages if you cannot read the words. Replace the
illustrations if the illustrations are not visible. When
you clean the safety messages, use a cloth, water,
and soap. Do not use solvent, gasoline, or other
harsh chemicals to clean the safety messages.
Solvents, gasoline, or harsh chemicals could loosen
the adhesive that secures the safety message. Loose
adhesive will allow the safety message to fall.
Replace any safety message that is damaged or
missing. If a safety message is attached to a part of
the machine that is replaced, install a safety message
on the replacement part. Any Prentice dealer can
provide new safety messages.
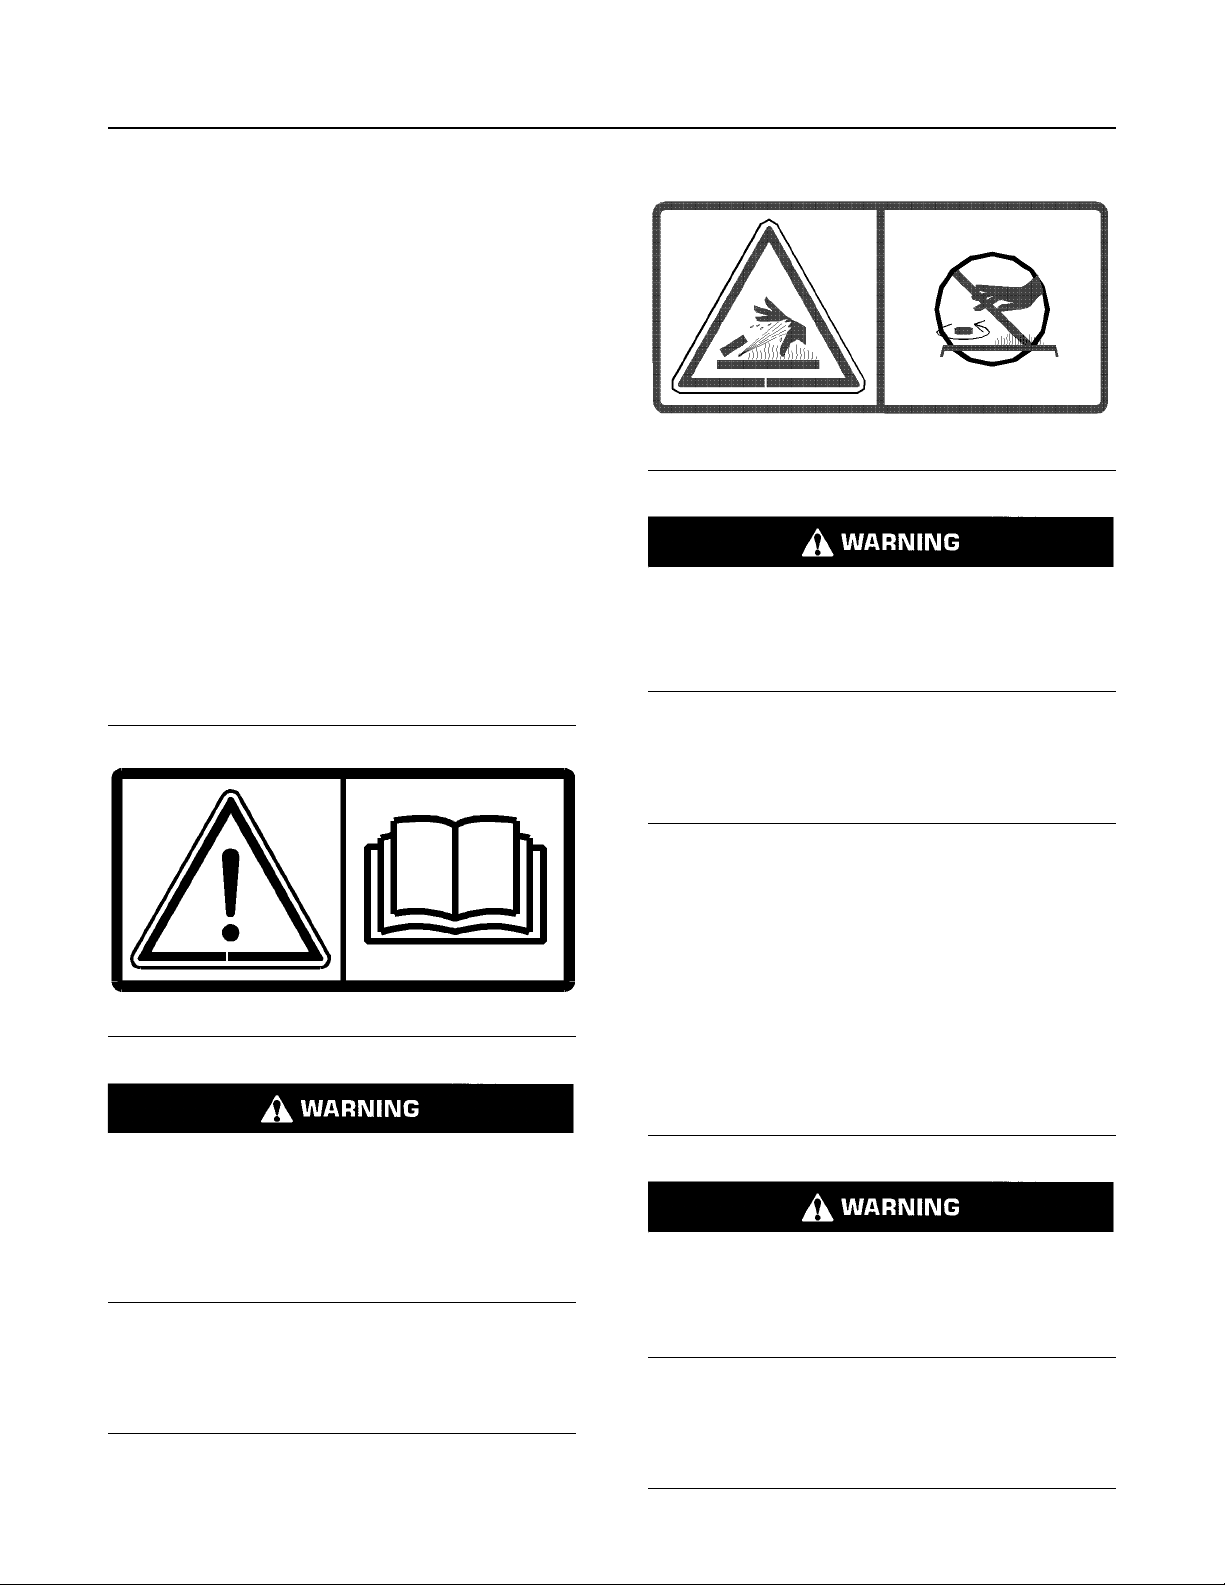
Do Not Operate (1)
Safety Message (1) is positioned in the cab on the
cab front cross member.
Illustration 5 g01053324
PRESSURIZED SYSTEM: HOT COOLANT CAN
CAUSE SERIOUS BURN. TO OPEN CAP, STOP
ENGINE, WAIT UNTIL RADIATOR IS COOL. THEN
LOOSEN CAP SLOWLY TO RELIEVE THE
PRESSURE.
Illustration 4 g01055734
Do not operate or work on this equipment unless
you have read and understand the instructions
and warnings in the Operation and Maintenance
Manual. Failure to follow the instructions or heed
the warnings could result in injury or death. Contact any Prentice dealer for replacement manuals.
Proper care is your responsibility.
Hot Fluid Under Pressure (2)
Seat Belt (3)
Safety Message (3) is positioned on the cab front
cross member of the machine.
Illustration 6 g01370908
A seat belt should be worn at all times during machine operation to prevent serious injury or death
in the event of an accident or machine overturn.
Failure to wear a seat belt during machine operation may result in serious injury or death.
Safety Message (2) is located on the inside of the
radiator access cover.
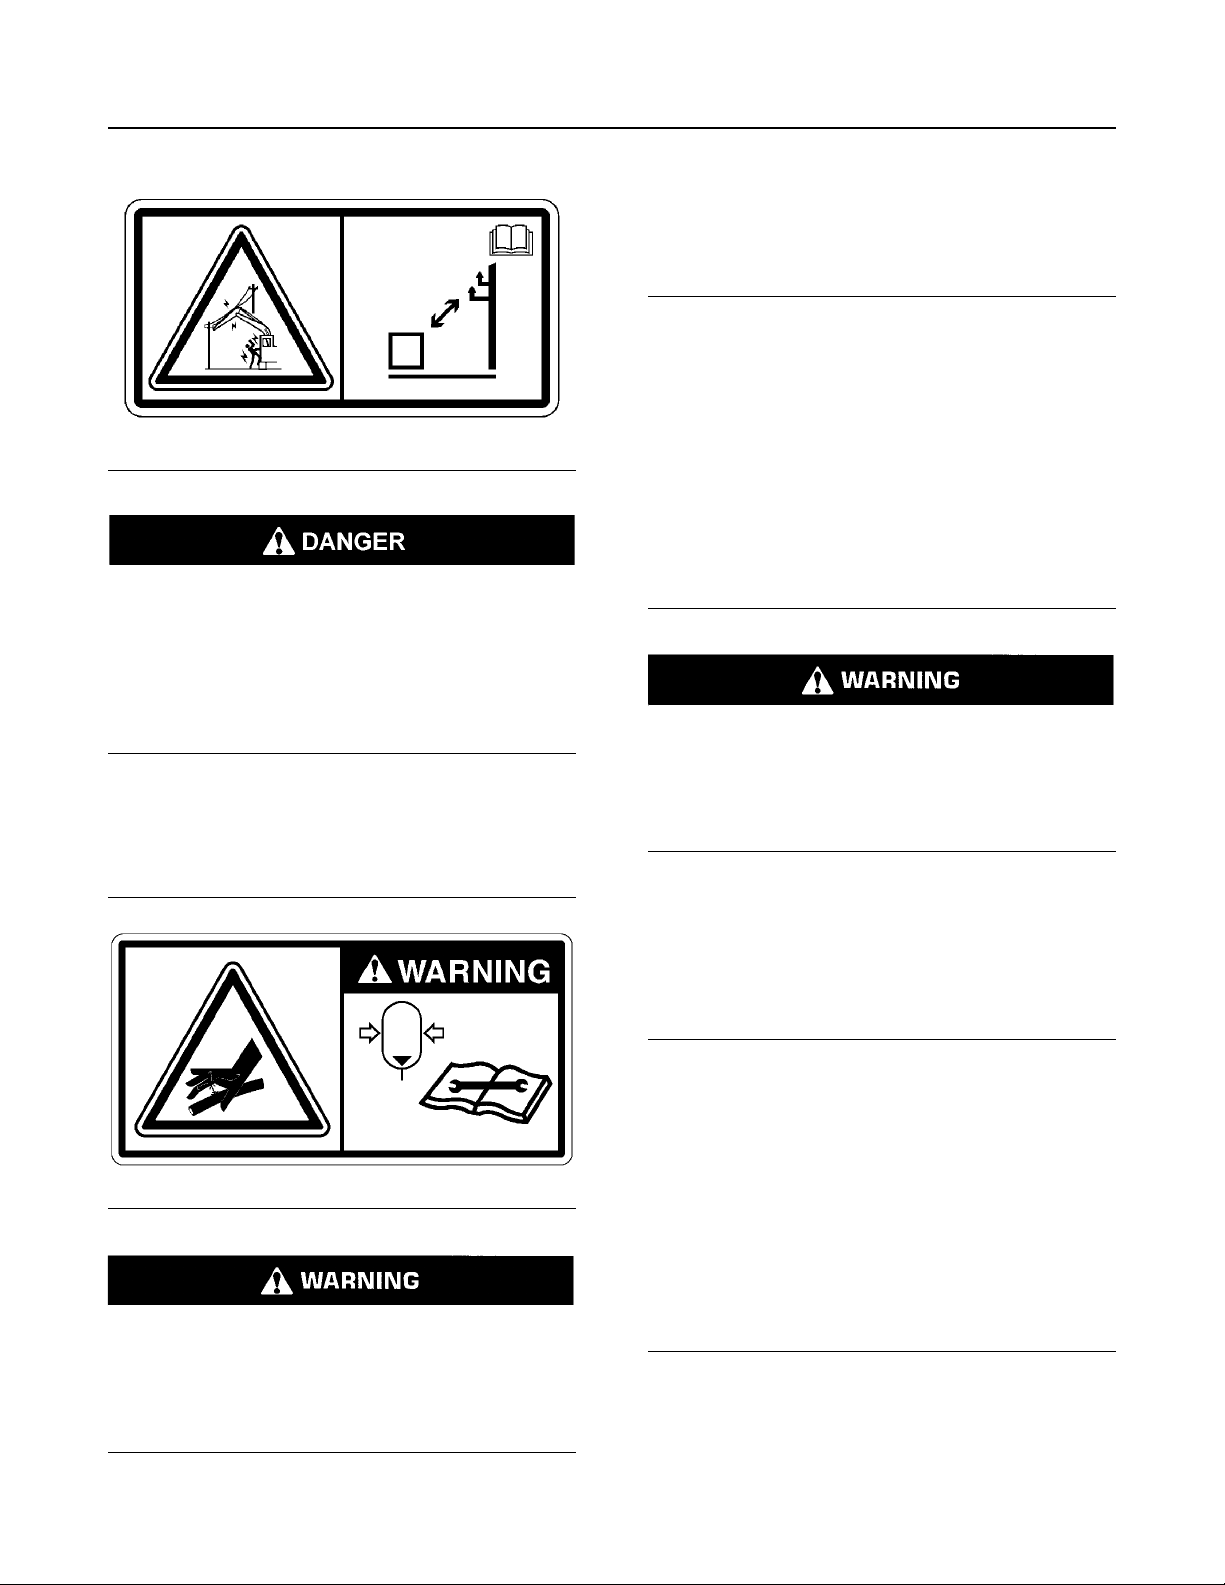
Electrocution (4)
This safety message (4) is located inside the cab on
the cab front cross member.
Page 10
10 SEBU9024
Safety Section
Safety Messages
Improper Connections for Jump
Start Cables (6)
Safety Message (6) is on the inside of the battery
compartment cover.
Illustration 7 g01506733
Electrocution Hazard! Keep the machine and
attachments a safe distance from electrical
power. Stay clear 3 m (10 ft) plus twice the line
insulator length. Read and understand the
instructions and warnings in the Operation and
Maintenance Manual. Failure to follow the
instructions and warnings will cause serious
injury or death
Accumulator Under High Pressure
(5)
Illustration 9 g01370909
Explosion Hazard! Improper jumper cable connections can cause an explosion resulting in serious injury or death. Batteries may be located in
separate compartments. Refer to the Operation
and Maintenance Manual for the correct jump
starting procedure.
Safety message (5) is located on the accumulator.
Illustration 8 g01223282
Hydraulic accumulator contains gas and oil under
high pressure. Improper removal or repair procedures could cause severe injury. To remove or repair, instructions in the service manual must be
followed. Special equipment is required for testing and charging.
Refer to Operation and Maintenance Manual, “Engine
Staring with Jump Start Cables”.
Reversing Fan (Severing Hand)(7)
Safety Message (7) is positioned on the left-hand
hood and on the side door.
Illustration 10 g01460652
Page 11
SEBU9024 11
Safety Section
Safety Messages
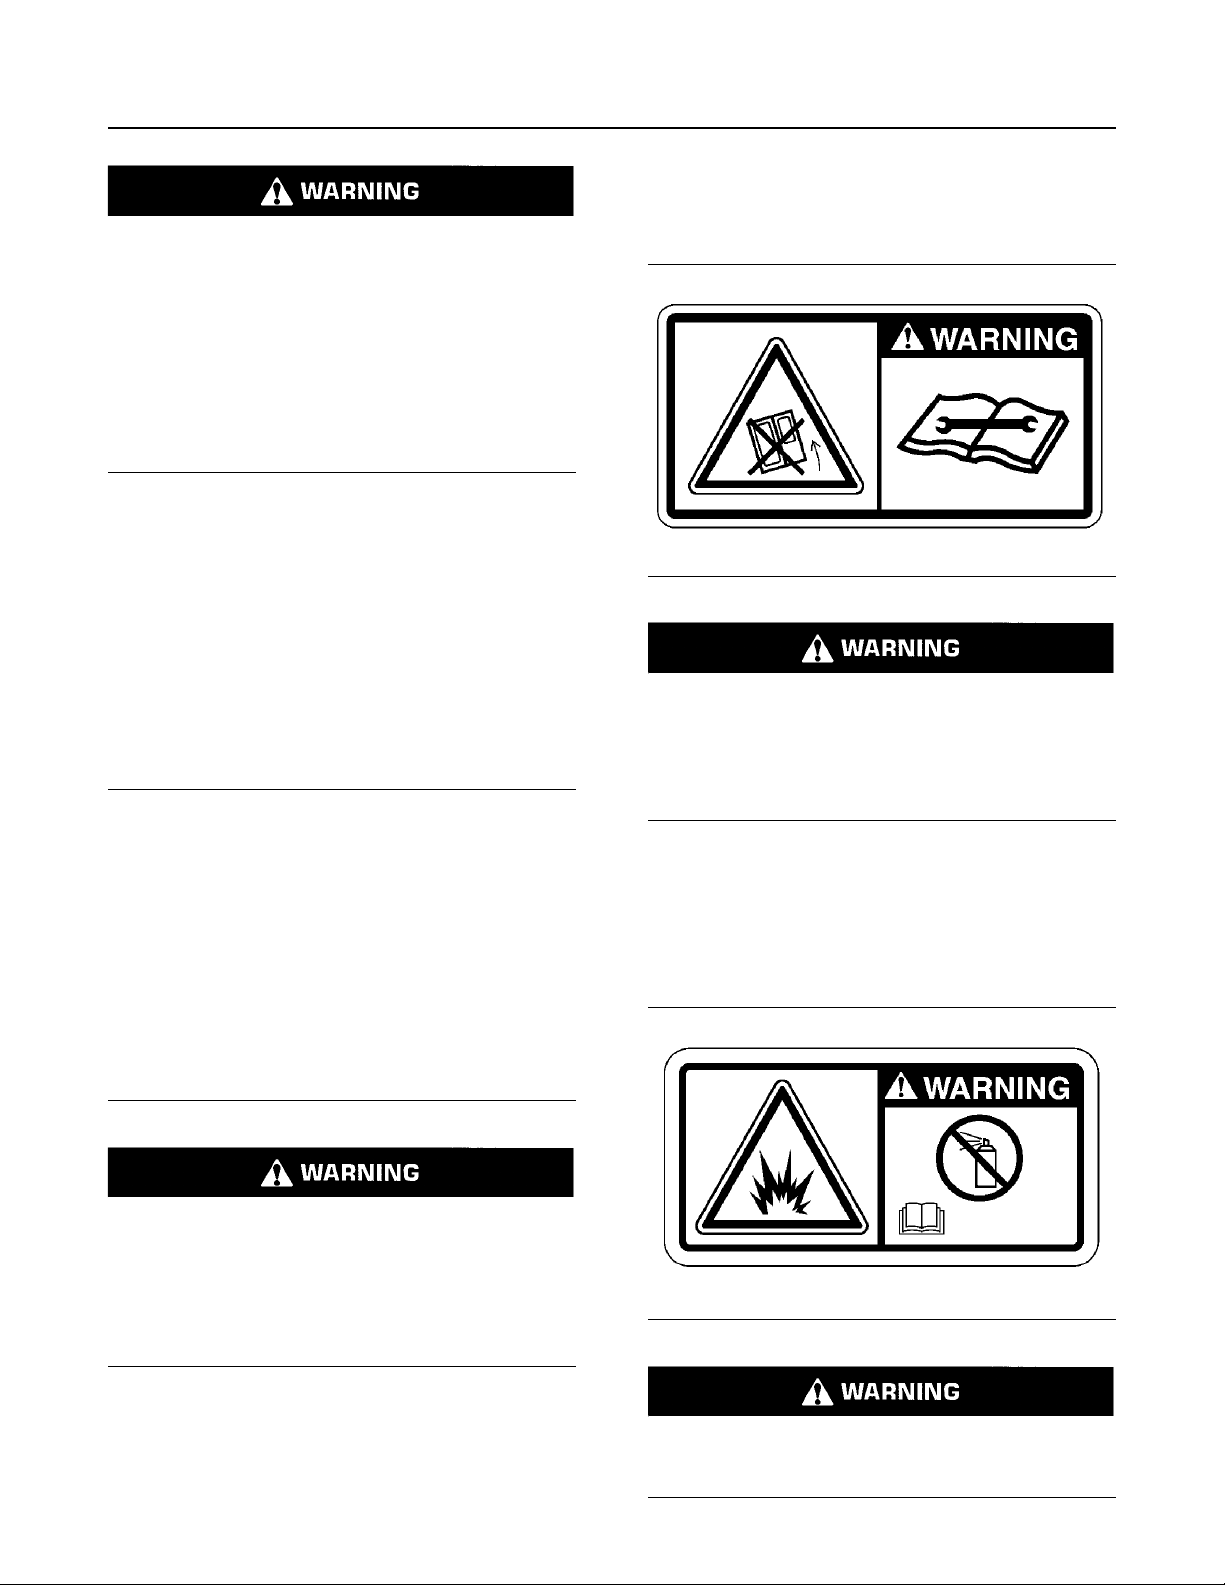
Cab Tilting (9)
Rotating fan blades can result in personal injury
or death.
Stop the engine and allow the fan to come to a
complete stop before making any test or
adjustment.
Before starting the engine, make sure all of the
finger guards are installed and the guard door is
closed. Do not allow any tools or test equipment
to protrude or vibrate into the path of the rotating
fan blades.
Rotating fan could cause serious injury or death. Turn
off key to shut down machine. Read the Operator
manual for further instruction.
Rotating serpentine belt and alternator fan could
cause serious injury or death. Turn off key to shut
down machine.
Do Not Weld On The ROPS & FOPS
(8)
Safety message (8) is positioned on the inside rear
right-hand post right of the cab.
This safety message (9) is located inside the fuel fill
access door.
Illustration 12 g01115087
Do not tilt the cab when occupied. Before tilting
the cab remove all loose articles from the cab, secure all windows and emergency exits, and then
close the cab and cab riser doors. Failure to do so
can result in personal injury or damage to the
machine.
Illustration 11 g02944777
Structural damage, an overturn, modification, alteration, or improper repair can impair the structural protection capability thereby voiding this
certification. Do not weld on or drill holes in the
structure. Consult a Prentice dealer to determine
the structural limitations without voiding required
safety certification.
This machine has been certified to the standards that
are listed on the certification plate.
Refer to Operation and Maintenance Manual, “Cab
Tilting” for further information.
Aerosol Starting Aid (10)
This safety message (10) is located on the air cleaner
cover, inside the left-hand engine compartment.
Illustration 13 g01067463
Do not use aerosol types of starting aids such as
ether. Such use could result in an explosion and
personal injury.
Page 12
12 SEBU9024
Safety Section
Safety Messages
Refer to Operation and Maintenance Manual, “Engine
Starting” for further information.
No Clearance (11)
This safety message (10) is located on both sides of
the front frame near the articulation lock.
Illustration 14 g01371644
Crushing Hazard! Stay back a safe distance.
There is no clearance for a person in this area
when the machine turns. Failure to follow these
instructions could cause serious injury or death.
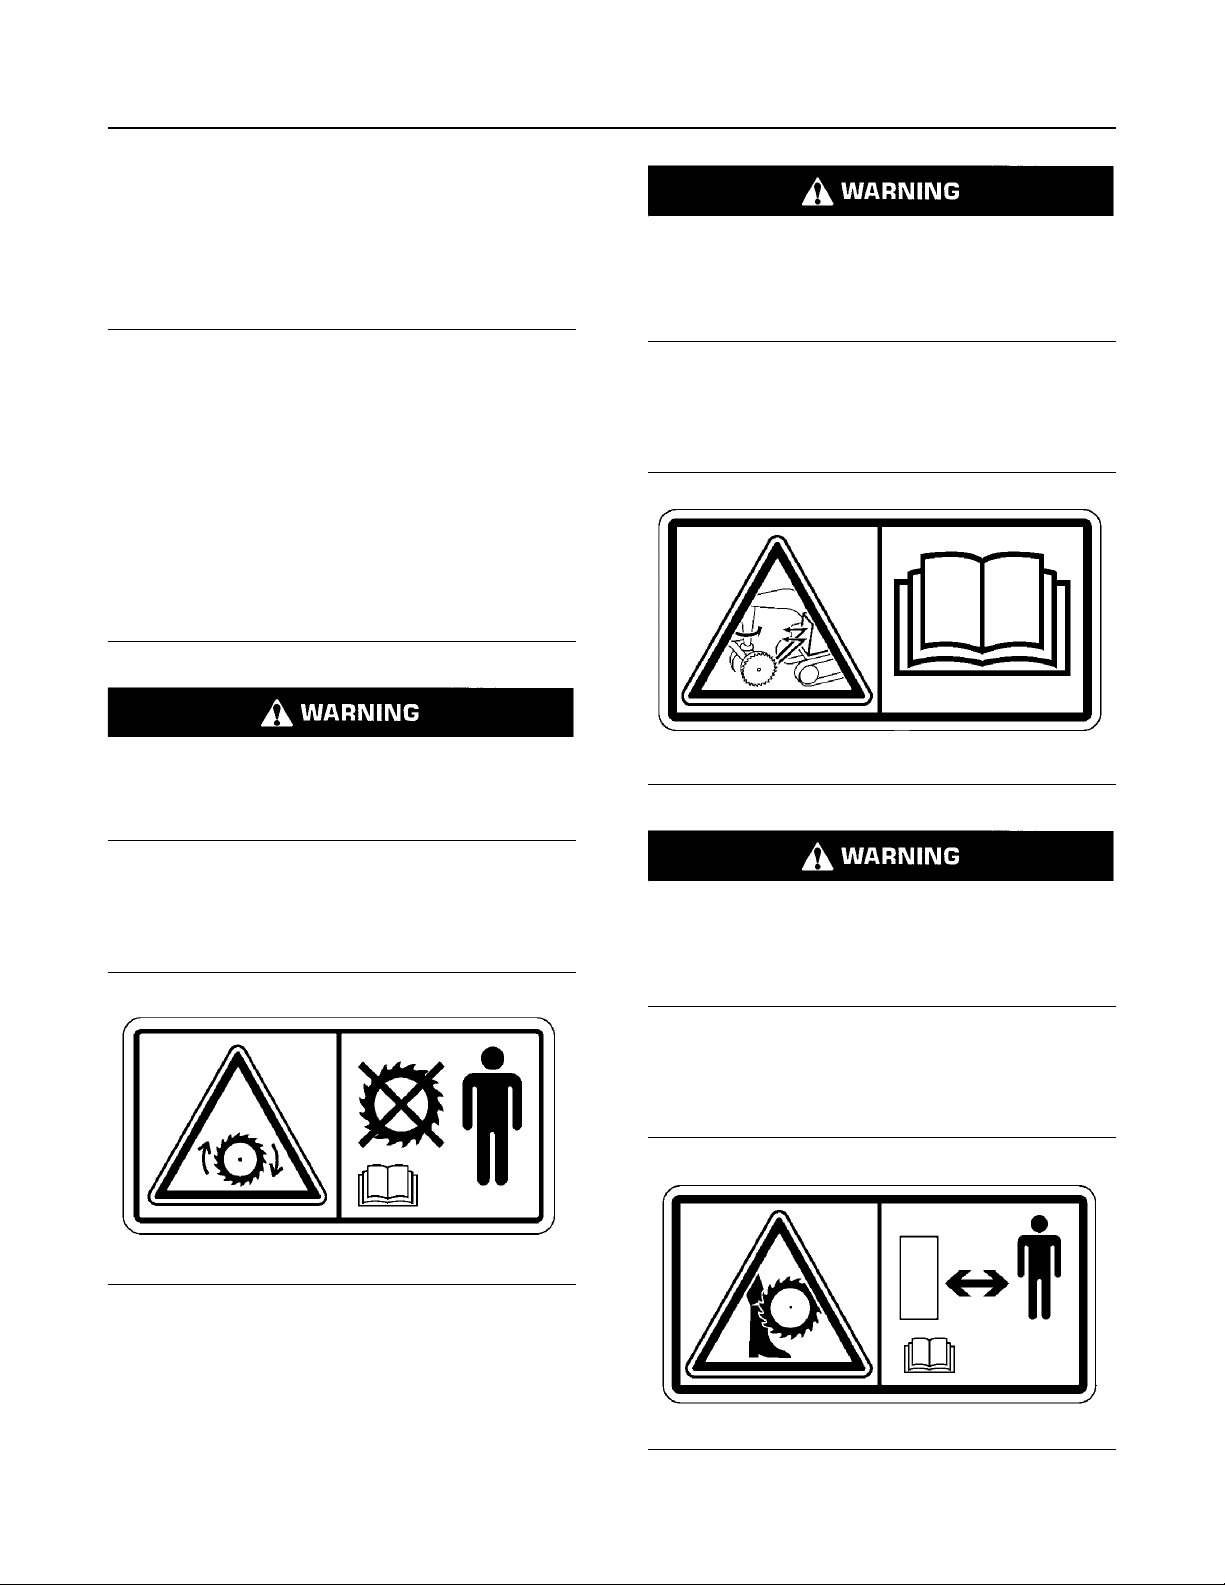
Do not operate the saw near other personnel.
Serious injury or death can occur by contacting
the moving blade or from flying objects. Read and
understand the instructions and warnings in the
Operation and Maintenance Manual.
Flying Debris (13)
This safety message (13) is located on the cab front
cross member.
Illustration 16 g01506755
Do Not Operate Saw (12)
This safety message (12) is located inside the cab on
the front console.
Illustration 15 g01506693
Flying Debris Hazard! Do not position saw with
discharge directed towards cab. Flying objects
from the rotating saw will cause serious injury
and/or death. Read and follow the instructions in
the Operation and Maintenance Manual.
Stay Back From Saw (14)
This safety message (14) is located on the front
console of the machine.
Illustration 17 g01505753
Page 13
SEBU9024 13
Safety Section
Safety Messages
Saw Blade Hazard. Do not operate the saw near
other personnel. Serious injury or death can occur from contacting a moving saw blade. Read
and follow the instructions in the Operation and
Maintenance Manual.
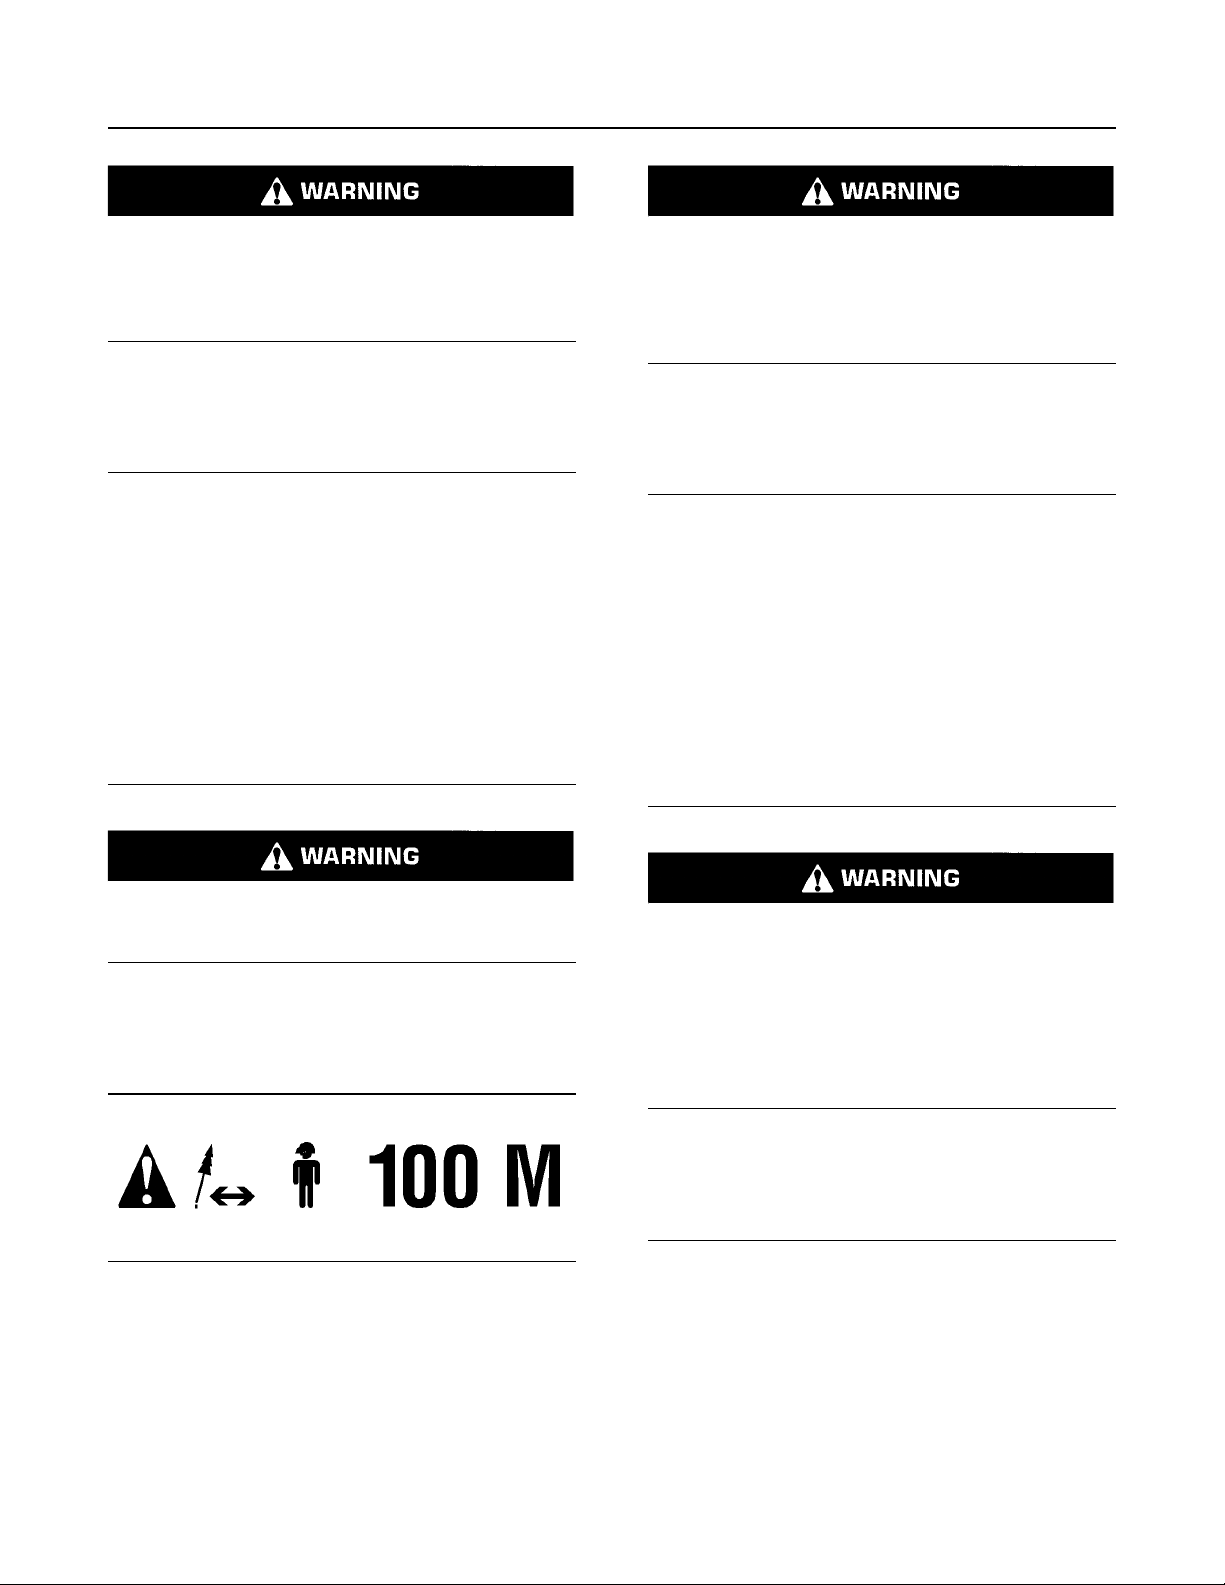
Flying Debris (15)
This safety message (15) is located on each side of
the stick close to the attachment.
Illustration 18 g01404266
Watch for falling trees when the wheel feller
buncher is in operation. Personal injury or death
can occur from being struck by falling trees. Keep
all personnel 100 m (300 feet) from the wheel feller
buncher when the wheel feller buncher is in
operation
Crush Hazard (17)
This safety message (17 ) is located on the front
frame near the articulation lock.
Illustration 20 g01371647
Stay clear of this work tool during operation. Flying objects from this work tool could result in injury or death.
Warning Distance (16)
This safety message (16 ) is located on the rear
frame, one film on each side.
Illustration 19 g02672426
Crushing Hazard. There is no clearance for a person in this area when the machine turns. Severe
injury or death from crushing could occur. Connect the steering frame lock between front and
rear frames before lifting, transporting, or servicing the machine in the articulation area.
Disconnect the steering lock and secure before
resuming operation.
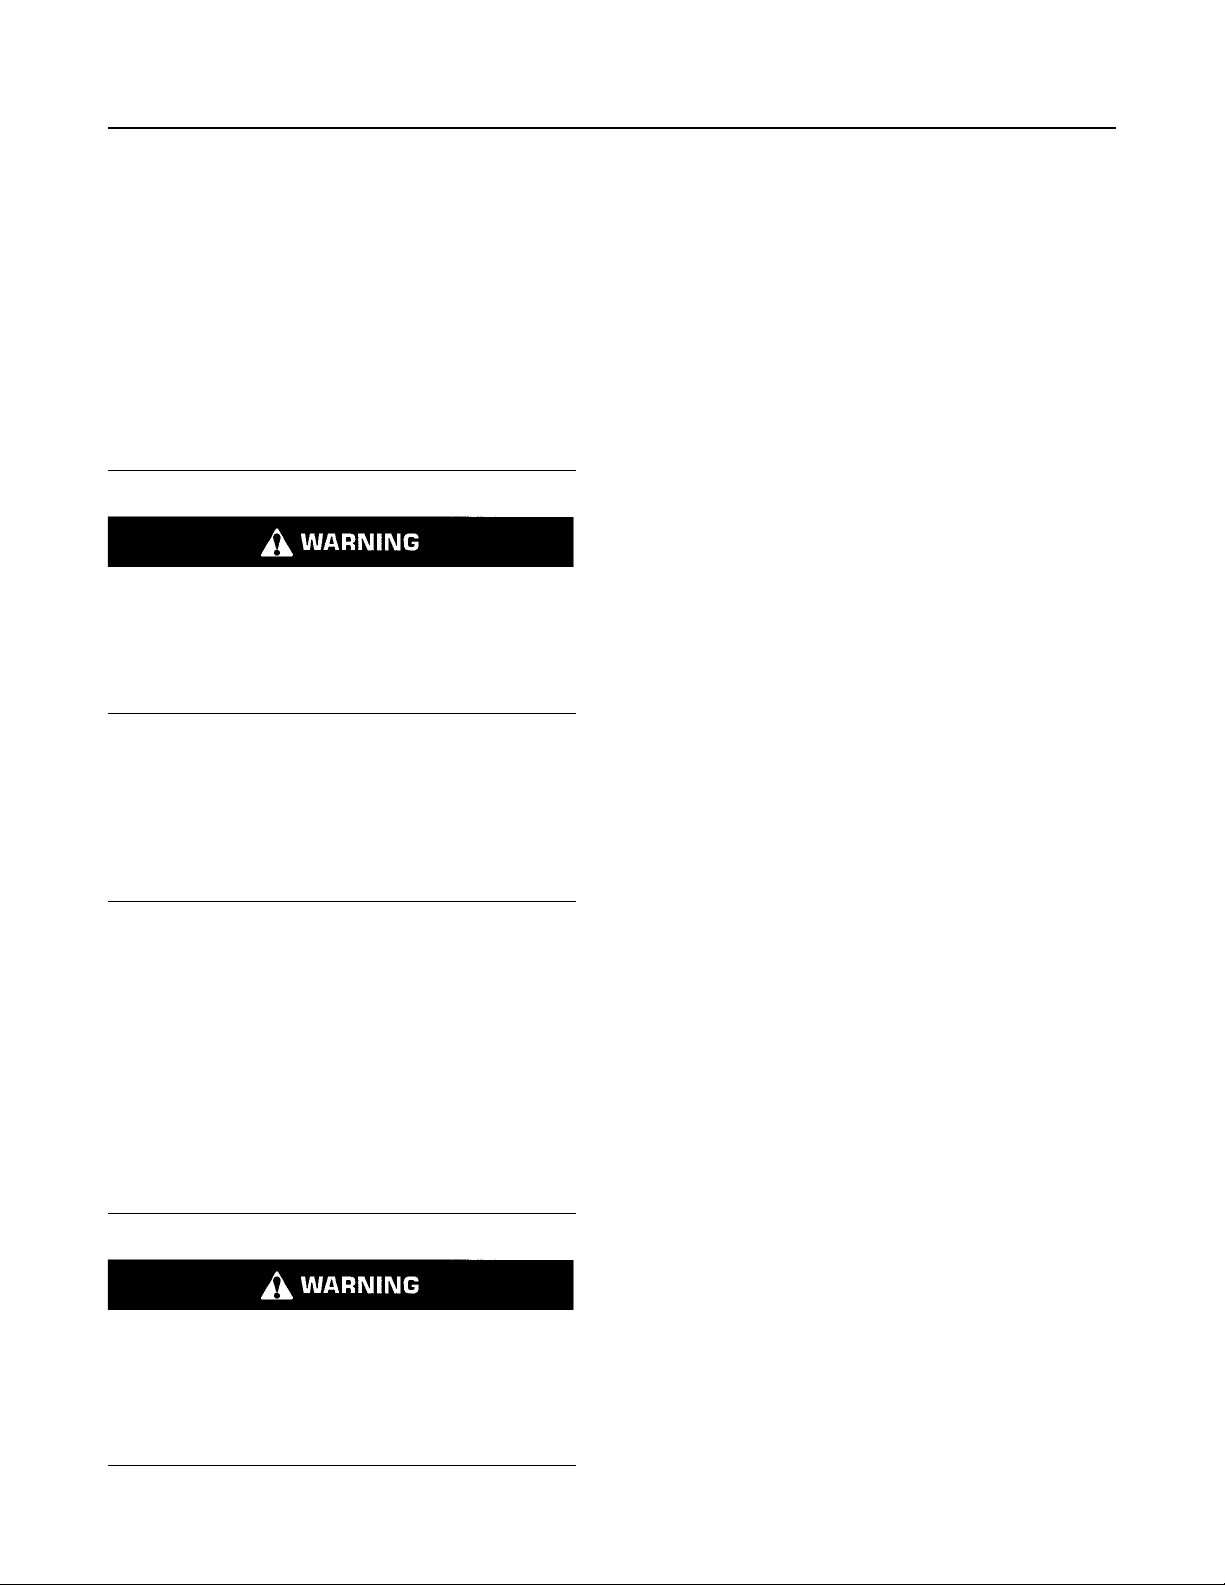
Product Link (18)
Safety Message (18) is positioned in the cab on the
front console.
Page 14
14 SEBU9024
Safety Section
Safety Messages
Illustration 21 g01370917
This machine is equipped with a Prentice Product
Link communication device which should be deactivated in or near a blast site in compliance with
applicable legal requirements. Failure to do so
could cause interference with blasting operations
resulting in serious injury or death.
Refer to Special Instruction, REHS1642, “Operation
of the Product Link System” for additional information.
Fluid Under Pressure(19)
Safety Message (19) is positioned on the left-hand
side of the tank, behind the tank access panel.
Illustration 22 g01371642
Personal injury can result from escaping fluid
under pressure.
If a pressure indication is shown on the indicator,
push the release valve in order to relieve pressure
before removing any hose from the heat
exchanger.
Page 15
SEBU9024 15
Safety Section
Additional Messages
i05740939
Additional Messages
SMCS Code: 7000
Illustration 23 g02839937
Page 16
16 SEBU9024
Safety Section
Additional Messages
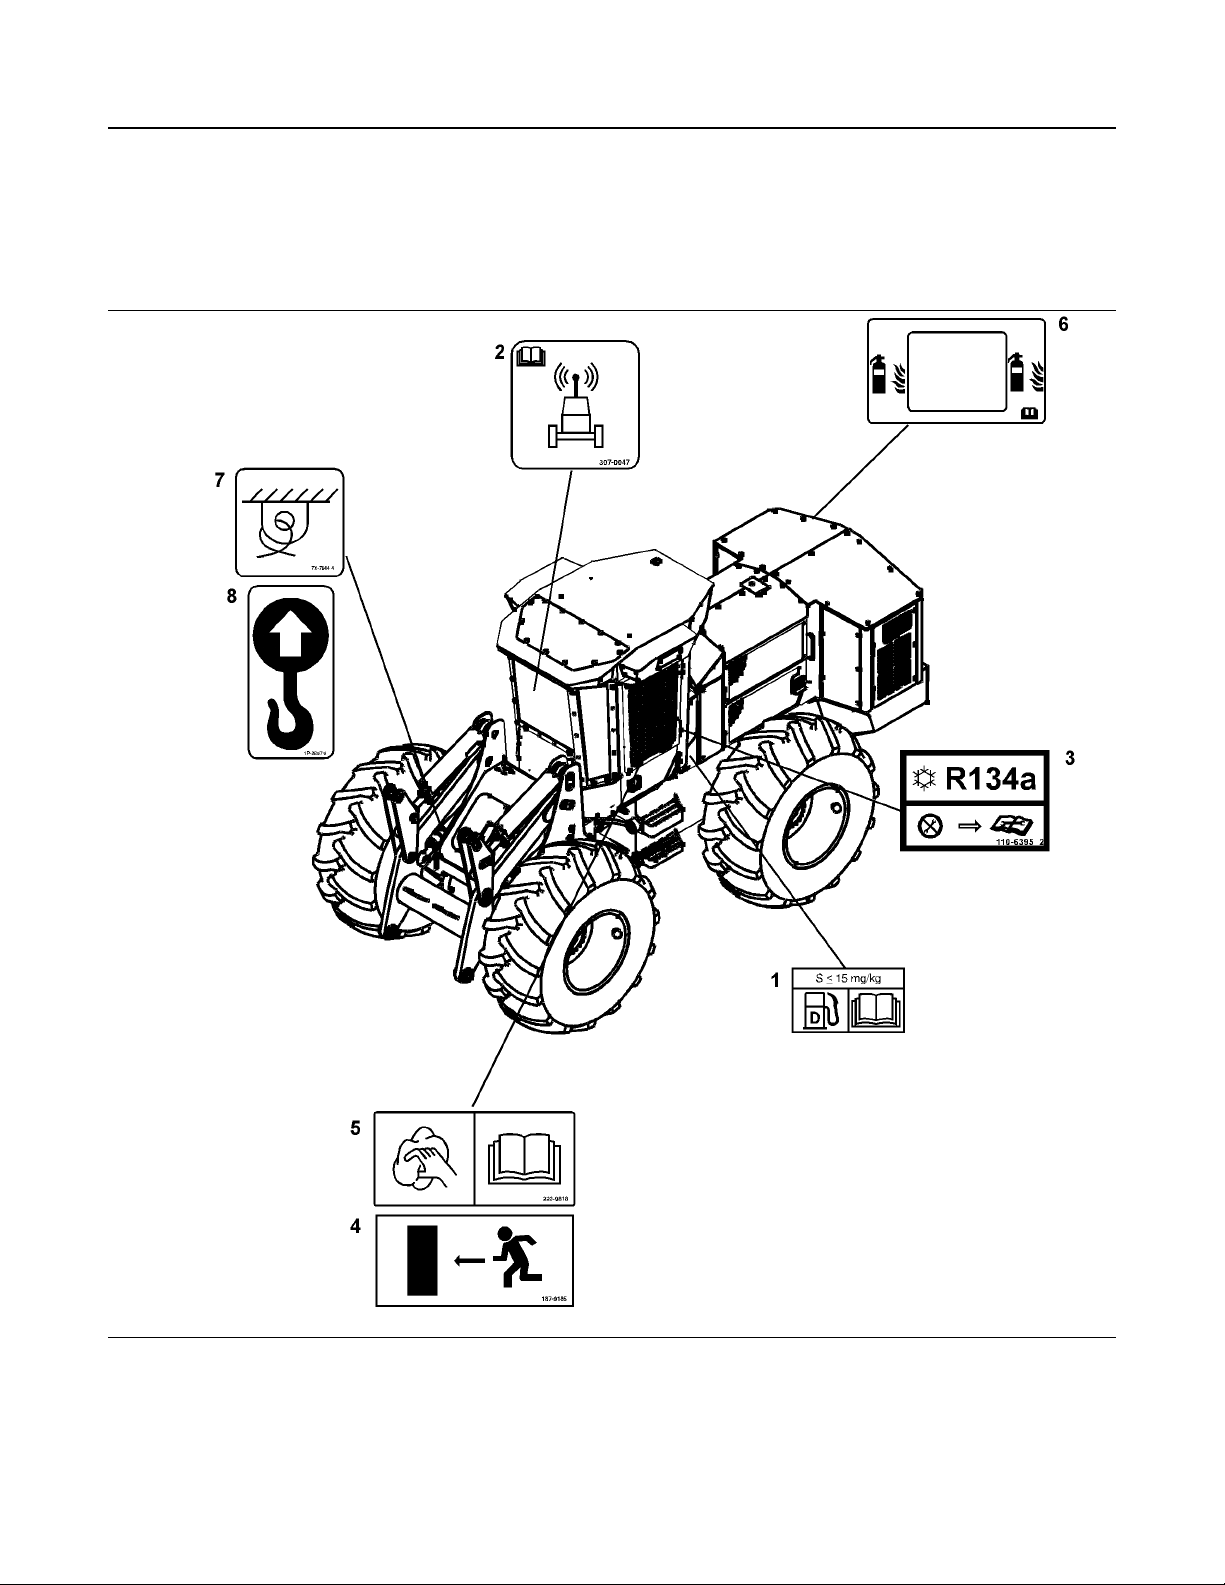
There are several specific messages on this
machine. The location of the messages and the
description of the messages are reviewed in this
section. Become familiarized with all messages.
Make sure that all of the messages are legible. Clean
the messages or replace the messages if you cannot
read the words. Replace the illustrations if the
illustrations are not legible. When you clean the
messages, use a cloth, water, and soap. Do not use
solvent, gasoline, or other harsh chemicals to clean
the messages. Solvents, gasoline, or harsh
chemicals could loosen the adhesive that secures the
messages. Loose adhesive will allow the messages
to fall.
Replace any message that is damaged, or missing. If
a message is attached to a part that is replaced,
install a message on the replacement part. Any
Prentice dealer can provide new messages.
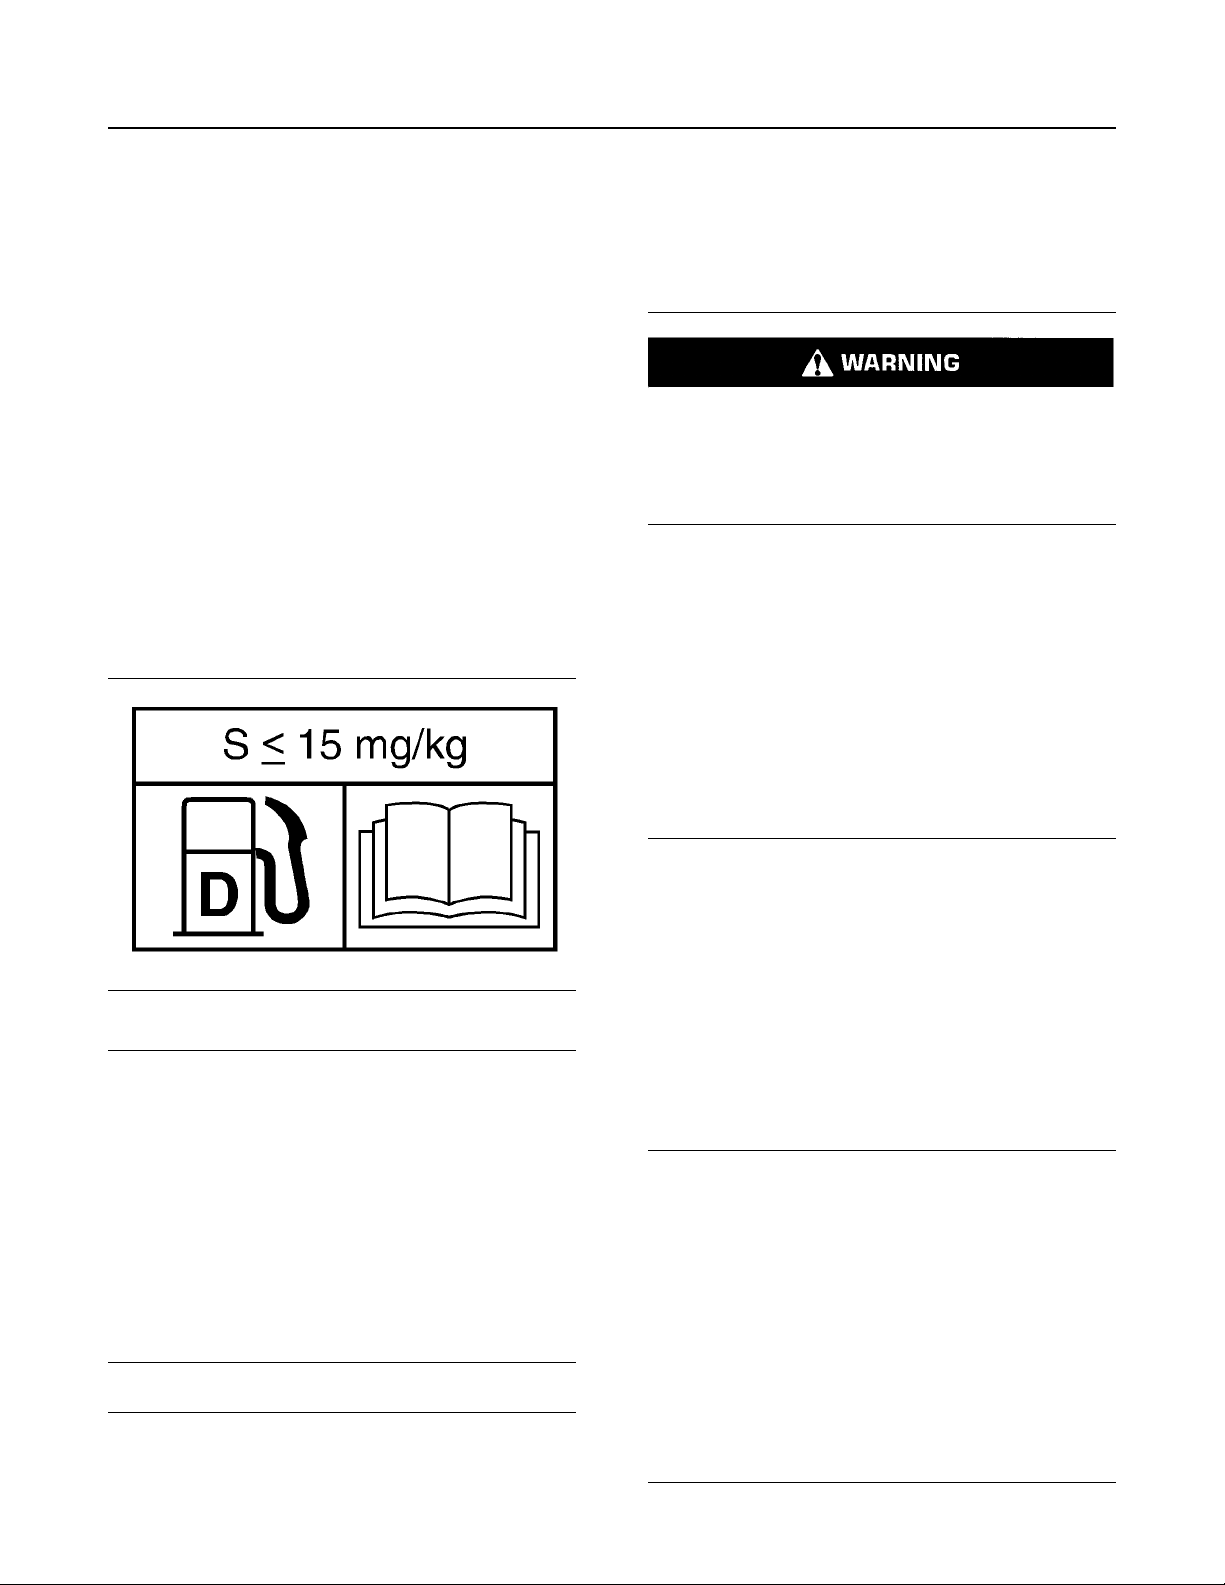
Diesel Fuel Requirements (1)
This message is located next to the fuel filler cap in
the fuel fill access compartment.
residual fuel that has been diluted with a lighter fuel
(cutter stock) so that they will flow. Blended fuels are
also referred to as heavy fuel oils. Severe component
wear and component failures will result if HFO type
fuels are used in engines that are configured to use
distillate fuel.
Mixing alcohol or gasoline with diesel fuel can
produce an explosive mixture in the engine crankcase or fuel tank.
Personal injury and damage to the engine may result. Prentice recommends against this practice.
There are many different types of fuel additives that
are available to use. Prentice does not generally
recommend the use of fuel additives.
Refer to Operation and Maintenance Manual,
SEBU6250, “Caterpillar Machine Fluids
Recommendations” for the use of fuel additives and
fuel conditioners.
Product Link (2)
Illustration 24 g03647556
Illustration 25 g02157153
NOTICE
Heavy Fuel Oil (HFO), Residual fuel, or Blended fuel
must NOT be used in Caterpillar diesel engines (except in 3600 Series HFO engines). Blended fuel is
If your machine is equipped with the Product Link
System, this additional message is located in the cab
on the right-hand counsel.
Illustration 26 g01418953
The Product Link System is a satellite or cellular
communication device that transmits information
regarding the machine back to Prentice and Prentice
dealers and customers. All logged events and
diagnostic codes that are available to the Prentice
Electronic Technician (ET) can be sent to satellite or
cellular tower. Information can also be sent to the
Product Link System. The information is used to
improve Prentice products and Prentice services.
Air Conditioner (3)
This message is located on the left side of the front
instrument panel.
Page 17
SEBU9024 17
Safety Section
Additional Messages
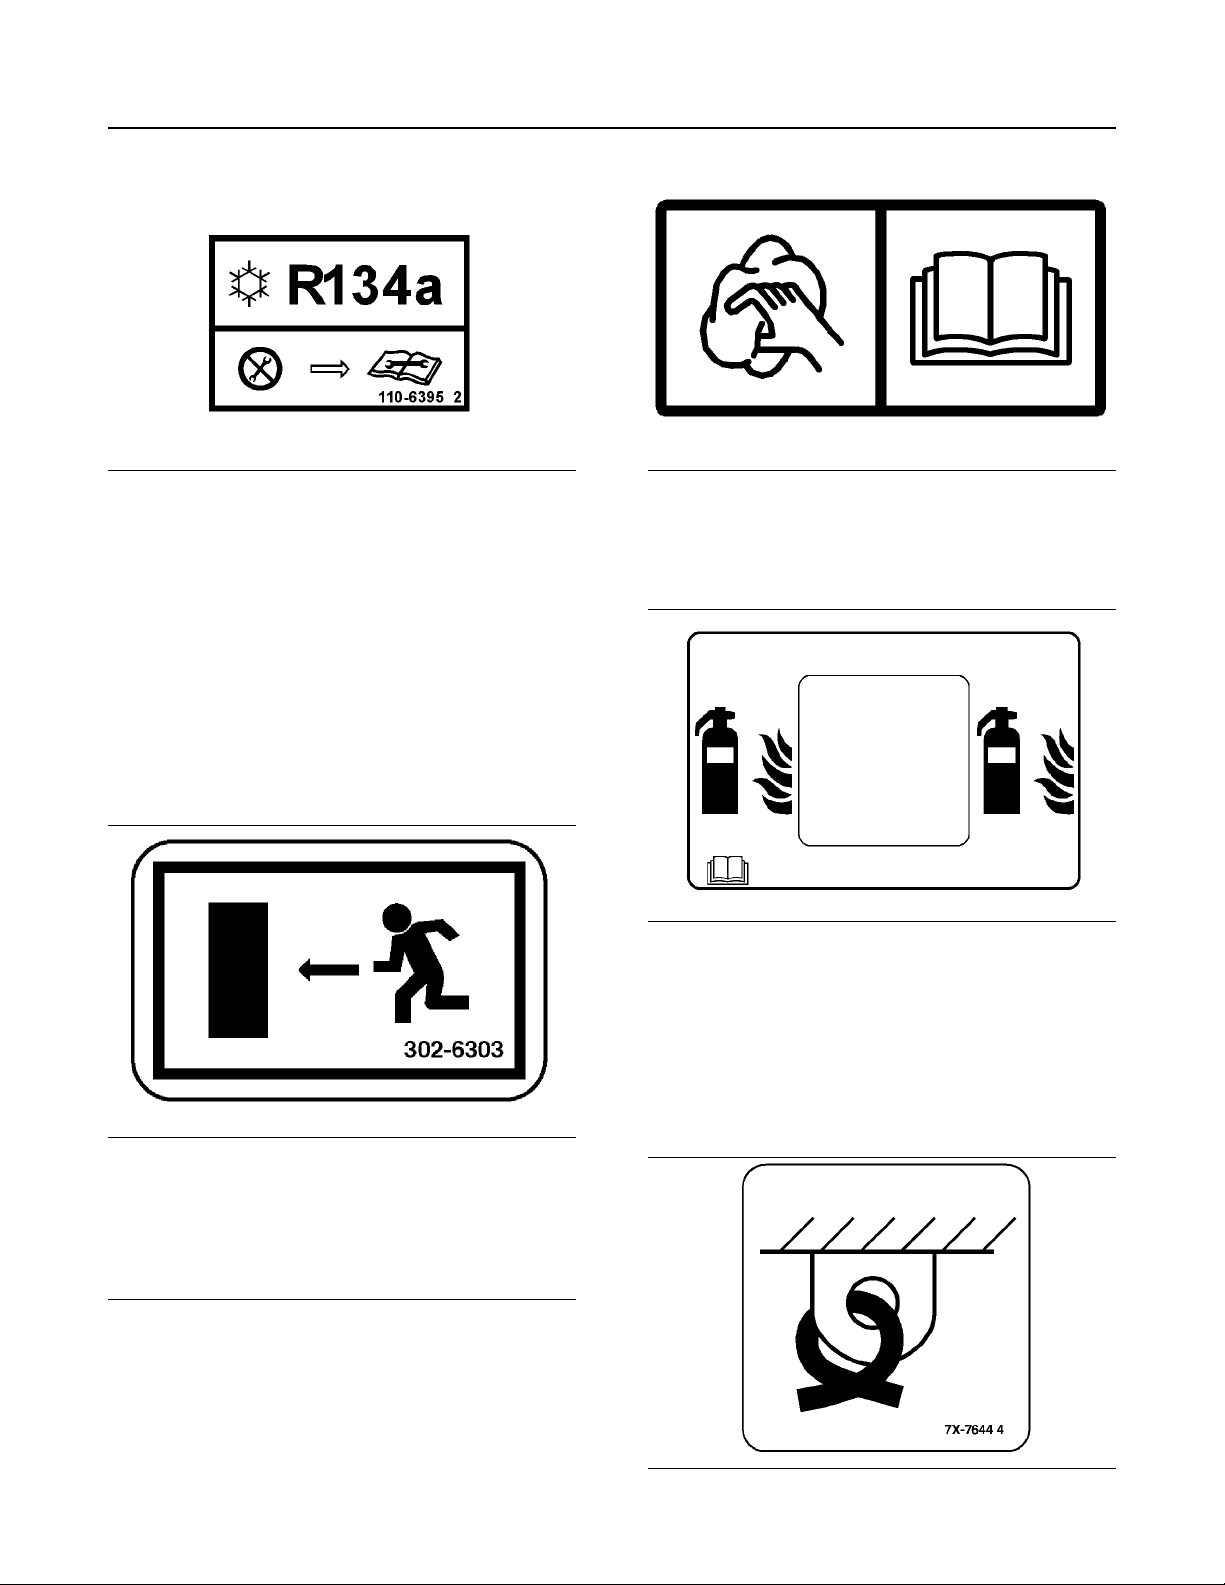
Illustration 27 g02665985
This message for the air conditioner has the
appropriate information for the following services: the
air conditioner lubricant, the refrigerant charge and
the refrigerant capacity.
Follow instruction in order to avoid engine damage.
Reference: See Operation and Maintenance
Manual, “Maintenance Interval Schedule” for all
maintenance recommendations.
Alternate Exit (4)
Two messages are located on both side windows of
the cab.
Illustration 29 g00930685
Reference: For more information, refer to Operation
and Maintenance Manual, “Windows - Clean”.
Fire Points (Engine)(6)
Illustration 30 g02095974
This message describes the fire points that are
available on the engine compartments. Use the
apertures in order to suppress fire hazards in the
engine compartment.
Illustration 28 g01422244
Alternate exit
Window Cleaning (5)
Two messages are located on both side windows of
the cab.
Do not use an unsafe method in order to suppress fire
hazards in the engine compartment.
Tie-Downs (7)
Illustration 31 g02666217
Page 18
18 SEBU9024
Safety Section
General Hazard Information
Illustration 34 g02666221
Lift Area Film
Read “Towing the Machine” and “Lifting and Tying
Down the Machine” in this manual for more
information.
i05740940
General Hazard Information
SMCS Code: 7000
Illustration 32 g02666219
Rear Frame Tie Down Area
Illustration 33 g02666225
Front Frame Tie Down Area
Also, two locations on each of the front and rear axles
are for tying down the machine or towing the
machine. Do not use these tie-downs to lift the
machine.
Illustration 35 g00104545
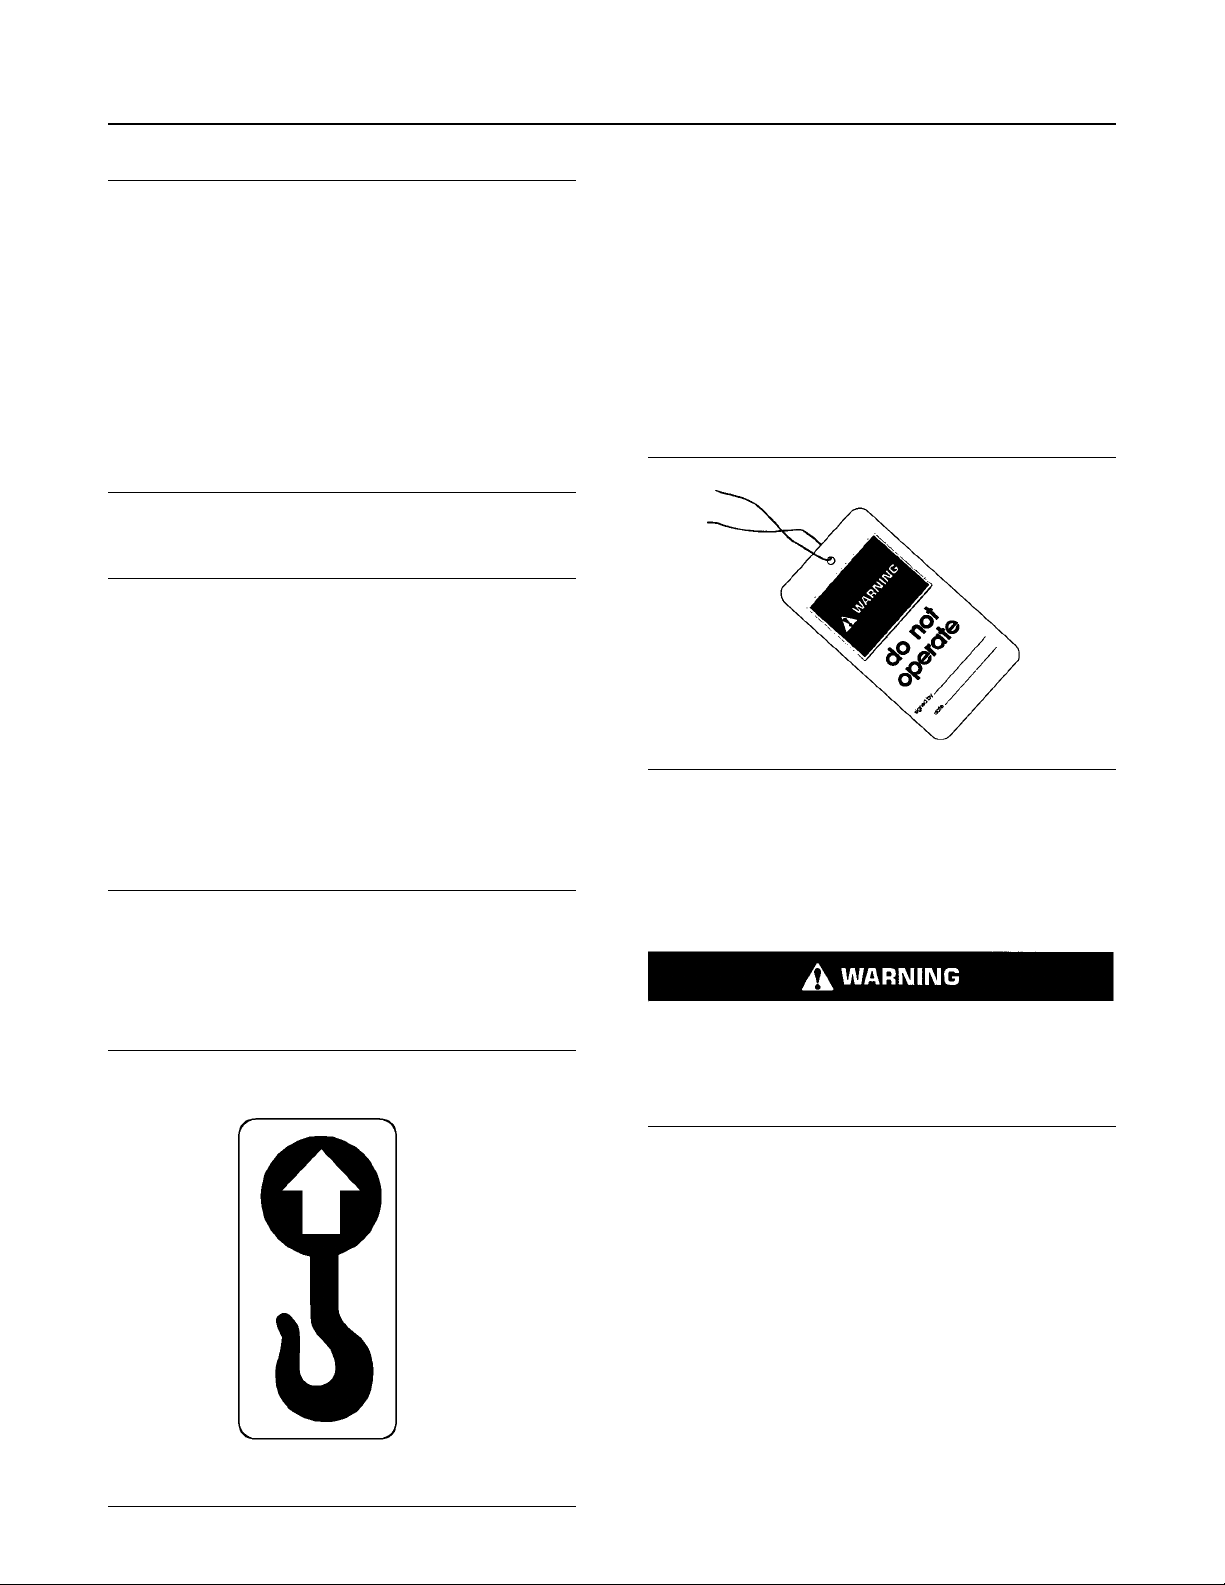
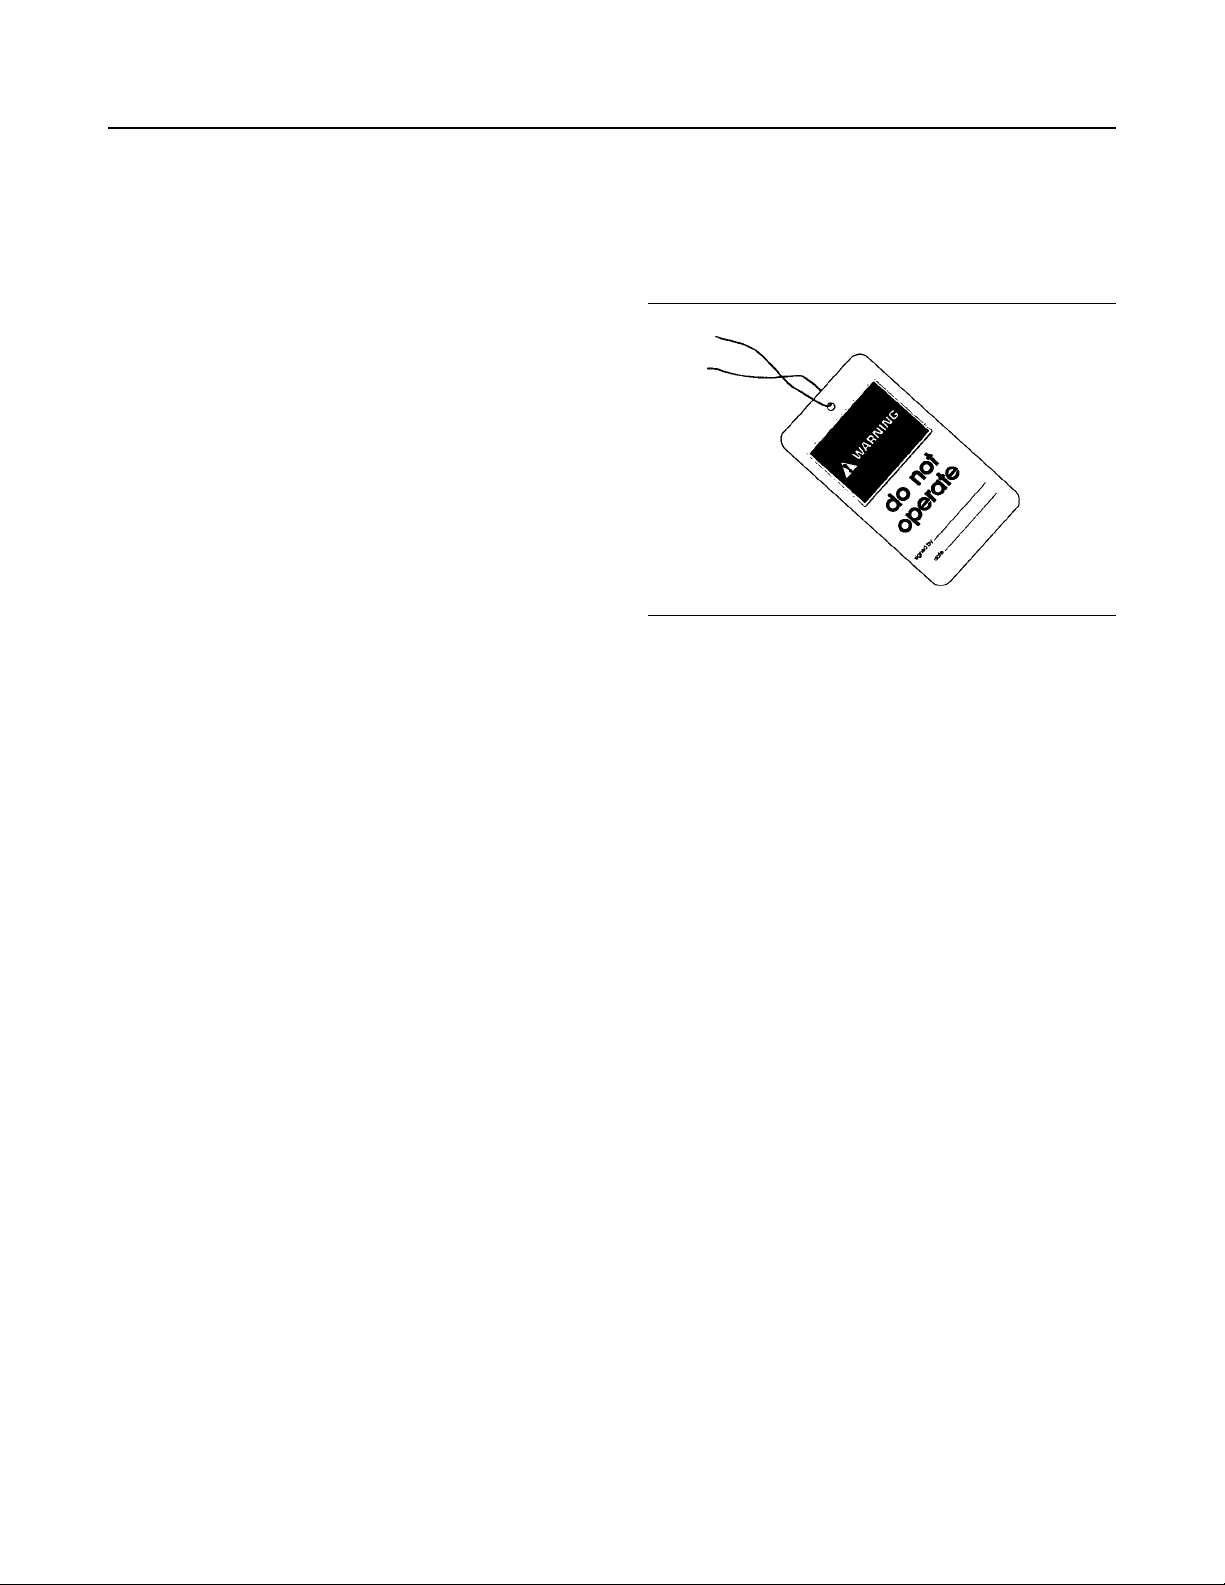
Attach a “Do Not Operate” warning tag or a similar
warning tag to the start switch or to the controls
before you service the equipment or before you repair
the equipment. These warning tags (Special
Instruction, SEHS7332) are available from your
Prentice dealer.
Operating the machine while distracted can result
in the loss of machine control. Use extreme caution when using any device while operating the
machine. Operating the machine while distracted
can result in personal injury or death.
Know the width of your equipment in order to maintain
proper clearance when you operate the equipment
near fences or near boundary obstacles.
Be aware of high voltage power lines and power
cables that are buried. If the machine comes in
contact with these hazards, serious injury or death
may occur from electrocution.
Page 19
SEBU9024 19
Safety Section
General Hazard Information
When maintenance is performed above ground level,
use appropriate devices such as ladders or man lift
machines. If Equipped, use the machine anchorage
points and use approved fall arrest harnesses and
lanyards.
Pressure Air and Water
Pressurized air and/or water can cause debris and/or
hot water to be blown out. The debris and/or hot
water could result in personal injury.
When pressurized air and/or pressurized water is
used for cleaning, wear protective clothing, protective
shoes, and eye protection. Eye protection includes
goggles or a protective face shield.
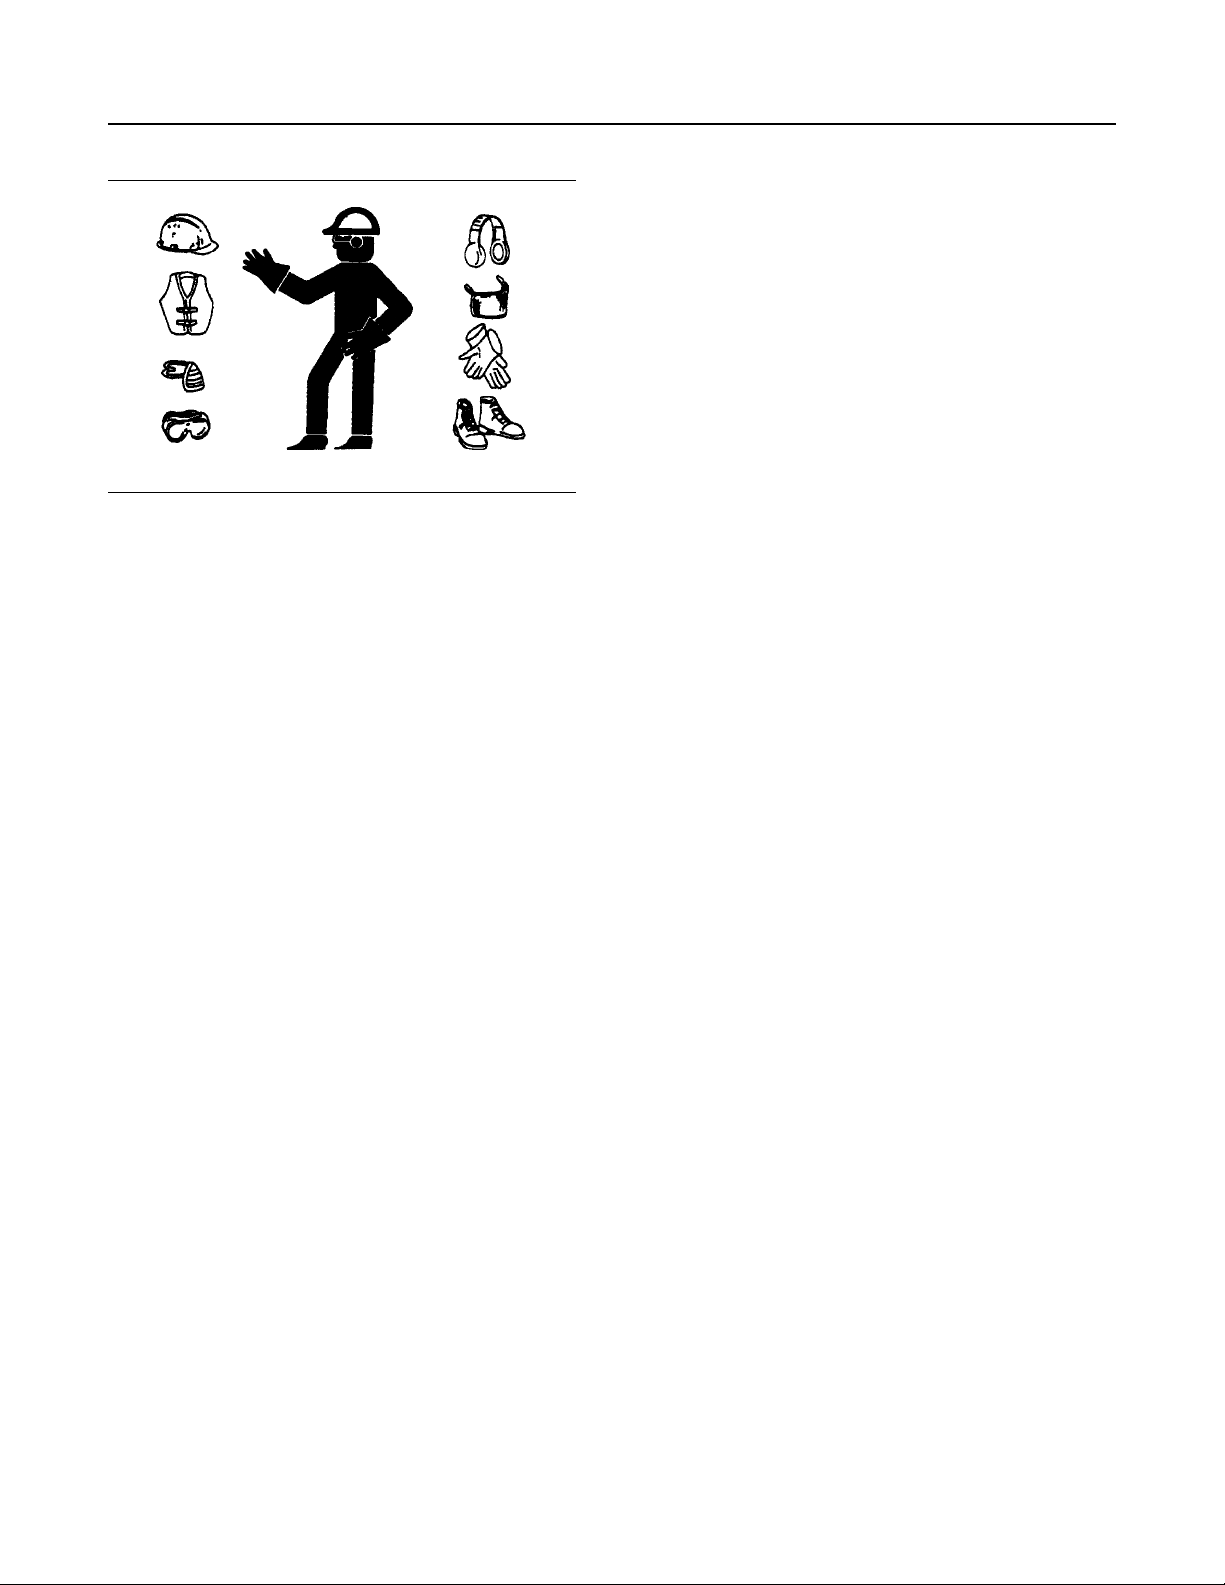
Illustration 36 g00702020
Wear a hard hat, protective glasses, and other
protective equipment, as required.
Do not wear loose clothing or jewelry that can snag
on controls or on other parts of the equipment.
Make sure that all protective guards and all covers
are secured in place on the equipment.
Keep the equipment free from foreign material.
Remove debris, oil, tools, and other items from the
deck, from walkways, and from steps.
The maximum air pressure for cleaning purposes
must be reduced to 448 kPa (65 psi) when the nozzle
is deadheaded and the nozzle is used with an
effective chip deflector and personal protective
equipment. The maximum water pressure for
cleaning purposes must be below 448n kPa (65 psi).
Avoid direct spraying of water on electrical
connectors, connections, and components. When
using air for cleaning, allow the machine to cool to
reduce the possibility of fine debris igniting when redeposited on hot surfaces.
Trapped Pressure
Secure all loose items such as lunch boxes, tools,
and other items that are not a part of the equipment.
Know the appropriate work site hand signals and the
personnel that are authorized to give the hand
signals. Accept hand signals from one person only.
Do not smoke when you service an air conditioner.
Also, do not smoke if refrigerant gas may be present.
Inhaling the fumes that are released from a flame that
contacts air conditioner refrigerant can cause bodily
harm or death. Inhaling gas from air conditioner
refrigerant through a lighted cigarette can cause
bodily harm or death.
Never put maintenance fluids into glass containers.
Drain all liquids into a suitable container.
Obey all local regulations for the disposal of liquids.
Use all cleaning solutions with care. Report all
necessary repairs.
Do not allow unauthorized personnel on the
equipment.
Unless you are instructed otherwise, perform
maintenance with the equipment in the servicing
position. Refer to Operation and Maintenance Manual
for the procedure for placing the equipment in the
servicing position.
Pressure can be trapped in a hydraulic system.
Accumulators in a hydraulic system will store
pressure. Allow a sufficient amount of time for the
pressure that is stored in the accumulators to be
released. Releasing trapped pressure can cause
sudden machine movement or attachment
movement. Use caution if you disconnect hydraulic
lines or fittings. High-pressure oil that is released can
cause a hose to whip. High-pressure oil that is
released can cause oil to spray. Fluid penetration can
cause serious injury and possible death.
Fluid Penetration
Pressure can be trapped in the hydraulic circuit long
after the engine has been stopped. The pressure can
cause hydraulic fluid or items such as pipe plugs to
escape rapidly if the pressure is not relieved correctly.
Do not remove any hydraulic components or parts
until pressure has been relieved or personal injury
may occur. Do not disassemble any hydraulic
components or parts until pressure has been relieved
or personal injury may occur. Refer to the Service
Manual for any procedures that are required to relieve
the hydraulic pressure.
Page 20
20 SEBU9024
Safety Section
General Hazard Information
Inhalation
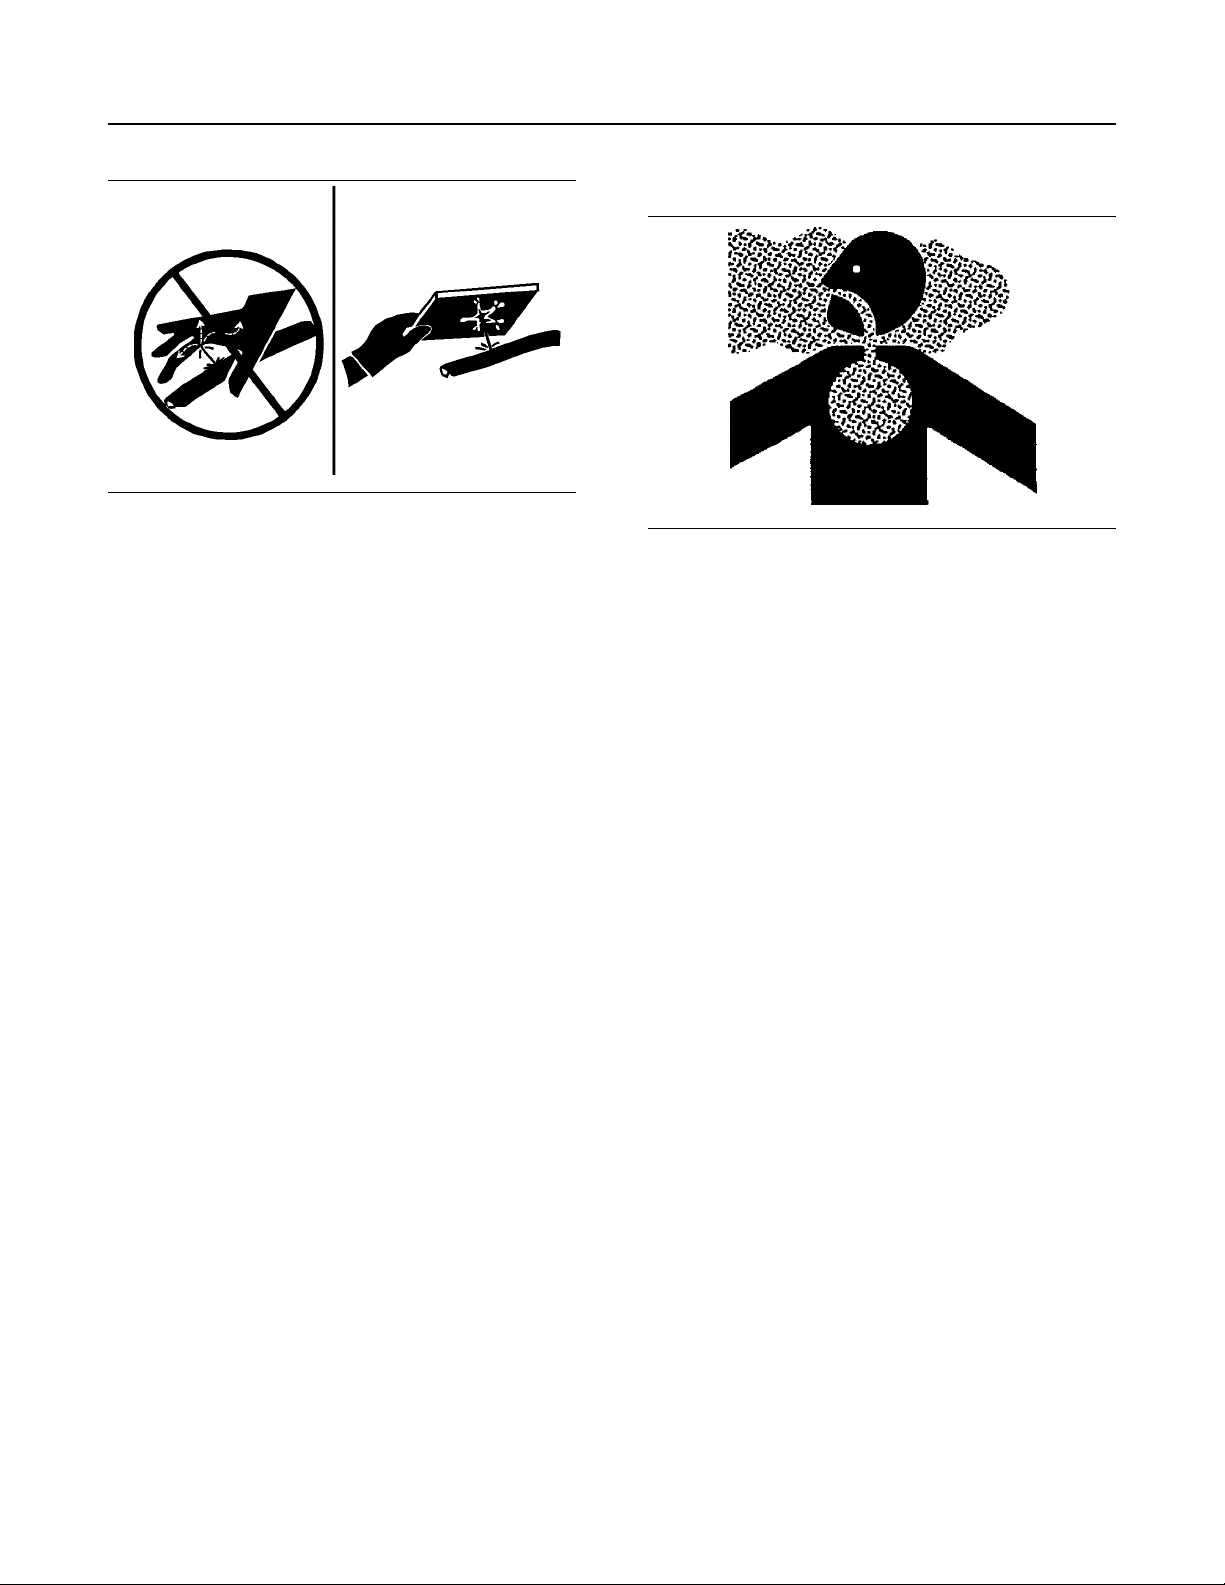
Illustration 37 g00687600
Always use a board or cardboard when you check for
a leak. Leaking fluid that is under pressure can
penetrate body tissue. Fluid penetration can cause
serious injury and possible death. A pin hole leak can
cause severe injury. If fluid is injected into your skin,
you must get treatment immediately. Seek treatment
from a doctor that is familiar with this type of injury.
Containing Fluid Spillage
Care must be taken in order to ensure that fluids are
contained during performance of inspection,
maintenance, testing, adjusting, and repair of the
equipment. Prepare to collect the fluid with suitable
containers before opening any compartment or
disassembling any component containing fluids.
Refer to Special Publication, NENG2500, “Tools and
Shop Products Guide” for the following items:
• Tools that are suitable for collecting fluids and
equipment that is suitable for collecting fluids
• Tools that are suitable for containing fluids and
equipment that is suitable for containing fluids
Obey all local regulations for the disposal of liquids.
Illustration 38 g02159053
Exhaust
Use caution. Exhaust fumes can be hazardous to
your health. If you operate the machine in an
enclosed area, adequate ventilation is necessary.
Asbestos Information
Prentice equipment and replacement parts that are
shipped from Caterpillar are asbestos free. Prentice
recommends the use of only genuine Prentice
replacement parts. Use the following guidelines when
you handle any replacement parts that contain
asbestos or when you handle asbestos debris.
Use caution. Avoid inhaling dust that might be
generated when you handle components that contain
asbestos fibers. Inhaling this dust can be hazardous
to your health. The components that may contain
asbestos fibers are brake pads, brake bands, lining
material, clutch plates, and some gaskets. The
asbestos that is used in these components is usually
bound in a resin or sealed in some way. Normal
handling is not hazardous unless airborne dust that
contains asbestos is generated.
If dust that may contain asbestos is present, there are
several guidelines that should be followed:
Page 21
SEBU9024 21
Safety Section
Crushing Prevention and Cutting Prevention
• Never use compressed air for cleaning.
• Avoid brushing materials that contain asbestos.
• Avoid grinding materials that contain asbestos.
• Use a wet method in order to clean up asbestos
materials.
• A vacuum cleaner that is equipped with a high
efficiency particulate air filter (HEPA) can also be
used.
• Use exhaust ventilation on permanent machining
jobs.
• Wear an approved respirator if there is no other
way to control the dust.
• Comply with applicable rules and regulations for
the work place. In the United States, use
Occupational Safety and Health Administration
(OSHA) requirements. These OSHA requirements
can be found in “29 CFR 1910.1001”.
• Obey environmental regulations for the disposal of
asbestos.
• Stay away from areas that might have asbestos
particles in the air.
Dispose of Waste Properly
i01359664
Crushing Prevention and
Cutting Prevention
SMCS Code: 7000
Support the equipment properly before you perform
any work or maintenance beneath that equipment. Do
not depend on the hydraulic cylinders to hold up the
equipment. Equipment can fall if a control is moved,
or if a hydraulic line breaks.
Do not work beneath the cab of the machine unless
the cab is properly supported.
Unless you are instructed otherwise, never attempt
adjustments while the machine is moving or while the
engine is running.
Never jump across the starter solenoid terminals in
order to start the engine. Unexpected machine
movement could result.
Whenever there are equipment control linkages the
clearance in the linkage area will change with the
movement of the equipment or the machine. Stay
clear of areas that may have a sudden change in
clearance with machine movement or equipment
movement.
Stay clear of all rotating and moving parts.
If it is necessary to remove guards in order to perform
maintenance, always install the guards after the
maintenance is performed.
Illustration 39 g00706404
Improperly disposing of waste can threaten the
environment. Potentially harmful fluids should be
disposed of according to local regulations.
Always use leakproof containers when you drain
fluids. Do not pour waste onto the ground, down a
drain, or into any source of water.
Keep objects away from moving fan blades. The fan
blade will throw objects or cut objects.
Do not use a kinked wire cable or a frayed wire cable.
Wear gloves when you handle wire cable.
When you strike a retainer pin with force, the retainer
pin can fly out. The loose retainer pin can injure
personnel. Make sure that the area is clear of people
when you strike a retainer pin. To avoid injury to your
eyes, wear protective glasses when you strike a
retainer pin.
Chips or other debris can fly off an object when you
strike the object. Make sure that no one can be
injured by flying debris before striking any object.
i04760300
Burn Prevention
SMCS Code: 7000
Do not touch any part of an operating engine. Allow
the engine to cool before any maintenance is
performed on the engine. Relieve all pressure in the
air system, in the oil system, in the lubrication system,
in the fuel system, or in the cooling system before any
lines, fittings, or related items are disconnected.
Page 22
22 SEBU9024
Safety Section
Fire Prevention and Explosion Prevention
Coolant
When the engine is at operating temperature, the
engine coolant is hot. The coolant is also under
pressure. The radiator and all lines to the heaters or
to the engine contain hot coolant.
Any contact with hot coolant or with steam can cause
severe burns. Allow cooling system components to
cool before the cooling system is drained.
Check the coolant level only after the engine has
been stopped.
Ensure that the filler cap is cool before removing the
filler cap. The filler cap must be cool enough to touch
with a bare hand. Remove the filler cap slowly in
order to relieve pressure.
Cooling system conditioner contains alkali. Alkali can
cause personal injury. Do not allow alkali to contact
the skin, the eyes, or the mouth.
Oils
Hot oil and hot components can cause personal
injury. Do not allow hot oil to contact the skin. Also, do
not allow hot components to contact the skin.
Remove the hydraulic tank filler cap only after the
engine has been stopped. The filler cap must be cool
enough to touch with a bare hand. Follow the
standard procedure in this manual in order to remove
the hydraulic tank filler cap.
Batteries
The liquid in a battery is an electrolyte. Electrolyte is
an acid that can cause personal injury. Do not allow
electrolyte to contact the skin or the eyes.
Do not smoke while checking the battery electrolyte
levels. Batteries give off flammable fumes which can
explode.
Always wear protective glasses when you work with
batteries. Wash hands after touching batteries. The
use of gloves is recommended.
i05831809
Fire Prevention and Explosion
Prevention
SMCS Code: 7000
Illustration 40 g00704000
General
All fuels, most lubricants, and some coolant mixtures
are flammable.
To minimize the risk of fire or explosion, Prentice
recommends the following actions.
Always perform a Walk-Around Inspection, which
may help you identify a fire hazard. Do not operate a
machine when a fire hazard exists. Contact your
Prentice dealer for service.
Understand the use of the primary exit and alternative
exit on the machine. Refer to Operation and
Maintenance Manual, “Alternative Exit”.
Do not operate a machine with a fluid leak. Repair
leaks and clean up fluids before resuming machine
operation. Fluids that are leaking or spilled onto hot
surfaces or onto electrical components can cause a
fire. A fire may cause personal injury or death.
Remove flammable material such as leaves, twigs,
papers, trash, and so on. These items may
accumulate in the engine compartment or around
other hot areas and hot parts on the machine.
Keep the access doors to major machine
compartments closed and access doors in working
condition in order to permit the use of fire suppression
equipment, in case a fire should occur.
Clean all accumulations of flammable materials such
as fuel, oil, and debris from the machine.
Do not operate the machine near any flame.
Page 23
SEBU9024 23
Safety Section
Fire Prevention and Explosion Prevention
Keep shields in place. Exhaust shields (if equipped)
protect hot exhaust components from oil spray or fuel
spray in case of a break in a line, in a hose, or in a
seal. Exhaust shields must be installed correctly.
Do not weld or flame cut on tanks or lines that contain
flammable fluids or flammable material. Empty and
purge the lines and tanks. Then clean the lines and
tanks with a nonflammable solvent prior to welding or
flame cutting. Ensure that the components are
properly grounded in order to avoid unwanted arcs.
Dust that is generated from repairing nonmetallic
hoods or fenders may be flammable and/or explosive.
Repair such components in a well ventilated area
away from open flames or sparks. Use suitable
Personal Protection Equipment (PPE).
Inspect all lines and hoses for wear or deterioration.
Replace damaged lines and hoses. The lines and the
hoses should have adequate support and secure
clamps. Tighten all connections to the recommended
torque. Damage to the protective cover or insulation
may provide fuel for fires.
Store fuels and lubricants in properly marked
containers away from unauthorized personnel. Store
oily rags and flammable materials in protective
containers. Do not smoke in areas that are used for
storing flammable materials.
Avoid static electricity risk when fueling. Ultra low
sulfur diesel (ULSD) poses a greater static ignition
hazard than earlier diesel formulations with a higher
sulfur content. Avoid death or serious injury from fire
or explosion. Consult with your fuel or fuel system
supplier to ensure that the delivery system is in
compliance with fueling standards for proper
grounding and bonding practices.
Never store flammable fluids in the operator
compartment of the machine.
Battery and Battery Cables
Illustration 41 g00704059
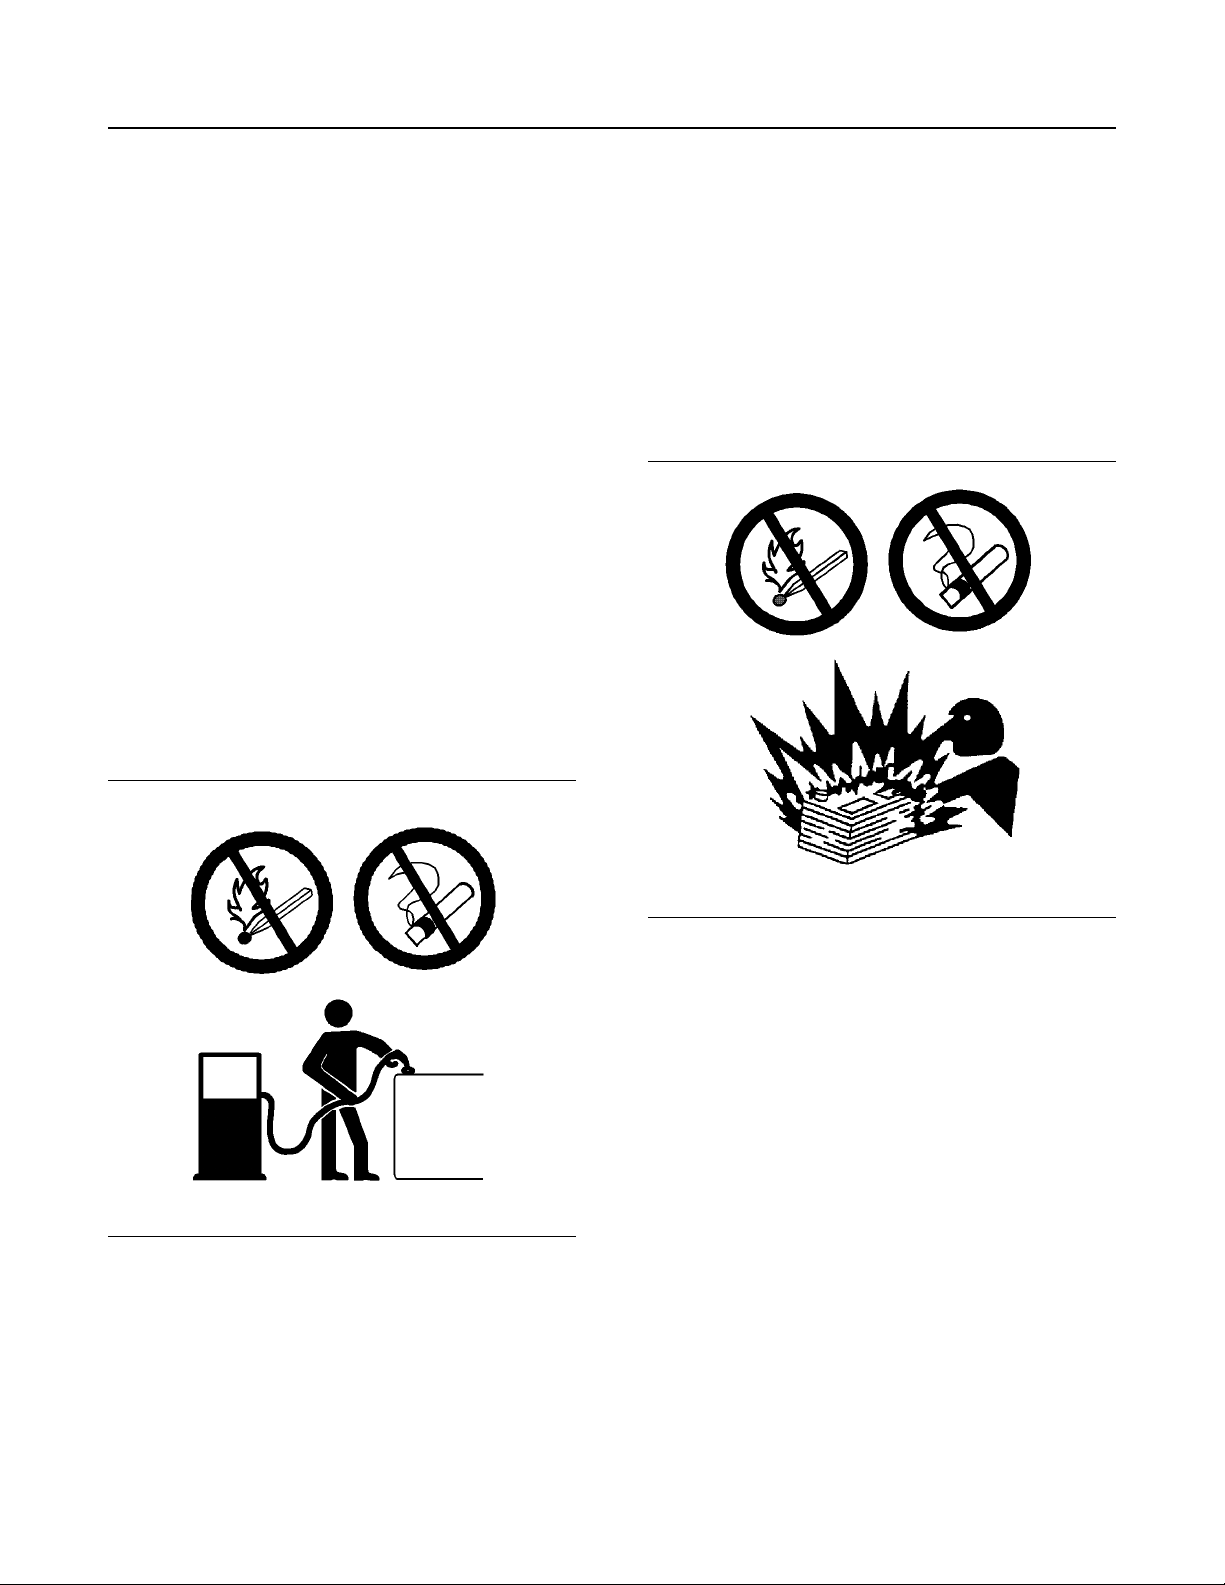
Use caution when you are fueling a machine. Do not
smoke while you are fueling a machine. Do not fuel a
machine near open flames or sparks. Always stop the
engine before fueling. Fill the fuel tank outdoors.
Properly clean areas of spillage.
Illustration 42 g02298225
Prentice recommends the following in order to
minimize the risk of fire or an explosion related to the
battery.
Do not operate a machine if battery cables or related
parts show signs of wear or damage. Contact your
Prentice dealer for service.
Follow safe procedures for engine starting with jumpstart cables. Improper jumper cable connections can
cause an explosion that may result in injury. Refer to
Operation and Maintenance Manual, “Engine Starting
with Jump Start Cables” for specific instructions.
Do not charge a frozen battery. This may cause an
explosion.
Gases from a battery can explode. Keep any open
flames or sparks away from the top of a battery. Do
not smoke in battery charging areas.
Never check the battery charge by placing a metal
object across the terminal posts. Use a voltmeter in
order to check the battery charge.
Page 24
24 SEBU9024
Safety Section
Fire Prevention and Explosion Prevention
Daily inspect battery cables that are in areas that are
visible. Inspect cables, clips, straps, and other
restraints for damage. Replace any damaged parts.
Check for signs of the following, which can occur over
time due to use and environmental factors:
• Fraying
• Abrasion
• Cracking
• Discoloration
• Cuts on the insulation of the cable
• Fouling
• Corroded terminals, damaged terminals, and loose
terminals
Replace damaged battery cable(s) and replace any
related parts. Eliminate any fouling, which may have
caused insulation failure or related component
damage or wear. Ensure that all components are
reinstalled correctly.
An exposed wire on the battery cable may cause a
short to ground if the exposed area comes into
contact with a grounded surface. A battery cable
short produces heat from the battery current, which
may be a fire hazard.
An exposed wire on the ground cable between the
battery and the disconnect switch may cause the
disconnect switch to be bypassed if the exposed area
comes into contact with a grounded surface. This
may result in an unsafe condition for servicing the
machine. Repair components or replace components
before servicing the machine.
• Fraying
• Signs of abrasion or wear
• Cracking
• Discoloration
• Cuts on insulation
• Other damage
Make sure that all clamps, guards, clips, and straps
are reinstalled correctly. This will help to prevent
vibration, rubbing against other parts, and excessive
heat during machine operation.
Attaching electrical wiring to hoses and tubes that
contain flammable fluids or combustible fluids should
be avoided.
Consult your Prentice dealer for repair or for
replacement parts.
Keep wiring and electrical connections free of debris.
Lines, Tubes, and Hoses
Do not bend high-pressure lines. Do not strike highpressure lines. Do not install any lines that are bent or
damaged. Use the appropriate backup wrenches in
order to tighten all connections to the recommended
torque.
Fire on a machine can result in personal injury or
death. Exposed battery cables that come into contact with a grounded connection can result in
fires. Replace cables and related parts that show
signs of wear or damage. Contact your Prentice
dealer.
Wiring
Check electrical wires daily. If any of the following
conditions exist, replace parts before you operate the
machine.
Illustration 43 g00687600
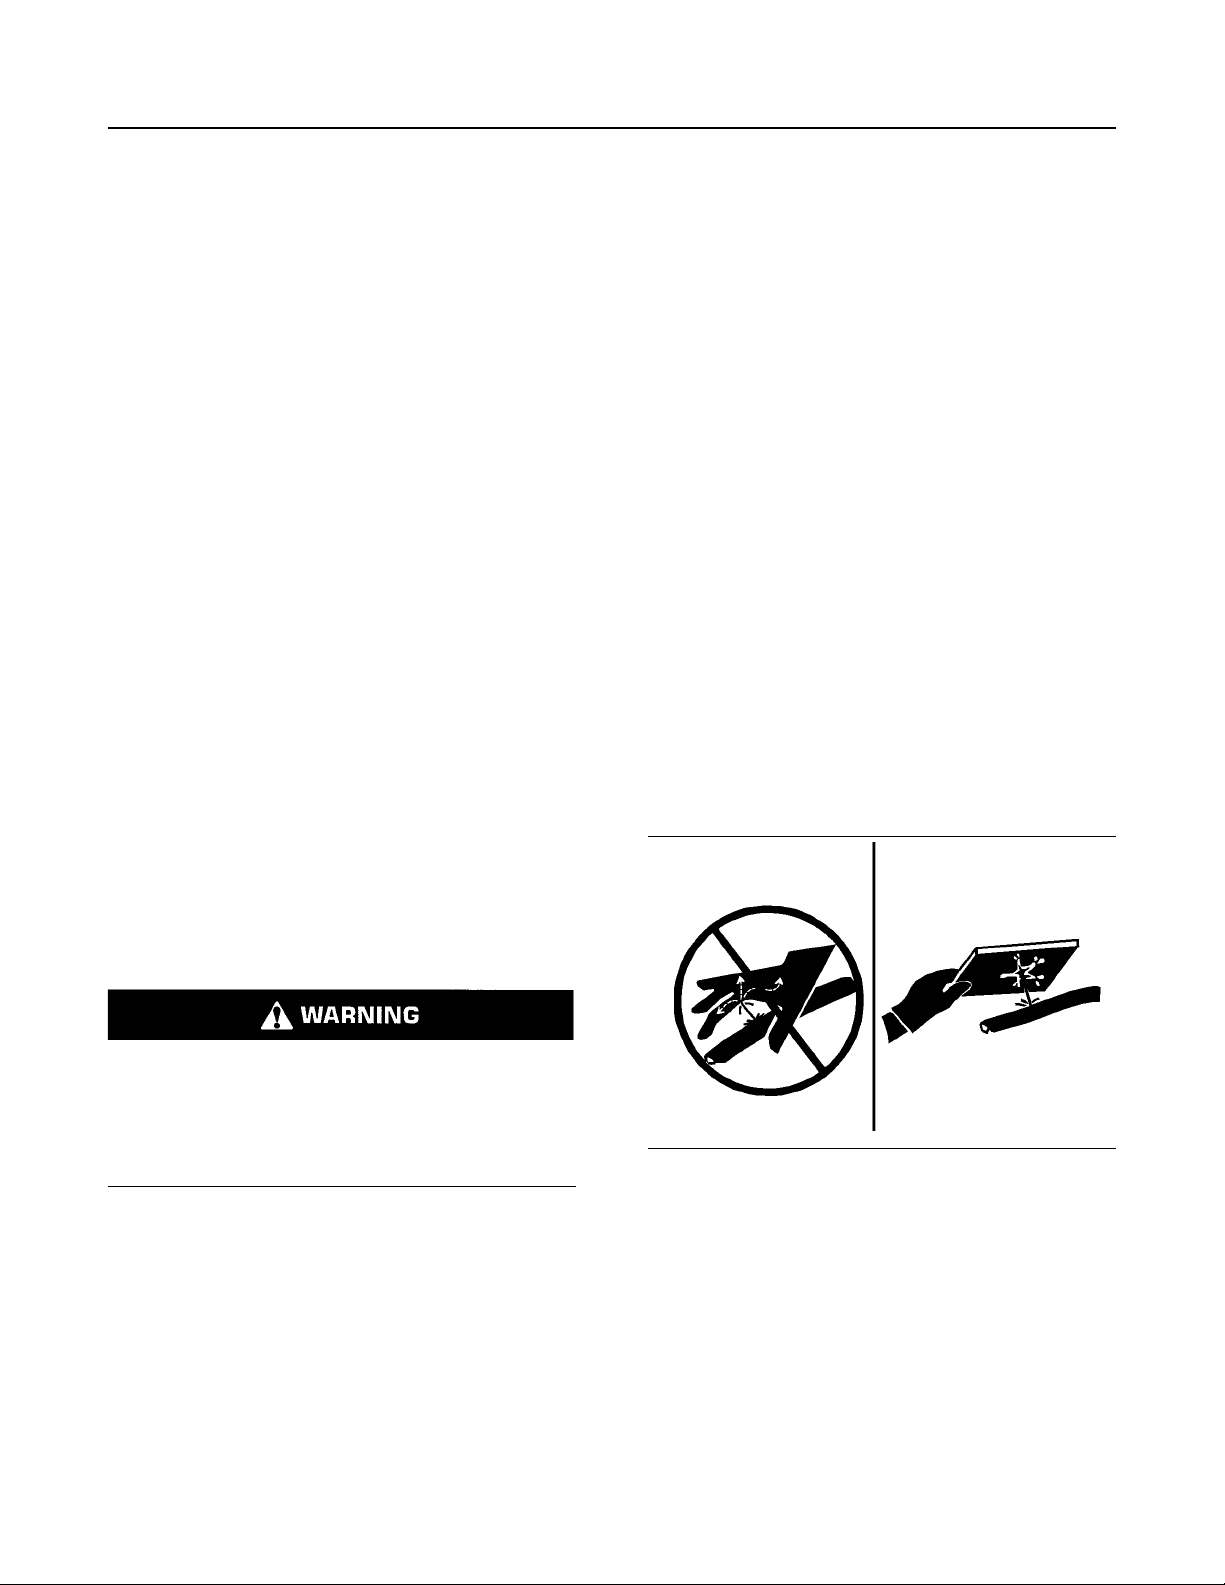
Check lines, tubes, and hoses carefully. Wear
Personal Protection Equipment (PPE) in order to
check for leaks. Always use a board or cardboard
when you check for a leak. Leaking fluid that is under
pressure can penetrate body tissue. Fluid penetration
can cause serious injury and possible death. A pin
hole leak can cause severe injury. If fluid is injected
into your skin, you must get treatment immediately.
Seek treatment from a doctor that is familiar with this
type of injury.
Replace the affected parts if any of the following
conditions are present:
Page 25

SEBU9024 25
Safety Section
Fire Safety
• End fittings are damaged or leaking.
• Outer coverings are chafed or cut.
• Wires are exposed.
• Outer coverings are swelling or ballooning.
• Flexible parts of the hoses are kinked.
• Outer covers have exposed embedded armoring.
• End fittings are displaced.
Make sure that all clamps, guards, and heat shields
are installed correctly. During machine operation, this
will help to prevent vibration, rubbing against other
parts, excessive heat, and failure of lines, tubes, and
hoses.
Do not operate a machine when a fire hazard exists.
Repair any lines that are corroded, loose, or
damaged. Leaks may provide fuel for fires. Consult
your Prentice dealer for repair or for replacement
parts. Use genuine Prentice parts or the equivalent,
for capabilities of both the pressure limit and
temperature limit.
Ether
Ether (if equipped) is commonly used in cold-weather
applications. Ether is flammable and poisonous.
Follow the correct cold engine starting procedures.
Refer to the section in the Operation and
Maintenance Manual with the label “Engine Starting”
.
Do not spray ether manually into an engine if the
machine is equipped with a thermal starting aid for
cold weather starting.
Consider installation of an aftermarket Fire
Suppression System, if the application and working
conditions warrant the installation.
i04025591
Fire Safety
SMCS Code: 1000; 6700; 7000
Note: Locate secondary exits and how to use the
secondary exits before you operate the machine.
Note: Locate fire extinguishers and how to use a fire
extinguisher before you operate the machine.
If you find that you are involved in a machine fire, your
safety and that of others on site is the top priority. The
following actions should only be performed if the
actions do not present a danger or risk to you and any
nearby people. At all times you should assess the risk
of personal injury and move away to a safe distance
as soon as you feel unsafe.
Move the machine away from nearby combustible
material such as fuel/oil stations, structures, trash,
mulch and timber.
Lower any implements and turn off the engine as
soon as possible. If you leave the engine running, the
engine will continue to feed a fire. The fire will be fed
from any damaged hoses that are attached to the
engine or pumps.
If possible, turn the battery disconnect switch to the
OFF position. Disconnecting the battery will remove
the ignition source in the event of an electrical short.
Disconnecting the battery will eliminate a second
ignition source if electrical wiring is damaged by the
fire, resulting in a short circuit.
Use ether in well ventilated areas. Do not smoke
while you are replacing an ether cylinder or while you
are using an ether spray.
Do not store ether cylinders in living areas or in the
operator compartment of a machine. Do not store
ether cylinders in direct sunlight or in temperatures
above 49° C (120.2° F). Keep ether cylinders away
from open flames or sparks.
Dispose of used ether cylinders properly. Do not
puncture an ether cylinder. Keep ether cylinders away
from unauthorized personnel.
Fire Extinguisher
As an additional safety measure, keep a fire
extinguisher on the machine.
Be familiar with the operation of the fire extinguisher.
Inspect the fire extinguisher and service the fire
extinguisher regularly. Follow the recommendations
on the instruction plate.
Notify emergency personnel of the fire and your
location.
If your machine is equipped with a fire suppression
system, follow the manufacturers procedure for
activating the system.
Note: Fire suppression systems need to be regularly
inspected by qualified personnel. You must be trained
to operate the fire suppression system.
Use the on-board fire extinguisher and use the
following procedure:
1. Pull the pin.
2. Aim the extinguisher or nozzle at the base of the
fire.
3. Squeeze the handle and release the extinguishing
agent.
4. Sweep the extinguisher from side to side across
the base of the fire until the fire is out.
Page 26

26 SEBU9024
Safety Section
Fire Extinguisher Location
Remember, if you are unable to do anything else,
shut off the machine before exiting. By shutting off the
machine, fuels will not continue to be pumped into the
fire.
If the fire grows out of control, be aware of the
following risks:
• Tires on wheeled machines pose a risk of
explosion as tires burn. Hot shrapnel and debris
can be thrown great distances in an explosion.
• Tanks, accumulators, hoses, and fittings can
rupture in a fire, spraying fuels and shrapnel over a
large area.
• Remember that nearly all of the fluids on the
machine are flammable, including coolant and oils.
Additionally, plastics, rubbers, fabrics, and resins
in fiberglass panels are also flammable.
i04450434
Fire Extinguisher Location
SMCS Code: 7000
Illustration 44 g02643077
The recommended location for mounting the fire
extinguisher is inside on the left-hand access door
(1).
Make sure that a fire extinguisher is on the machine.
Make sure that you are familiar with the operation of
the fire extinguisher. Inspect the fire extinguisher and
service the fire extinguisher on a regular basis. Obey
the recommendations on the instruction plate.
If the fire extinguisher is mounted on the ROPS, strap
the mounting plate to a leg of the ROPS. If the weight
of the fire extinguisher is more than 4.5 kg (10 lb),
mount the fire extinguisher as low as possible on one
leg. Do not mount the fire extinguisher on the upper
one-third area of the leg.
Note: Do not weld the ROPS in order to install the fire
extinguisher. Also, do not drill holes in the ROPS in
order to mount the fire extinguisher on the ROPS.
Page 27

SEBU9024 27
Safety Section
Tire Information
i05780053
Tire Information
SMCS Code: 7000
Explosions of air inflated tires have resulted from
heat-induced gas combustion inside the tires.
Explosions can be caused by heat that is generated
by welding, by heating rim components, by external
fire, or by excessive use of brakes.
A tire explosion is much more violent than a blowout.
The explosion can propel the tire, the rim
components, and the axle components from the
machine. Stay out of the trajectory path. Both the
force of the explosion and the flying debris can cause
property damage, personal injury, or death.
To avoid overinflation, proper nitrogen inflation
equipment and training in the usage of the equipment
are necessary. A tire blowout or a rim failure can
result from improper equipment or from misused
equipment.
When you inflate a tire, stand behind the tread and
use a self-attaching chuck.
Servicing tires and rims can be dangerous. Only
trained personnel that use proper tools and proper
procedures should perform this maintenance. If
correct procedures are not used for servicing tires
and rims, the assemblies could burst with explosive
force. This explosive force can cause serious
personal injury or death. Carefully obey the specific
instructions from your tire dealer.
i01122596
Electrical Storm Injury
Prevention
SMCS Code: 7000
When lightning is striking in the vicinity of the
machine, the operator should never attempt the
following procedures:
Illustration 45 g02166933
Typical example of tire is shown
Do not approach a hot or an apparently damaged tire.
Prentice recommends against using water or
calcium as a ballast for the tires except in machines
designed for this additional mass. For those
applicable machines, the maintenance section will
contain instructions on the correct tire inflation and
filling procedures. Ballast, such as fluid in the tires,
increases overall machine weight and may affect
braking, steering, power train components, or the
certification of the protective structure such as the
ROPS. The use of tire/rim rust preventatives or other
liquid additives is not required.
Dry nitrogen gas is recommended for inflation of
tires. If the tires were originally inflated with air,
nitrogen is still preferred for adjusting the pressure.
Nitrogen mixes properly with air.
Nitrogen inflated tires reduce the potential of a tire
explosion because nitrogen does not aid combustion.
Nitrogen helps to prevent oxidation of the rubber,
deterioration of rubber, and corrosion of rim
components.
• Mount the machine.
• Dismount the machine.
If you are in the operator's station during an electrical
storm, stay in the operator's station. If you are on the
ground during an electrical storm, stay away from the
vicinity of the machine.
i01643597
Before Starting Engine
SMCS Code: 1000; 7000
The steering frame lock must be in the UNLOCKED
position in order to steer the machine.
Start the engine only from the operator compartment.
Never short across the starter terminals or across the
batteries. Shorting could bypass the engine neutral
start system. Shorting could also damage the
electrical system.
Inspect the condition of the seat belt and the
condition of mounting hardware. Replace any parts
that are worn or damaged. Regardless of the
appearance, replace the seat belt after three years of
use.
Adjust the seat in order to have full pedal travel when
the operator is seated properly.
Adjust the mirror so that the operator has good
rearward visibility.
Page 28
28 SEBU9024
Safety Section
Visibility Information
Make sure that the machine is equipped with a
lighting system that is adequate for the job conditions.
Make sure that all lights are working properly.
Before you start the engine or before you move the
machine, make sure that no one is on the machine,
underneath the machine, or around the machine.
Make sure that there are no personnel in the area.
i04490177
Visibility Information
SMCS Code: 7000; 7615
Before you start the machine, perform a walk-around
inspection in order to ensure that there are no
hazards around the machine.
While the machine is in operation, constantly survey
the area around the machine. Identify potential
hazards as hazards become visible around the
machine.
Before operating the machine, ensure that the mirror
and rear camera visual aids are in proper working
condition and that the visual aids are clean. Adjust
the visual aids using the procedures that are located
in this Operation and Maintenance Manual.
Direct visibility may not be possible on large
machines to all areas around the machine.
Appropriate job site organization is required in order
to minimize hazards that are caused by restricted
visibility. Job site organization is a collection of rules
and procedures that coordinates machines and
people that work together in the same area.
Examples of job site organization include the
following:
i02112145
Engine Starting
SMCS Code: 1000; 7000
Illustration 46 g00104545
If a warning tag is attached to the engine start switch
or to the controls, do not start the engine and do not
move any controls.
Move the hydraulic lockout control into the LOCKED
position before you start the engine.
Engage the parking brake.
Diesel engine exhaust contains products of
combustion which can be harmful to your health.
Always operate the engine in a well ventilated area. If
you are in an enclosed area, vent the exhaust to the
outside.
• Safety instructions
• Controlled patterns of machine movement and
vehicle movement
• Workers that direct traffic to move when safe
• Restricted areas
• Operator training
• Warning symbols or warning signs on machines or
on vehicles
• A system of communication
• Communication between workers and operators
prior to approaching the machine
Modifications of the machine configuration by the
user that result in a restriction of visibility shall be
evaluated.
i01484858
Before Operation
SMCS Code: 7000
Clear all personnel from the machine and from the
area. Maintain a distance of 91 m (300 ft) in all
directions prior to operation.
Clear all obstacles from the path of the machine.
Beware of hazards such as wires, ditches, etc.
Make sure that all windows are clean. Secure the
doors in the shut position. Secure the windows in the
shut position.
For the best vision of the area behind the machine,
adjust the rear view mirror.
Make sure that the machine horn, the backup alarm
and all other warning devices are working properly.
Fasten the seat belt securely.
Page 29
SEBU9024 29
Safety Section
Operation
i05781646
Operation
SMCS Code: 7000
Machine Operating Temperature
Range
The machine must function satisfactorily in the
anticipated ambient temperature limits that are
encountered during operation. The standard machine
configuration is intended for use within an ambient
temperature range of −18 °C (−0 °F) to 43 °C
(109 °F). Special configurations for different ambient
temperatures may be available. Consult your Prentice
dealer for additional information on special
configurations of your machine.
Machine Operation
Know the maximum height and the maximum
reach of your machine. Serious injury or death by
electrocution can occur if the machine or the work
tools are not kept a safe distance from electrical
power lines. Keep a distance of at least 3 m
(10 feet) .
Do not go close to the edge of a cliff, an excavation,
or an overhang.
Avoid operating the machine across the slope. When
possible, operate the machine up the slopes and
down the slopes. If the machine begins to sideslip on
a downgrade, immediately remove the load and turn
the machine downhill.
Avoid any conditions that can lead to tipping the
machine. The machine can tip when you work on
hills, on banks and on slopes. Also, the machine can
tip when you cross ditches, ridges, or other
unexpected obstructions.
Avoid changing direction of travel on a slope.
Changing the direction of travel on a slope could
result in tipping or side slipping of the machine.
Maintain control of the machine. Do not overload the
machine beyond the machine capacity.
Never straddle a wire cable. Never allow other
personnel to straddle a wire cable.
Know the maximum dimensions of your machine.
Check local regulations, state codes, and/or
directives of the job site for a specific minimum
distance from obstacles.
Before you operate the machine, check with local
utilities for the locations of underground pipes and for
the locations of buried cables.
For safety, one of the following may require a greater
distance:
• Local codes
• State codes
• Requirements of the job site
Only operate the machine while you are sitting in a
seat. The seat belt must be fastened while you
operate the machine. Only operate the controls while
the engine is running.
While you operate the machine slowly in an open
area, check for proper operation of all controls and all
protective devices.
Before you move the machine, make sure that no one
will be endangered.
Do not allow riders on the machine unless the
machine has an additional seat with a seat belt.
Never use the work tool for a work platform.
Note any needed repairs during machine operation.
Report any needed repairs.
Carry work tools at approximately 40 cm (15 inches)
above ground level.
Dangerous Operation Practices
Do not use feller bunchers to harvest trees in a
fallen or blown over condition. Serious personal
injury or death may result from high velocity
projectiles being thrown through the cab window.
Feller bunchers are intended to fell standing trees,
not for harvesting fallen or blown over trees.
Do not use feller buncher to cut when the head and
saw disc are tilted forward from the cab more than 20
degrees. Such use may result in high velocity
projectiles, like wood pieces, being thrown with
enough force to penetrate cab window. Projectiles
penetrating the cab windows or entering the cab can
cause serious personal injury or death.
The polycarbonate windows are designed to standard
specification that offer protection under most
conditions of normal operation.
Feller bunchers are not designed to harvest fallen
or blown over trees. doing so can cause serious
personal injury or death.
Page 30
30 SEBU9024
Safety Section
Work Tools
• Never intentionally let the disc hit a rock
• ONLY fell with the disc horizontal and the bunching
head vertical. DO NOT cut with the feller buncher
tipped forward.
Operation in Rocky Terrain
Flying debris, falling trees, limbs, and tops can
cause severe injury or death. Do not operate saw
within 91 M (300 feet) of personnel or machinery.
Operating feller buncher in rocky conditions is
hazardous and should be avoided. If felling in rocky
conditions cannot be avoided the following
precautions should be taken:
• Use only solid steel teeth. DO NOT use carbide
tipped teeth.
• Make the cut high enough to clear the rocks.
NOTICE
Teeth breaking when hitting a rock can damage the
tooth seat on the saw disc. The more economical option is to use a segmented disc. When broken tooth
damages the tooth seat, replace tooth and the segment instead of a whole disc.
i04550350
Work Tools
SMCS Code: 6700
Work tools and work tool control systems, that are
compatible with your Prentice machine, are required
for safe machine operation and/or reliable machine
operation. If you are in doubt about the compatibility
of a particular work tool with your machine, consult
your Prentice dealer.
Make sure that all necessary guarding is in place on
the host machine and on the work tool.
Keep all windows and doors closed on the host
machine. A polycarbonate shield must be used when
the host machine is not equipped with windows and
when a work tool could throw debris.
Do not exceed the maximum operating weight that is
listed on the ROPS certification.
If your machine is equipped with an extendable stick,
install the transport pin when you are using the
following work tools: hydraulic hammers, augers and
compactors
Always wear protective glasses. Always wear the
protective equipment that is recommended in the
operation manual for the work tool. Wear any other
protective equipment that is required for the operating
environment.
To prevent personnel from being struck by flying
objects, ensure that all personnel are out of the work
area.
While you are performing any maintenance, any
testing, or any adjustments to the work tool stay clear
of the following areas: cutting edges, pinching
surfaces and crushing surfaces.
Never use the work tool for a work platform.
i05736403
Only use work tools that are recommended by
Prentice for use on Prentice machines.
Use of work tools, including buckets, which are
outside of Prentice's recommendations or
specifications for weight, dimensions, flows,
pressures, and so on. may result in less-than-optimal
vehicle performance, including but not limited to
reductions in production, stability, reliability, and
component durability. Prentice recommends
appropriate work tools forPrentice's machines to
maximize the valuePrentice's customers receive from
Prentice products. Prentice understands that special
circumstances may lead a customer to use tools
outside of Prentice's specifications. Customers must
be aware that such choices can reduce vehicle
performance and will affect their ability to claim
warranty in the event of what a customer may
perceive as a premature failure.
Parking
SMCS Code: 7000
1. Park the machine on a level surface. If you must
park the machine on a downgrade, block the tires
or chock the tracks of the machine.
2. Apply the service brake in order to stop the
machine.
3. Engage the parking brake.
4. Lower all attachments to the ground. Make sure
that all attachments are in the recommended
servicing position before servicing the machine.
Page 31
SEBU9024 31
Safety Section
Equipment Lowering with Engine Stopped
5. Move the hydraulic lockout control to the LOCKED
position. The hydraulic system remains
pressurized if the accumulator is charged. This
condition is true even when the engine is not
running. This pressure should decrease in a short
time (approximately 1 minute). While the hydraulic
system maintains a charge, the machine controls
remain functional.
Deactivation of the hydraulic controls does not
prevent the blade, boom swing, or auxiliary circuit
functions from moving under gravity or other external forces. Gravity or other external forces can
move the blade, boom swing, or auxiliary circuit
functions suddenly if a hydraulic control lever is
moved.
Personal injury or death may occur from sudden
machine movement.
6. Turn the engine start switch to the OFF position
and remove the key.
7. Turn the battery disconnect switch to the OFF
position. If the machine will not be operated for an
extended time period, remove the key in order to
avoid battery discharge that may be caused by a
battery short circuit, by the current draw via certain
components, or by vandalism.
8. Install all guards on the attachments.
i01329161
Equipment Lowering with
Engine Stopped
SMCS Code: 7000
Before lowering any equipment with the engine
stopped, clear the area around the equipment of all
personnel. The procedure to use will vary with the
type of equipment to be lowered. Keep in mind most
systems use a high pressure fluid or air to raise or
lower equipment. The procedure will cause high
pressure air, hydraulic, or some other media to be
released in order to lower the equipment. Wear
appropriate personal protective equipment and follow
the established procedure in the Operation and
Maintenance Manual, “Equipment Lowering with
Engine Stopped” in the Operation Section of the
manual.
i05738646
Sound Information and
Vibration Information
SMCS Code: 7000
The declared operator sound exposure Leq
(equivalent sound pressure level) that is measured
according to the work cycle procedures that are
specified in “ANSI/SAE J1166FEB2008” is 87.3 dB
(A). This measurement is for the cab that is offered by
your machine, is properly installed, maintained, and
tested with the doors and the windows closed.
Stay back until all attachment functions have
come to complete stop after shutdown. May cause
serious injury or death.
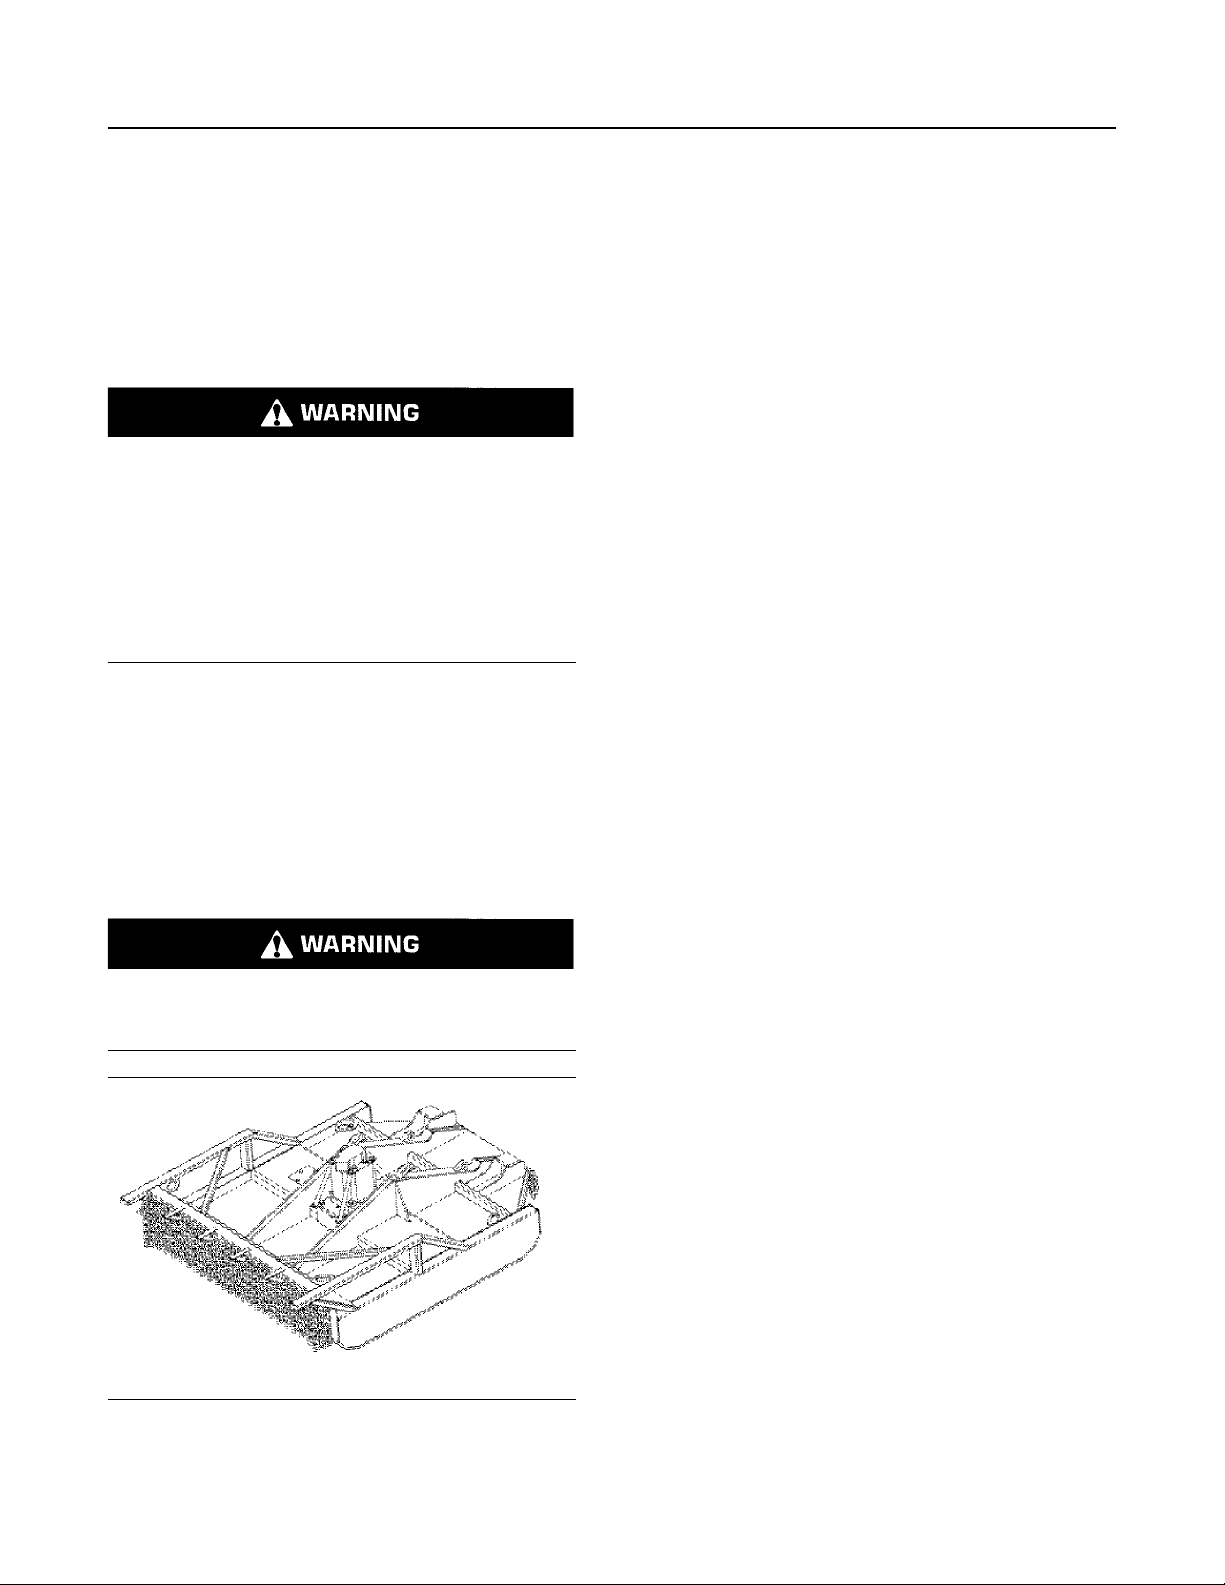
Illustration 47 g02840448
The MR-244 is shown in this graphic. Other
attachments may be utilized with site-prep machines.
The declared operator sound pressure level
measured according to the procedures specified in
“ANSI/SAE J1166FEB2008” is 75.6 dB(A). During this
test, the machine was in high idle and the operator
fan was in the midrange position. This measurement
is for the cab that is offered by your machine when
properly installed, maintained, and tested with the
doors and windows closed and with the machine in
middle gear range and moving.
The declared exterior sound pressure level is 87.3 dB
(A) when the test procedures specified in “SAE
J88Feb2006 - Constant Speed Moving Test”
procedure is used to measure the value of the
standard machine. The measurement was conducted
under the following conditions: distance of 15 m (49.2
ft) and "the machine moving forward in intermediate
gear ratio" .
Hearing protection may be needed when the machine
is operated with an open operator station for
extended periods or in a noisy environment. Hearing
protection may be needed when the machine is
operated with a cab that is not properly maintained, or
when the doors and windows are open for extended
periods or in a noisy environment.
Page 32

32 SEBU9024
Safety Section
Operator Station
The average exterior sound pressure level is 87.3 dB
(A) when the “SAE J88 Feb 2006 - Constant Speed
Moving Test Procedure” is used to measure the value
for the standard machine. The measurement was
conducted under the following conditions: distance of
15 m (49.2 ft) and "the machine moving forward in an
intermediate gear ratio".
The exterior sound power level is 87.3 dB(A) when
the value is measured according to the static test
procedures and the conditions that are specified in
“ISO 6393:1998”.
i03634321
Operator Station
SMCS Code: 7000
Any modifications to the inside of the operator station
should not project into the operator space or into the
space for the companion seat (if equipped). The
addition of a radio, fire extinguisher, and other
equipment must be installed so that the defined
operator space and the space for the companion seat
(if equipped) is maintained. Any item that is brought
into the cab should not project into the defined
operator space or the space for the companion seat
(if equipped). A lunch box or other loose items must
be secured. Objects must not pose an impact hazard
in rough terrain or in the event of a rollover.
Page 33
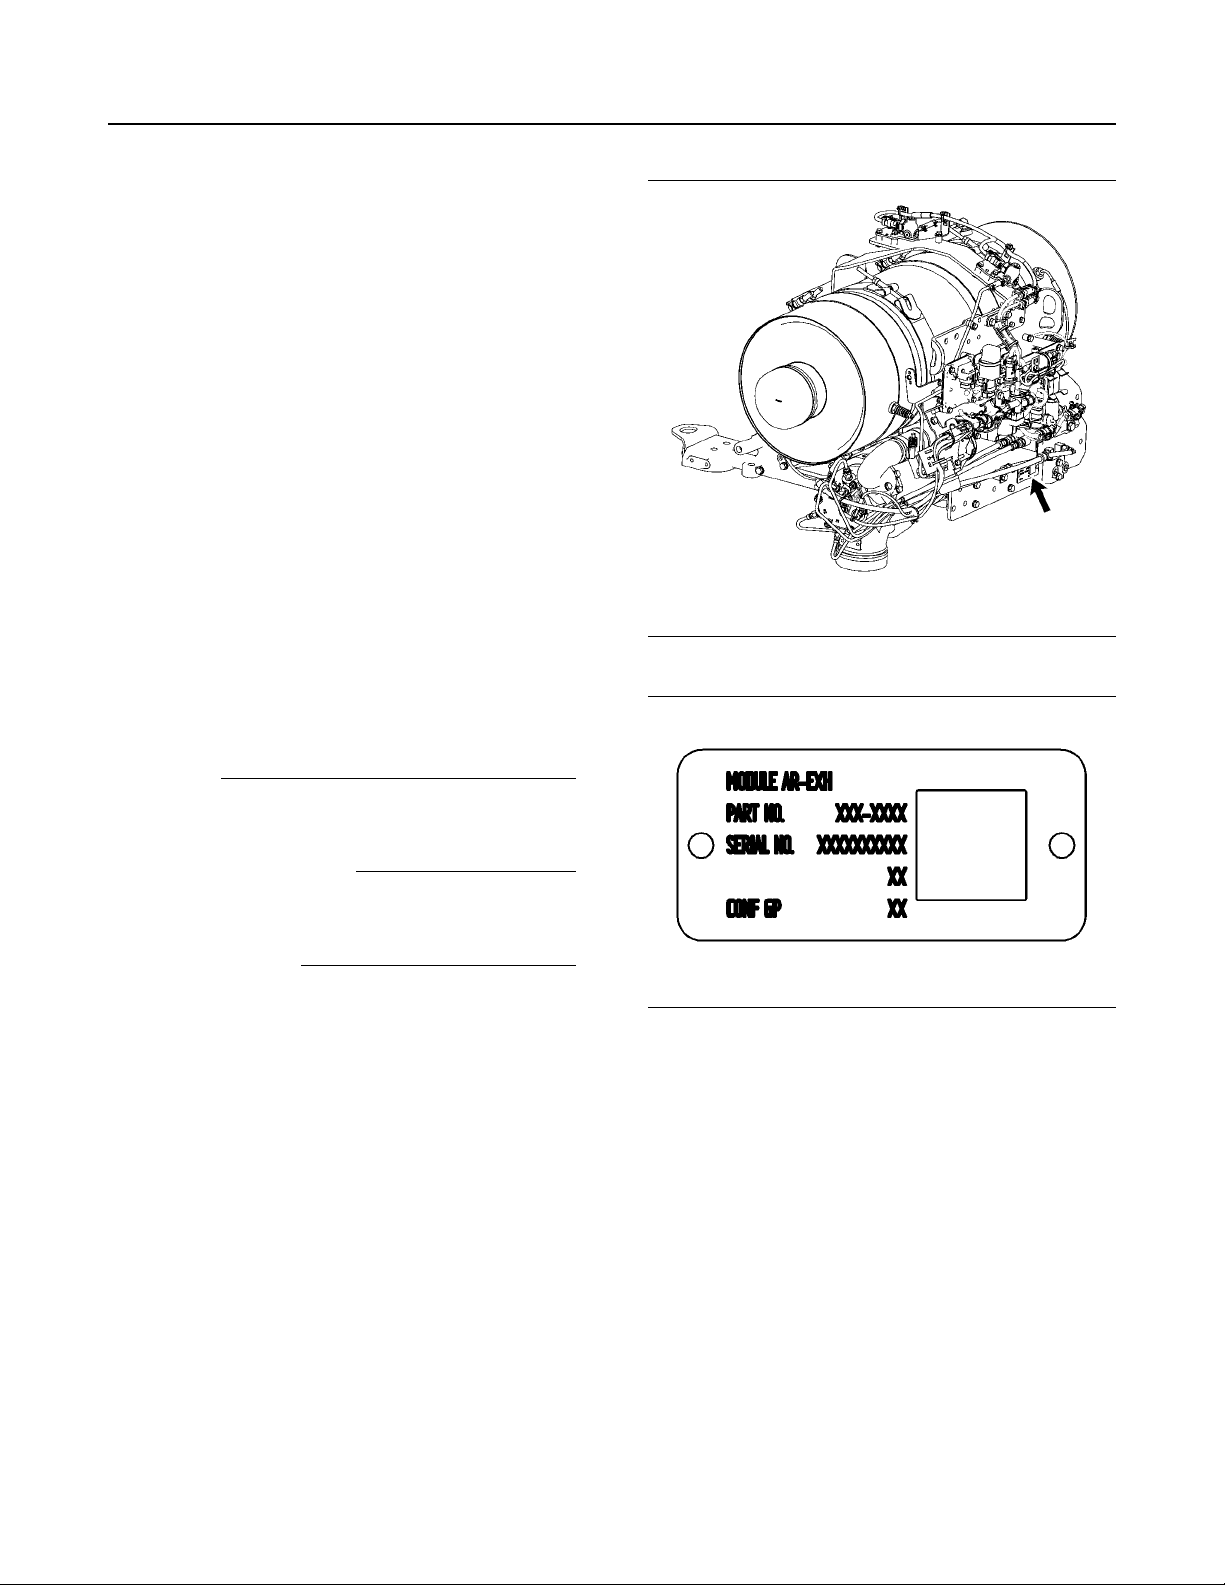
SEBU9024 33
Product Information Section
Plate Locations and Film Locations
Product Information
Section
Identification Information
i04551186
Plate Locations and Film
Locations
SMCS Code: 1000; 7000
The Product Identification Number (PIN) will be used
to identify a powered machine that is designed for an
operator to ride.
Prentice products such as engines, transmissions
and major attachments that are not designed for an
operator to ride are identified by Serial Numbers.
For quick reference, record the identification numbers
in the spaces that are provided.
Illustration 48 g02236893
The machine PIN is located on the left side of the
machine on the upper hitch.
Machine PIN
The transmission serial number is located on the
transmission gearbox.
Transmission Serial Number
The engine serial number is located on the top of the
engine.
Engine Serial Number
i05781665
Emissions Certification Film
SMCS Code: 1000; 7000; 7405
Certification Label for Emissions
Note: This information is pertinent in the United
States, in Canada, and in Europe.
Consult your Prentice dealer for an Emission Control
Warranty Statement.
Illustration 49 g02236574
The Clean Emission Module (CEM) identification
plate contains the following information: part number,
serial number, change level, and configuration ID
code. This information may be needed by the Cat
dealer when inquiries are being made on the CEM,
Page 34
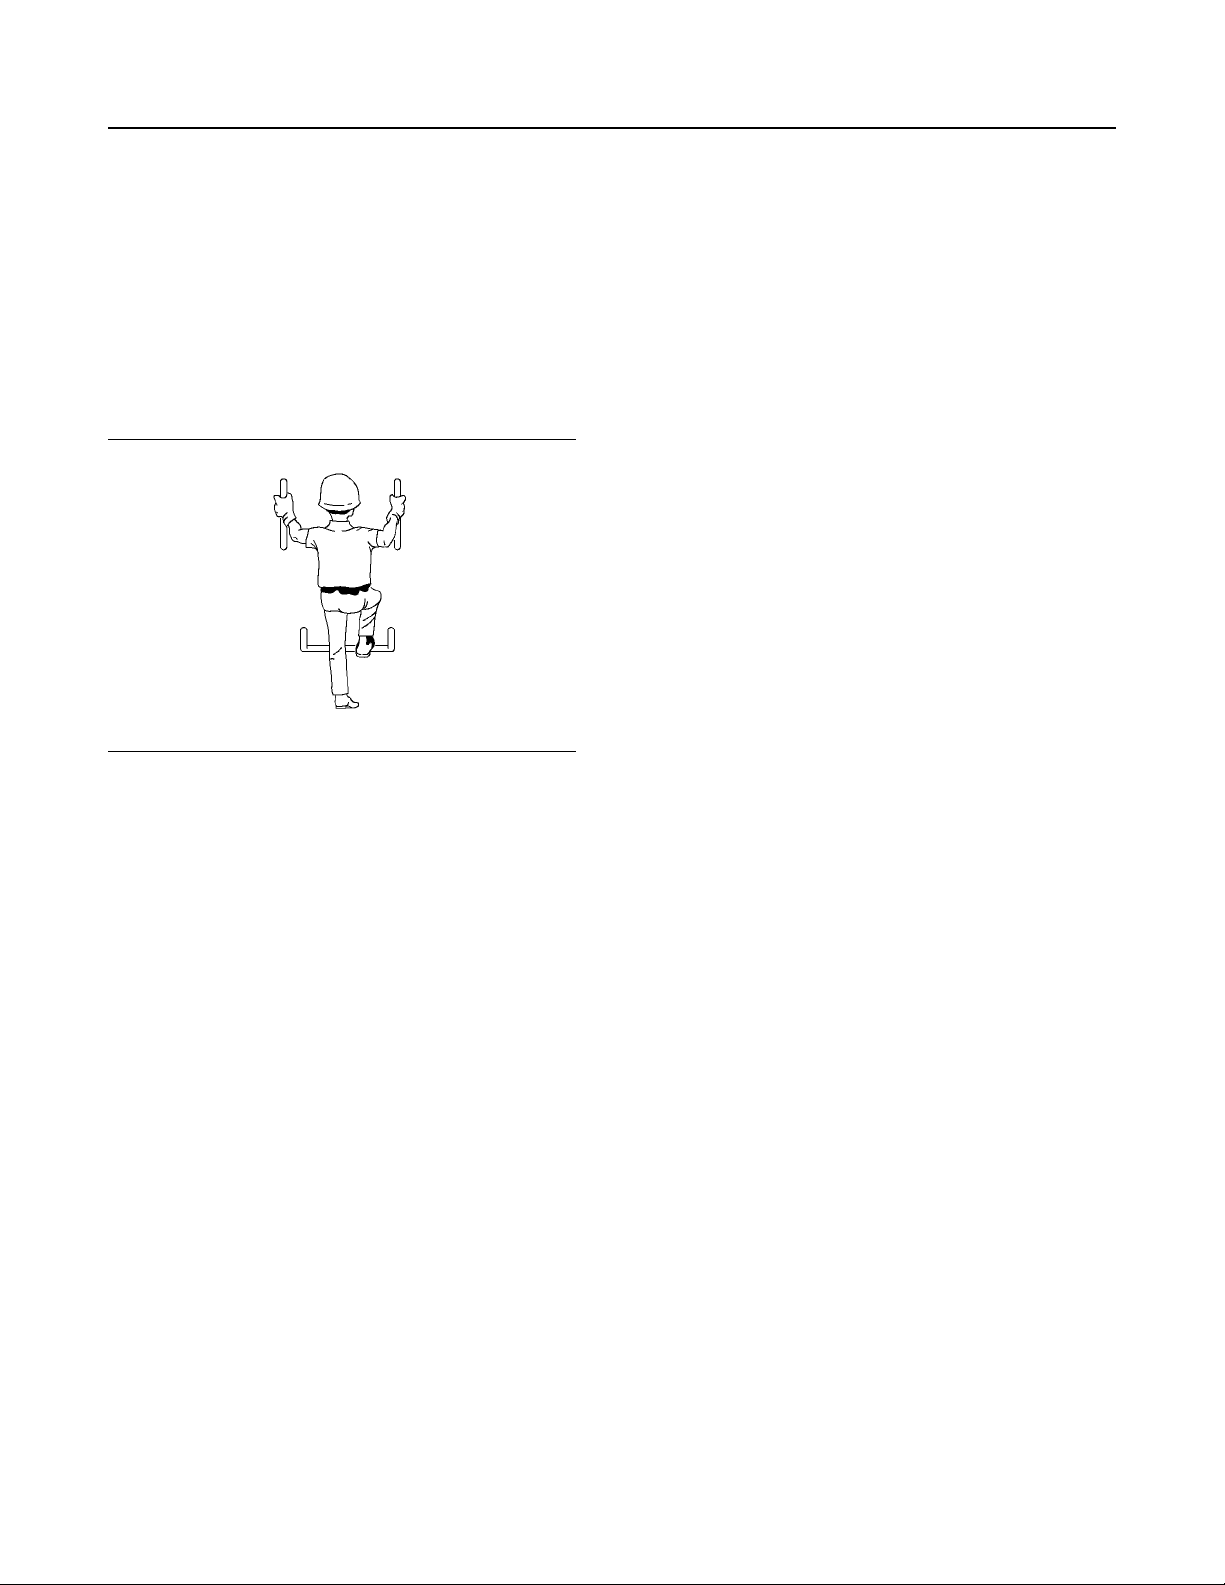
34 SEBU9024
Operation Section
Mounting and Dismounting
Operation Section
Before Operation
i04407212
Mounting and Dismounting
SMCS Code: 7000
Illustration 50 g00037860
Typical example
Mount the machine and dismount the machine only at
locations that have steps and/or handholds. Before
you mount the machine, clean the steps and the
handholds. Inspect the steps and handholds. Make
all necessary repairs.
Machine Access System
Specifications
The machine access system has been designed to
meet the intent of the technical requirements in “ISO
2867 Earth-moving Machinery – Access Systems”.
The access system provides for operator access to
the operator station and to conduct the maintenance
procedures described in the maintenance section.
Alternate Exit
Machines that are equipped with cabs have alternate
exits. For additional information, see Operation and
Maintenance Manual, “Alternate Exit”.
i02037991
Daily Inspection
SMCS Code: 1000; 7000
For a maximum service life of the machine, complete
a thorough daily inspection before you mount the
machine and before you start the engine.
• Daily, perform the maintenance requirements that
are applicable to your machine.
Reference: For more information on the daily
maintenance requirements, refer to Operation and
Maintenance Manual, “Maintenance Interval
Schedule”.
Face the machine whenever you get on the machine
and whenever you get off the machine.
Maintain a three-point contact with the steps and with
the handholds.
Note: Three-point contact can be 2 feet and one
hand. Three-point contact can also be 1 foot and two
hands.
To access the rear of the machine. Fully raise the
hood and use the handrails under the hood to
maintain three points of contact.
Do not mount a moving machine. Do not dismount a
moving machine. Ensure that the work tool is fully
lowered to the ground, the transmission is in neutral,
and the parking brake is applied. Ensure that the Left
Hand Steering Control (if equipped) is tilted up and
out of the way before you enter or exit the cab. Never
jump off the machine. Do not carry tools or supplies
when you try to mount the machine or when you try to
dismount the machine. Use a hand line to pull
equipment onto the platform. Do not use any controls
as handholds when you enter the operator
compartment or when you exit the operator
compartment.
Page 35
SEBU9024 35
Before Operation
Steering Frame Lock
• Inspect the area around the machine and under
the machine. Look for loose bolts, trash buildup,
oil, fluid leakage, broken parts, or worn parts.
• Watch closely for leaks. If you observe a leak, find
the source of the leak and correct the leak.
Replace hoses, as needed. If you suspect a leak
or you observe a leak, check the fluid levels more
frequently.
• Inspect the engine compartment. Remove any
debris buildup from the engine compartment.
Inspect the engine for any obvious component
damage.
• Inspect the hydraulic system for leaks. Check the
hydraulic tank, all hoses and all tubes. Inspect
plugs, seals, couplings and fittings. Fix any leaks
and replace hoses, as needed.
• Inspect all attachments and the linkages for wear
and for damage.
• Make sure that all access doors, all access covers
and all guards are secured. Inspect the access
doors, the access covers and the guards for
damage.
• Inspect the tires for damage. Replace any missing
valve caps.
• Make all necessary repairs before you operate the
machine.
i05401889
Steering Frame Lock
SMCS Code: 7506
No clearance for person in this area when machine turns. Severe injury or death from crushing
could occur.
Note: To connect the steering frame lock, the
machine must be in the straight ahead position.
The steering frame lock is located in the right-hand
engine compartment at the rear of the machine.
Connect the steering frame lock when the machine is
being lifted and when the machine is being
transported. Also connect the steering frame lock if
you are performing service work near the articulation
joint. Install the steering frame lock between the front
frame and the rear frame.
• Inspect the steps, the walkways and the
handholds. Remove any debris. Repair any
damage or replace any damaged parts.
• Inspect the lights. Replace any broken bulbs and
any broken lenses.
• Inspect the Rollover Protective Structure (ROPS)
for obvious damage. Consult your authorized
dealer for repairs.
• Inspect the operator compartment. Remove any
trash buildup. Keep the operator compartment
clean. Inspect the dash panel for broken gauges
and for broken indicator lights. Replace any broken
parts.
• Inspect the seat belt, the buckle and the mounting
hardware. Replace any components that are worn
or damaged. For more information, refer to
Operation and Maintenance Manual, “Seat Belt Replace”.
• Adjust the mirrors for best visibility.
• Inspect the windows. Make sure that the operator's
vision is not impaired by dust, by mud, or by other
foreign materials. Clean the windows, if necessary.
For more information, refer to Operation and
Maintenance Manual, “Windows - Clean”.
Page 36

36 SEBU9024
Before Operation
Steering Frame Lock
Illustration 51 g03413165
The steering frame locking bar is stored in the rear
right-hand engine compartment.
Illustration 52 g02640417
To connect the steering frame lock, install locking bar
(1) and secure locking bar with locking pins.
Separate the steering frame lock before the machine
is operated. Remove the pins and the locking pins.
Store the pins and the locking pins in storage
compartment.
Page 37
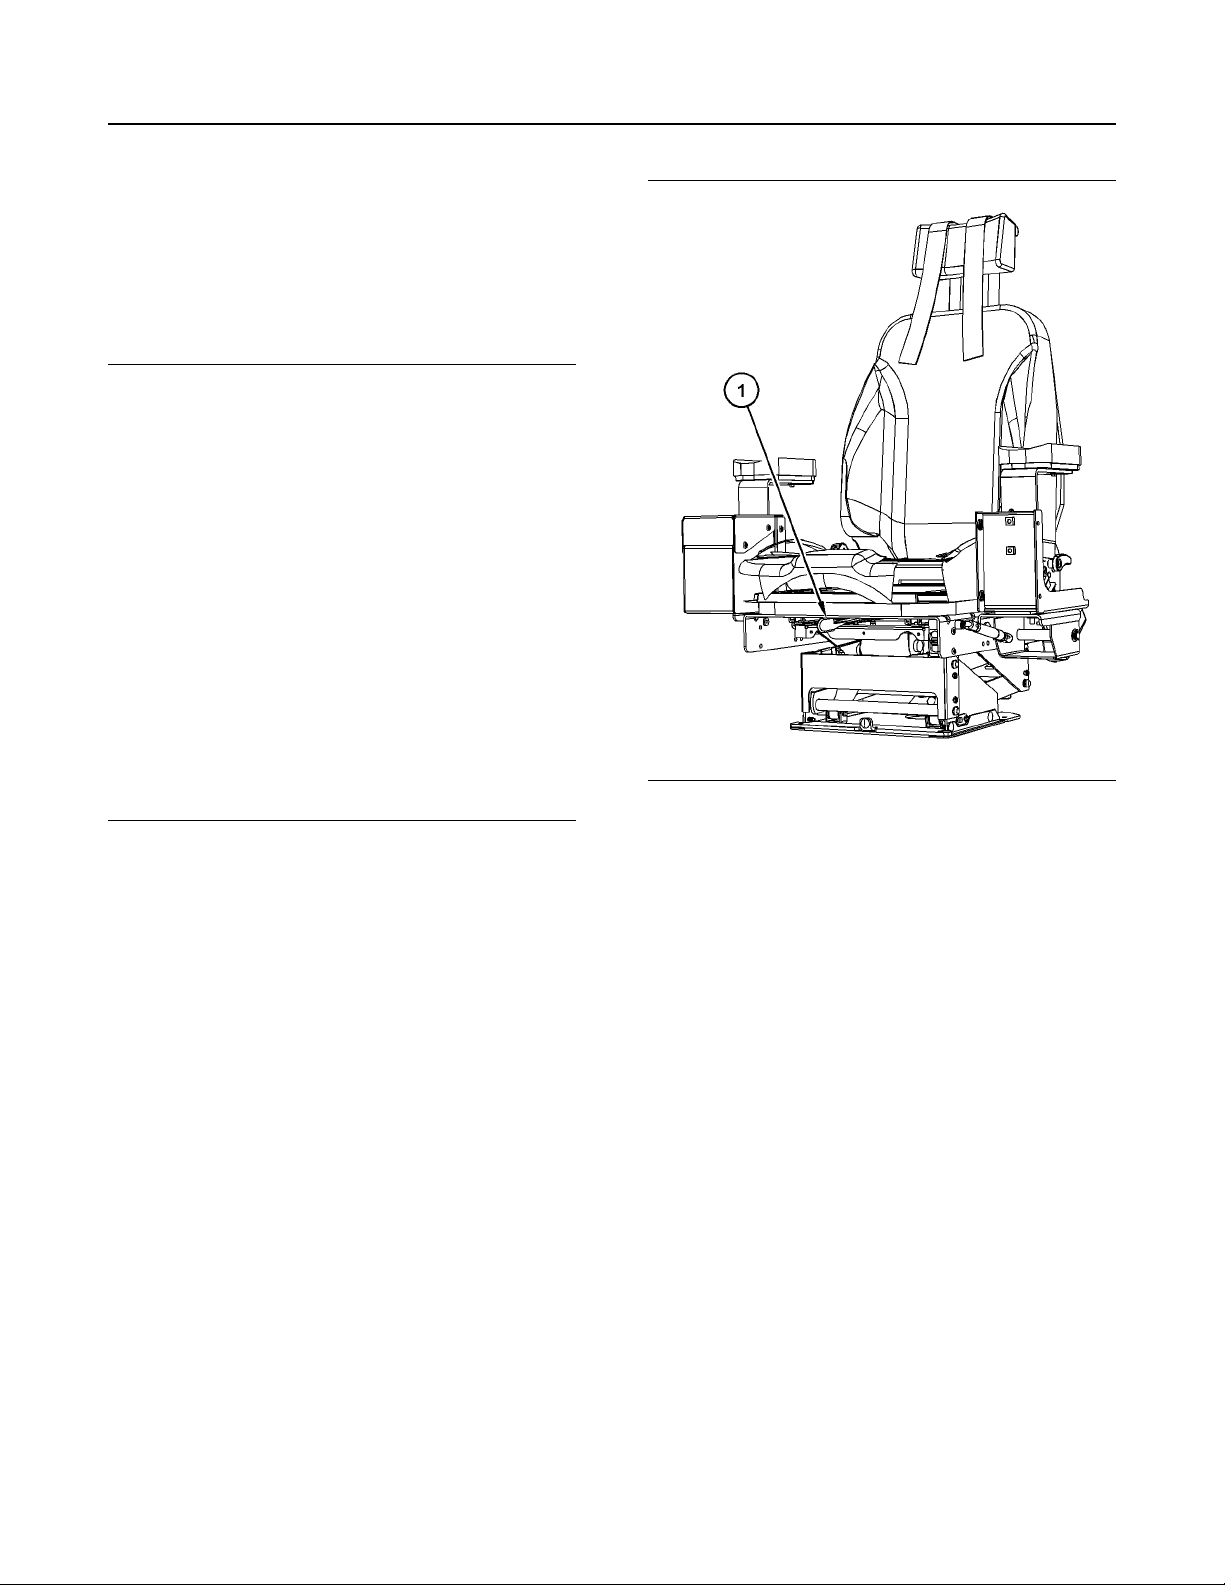
SEBU9024 37
Machine Operation
Alternate Exit
Machine Operation
i05738649
Alternate Exit
SMCS Code: 7308; 7310
Illustration 53 g02646096
The alternate exit is located on either side through the
access doors. Use either access door handle (1) as
an emergency exit from the cab. The access doors
can be opened from the inside of the cab or from the
outside of the cab when the doors are UNLOCKED.
i05738659
Seat
SMCS Code: 7312
Put the hydraulic lockout control in the LOCKED
position. For further details on this procedure, refer to
Operation and Maintenance Manual, “Operator
Controls”. Do this procedure before you adjust the
seat and the console. In order to prevent any
possibility of unexpected movement of the machine.
Adjust the seat at the beginning of each work period
and adjust the seat when you change operators.
Always use the seat belt when you operate the
machine. For further details on this procedure, refer to
Operation and Maintenance Manual, “Seat Belt”.
Illustration 54 g03651662
The operator can adjust the seat position forward or
backward. Adjust seat position with knob (1) on front
of seat. The operator may also adjust the seat back
tilt. Select the desired position in order to allow full
pedal travel and full lever travel.
The seat and the consoles can also slide as one unit.
To move the seat, the left console, and the right
console forward or backward as one unit, pull up
lever (1) and hold the lever. Hold the seat in the
desired position. Release the lever in order to lock the
seat, the left console, and the right console.
The seat should be adjusted so that full pedal travel is
allowed.
Page 38
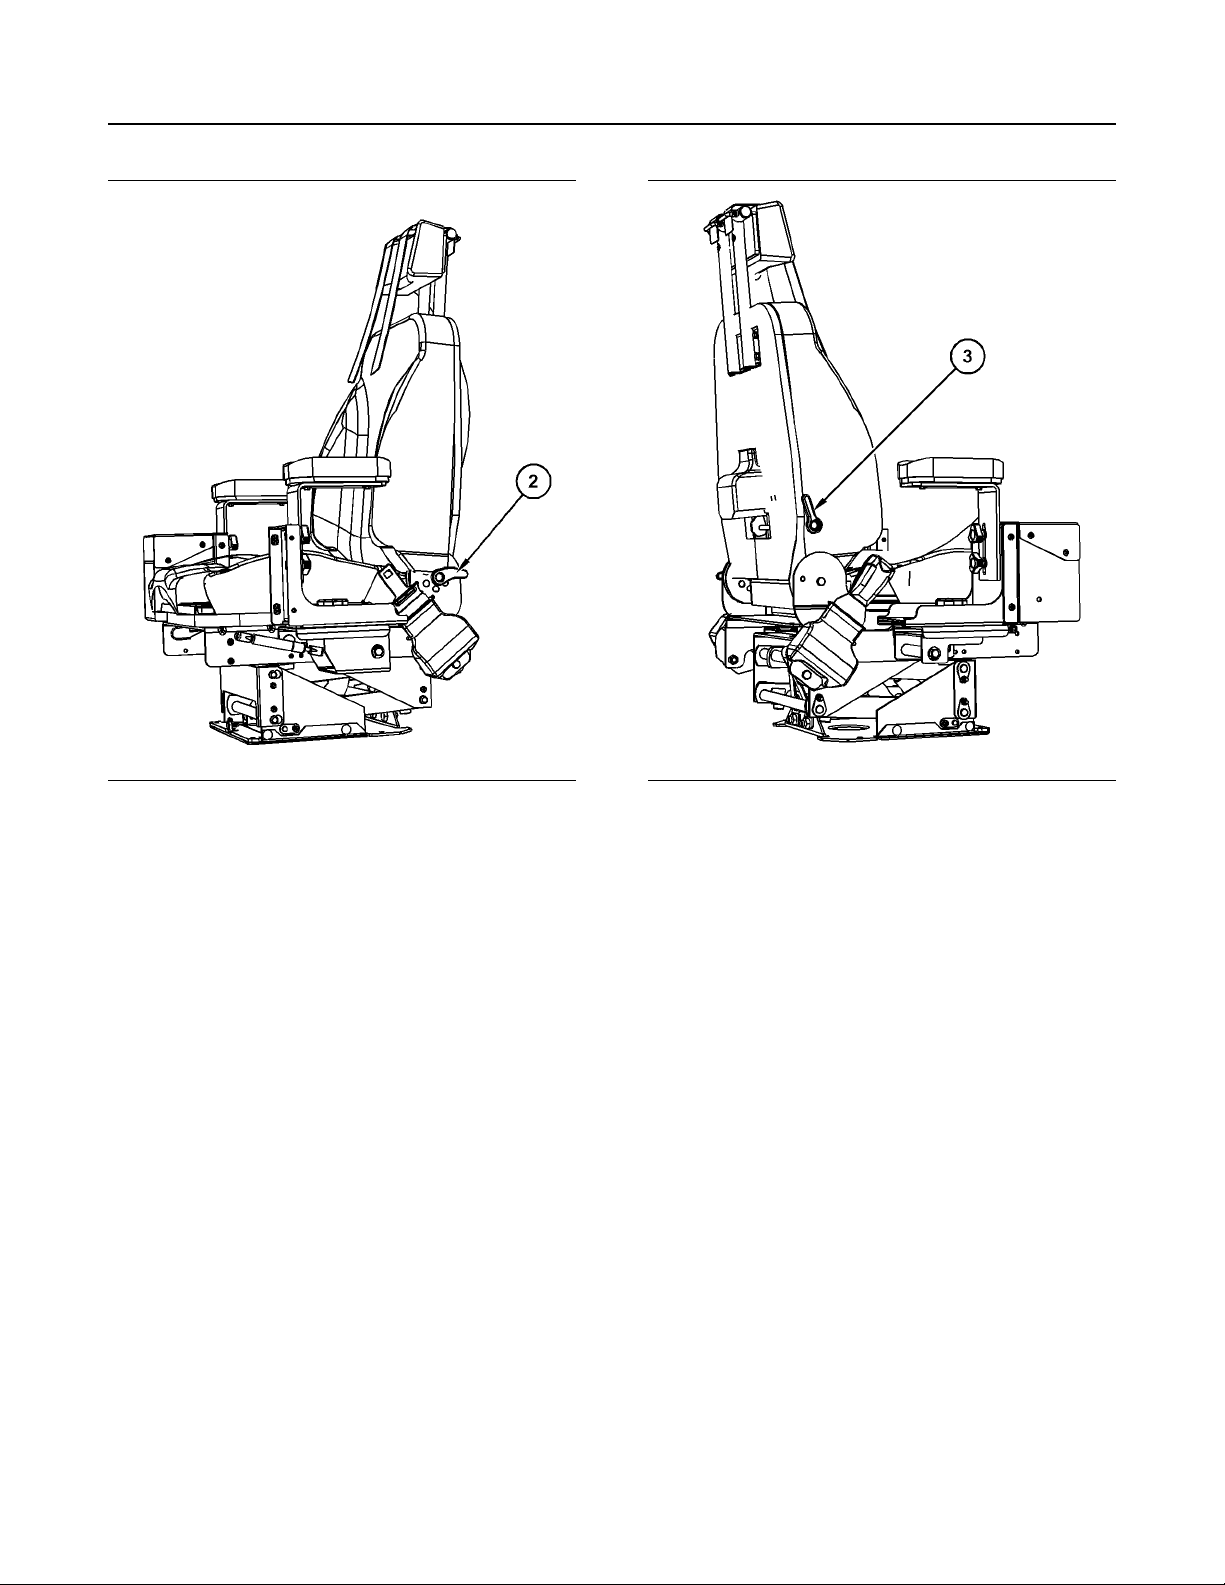
38 SEBU9024
Machine Operation
Seat
Illustration 55 g03651671
To adjust the seat back tilt, move lever (2) and move
the seat back to the desired position.
Illustration 56 g03651694
Pull up lever (3) in order to change the angle of the
seat. Hold the seat in the desired position. Release
the lever.
Page 39
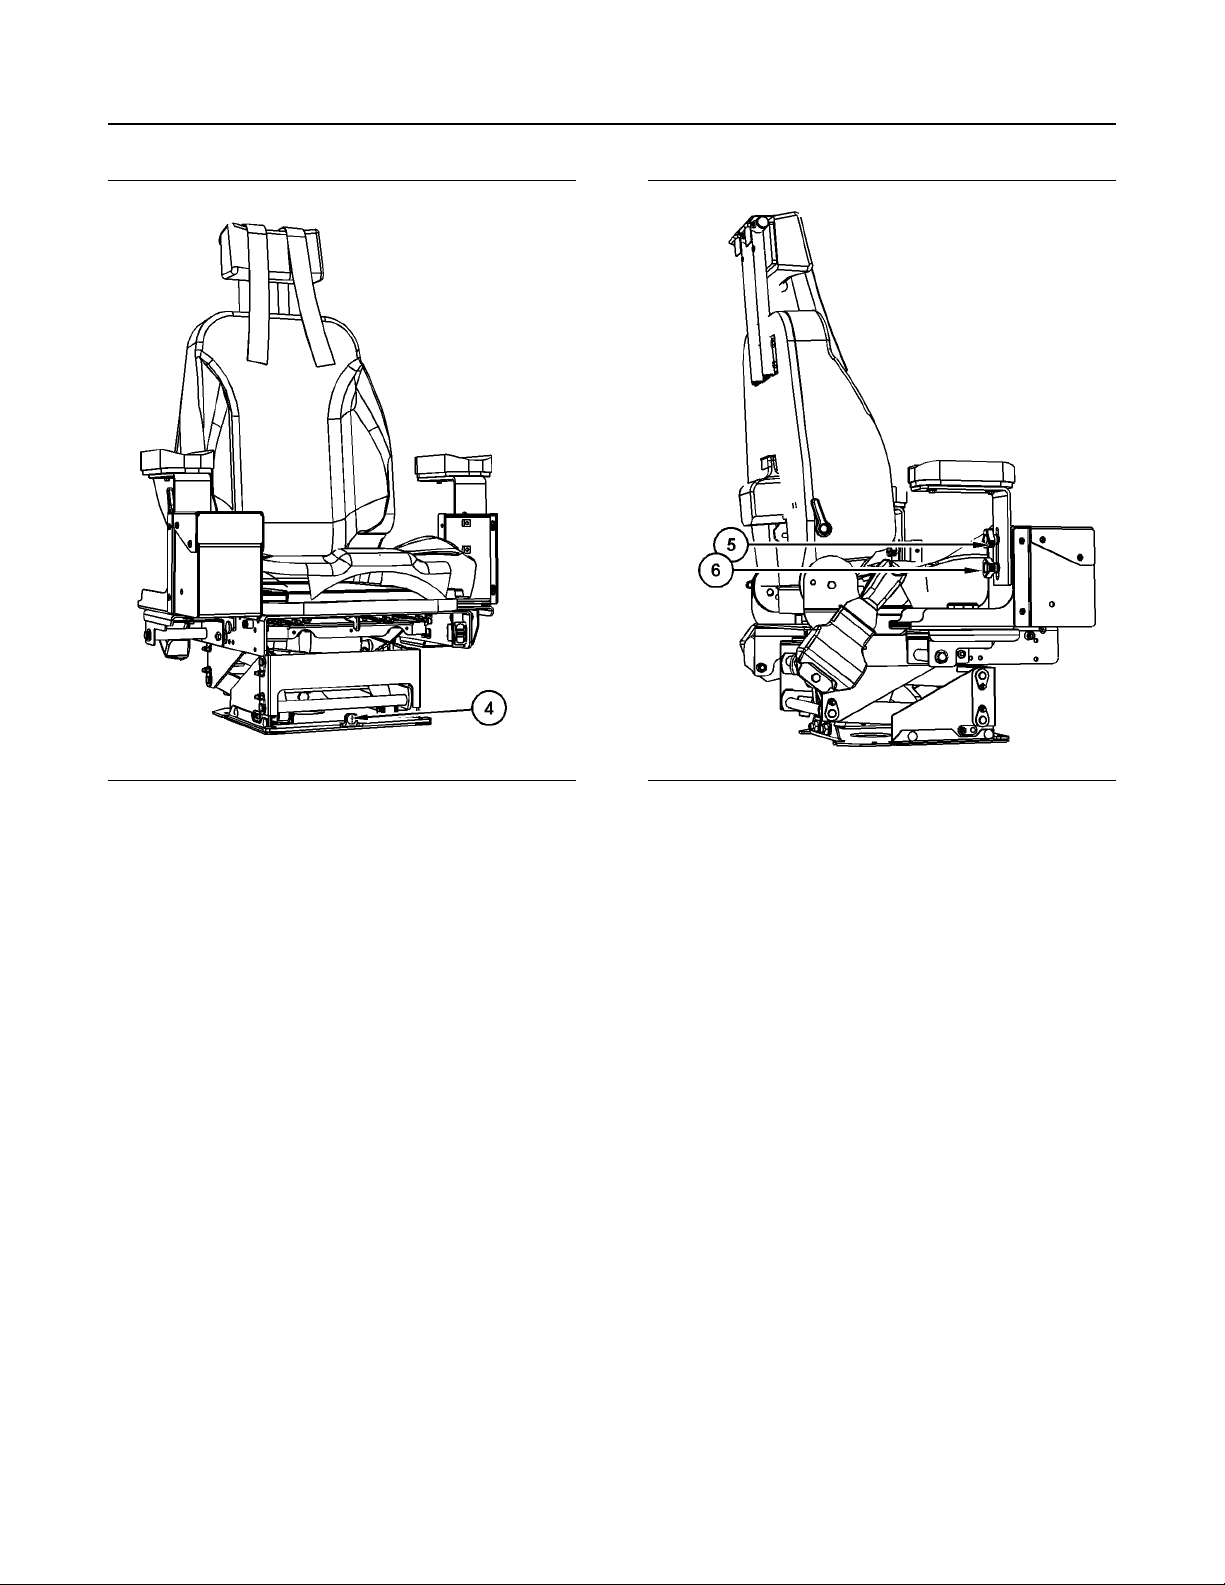
SEBU9024 39
Machine Operation
Seat
Illustration 57 g03651707
Use air suspension control button (4) in order to
adjust the height of the seat. Depress top of button to
raise seat. Depress bottom of button to lower seat.
Illustration 58 g03651730
To adjust the angle or placement of the armrest,
operate knob (5). Knob is on the back side of each
armrest. Place the left-hand armrest in the upright
position when you exit the machine.
The height of the armrest can be adjusted. Loosen
knob (6) in order to adjust the height of the armrest.
Move the armrest upward or move the armrest
downward. Tighten knob when the armrest is in the
desired position.
Page 40
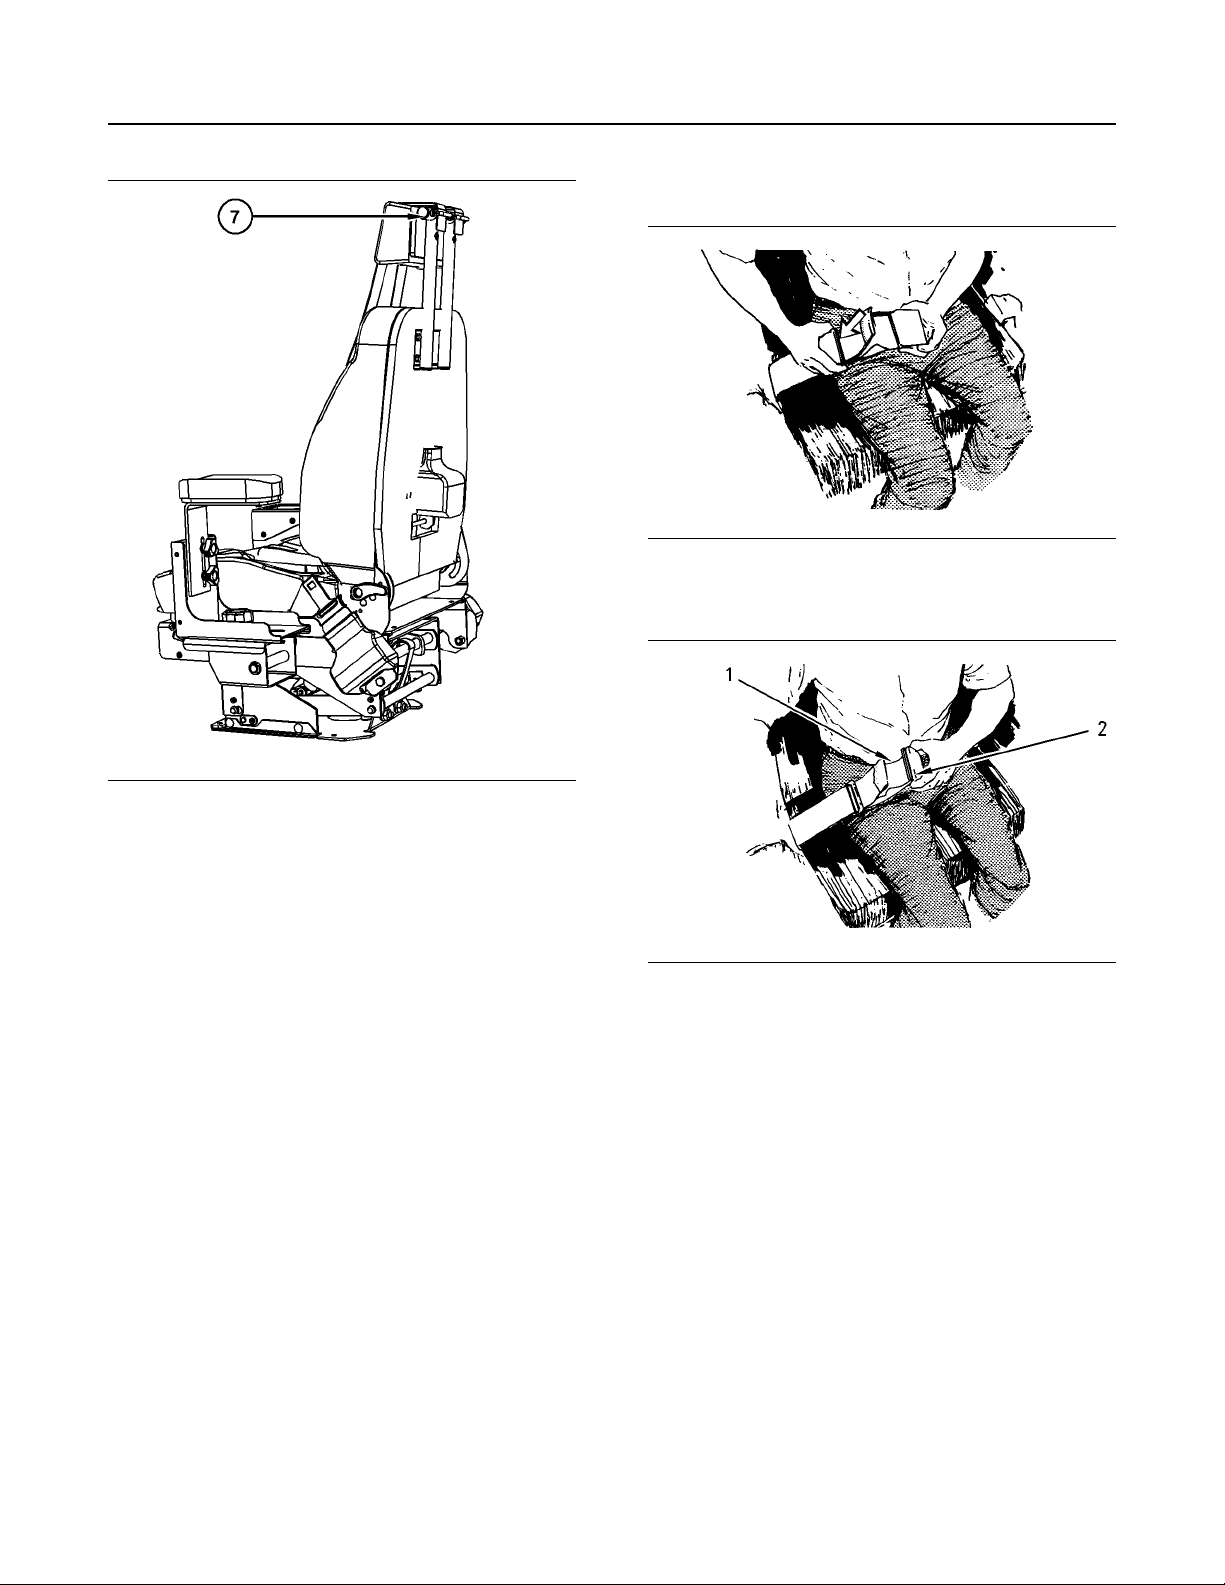
40 SEBU9024
Machine Operation
Seat Belt
Lengthening the Seat Belt
Illustration 60 g00100709
1. Unfasten the seat belt.
Illustration 59 g03651742
The operator can adjust the height of headrest (7) (if
equipped). To adjust the headrest, hold the headrest
with both hands. Move the headrest up and down.
Release the headrest when the desired position is
attained. The headrest will remain in the desired
position.
i04762830
Seat Belt
SMCS Code: 7327
Note: This machine was equipped with a seat belt
when the machine was shipped from Prentice . At the
time of installation, the seat belt and the instructions
for installation of the seat belt meet the SAE J386 and
ISO 6683 standards. Consult your Prentice dealer
for all replacement parts.
Always check the condition of the seat belt and the
condition of the mounting hardware before you
operate the machine.
Seat Belt Adjustment for NonRetractable Seat Belts
Illustration 61 g00932817
2. To remove the slack in outer loop (1), rotate buckle
(2). This will free the lock bar. This permits the seat
belt to move through the buckle.
3. Remove the slack from the outer belt loop by
pulling on the buckle.
4. Loosen the other half of the seat belt in the same
manner. If the seat belt does not fit snugly with the
buckle in the center, readjust the seat belt.
Adjust both ends of the seat belt. The seat belt should
be snug but comfortable.
Page 41
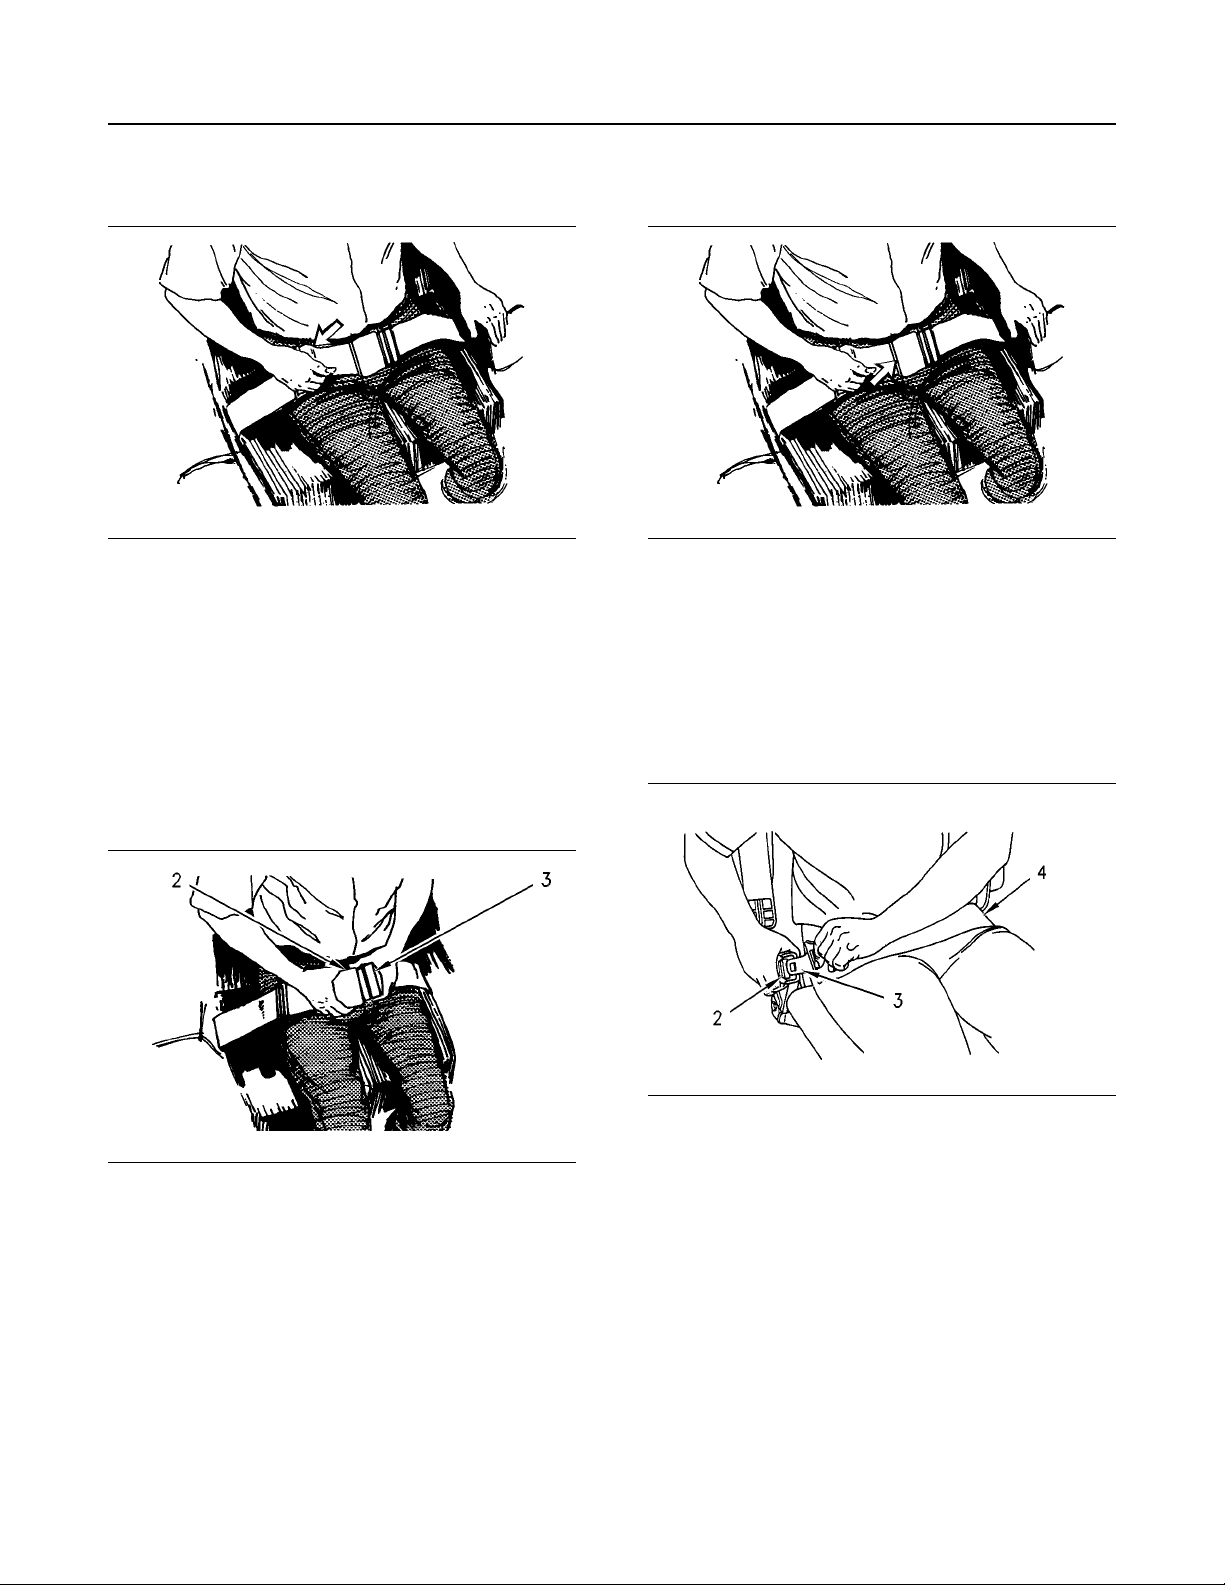
SEBU9024 41
Machine Operation
Seat Belt
Shortening the Seat Belt
Illustration 62 g00100713
1. Fasten the seat belt. Pull out on the outer belt loop
in order to tighten the seat belt.
2. Adjust the other half of the seat belt in the same
manner.
3. If the seat belt does not fit snugly with the buckle in
the center, readjust the seat belt.
Releasing The Seat Belt
Illustration 64 g00100717
Pull up on the release lever. This will release the seat
belt.
Seat Belt Adjustment for
Retractable Seat Belts
Fastening The Seat Belt
Fastening The Seat Belt
Illustration 63 g00932818
Fasten the seat belt catch (3) into the buckle (2).
Make sure that the seat belt is placed low across the
lap of the operator.
Illustration 65 g00867598
Pull seat belt (4) out of the retractor in a continuous
motion.
Fasten seat belt catch (3) into buckle (2). Make sure
that the seat belt is placed low across the lap of the
operator.
The retractor will adjust the belt length and the
retractor will lock in place. The comfort ride sleeve will
allow the operator to have limited movement.
Page 42
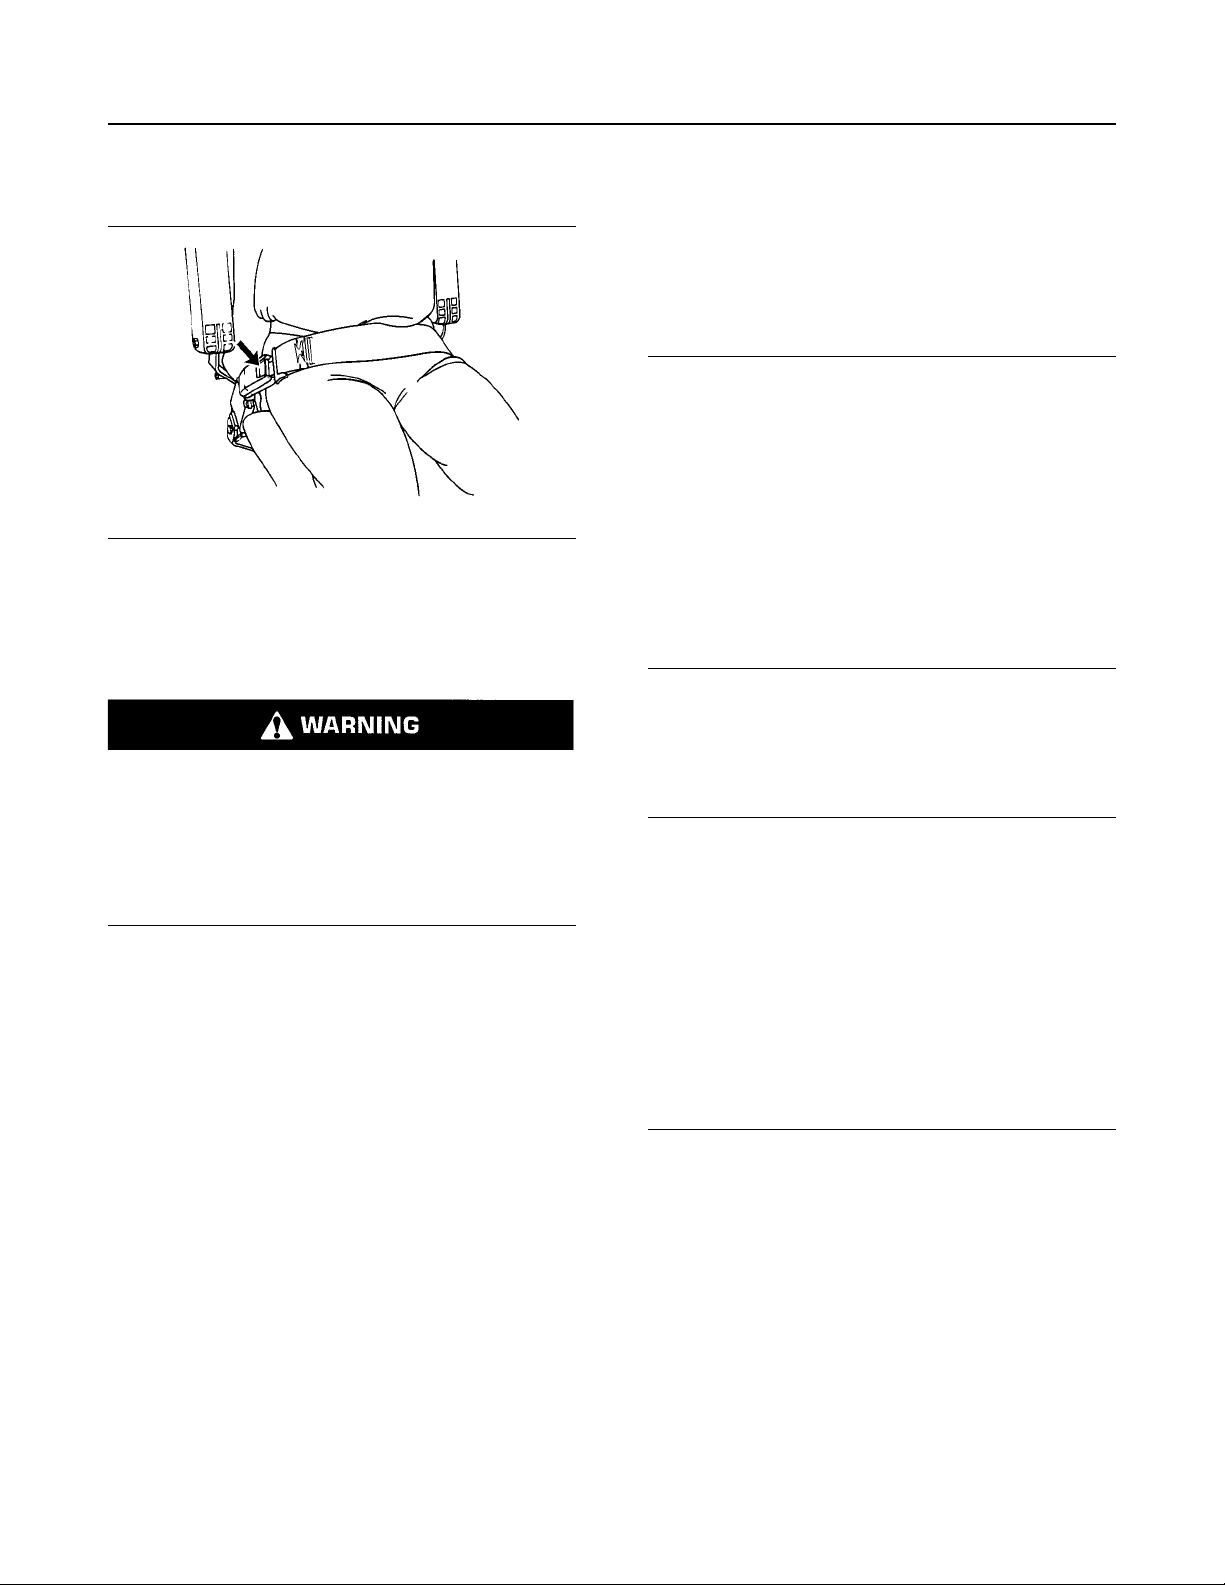
42 SEBU9024
Machine Operation
Seat Belt
Releasing The Seat Belt
Illustration 66 g00039113
Push the release button on the buckle in order to
release the seat belt. The seat belt will automatically
retract into the retractor.
Extension of the Seat Belt
4-Point Harness Adjustment
Each operator should make sure that the correct
adjustments are made to insure a correct fit of the
harness.
Step 1
Illustration 67 g03453756
Place each arm under the adjacent shoulder strap.
When using retractable seat belts, do not use seat
belt extensions, or personal injury or death can
result.
The retractor system may or may not lock up depending on the length of the extension and the
size of the person. If the retractor does not lock
up, the seat belt will not retain the person.
Longer, non-retractable seat belts and extensions for
the non-retractable seat belts are available.
Prentice requires only non-retractable seat belts to be
used with a seat belt extension.
Consult your Prentice dealer for longer seat belts
and for information on extending the seat belts.
i05791047
Seat Belt
(4-Point Harness )
SMCS Code: 7327
Note: This machine was equipped with a seat belt
when the machine was shipped from Prentice . At the
time of installation, the seat belt and the instructions
for installation of the seat belt meet the SAE J386 and
ISO 6683 standards. Consult your Prentice dealer
for all replacement parts.
Step 2
Illustration 68 g03453778
Pull upward on the orange tabs to loosen belt.
Always check the condition of the seat belt and the
condition of the mounting hardware before you
operate the machine.
Page 43

SEBU9024 43
Machine Operation
Seat Belt
Step 3
Illustration 69 g03453805
Buckle the lap belt. Fasten the seat belt catch into the
buckle . Make sure that the seat belt is placed low
across the lap of the operator.
Step 4
Sternum Strap (If Equipped)
Illustration 71 g03453859
(1) Strap clip
(2) Quick Release Buckle w/ Strap
(3) Length Adjustment
(4) Emergency Breakaway
Install sternum strap clips (1) onto the shoulder belt
webbing so the center bar is on the inside of the belt.
Illustration 70 g03453821
Pull black strap ends to snug belt across hips and
pelvis. The buckle should be centered and the
shoulder belts straight.
Note: If buckle rides up tighten lab belt. Make sure
that the seat belt is placed low across the lap of the
operator.
Releasing Harness
1. Push release button on buckle. This action will
release the lap belt.
2. Remove arms from under adjacent shoulder
straps.
Illustration 72 g03453866
• Insert clip into buckle to fasten Sternum strap.
• Use length adjustment (3) to properly adjust the
length of strap for a correct fit.
Note: Sternum strap should be adjusted so the belts
fall smoothly and is not loose.
Page 44

44
Machine Operation
Operator Controls
Illustration 73 g03453876
• Pull Quick release (2) to release.
SEBU9024
i05740860
Operator Controls
SMCS Code: 7300; 7301; 7451
Illustration 74 g03413585
Console on the right side of the machine
(1) IQAN-Md3
(2) Right Hand Joystick
(3) Engine Start Switch
(4) Heating and Air Conditioning Controls
(5) 12V Power Receptacles
(6) Cup Holders
(7) Control Panel
Page 45

SEBU9024
45
Machine Operation
Operator Controls
Illustration 75 g02647097
(8) Foot Rest
(9) Service Brake
(10) Travel Pedal REVERSE
(11) Travel Pedal FORWARD
Illustration 76 g03413756
(12) Parking Brake
(13) Hydraulic Arming Control
(14) Throttle Up Control
(15) Active Regeneration Indicator
(16) Front Floodlight Control
(17) Pump Displacement Switch
(18) Horn Control
(19) Fan Directional Control
(20) Saw Control
(21) Throttle Down Control
(22) Active Regeneration Disable Control
(23) Rear Floodlight Control
(24) Differential Lock Control
(25) Manual Hydraulic Over Ride Control
(26) Winch Retract
(27) Winch Release
Page 46

46 SEBU9024
Machine Operation
Operator Controls
IQAN-Md3 Display (1)
Illustration 77 g03667695
(28 ) Left Hand Joystick.
Illustration 78 g02647268
The cab dome light is located on the ceiling of the cab
above the operator.
Illustration 79 g03688895
IQAN-Md3 Display (1) is located on the right side
console in the cab.
The IQAN-MD3 module consists of a display, nine
buttons. This module is located on the right switch
panel in the front of the cab. The IQAN-MD3 allows
individual functions of the machine to be displayed.
The IQAN-MD3 allows you to adjust several
implement functions. The IQAN-MD3 monitors all of
the input signals and all of the output signals.
The IQAN-MD3 allows the operator to obtain different
machine information. The monitor is also used for
adjusting the hydraulic settings, calibrating machine
controls, testing machine components, and
troubleshooting machine systems.
Note: Most of the troubleshooting of the IQAN
system and machine system can be performed with
the use of the IQAN-MD3 module.
The IQAN-MD3 processes incoming CAN Bus
signals, the digital on/off signals, and the voltage
input signals. Module converts the signals into
functions and the module sends the signals to the
solenoids and the CAN Bus signals to the other
control units.
Page 47

SEBU9024
47
Machine Operation
Operator Controls
Right Hand Joystick (2)
Illustration 80 g03667706
Note: The momentary differential lock switch will only
function if the front differential lock switch and the rear
differential lock switch are in the OFF position.
Engine Start Switch (3)
OFF – When you insert the engine start
switch key and when you remove the
engine start switch key, the engine start
switch must be in the OFF position. To disconnect
the power to the electrical circuits in the cab, turn
the engine start switch to the OFF position. Also,
turn the engine start switch to the OFF position in
order to stop the engine.
ON – To activate the electrical circuits in
the cab, turn the engine start switch key
clockwise to the ON position.
START – To start the engine, turn the
engine start switch clockwise to the
START position. When the engine start
switch key is released, the engine start switch will
return to the ON position.
Note: If the engine fails to start, return the engine
start switch to the OFF position. This must be done
before you attempt to start the engine again.
Illustration 81 g03688897
The right joystick controls the accumulator arms, the
lift and the tilt of the felling head, and the temporary
differential lock. The middle left button on the top of
the right joystick closes the accumulator arms. The
middle right button on the top of the right joystick
opens the accumulator arms.
The lower right button and the top right buttons on the
top of the right joystick have no function.
Heating and Air Conditioning
Controls (4)
Illustration 82 g02647839
The control panel for the heating and air conditioning
system are located on the right side of the cab.
To temporarily engage the front differential lock, hold
the toggle switch on the joystick. To disengage the
front differential lock, release the toggle switch.
Page 48

48 SEBU9024
Machine Operation
Operator Controls
On Off Switch
On/Off Switch (A) Turns the heater or Air Conditioner
on and off.
Temperature Control
Cooling – Turn knob (B)
counterclockwise in order to decrease
the temperature in the cab.
Heating – Turn knob (B) clockwise in
order to increase the temperature in the
cab.
Fan Switch
Fan Speed Switch – Fan speed switch
(C) controls the speed of the blower fan
motor for the heating and air
conditioning system. Turn the knob clockwise for
more air. Turn the knob counterclockwise for less
air.
Control Panel (7)
Illustration 83 g02647923
The Control Panel is located on the right side console
in the cab.
Page 49

SEBU9024 49
Machine Operation
Operator Controls
Foot Brake Control (Service) (9)
Illustration 84 g02647998
Service brake pedal (9) is the center pedal on the cab
floor.
When you depress travel pedal (11) the machine will
travel in the FORWARD direction.
When both of the travel pedals are released, the
engine speed will slow.
Depress the center brake pedal in order to slow or
stop the machine.
Brake Control (Parking) (12)
NOTICE
Do not engage the parking brake while the machine is
moving unless the service brake fails. The use of the
parking brake as a service brake in regular operation
will cause severe damage to the parking brake.
Depress the service brake pedal in order to slow the
machine ground speed. Use the service brake pedal
for normal braking.
Travel Pedals(10, 11)
Illustration 85 g02647998
Illustration 86 g02649240
Parking Brake – Parking brake switch
(12) is located on the right side console.
Use the parking brake only after the
machine is stopped.
Depress switch in order to activate the parking brake.
Parking brake switch indicator (12) will be illuminated
when the parking brake is engaged.
Depress switch in order to turn off the parking brake.
Parking brake switch indicator (12) will go off.
Release the switch when the parking brake
deactivates.
Note: To deactivate the parking brake, the hydraulic
system must be armed.
The direction of the machine is determined by travel
pedals (10) and (11).
When you depress travel pedal (10), the machine will
travel in the REVERSE direction.
Page 50

50 SEBU9024
Machine Operation
Operator Controls
Hydraulic Arming Control (13)
Illustration 87 g02649316
The hydraulic arming control (13) is used to turn the
machine hydraulic system (implement and steering)
on and off. The hydraulic arming control is located on
the right side of the operator seat.
When the hydraulic arming control activation light is
ILLUMINATED, the machine hydraulic system is on.
Throttle Up Speed Control (14)
Illustration 88 g02649337
This valve controls the ground speed by regulating
the signal pressure to the propel pump.
Depress switch (14) in order to increase engine
speed.
Active Regeneration Control (15)
When the hydraulic arming control activation light is
NOT ILLUMINATED, the machine hydraulic system is
off.
Illustration 89 g02649343
Depress switch (15) for 2-3 seconds in order to
activate regeneration function (ARD).
Page 51

SEBU9024 51
Machine Operation
Operator Controls
Front Floodlight Switch (16)
Illustration 90 g02649437
Depress the switch (16) in order to turn the front lights
ON. Depress the switch again in order to turn the
front lights OFF.
Horn Switch (18)
Illustration 92 g02649457
Depress the switch (18) in order to sound the horn.
Repeatedly depress the switch to sound the horn
again.
Pump Displacement Switch (17)
Illustration 91 g02650718
Depress the switch (17) in order to select motor
displacement. Depress the switch to select maximum
displacement pressure, and disable auto shift
function.
Reversible Fan Control (19)
Illustration 93 g02649476
The direction of the fan can be reversed. This will
clear debris from the radiator. The switch (19) is
located in the right side console. Operate the switch
in order to reverse the fan. Release the switch in
order to stop the reverse direction of the fan.
Page 52

52 SEBU9024
Machine Operation
Operator Controls
Implement Switch (20)
Illustration 94 g02649499
Implement switch (20) is located on the right side
console in the cab.
Throttle Down Speed Control (21)
Illustration 95 g02649502
This valve controls the engine speed by regulating
the signal pressure to the propel pump.
Depress the implement switch in order to activate the
implement function.
Depress the implement switch again in order to
deactivate the implement function.
Note: The implement functions will only operate if the
hydraulic lockout control is in the ON position, with
light ILLUMINATED.
Note: Implement function pressure is displayed on
the IQAN-Md3 main screen. Display indicates the
hydraulic oil pressure to the implement . If the
pressure is high, the speed of the implement function
is slow. If the pressure is low, the speed of the
implement is high. When the pressure is high and the
implement function is slow, you may choose to limit
another function such as the travel, the lift or the steer
in order for the saw to recover faster.
Depress switch (21) in order to decrease engine
speed.
Regeneration Disable Control (22)
This function will deactivate the ARD.
Illustration 96 g02649505
Depress switch (22) in order to deactivate
regeneration function.
Page 53

SEBU9024 53
Machine Operation
Operator Controls
Rear Floodlight Switch (23)
Illustration 97 g02649507
Depress the switch (23) in order to turn the rear lights
ON. Depress the switch again in order to turn the rear
lights OFF.
The momentary front differential lock switch is located
on the right joystick. Squeeze and hold the
momentary front differential lock switch in order to
activate the differential lock. Release the momentary
differential lock switch in order to deactivate the front
differential lock.
Indicator will illuminate on the IQAN-Md3 display and
light on control panel will illuminate when the
differential lock is engaged.
Hydraulic Override Control(25)
Differential Lock Control (24)
Illustration 98 g02649509
The rear differential lock switch (24) is located on the
right side panel.
Illustration 99 g02649517
The hydraulic override switch (25) is located on the
right side panel.
Press and hold hydraulic override switch to enable
the "limp" home hydraulic functions. Functions that
will be enabled are propel, steer, and raise or lower
the arm.
Press rear differential lock switch (24) in order to
engage the rear differential lock. When the differential
lock is engaged, both wheels on the axle will turn at
the same speed.
Page 54

54
Machine Operation
Operator Controls
SEBU9024
Winch Retract (26)
Illustration 100 g03413776
The winch retract switch (26) is located on the right
side panel.
Hand Controls (2, 28)
The momentary front differential lock toggle switch is
located on the right joystick. Squeeze the momentary
front differential lock switch in order to activate the
front differential lock. Release the momentary front
differential lock switch in order to deactivate the front
differential lock.
Right Joystick Control (2)
Press the winch retract switch to spool the winch
cable back onto the winch.
Winch Spool (27)
Illustration 101 g03413826
Illustration 102 g03688904
The right joystick controls the implement function and
differential lock function for this machine.
(A) Move the joystick to this position in order to tilt the
implement downward.
(B) Move the joystick to this position in order to raise
the implement.
(C) Move the joystick to this position in order to tilt the
implement upward.
(D) Move the joystick to this position in order to lower
the implement.
(E) Press the switch in order to open the collector
arms.
(F) Press the switch in order to close collector arms.
(G) Press the switch in order to activate front
differential lock function.
The winch spool switch (27) is located on the right
side panel.
Press the winch spool switch to release the winch
cable.
Page 55
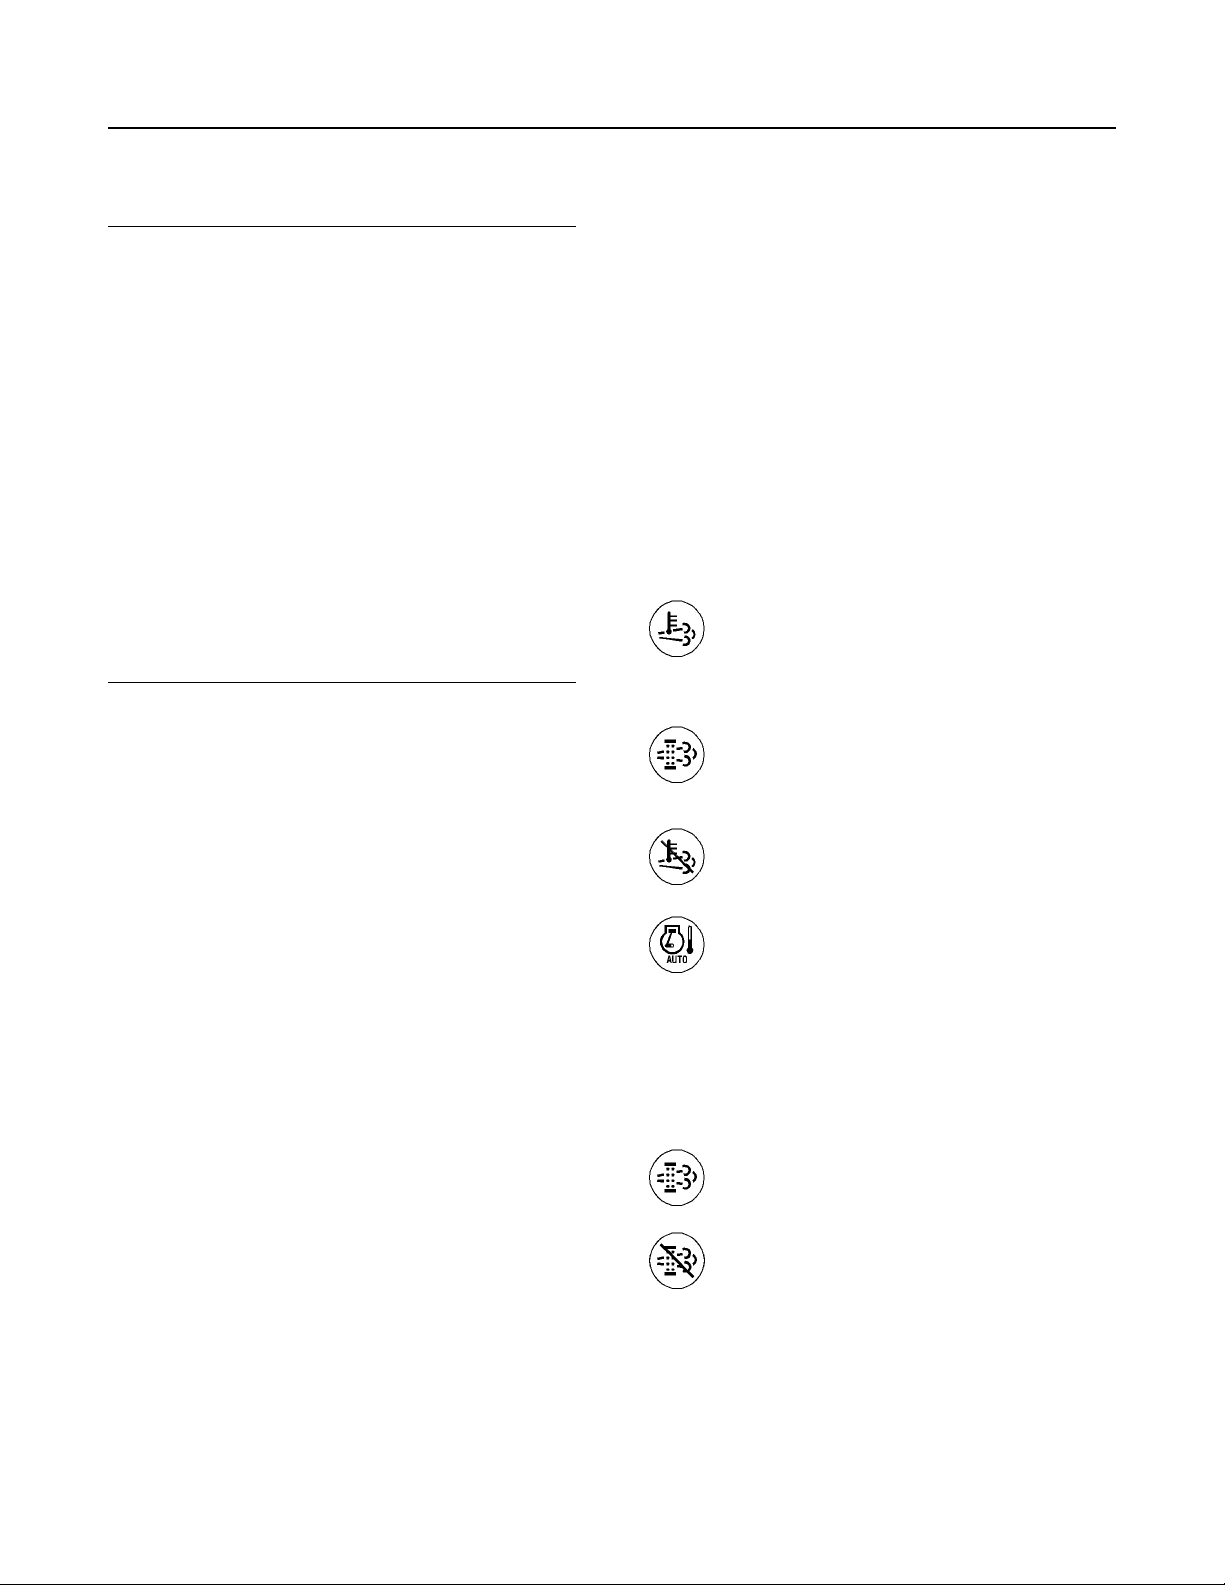
SEBU9024
55
Machine Operation
Diesel Particulate Filter Regeneration
Left Joystick Control (28)
Illustration 103 g03688938
The left joystick controls the steering for this machine.
(A) Move the joystick to this position in order to steer
the machine to the right.
(B) Move the joystick to this position in order to steer
the machine to the left.
The joystick will return to the center when the joystick
is released. However, the machine will not straighten
as the joystick returns to the center position. You
must steer the machine in the opposite direction in
order to straighten the machine.
(C) Press the switch in order to open gather arms.
(D) Press the switch in order to close gather arms.
(E) Press the switch in order to open all arms.
(F) Press the switch in order to temporarily slow
machine speed.
i05430708
Diesel Particulate Filter
Regeneration
SMCS Code: 108F
Regeneration
Regeneration is the removal of soot from the Diesel
Particulate Filter (DPF). The Aftertreatment
Regeneration Device (ARD) is used to regenerate the
DPF. The DPF traps both soot and ash. The ash is
removed through a manual cleaning process. Refer
to Operation and Maintenance Manual, “Diesel
Particulate Filter - Clean” for more information on the
service of the DPF.
Regeneration Indicators
High Exhaust System Temperature –
This indicator will illuminate in order to
show that the ARD is active. This
indicator will turn off when regeneration is
complete.
DPF – This indicator will illuminate in
order to show that a regeneration is
needed. This indicator will illuminate
when the soot level reaches 90%.
Regeneration Disabled – This indicator
will illuminate in order to show that a
regeneration has been disabled.
Delayed Engine Shutdown (If Equipped)
– This indicator illuminates in order to
show that the delayed engine shutdown
is active.
Regeneration Switch
Note: The MIDDLE position of the regeneration
switch is the default position for automatic
regeneration.
Force Regeneration – Press in the top of
the switch for 2 seconds in order to
begin regeneration.
Disable Regeneration – Press in the
bottom of the switch for 2 seconds in
order to disable regeneration.
Note: To re-enable the regeneration, cycle the engine
start switch key or press and hold down the force
regeneration switch for 2 seconds. If the soot level is
above 15%, an active regeneration will begin if you
are within the low speed automatic regeneration
window.
Page 56
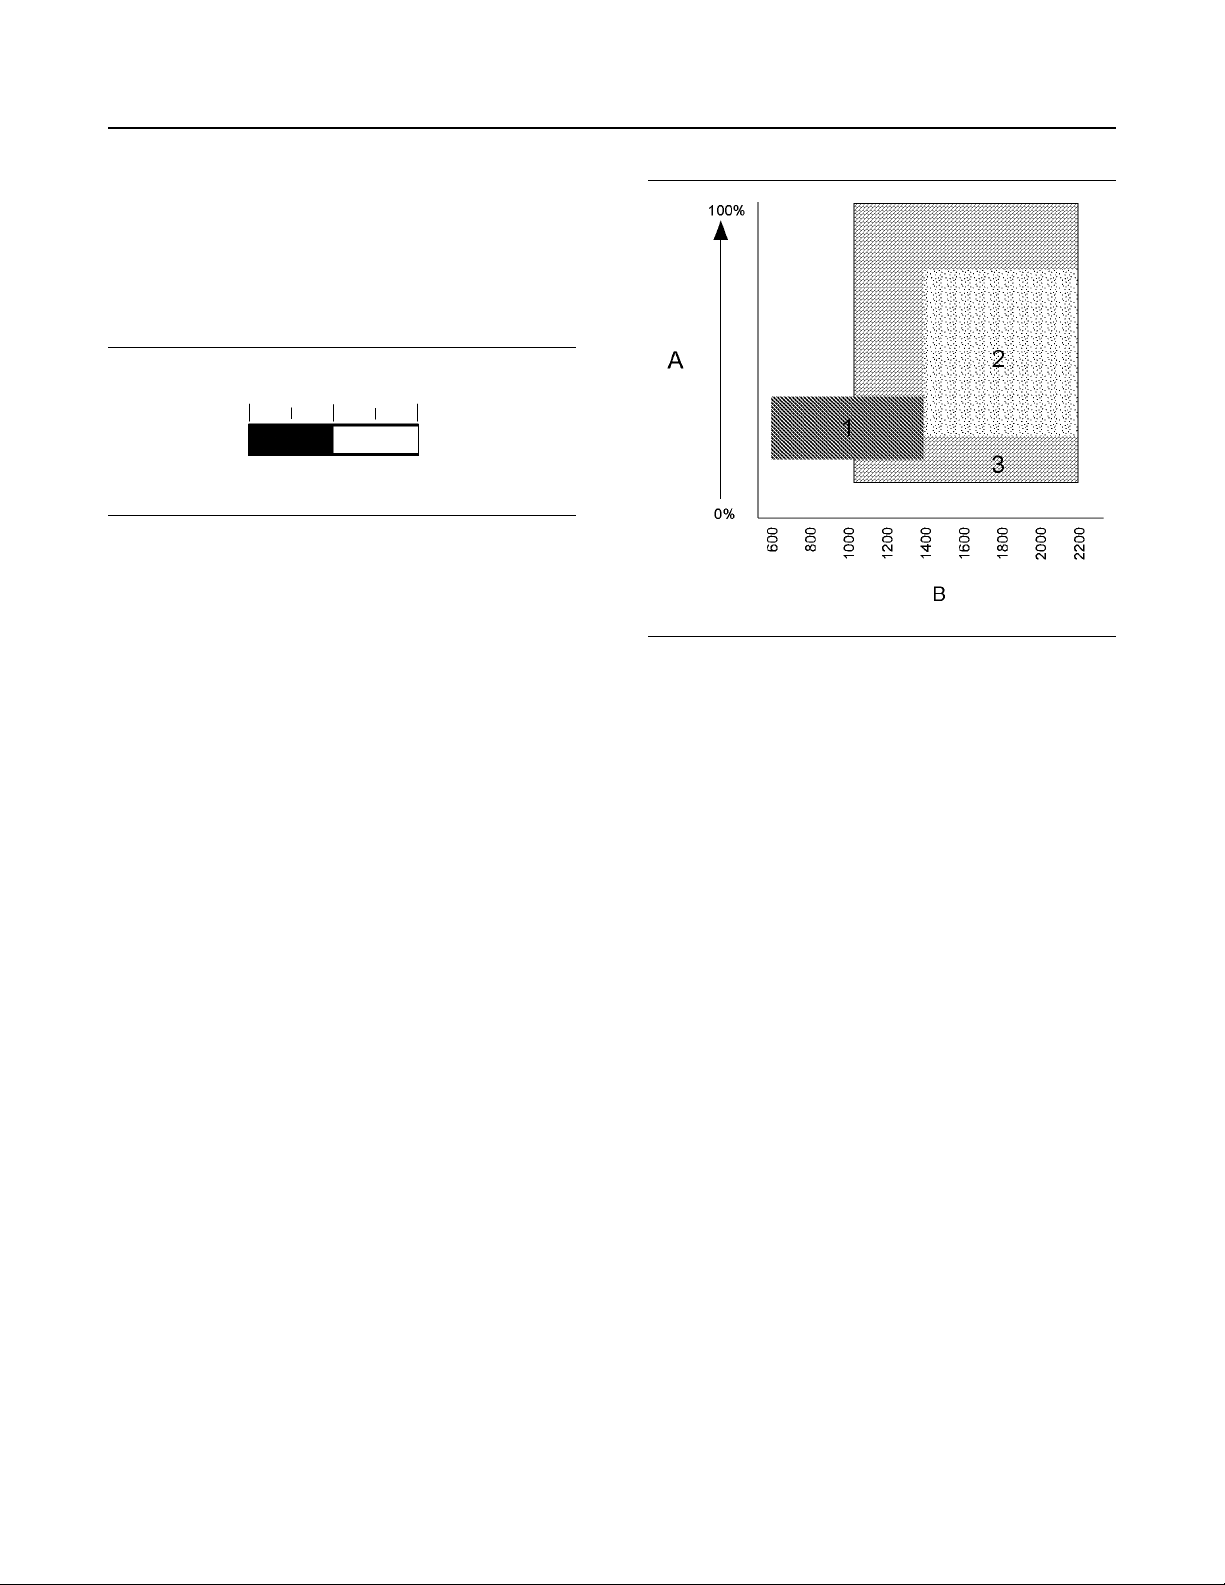
56 SEBU9024
Machine Operation
Diesel Particulate Filter Regeneration
Note: If the engine start switch key is cycled while the
regeneration system is disabled via the disable
regeneration switch, press and hold the disable
regeneration switch for 2 seconds to re-initiate the
disable regeneration.
Soot Level Monitoring
Illustration 104 g02228033
The soot level monitor indicates the level of soot that
has accumulated within the DPF. The five marks on
the monitor represent a percentage of soot within the
DPF. The first mark indicates 0% soot level. The
second mark indicates 25% soot level. The middle
mark indicates 50% soot level. The fourth mark
indicates 75% soot level. The last mark indicates
100% soot level. The soot level monitor can be used
to optimize DPF regenerations based upon the work
cycle of your machine. If machine conditions do not
allow for an automatic regeneration, a forced
regeneration should be performed before the soot
level gauge indicates 100%.
Illustration 105 g02301654
Engine Load Factor (A)
Engine RPM (B)
Low Speed Automatic Regeneration (1)
High Speed Automatic Regeneration (2)
High Speed Automatic Regeneration (3)
Note: Some machines will display soot level as a
percentage and will not use a graphical depiction as
displayed above.
Modes of Regeneration
• Automatic: An automatic regeneration is allowed
between approximately 30% and 100% on the
soot level monitor. There are two types of
automatic regeneration, low speed automatic and
high speed automatic.
• Forced: A forced regeneration is initiated by
pressing the force regeneration switch. A forced
regeneration is allowed when the soot level is
equal to or greater than 15%. The machine must
be brought to a low idle speed in order to perform a
forced regeneration.
• Disabled: When the regeneration system is in
disabled mode, automatic regenerations will not be
performed.
Low Speed Automatic Regeneration (1)
the engine must be at a state of low idle, refer to
illustration 105 . Machine should be stationary .
Engaging the parking brake or hydraulic lock will
ensure the quickest start time for regeneration. If low
idle speed is less than 1000 rpm, engine speed will
automatically increase to between 1000 and 1400
rpm to activate regeneration.
Load on engine should be minimal. Soot percentage
must be between 30% and 100% on the soot monitor.
Low speed automatic regenerations are ideal in
environments where interruptions in the work cycle of
the machine are not a problem. By utilizing low speed
regenerations, the duration of the regeneration will be
shortest and less fuel will be consumed by the
aftertreatment regeneration device when low speed
regenerations are used.
High Speed Automatic Regeneration (2)
Engine can be operating between approximately
1400 rpm and 2200 rpm
Engine load factor can be anywhere between 30%
and 85%
Soot load percentage will be between 60 and 75%
when this type of regeneration is available.
Page 57
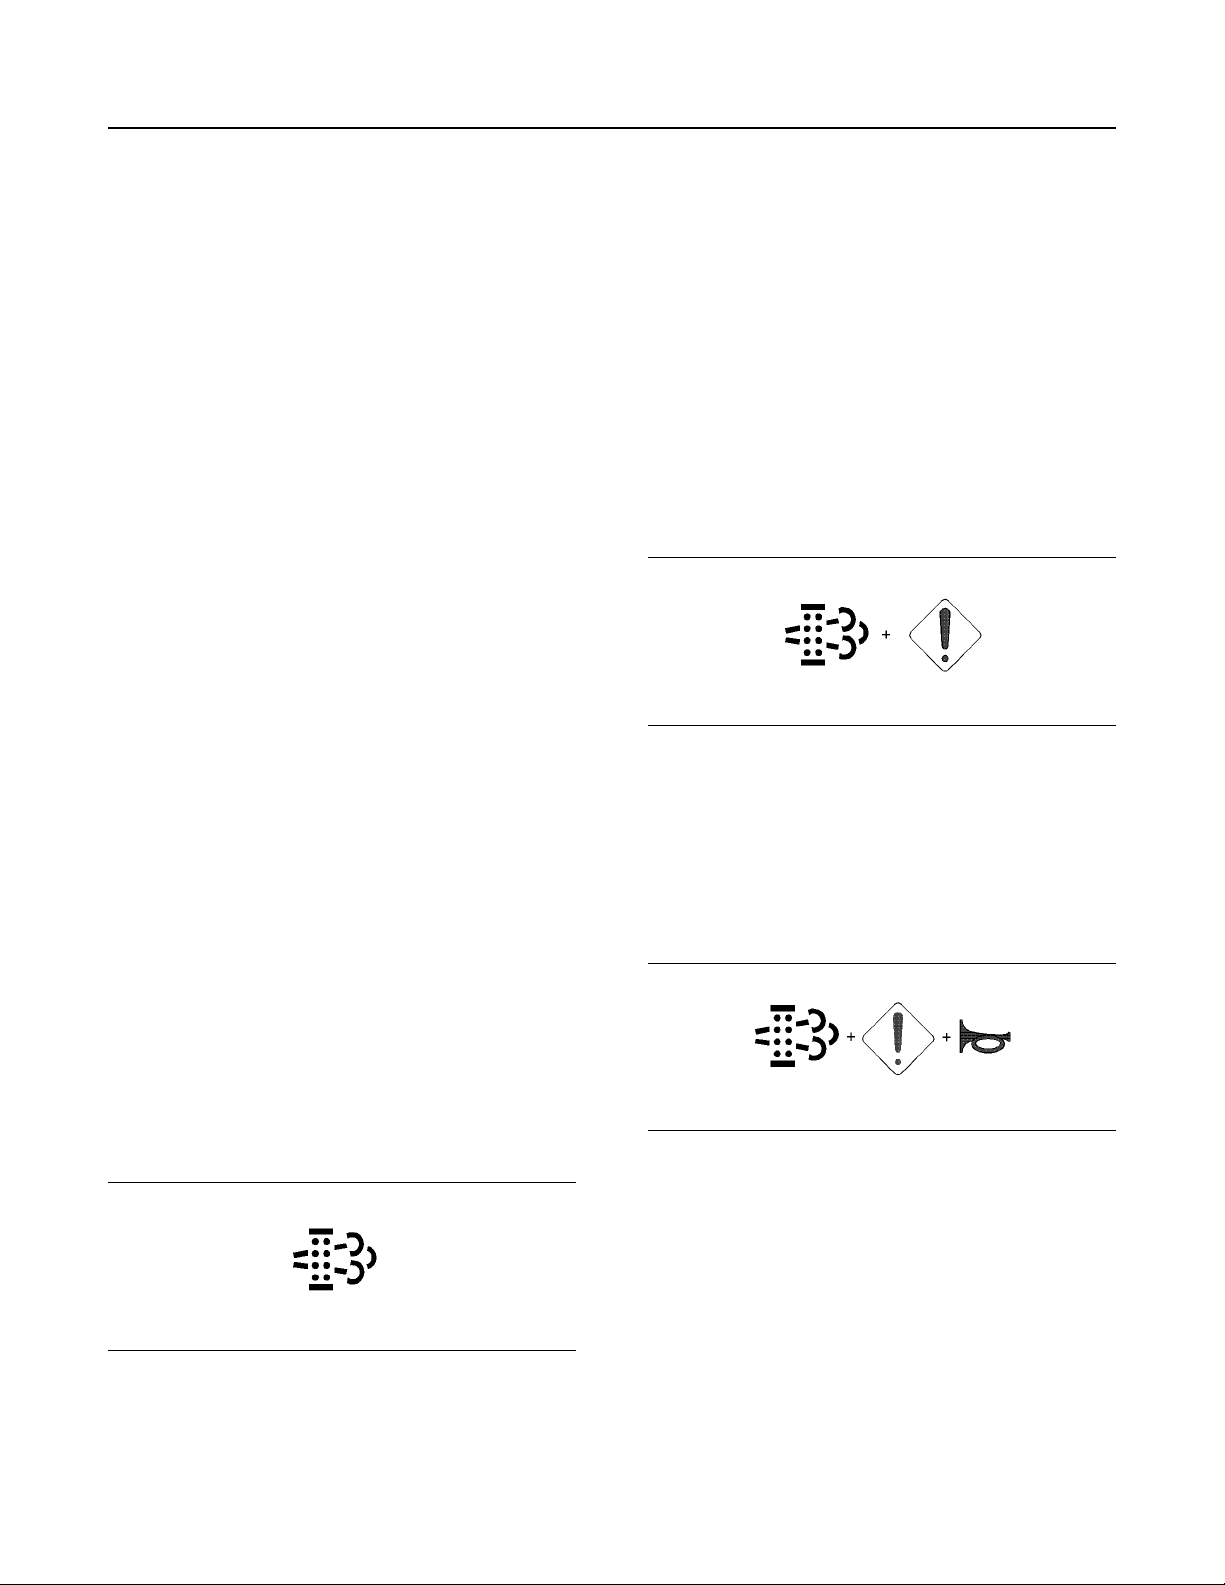
SEBU9024
57
Machine Operation
Diesel Particulate Filter Regeneration
High speed automatic regenerations are ideal for
situations where interruptions in the work cycle are
not acceptable. In situations where the engine is not
allowed to idle, regenerations will automatically take
place during the normal work cycle of the machine if
the above criteria are met. High speed regenerations
take longer to complete and the aftertreatment
regeneration device consumes more fuel when high
speed regenerations are utilized.
Note: If high speed regenerations are not being
performed, take the engine to low speed regeneration
window before investigating system for issues. There
are other factors not outlined above which need to be
met in order for high speed automatic regenerations
to occur.
High Speed Automatic Regeneration (3)
Engine can be operating between approximately
1000 rpm and 2200 rpm
Engine load factor can be anywhere between 15%
and 100%
Soot load percentage will be between 75 and 90%
when this type of regeneration is available.
High speed automatic regenerations are ideal for
situations where interruptions in the work cycle are
not acceptable. In situations where the engine is not
allowed to idle, regenerations will automatically take
place during the normal work cycle of the machine if
the above criteria are met. High speed regenerations
take longer to complete and the aftertreatment
regeneration device consumes more fuel when high
speed regenerations are utilized.
Note: If high speed automatic regenerations are not
being performed, take the engine to low speed
regeneration window before investigating system for
issues. There are other factors not outlined above
which need to be met in order for high speed
automatic regenerations to occur.
Regeneration should be performed as soon as
possible. If high speed automatic regenerations
are not activating, take engine to low speed
automatic window or perform a forced
regeneration.
Indicator will turn off once DPF regeneration has
started.
Note: In some situations, the DPF indicator may stay
illuminated when the soot load is below 90%. The
illuminated DPF indicator indicates that a complete
regeneration has not been performed. A complete
regeneration is when the soot level is reduced to 0%.
If the DPF indicator stays illuminated, perform a
regeneration without interruption until the soot level is
reduced to 0%. A complete regeneration will reset the
DPF indicator.
Illustration 107 g02117259
The DPF indicator will illuminate and an action lamp
will illuminate when the engine control module
determines the amount of soot collected in the DPF
has reached a level that a regeneration is required.
The machine should be brought to the NEUTRAL
position immediately. Both forced regeneration and
low speed automatic regeneration are possible.
Engine power will be slightly derated if the machine
continues to operate.
Regeneration System Warning
Indicators
Illustration 106 g02117258
Indicator will illuminate when DPF soot load is greater
than 90%
Illustration 108 g02117261
After a certain period, an action alarm will activate.
After 5 minutes with the action alarm active, the
engine will automatically be taken to low idle.
A forced regeneration is required at this time. A
complete regeneration will unlock the forced low idle
speed. Cycling the engine start switch key will unlock
the forced low idle speed.
After a certain amount of time, engine will
automatically shut down. Engine can be restarted but
will only run for 30 seconds before shutting down
again. Once engine enters shutdown strategy,
regeneration is locked out and a Prentice dealer must
be called to perform a service level regeneration.
Page 58
58 SEBU9024
Machine Operation
Battery Disconnect Switch
Finally, if engine is still allowed to run through multiple
forced shutdowns, the DPF must be replaced.
Key Off Regeneration (If Equipped)
Note: There may be some local regulations and/or
government regulations that define the requirements
for the operator and/or support personnel to be
present when the engine is running. Obey these
regulations.
Use of the Key Off Regeneration feature or the Delayed Engine Shutdown feature allows the engine
to run for a period with the engine start switch key
removed. Leaving the machine unattended when
the engine is running could result in personal injury or property damage. When using the Key Off
Regeneration feature or the Delayed Engine Shutdown feature, do not leave the machine unattended when the engine is running. Once the
engine has stopped, perform a visual check of the
machine to ensure that the machine is in a safe
state before leaving the machine unattended.
i05740861
Battery Disconnect Switch
SMCS Code: 1411
Note: Safe state (lowering work tools to the ground,
applying brakes, etc.) shall be attained before the
engine start switch is moved to the OFF position.
Confirmation of a safe state should be conducted
after the engine is stopped.
Key off regeneration allows for regeneration when the
engine start switch key has been removed. To begin a
key off regeneration the soot level must be between
15% and 100% on the soot level monitor and/or a
regeneration is in progress. The following steps
outline the procedure of a key off regeneration:
1. Remove the engine start switch key.
2. The engine will continue to run for 15 seconds.
During this 15 second interval, if a regeneration is
desired, press and hold the force regeneration
switch for 2 seconds.
Note: If a regeneration is not desired the machine will
initiate the delayed engine shutdown.
3. The key off regeneration will activate and the key
off regeneration will last for up to 15 minutes.
4. Once the key off regeneration is complete the
machine will initiate the delayed engine shutdown.
5. The delayed engine shutdown can last up to 10
minutes.
Illustration 109 g03414099
Open the diesel fuel fill access door on the left side of
the machine. The battery disconnect switch is located
in the diesel fuel fill compartment.
Disconnect Switch ON – To activate the
electrical system, turn the battery
disconnect switch clockwise. The
battery disconnect switch must be turned to the
ON position before you start the engine.
Disconnect Switch OFF – To deactivate
the electrical system, turn the battery
disconnect switch counterclockwise to
the OFF position.
6. After the delayed engine shutdown has been
completed the engine will shut down.
Page 59

SEBU9024 59
Machine Operation
Backup Alarm
The battery disconnect switch and the engine start
switch perform different functions. To disable the
entire electrical system, turn off the battery
disconnect switch. When you only turn off the engine
start switch, the battery remains connected to the
electrical system.
Turn the battery disconnect switch to the OFF
position. Turn the battery disconnect switch to the
OFF position when you service the electrical system
or any other machine components. Turn the battery
disconnect switch to the OFF position at the end of
the work day to prevent drainage of the battery.
NOTICE
Never move the battery disconnect switch to the OFF
position while the engine is operating. Serious damage to the electrical system could result.
i04451210
Backup Alarm
SMCS Code: 7406
The backup alarm is mounted at the rear of the
machine inside the engine compartment.
Backup Alarm – The alarm will sound
when the reverse travel pedal is
depressed. The backup alarm is used to
alert people behind the machine when the
machine is backing up.
i04749050
Monitoring System
SMCS Code: 7451; 7490
Illustration 110 g02894797
The IQAN Monitoring System performs an automatic
internal test when the machine is activated. Turning
the engine start switch from the OFF position to the
ON position will activate the test.
A three-position switch at the rear of the backup
alarm regulates the volume of the alarm (HIGH, LOW,
and MEDIUM).
The alarm is set at the maximum sound level when
the machine is shipped from the factory. The setting
should remain on HIGH unless the job site requires a
lower sound level.
The test verifies proper operation of the outputs
(displays, indicator lamps, and audible alarms).
The internal circuits are automatically checked.
The operator must observe the outputs in order to
determine whether the displays are operating
properly. The length of time for the test is
approximately 3 seconds.
During this test, all alert indicators flash.
The display then goes into the Normal Mode of
operation. The display may scroll through the modes
if the service input and the clear input are grounded
or the operator switch input is grounded.
Reference: For more information, refer to Special
Publication, UENR1668, “Systems Operation
Troubleshooting, IQAN Monitoring & Control System”.
i04783734
Product Link
(If Equipped)
Page 60

60 SEBU9024
Machine Operation
Product Link
SMCS Code: 7490; 7606
The Product Link 121SR system utilizes satellite
technology to communicate machine information. The
Product Link 522/523 is a cellular based
communication device that transmits machine
information. This information is communicated to
Prentice dealers and Prentice customers. Both
Product Link systems contain Global Positioning
System (GPS) satellite receivers.
The capability of two-way communication between
the machine and a remote user is available with the
Product Link 121SR and 522/523 system. The
remote user can be a dealer or a customer. At any
time, a user can request updated information from a
machine such as hours of use or the location of the
machine. Also, the system parameters for Product
Link 121SR system and the Product Link 522/523
system can be changed.
Data Broadcasts
Data concerning this machine, the condition of the
machine, and the operation of the machine is being
transmitted by Product Link to Prentice dealers. The
data is used to serve the customer better and to
improve upon Prentice products and services. The
information transmitted may include: machine serial
number, machine location and operational data,
including but not limited to: fault codes, emissions
data, fuel usage, service meter hours, software and
hardware version numbers and installed attachments.
Prentice dealers may use this information for various
purposes. Refer to the following list for possible uses:
• Providing services to the customer and/or the
machine
• Checking or maintaining Product link equipment
• Monitoring the health of the machine or
performance
• Helping maintain the machine and/or improve the
efficiency of the machine
• Evaluating or improving Prentice products and
services
• Complying with legal requirements and valid court
orders
Operation in a Blast Site
If the machine is required to work within 12 m (40 ft)
of a blast site, then Product Link 121SR system or the
Product Link 522/523 system should be disabled in
compliance with applicable legal requirements. One
of the following are suggested methods in order to
disable the Product Link 121SR system or the
Product Link 522/523 system: (a) Install a Product
Link disconnect switch in the machine cab that will
allow the Product Link 121SR system or the Product
Link 522/523 system module to be shut off. Refer to
Special Instruction, REHS2365, “An Installation
Guide for the Product Link PL121SR and for the
PL300” and Special Instruction, REHS2368,
“Installation Procedure For Product Link PL522/523
(Cellular)” for more details and installation
instructions. Or, (b) Disconnect the Product Link
121SR system or the Product Link 522/523 module
from the main power source by disconnecting the
wiring harness at the Product Link module.
The following Product Link 121SR system and the
Product Link 522/523 system specifications are
provided in order to aid in conducting any related
hazard assessment and to ensure compliance with all
local regulations:
• The transmit power rating for the Product Link
121SR transmitter is 5 to 10 W.
• The operating frequency range for the Product
Link 121SR system is 148 to 150 MHz
• The transmit power rating for the Product Link 522/
523 transmitter is approximately 1 W.
• The operating frequency range for the Product
Link 522/523 system is 824 to 849 MHz, 880 to
915 MHz, 1710 to 1785 MHz, and 1850 to 1910
MHz.
Consult your Prentice dealer if there are any
questions.
Information for the initial installation of the Product
Link 121SR system is available in Special Instruction,
REHS2365, “An Installation Guide for the Product
Link PL121SR and for the PL300”. Information for the
initial installation of the Product Link 522/523 system
is available in Special Instruction, REHS2368,
“Installation Procedure For Product Link PL522/523
(Cellular)”.
• Performing market research
• Offering the customer new products and services
Prentice may share some or all of the collected
information with Prentice affiliated companies,
dealers, and authorized representatives. Prentice will
not sell or rent collected information to any other third
party and will exercise reasonable efforts to keep the
information secure. Prentice recognizes and respects
customer privacy. For more information, please
contact your local Prentice dealer.
Operation, configuration and troubleshooting
information for the Product Link 121SR system can
be found in the Systems Operation, Troubleshooting,
Testing and Adjusting, RENR7911, “Product Link 121/
321”.
Operation, configuration and troubleshooting
information for the Product Link 522/523 system can
be found in the Systems Operation, Troubleshooting,
Testing and Adjusting, RENR8143, “Product Link PL522/523”.
Page 61
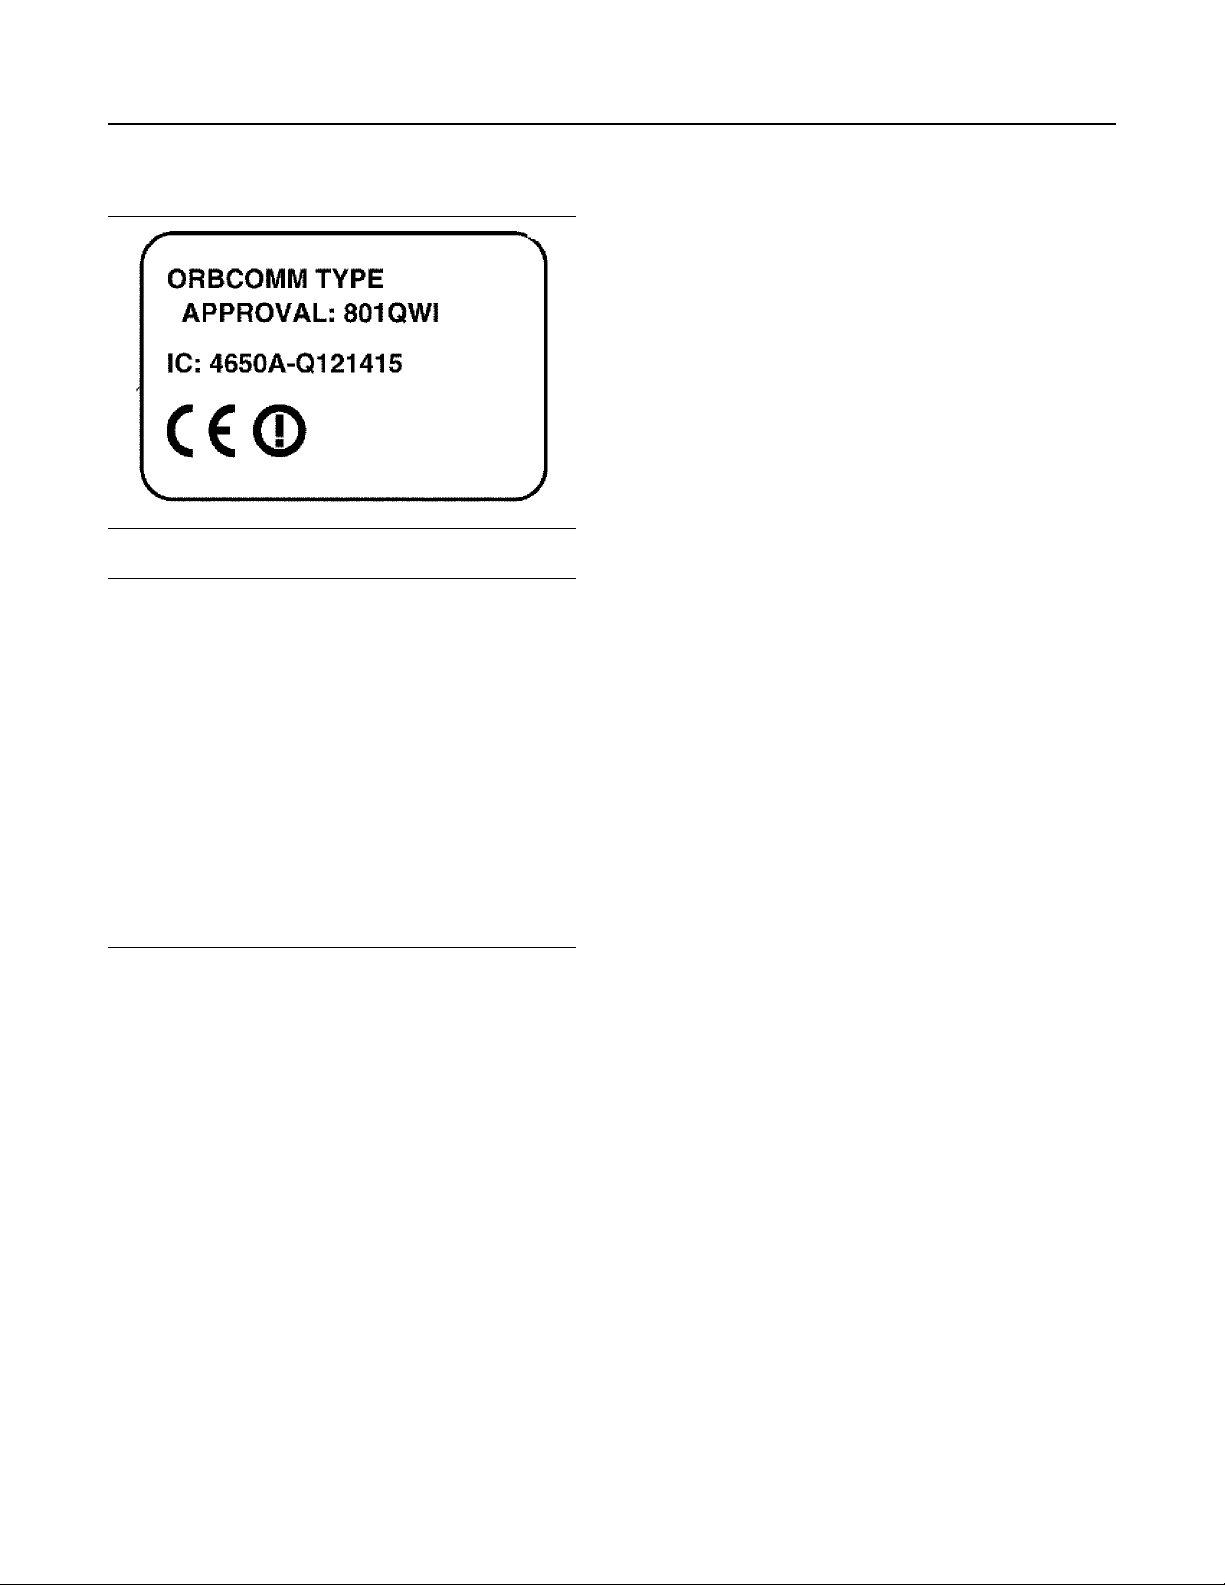
SEBU9024 61
Machine Operation
Product Link
Regulatory Compliance
Illustration 111 g01131982
NOTICE
Transmission of information using Product Link is
subject to legal requirements that may vary from location to location, including, but not limited to, radio frequency use authorization. The use of Product Link
must be limited to those locations where all legal requirements for the use of the Product Link communication network have been satisfied.
In the event that a machine outfitted with Product Link
is located in or relocated to a location where (i) legal
requirements are not satisfied or (ii) transmitting or
processing of such information across multiple locations would not be legal, Prentice disclaims any liability related to such failure to comply and Prentice may
discontinue the transmission of information from that
machine.
Consult your Prentice dealer with any questions that
concern the operation of the Product Link in a specific
country.
Page 62

62 SEBU9024
Machine Operation
Product Link
Illustration 112 g02348438
Page 63
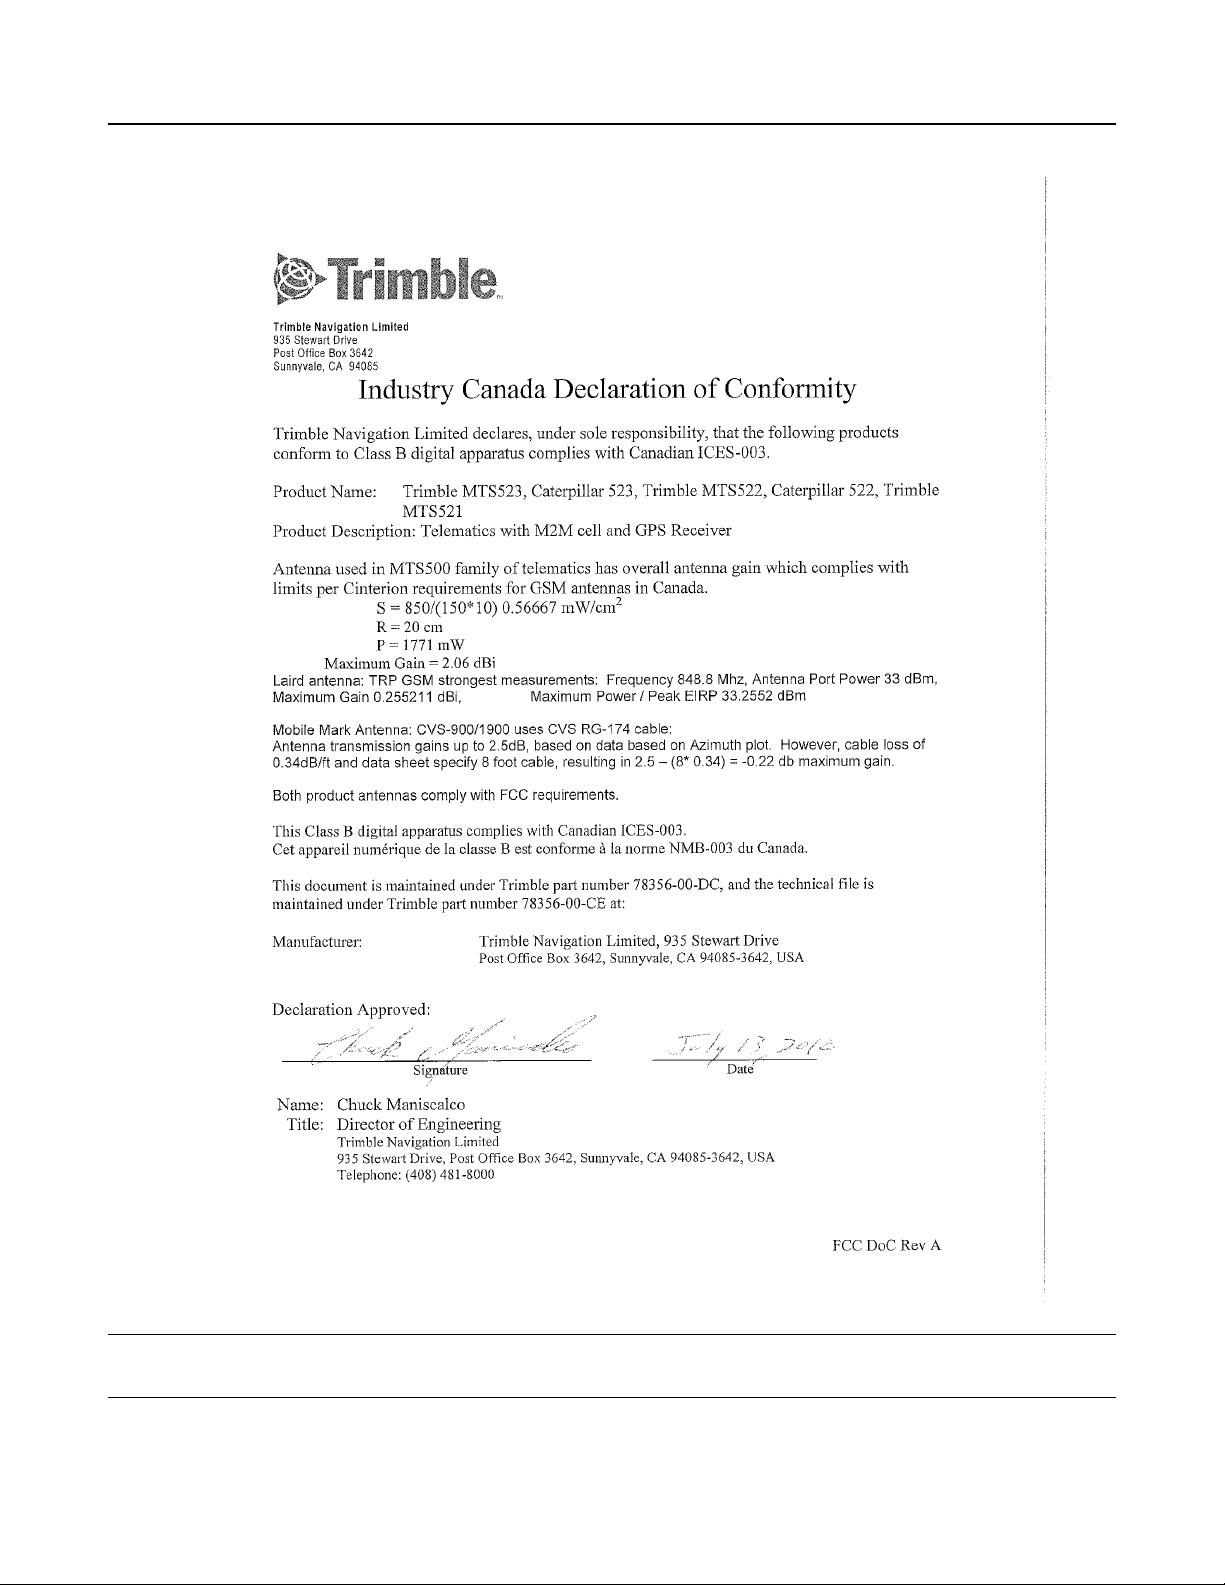
SEBU9024 63
Machine Operation
Product Link
Illustration 113 g02346204
Page 64

64 SEBU9024
Machine Operation
Product Link
Illustration 114 g02346205
Page 65
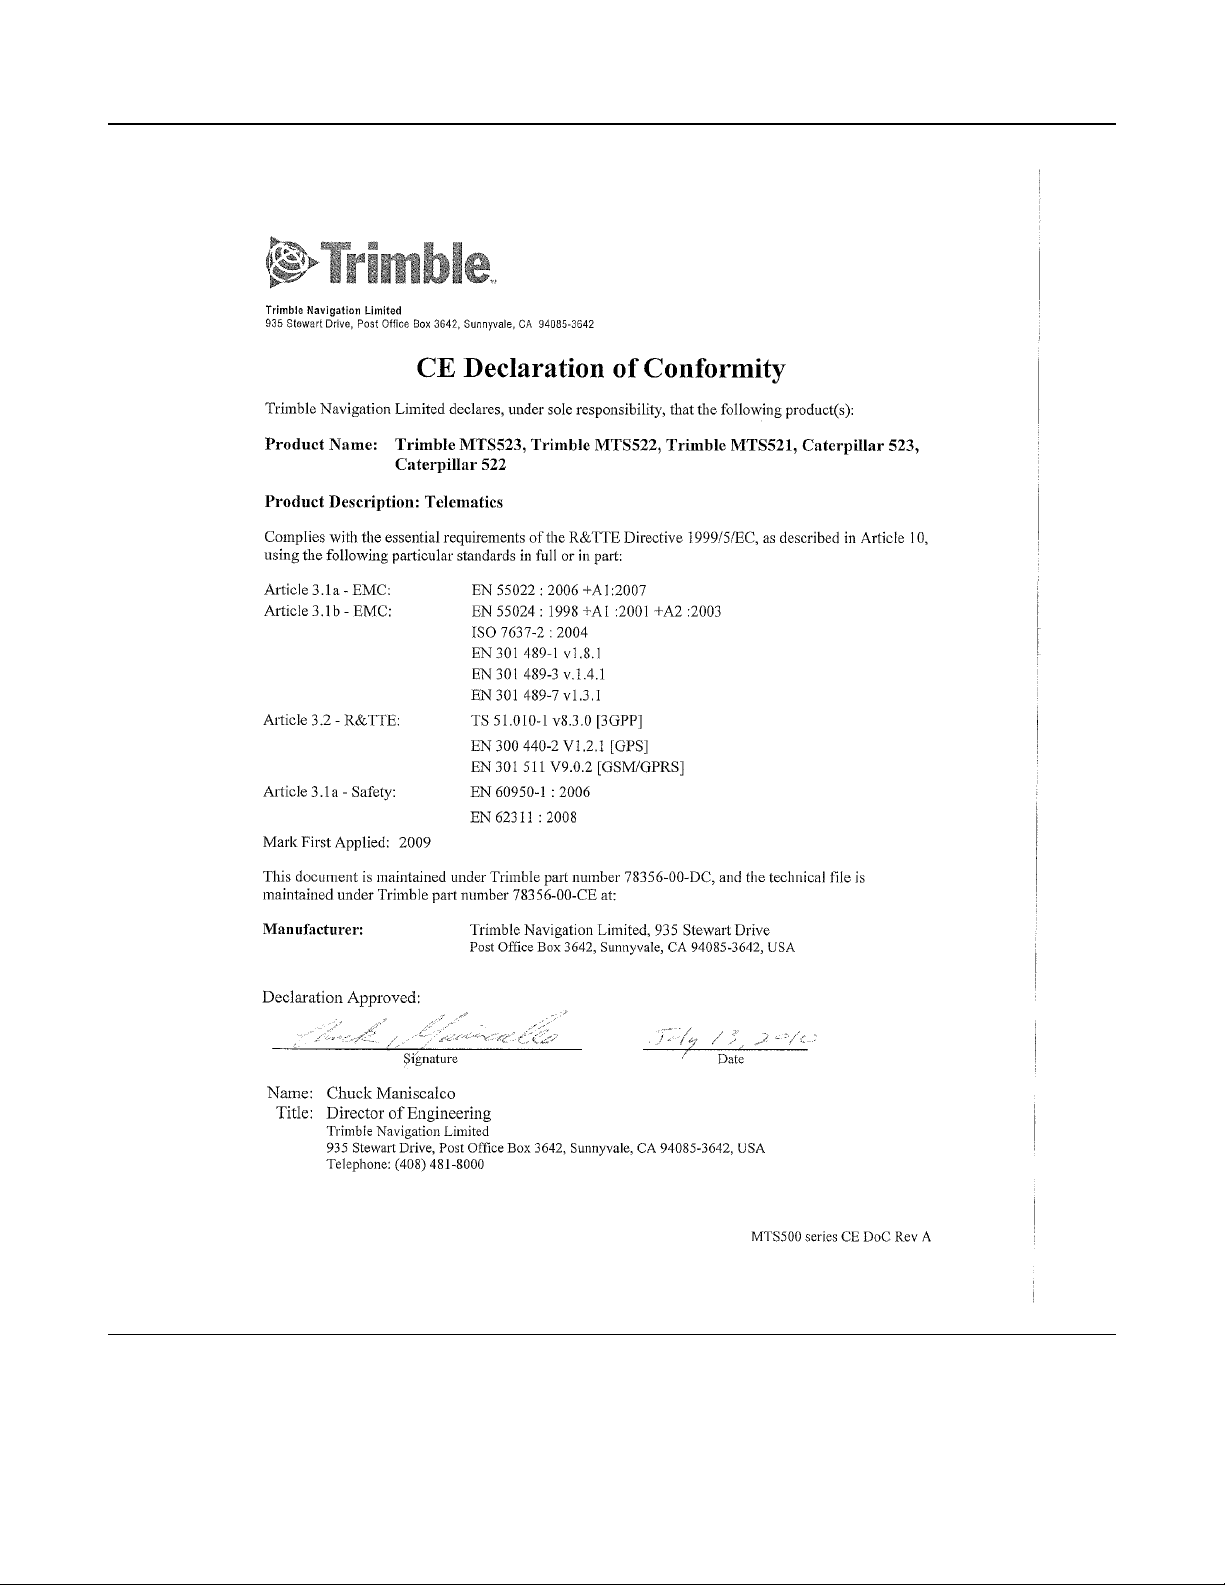
SEBU9024 65
Machine Operation
Product Link
Illustration 115 g02346208
Page 66

66 SEBU9024
Machine Operation
Product Link
i05831877
Product Link
SMCS Code: 7490; 7606
Note: Your machine may be equipped with the Cat
®
Product Link system.
The Product Link 121SR/321SR system utilizes
satellite technology to communicate machine
information. The Product Link 420/421 and 522/523
are cellular based communication devices that
transmit machine information. This information is
communicated to Prentice , Prentice dealers and
Prentice customers. Product Link systems contain
Global Positioning System (GPS) satellite receivers.
The capability of two-way communication between
the machine and a remote user is available with the
Product Link 121SR/321SR, 420/421, and 522/523
system. The remote user can be a dealer or a
customer. At any time, a user can request updated
information from a machine such as hours of use or
the location of the machine. Also, the system
parameters for Product Link 121SR/321SR, 420/421,
and 522/523 systems can be changed.
Data Broadcasts
Data concerning this machine, the condition of the
machine, and the operation of the machine is being
transmitted by Product Link to Prentice and/or
Prentice dealers. The data is used to serve the
customer better and to improve upon Prentice
products and services. The information transmitted
may include: machine serial number, machine
location and operational data, including but not limited
to: fault codes, emissions data, fuel usage, service
meter hours, software and hardware version numbers
and installed attachments.
Prentice and/or Prentice dealers may use this
information for various purposes. Refer to the
following list for possible uses:
• Providing services to the customer and/or the
machine
• Checking or maintaining Product Link equipment
• Monitoring the health of the machine or
performance
• Helping maintain the machine and/or improve the
efficiency of the machine
• Evaluating or improving Prentice products and
services
• Complying with legal requirements and valid court
orders
• Performing market research
• Offering the customer new products and services
Prentice may share some or all of the collected
information with Prentice affiliated companies,
dealers, and authorized representatives. Prentice
will not sell or rent collected information to any other
third party and will exercise reasonable efforts to
keep the information secure. Prentice recognizes
and respects customer privacy. For more information,
please contact your local Prentice dealer.
Operation in a Blast Site for
Product Link
The Product Link radio transmitter must be disabled
by the minimum distance mandated under all
applicable legal requirements, or the following
Prentice recommended distance from the site,
whichever is greater: 12 m (40 ft) for Product Link
121SR and 321SR and 3 m (10 ft) for Product Link
420/421 and 522/523.
The following are suggested methods to disable the
Product Link 121SR/321SR system or the Product
Link 522/523 system: (a) Install a Product Link
disconnect switch in the machine cab that will allow
the Product Link 121SR/321SR system or the
Product Link 522/523 system module to be shut off.
Refer to Special Instruction, REHS2365, “An
Installation Guide for the Product Link PL121SR and
for the PL300” and Special Instruction, REHS2368,
“Installation Procedure For Product Link PL522/523
(Cellular)” for more details and installation
instructions. Or, (b) Disconnect the Product Link
121SR/321SR system or the Product Link 522/523
module from the main power source by disconnecting
the wiring harness at the Product Link module.
For Product Link devices with an internal battery
back-up without a radio disable feature including the
PL420 and PL421 system: it is not recommended to
operate an asset with this type of device within a blast
site, nor should it be operated within the minimum
mandated or recommended distance from a blast site
perimeter.
The following Product Link system specifications are
provided in order to aid in conducting any related
hazard assessment and to ensure compliance with all
local regulations:
• The transmit power rating for the Product Link
121SR transmitter is 5 to 10 W.
• The operating frequency range for the Product
Link 121SR system is 148 to 150 MHz
• The transmit power rating for the Product Link
522/523 transmitter is approximately 1 W.
• The operating frequency range for the Product
Link 522/523 system is 824 to 849 MHz, 880 to
915 MHz, 1710 to 1785 MHz, and 1850 to 1910
MHz.
• The transmit power rating for the Product Link
420/421 system is 2 w for 850 MHz and 900 MHz
and 1 w for 1800 MHz and 1900 MHz.
Page 67
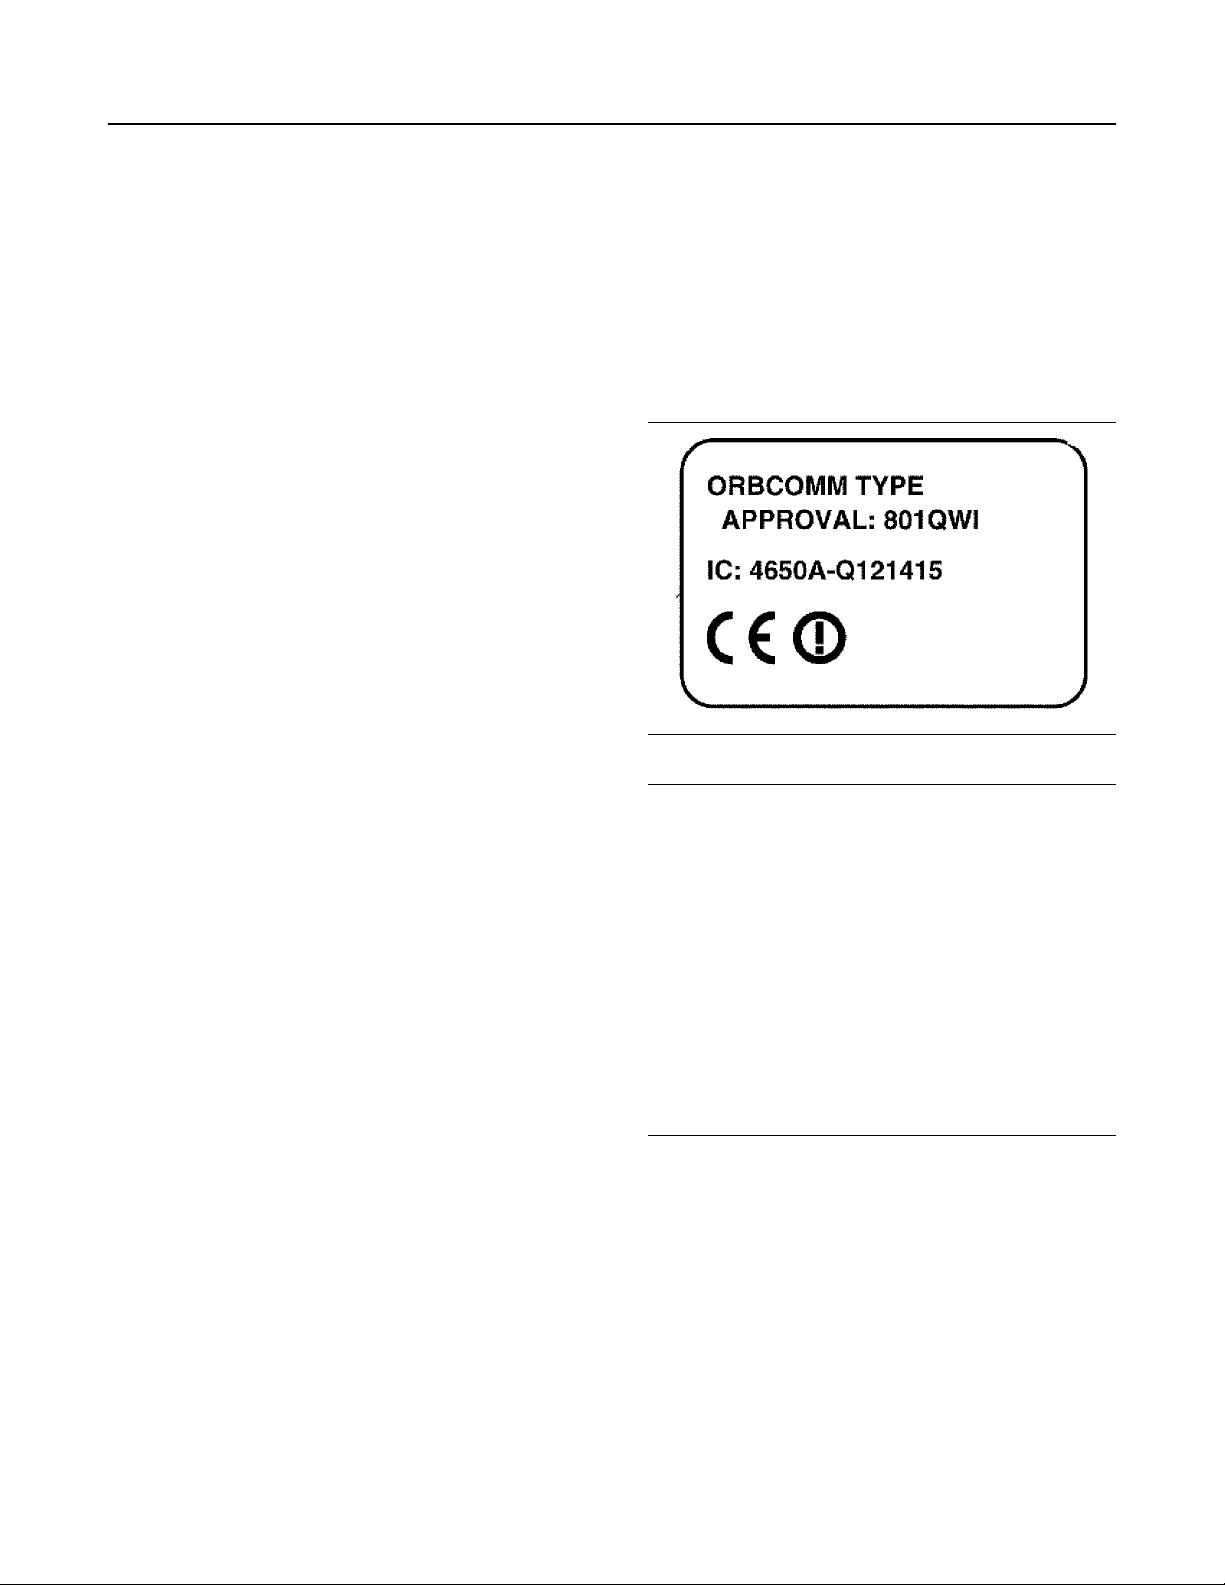
SEBU9024 67
Machine Operation
Product Link
Consult your Prentice dealer if there are any
questions.
Information for the initial installation of the Product
Link 121SR/321SR system is available in Special
Instruction, REHS2365, “An Installation Guide for the
Product Link PL121SR and for the PL300”.
Information for the initial installation of the Product
Link 522/523 system is available in Special
Instruction, REHS2368, “Installation Procedure For
Product Link PL522/523 (Cellular)”.
Operation, configuration and troubleshooting
information for the Product Link 121SR/321SR
system can be found in the Systems Operation,
Troubleshooting, Testing and Adjusting, RENR7911,
“Product Link 121/321”.
Operation, configuration and troubleshooting
information for the Product Link 522/523 system can
be found in the Systems Operation, Troubleshooting,
Testing and Adjusting, RENR8143, “Product Link PL522/523”.
Information for the initial installation of the Product
Link 420 system is available in Special Instruction,
REHS5595, “Installation Procedure for Product Link
PL420 Retrofit”.
Information for the initial installation of the Product
Link 421 system is available in Special Instruction,
REHS5596, “Installation Procedure for Product Link
PL421 Retrofit”.
Machine Security
Machine Lock Icon –
De-rate – Some machines can have the machine
engine de-rated remotely by the owner of the
machine. The action causes the machine to operate
much slower than normal.
A warning is given before this action occurs on the
display with the machine lock icon and “Security
Pending” . When engine de-rate has happened, the
machine display shows the machine lock icon and
“Security Enabled” . The operator should move the
machine to a safe location, apply the parking brake,
power the machine down, notify the site supervisor,
and contact your local Prentice dealer.
Disable – Some machines can be prevented from
starting remotely by the owner of the machine. When
disabling has happened, the machine display shows
the machine lock icon and “Security Enabled” .
Before the machine is disabled, the machine display
shows the machine lock icon and “Security Pending”
. The operator should notify the site supervisor.
diagnostics occur due to Product Link notify your
site supervisor immediately to prevent derating. An
example of this situation is an antenna becoming
damaged.
Note: Leaving the blast site switch in the OFF
position for more than 48 machine hours can cause
the machine to derate.
Regulatory Compliance
Illustration 116 g01131982
NOTICE
Transmission of information using Product Link is
subject to legal requirements that may vary from location to location, including, but not limited to, radio frequency use authorization. The use of Product Link
must be limited to those locations where all legal requirements for the use of the Product Link communication network have been satisfied.
If a machine outfitted with Product Link is located in
or relocated to a location where (i) legal requirements
are not satisfied or (ii) transmitting or processing of
such information across multiple locations would not
be legal, Prentice disclaims any liability related to
such failure to comply and Prentice may discontinue
the transmission of information from that machine.
Consult your Prentice dealer with any questions that
concern the operation of the Product Link in a
specific country.
Note: This equipment has been registered with the
Botswana Telecommunications Authority for use in
Botswana. BTA REGISTERED No: BTA/TA/2012/378
Tampering – Tampering with the Product Link
system to disable the Product Link can also result in
engine de-rating of the machine. To avoid de-rating,
prevent tampering with the Product Link . If, machine
Page 68

68 SEBU9024
Machine Operation
Product Link
Illustration 117 g02348438
Page 69

SEBU9024 69
Machine Operation
Product Link
Illustration 118 g02657277
Page 70
70 SEBU9024
Machine Operation
Product Link
Illustration 119 g02346204
Page 71

SEBU9024 71
Machine Operation
Product Link
Illustration 120 g02346205
Page 72
72 SEBU9024
Machine Operation
Product Link
Illustration 121 g02346208
Page 73
SEBU9024 73
Machine Operation
Product Link
Illustration 122 g02727978
Page 74

74
Machine Operation
Product Link
SEBU9024
Page 75
SEBU9024
75
Machine Operation
Product Link
Illustration 123 g02727979
Page 76

76 SEBU9024
Machine Operation
Product Link
Page 77
SEBU9024
77
Machine Operation
Product Link
Illustration 124 g03341389
Page 78

78 SEBU9024
Machine Operation
Product Link
Page 79
SEBU9024 79
Machine Operation
Product Link
Illustration 125 g03341393
Page 80

80 SEBU9024
Machine Operation
Camera
i05781684
Camera
SMCS Code: 1408; 7347; 7348
The camera system is a closed circuit video
monitoring system. The camera system consists of
an LCD display and a camera. The display for the
camera is integrated into the Color Multi Purpose
Display. The camera is mounted in the frame at the
rear of the machine.
Power is supplied to the camera system when the
engine start switch is turned to the ON position.
The camera lens and the display screen will require
periodic cleaning. Cleaning instructions for the
camera lens and the display are described in the
Maintenance section.
Camera
After installation, there should be no need to make
any physical adjustments to any of the cameras
under normal operating conditions. The camera
system uses a fixed-focused camera that has been
installed at the factory, a Prentice dealer, or a
qualified technician.
Display
Illustration 126 g03414110
Rear camera
Illustration 127 g03414111
Color Multi Purpose Display
The view from the camera is displayed on the CPMD
display. The screen will automatically display the rear
camera when reverse is selected on the transmission
control. The camera view can also be selected at any
time through the display menu. Refer to Operation
and Maintenance Manual, “Monitoring System” for
more information on the display screen and the
display menu.
i05740862
Operation Information
SMCS Code: 7000
Follow these basic instructions whenever you are
operating the machine:
The orientation of the camera is set during
installation. The rear camera is set to provide a
reverse image that is similar to a mirror view.
Page 81
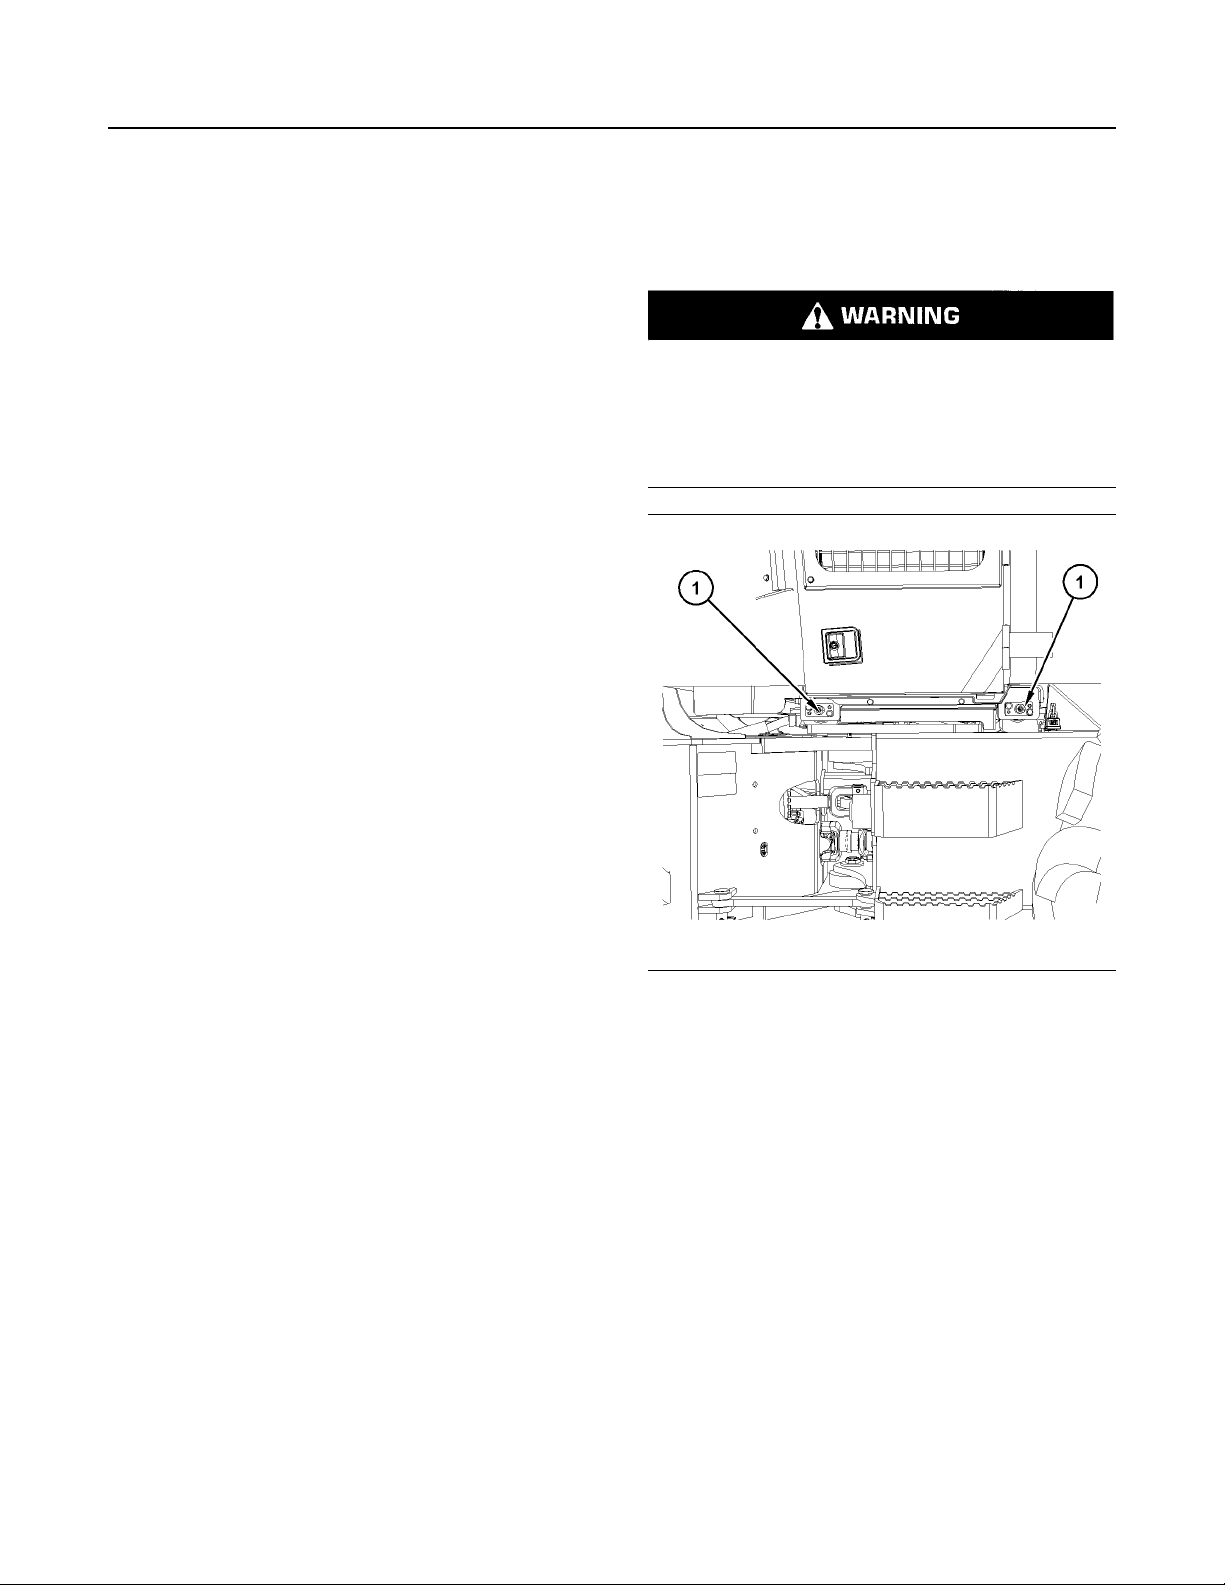
SEBU9024 81
Machine Operation
Cab Tilting
• To prevent injury, make sure that no one is working
on the machine or near the machine. Always
maintain control of the machine.
• Raise the bucket or the work tool enough to
negotiate any obstacles.
• Before you release the parking brake, depress the
service brake pedal in order to keep the machine
from moving.
• Drive the machine forward for best visibility and for
best control.
• Reduce the engine speed when you maneuver in
tight quarters and when you are going over a hill.
Machine Operating Temperature
Range
The standard machine configuration is intended for
use within an ambient temperature range of −40 °C
(−40 °F) to 43 °C (110 °F). Special configurations for
different ambient temperatures may be available.
Consult your authorized dealer for additional
information on special configurations of your
machine.
i05774435
Cab Tilting
SMCS Code: 7301-084; 7341-084; 7341
Do not tilt the cab when occupied. Before tilting
the cab remove all loose articles from the cab, secure all windows and emergency exits, and then
close the cab and cab riser doors. Failure to do so
can result in personal injury or damage to the
machine.
Downhill Operation
Maintain a ground speed that is slow enough for the
conditions. Before you operate down a hill, select the
proper range before you start down the grade. The
range should allow the machine to maintain the
appropriate speed on the down grade. The throttle
control should be at high idle and the engine should
not overspeed. In most situations, the range will be
the same range that is required to drive up the grade.
If the machine builds up excessive speed, the engine
can overspeed. Use the service brake in order to slow
the machine until a lower range can be selected.
Select the lower range and proceed with the throttle
control at high idle.
Use the service brakes for stopping the machine.
Using the service brakes in order to control travel
speed of the machine or using the service brakes for
stopping from high speeds can cause the brake axle
oil to overheat. This can result in significant wear and/
or damage to the service brakes.
Do not use the reverse travel pedal in order to slow
the machine when you travel forward downhill. Do not
use the forward travel pedal in order to slow the
machine when you travel reverse downhill.
Illustration 128 g03662996
Loosen the cab locking pin retaining hardware, bolts
& washers(1).
Page 82
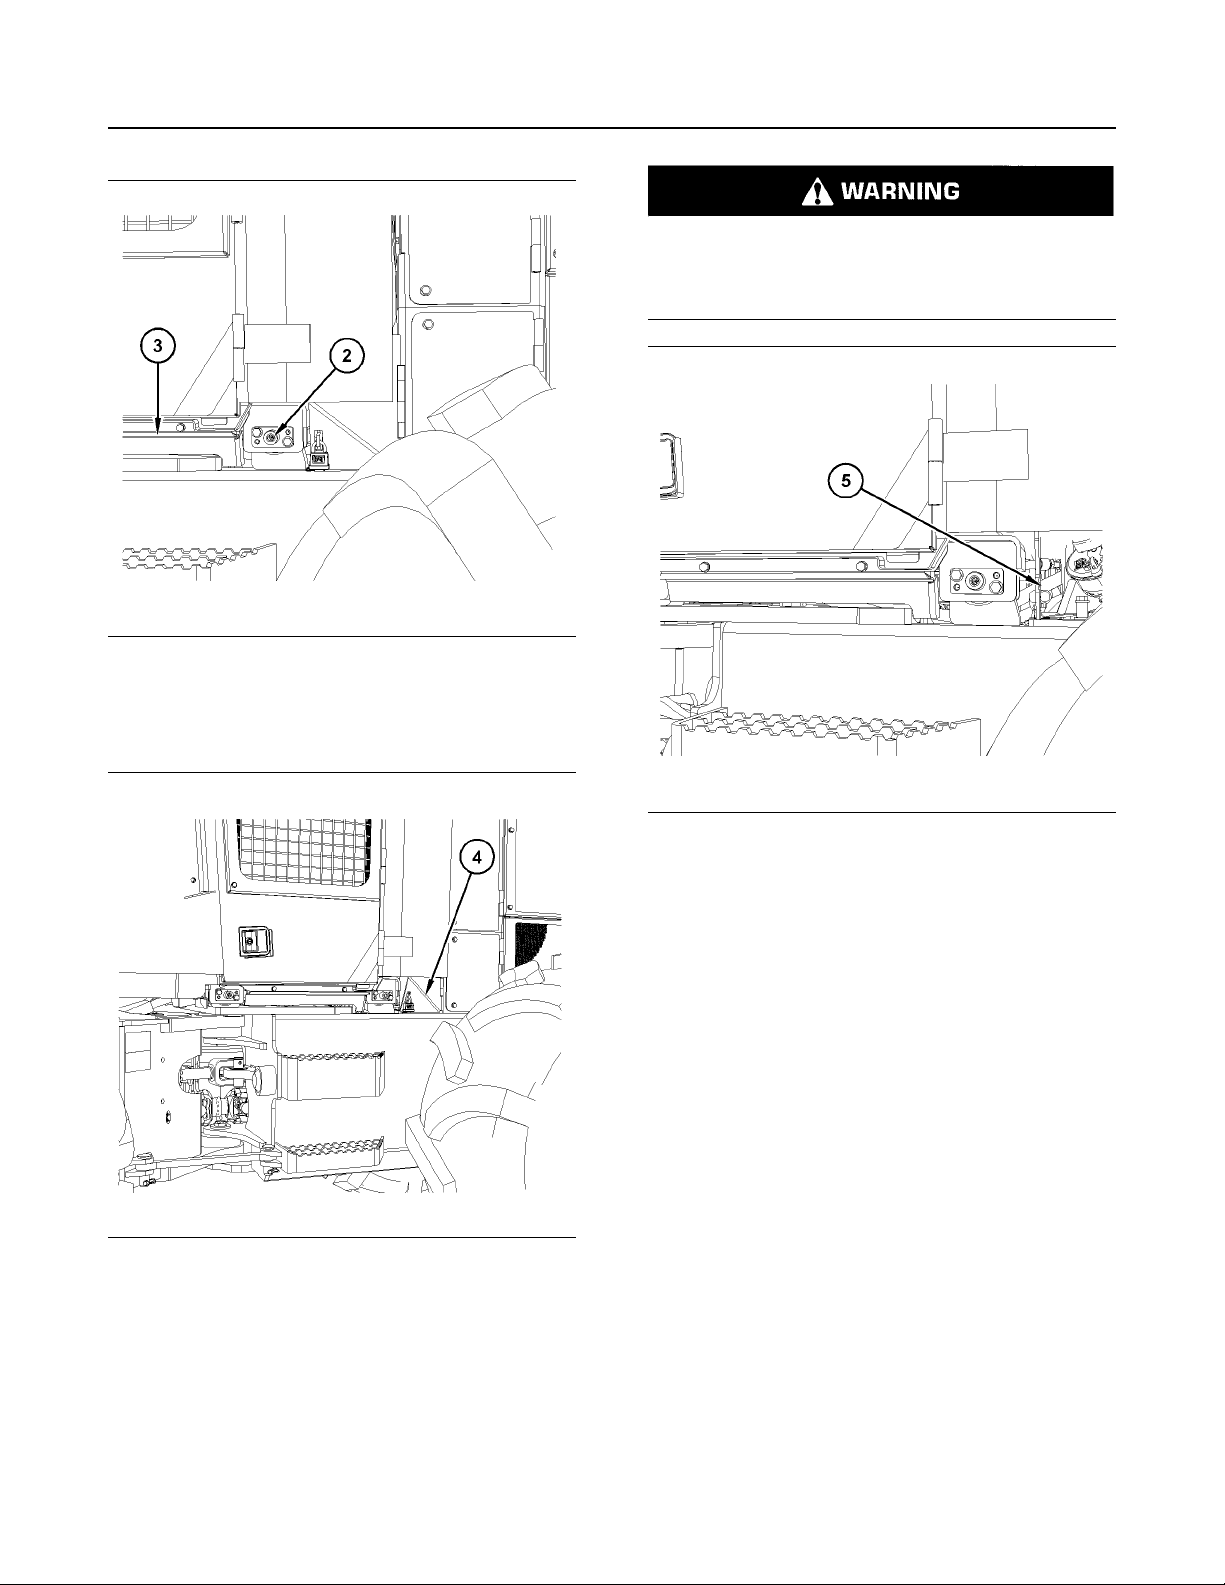
82 SEBU9024
Machine Operation
Cab Tilting
There is no room for a person in this area when
tilting or lowering the machine cab. Stay clear of
area when tilting or lowering the cab. Severe personal injury or death from crushing could occur.
Illustration 129 g03662995
Remove retention pin and cab guard plate (2, 3).
Raise
Illustration 131 g03663086
2. Place cab tilt jack rod in the cab tilt pump (5).
Note: Move the lever on the cab tilt pump to the
RAISE position.
Note: When the pump is jacked, the cab will move to
the RAISE position.
3. After making sure that the cab has moved to the
highest position, stop jacking pump.
Lower
1. Turn the lever on the cab tilt pump to lower.
2. When the pump is jacked, the cab will move to the
LOWER position.
Illustration 130 g03662998
1. Open the diesel fuel fill compartment (4) on the lefthand side of the rear frame. Access the cab tilt jack
rod located on the left-hand rear frame.
Note: Slowly lower cab to over center position.
3. Reinstall all guards, pins, and hardware.
Page 83

SEBU9024 83
Machine Operation
Changing Direction and Speed
i01510763
Changing Direction and Speed
SMCS Code: 1000; 7000
Speed changes at full engine speed and directional
changes at full engine speed are possible. However,
deceleration and/or braking is recommended when
you change direction. This will maximize operator
comfort and the service life of the transmission
components.
1. Decrease the machine speed by releasing the
travel pedal.
2. To change direction, release one travel pedal and
depress the other travel pedal.
Note: There may be a slight delay in response when
you change direction.
3. Increase the machine speed by depressing the
travel pedal.
Note: The travel pedal on the right will move the
machine forward. The travel pedal on the left will
move the machine in reverse.
4. Press the service brake pedal in order to slow or
stop the machine.
Crushing Hazard. There is no clearance for a person in this area when the machine turns. Severe
injury or death from crushing could occur. Connect the steering frame lock between front and
rear frames before lifting, transporting, or servicing the machine in the articulation area.
Disconnect the steering lock and secure before
resuming operation.
Perform the following steps before you tow the
machine.
1. Place transmission in neutral. This disconnects the
wheels from the hydraulic motor.
2. Raise the attachment off the ground. Install the
boom cylinder lift lock.
3. Turn off the machine engine.
4. Install steering lock bar.
i05791070
Parking Brake Override
SMCS Code: 4250
The parking brake can be released manually. Refer to
Operation and Maintenance Manual, “Parking Brake
Manual Release”.
Contact your local Prentice dealer for service on the
parking brake. Do not operate the machine until the
problem is fixed.
i05785447
Parking Brake Manual Release
SMCS Code: 3077; 4267; 4284; 4354; 5070; 7000
Personal injury or death could result when towing
a disabled machine incorrectly.
Block the machine to prevent movement before
releasing the brakes. The machine can roll free if
it is not blocked.
Page 84

84 SEBU9024
Machine Operation
Parking Brake Manual Release
Illustration 132 g02726446
NOTICE
Care must be taken to ensure that fluids are contained during performance of inspection, maintenance, testing, adjusting, and repair of the product.
Be prepared to collect the fluid with suitable containers before opening any compartment or disassembling any component containing fluids.
Refer to Special Publication, NENG2500, “Dealer
Service Tool Catalog” for tools and supplies suitable
to collect and contain fluids on Prentice products.
Dispose of all fluids according to local regulations and
mandates.
5. Reverse the hydraulic steering hose connections
(A) and (B) in steering cylinder hydraulic circuit.
This will allow the steering cylinders to move freely.
Note: Make sure that the cylinder hoses are
connected correctly before you operate the machine
again. The steering system will not function if the
hose connections are reversed.
6. To deactivate the parking brake, provide portable
hydraulic pressure Port-A-Power at the parking
brake supply on the pilot manifold.
Illustration 133 g02726471
7. Block the wheels. Connect portable hydraulic
pressure Port-A-Power to the brake hose. Plug
port on the manifold. Pressurize to 1896 kpa
(275 PSI) minimum, 3447 kpa (500 PSI)
maximum.
8. Remove steering lock bar.
Illustration 134 g02726176
9. The machine will be towed from the rear, using the
towing eye (D) located under the rear bumper.
Note: Before you tow the machine, inspect the tow
line or the tow bar. Make sure that the tow line or the
tow bar is sturdy enough for towing the disabled
machine. The tow line or bar must have a strength
that is equal to 1.5 times the gross weight of the
machine that is being towed.
Page 85
SEBU9024 85
Machine Operation
Transmission Speed Control
Normally, the towing machine should be as large
as the disabled machine. The towing machine
must have enough brake capacity, enough weight,
and enough power for the grade and distance that
is involved.
Note: When going downhill, be sure to use a hold
back vehicle. The machine is now without any
effective braking.
10. When towing is completed, reinstall steering
frame lock.
11. Reconnect steering cylinder hoses in proper
location.
12. Reconnect parking brake hose to port on the pilot
manifold.
Personal injury or death can result from brake
malfunction.
Illustration 135 g02727548
Make sure all necessary repairs and adjustments
have been made before a machine that has been
towed to a service area, is put back into
operation.
i05740872
Transmission Speed Control
SMCS Code: 3065
NOTICE
Before traveling, verify that there are no people near
machine or attachment.
Speed changes at full engine speed and directional
changes at full engine speed are possible. However,
deceleration and/or braking is recommended when
you change gear. Maximizing operator comfort and
the service life of the transmission components.
1. Fasten seat belt snugly.
2. With engine and hydraulics warmed up properly,
steer left and right while engaging transmission in
low idle. Depress the throttle button (A) to high idle
position.
Illustration 136 g02727861
3. Set transmission shifter (B) to desired position.
Note: Set transmission to LOW speed when
operating implement. Set transmission to HIGH
speed when traveling.
4. Completely release parking brake. Machine will not
move if parking brake is not released.
5. Lift attachment off the ground. Keep attachment as
low as possible without running into obstructions.
Page 86
86 SEBU9024
Machine Operation
Power Receptacle
SMCS Code: 1000; 1408; 1436; 7000; 7451
Illustration 137 g02727870
6. Use propel pedals (C ) to travel in desired direction.
If machine can be Propeled with parking brake
set, interlock system is not working as intended.
Shut engine down and contact an authorized dealer immediately for system repair.
i04784193
Power Receptacle
(If Equipped)
Illustration 138 g02894116
Power Receptacle – Two 12 V power receptacles (1
)are located on the right side console. These power
receptacles can be used for powering automotive
electrical equipment or accessories. Remove the cap
before use.
Page 87

SEBU9024 87
Engine Starting
Engine Starting
Engine Starting
i05781687
Engine Starting
SMCS Code: 1000; 7000
NOTICE
The start will be automatically disengage after 45 seconds of cranking. Allow the starter to cool for 2 minutes before cranking again. Turbocharger damage
can result if the engine rpm is not kept low until the oil
gauge display verifies that the oil pressure is
sufficient.
1. All controls must be in the NEUTRAL position in
order to start the machine. If any machine function
is active, the machine will not start.
2. Engage the parking brake.
3. Fasten the seat belt.
4. Ensure that the control levers are in the HOLD
position.
Engine Starting with Ether Starting
Aid (If Equipped)
NOTICE
Use ether for cold starting purposes only.
The start will be automatically disengage after 45 seconds of cranking. Allow 2 minutes for starting motor to
cool before cranking again.
Turbocharger damage can result, if the engine rpm is
not kept low until the engine oil light/gauge verifies
the oil pressure is sufficient.
1. Follow Step 1 through Step 6 of the Engine Starting
Procedure.
A premeasured amount of ether will be
automatically injected if the ambient conditions call
for starting aid. The starting aid indicator will be
illuminated on the Monitoring System Display.
2. Release the engine start switch key after the
engine starts.
Engine Starting with Cold Start
Package (If Equipped)
5. Before the engine is started, check for the
presence of bystanders or maintenance personnel.
Ensure that all personnel are clear of the machine.
Briefly sound the horn before you start the engine.
6. Turn the engine start switch to the START position
in order to start the engine.
Note: When engine start switch is in the ON position
and indicator lamp for Starting Aid turns on, the glow
plugs activate. Pause until the indicator lamp for the
Starting Aid turns off. Once the indicator light for the
Starting Aid goes off, you may start to crank the
engine. If the indicator lamp for Starting Aid comes on
while cranking the engine, the ether (if equipped) is
being activated. The selection of the type of cold
weather Starting Aid is based on temperature and
altitude.
7. Release the engine start switch key after the
engine starts.
For starting below −18°C (0°F), the use of a coolant
heater is recommended:
Dependent on the ambient air temperature, a
transmission pump bypass, and fan/brake pump
bypass may be activated, to reduce the parasitic load
on the engine.
Reference: At temperatures below −23°C (−10°F),
consult your Prentice dealer for additional information
or refer to Special Publication, SEBU5898, “Cold
Weather Recommendations”.
Engine Idle Management System
The Engine Idle Management System (EIMS) is
designed to help maximize fuel efficiency. EIMS
allows flexibility to manage idle speeds. The EIMS
engine software comes with two idle control settings:
hibernate mode and work mode.
Before the first Work Mode after machine starting, the
machine will set the idle speed so a transmission oil
level check can be completed. The idle speed will be
held for 5 minutes with the low idle set to 800 rpm.
The following conditions must be met:
Page 88

88 SEBU9024
Engine Starting
Engine Starting
• The throttle is released
• The parking brake is engaged
• The transmission is in neutral
• The implements are not active
• There are no active diagnostic codes
If any of the above conditions are not met, the
transmission oil level check will not occur again until
the next power cycle.
Note: If there is an active diagnostic code on the
machine, the machine may operate at the
programmed idle speed.
Hibernate Mode
If your machine has higher idle time, hibernate mode
will provide lower fuel consumption, reduced sound
level, and reduced emissions levels. Fuel
consumption savings will vary by the model of the
machine and work cycle. The hibernate mode is
engaged after 10 seconds and the following
conditions are met:
• The parking brake is engaged
• The implements are not active
• There are no active diagnostic codes
• The coolant temperature is greater than 50C
• The DPF outlet temperature is less than 200C
Work Mode
The work mode is the low idle speed of the machine
during normal operation. The engine idle speed for
work mode may be set in order to meet the
requirements of the application.
Note: EIMS work mode engine idle speed can be
adjusted by your dealer. The programmable range for
the work mode is 650 rpm to 1100 rpm. The default
work mode speed is 800 RPM.
Note: If there is an active diagnostic code on the
machine, the machine may operate at the
programmed idle speed.
Low Voltage Mode
High electrical loads from attachments may cause a
high electrical current drain on the battery. The low
voltage mode is designed to reduce the risk of fully
discharging the batteries. This feature is standard on
all machines. The low voltage mode is engaged after
5 minutes when the following conditions are met:
• The transmission is in neutral.
• The parking brake is set.
• The throttle switch is depressed.
When the battery voltage drops below 24.5 V, the
engine speed will increase to 1000 rpm in order to
charge the battery.
The machine will return to the engine idle speed for
work mode if any of the following occurs:
• The engine fan must be greater than 77% bypass
• The transmission is in neutral.
• The throttle switch is depressed.
Note: The EIMS hibernate engine idle speed can be
adjusted by your dealer. The programmable range for
the hibernate mode is 650 rpm to 800 rpm.
The machine will return to the engine idle speed for
work mode if any of the following occurs:
• Release of the parking brake
• Directional shift of the machine
• Activation of the implements
• Push of the throttle switch
• The engine fan is at full speed
• release of the parking brake
• directional shift of the machine
Warm Up Mode
Note: If the machine is unable to regenerate during
extended idling in extremely cold ambient conditions,
engine derate and shutdown may occur.
The warm-up mode is designed to keep the engine
and the machine warmer in cold-weather operations.
The warm-up mode is engaged after 10 minutes and
the following conditions are met:
• The feature is enabled in the software.
• The transmission is in neutral.
• The parking brake is set.
• The throttle switch is depressed.
Page 89

SEBU9024 89
Engine Starting
Engine and Machine Warm-Up
When the coolant temperature drops below 70 °C
(158 °F) and the charge air cooler temperature drops
below 5 °C (41 °F), the engine idle speed will
increase 20rpm/sec until target rpm is reached. RPM
will stay raised until coolant temperature rises above
70° C (158° F). The machine will disengage warm-up
mode when the coolant temperature reaches80 °C
(176 °F).
The machine will return to the engine idle speed for
work mode if any of the following occurs:
Note: Engine speed drops a 1000 rpm/sec.
• release of the parking brake
• directional shift of the machine
After the first time warm-up mode has been engaged,
the following conditions will activate warm-up mode:
• 1 minute elapsed time
• The coolant temperature goes below 70 °C
(158 °F).
The engine speed will increase to 20 rpm/sec till
target speed is met.
The default setting for the warm-up mode is enabled.
Note: Consult your Prentice dealer in order to enable/
disable the warm-up mode.
Note: If there is an active diagnostic code on the
machine, the machine may operate at the
programmed idle speed.
i04451309
Engine and Machine Warm-Up
SMCS Code: 1000; 7000
NOTICE
Keep the engine speed low until the engine oil pressure registers (2) or the engine oil indicator light (1)
goes out on the IQAN-Md3.
If engine oil pressure fails to register or the light does
not go out within 10 seconds, stop the engine and investigate the cause before starting again. Failure to
do so, can cause engine damage.
Illustration 139 g02646546
Illustration 140 g02646582
Page 90

90 SEBU9024
Engine Starting
Engine and Machine Warm-Up
1. Allow a cold engine to warm up at LOW IDLE for at
least 5 minutes.
2. Look at the IQAN-Md3 screen and the indicator
lights frequently during operation.
If low engine oil pressure indicator (1) remains
illuminated, inspect the machine for the cause of
the trouble.
If the IQAN-Md3 screen does not display properly,
inspect the machine for the trouble. Repair all
problems before moving the machine.
3. Cycle all controls in order to allow warm oil to
circulate through all of the lines and the cylinders.
Observe the following recommendations during the
warm-up period for the engine:
• In temperatures above 0°C (32°F), the warm-up
period is 15 minutes.
• In temperatures below 0°C (32°F), the warm-up
period is 30 minutes or a longer period of time.
• In temperatures below −18°C (0°F), more time is
required if the hydraulic controls are sluggish.
Page 91
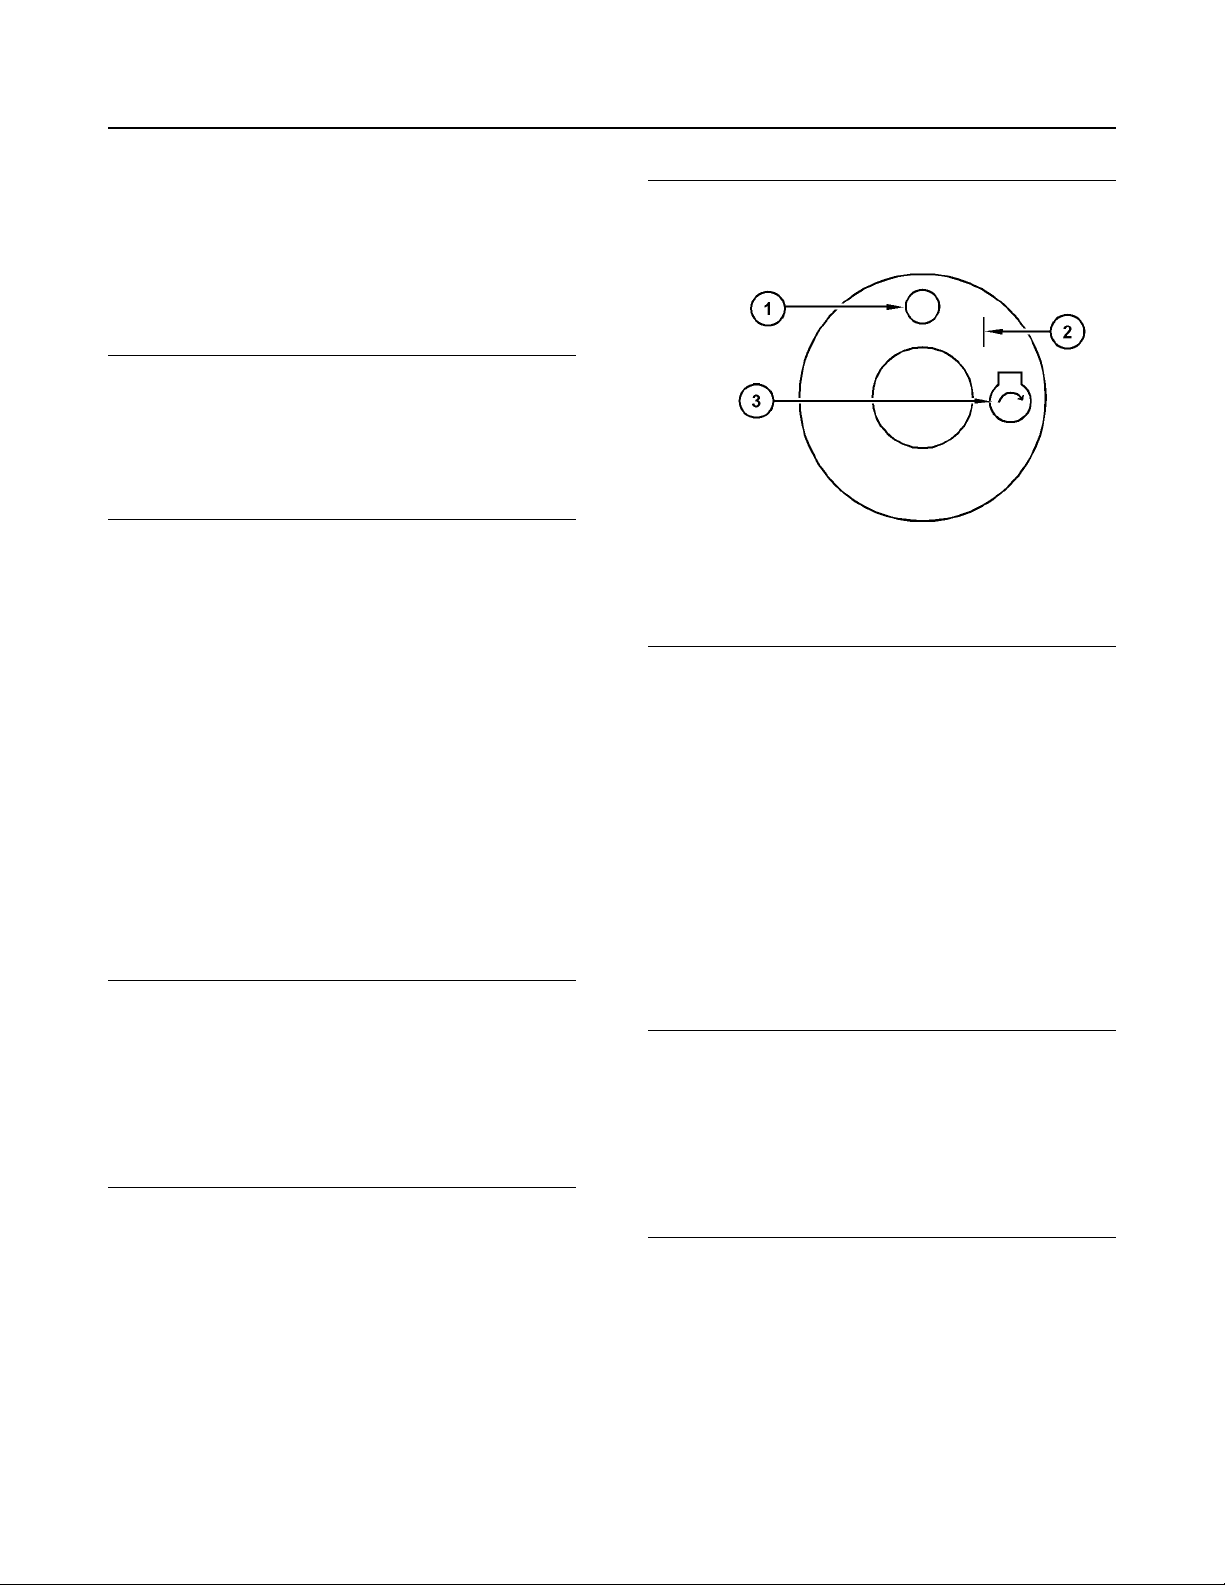
SEBU9024 91
Parking
Stopping the Machine
Parking
i05740875
Stopping the Machine
SMCS Code: 7000
NOTICE
Do not engage the parking brake while the machine is
moving unless the primary service brake fails.
The use of the parking brake as a service brake in
regular operation will cause severe damage to the
brake system.
1. Park the machine on a level surface. If necessary
to park on a grade, block the wheels.
2. Apply the service brakes in order to stop the
machine.
3. Move the transmission control to the NEUTRAL
position.
4. Engage the parking brake.
Illustration 141 g03352515
(1) Off
(2) On
(3) Start
5. Lower the work tool to the ground and apply slight
downward pressure.
i05267728
Stopping the Engine
SMCS Code: 1000; 7000
NOTICE
Stopping the engine immediately after it has been
working under load, can result in overheating and accelerated wear of the engine components.
See the following stopping procedure, to allow the engine to cool, and to prevent excessive temperatures
in the turbocharger center housing, which could
cause oil cooking problems.
1. While the machine is stopped, run the engine for 5
minutes at low idle. The engine idle allows hot
areas of the engine to cool gradually.
2. Turn the engine start switch to the OFF position
and remove the key.
Note: Damage could occur to the machine if engine is
not allowed to cool down before shutdown.
i04778442
Stopping the Engine
SMCS Code: 1000; 7000
NOTICE
Stopping the engine immediately after it has been
working under load, can result in overheating and accelerated wear of the engine components.
See the following stopping procedure, to allow the engine to cool, and to prevent excessive temperatures
in the turbocharger center housing, which could
cause oil coking problems.
1. While the machine is stopped, run the engine for 5
minutes at low idle. The engine idle allows hot
areas of the engine to cool gradually.
Page 92

92 SEBU9024
Parking
Stopping the Engine if an Electrical Malfunction Occurs
Delayed Engine Shut Down
Turn the ignition key switch to the OFF position. If a
regeneration is not required or not allowed, the
engine may delay shutdown for 5 minutes for the
engine to cool down.
Force Shut Down
Illustration 142 g02110334
Ignition Keyswitch
(1) Engine Forced Shut down -Stop
(2) Off
(3) On
(4) Start
2. Turn the engine start switch to the OFF position
and remove the key. There are several machine
features that can occur when stopping the engine.
Engine Idle Shutdown (If Enabled)
The engine can shut down if all of the following
conditions exist:
• The machine was warm when started
• The engine is left idling with the transmission in
neutral
• No implement control movement
• No throttle movement
• Engine idle shutdown is enabled in the monitoring
system.
Reference: Refer to the Operation and Maintenance
Manual, “Operator Controls”, “Engine Idle Shut Down”
section for more information.
In order to restart the engine after an engine idle shut
down, the keyswitch must be moved into the OFF
position. Then turn the keyswitch back to the ON or
START position
Illustration 143 g02110334
Ignition Keyswitch
(1) Engine Forced Shut down -Stop
(2) Off
(3) On
(4) Start
When the operator determines that an immediate
shutdown is necessary, turn the key switch to the
STOP position (2). Then turn the key switch in the
counter clockwise direction and hold in that position
(1) for 2 seconds.
Note: Damage could occur to the machine if the
engine is not allowed to cool down before shutdown.
Use the forced shutdown only if necessary.
i05740876
Stopping the Engine if an
Electrical Malfunction Occurs
SMCS Code: 1000; 7000
Turn the engine start switch into the STOP position
and hold for 2 seconds. If the engine does not stop,
an electrical malfunction exists.
Key Off Regeneration Cycle (If
Enabled)
When the ignition key switch is turned to the OFF
position, the system will determine if a regeneration is
possible. If the soot level is above 15 percent, the
operator will be prompted to initiate a regeneration, if
desired. If initiated, the cycle will run for 15 minutes.
The cycle may be stopped by pressing the “Disable
Regeneration” button. The normal delayed engine
shutdown will continue.
Page 93
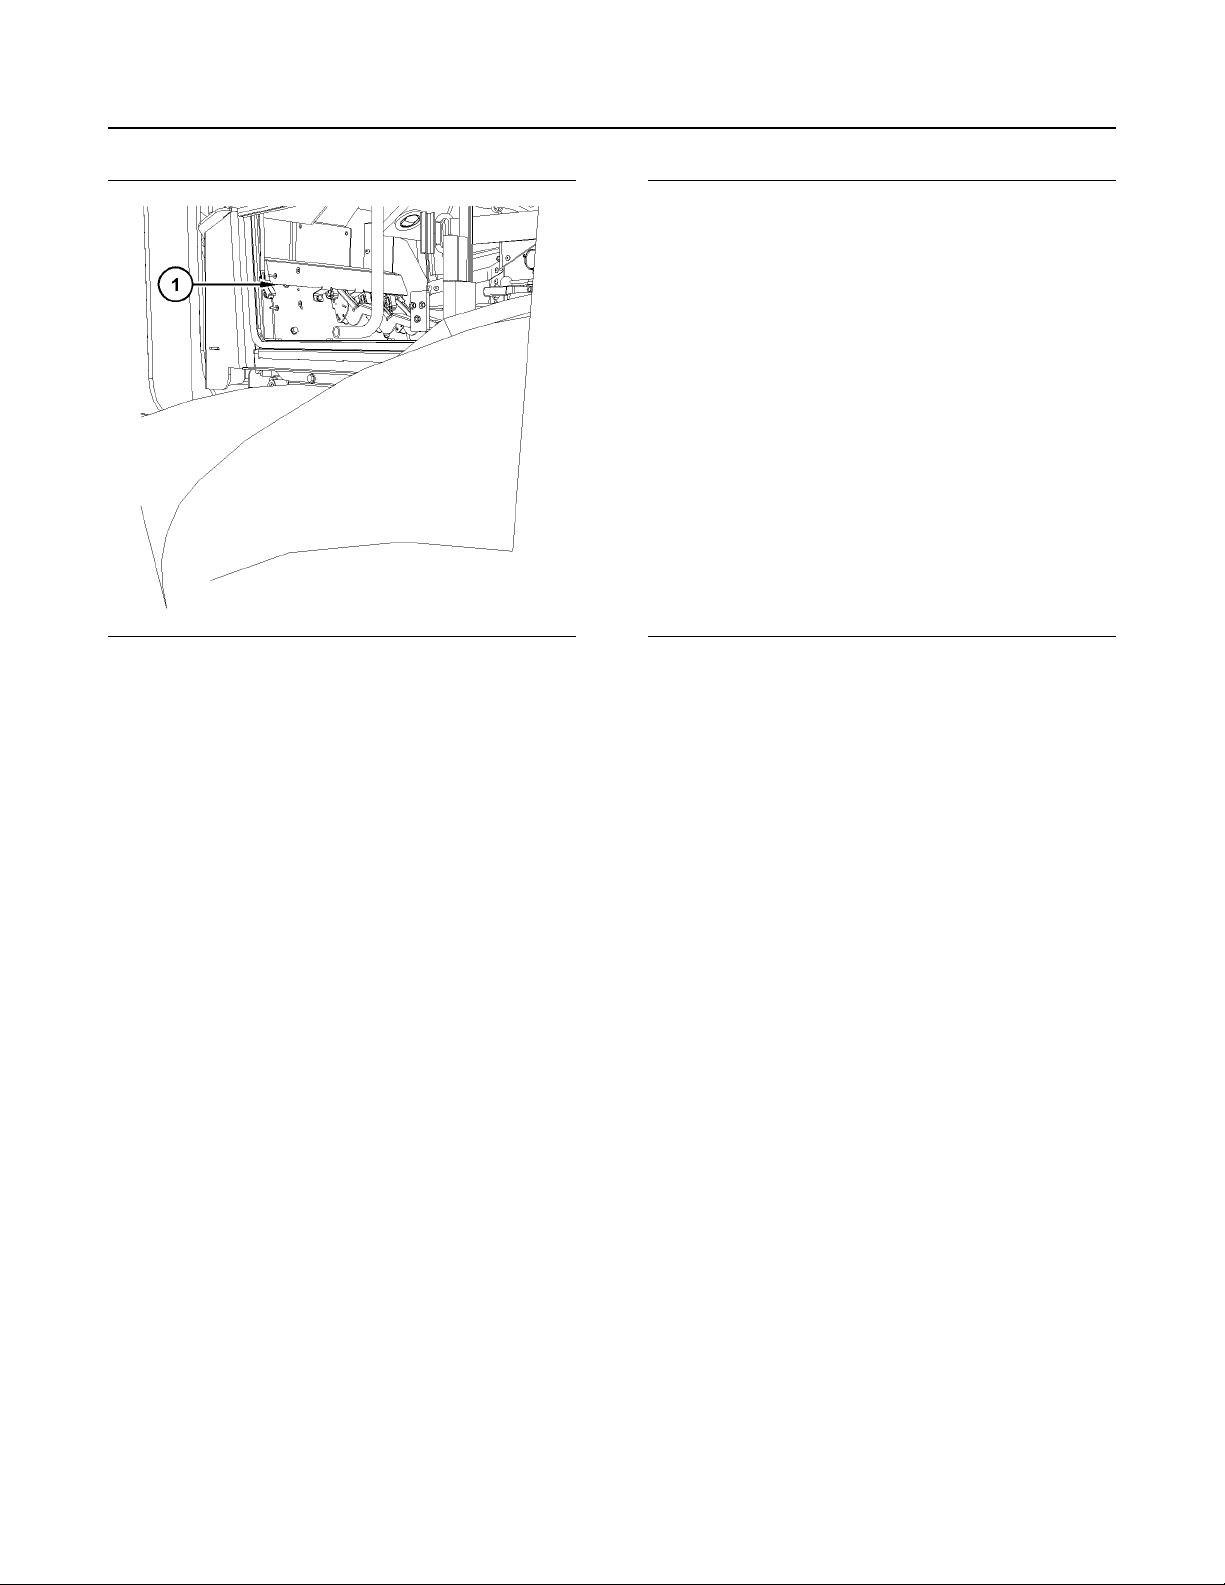
SEBU9024 93
Parking
Stopping the Engine if an Electrical Malfunction Occurs
Illustration 144 g03656465
An emergency shutdown switch (1) is located in the
cab on the left-hand cab door post near the floor.
Move the switch downward in order to stop the
engine.
i04778489
Stopping the Engine if an
Electrical Malfunction Occurs
SMCS Code: 1000; 7000
Turn the engine start switch into the STOP position
and hold for 2 seconds. If the engine does not stop,
an electrical malfunction exists.
Illustration 145 g02885077
An emergency shutdown switch (1) is located in the
cab on the left-hand goal post near the floor. Move
the switch upward in order to stop the engine.
i03907860
Leaving the Machine
SMCS Code: 7000
1. Use the steps and the handholds when you get off
the machine. Face the machine and use both
hands. Make sure that the steps are clear of debris
before you dismount.
2. Inspect the engine compartment for debris. Clean
out any debris and paper in order to avoid a fire.
3. Remove all flammable debris in order to reduce a
fire hazard. Dispose of all debris properly.
4. Always turn the battery disconnect switch to the
OFF position before leaving the machine.
5. If the machine will not be operated for a month or
more, remove the battery disconnect switch key.
6. Install all covers and all vandalism protection locks.
Page 94
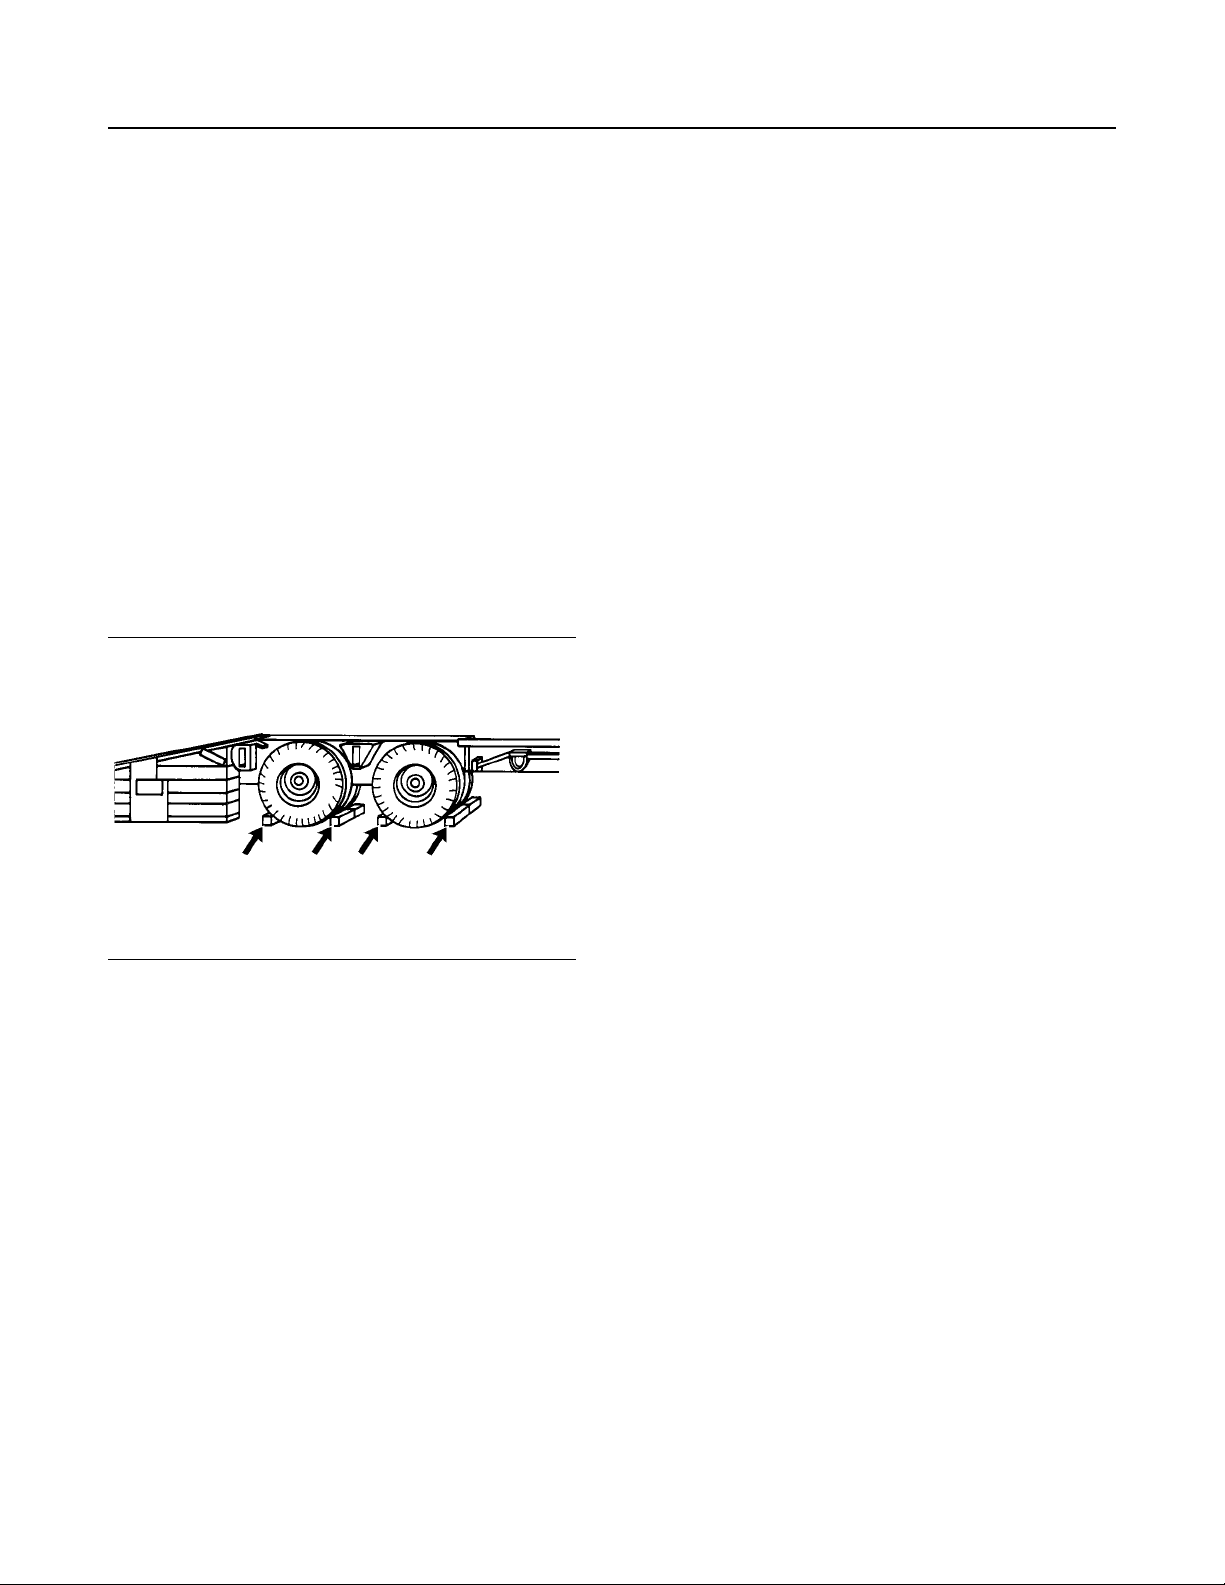
94 SEBU9024
Transportation Information
Shipping the Machine
Transportation Information
i04451369
Shipping the Machine
SMCS Code: 7000; 7500
Investigate the travel route for overpass clearances.
Make sure that there will be adequate clearance if the
machine that is transported has a ROPS, a cab, or a
canopy.
Remove ice, snow, or other slippery material from the
loading dock and from the transport machine before
you load the machine. This will help to prevent
slippage of the machine. This will also help to prevent
a shift while the machine is moving in transit.
Obey the appropriate laws that govern the
parameters of the load (weight, width, and length).
7. Turn the battery disconnect switch to the OFF
position. Remove the battery disconnect switch
key.
8. Lock the door and the access covers. Attach any
vandalism protection.
9. Secure the machine, any equipment, and any tools
with adequate tie-downs in order to prevent
movement during shipping.
10. Cover the exhaust opening. The turbocharger (if
equipped) should not rotate when the engine is not
operating. Damage to the turbocharger can result.
i05740877
Roading the Machine
SMCS Code: 7000
Before you road a machine, consult your tire dealer
for recommended tire pressures and for speed
limitations.
Turn the saw blade control switch to the OFF position
before you road the machine. Put the hydraulic
controls lockout lever in the LOCKED position before
you road the machine.
Illustration 146 g00040011
Properly chocked trailer wheels
1. Chock the trailer wheels or the rail car wheels
before you load the machine.
2. After the machine is positioned, connect the
steering frame lock in order to hold the front frame
and the rear frame in place.
3. Lower the work tool to the floor of the transport
vehicle. Make sure all guards are in place on the
work tools prior to transport.
4. Engage the parking brake.
5. Turn the engine start switch to the OFF position.
Remove the engine start switch key.
6. Move all of the control levers in order to relieve any
trapped pressure.
Limitations for TON-kilometer per hour (TON-mile per
hour) must be obeyed. Consult your tire dealer for the
speed limit of the tires that are used.
When you travel for long distances, schedule stops in
order to allow the tires and the components to cool.
Stop for 30 minutes after every 40 km (25 miles) or
after every hour.
Perform a walk-around inspection and measure the
fluid levels in each of the compartments.
Bring the engine coolant, the crankcase oil, and the
transmission oil up to the correct levels.
Inflate the tires to the correct pressure.
Use a self-attaching inflation chuck in order to inflate
the tire. Stand behind the tire tread while you inflate
the tires.
Reference: For more information, refer to Operation
and Maintenance Manual, “Tire Inflation Information”.
Check with the proper officials in order to obtain the
required licenses and other similar items.
Travel at a moderate speed. Observe all speed
limitations when you road the machine. Carry the
work tool as low to the ground as possible.
Page 95

SEBU9024 95
Transportation Information
Lifting and Tying Down the Machine
i05781706
Lifting and Tying Down the
Machine
SMCS Code: 7000; 7500
Improper lifting and improper tie-downs can allow
the load to shift or fail and cause injury or damage. Use only properly rated cables and slings
with lift and tie down points provided.
Follow the instructions in Operation and Maintenance Manual, “Lifting and Tying Down the Machine” for the proper technique for securing the
machine. Refer to Operation and Maintenance
Manual, “Specifications” for specific weight
information.
Page 96
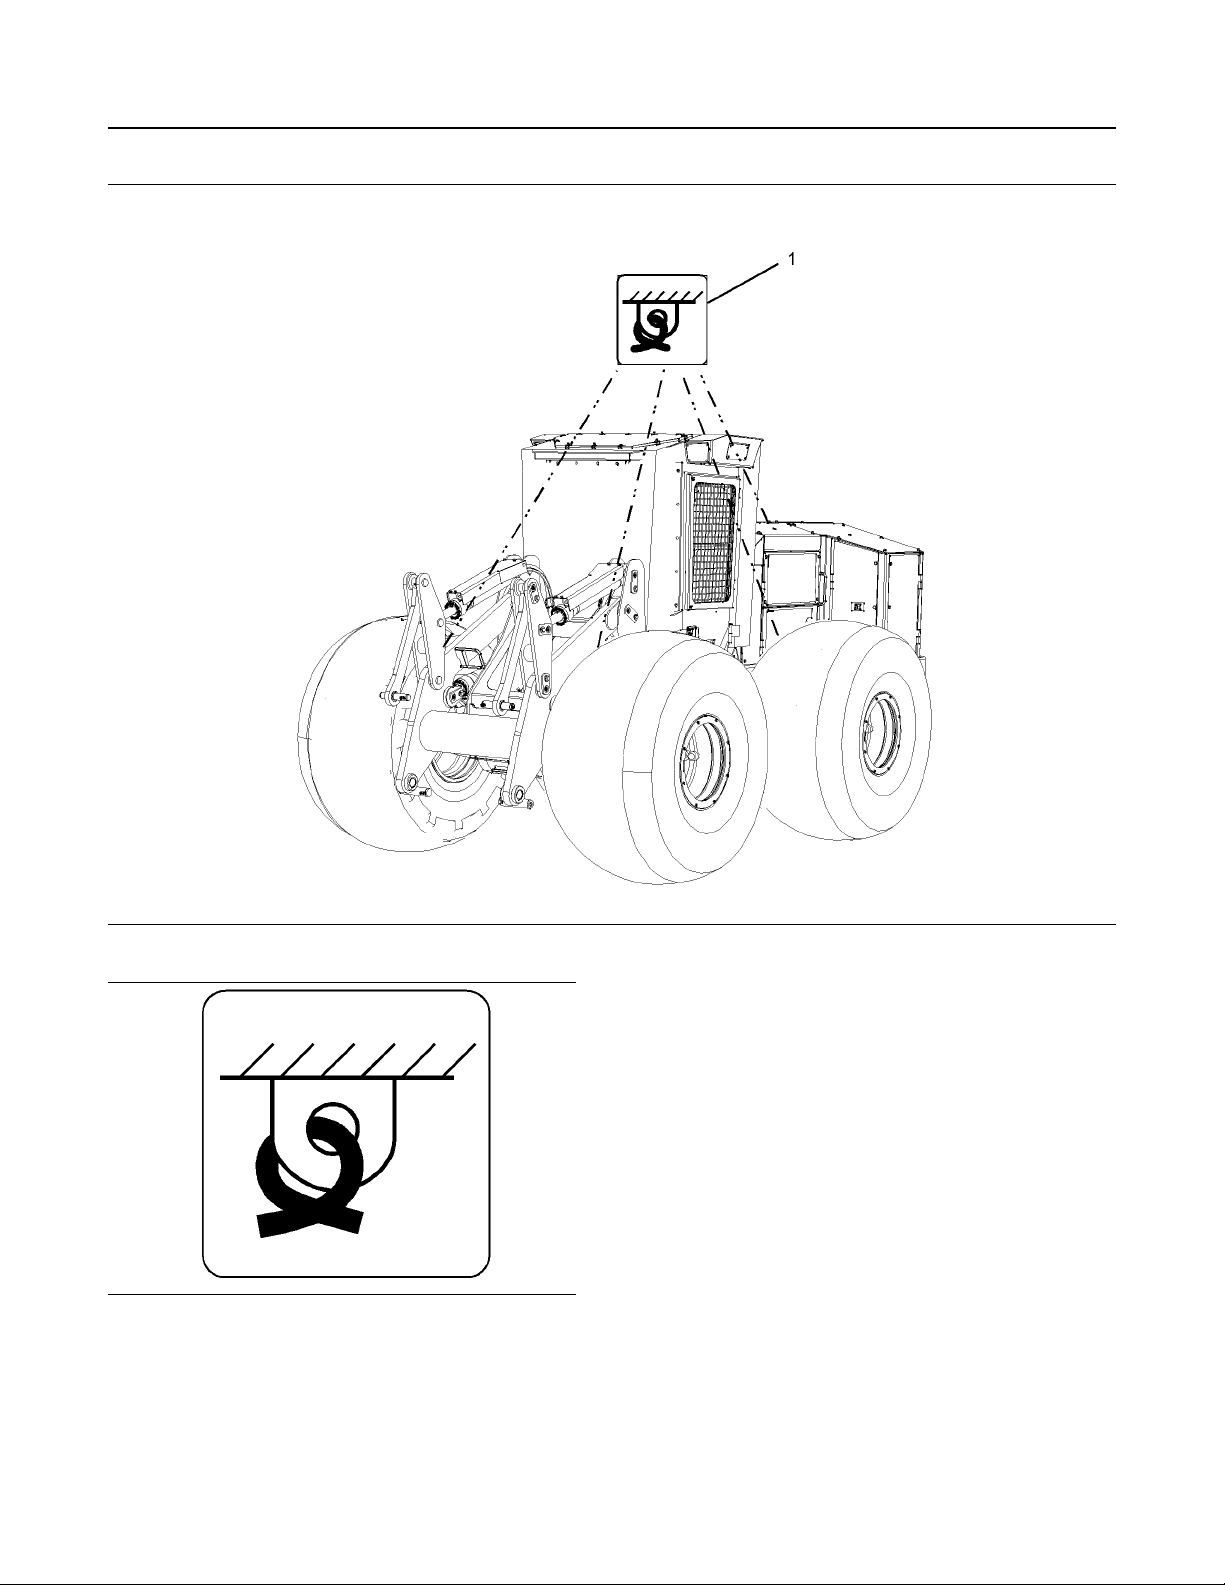
96 SEBU9024
Transportation Information
Lifting and Tying Down the Machine
Illustration 147 g02996562
Illustration 148 g02996560
The lift and tie down film (1) is located on all four
axles.
Page 97
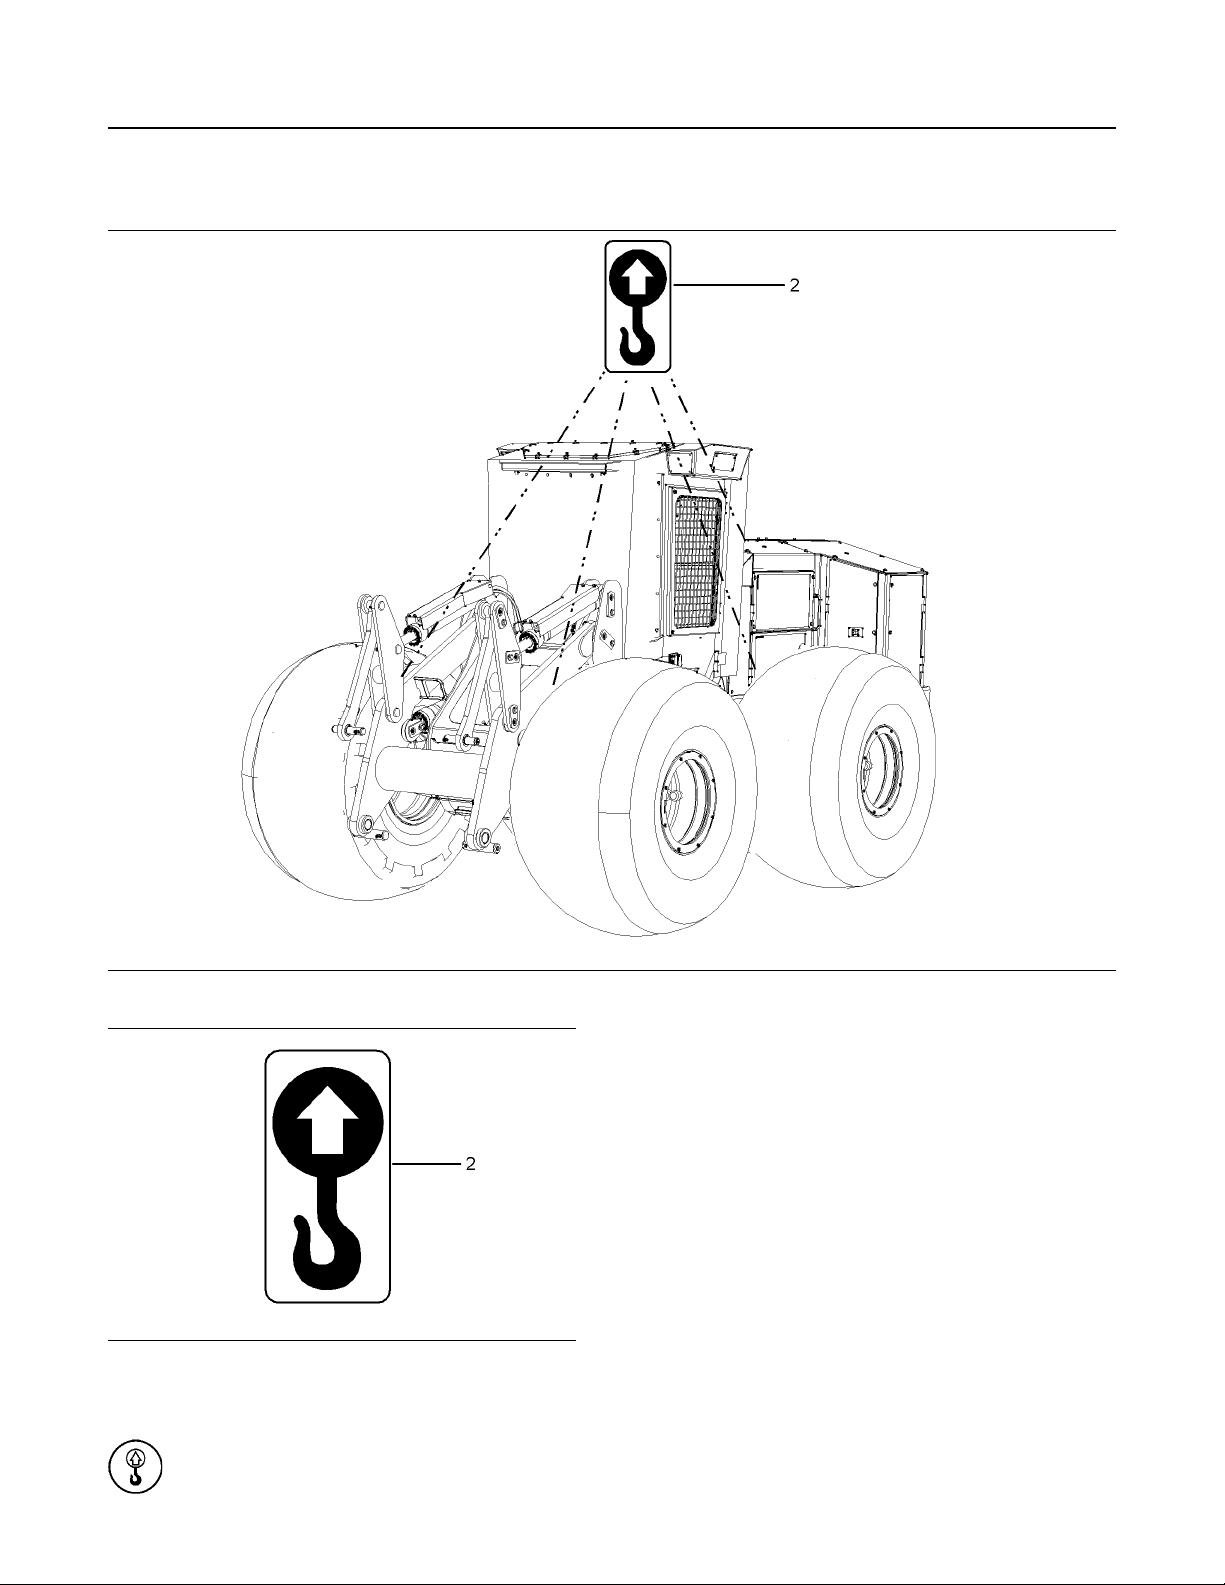
SEBU9024 97
Transportation Information
Lifting and Tying Down the Machine
Lifting the machine
Illustration 149 g02997078
The weight and the instructions that are given herein
describe the machine as the machine is
manufactured by Prentice.
Refer to the Operation and Maintenance,
“Specifications” for specific weight information.
Note: Only lift objects from approved lifting points and
with approved lifting devices
1. Use proper rated cables and slings for lifting. The
crane should be positioned so that the machine is
lifted parallel to the ground.
2. To prevent contact with the machine, lifting cables
Illustration 150 g02997096
The lift and tie down film (2) is located on all four
axles.
Lifting Point – In order to lift the
should have sufficient length.
3. Move the hydraulic lockout control to the LOCKED
position.
4. Install the steering frame lock.
machine, attach the lifting devices to the
lifting points.
5. Thread the cable around each of four axles.
Page 98
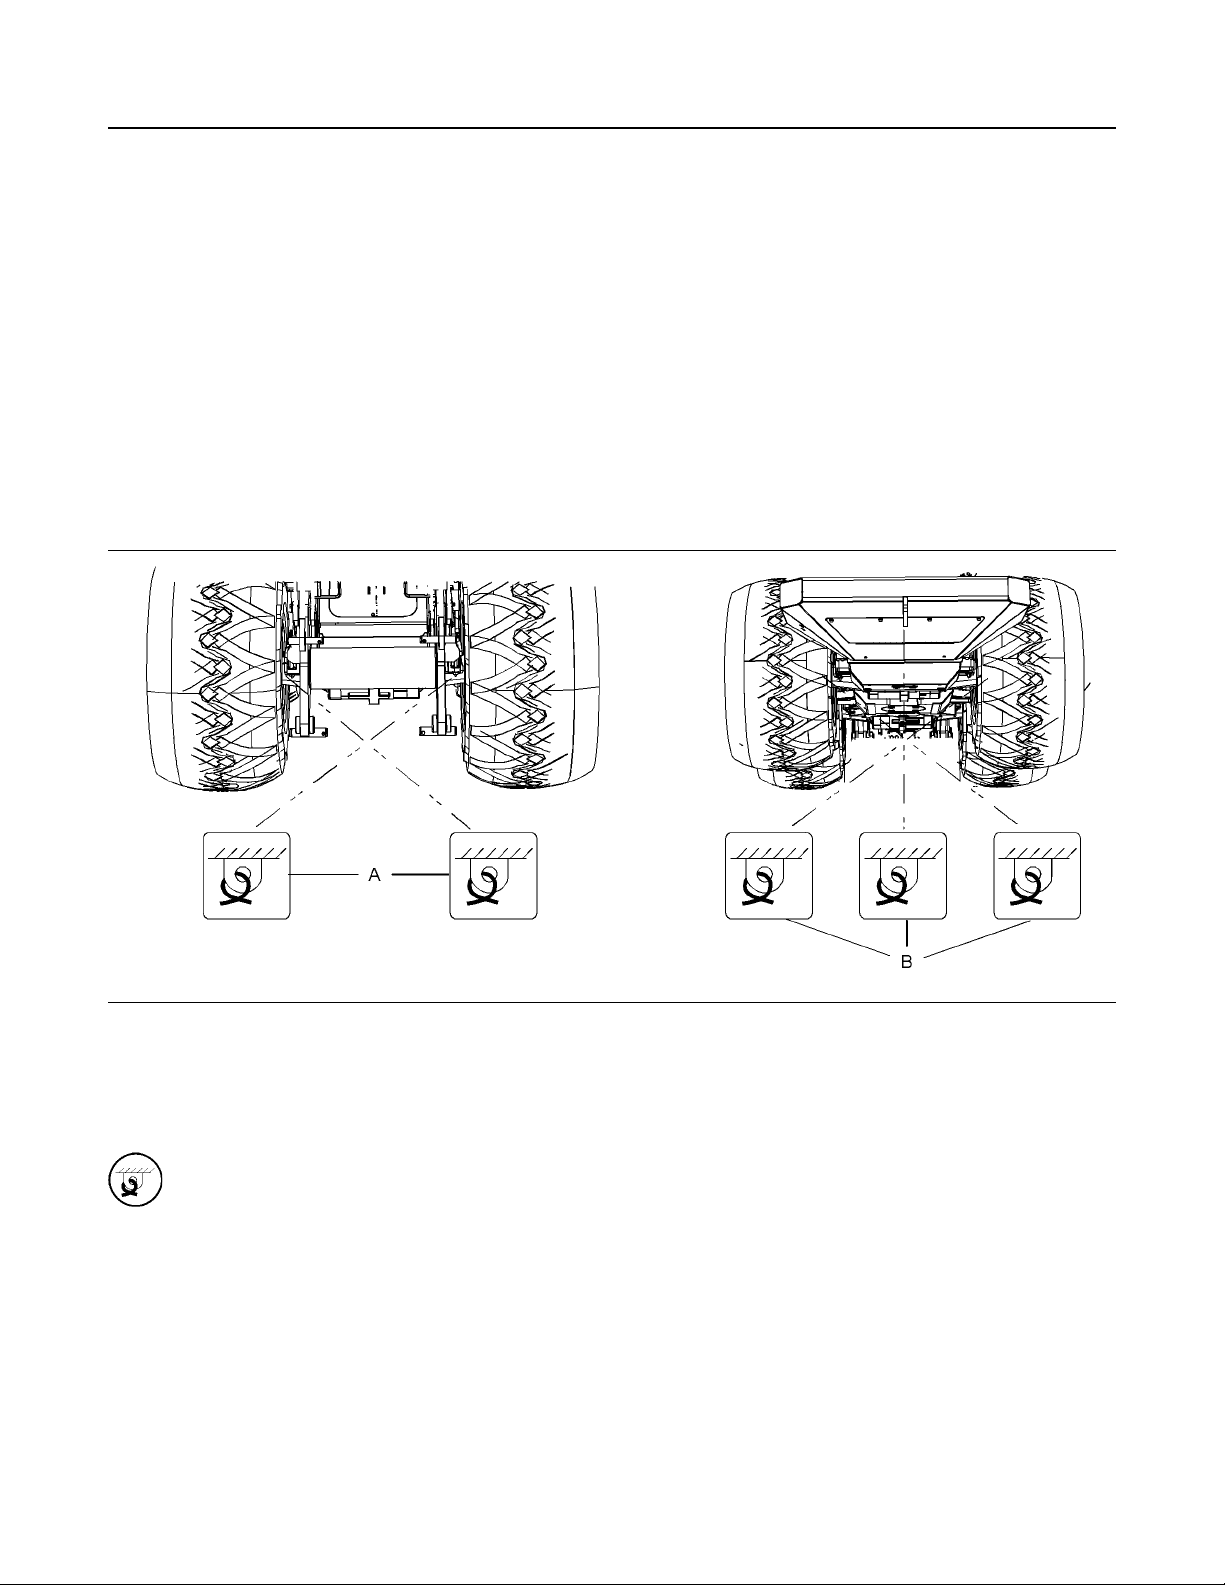
98 SEBU9024
Transportation Information
Lifting and Tying Down the Machine
6. Apply the proper protector to prevent machine/wire
damage and slippage.
Tying Down the Machine
There are two methods that can be used to tie down a
machine. Local and/or regional regulations will
determine which method to use.
Note: Obey all local and regional governmental
regulations.
Tie Down Method
In areas where frictional lashing is not allowed, direct
lashing can be used as shown below.
Illustration 151 g02997677
Direct lashing
(A) Front of the machine (B) Rear of the machine
Tying Down the Machine
Tie Down Point – In order to tie down the
machine, attach the tie-downs to the tie
down points.
The weight and the instructions that are given herein
describe the machine as the machine is
manufactured by Prentice.
Refer to the Operation and Maintenance,
“Specifications” for specific weight information.
1. Use proper rated cables and shackles for tying
down the machine.
2. Move the hydraulic lockout control to the LOCKED
position.
3. Install steering frame lock.
4. If there is a requirement of diagonal lashing for
tying down, use the proper tie-down point on the
lower frame. Set the lashing angle which is on the
longitudinal axis of the machine and the cable, at
30 to 50 degrees.
Page 99
SEBU9024 99
Towing Information
Machine Retrieval
Towing Information
i05785406
Machine Retrieval
SMCS Code: 7000
Personal injury or death could result when towing
a disabled machine incorrectly.
Block the machine to prevent movement before
releasing the brakes. The machine can roll free if
it is not blocked.
Personal injury or death can result from brake
malfunction.
Make sure all necessary repairs and adjustments
have been made before a machine that has been
towed to a service area, is put back into
operation.
Do not use a chain for pulling. A chain link may break
causing personal injury. Use a wire rope that has
cable loops or end rings. Position an observer at a
safe location. The observer should stop the pulling
procedure if the cable starts to break or the cable
starts to unravel. If the towing machine moves without
the pulled machine, stop the pulling procedure.
Keep the tow line angle to a minimum. Do not exceed
a 30 degree angle from the straight ahead position.
Quick machine movement could overload and break
the tow line or the tow bar. Gradual, smooth machine
movement works better.
Normally, the towing machine should be as large as
the disabled machine. The towing machine must
have enough brake capacity, enough weight, and
enough power for the grade and distance that is
involved.
Connect a larger machine or additional machines to
the disabled machine in order to provide sufficient
control and sufficient braking. Control of the disabled
machine must be maintained at all times.
The requirements for all different situations cannot be
specified. Minimal towing machine capacity is
required on smooth, level surfaces. Maximum towing
machine capacity is required on inclines or on poor
surface conditions.
NOTICE
This machine is not designed to allow for towing of attachments. The hitch is for machine retrieval only.
To perform the towing procedure properly, use the
following recommendations.
This machine is equipped with spring-applied, oil
pressure released parking brakes. If the engine or the
brake oil system is inoperable, the parking brakes are
applied and the machine cannot be moved.
Use these towing instructions for moving a disabled
machine over a short distance of 8 kilometers
(5 miles) or less. Do not move the machine faster
than 3 km/h (2 mph). Move the machine to a
convenient location for repair. Always haul the
machine if long distance moving is required.
Shielding must be provided on the towing machine in
order to protect the operator in case the tow line or
the tow bar breaks.
Do not allow riders on a machine that is being towed
unless the operator can control the steering and/or
the braking.
Before you tow the machine, inspect the tow line or
the tow bar. Make sure that the tow line or the tow bar
is sturdy enough for towing the disabled machine.
The tow line or the tow bar must have a strength that
is equal to 1.5 times the gross weight of the machine
being towed.
Any towed machine with a load must be equipped
with a braking system that can be operated from the
operator compartment.
Consult your Prentice dealer for more information
about towing a disabled machine.
Towing with a Running Engine
If the engine is running, the machine can be towed for
a short distance under certain conditions. The power
train and the steering system must be operable. Tow
the machine for a short distance only. For
example, pull the machine out of mud or to the side of
the road.
The operator on the towed machine must steer the
machine in the direction of the tow line.
Carefully obey all of the instructions that are outlined
in this topic.
Page 100
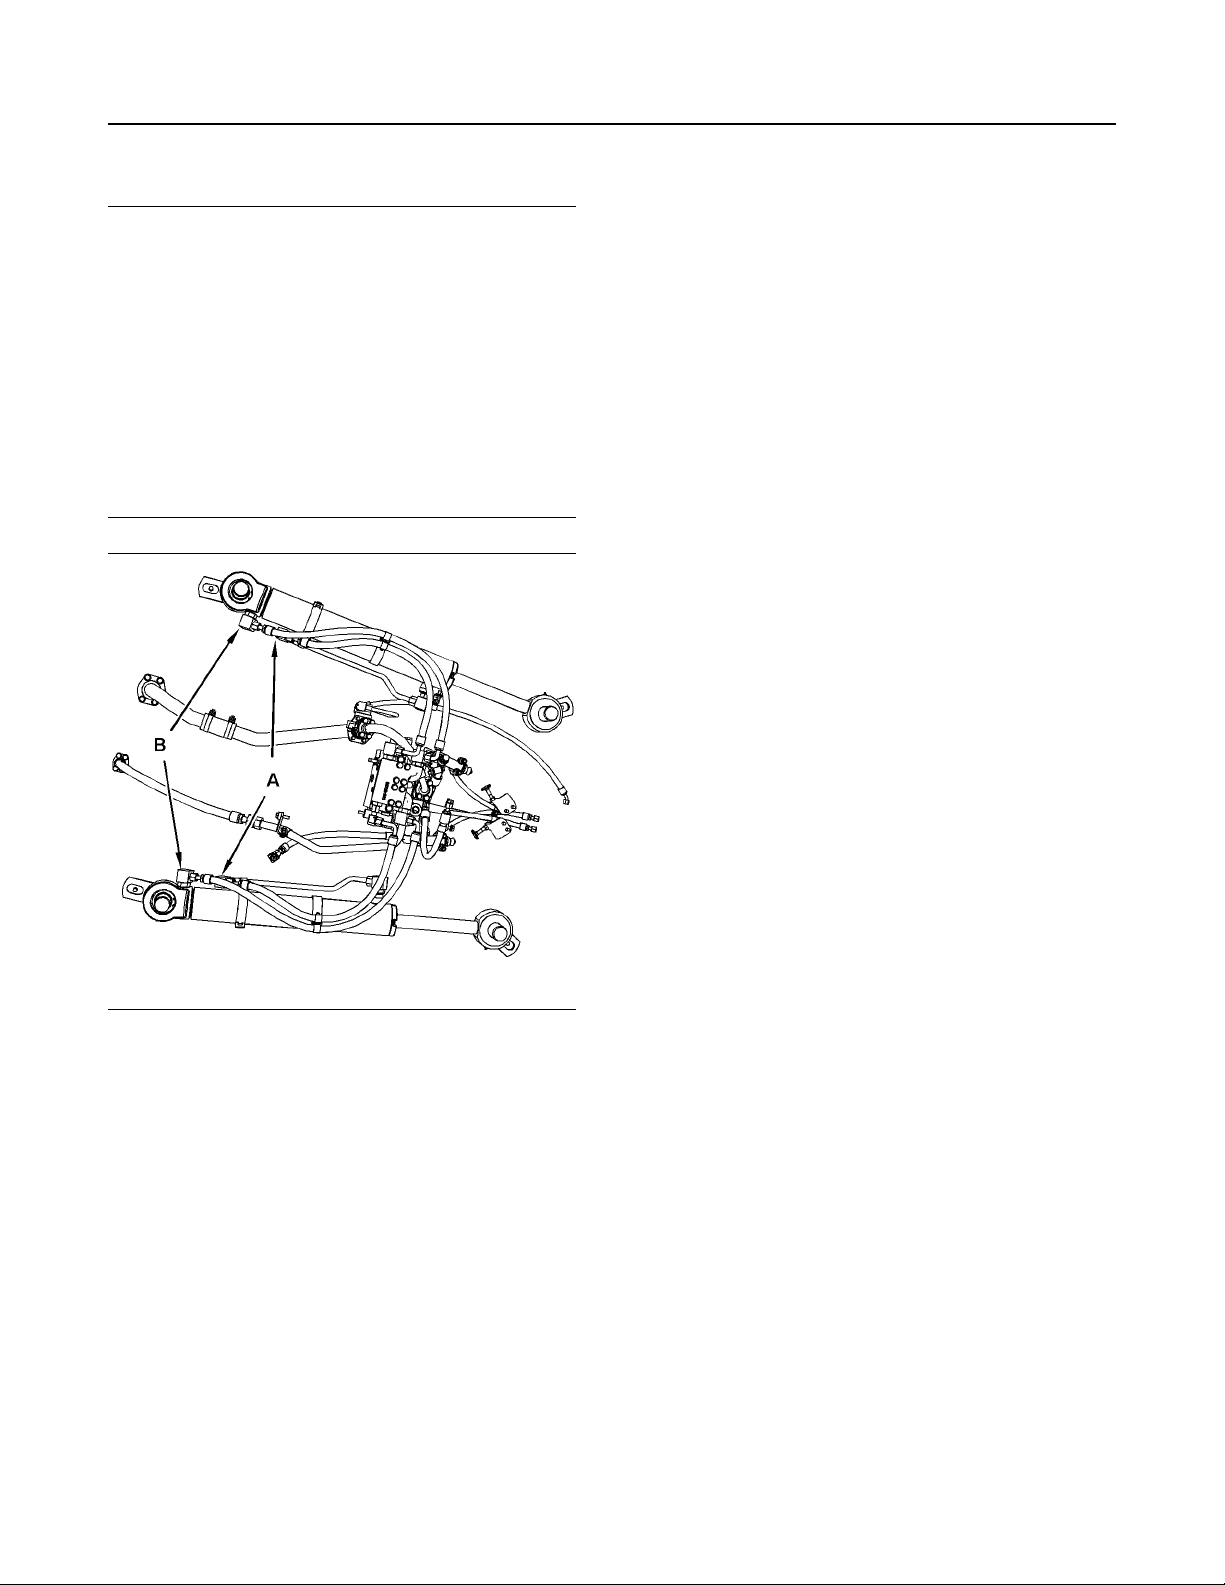
100 SEBU9024
Towing Information
Machine Retrieval
Towing with a Stopped Engine
3. Release the parking brake in order to prevent
NOTICE
Care must be taken to ensure that fluids are contained during performance of inspection, maintenance, testing, adjusting, and repair of the product.
Be prepared to collect the fluid with suitable containers before opening any compartment or disassembling any component containing fluids.
excessive wear and damage to the parking brake
system while the machine is being towed.
Reference: For information about the manual
release of the parking brake, refer to Operation and
Maintenance Manual, “Parking Brake Manual
Release”.
Refer to Special Publication, NENG2500, “Dealer
Service Tool Catalog” for tools and supplies suitable
to collect and contain fluids on Cat products.
Dispose of all fluids according to local regulations and
mandates.
4. Fasten the tow bar or the tow line between the
disabled machine and the towing machine.
5. Tow the machine slowly. Do not exceed 3 km/h
(2 mph).
Illustration 152 g02711918
(A) Rod end. (B) Head end.
Perform the following steps before you tow the
machine.
1. Reverse the hydraulic steering hose connections
on one cylinder only allowing the steering cylinders
to move freely.
Note: Make sure that the cylinder hoses are
connected correctly before you operate the machine
again. The steering system will not function if the
hose connections are reversed.
2. If failure of the internal transmission or of the drive
train is suspected, remove the center drive shaft
and remove the rear drive shaft.
Reference: For the removal procedure for the drive
shafts, refer to the Disassembly and Assembly
manual for the power train or consult your Prentice
dealer.
 Loading...