

Page 1

OPERATOR’S MANUAL
WHEEL FELLER
BUNCHER
OPERATOR’S MANUAL 2470 2570 2670
Knuckle Boom Loader
2384D & 2484D
Part No. SEBU9422
Oct. 2017
Rev. 02
KBF 1-Up
KP5 1-Up
KBR 1-Up
KP7 1-Up
Part No. 30009235
Rev. No. 0503, 0904
©Blount Inc. 2006. All Rights Reserved.
Page 2

i06558969
Important Safety Information
Most accidents that involve product operation, maintenance and repair are caused by failure to observe
basic safety rules or precautions. An accident can often be avoided by recognizing potentially hazardous
situations before an accident occurs. A person must be alert to potential hazards, including human factors
that can affect safety. This person should also have the necessary training, skills and tools to perform these
functions properly.
Improper operation, lubrication, maintenance or repair of this product can be dangerous and could
result in injury or death.
Do not operate or perform any lubrication, maintenance or repair on this product, until you verify
that you are authorized to perform this work, and have read and understood the operation,
lubrication, maintenance and repair information.
Safety precautions and warnings are provided in this manual and on the product. If these hazard warnings
are not heeded, bodily injury or death could occur to you or to other persons.
The hazards are identified by the “Safety Alert Symbol” and followed by a “Signal Word” such as
“DANGER”, “WARNING” or “CAUTION”. The Safety Alert “WARNING” label is shown below.
The meaning of this safety alert symbol is as follows:
Attention! Become Alert! Your Safety is Involved.
The message that appears under the warning explains the hazard and can be either written or pictorially
presented.
A non-exhaustive list of operations that may cause product damage are identified by “NOTICE” labels on
the product and in this publication.
Caterpillar cannot anticipate every possible circumstance that might involve a potential hazard.
The warnings in this publication and on the product are, therefore, not all inclusive. You must not
use this product in any manner different from that considered by this manual without first
satisfying yourself that you have considered all safety rules and precautions applicable to the
operation of the product in the location of use, including site-specific rules and precautions
applicable to the worksite. If a tool, procedure, work method or operating technique that is not
specifically recommended by Caterpillar is used, you must satisfy yourself that it is safe for you
and for others. You should also ensure that you are authorized to perform this work, and that the
product will not be damaged or become unsafe by the operation, lubrication, maintenance or repair
procedures that you intend to use.
The information, specifications, and illustrations in this publication are on the basis of information that was
available at the time that the publication was written. The specifications, torques, pressures,
measurements, adjustments, illustrations, and other items can change at any time. These changes can
affect the service that is given to the product. Obtain the complete and most current information before you
start any job. Cat dealers have the most current information available.
When replacement parts are required for this
product Caterpillar recommends using Cat replacement parts.
Failure to follow this warning may lead to premature failures, product damage, personal injury or death.
In the United States, the maintenance, replacement, or repair of the emission control devices and
systems may be performed by any repair establishment or individual of the owner's choosing.
Page 3

SEBU9422-02
3
Table of Contents
Table of Contents
Foreword ........................................................... 4
Safety Section
Safety Messages (Knuckleboom Loader)......... 6
Additional Messages ....................................... 12
General Hazard Information............................ 18
General Hazard Information............................ 21
Crushing Prevention and Cutting Prevention.. 24
Burn Prevention............................................... 24
Fire Prevention and Explosion Prevention...... 25
Fire Prevention and Explosion Prevention...... 28
Tire Information ............................................... 31
Guards (Operator Protection) ......................... 40
Product Information Section
General Information ........................................ 41
Identification Information ................................. 47
Operation Section
Before Operation ............................................. 48
Machine Operation .......................................... 50
Controls ........................................................... 76
Engine Starting................................................ 80
Parking ............................................................ 81
Maintenance Section
Lubricant Viscosities and Refill Capacities ..... 83
Before Starting Engine .................................... 32
Engine Starting................................................ 33
Before Operation ............................................. 33
Operation......................................................... 33
Operation......................................................... 34
Engine Stopping .............................................. 34
High Pressure Fuel Lines................................ 35
Work Tools....................................................... 37
Lifting Objects.................................................. 37
Parking ............................................................ 37
Equipment Lowering with Engine Stopped ..... 38
Sound Information and Vibration Information . 38
Maintenance Support ...................................... 86
Maintenance Interval Schedule....................... 87
Reference Information Section
Reference Materials ...................................... 151
Index Section
Index.............................................................. 152
Accumulator Pressure Release ...................... 38
Operator Station .............................................. 40
Page 4

4
Foreword
SEBU9422-02
Foreword
Literature Information
This manual should be stored in the operator's
compartment in the literature holder or seat back
literature storage area.
This manual contains safety information, operation
instructions, transportation information, lubrication
information and maintenance information.
Some photographs or illustrations in this publication
show details or attachments that can be different
from your machine. Guards and covers might have
been removed for illustrative purposes.
Continuing improvement and advancement of
product design might have caused changes to your
machine which are not included in this publication.
Read, study and keep this manual with the machine.
Whenever a question arises regarding your machine,
or this publication, please consult your Cat dealer for
the latest available information.
Safety
The safety section lists basic safety precautions. In
addition, this section identifies the text and locations
of warning signs and labels used on the machine.
Read and understand the basic precautions listed in
the safety section before operating or performing
lubrication, maintenance and repair on this machine.
Operation
The operation section is a reference for the new
operator and a refresher for the experienced
operator. This section includes a discussion of
gauges, switches, machine controls, attachment
controls, transportation and towing information.
Maintenance Intervals
Use the service hour meter to determine servicing
intervals. Calendar intervals shown (daily, weekly,
monthly, etc.) can be used instead of service hour
meter intervals if they provide more convenient
servicing schedules and approximate the indicated
service hour meter reading. Recommended service
should always be performed at the interval that
occurs first.
Under extremely severe, dusty or wet operating
conditions, more frequent lubrication than is specified
in the maintenance intervals chart might be
necessary.
Perform service on items at multiples of the original
requirement. For example, at every 500 service
hours or 3 months, also service those items listed
under every 250 service hours or monthly and every
10 service hours or daily.
California Proposition 65 Warning
Diesel engine exhaust and some of its constituents
are known to the State of California to cause cancer,
birth defects, and other reproductive harm.
Battery posts, terminals and related accessories
contain lead and lead compounds. Wash hands
after handling.
Certified Engine Maintenance
Proper maintenance and repair is essential to keep
the engine and machine systems operating correctly.
As the heavy duty off-road diesel engine owner, you
are responsible for the performance of the required
maintenance listed in the Owner Manual, Operation
and Maintenance Manual, and Service Manual.
Photographs and illustrations guide the operator
through correct procedures of checking, starting,
operating and stopping the machine.
Operating techniques outlined in this publication are
basic. Skill and techniques develop as the operator
gains knowledge of the machine and its capabilities.
Maintenance
The maintenance section is a guide to equipment
care. The Maintenance Interval Schedule (MIS) lists
the items to be maintained at a specific service
interval. Items without specific intervals are listed
under the "When Required" service interval. The
Maintenance Interval Schedule lists the page number
for the step-by-step instructions required to
accomplish the scheduled maintenance. Use the
Maintenance Interval Schedule as an index or "one
safe source" for all maintenance procedures.
Page 5
SEBU9422-02
5
Foreword
It is prohibited for any person engaged in the
business of repairing, servicing, selling, leasing, or
trading engines or machines to remove, alter, or
render inoperative any emission related device or
element of design installed on or in an engine or
machine that is in compliance with the regulations
(40 CFR Part 89). Certain elements of the machine
and engine such as the exhaust system, fuel system,
electrical system, intake air system and cooling
system may be emission related and should not be
altered unless approved by Caterpillar.
Machine Capacity
Additional attachments or modifications may exceed
machine design capacity which can adversely affect
performance characteristics. Included would be
stability and system certifications such as brakes,
steering, and rollover protective structures (ROPS).
Contact your Cat dealer for further information.
Cat Product Identification Number
Effective First Quarter 2001 the Cat Product
Identification Number (PIN) has changed from 8 to 17
characters. In an effort to provide uniform equipment
identification, Caterpillar and other construction
equipment manufacturers are moving to comply with
the latest version of the product identification
numbering standard. Non-road machine PINs are
defined by ISO 10261. The new PIN format will apply
to all Cat machines and generator sets. The PIN
plates and frame marking will display the 17
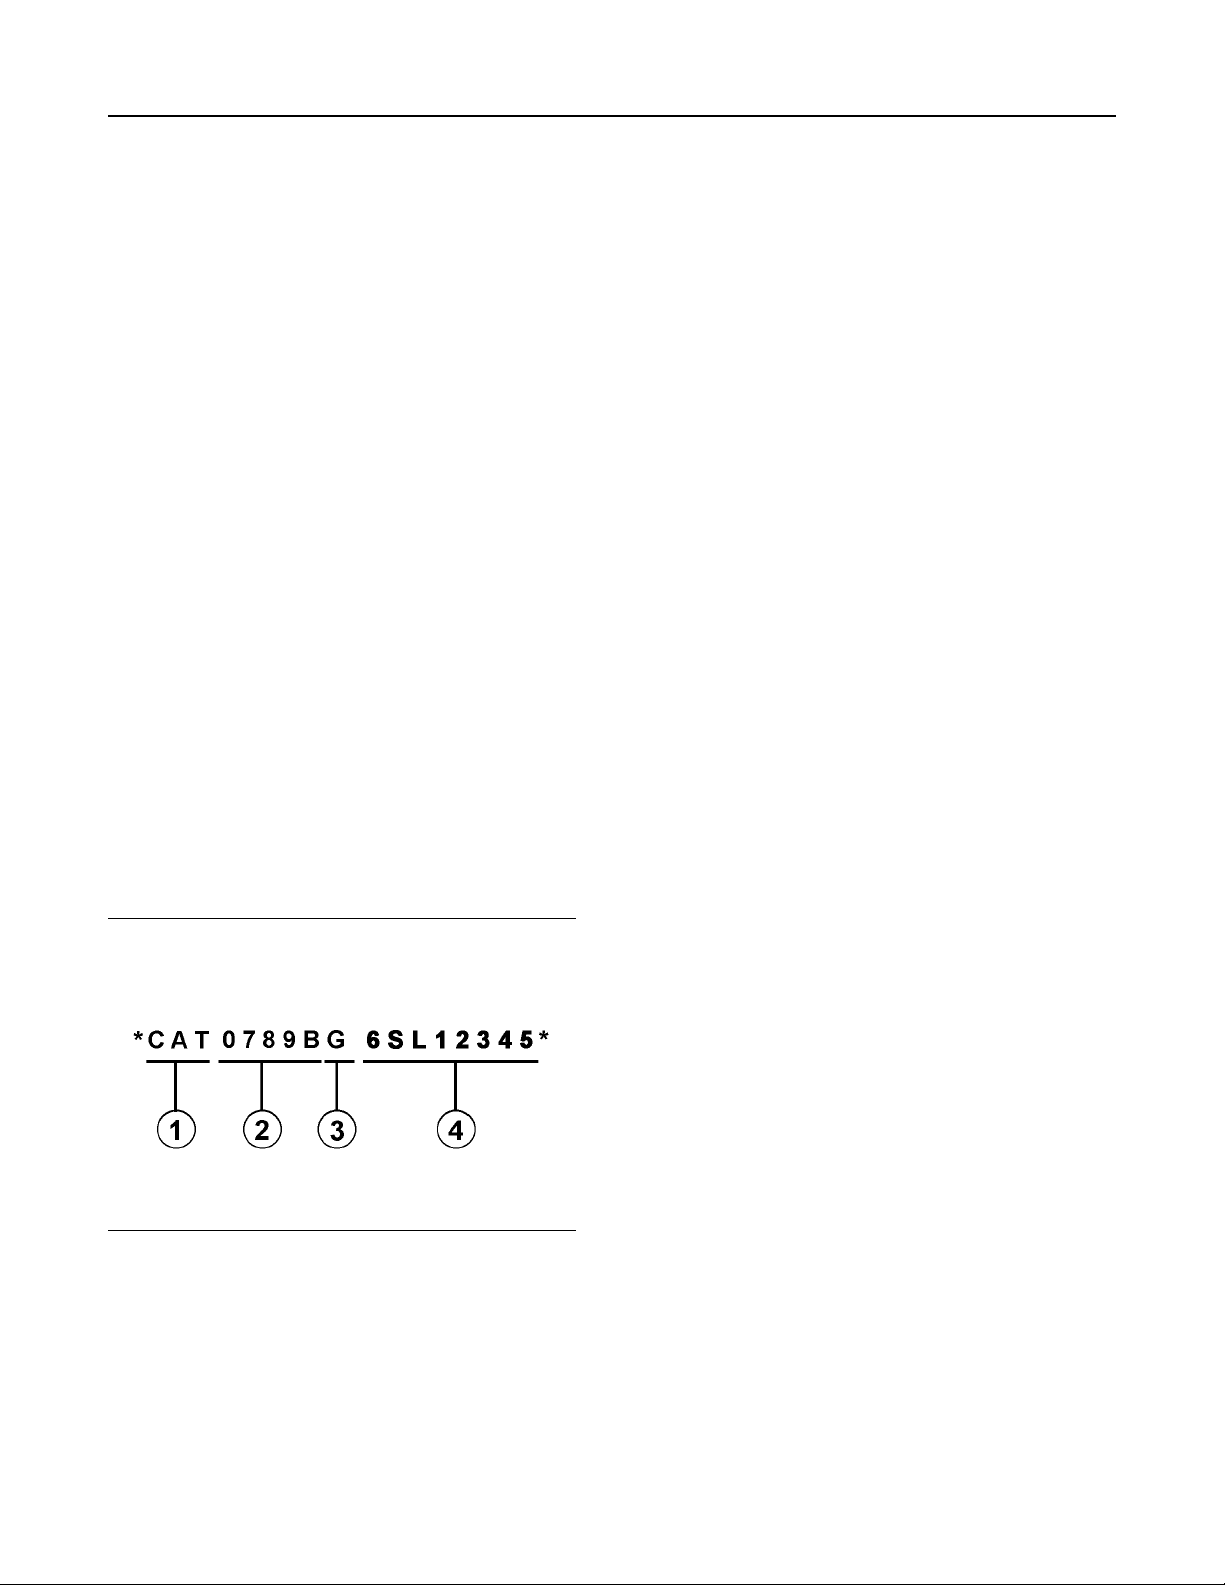
character PIN. The new format will look like the
following:
Machines and generator sets produced before First
Quarter 2001 will maintain their 8 character PIN
format.
Components such as engines, transmissions, axles,
etc. and work tools will continue to use an 8 character
Serial Number (S/N).
Illustration 1 g00751314
Where:
1. Caterpillar's World Manufacturing Code
(characters 1-3)
2. Machine Descriptor (characters 4-8)
3. Check Character (character 9)
4. Machine Indicator Section (MIS) or Product
Sequence Number (characters 10-17). These were
previously referred to as the Serial Number.
Page 6

6
Safety Section
Safety Messages
Safety Section
Safety Messages
(Knuckleboom Loader)
SMCS Code: 7000
SEBU9422-02
i06916830
Page 7
SEBU9422-02
7
Safety Section
Knuckleboom Loader
Illustration 2 g06167665
Page 8
8
Safety Section
Knuckleboom Loader
SEBU9422-02
Illustration 3 g03337559
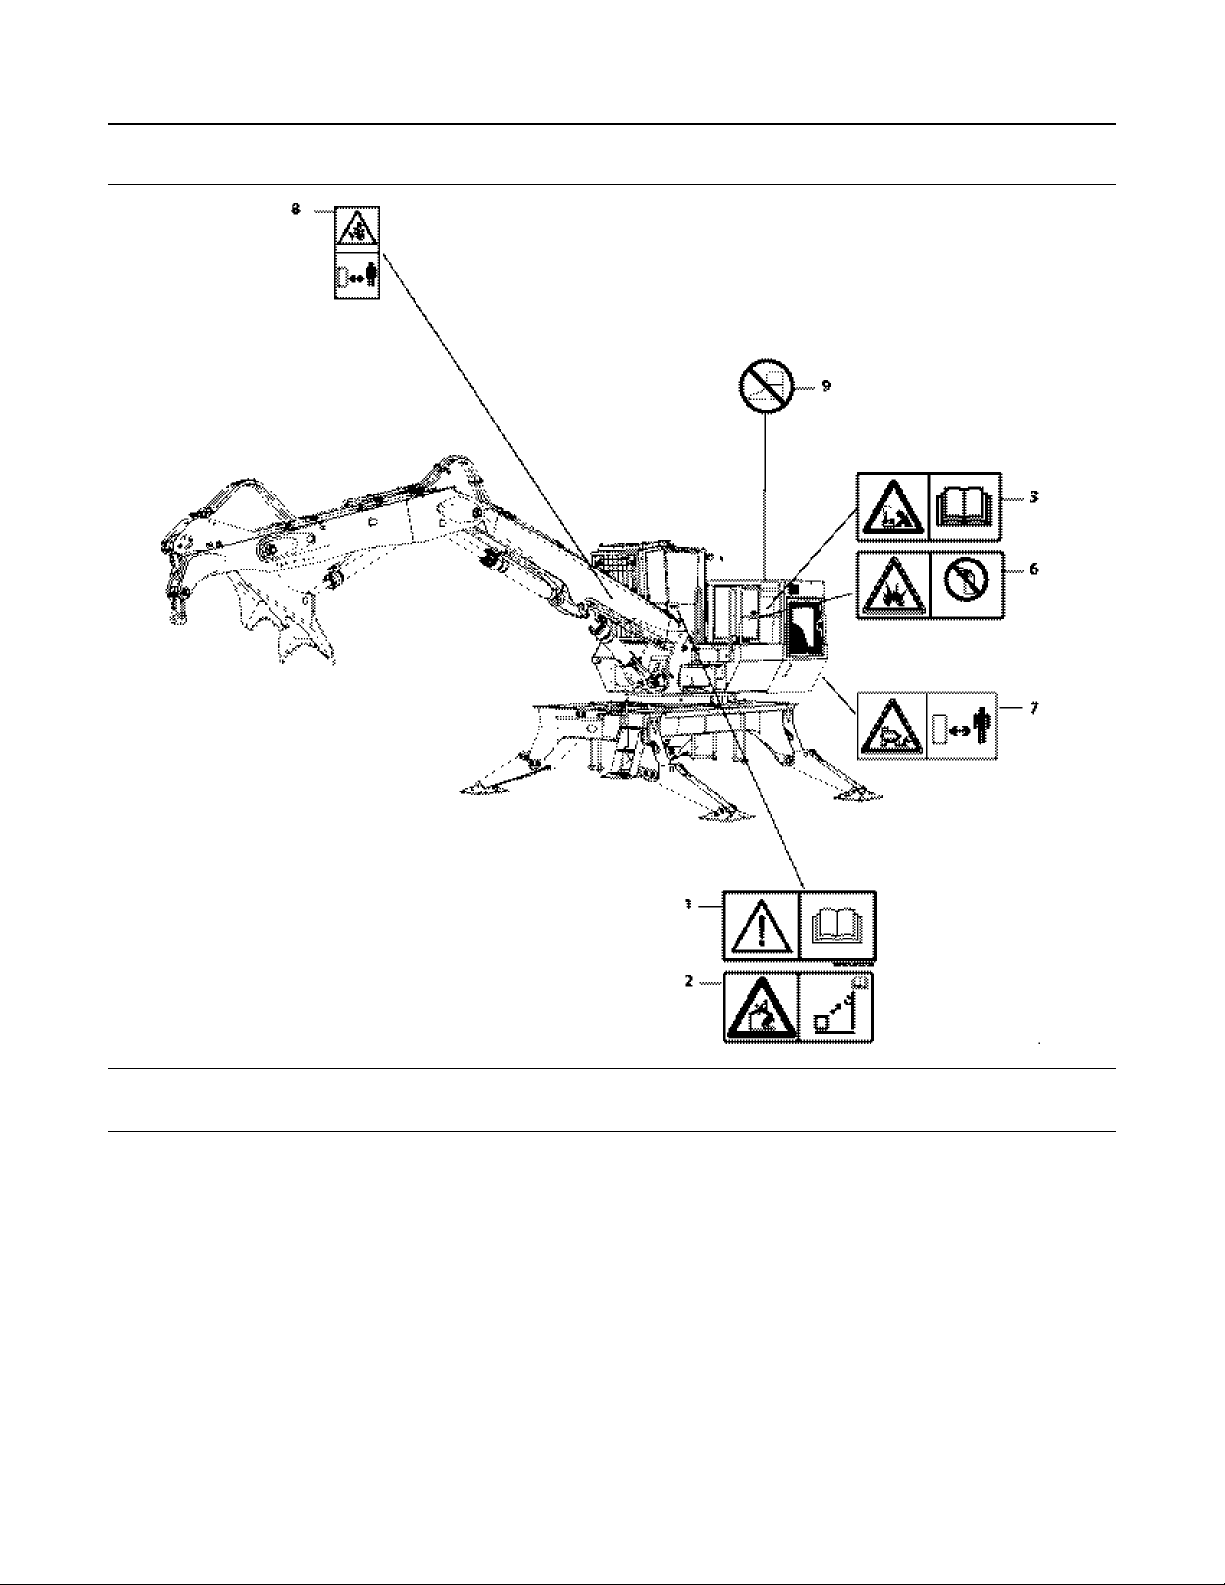
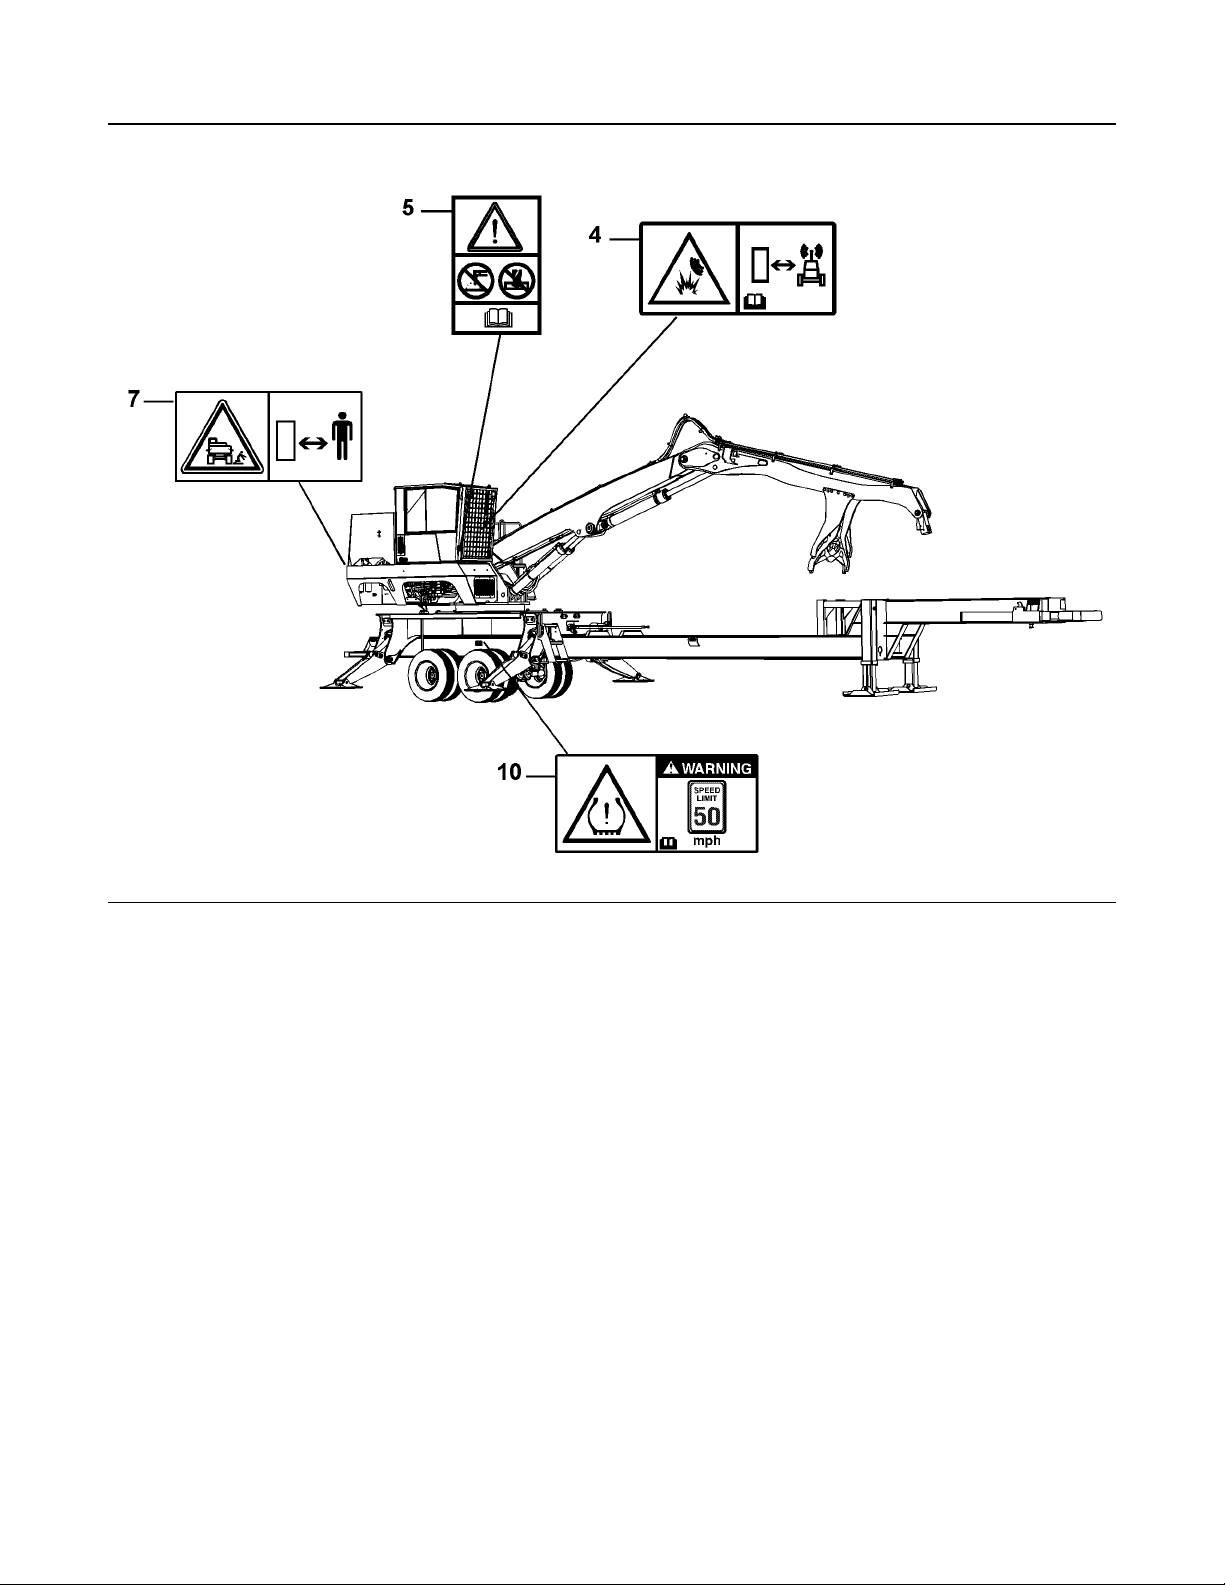
There are several specific safety messages on this
machine. The exact location of the hazards and the
description of the hazards are reviewed in this
section. Become familiarized with all safety
messages.
Make sure that all the safety messages are legible.
Clean the safety messages or replace the safety
messages if you cannot read the words. Replace the
illustrations if the illustrations are not visible. When
you clean the safety messages, use a cloth, water,
and soap. Do not use solvent, gasoline, or other
harsh chemicals to clean the safety messages.
Solvents, gasoline, or harsh chemicals could loosen
the adhesive that secures the safety message. Loose
adhesive will allow the safety message to fall.
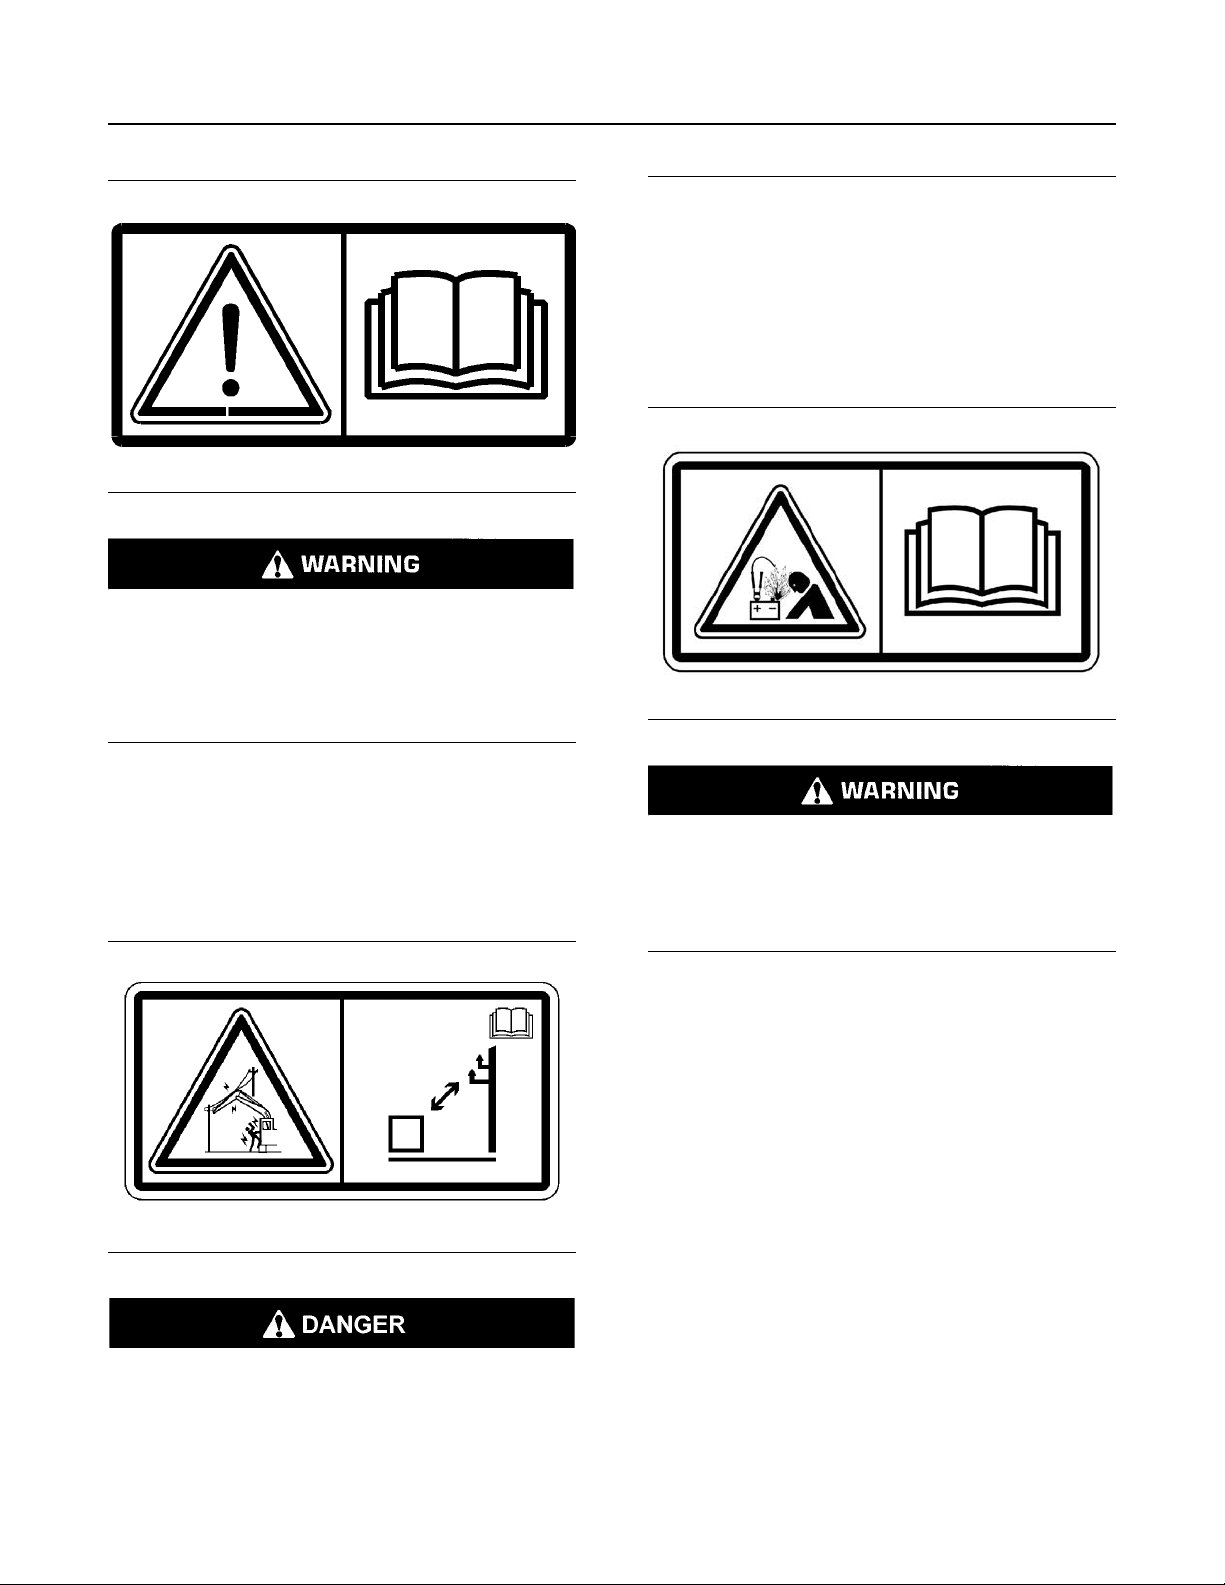
Do Not Operate (1)
Safety Message (1) is located in the cab on the door
of the machine.
Page 9
SEBU9422-02
Illustration 4 g01055734
Do not operate or work on this equipment unless
you have read and understand the instructions
and warnings in the Operation and Maintenance
Manual. Failure to follow the instructions or heed
the warnings could result in injury or death. Contact any Prentice dealer for replacement manuals.
Proper care is your responsibility.
9
Safety Section
Knuckleboom Loader
Refer to Operation and Maintenance
Manual“Specifications” for further information.
Improper Connections for Jump
Start Cables (3)
Safety Message (3) is on the battery tie-down bracket
inside the battery access cover.
Illustration 6 g01370909
Read and understand the operators manual before
operating or performing maintenance on machine.
Electrocution (2)
This safety message (2) is located inside the cab on
the door.
Illustration 5 g01506733
Electrocution Hazard! Keep the machine and
attachments a safe distance from electrical
power. Stay clear 3 m (10 ft) plus twice the line
insulator length. Read and understand the
instructions and warnings in the Operation and
Maintenance Manual. Failure to follow the
instructions and warnings will cause serious
injury or death
Explosion Hazard! Improper jumper cable connections can cause an explosion resulting in serious injury or death. Batteries may be located in
separate compartments. Refer to the Operation
and Maintenance Manual for the correct jump
starting procedure.
Refer to Operation and Maintenance Manual,
“Engine Staring with Jump-Start Cables”.
Product Link (4) (If Equipped)
Safety Message (4) is on the cab door.
Page 10
10
Safety Section
Knuckleboom Loader
Illustration 7 g01370917
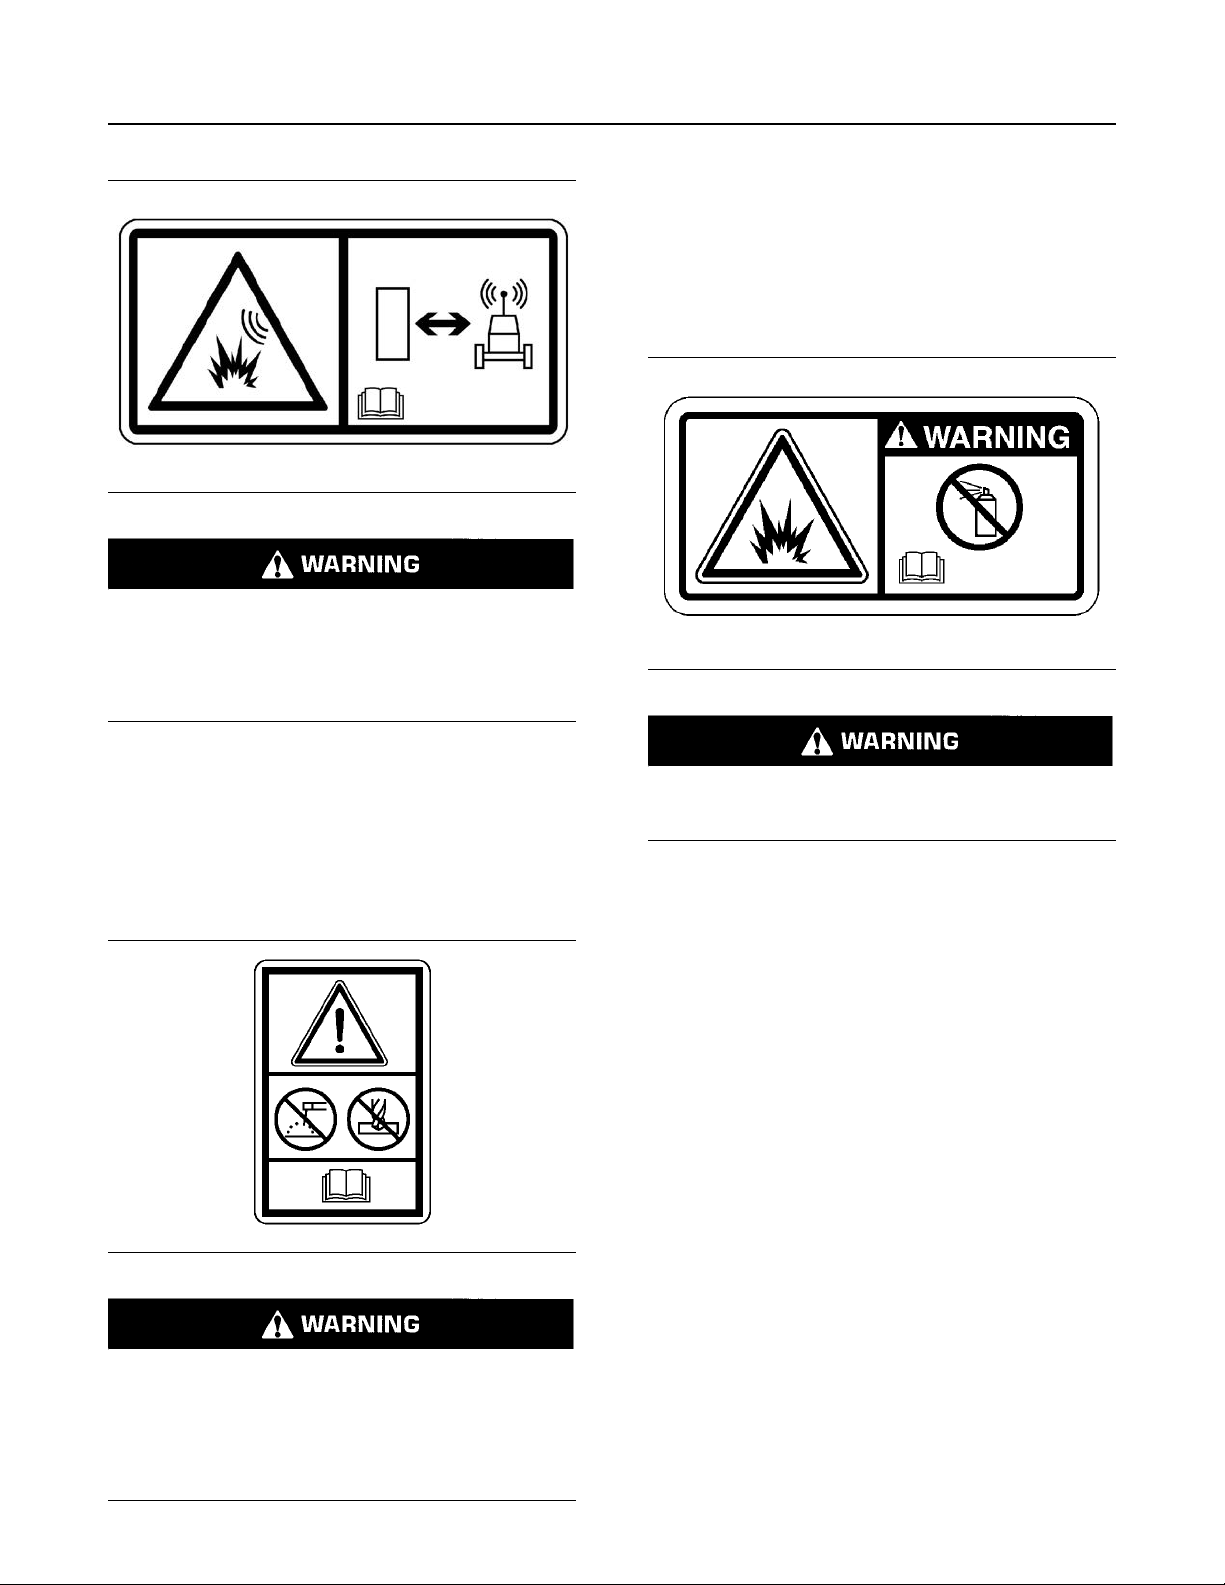
This machine is equipped with a Cat Product Link
communication device. Deactivate in or near a
blast site in compliance with applicable legal requirements. Failure to do so could cause interference with blasting operations resulting in serious
injury or death.
SEBU9422-02
This machine has been certified to the standards that
are listed on the certification plate.
Aerosol Starting Aid (6)
This safety message (6) is on the hood cross
member above the cooling package access door
near the Operator access platform.
Illustration 9 g01067463
Refer to Special Instruction, REHS1642, “Operation
of the Product Link System” for additional
information.
Do Not Weld On The FOPS (5)
Safety message (5) is on the inside front right-hand
corner post of the cab.
Illustration 8 g01390454
Do not use aerosol types of starting aids such as
ether. Such use could result in an explosion and
personal injury.
Refer to Operation and Maintenance Manual,
“Engine Starting” for further information.
Crush Point (7)
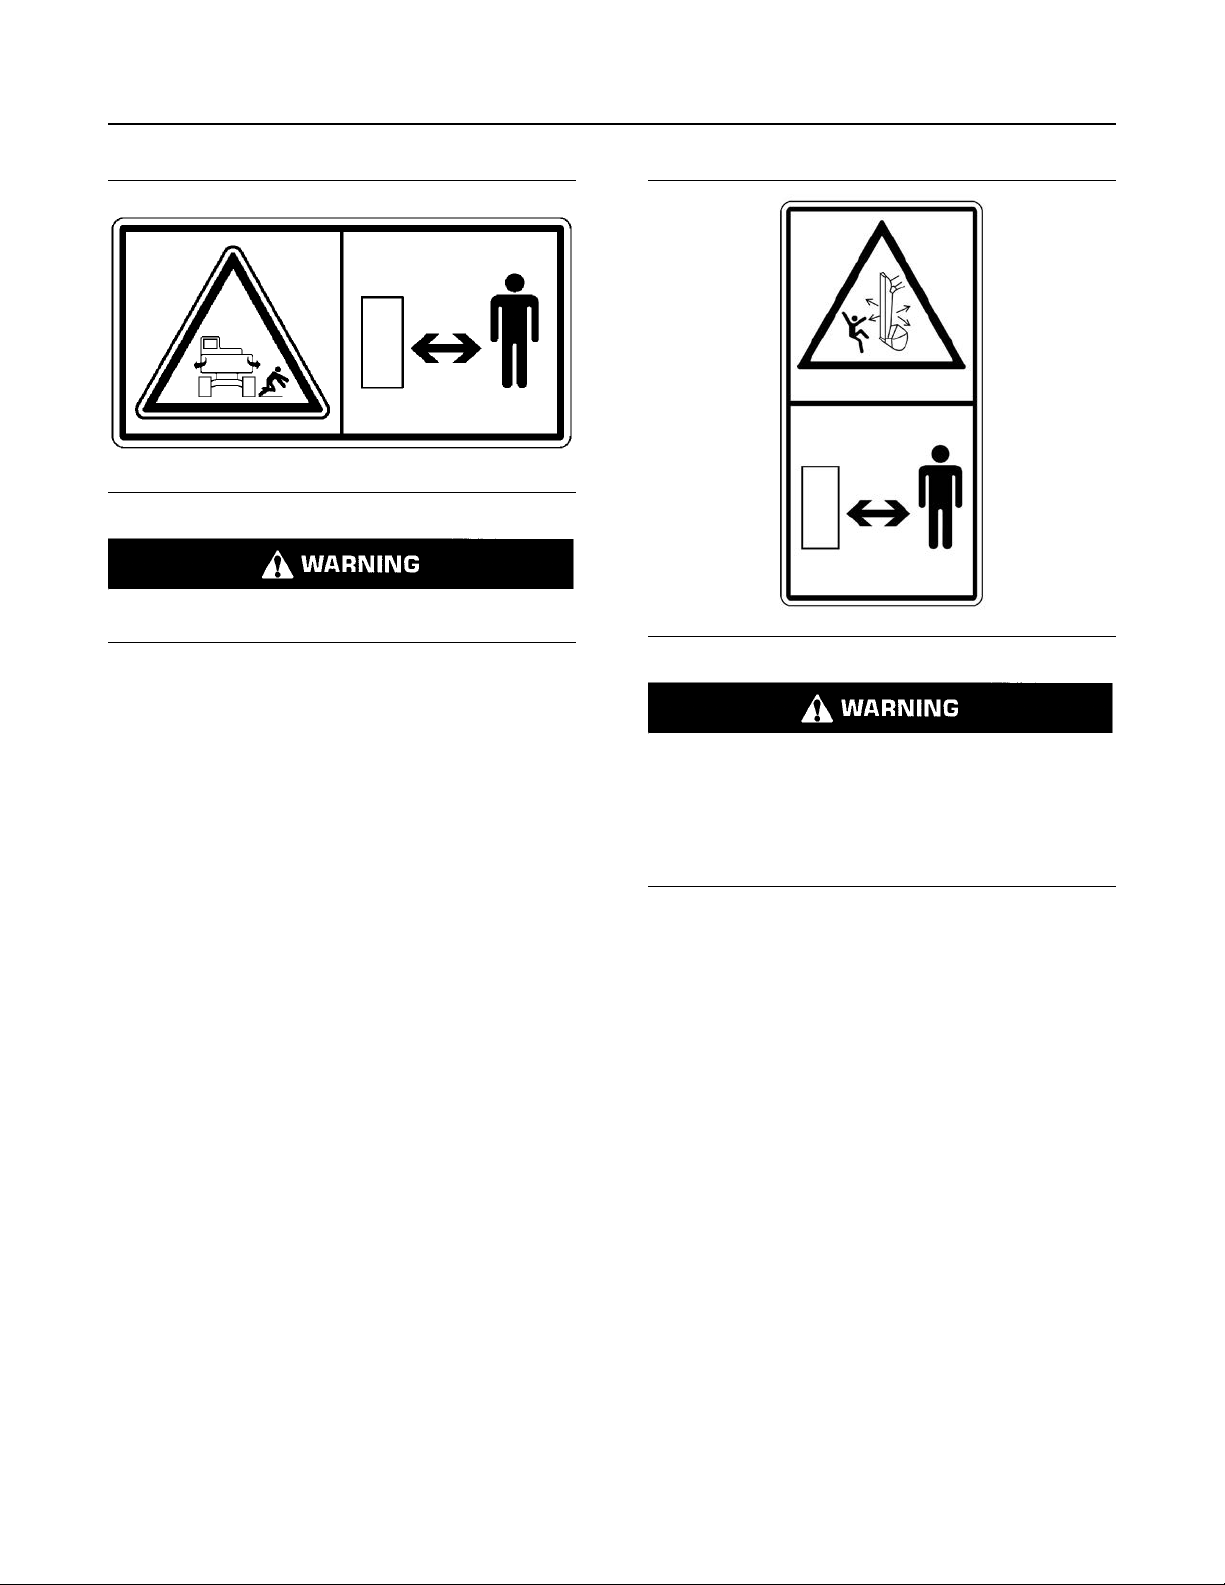
Safety Message (7) is on the left and right sides of
the machine near the back plate. Film to be on
sloped surface of side plates.
Structural damage, an overturn, modification, alteration, or improper repair can impair this structures protection capability thereby voiding this
certification. Do not weld on or drill holes in the
structure. Consult a Prentice dealer to determine
the structures limitations without voiding the
structures certification.
Page 11
SEBU9422-02
Illustration 10 g01055930
Machine swings. Stay back. Crushing hazard
could cause serious injury or death.
Crushing could cause serious injury or death. Turn off
key to shutdown machine. Read the Operation and
Maintenance Manual for further instruction.
Before operating or rotating machine, verify that all
personnel are clear of the area. Do swing machine
unless you have read and understand the correct
operating procedure in the Operation and
Maintenance Manual.
Crushing Hazard (8)
11
Safety Section
Knuckleboom Loader
Illustration 11 g01385579
A crushing hazard exists when the stick and
boom are in motion and when the machine is
being used in object handling applications. Failure to stay clear of the stick and boom when the
machine is in operation can result in personal injury or death. Stay clear of the stick and boom
when the machine is in operation.
This safety message (8) is on both sides of the stick
boom forward of the stick cylinder rod.
Verify that no personnel or objects are in the work
path of the stick and boom when operating machine.
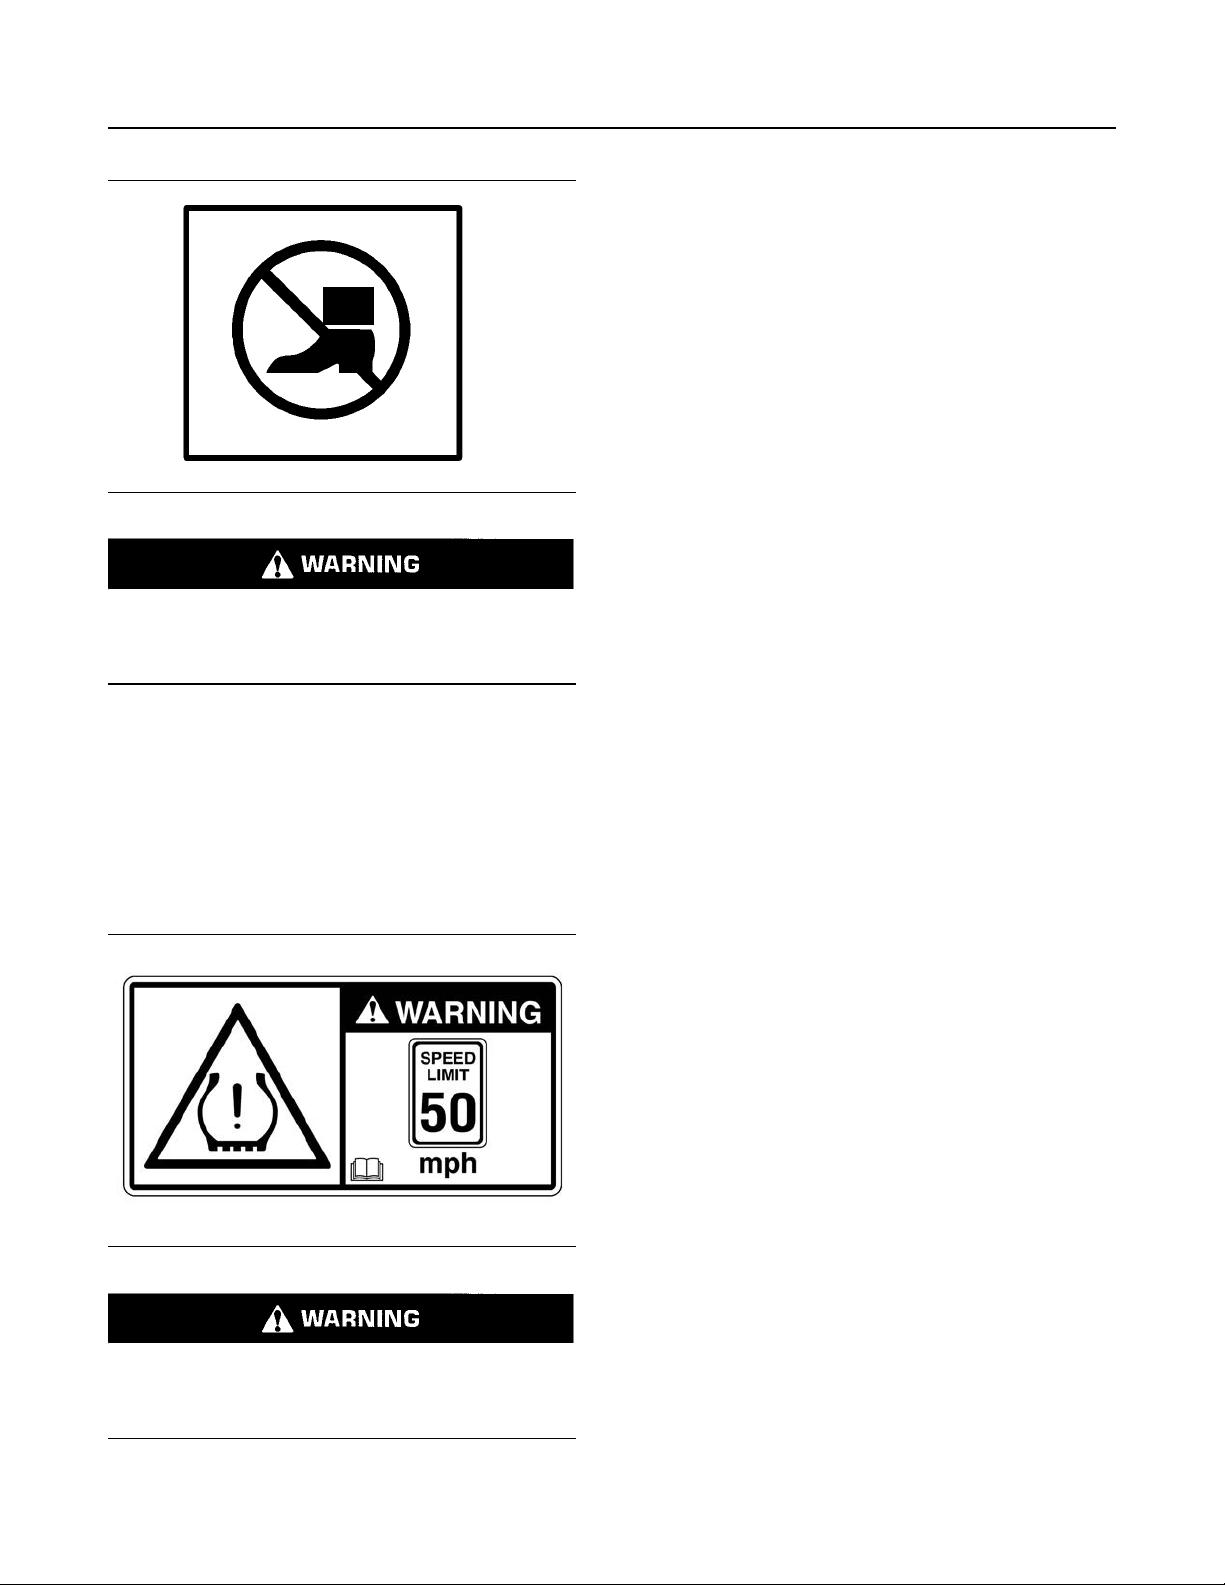
Do Not Step (9)
This safety message (9) is on the hood surface near
the Operator access platform.
Page 12
12
Safety Section
Additional Messages
Illustration 12 g00989364
Do not use this surface as a step or platform. This
surface may not support additional weight or may
be slippery. Serious injury or death could occur
from a fall.
SEBU9422-02
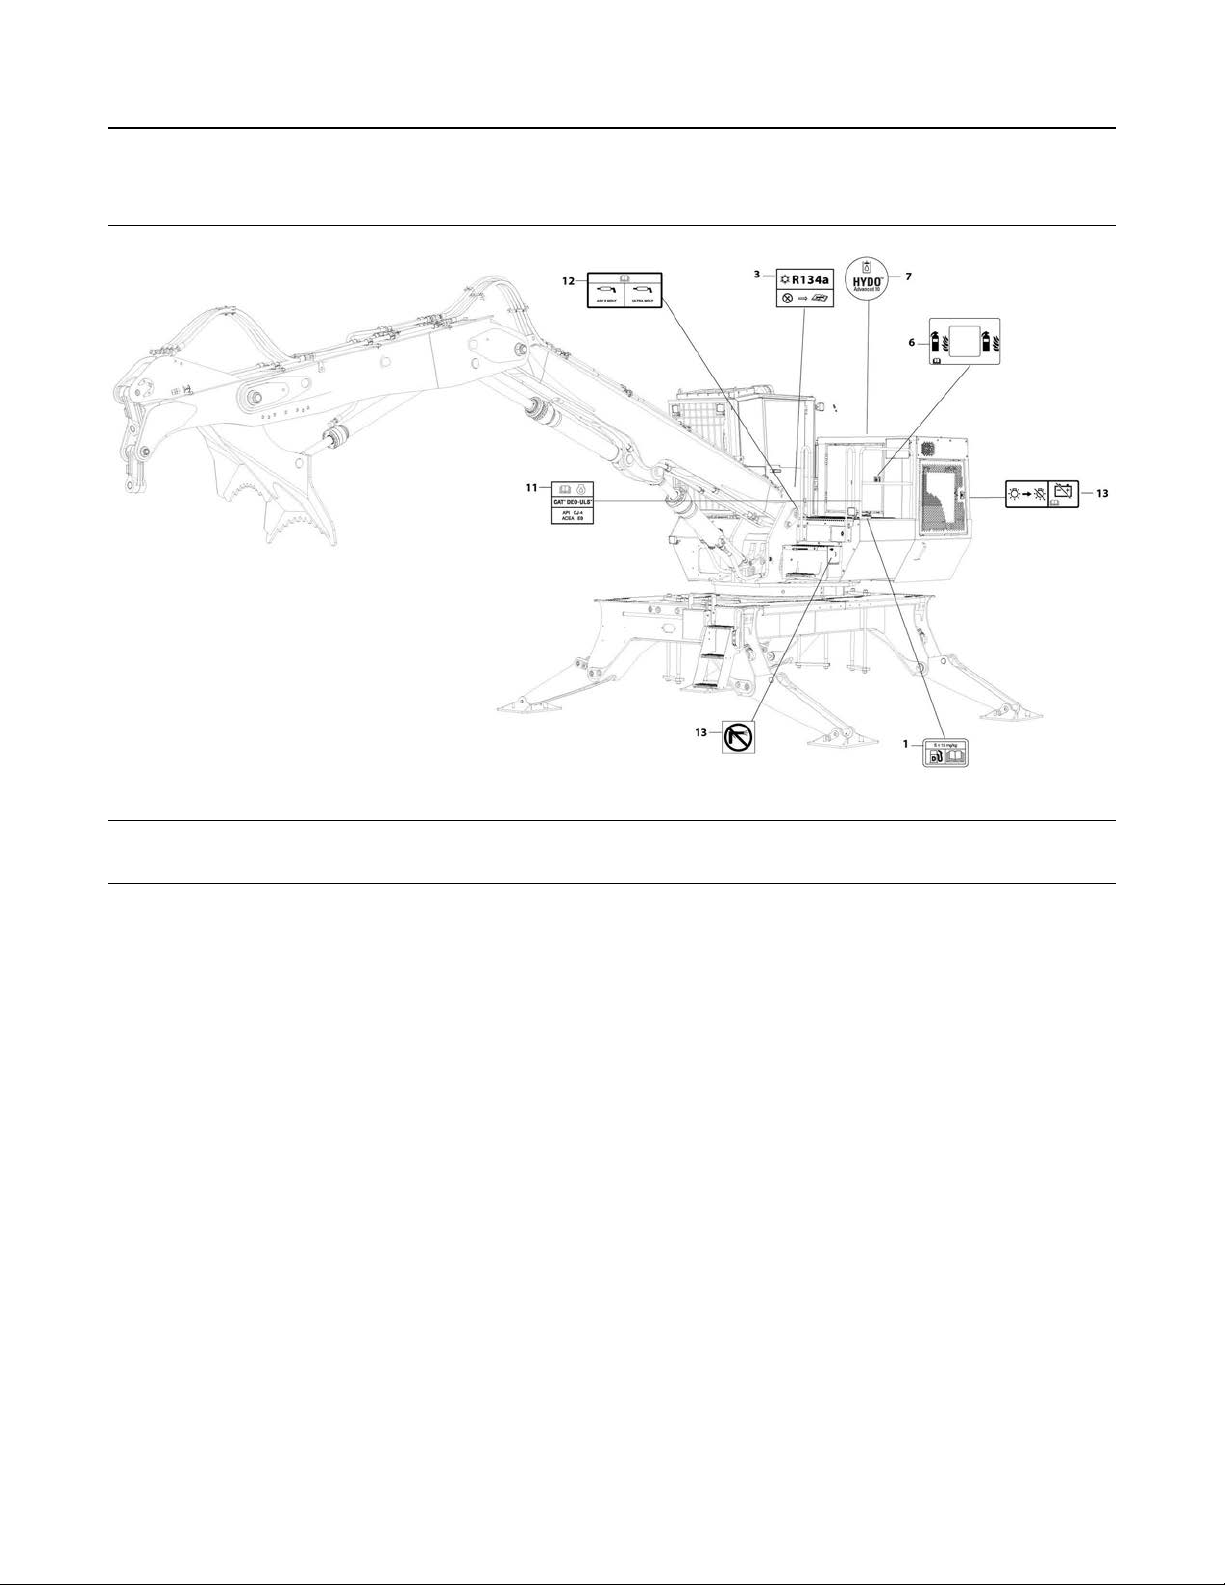
Exceeding speeds of 50 MPH while transporting
machine can cause tire malfunction. Refer to
Operation and Maintenance Manual,
“Transportation”.
i07178390
Do not step on engine enclosure structure. The
engine enclosure is not designed to support a
persons weight and may be slippery.
Tire Malfunction (10) (Maximum
Speed)
This safety message (if equipped) (10) is on each
side of the carrier trailer.
Illustration 13 g03236217
Tire Malfunction could cause serious personal injury or death. Keep speed below 50 MPH when
transporting. Read Operation and Maintenance
Manual.
Additional Messages
Page 13
SEBU9422-02
SMCS Code: 7000
13
Safety Section
Additional Messages
Illustration 14 g06243463
Page 14
14
Safety Section
Additional Messages
SEBU9422-02
Illustration 15 g06164645
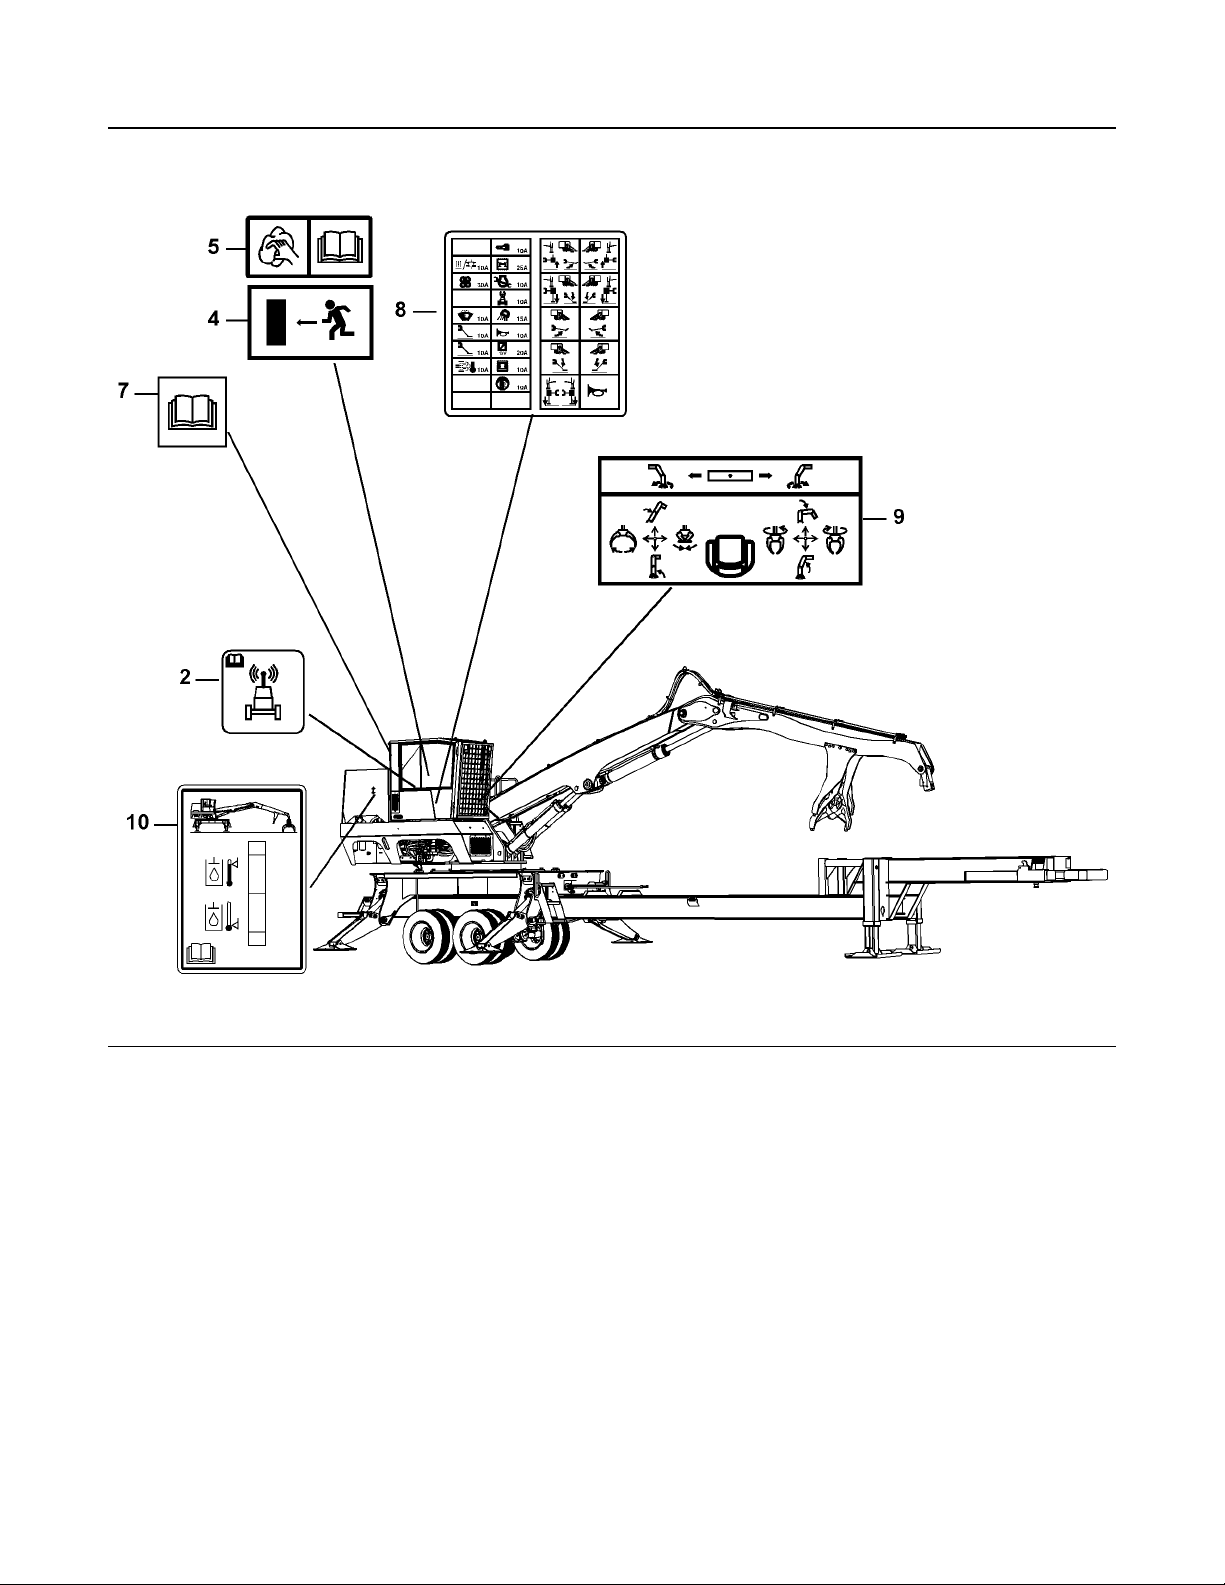
There are several specific messages on this
Diesel Fuel Requirements (1)
machine. The location of the messages and the
description of the messages are reviewed in this
section. Become familiarized with all messages.
This message is located next to the fuel filler cap in
the fuel fill access compartment.
Make sure that all the messages are legible. Clean
the messages or replace the messages if you cannot
read the words. Replace the illustrations if the
illustrations are not legible. When you clean the
messages, use a cloth, water, and soap. Do not use
solvent, gasoline, or other harsh chemicals to clean
the messages. Solvents, gasoline, or harsh
chemicals could loosen the adhesive that secures the
messages. Loose adhesive will allow the messages
to fall.
Replace any message that is damaged, or missing. If
a message is attached to a part that is replaced,
install a message on the replacement part. Any
Prentice dealer can provide new messages.
Page 15
SEBU9422-02
15
Safety Section
Additional Messages
Illustration 16 g02157153
NOTICE
Ultra Low Sulfur Diesel (ULSD) fuel will have ≤15
ppm (0.0015%) sulfur using the “ASTM D5453”,
“ASTM D2622”, or “DIN 51400” test methods. Certain
applications and/or governments/localities MAY require the use of ULSD fuel. Emission controlled diesel engines and/or diesel engines equipped with
exhaust aftertreatment devices MAY require the use
of Ultra Low Sulfur Diesel (ULSD) fuel. Consult federal, state, and local authorities for guidance on fuel requirements for your area. Also, consult the specific
engine Operation and Maintenance Manual for
guidance.
Caterpillar does not mandate the across the board
use of ULSD fuel in non-road and stationary applications, but does allow its use. When ULSD is used,
there are concerns with fuel viscosity, lubricity, and
thermal stability. The fuel viscosity, lubricity, and thermal stability limits stated in the Caterpillar Specification for Distillate Diesel Fuel address these concerns.
In North America, diesel fuel that is identified as
“ASTM D975 Grade No. 1-D S15” or “ASTM D975
Grade No. 2-D S15” and meet the “ASTM D975 Thermal Stability Guideline X2.10.2.2”, generally meet the
Caterpillar requirements for ULSD fuel.
Illustration 17 g01418953
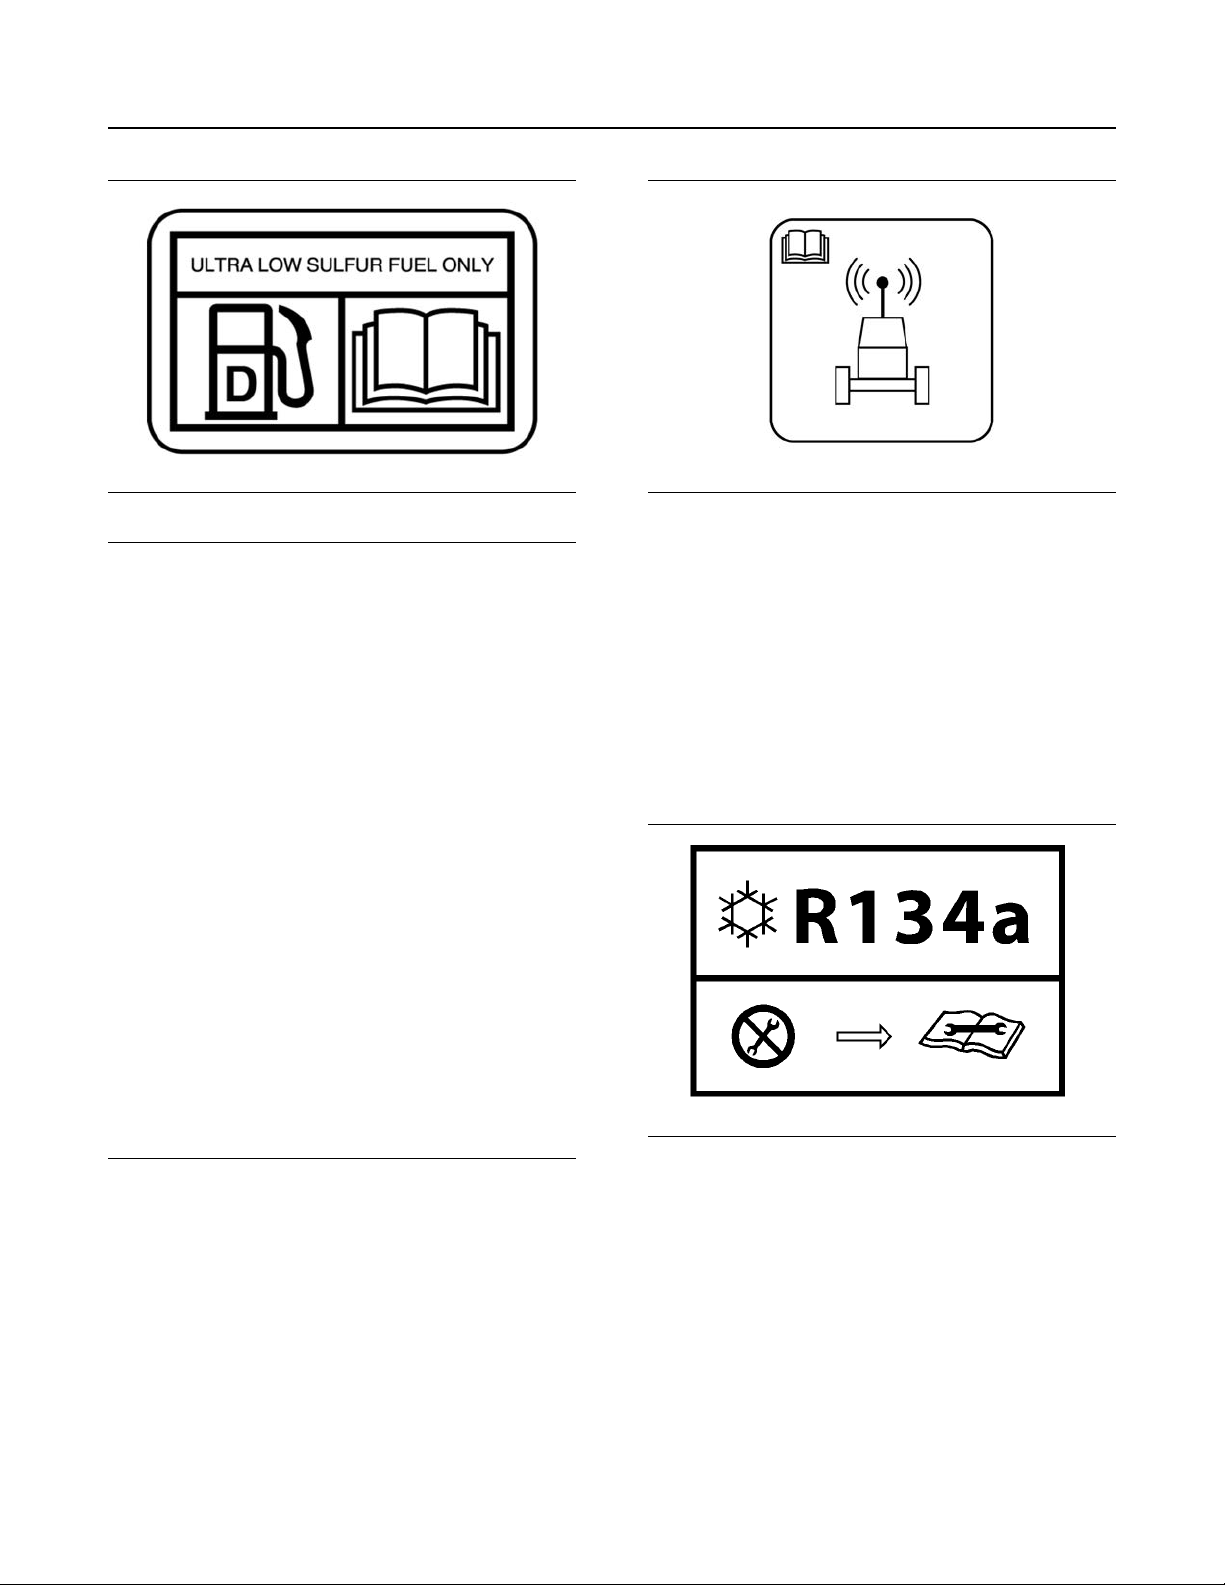
The Product Link System is a satellite or cellular
communication device that transmits information
regarding the machine back to Prentice dealers and
customers. All logged events and diagnostic codes
that are available to the Cat Electronic Technician
(ET) can be sent to satellite or cellular tower.
Information can also be sent to the Product Link
System. The information is used to improve Cat
products and Cat services.
Air Conditioner (3)
This message is on the left-hand front of the heater/
evaporator assembly.
2007 and newer mdoel lyear on-highway diesel engines are required to use fuel with 15 ppm or less
sulfur.
Product Link (2)
Your machine is equipped with the Product Link
System, this additional message is on the cab door.
Illustration 18 g03338001
This message for the air conditioner has the
appropriate information for the following services: the
air conditioner lubricant.
Follow instruction to avoid engine damage.
Reference: See Operation and Maintenance
Manual, “Maintenance Interval Schedule” for all
maintenance recommendations.
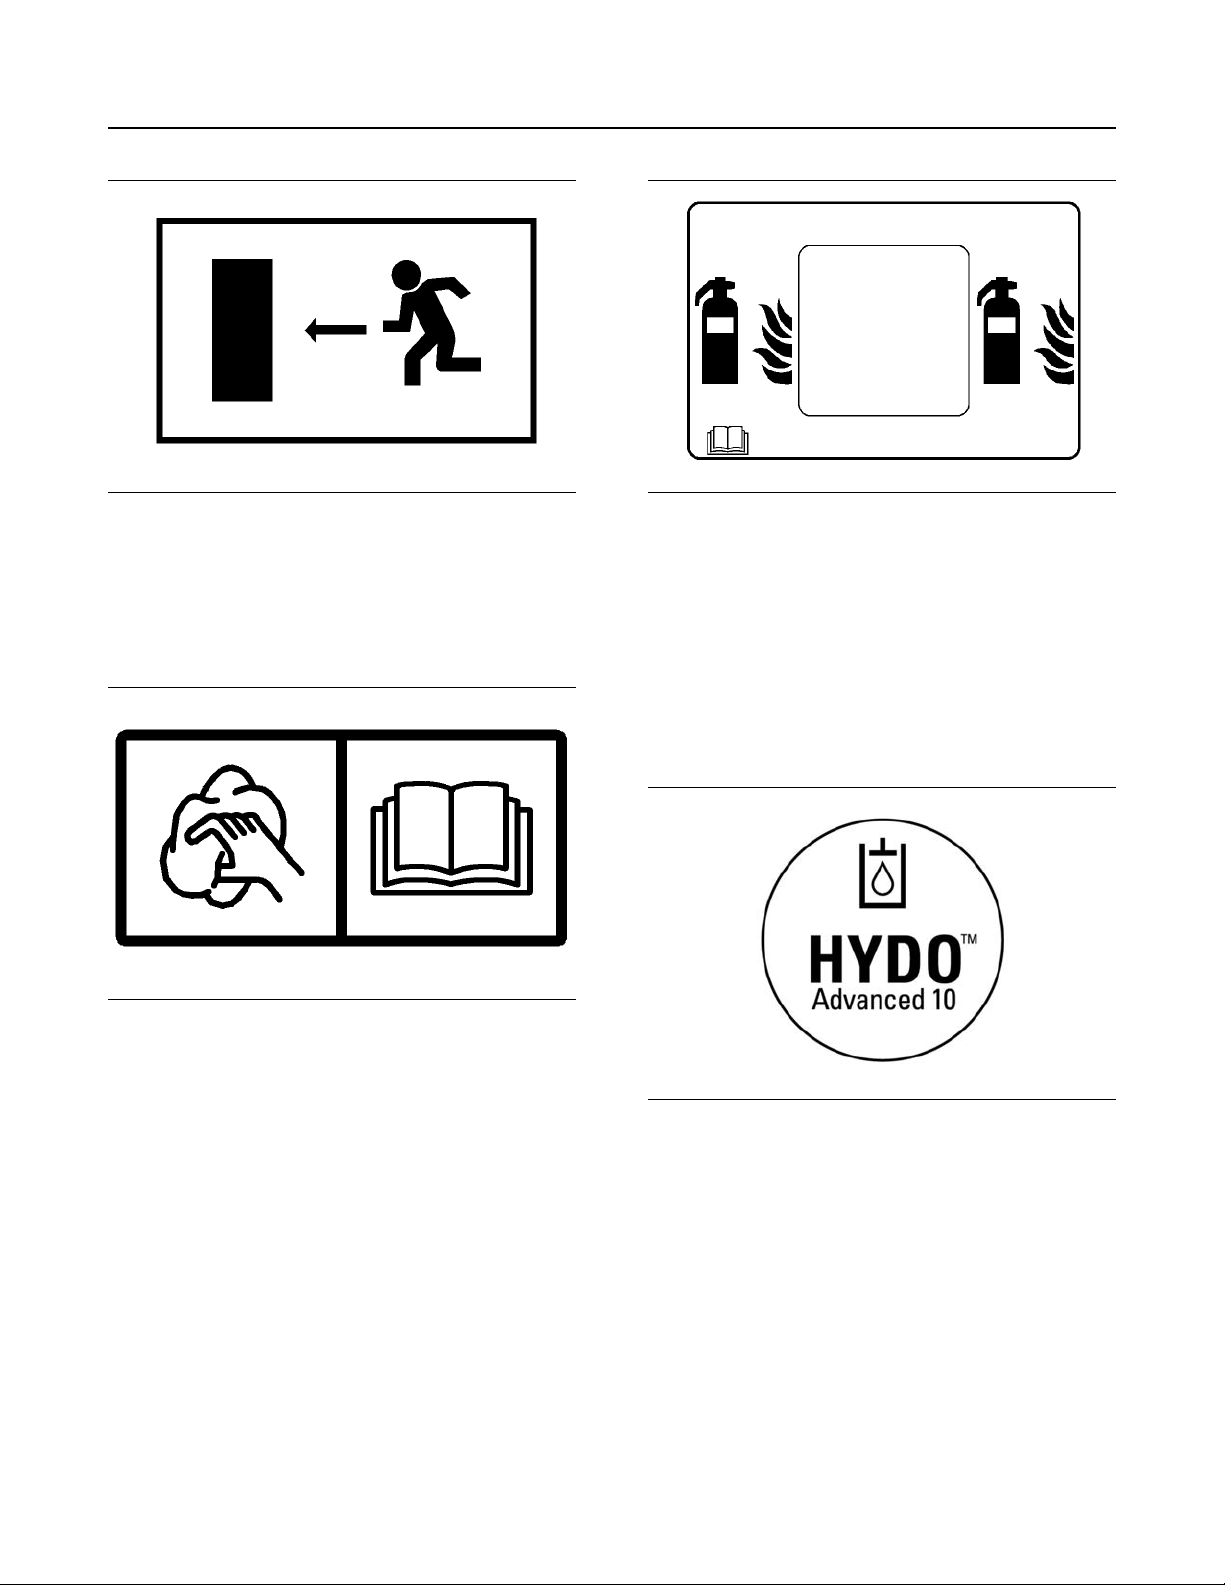
Alternate Exit (4)
This message is on the lower front corner of the righthand sliding window.
Page 16
16
Safety Section
Additional Messages
SEBU9422-02
Illustration 19 g03337999
This message indicates the correct alternate exit
path.
Window Cleaning (5)
This message is on the left-hand rear corner of the
skylight.
Illustration 20 g00930685
Reference: For more information, refer to Operation
and Maintenance Manual, “Windows - Clean”.
Fire Point (Engine) (6)
Illustration 21 g02095974
This message describes the fire point that is
available on the engine compartment. Use the
aperture to suppress fire hazard in the engine
compartment.
Do not use an unsafe method to suppress fire hazard
in the engine compartment.
Machine Hydraulic System (7)
The following message is on the hydraulic oil fill
pump pipe support bracket.
Illustration 22 g02096113
This message is on the front engine enclosure door,
over the Fire Extinguisher Access Hole.
This machine hydraulic system is filled with Cat
HYDO Advanced oil.
Refer to Operation and Maintenance Manual,
“Lubricant Viscosities” for more information about the
hydraulic oil.
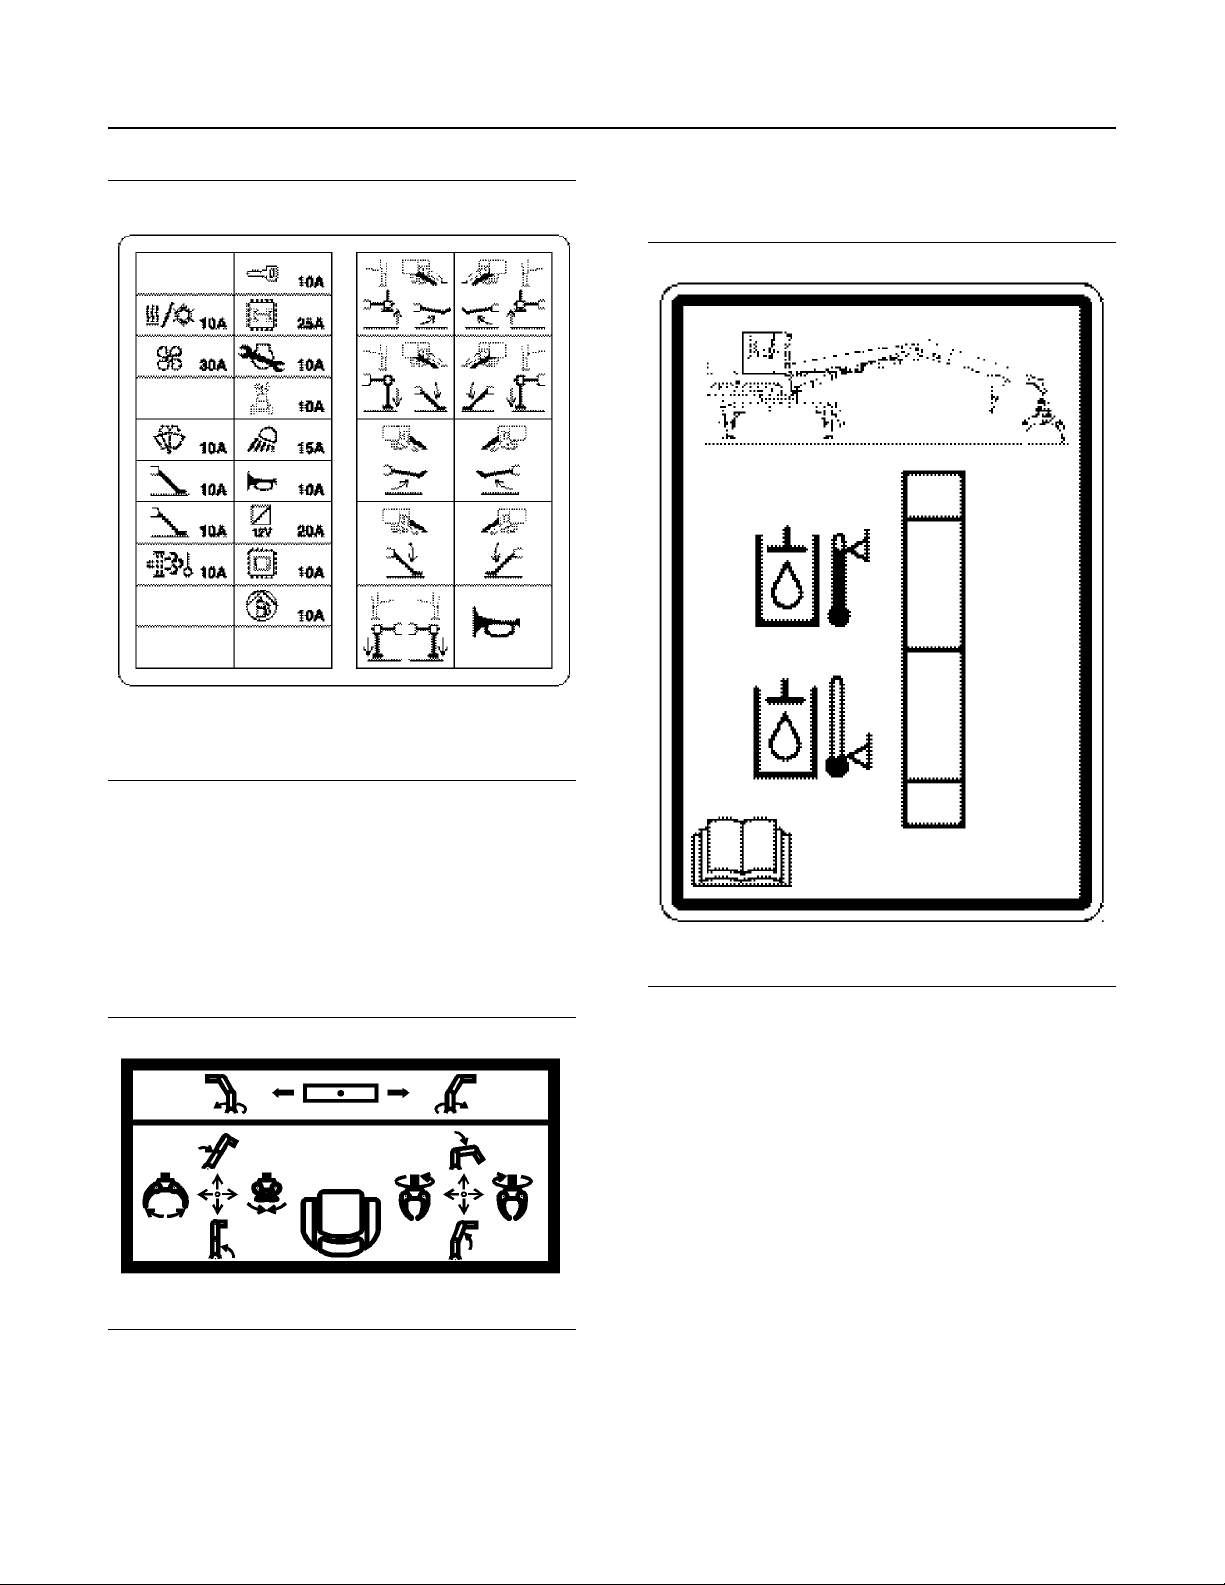
Fuse Panel Identifier (8)
The following message is on the inside console door
fuse/relay panel access.
Page 17
SEBU9422-02
17
Safety Section
Additional Messages
This message is on the right-hand side of the
hydraulic tank, level with the hydraulic oil sight
gauge.
Illustration 23 g06162900
The messages on the left-hand side of the film
identify the function for each fuse and the amperage
of each fuse. The messages on the right-hand side of
the film identify the relay functions.
Joystick Control Functions (9)
This message is located in the cab on the lower rear
surface of the door window.
Illustration 24 g03233117
Illustration 25 g06162901
This message identifies the hydraulic oil fill level
information.
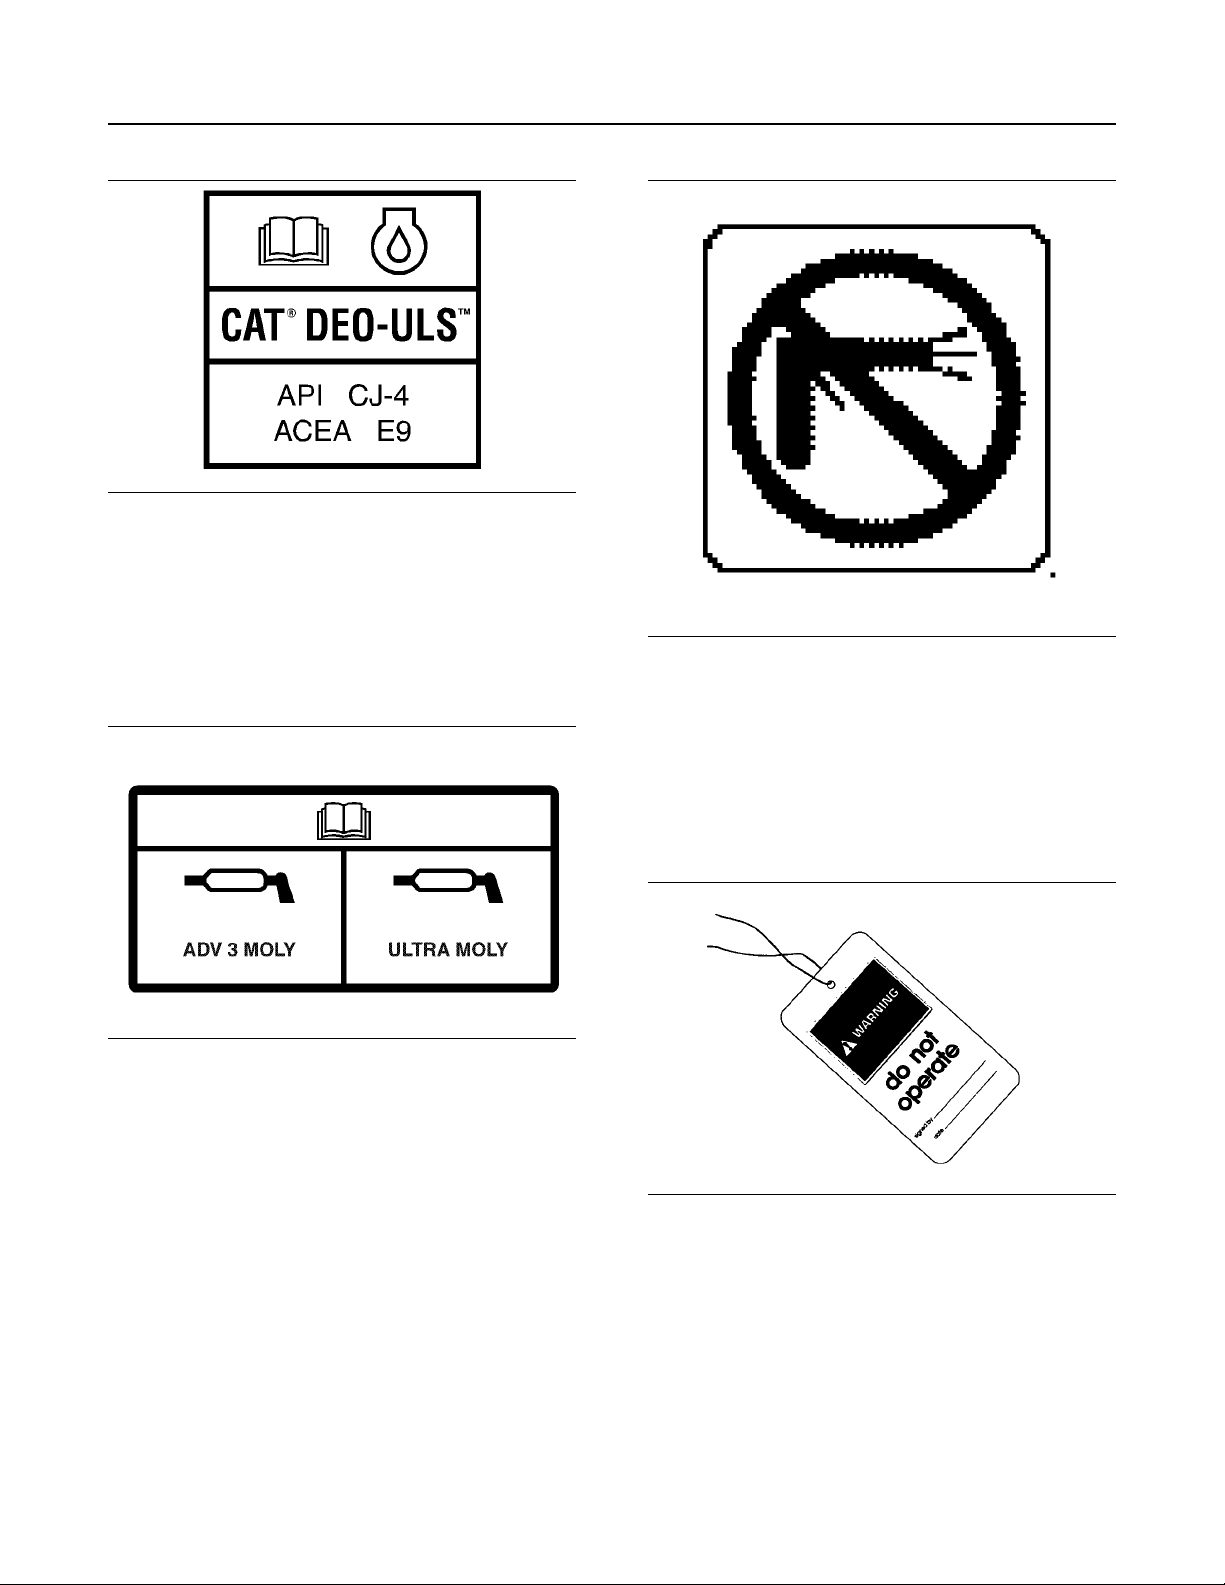
DEO-ULS Oil Information (11)
This message is located under the oil fill access
cover on the bracket supporting the remote oil fill
hose.
This message identifies what function each joystick
movement will initiate. Films are applied according to
factory settings.
Hydraulic Oil System (10)
Page 18
18
Safety Section
General Hazard Information
Illustration 26 g03337954
This message identifies the proper oil required for
engine.
Grease Identifier (12)
SEBU9422-02
This message is on the outside of the operator cab
on the lower rear corner of the front left-hand side
panel. Located near the grease fittings on the
operator access platform.
Illustration 27 g03337966
This message identifies the proper grease to use for
remote grease fittings.
Power Wash Prohibited(13)
This message is on the inside of the Diesel Exhaust
Fluid fill access panel.
Illustration 28 g06243353
Washing with high-pressure water is prohibited in this
area. Manually clean with a wet cloth or sponge.
i05740940
General Hazard Information
SMCS Code: 7000
Illustration 29 g00104545
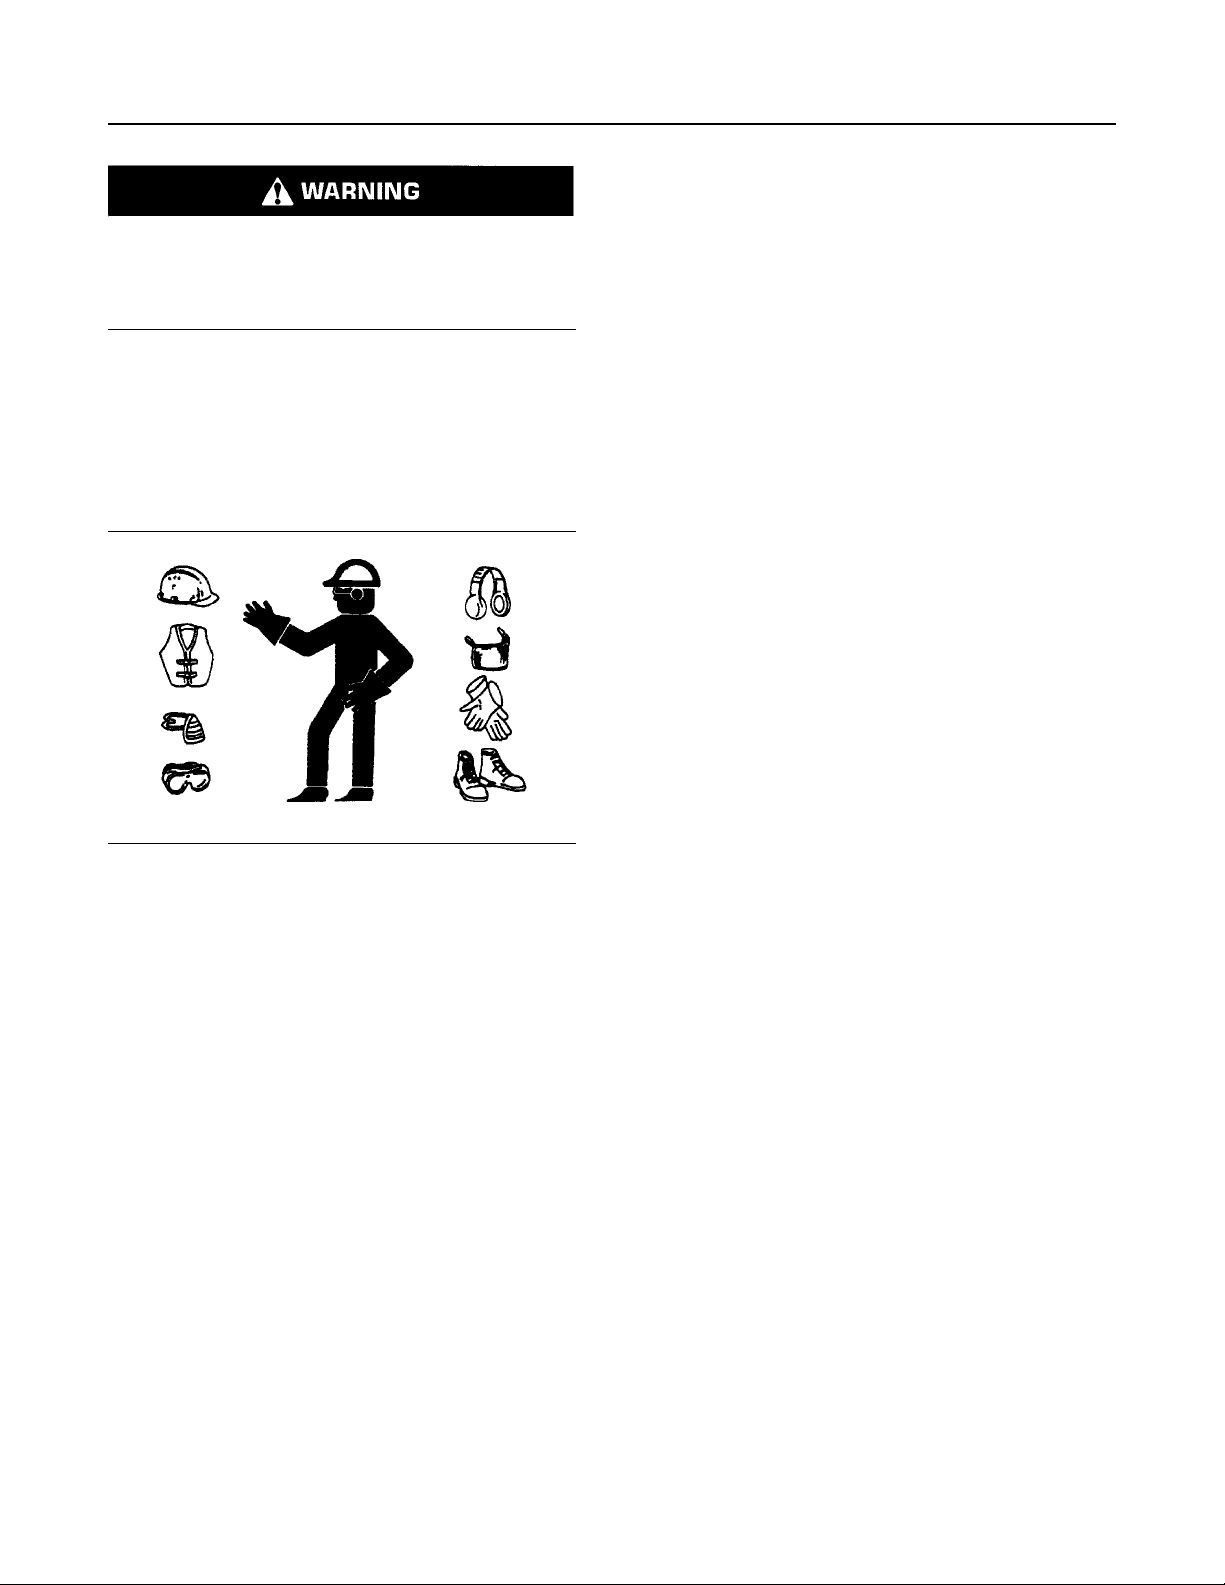
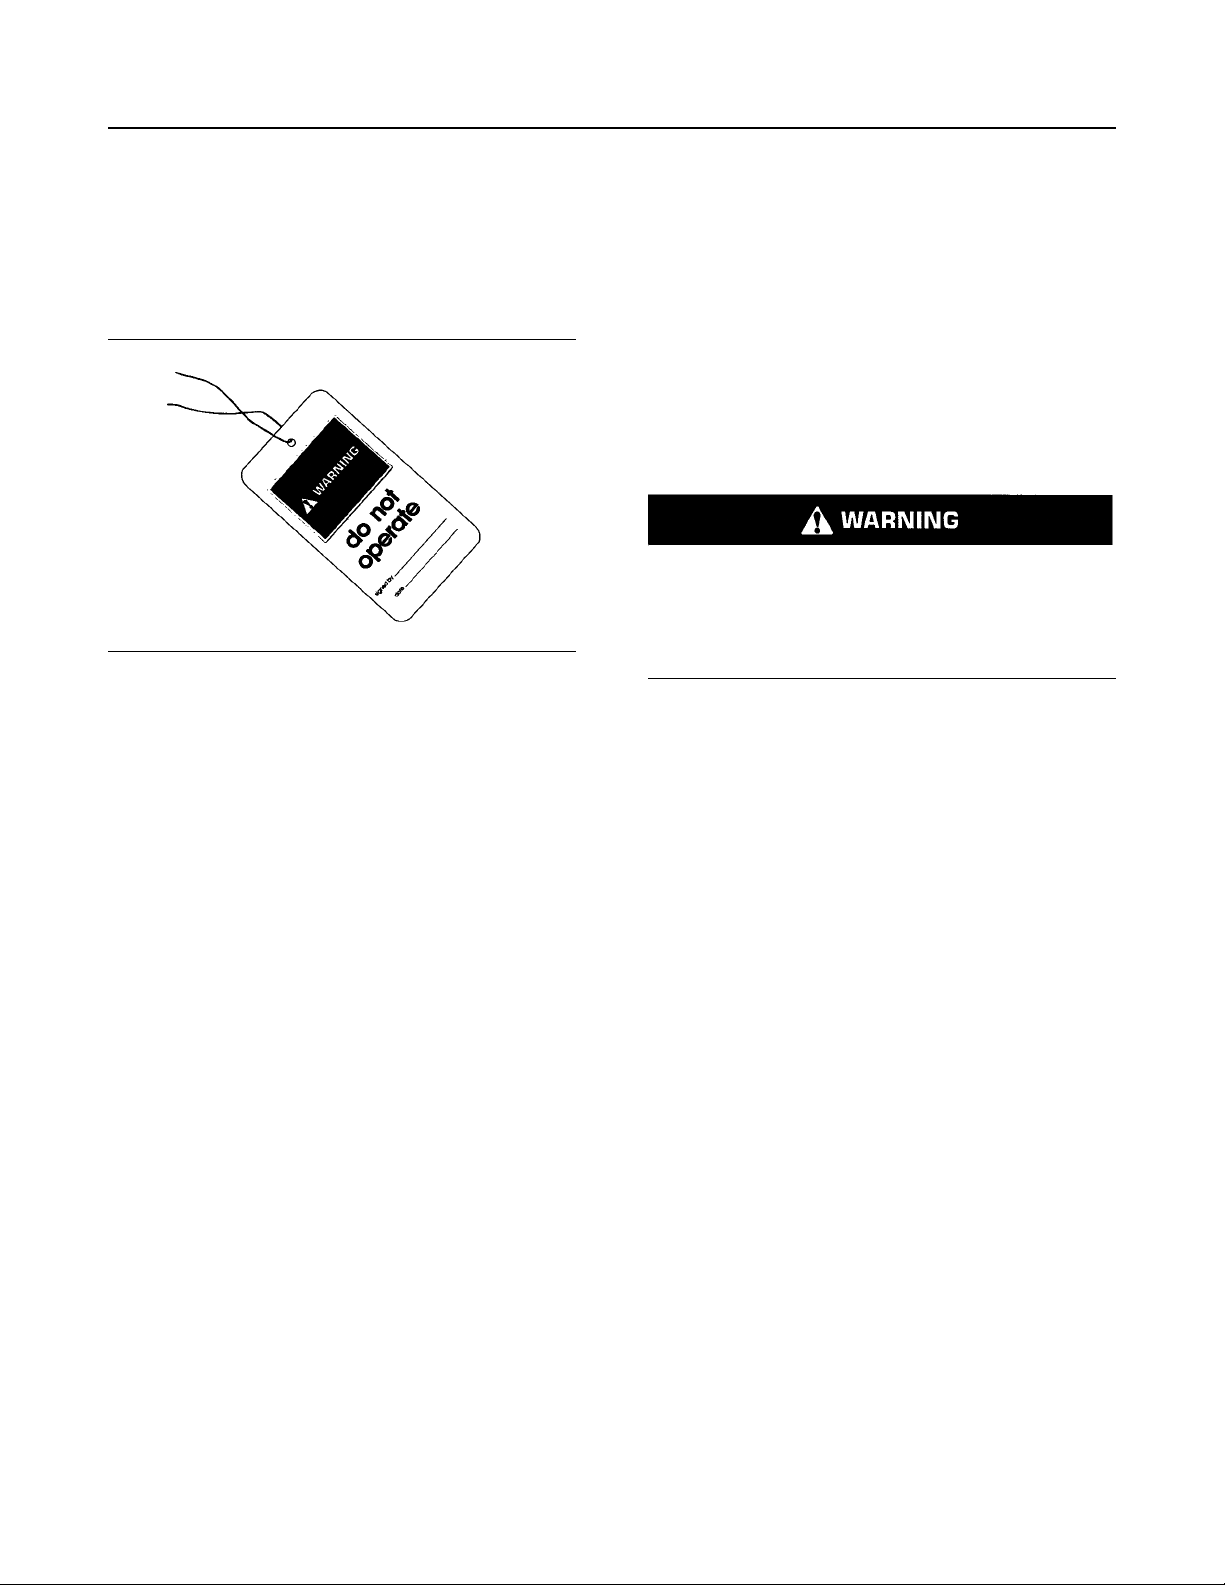
Attach a “Do Not Operate” warning tag or a similar
warning tag to the start switch or to the controls
before you service the equipment or before you
repair the equipment. These warning tags (Special
Instruction, SEHS7332) are available from your
Prentice dealer.
Page 19
SEBU9422-02
19
Safety Section
General Hazard Information
Obey all local regulations for the disposal of liquids.
Operating the machine while distracted can result
in the loss of machine control. Use extreme cau-
tion when using any device while operating the
machine. Operating the machine while distracted
can result in personal injury or death.
Know the width of your equipment in order to
maintain proper clearance when you operate the
equipment near fences or near boundary obstacles.
Be aware of high voltage power lines and power
cables that are buried. If the machine comes in
contact with these hazards, serious injury or death
may occur from electrocution.
Use all cleaning solutions with care. Report all
necessary repairs.
Do not allow unauthorized personnel on the
equipment.
Unless you are instructed otherwise, perform
maintenance with the equipment in the servicing
position. Refer to Operation and Maintenance
Manual for the procedure for placing the equipment
in the servicing position.
When maintenance is performed above ground level,
use appropriate devices such as ladders or man lift
machines. If Equipped, use the machine anchorage
points and use approved fall arrest harnesses and
lanyards.
Pressure Air and Water
Pressurized air and/or water can cause debris and/or
hot water to be blown out. The debris and/or hot
water could result in personal injury.
When pressurized air and/or pressurized water is
used for cleaning, wear protective clothing, protective
shoes, and eye protection. Eye protection includes
goggles or a protective face shield.
Illustration 30 g00702020
Wear a hard hat, protective glasses, and other
protective equipment, as required.
Do not wear loose clothing or jewelry that can snag
on controls or on other parts of the equipment.
Make sure that all protective guards and all covers
are secured in place on the equipment.
Keep the equipment free from foreign material.
Remove debris, oil, tools, and other items from the
deck, from walkways, and from steps.
Secure all loose items such as lunch boxes, tools,
and other items that are not a part of the equipment.
Know the appropriate work site hand signals and the
personnel that are authorized to give the hand
signals. Accept hand signals from one person only.
Do not smoke when you service an air conditioner.
Also, do not smoke if refrigerant gas may be present.
Inhaling the fumes that are released from a flame that
contacts air conditioner refrigerant can cause bodily
harm or death. Inhaling gas from air conditioner
refrigerant through a lighted cigarette can cause
bodily harm or death.
Never put maintenance fluids into glass containers.
Drain all liquids into a suitable container.
The maximum air pressure for cleaning purposes
must be reduced to 448 kPa (65 psi) when the
nozzle is deadheaded and the nozzle is used with an
effective chip deflector and personal protective
equipment. The maximum water pressure for
cleaning purposes must be below 448n kPa (65 psi).
Avoid direct spraying of water on electrical
connectors, connections, and components. When
using air for cleaning, allow the machine to cool to
reduce the possibility of fine debris igniting when redeposited on hot surfaces.
Trapped Pressure
Pressure can be trapped in a hydraulic system.
Accumulators in a hydraulic system will store
pressure. Allow a sufficient amount of time for the
pressure that is stored in the accumulators to be
released. Releasing trapped pressure can cause
sudden machine movement or attachment
movement. Use caution if you disconnect hydraulic
lines or fittings. High-pressure oil that is released can
cause a hose to whip. High-pressure oil that is
released can cause oil to spray. Fluid penetration can
cause serious injury and possible death.
Fluid Penetration
Pressure can be trapped in the hydraulic circuit long
after the engine has been stopped. The pressure can
cause hydraulic fluid or items such as pipe plugs to
escape rapidly if the pressure is not relieved
correctly.
Page 20
20
Safety Section
General Hazard Information
SEBU9422-02
Do not remove any hydraulic components or parts
until pressure has been relieved or personal injury
may occur. Do not disassemble any hydraulic
components or parts until pressure has been relieved
or personal injury may occur. Refer to the Service
Manual for any procedures that are required to
relieve the hydraulic pressure.
Illustration 31 g00687600
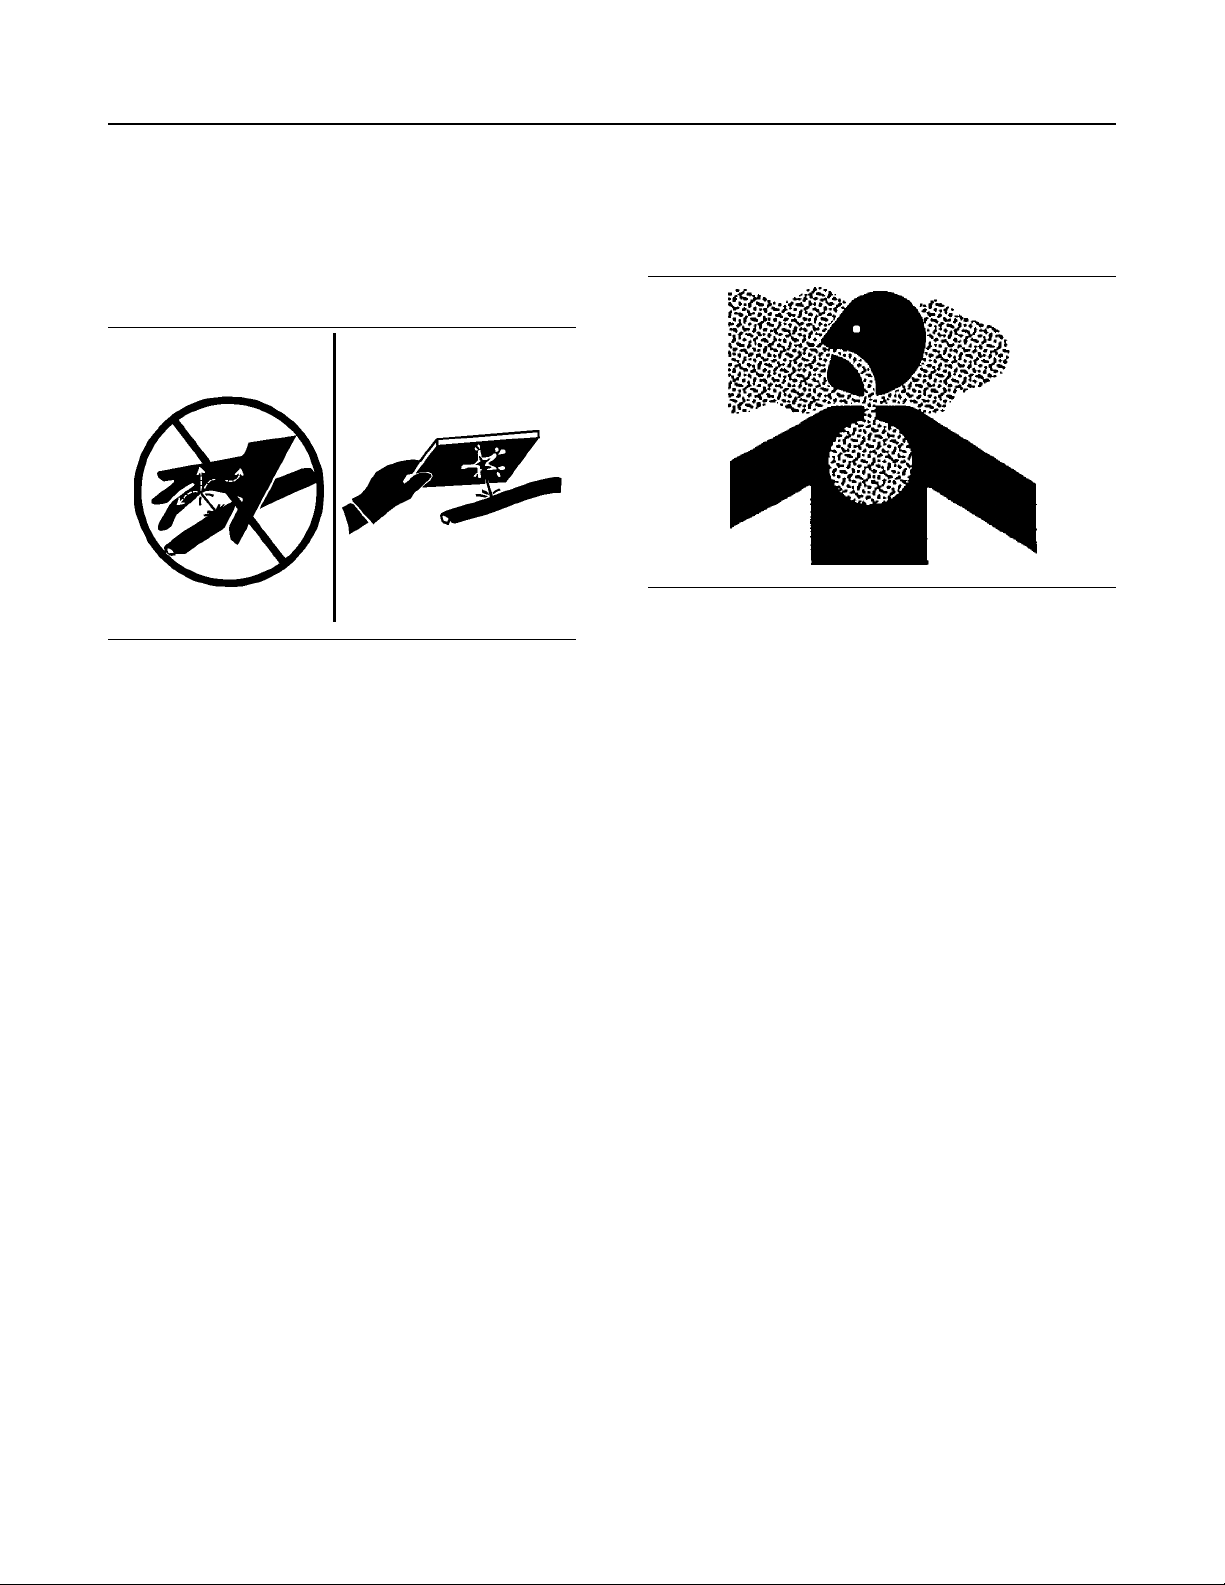
Always use a board or cardboard when you check for
a leak. Leaking fluid that is under pressure can
penetrate body tissue. Fluid penetration can cause
serious injury and possible death. A pin hole leak can
cause severe injury. If fluid is injected into your skin,
you must get treatment immediately. Seek treatment
from a doctor that is familiar with this type of injury.
Containing Fluid Spillage
Care must be taken in order to ensure that fluids are
contained during performance of inspection,
maintenance, testing, adjusting, and repair of the
equipment. Prepare to collect the fluid with suitable
containers before opening any compartment or
disassembling any component containing fluids.
Refer to Special Publication, NENG2500, “Tools and
Shop Products Guide” for the following items:
• Tools that are suitable for collecting fluids and
equipment that is suitable for collecting fluids
• Tools that are suitable for containing fluids and
equipment that is suitable for containing fluids
Obey all local regulations for the disposal of liquids.
Inhalation
Illustration 32 g02159053
Exhaust
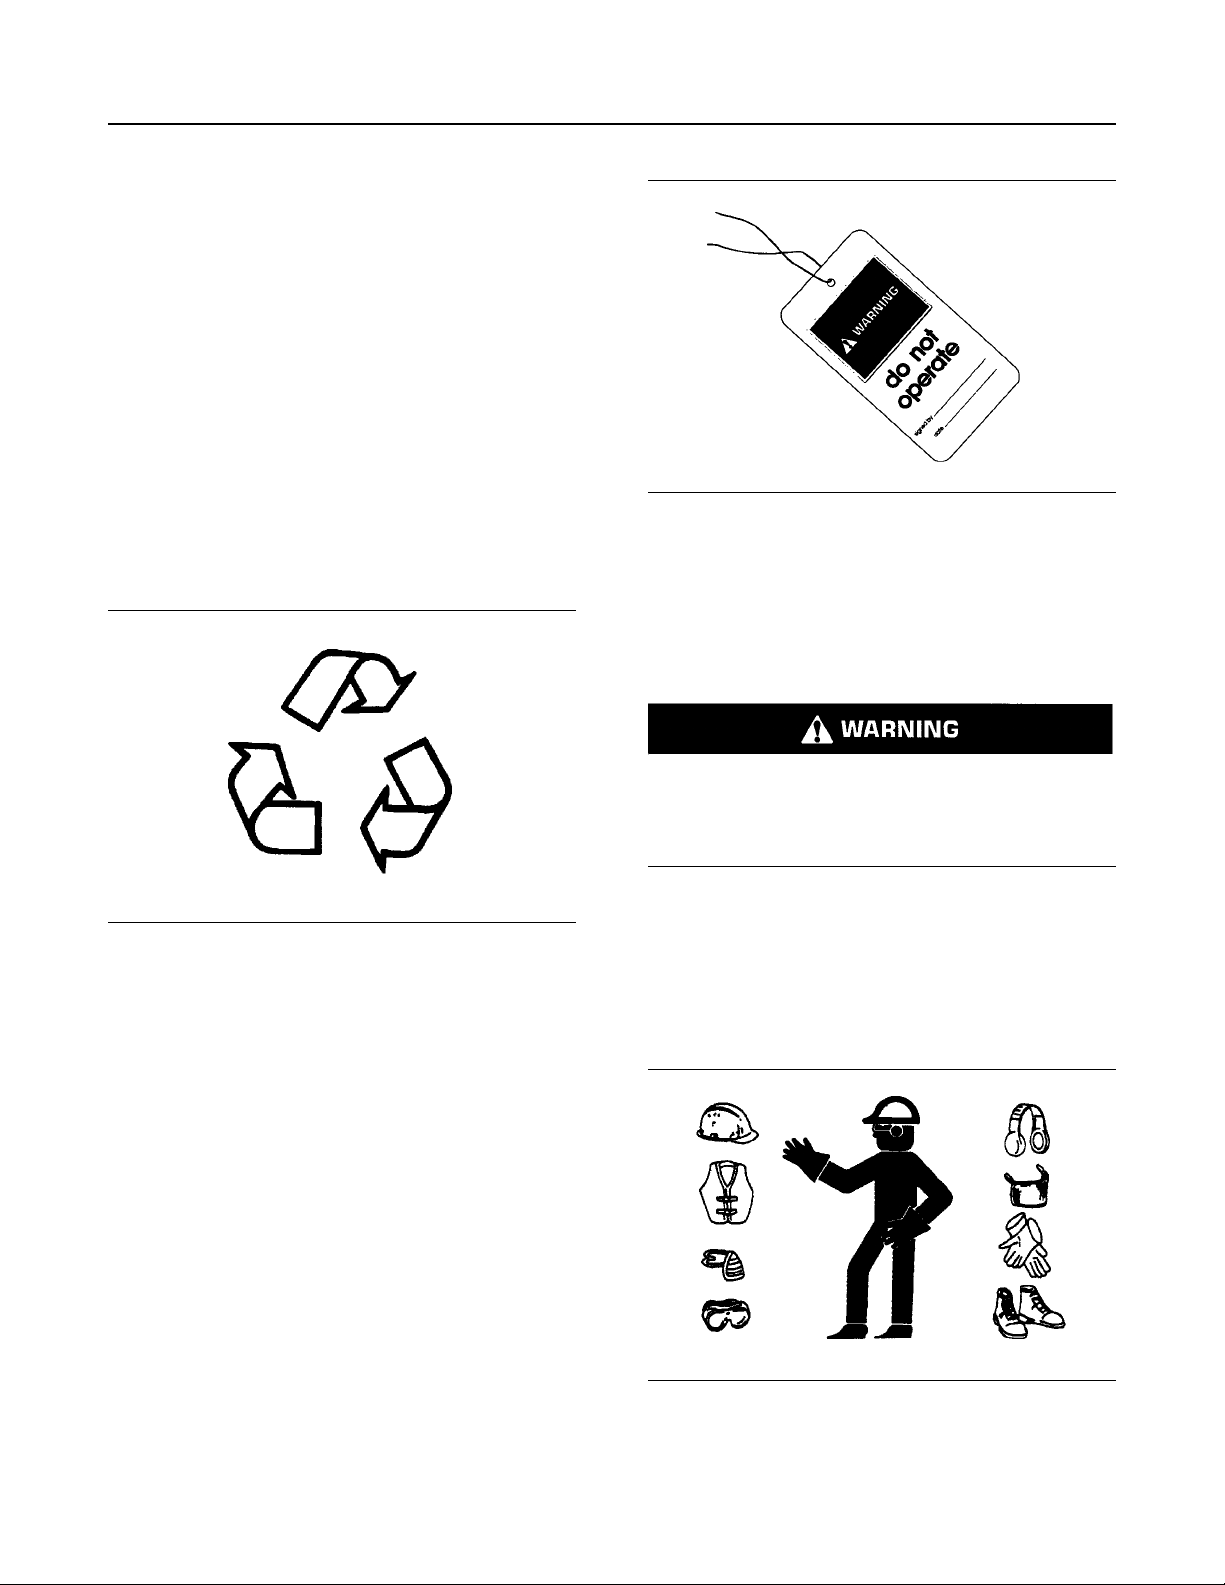
Use caution. Exhaust fumes can be hazardous to
your health. If you operate the machine in an
enclosed area, adequate ventilation is necessary.
Asbestos Information
Prentice equipment and replacement parts that are
shipped from Caterpillar are asbestos free. Prentice
recommends the use of only genuine Prentice
replacement parts. Use the following guidelines when
you handle any replacement parts that contain
asbestos or when you handle asbestos debris.
Use caution. Avoid inhaling dust that might be
generated when you handle components that contain
asbestos fibers. Inhaling this dust can be hazardous
to your health. The components that may contain
asbestos fibers are brake pads, brake bands, lining
material, clutch plates, and some gaskets. The
asbestos that is used in these components is usually
bound in a resin or sealed in some way. Normal
handling is not hazardous unless airborne dust that
contains asbestos is generated.
If dust that may contain asbestos is present, there
are several guidelines that should be followed:
• Never use compressed air for cleaning.
• Avoid brushing materials that contain asbestos.
• Avoid grinding materials that contain asbestos.
• Use a wet method in order to clean up asbestos
materials.
• A vacuum cleaner that is equipped with a high
efficiency particulate air filter (HEPA) can also be
used.
Page 21
SEBU9422-02
• Use exhaust ventilation on permanent machining
jobs.
• Wear an approved respirator if there is no other
way to control the dust.
• Comply with applicable rules and regulations for
the work place. In the United States, use
Occupational Safety and Health Administration
(OSHA) requirements. These OSHA requirements
can be found in “29 CFR 1910.1001”.
• Obey environmental regulations for the disposal of
asbestos.
21
Safety Section
General Hazard Information
• Stay away from areas that might have asbestos
particles in the air.
Dispose of Waste Properly
Illustration 33 g00706404
Improperly disposing of waste can threaten the
environment. Potentially harmful fluids should be
disposed of according to local regulations.
Always use leakproof containers when you drain
fluids. Do not pour waste onto the ground, down a
drain, or into any source of water.
Illustration 34 g00104545
Typical example
Attach a “Do Not Operate” warning tag or a similar
warning tag to the start switch or to the controls.
Attach the warning tag before you service the
equipment or before you repair the equipment.
Warning tag SEHS7332 is available from your Cat
dealer.
Operating the machine while distracted can result
in the loss of machine control. Use extreme cau-
tion when using any device while operating the
machine. Operating the machine while distracted
can result in personal injury or death.
Know the width of your equipment in order to
maintain proper clearance when you operate the
equipment near fences or near boundary obstacles.
Be aware of high voltage power lines and power
cables that are buried. If the machine comes in
contact with these hazards, serious injury or death
may occur from electrocution.
General Hazard Information
SMCS Code: 7000
S/N: KP51–Up
i07046904
Illustration 35 g00702020
Wear a hard hat, protective glasses, and other
protective equipment, as required.
Page 22

22
Safety Section
General Hazard Information
SEBU9422-02
Do not wear loose clothing or jewelry that can snag
on controls or on other parts of the equipment.
Make sure that all protective guards and all covers
are secured in place on the equipment.
Keep the equipment free from foreign material.
Remove debris, oil, tools, and other items from the
deck, from walkways, and from steps.
Secure all loose items such as lunch boxes, tools,
and other items that are not a part of the equipment.
Know the appropriate work site hand signals and the
personnel that are authorized to give the hand
signals. Accept hand signals from one person only.
Do not smoke when you service an air conditioner.
Also, do not smoke if refrigerant gas may be present.
Inhaling the fumes that are released from a flame that
contacts air conditioner refrigerant can cause bodily
harm or death. Inhaling gas from air conditioner
refrigerant through a lighted cigarette can cause
bodily harm or death.
Never put maintenance fluids into glass containers.
Drain all liquids into a suitable container.
Obey all local regulations for the disposal of liquids.
Use all cleaning solutions with care. Report all
necessary repairs.
Do not allow unauthorized personnel on the
equipment.
Avoid direct spraying of water on electrical
connectors, connections, and components. When
using air for cleaning, allow the machine to cool to
reduce the possibility of fine debris igniting when redeposited on hot surfaces.
Trapped Pressure
Pressure can be trapped in a hydraulic system.
Releasing trapped pressure can cause sudden
machine movement or attachment movement. Use
caution if you disconnect hydraulic lines or fittings.
High-pressure oil that is released can cause a hose
to whip. High-pressure oil that is released can cause
oil to spray. Fluid penetration can cause serious
injury and possible death.
Fluid Penetration
Pressure can be trapped in the hydraulic circuit long
after the machine has been stopped. The pressure
can cause hydraulic fluid or items such as pipe plugs
to escape rapidly if the pressure is not relieved
correctly.
Do not remove any hydraulic components or parts
until pressure has been relieved or personal injury
may occur. Do not disassemble any hydraulic
components or parts until pressure has been relieved
or personal injury may occur. Refer to the Service
Manual for any procedures that are required to
relieve the hydraulic pressure.
Unless you are instructed otherwise, perform
maintenance with the equipment in the servicing
position. Refer to Operation and Maintenance
Manual for the procedure for placing the equipment
in the servicing position.
When you perform maintenance above ground level,
use appropriate devices such as ladders or man lift
machines. If equipped, use the machine anchorage
points and use approved fall arrest harnesses and
lanyards.
Pressurized Air and Water
Pressurized air and/or water can cause debris and/or
hot water to be blown out. The debris and/or hot
water could result in personal injury.
When pressurized air and/or pressurized water is
used for cleaning, wear protective clothing, protective
shoes, and eye protection. Eye protection includes
goggles or a protective face shield.
The maximum air pressure for cleaning purposes
must be reduced to 205 kPa (30 psi) when the
nozzle is deadheaded and the nozzle is used with an
effective chip deflector and personal protective
equipment. The maximum water pressure for
cleaning purposes must be below 275 kPa (40 psi).
Page 23
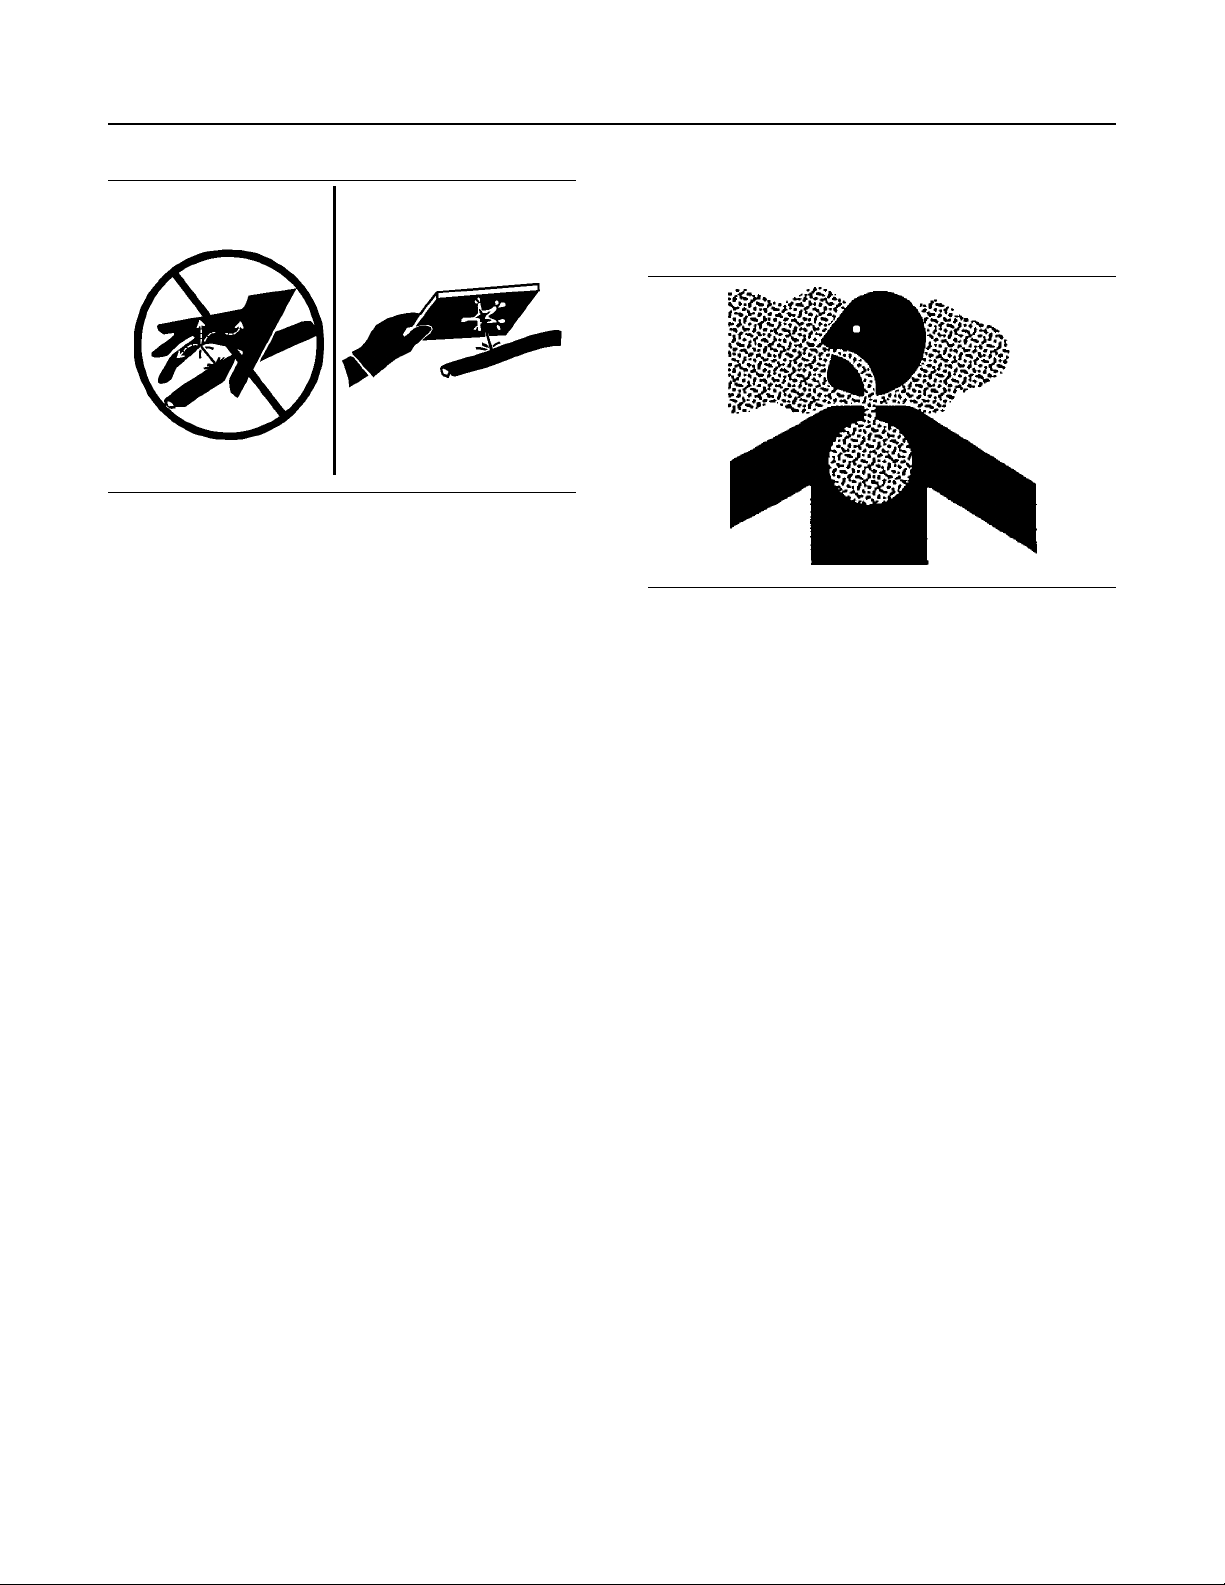
SEBU9422-02
Illustration 36 g00687600
Always use a board or cardboard when you check for
a leak. Leaking fluid that is under pressure can
penetrate body tissue. Fluid penetration can cause
serious injury and possible death. A pin hole leak can
cause severe injury. If fluid is injected into your skin,
you must get treatment immediately. Seek treatment
from a doctor that is familiar with this type of injury.
Containing Fluid Spillage
23
Safety Section
General Hazard Information
Obey all local regulations for the disposal of liquids.
Inhalation
Illustration 37 g02159053
Exhaust
Use caution. Exhaust fumes can be hazardous to
your health. If you operate the machine in an
enclosed area, adequate ventilation is necessary.
Care must be taken in order to ensure that fluids are
contained during performance of inspection,
maintenance, testing, adjusting, and repair of the
equipment. Prepare to collect the fluid with suitable
containers before opening any compartment or
disassembling any component that contains fluids.
Refer to Special Publication, NENG2500, “Cat dealer
Service Tool Catalog” for the following items:
• Tools that are suitable for collecting fluids and
equipment that is suitable for collecting fluids
• Tools that are suitable for containing fluids and
equipment that is suitable for containing fluids
Asbestos Information
Cat equipment and replacement parts that are
shipped from Caterpillar are asbestos free.
Caterpillar recommends the use of only genuine Cat
replacement parts. Use the following guidelines when
you handle any replacement parts that contain
asbestos or when you handle asbestos debris.
Use caution. Avoid inhaling dust that might be
generated when you handle components that contain
asbestos fibers. Inhaling this dust can be hazardous
to your health. The components that may contain
asbestos fibers are brake pads, brake bands, lining
material, clutch plates, and some gaskets. The
asbestos that is used in these components is bound
in a resin or sealed in some way. Normal handling is
not hazardous unless airborne dust that contains
asbestos is generated.
If dust that may contain asbestos is present, there
are several guidelines that should be followed:
• Never use compressed air for cleaning.
• Avoid brushing materials that contain asbestos.
• Avoid grinding materials that contain asbestos.
• Use a wet method in order to clean up asbestos
materials.
• A vacuum cleaner that is equipped with a high
efficiency particulate air filter (HEPA) can also be
used.
Page 24

24
Safety Section
Crushing Prevention and Cutting Prevention
SEBU9422-02
• Use exhaust ventilation on permanent machining
jobs.
• Wear an approved respirator if there is no other
way to control the dust.
• Comply with applicable rules and regulations for
the work place. In the United States, use
Occupational Safety and Health Administration
(OSHA) requirements. These OSHA requirements
can be found in “29 CFR 1910.1001”. In Japan,
use the requirements found in the “Ordinance on
Prevention of Health Impairment due to Asbestos”
in addition to the requirements of the Industrial
Safety and Health Act.
• Obey environmental regulations for the disposal of
asbestos.
• Stay away from areas that might have asbestos
particles in the air.
Dispose of Waste Properly
Support the equipment properly before you perform
any work or maintenance beneath that equipment.
Do not depend on the hydraulic cylinders to hold up
the equipment. Equipment can fall if a control is
moved, or if a hydraulic line breaks.
Do not work beneath the cab of the machine unless
the cab is properly supported.
Unless you are instructed otherwise, never attempt
adjustments while the machine is moving or while the
engine is running.
Never jump across the starter solenoid terminals in
order to start the engine. Unexpected machine
movement could result.
Whenever there are equipment control linkages the
clearance in the linkage area will change with the
movement of the equipment or the machine. Stay
clear of areas that may have a sudden change in
clearance with machine movement or equipment
movement.
Stay clear of all rotating and moving parts.
If it is necessary to remove guards in order to perform
maintenance, always install the guards after the
maintenance is performed.
Illustration 38 g00706404
Improperly disposing of waste can threaten the
environment. Potentially harmful fluids should be
disposed of according to local regulations.
Always use leakproof containers when you drain
fluids. Do not pour waste onto the ground, down a
drain, or into any source of water.
i01359664
Crushing Prevention and
Cutting Prevention
SMCS Code: 7000
Keep objects away from moving fan blades. The fan
blade will throw objects or cut objects.
Do not use a kinked wire cable or a frayed wire cable.
Wear gloves when you handle wire cable.
When you strike a retainer pin with force, the retainer
pin can fly out. The loose retainer pin can injure
personnel. Make sure that the area is clear of people
when you strike a retainer pin. To avoid injury to your
eyes, wear protective glasses when you strike a
retainer pin.
Chips or other debris can fly off an object when you
strike the object. Make sure that no one can be
injured by flying debris before striking any object.
i05294650
Burn Prevention
SMCS Code: 7000
S/N: KP51–Up
Do not touch any part of an operating engine system.
The engine, the exhaust, and the engine
aftertreatment system can reach temperatures as
high as 650° C (1202° F) under normal operating
conditions.
S/N: KP51–Up
Allow the engine system to cool before any
maintenance is performed. Relieve all pressure in the
air system, hydraulic system, lubrication system, fuel
system, and the cooling system before the related
items are disconnected.
Page 25
SEBU9422-02
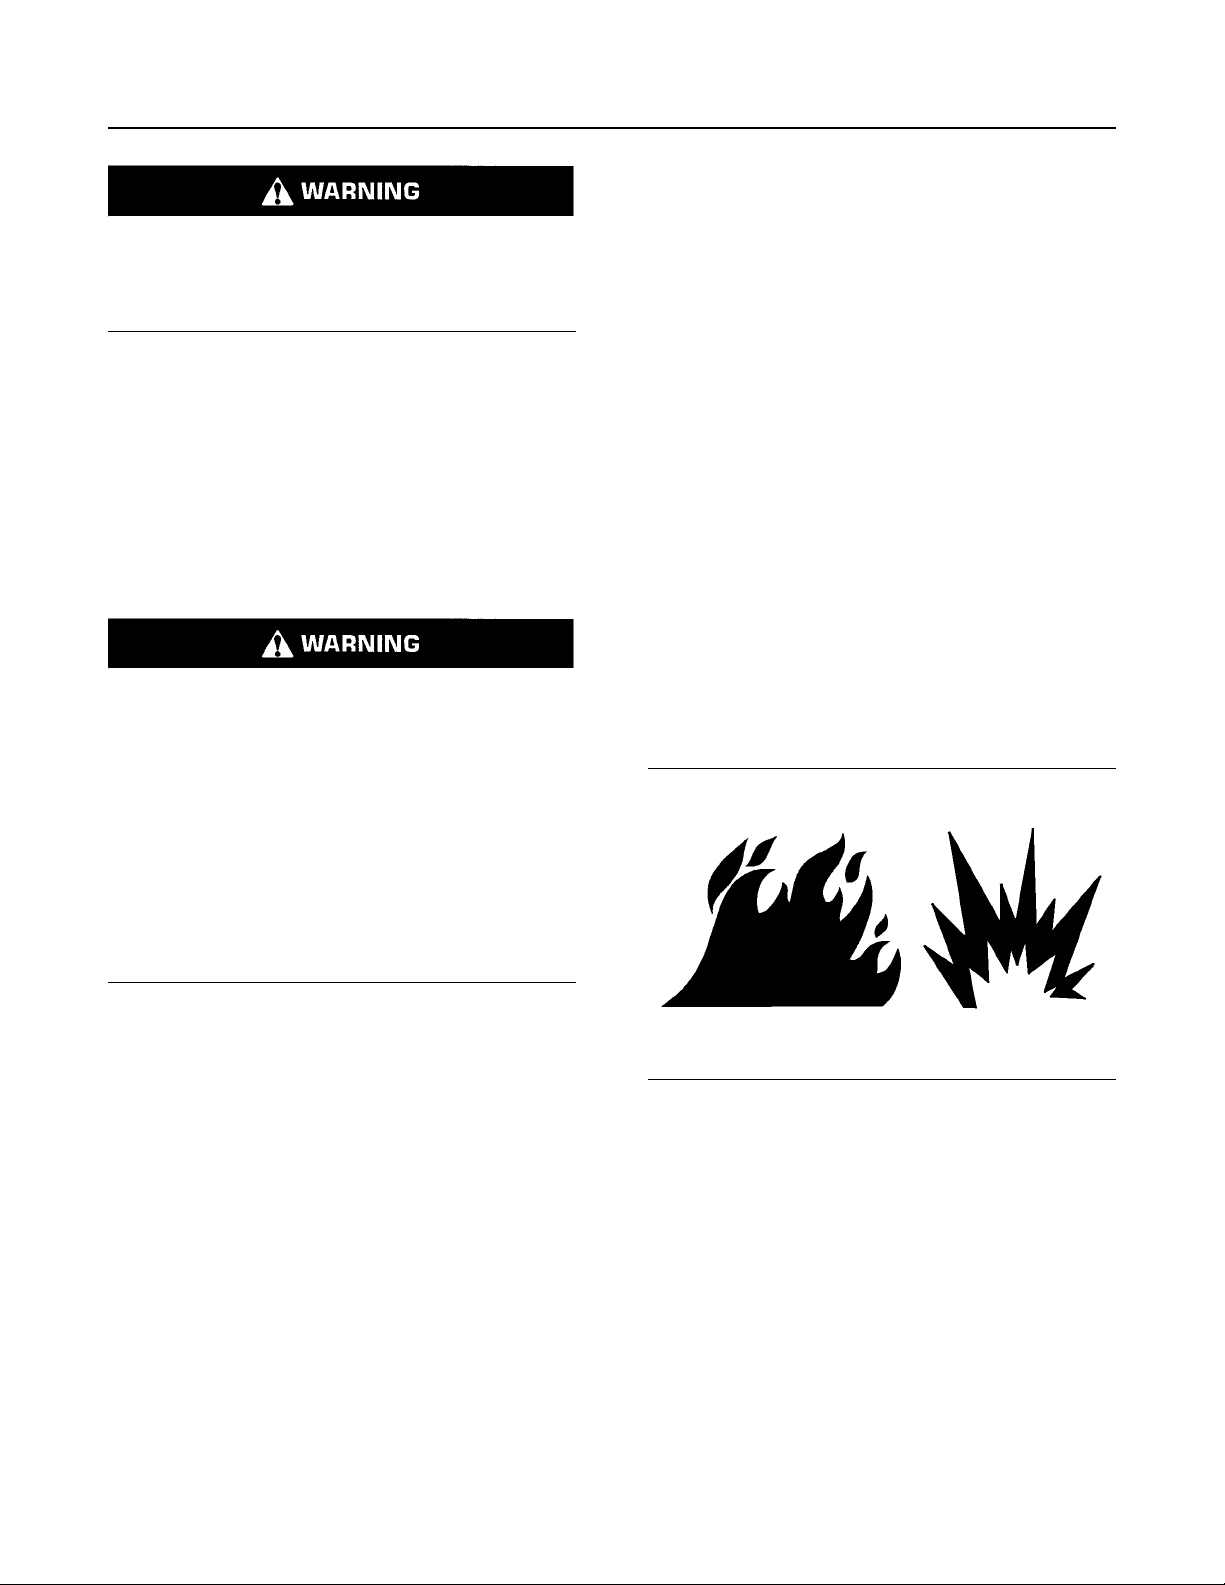
Contact with high pressure fuel may cause fluid
penetration and burn hazards. High pressure fuel
spray may cause a fire hazard. Failure to follow
these inspection, maintenance and service instructions may cause personal injury or death.
After the engine has stopped, wait for 10 minutes in
order to allow the fuel pressure to be purged from the
high-pressure fuel lines before any service or repair
is performed on the engine fuel lines.
Allow the pressure to be purged in the air system, in
the hydraulic system, in the lubrication system, or in
the cooling system before disconnecting any lines,
fittings, or related items.
Induction System
25
Safety Section
Fire Prevention and Explosion Prevention
Cooling system conditioner contains alkali. Alkali can
cause personal injury. Do not allow alkali to contact
the skin, the eyes, or the mouth.
Oils
Hot oil and hot lubricating components can cause
personal injury. Do not allow hot oil to contact the
skin. Also, do not allow hot components to contact
the skin.
Batteries
Electrolyte is an acid. Electrolyte can cause personal
injury. Do not allow electrolyte to contact the skin or
the eyes. Always wear protective glasses for
servicing batteries. Wash hands after touching the
batteries and connectors. Use of gloves is
recommended.
i05185212
Sulfuric Acid Burn Hazard may cause serious
personal injury or death.
The exhaust gas cooler may contain a small
amount of sulfuric acid. The use of fuel with sul-
fur levels greater than 15 ppm may increase the
amount of sulfuric acid formed. The sulfuric acid
may spill from the cooler during service of the engine. The sulfuric acid will burn the eyes, skin
and clothing on contact. Always wear the appropriate personal protective equipment (PPE) that
is noted on a material safety data sheet (MSDS)
for sulfuric acid. Always follow the directions for
first aid that are noted on a material safety data
sheet (MSDS) for sulfuric acid.
Coolant
When the engine is at operating temperature, the
engine coolant is hot. The coolant is also under
pressure. The radiator and all lines to the heaters or
to the engine contain hot coolant.
Any contact with hot coolant or with steam can cause
severe burns. Allow cooling system components to
cool before the cooling system is drained.
Check that the coolant level after the engine has
stopped and the engine has been allowed to cool.
Ensure that the filler cap is cool before removing the
filler cap. The filler cap must be cool enough to touch
with a bare hand. Remove the filler cap slowly in
order to relieve pressure.
Fire Prevention and Explosion
Prevention
SMCS Code: 7000
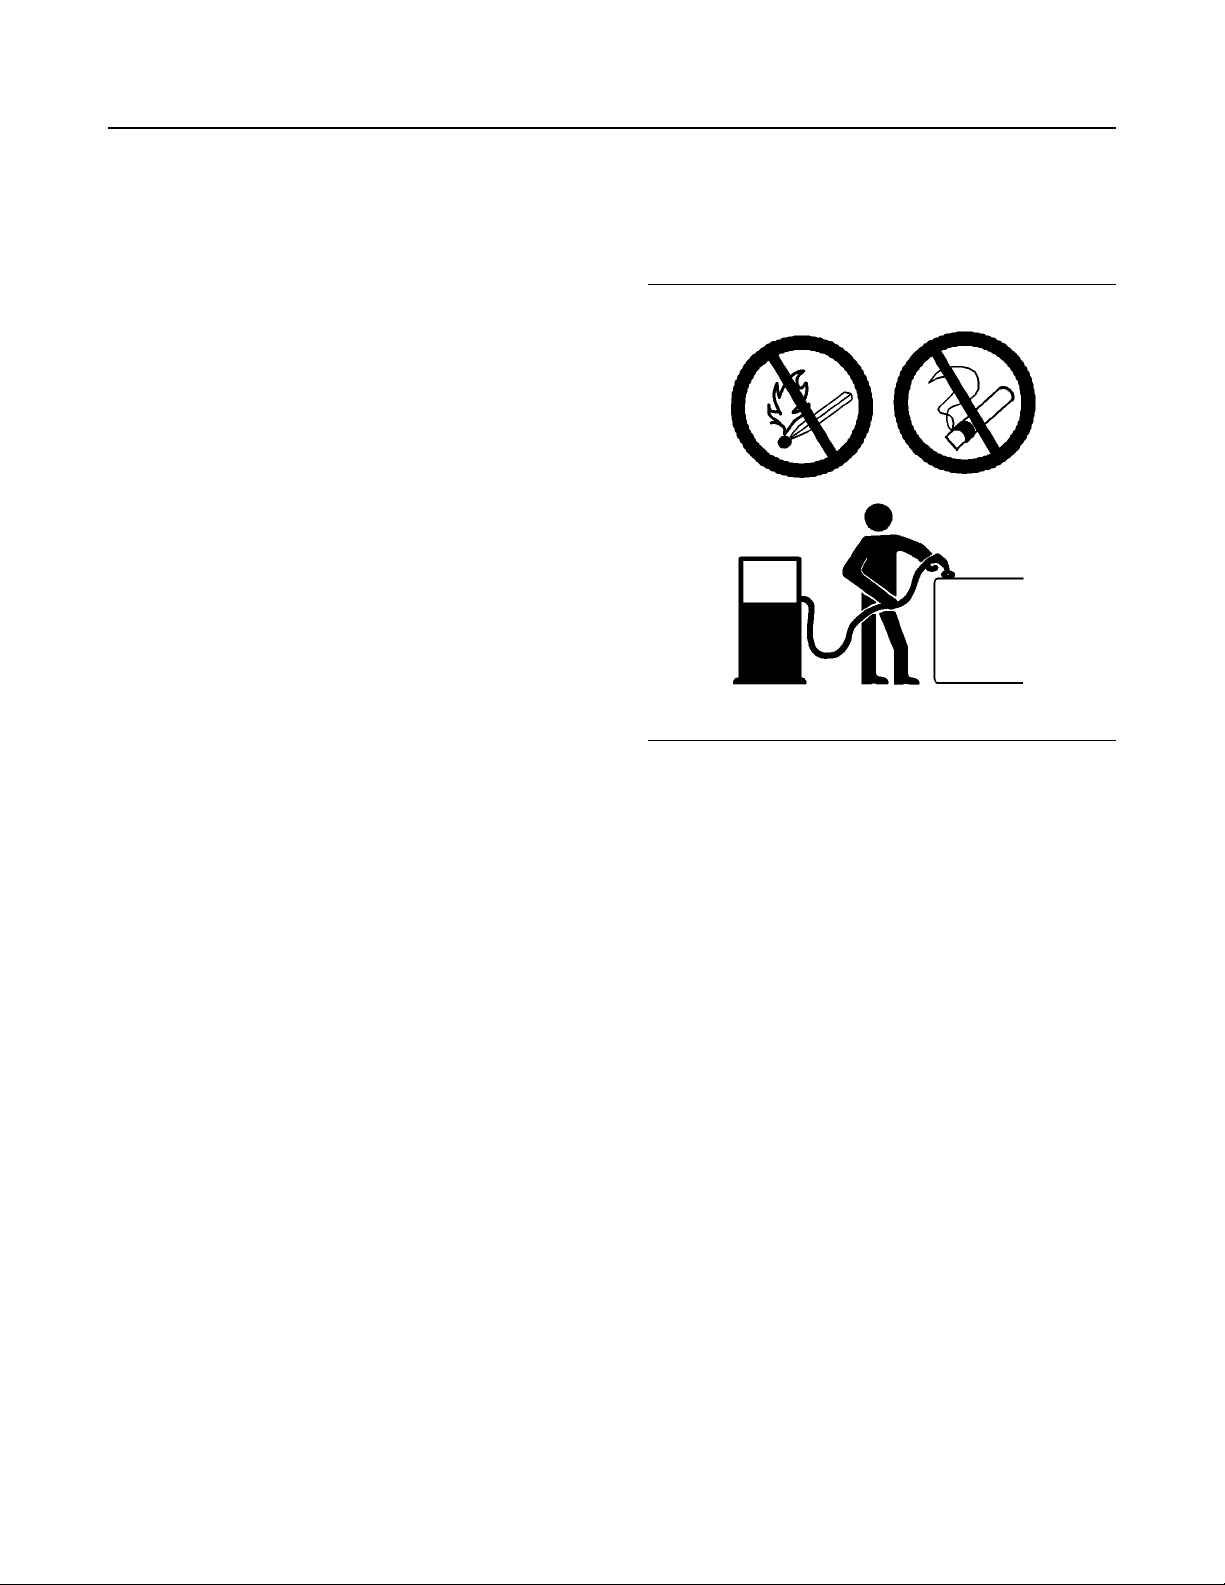
Illustration 39 g00704000
General
Much of the material found in forestry applications is
highly flammable, including limbs, bark, leaves, saw
dust, small wood chips and pine needles. When the
forestry debris is soaked with fuel or lubricants, the
risk of fire is greatly increased SEBD1901. Doing a
daily inspection before every shift, or more often
based on the work activity and build-up of debris, is
the best way to prevent a machine fire. Frequent
inspections and thorough machine cleaning are
critical when engaged in forestry operations. Even
minor leaks or electrical malfunctions should be
repaired as soon as possible. SEBD1901
All fuels, most lubricants, and some coolant mixtures
are flammable.
Page 26
26
Safety Section
Fire Prevention and Explosion Prevention
SEBU9422-02
To minimize the risk of fire or explosion, Prentice
recommends the following actions.
Always perform a Walk-Around Inspection, which
may help you identify a fire hazard. Do not operate a
machine when a fire hazard exists. Contact your
Prentice dealer for service.
Understand the use of the primary exit and
alternative exit on the machine. Refer to Operation
and Maintenance Manual, “Alternative Exit”.
Do not operate a machine with a fluid leak. Repair
leaks and clean up fluids before resuming machine
operation. Fluids that are leaking or spilled onto hot
surfaces or onto electrical components can cause a
fire. A fire may cause personal injury or death.
Remove flammable material such as leaves, twigs,
papers, trash, and so on. These items may
accumulate in the engine compartment or around
other hot areas and hot parts on the machine. Highly
flammable debris such as leaves, twigs, saw dust,
small wood chips and pine needles can collect on
and in equipment used in forestry operations. If
allowed to accumulate, the debris can rapidly
become the fuel component of a machine fire. Clean
all accumulations of forest debris in the engine
compartment or around other hot areas and hot parts
on the machine at eh completion of each work shift or
more frequently when working in conditions where
large amounts of forest debris are present.
Keep the access doors to major machine
compartments closed and access doors in working
condition in order to permit the use of fire
suppression equipment, in case a fire should occur.
Store fuels and lubricants in properly marked
containers away from unauthorized personnel. Store
oily rags and flammable materials in protective
containers. Do not smoke in areas that are used for
storing flammable materials.
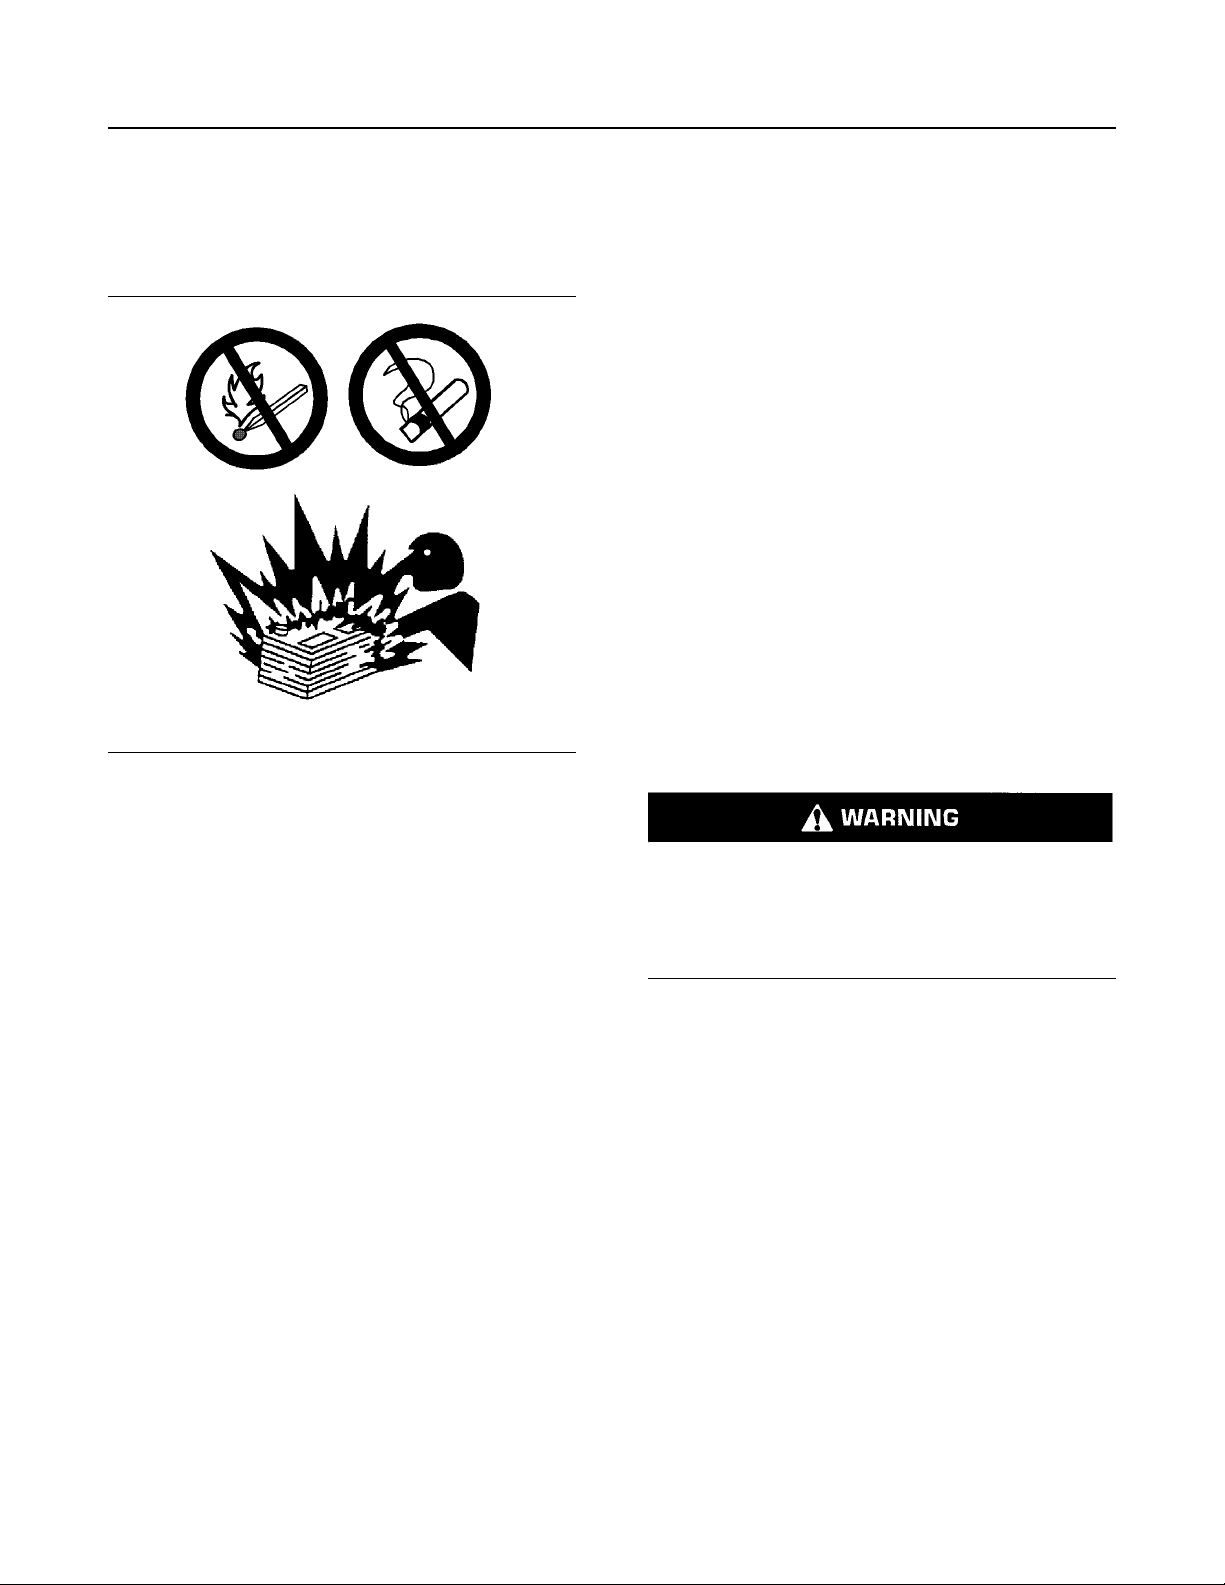
Illustration 40 g00704059
Use caution when you are fueling a machine. Do not
smoke while you are fueling a machine. Do not fuel a
machine near open flames or sparks. Always stop
the engine before fueling. Fill the fuel tank outdoors.
Properly clean areas of spillage.
Clean all accumulations of flammable materials such
as fuel, oil, and debris from the machine.
Do not operate the machine near any flame.
Keep shields in place. Exhaust shields (if equipped)
protect hot exhaust components from oil spray or fuel
spray in case of a break in a line, in a hose, or in a
seal. Exhaust shields must be installed correctly.
Do not weld or flame cut on tanks or lines that contain
flammable fluids or flammable material. Empty and
purge the lines and tanks. Then clean the lines and
tanks with a nonflammable solvent prior to welding or
flame cutting. Ensure that the components are
properly grounded in order to avoid unwanted arcs.
Dust that is generated from repairing nonmetallic
hoods or fenders may be flammable and/or
explosive. Repair such components in a well
ventilated area away from open flames or sparks.
Use suitable Personal Protection Equipment (PPE).
Inspect all lines and hoses for wear or deterioration.
Replace damaged lines and hoses. The lines and the
hoses should have adequate support and secure
clamps. Tighten all connections to the recommended
torque. Damage to the protective cover or insulation
may provide fuel for fires.
Page 27
SEBU9422-02
27
Safety Section
Fire Prevention and Explosion Prevention
Never store flammable fluids in the operator
compartment of the machine.
Battery and Battery Cables
Illustration 41 g02298225
• Cracking
• Discoloration
• Cuts on the insulation of the cable
• Fouling
• Corroded terminals, damaged terminals, and
loose terminals
Replace damaged battery cable(s) and replace any
related parts. Eliminate any fouling, which may have
caused insulation failure or related component
damage or wear. Ensure that all components are
reinstalled correctly.
An exposed wire on the battery cable may cause a
short to ground if the exposed area comes into
contact with a grounded surface. A battery cable
short produces heat from the battery current, which
may be a fire hazard.
An exposed wire on the ground cable between the
battery and the disconnect switch may cause the
disconnect switch to be bypassed if the exposed area
comes into contact with a grounded surface. This
may result in an unsafe condition for servicing the
machine. Repair components or replace components
before servicing the machine.
Prentice recommends the following in order to
minimize the risk of fire or an explosion related to the
battery.
Do not operate a machine if battery cables or related
parts show signs of wear or damage. Contact your
Prentice dealer for service.
Follow safe procedures for engine starting with jumpstart cables. Improper jumper cable connections can
cause an explosion that may result in injury. Refer to
Operation and Maintenance Manual, “Engine Starting
with Jump Start Cables” for specific instructions.
Do not charge a frozen battery. This may cause an
explosion.
Gases from a battery can explode. Keep any open
flames or sparks away from the top of a battery. Do
not smoke in battery charging areas.
Never check the battery charge by placing a metal
object across the terminal posts. Use a voltmeter in
order to check the battery charge.
Daily inspect battery cables that are in areas that are
visible. Inspect cables, clips, straps, and other
restraints for damage. Replace any damaged parts.
Check for signs of the following, which can occur
over time due to use and environmental factors:
• Fraying
• Abrasion
Fire on a machine can result in personal injury or
death. Exposed battery cables that come into
contact with a grounded connection can result in
fires. Replace cables and related parts that show
signs of wear or damage. Contact your Prentice
dealer.
Wiring
Check electrical wires daily. If any of the following
conditions exist, replace parts before you operate the
machine.
• Fraying
• Signs of abrasion or wear
• Cracking
• Discoloration
• Cuts on insulation
• Other damage
Make sure that all clamps, guards, clips, and straps
are reinstalled correctly. This will help to prevent
vibration, rubbing against other parts, and excessive
heat during machine operation.
Page 28
28
Safety Section
Fire Prevention and Explosion Prevention
SEBU9422-02
Attaching electrical wiring to hoses and tubes that
contain flammable fluids or combustible fluids should
be avoided.
Consult your Prentice dealer for repair or for
replacement parts.
Keep wiring and electrical connections free of debris.
Lines, Tubes, and Hoses
Do not bend high-pressure lines. Do not strike highpressure lines. Do not install any lines that are bent
or damaged. Use the appropriate backup wrenches
in order to tighten all connections to the
recommended torque.
Make sure that all clamps, guards, and heat shields
are installed correctly. During machine operation, this
will help to prevent vibration, rubbing against other
parts, excessive heat, and failure of lines, tubes, and
hoses.
Do not operate a machine when a fire hazard exists.
Repair any lines that are corroded, loose, or
damaged. Leaks may provide fuel for fires. Consult
your Prentice dealer for repair or for replacement
parts. Use genuine Prentice parts or the equivalent,
for capabilities of both the pressure limit and
temperature limit.
Ether
Ether (if equipped) is commonly used in cold-weather
applications. Ether is flammable and poisonous.
Follow the correct cold engine starting procedures.
Refer to the section in the Operation and
Maintenance Manual with the label “Engine Starting”
.
Do not spray ether manually into an engine if the
machine is equipped with a thermal starting aid for
cold weather starting.
Use ether in well ventilated areas. Do not smoke
while you are replacing an ether cylinder or while you
are using an ether spray.
Illustration 42 g00687600
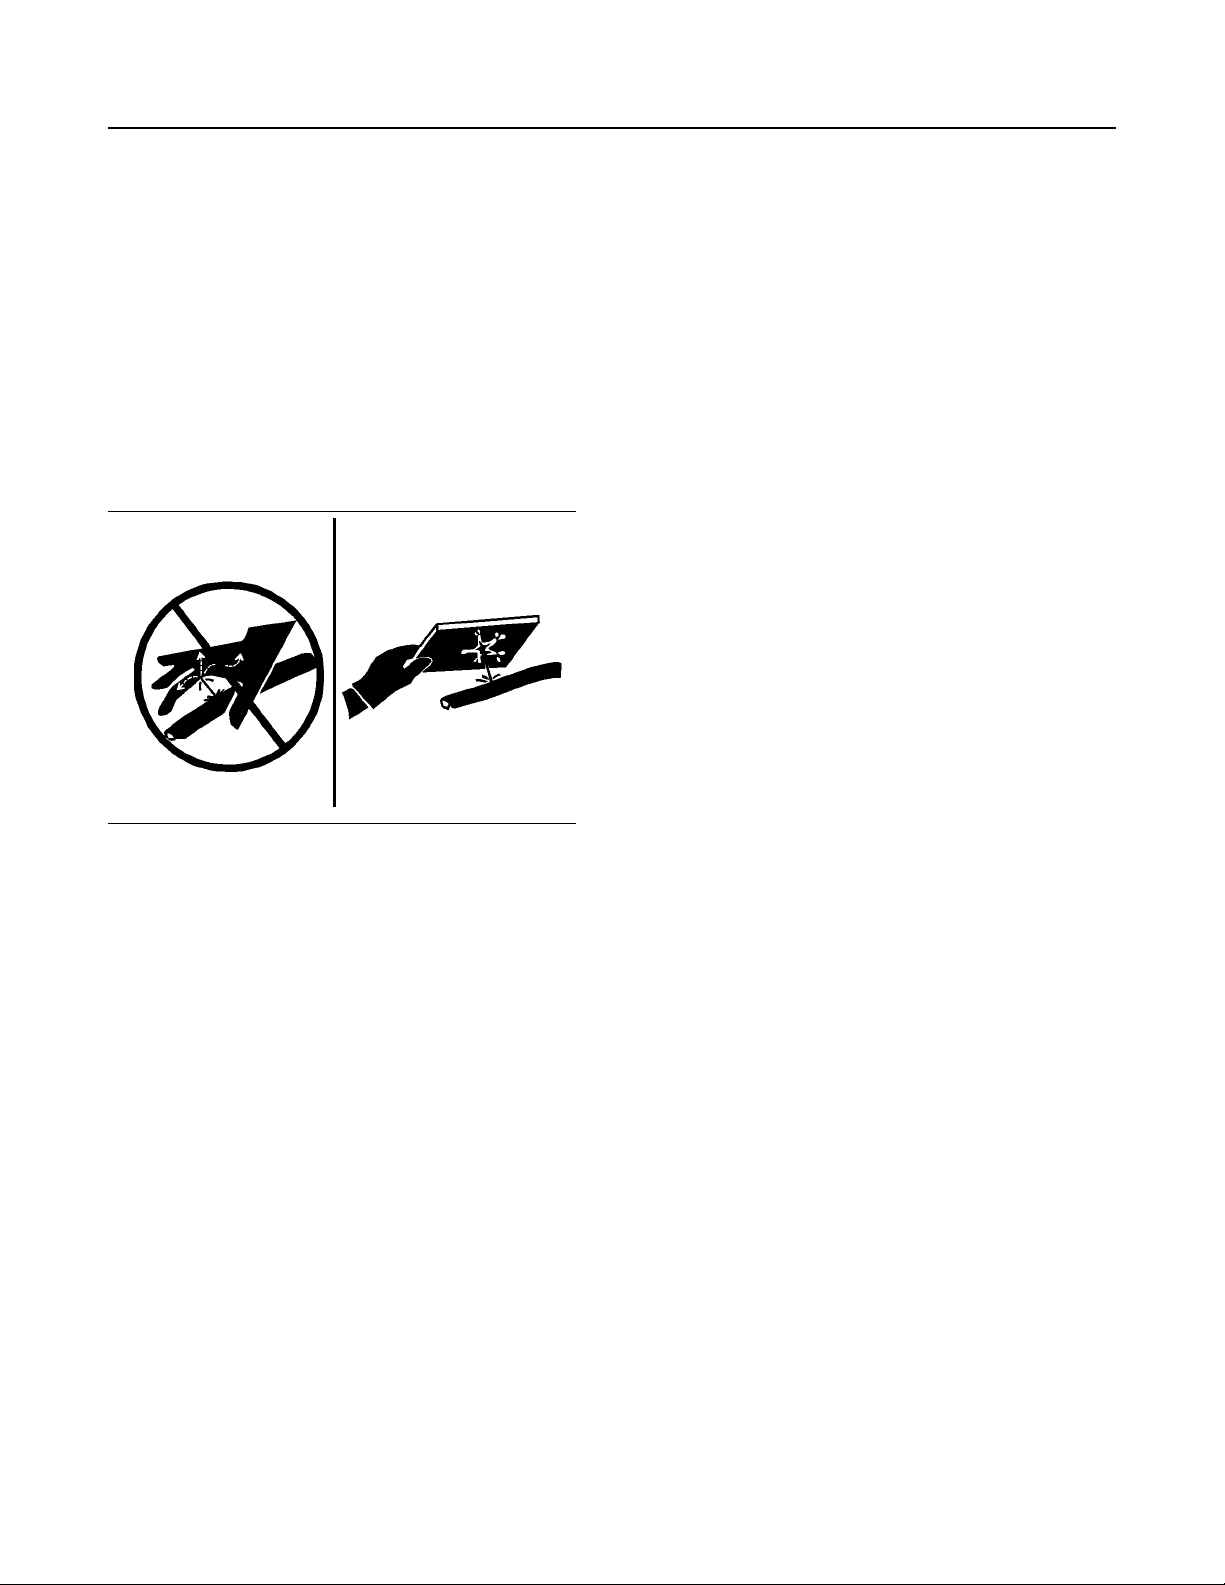
Check lines, tubes, and hoses carefully. Wear
Personal Protection Equipment (PPE) in order to
check for leaks. Always use a board or cardboard
when you check for a leak. Leaking fluid that is under
pressure can penetrate body tissue. Fluid penetration
can cause serious injury and possible death. A pin
hole leak can cause severe injury. If fluid is injected
into your skin, you must get treatment immediately.
Seek treatment from a doctor that is familiar with this
type of injury.
Replace the affected parts if any of the following
conditions are present:
• End fittings are damaged or leaking.
• Outer coverings are chafed or cut.
• Wires are exposed.
• Outer coverings are swelling or ballooning.
• Flexible parts of the hoses are kinked.
• Outer covers have exposed embedded armoring.
• End fittings are displaced.
Do not store ether cylinders in living areas or in the
operator compartment of a machine. Do not store
ether cylinders in direct sunlight or in temperatures
above 49° C (120.2° F). Keep ether cylinders away
from open flames or sparks.
Dispose of used ether cylinders properly. Do not
puncture an ether cylinder. Keep ether cylinders
away from unauthorized personnel.
Fire Extinguisher
As an additional safety measure, keep a fire
extinguisher on the machine.
Be familiar with the operation of the fire extinguisher.
Inspect the fire extinguisher and service the fire
extinguisher regularly. Follow the recommendations
on the instruction plate.
Consider installation of an aftermarket Fire
Suppression System, if the application and working
conditions warrant the installation.
i06180998
Fire Prevention and Explosion
Prevention
SMCS Code: 7000
S/N: KP51–Up
Page 29
SEBU9422-02
Illustration 43 g00704000
General
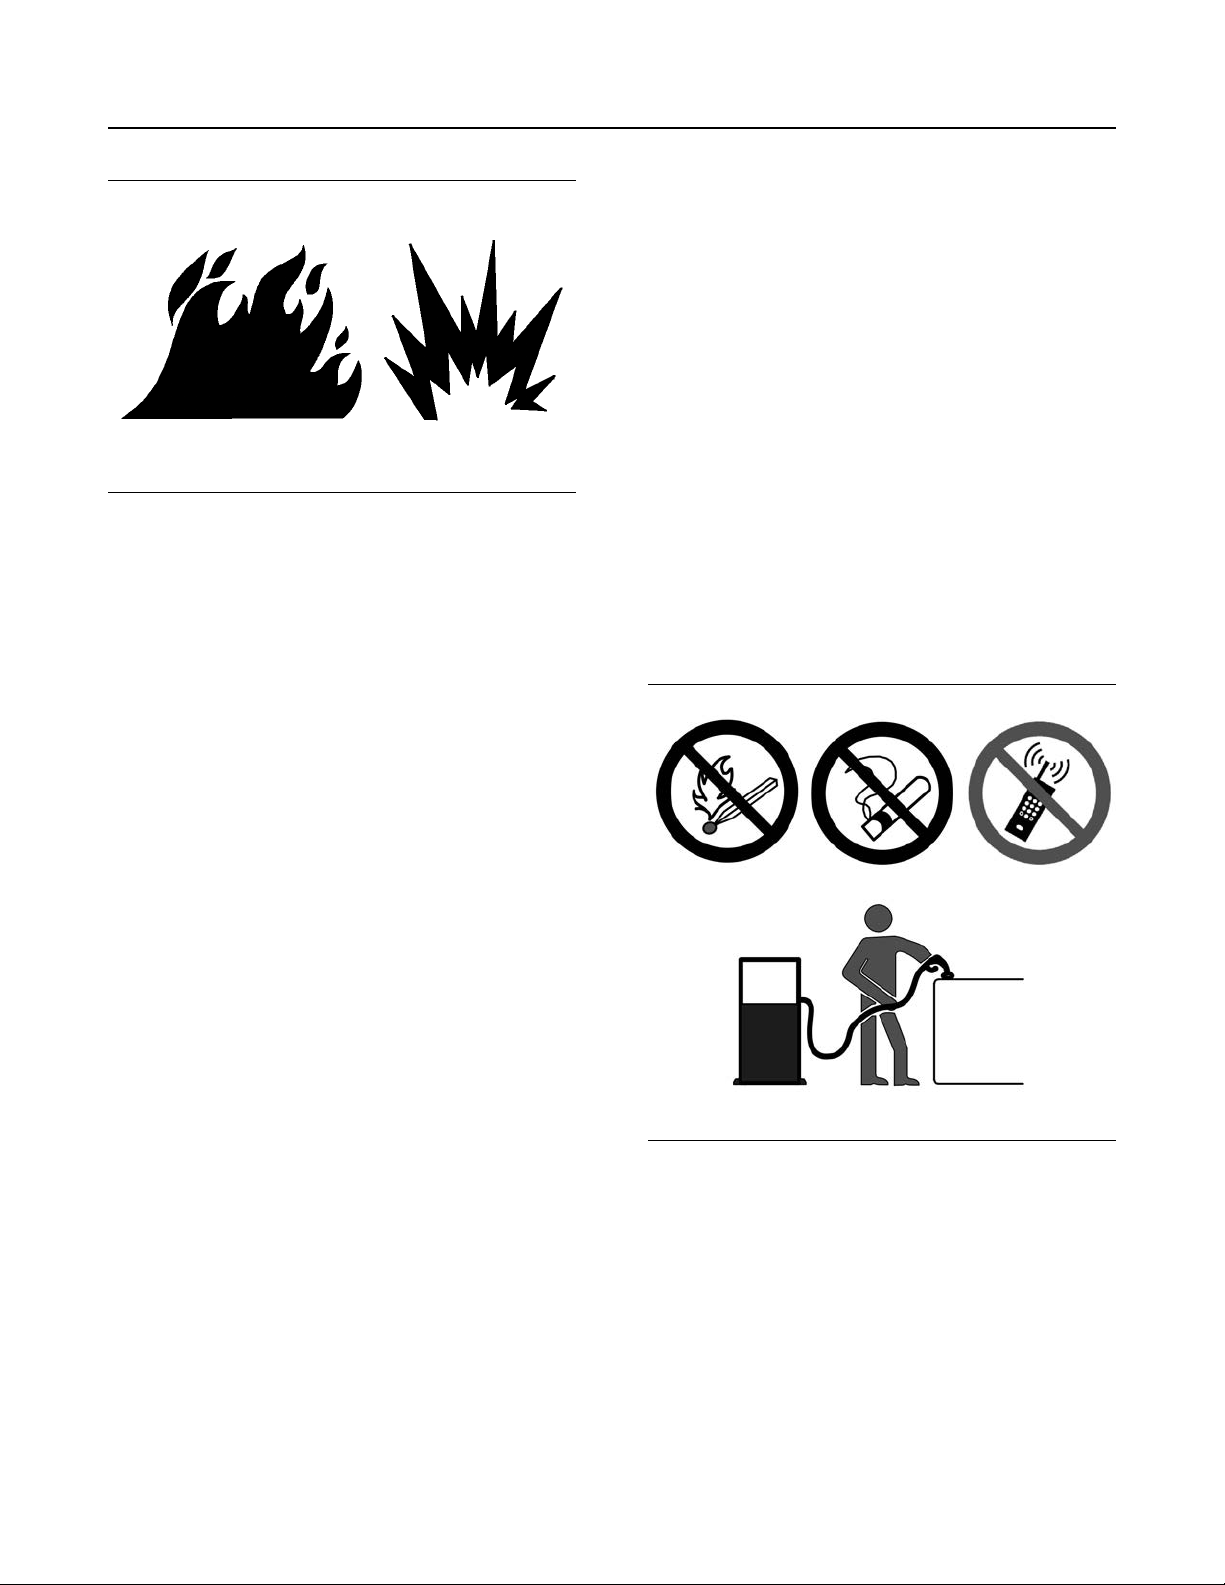
All fuels, most lubricants, and some coolant mixtures
are flammable.
To minimize the risk of fire or explosion, Caterpillar
recommends the following actions.
29
Safety Section
Fire Prevention and Explosion Prevention
Do not weld or flame cut on tanks or lines that contain
flammable fluids or flammable material. Empty and
purge the lines and tanks. Then clean the lines and
tanks with a nonflammable solvent prior to welding or
flame cutting. Ensure that the components are
properly grounded in order to avoid unwanted arcs.
Dust that is generated from repairing nonmetallic
hoods or fenders may be flammable and/or
explosive. Repair such components in a well
ventilated area away from open flames or sparks.
Use suitable Personal Protection Equipment (PPE).
Inspect all lines and hoses for wear or deterioration.
Replace damaged lines and hoses. The lines and the
hoses should have adequate support and secure
clamps. Tighten all connections to the recommended
torque. Damage to the protective cover or insulation
may provide fuel for fires.
Store fuels and lubricants in properly marked
containers away from unauthorized personnel. Store
oily rags and flammable materials in protective
containers. Do not smoke in areas that are used for
storing flammable materials.
Always perform a Walk-Around Inspection, which
may help you identify a fire hazard. Do not operate a
machine when a fire hazard exists. Contact your Cat
dealer for service.
Understand the use of the primary exit and
alternative exit on the machine. Refer to Operation
and Maintenance Manual, “Alternative Exit”.
Do not operate a machine with a fluid leak. Repair
leaks and clean up fluids before resuming machine
operation. Fluids that are leaking or spilled onto hot
surfaces or onto electrical components can cause a
fire. A fire may cause personal injury or death.
Remove flammable material such as leaves, twigs,
papers, trash, and so on. These items may
accumulate in the engine compartment or around
other hot areas and hot parts on the machine.
Keep the access doors to major machine
compartments closed and access doors in working
condition in order to permit the use of fire
suppression equipment, in case a fire should occur.
Clean all accumulations of flammable materials such
as fuel, oil, and debris from the machine.
Do not operate the machine near any flame.
Keep shields in place. Exhaust shields (if equipped)
protect hot exhaust components from oil spray or fuel
spray in case of a break in a line, in a hose, or in a
seal. Exhaust shields must be installed correctly.
Illustration 44 g03839130
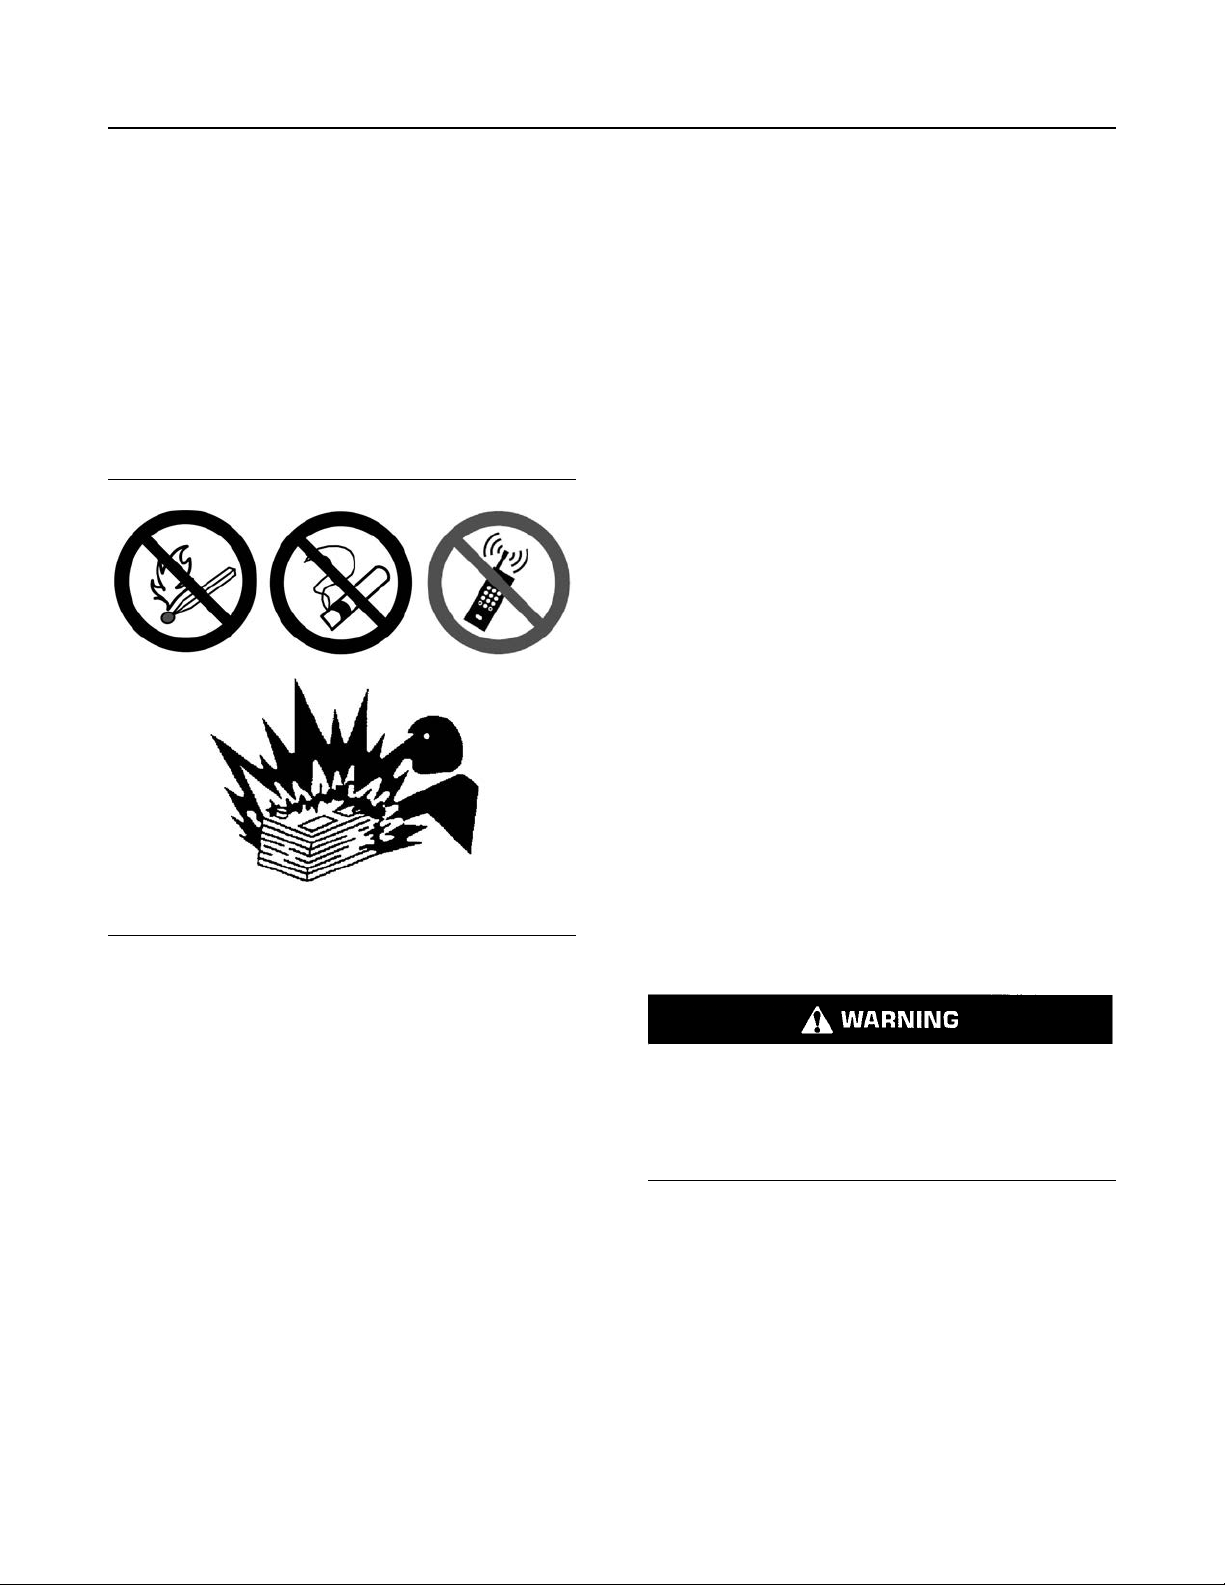
Use caution when you are fueling a machine. Do not
smoke while you are fueling a machine. Do not fuel a
machine near open flames or sparks. Do not use cell
phones or other electronic devices while you are
refueling. Always stop the engine before fueling. Fill
the fuel tank outdoors. Properly clean areas of
spillage.
Page 30
30
Safety Section
Fire Prevention and Explosion Prevention
SEBU9422-02
Avoid static electricity risk when fueling. Ultra low
sulfur diesel (ULSD) poses a greater static ignition
hazard than earlier diesel formulations with a higher
sulfur content. Avoid death or serious injury from fire
or explosion. Consult with your fuel or fuel system
supplier to ensure that the delivery system is in
compliance with fueling standards for proper
grounding and bonding practices.
Never store flammable fluids in the operator
compartment of the machine.
Battery and Battery Cables
Daily inspect battery cables that are in areas that are
visible. Inspect cables, clips, straps, and other
restraints for damage. Replace any damaged parts.
Check for signs of the following, which can occur
over time due to use and environmental factors:
• Fraying
• Abrasion
• Cracking
• Discoloration
• Cuts on the insulation of the cable
• Fouling
• Corroded terminals, damaged terminals, and
loose terminals
Replace damaged battery cable(s) and replace any
related parts. Eliminate any fouling, which may have
caused insulation failure or related component
damage or wear. Ensure that all components are
reinstalled correctly.
An exposed wire on the battery cable may cause a
short to ground if the exposed area comes into
contact with a grounded surface. A battery cable
short produces heat from the battery current, which
may be a fire hazard.
Illustration 45 g03839133
Caterpillar recommends the following in order to
minimize the risk of fire or an explosion related to the
battery.
Do not operate a machine if battery cables or related
parts show signs of wear or damage. Contact your
Cat dealer for service.
Follow safe procedures for engine starting with jumpstart cables. Improper jumper cable connections can
cause an explosion that may result in injury. Refer to
Operation and Maintenance Manual, “Engine Starting
with Jump Start Cables” for specific instructions.
Do not charge a frozen battery. This may cause an
explosion.
Gases from a battery can explode. Keep any open
flames or sparks away from the top of a battery. Do
not smoke in battery charging areas. Do not use cell
phones or other electronic devices in battery
charging areas.
Never check the battery charge by placing a metal
object across the terminal posts. Use a voltmeter in
order to check the battery charge.
An exposed wire on the ground cable between the
battery and the disconnect switch may cause the
disconnect switch to be bypassed if the exposed area
comes into contact with a grounded surface. This
may result in an unsafe condition for servicing the
machine. Repair components or replace components
before servicing the machine.
Fire on a machine can result in personal injury or
death. Exposed battery cables that come into
contact with a grounded connection can result in
fires. Replace cables and related parts that show
signs of wear or damage. Contact your Cat
dealer.
Wiring
Check electrical wires daily. If any of the following
conditions exist, replace parts before you operate the
machine.
• Fraying
• Signs of abrasion or wear
• Cracking
• Discoloration
Page 31
SEBU9422-02
31
Safety Section
Tire Information
• Cuts on insulation
• Other damage
Make sure that all clamps, guards, clips, and straps
are reinstalled correctly. This will help to prevent
vibration, rubbing against other parts, and excessive
heat during machine operation.
Attaching electrical wiring to hoses and tubes that
contain flammable fluids or combustible fluids should
be avoided.
Consult your Cat dealer for repair or for replacement
parts.
Keep wiring and electrical connections free of debris.
Lines, Tubes, and Hoses
Do not bend high-pressure lines. Do not strike highpressure lines. Do not install any lines that are bent
or damaged. Use the appropriate backup wrenches
in order to tighten all connections to the
recommended torque.
• Outer covers have exposed embedded armoring.
• End fittings are displaced.
Make sure that all clamps, guards, and heat shields
are installed correctly. During machine operation, this
will help to prevent vibration, rubbing against other
parts, excessive heat, and failure of lines, tubes, and
hoses.
Do not operate a machine when a fire hazard exists.
Repair any lines that are corroded, loose, or
damaged. Leaks may provide fuel for fires. Consult
your Cat dealer for repair or for replacement parts.
Use genuine Cat parts or the equivalent, for
capabilities of both the pressure limit and
temperature limit.
Ether
Ether (if equipped) is commonly used in cold-weather
applications. Ether is flammable and poisonous.
Only use approved Ether canisters for the Ether
dispensing system fitted to your machine, do not
spray Ether manually into an engine, follow the
correct cold engine starting procedures. Refer to the
section in the Operation and Maintenance Manual
with the label “Engine Starting” .
Illustration 46 g00687600
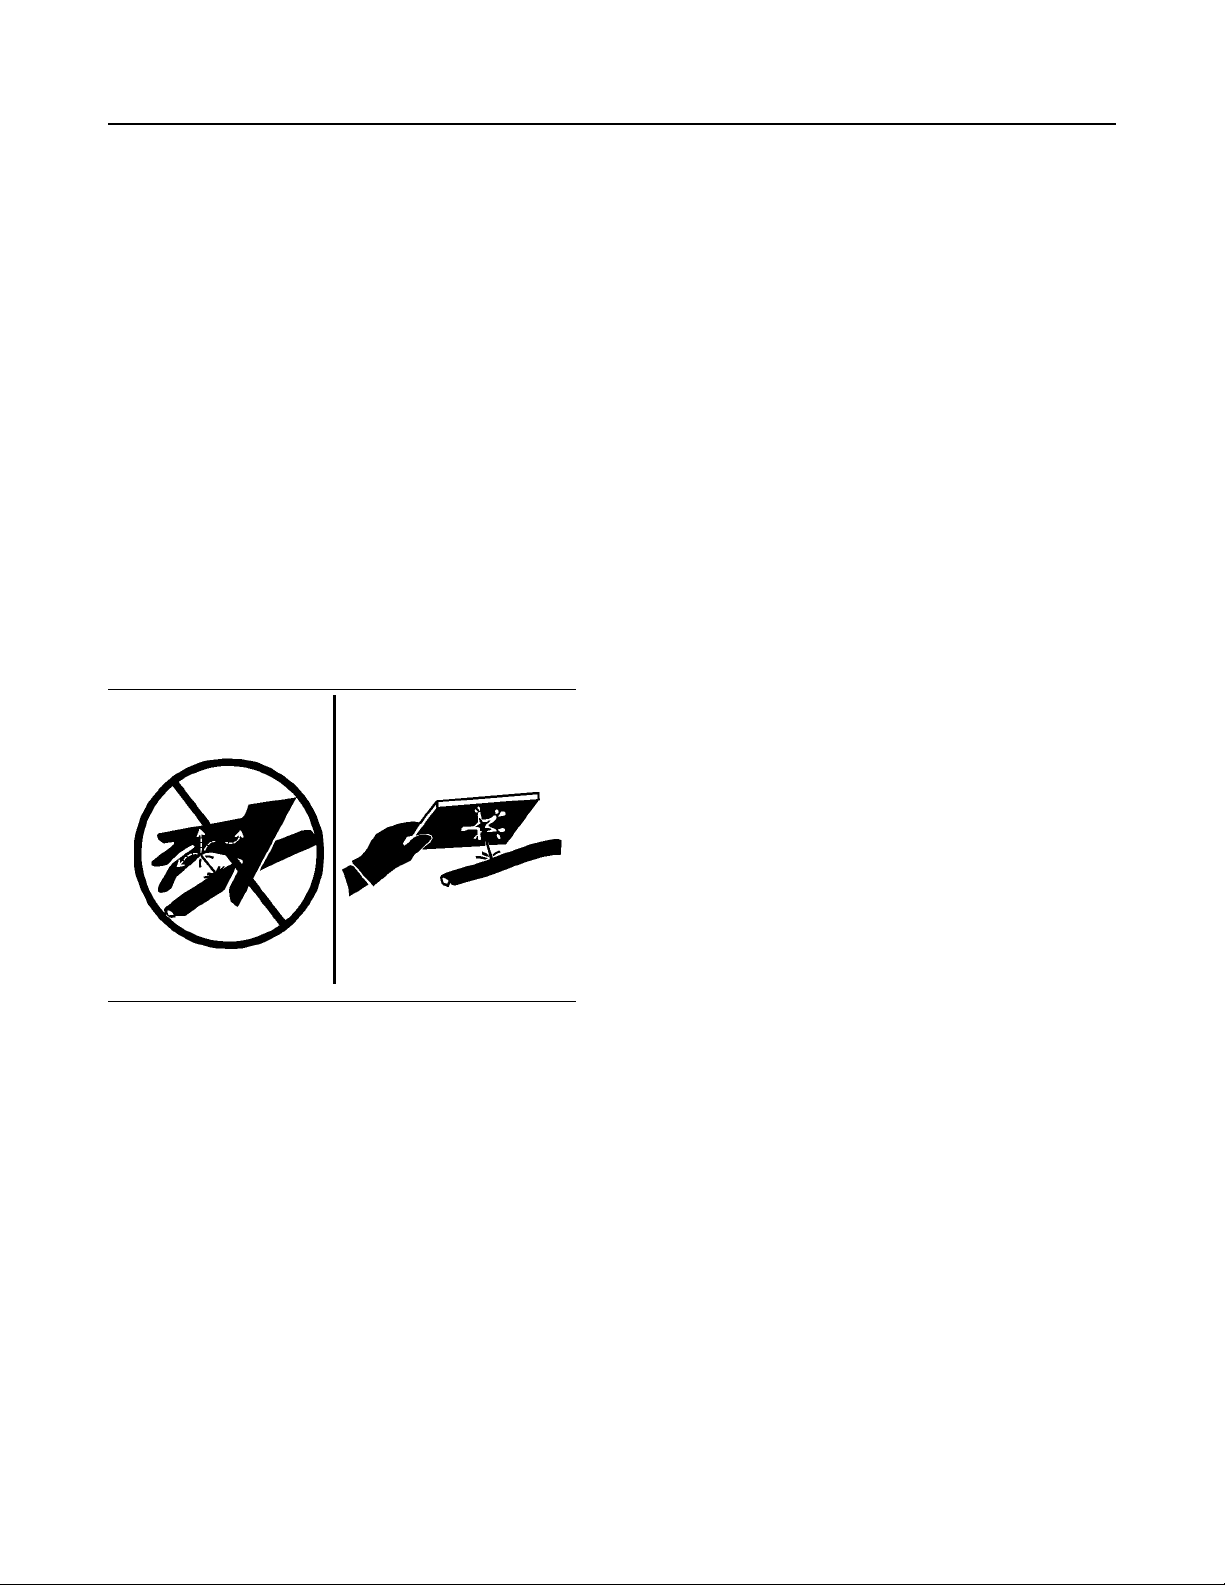
Check lines, tubes, and hoses carefully. Wear
Personal Protection Equipment (PPE) in order to
check for leaks. Always use a board or cardboard
when you check for a leak. Leaking fluid that is under
pressure can penetrate body tissue. Fluid penetration
can cause serious injury and possible death. A pin
hole leak can cause severe injury. If fluid is injected
into your skin, you must get treatment immediately.
Seek treatment from a doctor that is familiar with this
type of injury.
Replace the affected parts if any of the following
conditions are present:
• End fittings are damaged or leaking.
• Outer coverings are chafed or cut.
• Wires are exposed.
• Outer coverings are swelling or ballooning.
• Flexible parts of the hoses are kinked.
Use ether in ventilated areas. Do not smoke while
you are replacing an ether cylinder.
Do not store ether cylinders in living areas or in the
operator compartment of a machine. Do not store
ether cylinders in direct sunlight or in temperatures
above 49° C (120.2° F). Keep ether cylinders away
from open flames or sparks.
Dispose of used ether cylinders properly. Do not
puncture an ether cylinder. Keep ether cylinders
away from unauthorized personnel.
Fire Extinguisher
As an additional safety measure, keep a fire
extinguisher on the machine.
Be familiar with the operation of the fire extinguisher.
Inspect the fire extinguisher and service the fire
extinguisher regularly. Follow the recommendations
on the instruction plate.
Consider installation of an aftermarket Fire
Suppression System, if the application and working
conditions warrant the installation.
i06164462
Tire Information
SMCS Code: 7000
S/N: KP51–Up
Page 32
32
Safety Section
Before Starting Engine
SEBU9422-02
Explosions of air inflated tires have resulted from
heat-induced gas combustion inside the tires.
Explosions can be caused by heat that is generated
by welding, by heating rim components, by external
fire, or by excessive use of brakes.
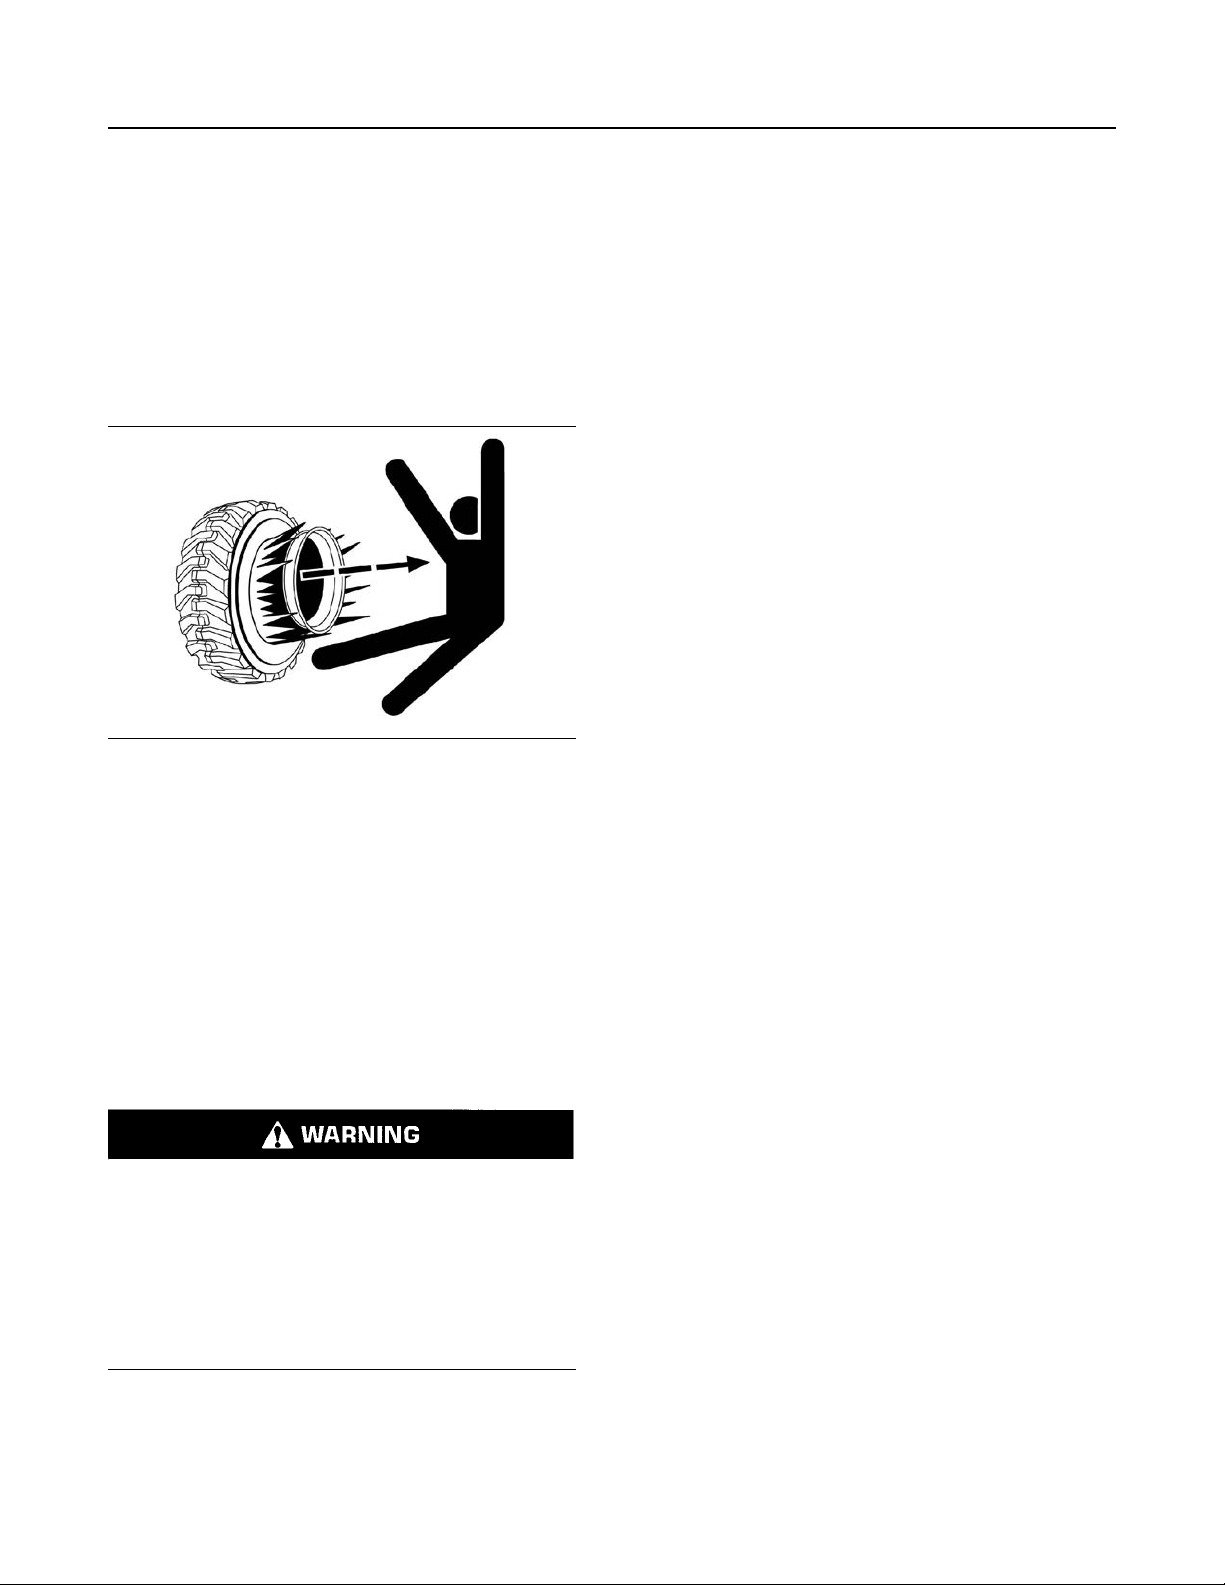
A tire explosion is much more violent than a blowout.
The explosion can propel the tire, the rim
components, and the axle components from the
machine. Stay out of the trajectory path. Both the
force of the explosion and the flying debris can cause
property damage, personal injury, or death.
Illustration 47 g02166933
Typical example of tire is shown
Do not approach a hot or an apparently damaged
tire.
Caterpillar recommends against using water or
calcium as a ballast for the tires except in machines
designed for this additional mass. For those
applicable machines, the maintenance section will
contain instructions on the correct tire inflation and
filling procedures. Ballast, such as fluid in the tires,
increases overall machine weight and may affect
braking, steering, power train components, or the
certification of the protective structure such as the
ROPS. The use of tire/rim rust preventatives or other
liquid additives is not required.
Proper nitrogen inflation equipment, and training
in using the equipment, are necessary to avoid
over inflation. A tire blowout or rim failure can re-
sult from improper or misused equipment and
personal injury or death can occur.
A tire blowout and/or rim failure can occur if the
inflation equipment is not used correctly, due to
the fact that a fully charged nitrogen cylinder's
pressure is approximately 15000 kPa (2200 psi).
Dry nitrogen gas is recommended for inflation of
tires. If the tires were originally inflated with air,
nitrogen is still preferred for adjusting the pressure.
Nitrogen mixes properly with air.
Nitrogen inflated tires reduce the potential of a tire
explosion because nitrogen does not aid combustion.
Nitrogen helps to prevent oxidation of the rubber,
deterioration of rubber, and corrosion of rim
components.
To avoid overinflation, proper nitrogen inflation
equipment and training in the usage of the equipment
are necessary. A tire blowout or a rim failure can
result from improper equipment or from misused
equipment.
When you inflate a tire, stand behind the tread and
use a self-attaching chuck.
Servicing tires and rims can be dangerous. Only
trained personnel that use proper tools and proper
procedures should perform this maintenance. If
correct procedures are not used for servicing tires
and rims, the assemblies could burst with explosive
force. This explosive force can cause serious
personal injury or death. Carefully obey the specific
instructions from your tire dealer.
i05069109
Before Starting Engine
SMCS Code: 1000; 7000
S/N: KP51–Up
Start the engine only from the operator compartment.
Never short across the starter terminals or across the
batteries. Shorting could bypass the engine neutral
start system. Shorting could also damage the
electrical system.
Inspect the condition of the seat belt and the
condition of mounting hardware. Replace any
damaged parts or worn parts. Regardless of
appearance, replace the seat belt after 3 years of
use. Do not use an extension for a seat belt on a
retractable seat belt.
Adjust the seat so that full pedal travel can be
achieved. Make sure that the operator's back is
against the back of the seat. Adjust the seat only
when the controls are de-energized.
Make sure that the machine is equipped with a
lighting system that is adequate for the job
conditions. Ensure that all lights are in proper
working condition.
Make sure that there are no personnel in the area
before you start the engine. Make sure that there are
no personnel in the area before you move the
machine. Make sure that there are no personnel on
the machine, underneath the machine, or around the
machine.
Check for worn wires or for frayed wires. Check for
loose connections in the electrical system.
Page 33
SEBU9422-02
33
Safety Section
Engine Starting
i05069131
Engine Starting
SMCS Code: 1000; 7000
S/N: KP51–Up
Illustration 48 g00104545
Perform the walk-around inspection before starting
the engine.
If a warning tag is attached to the start switch or to
the controls, do not start the engine. Also, do not
move any controls.
Adjust the rear view mirrors (if equipped) for the best
vision of the area near the machine.
Ensure that the horn, the alarm (if equipped), and all
other warning devices are working properly.
Fasten the seat belt securely.
i05278107
Operation
SMCS Code: 7000
S/N: KP51–Up
Know the maximum height and the maximum
reach of your machine. Serious injury or death by
electrocution can occur if the machine or the
work tools are not kept a safe distance from electrical power lines. Keep a distance of at least 3 m
(10 feet) .
For safety, one of the following may require a greater
distance:
• Local codes
• State codes
Ensure that all hydraulic controls are in the HOLD
position before you start the engine.
Make sure that the hydraulic activation control lever
is in the LOCKED position.
Ensure that the cab door is shut.
Diesel engine exhaust contains products of
combustion which can be harmful to your health.
Always operate the engine in a ventilated area. If you
are in an enclosed area, vent the exhaust to the
outside.
i05069191
Before Operation
SMCS Code: 7000
S/N: KP51–Up
Clear all personnel from on the machine and from the
area around the machine.
Clear all obstacles from the path of the machine.
Beware of hazards such as wires, ditches, ravines,
cetera.
Make sure that all windows are clean. Secure the
door in the shut position. Secure the windows in the
open position or in the shut position.
• Requirements of the job site
Machine Operating Temperature
Range
The standard machine configuration is intended for
use within an ambient temperature range of −40 °C
(−40 °F) to 50 °C (122 °F). Special configurations for
different ambient temperatures may be available.
Consult your CAT dealer for additional information on
special configurations of your machine.
Machine Operation
Only operate the machine while you are sitting in a
seat. Only operate the controls while the engine is
running.
While you operate the machine slowly in an open
area, check for proper operation of all controls and all
protective devices.
Before you move the machine, make sure that no
one will be endangered.
Do not allow riders on the machine.
Note any needed repairs during machine operation.
Report any needed repairs.
Do not operate close to the edge of a cliff, an
excavation, or an overhang.
Page 34
34
Safety Section
Operation
SEBU9422-02
Avoid any conditions that can lead to tipping the
machine. The machine can tip when you work on
hills, on banks and on slopes.
Maintain control of the machine. Do not overload the
machine beyond the machine capacity.
Make sure that the hitches and the towing devices
are adequate. Only connect trailing equipment to a
drawbar or to a hitch.
Never straddle a wire cable. Never allow other
personnel to straddle a wire cable.
Know the maximum dimensions of your machine.
i06952586
Operation
SMCS Code: 7000
Know the maximum height and the maximum
reach of your machine. Serious injury or death by
electrocution can occur if the machine or the
work tools are not kept a safe distance from electrical power lines. Keep a distance of at least 3 m
(10 feet) .
Do not allow riders on the machine.
Note any needed repairs during machine operation.
Report any needed repairs.
Do not operate close to the edge of a cliff, an
excavation, or an overhang.
Avoid any conditions that can lead to tipping the
machine. The machine can tip when you work on
hills, on banks and on slopes.
Maintain control of the machine. Do not overload the
machine beyond the machine capacity.
Make sure that the hitches and the towing devices
are adequate. Only connect trailing equipment to a
drawbar or to a hitch.
Never straddle a wire cable. Never allow other
personnel to straddle a wire cable.
Know the maximum dimensions of your machine.
i06843037
Engine Stopping
SMCS Code: 1000; 7000
S/N: KP51–Up
For safety, one of the following may require a greater
distance:
• Local codes
• State codes
• Requirements of the job site
Machine Operating Temperature
Range
The standard machine configuration is intended for
use within an ambient temperature range of −40 °C
(−40 °F) to 50 °C (122 °F). Special configurations for
different ambient temperatures may be available.
Consult your Prentice dealer for additional
information on special configurations of your
machine.
Machine Operation
Only operate the machine while you are sitting in a
seat. Only operate the controls while the engine is
running.
While you operate the machine slowly in an open
area, check for proper operation of all controls and all
protective devices.
Stopping the engine immediately after it has been
NOTICE
working under load can result in overheating and accelerated wear of engine components.
Refer to the following procedure to allow the engine
to cool and to prevent excessive temperatures in the
turbocharger housing, which could cause oil coking
problems.
1. Stop the machine and run the engine at low idle for
5 minutes.
2. Turn the engine start switch to the OFF position
and remove the engine start switch key.
NOTICE
Never turn the battery disconnect switch to the OFF
position while the engine is running. Serious damage
to the electrical system may result.
Before you move the machine, make sure that no
one will be endangered.
Page 35

SEBU9422-02
35
Safety Section
High Pressure Fuel Lines
Illustration 49 g06138431
3. There is an emergency kill switch(1) located in the
platform of the knuckleboom loader. Activate this
switch in emergency situations only.
i06858015
High Pressure Fuel Lines
SMCS Code: 1000; 1252; 1274; 7000
S/N: KP51–Up
Contact with high pressure fuel may cause fluid
penetration and burn hazards. High pressure fuel
spray may cause a fire hazard. Failure to follow
these inspection, maintenance and service instructions may cause personal injury or death.
Page 36
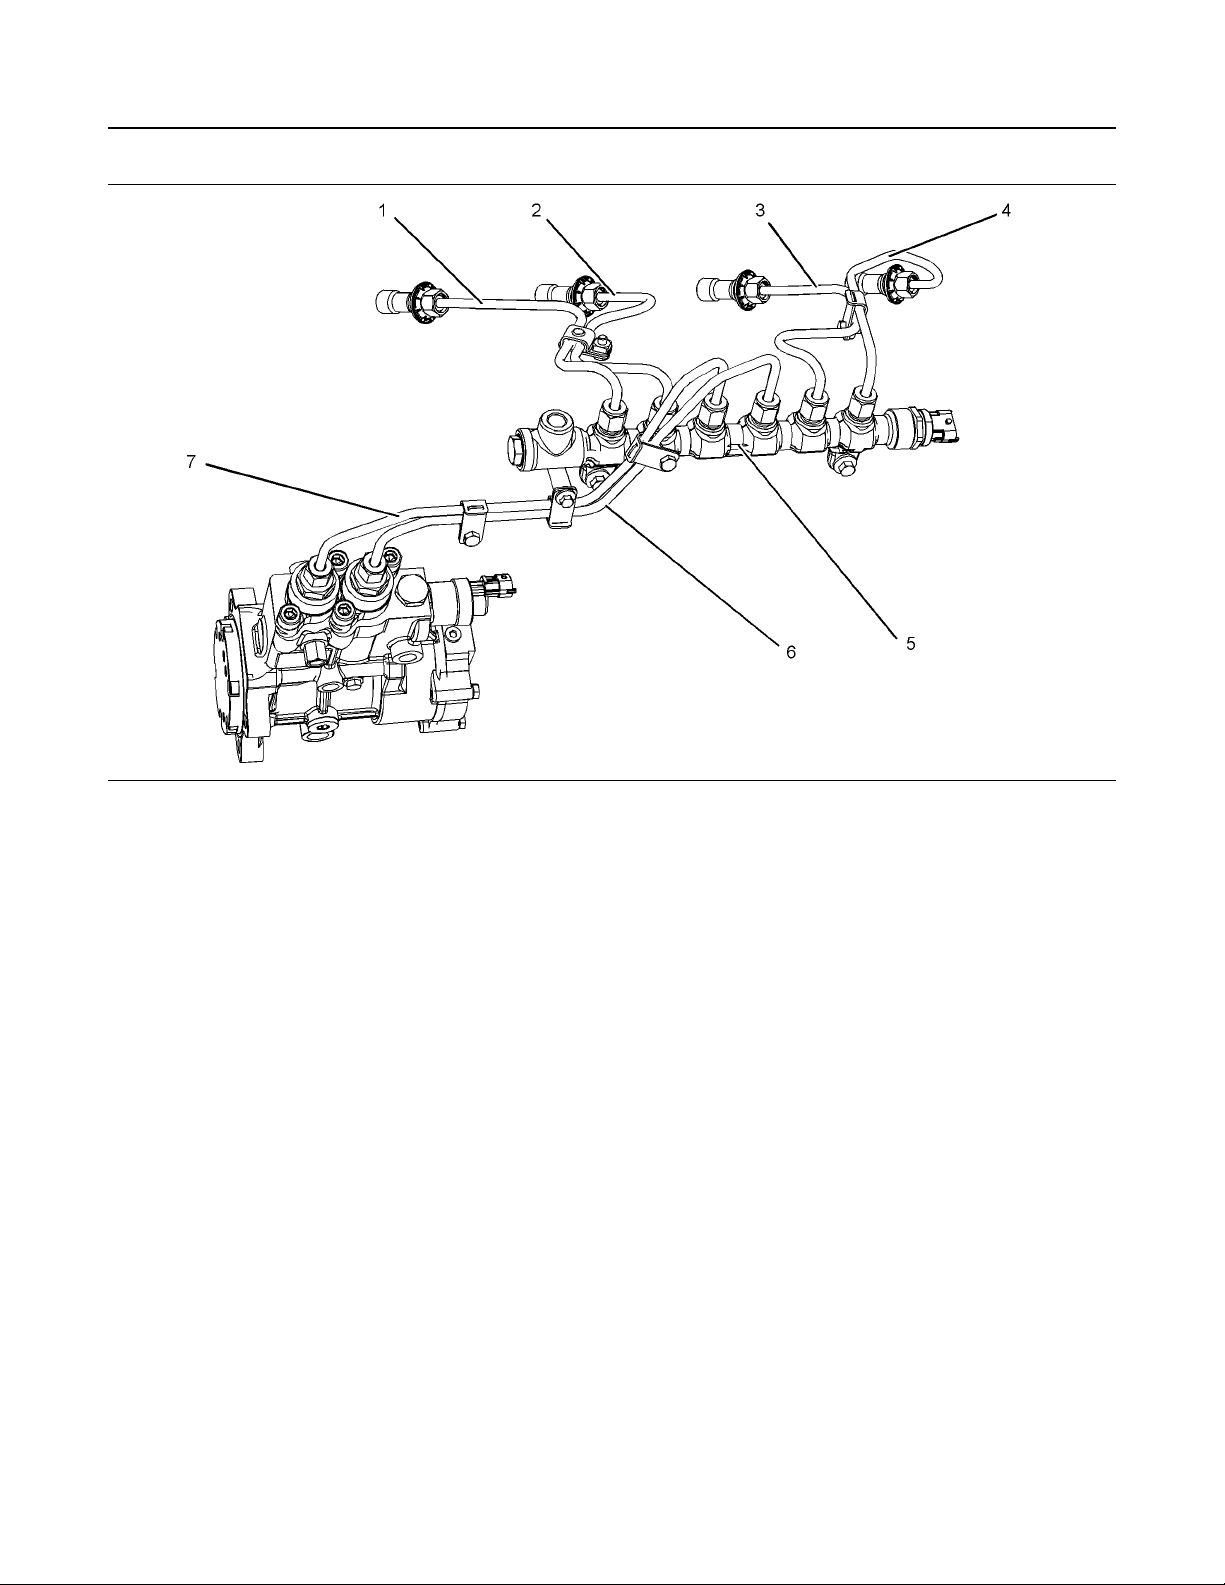
36
Safety Section
High Pressure Fuel Lines
SEBU9422-02
Illustration 50 g03452057
(1) High-pressure line
(2) High-pressure line
(3) High-pressure line
The high-pressure fuel lines are the fuel lines that are
between the high-pressure fuel pump and the highpressure fuel manifold and the fuel lines that are
(4) High-pressure line
(5) High-pressure fuel manifold (rail)
(6) High-pressure supply line
Do not loosen the high-pressure fuel lines to remove
air from the fuel system. This procedure is not
required.
(7) High-pressure supply line
between the fuel manifold and cylinder head. These
fuel lines are different from fuel lines on other fuel
systems.
Visually inspect the high-pressure fuel lines before
the engine is started. This inspection should be each
day.
This difference is because of the following items:
If you inspect the engine in operation, always use the
• The high-pressure fuel lines are constantly
charged with high pressure.
proper inspection procedure to avoid a fluid
penetration hazard. Refer to Operation and
Maintenance Manual, “General hazard Information”.
• The internal pressures of the high-pressure fuel
lines are higher than other types of fuel system.
• Inspect the high-pressure fuel lines for damage,
deformation, a nick, a cut, a crease, or a dent.
• The high-pressure fuel lines are formed to shape
and then strengthened by a special process.
• Do not operate the engine with a fuel leak. If there
is a leak, do not tighten the connection to stop the
Do not step on the high-pressure fuel lines. Do not
deflect the high-pressure fuel lines. Do not bend or
strike the high-pressure fuel lines. Deformation or
damage of the high-pressure fuel lines may cause a
point of weakness and potential failure.
Do not check the high-pressure fuel lines with the
engine or the starting motor in operation. After the
engine has stopped, allow 90 seconds to pass to
leak. The connection must only be tightened to the
recommended torque. Refer to Disassembly and
Assembly, “Fuel injection lines - Remove and Fuel
injection lines - Install”.
• If the high-pressure fuel lines are torqued correctly
and the high-pressure fuel lines are leaking, the
high-pressure fuel lines must be replaced.
allow the pressure to be purged before any service or
repair is performed on the engine fuel lines.
Page 37

SEBU9422-02
37
Safety Section
Work Tools
• Ensure that all clips on the high-pressure fuel lines
are in place. Do not operate the engine with clips
that are damaged, missing, or loose.
• Do not attach any other item to the high-pressure
fuel lines.
• Loosened high-pressure fuel lines must be
replaced. Also removed high-pressure fuel lines
must be replaced. Refer to Disassembly and
assembly manual, “Fuel Injection Lines - Install”.
NOTICE
The low-pressure fuel system can be pressurized for
a time period after the engine has stopped operating.
The operating pressure of the low-pressure fuel system can be 500 kPa (73 psi). The secondary fuel filters should be drained before any maintenance of the
low-pressure fuel system is carried out.
i06952588
Work Tools
SMCS Code: 6700
Only use work tools that are recommended by
Prentice for use on Prentice machines.
Use of work tools, including buckets, which are
outside of Prentice recommendations or
specifications for weight, dimensions, flows,
pressures, and so on. may result in less-than-optimal
vehicle performance, including but not limited to
reductions in production, stability, reliability, and
component durability. Prentice recommends
appropriate work tools for Prentice machines to
maximize the valuePrentice customers receive
fromPrentice products. Prentice understands that
special circumstances may lead a customer to use
tools outside of Prentice specifications. In these
cases, customers must be aware that such choices
can reduce vehicle performance. Affecting the
customers ability to claim warranty in the event of
what a customer may perceive as a premature
failure.
Work tools and work tool control systems, that are
compatible with your Prentice machine, are required
for safe machine operation and/or reliable machine
operation. If you are in doubt about the compatibility
of a particular work tool with your machine, consult
your Prentice dealer.
Make sure that all necessary guarding is in place on
the host machine and on the work tool.
Always wear protective glasses. Always wear the
protective equipment that is recommended in the
operation manual for the work tool. Wear any other
protective equipment that is required for the
operating environment.
To prevent personnel from being struck by flying
objects, ensure that all personnel are out of the work
area.
While you are performing any maintenance, any
testing, or any adjustments to the work tool stay clear
of the following areas: cutting edges, pinching
surfaces, and crushing surfaces.
Never use the work tool for a work platform.
i02273818
Lifting Objects
SMCS Code: 7000
S/N: KP51–Up
There may be some local regulations and/or
government regulations that govern the use of
machines which lift heavy objects. Obey those
regulations.
If this machine is used to lift objects within an area
that is controlled by the European Directive “89/392/
EEC”, the machine must be equipped with a boom
lowering control valve and an overload warning
device.
i06919099
Parking
SMCS Code: 7000
1. Park the carrier on a level surface. If you must park
the carrier on a downgrade, block the tires or
chock the tracks of the carrier.
2. Lower all work tools to the ground. Make sure that
all work tools are in the recommended servicing
position before servicing the machine.
3. Move the hydraulic lockout control to the LOCKED
position. This pressure should decrease in a short
time (approximately 1 minute). While the hydraulic
system maintains a charge, the machine controls
remain functional.
Keep all windows and doors closed on the host
machine. A polycarbonate shield must be used when
the host machine is not equipped with windows and
when a work tool could throw debris.
Do not exceed the maximum operating weight that is
listed on the machine certification.
Page 38
38
Safety Section
Equipment Lowering with Engine Stopped
Deactivation of the hydraulic controls does not
prevent the blade, boom swing, or auxiliary circuit functions from moving under gravity or other
external forces. Gravity or other external forces
can move the blade, boom swing, or auxiliary circuit functions suddenly if a hydraulic control lever is moved.
Personal injury or death may occur from sudden
machine movement.
4. Turn the engine start switch to the OFF position
and remove the key.
5. Turn the battery disconnect switch to the OFF
position. If the machine will not be operated for an
extended time period, remove the key to avoid
battery discharge that may be caused by a battery
short circuit, by the current draw via certain
components, or by vandalism.
SEBU9422-02
The operator sound exposure Leq (equivalent sound
pressure level) that is measured according to the
work cycle procedures specified in “ISO 5131” is __
dB(A). Measurement is for the cab that is offered by
Cat, when the cab is properly installed, maintained
and tested with the doors and windows closed.
The operator sound pressure level measured
according to the procedures specified in “ISO 5131”
is __ dB(A). During this test, the machine was in high
idle and the operator fan was in the midrange
position. Measurement is for the cab that is offered
by Cat , when properly installed, maintained and
tested with the doors and windows closed and with
the machine in middle gear range and moving.
The exterior sound pressure level for the standard
machine measured at a distance of 15 m (49.2 ft)
according to the test procedures specified in “ISO
6393”, with the machine in middle gear range and
moving, is __ dB(A).
i06843541
Note: Do not conduct any service procedures until
the DEF purge indicator lamp in not illuminated. The
indicator lamp may remain illuminated for several
minutes even thought eh battery disconnect switch is
OFF and the engine start switch is OFF. When the
indicator lamp is on the DEF system is still powered.
i01329161
Equipment Lowering with
Engine Stopped
SMCS Code: 7000
S/N: KP51–Up
Before lowering any equipment with the engine
stopped, clear the area around the equipment of all
personnel. The procedure to use will vary with the
type of equipment to be lowered. Keep in mind most
systems use a high pressure fluid or air to raise or
lower equipment. The procedure will cause high
pressure air, hydraulic, or some other media to be
released in order to lower the equipment. Wear
appropriate personal protective equipment and follow
the established procedure in the Operation and
Maintenance Manual, “Equipment Lowering with
Engine Stopped” in the Operation Section of the
manual.
Accumulator Pressure Release
SMCS Code: 5077; 5077-553-ZJ
Delimber Blade Safety
Charged accumulator can close delimber blades
resulting in sever personal injury or death. DO
NOT enter the delimber area without closing delimber blades, shutting engine down, discharging
accumulator and blocking out tilting delimber
base frame.
Personal injury or death can result from sudden
machine movement.
Sudden movement of the machine can cause injury or death to persons on or near the machine.
To prevent injury or death, make sure that the
area around the machine is clear of all personnel
and obstructions before you test the machine.
Sound Information and
Vibration Information
SMCS Code: 7000
S/N: KP51–Up
i04887388
Page 39
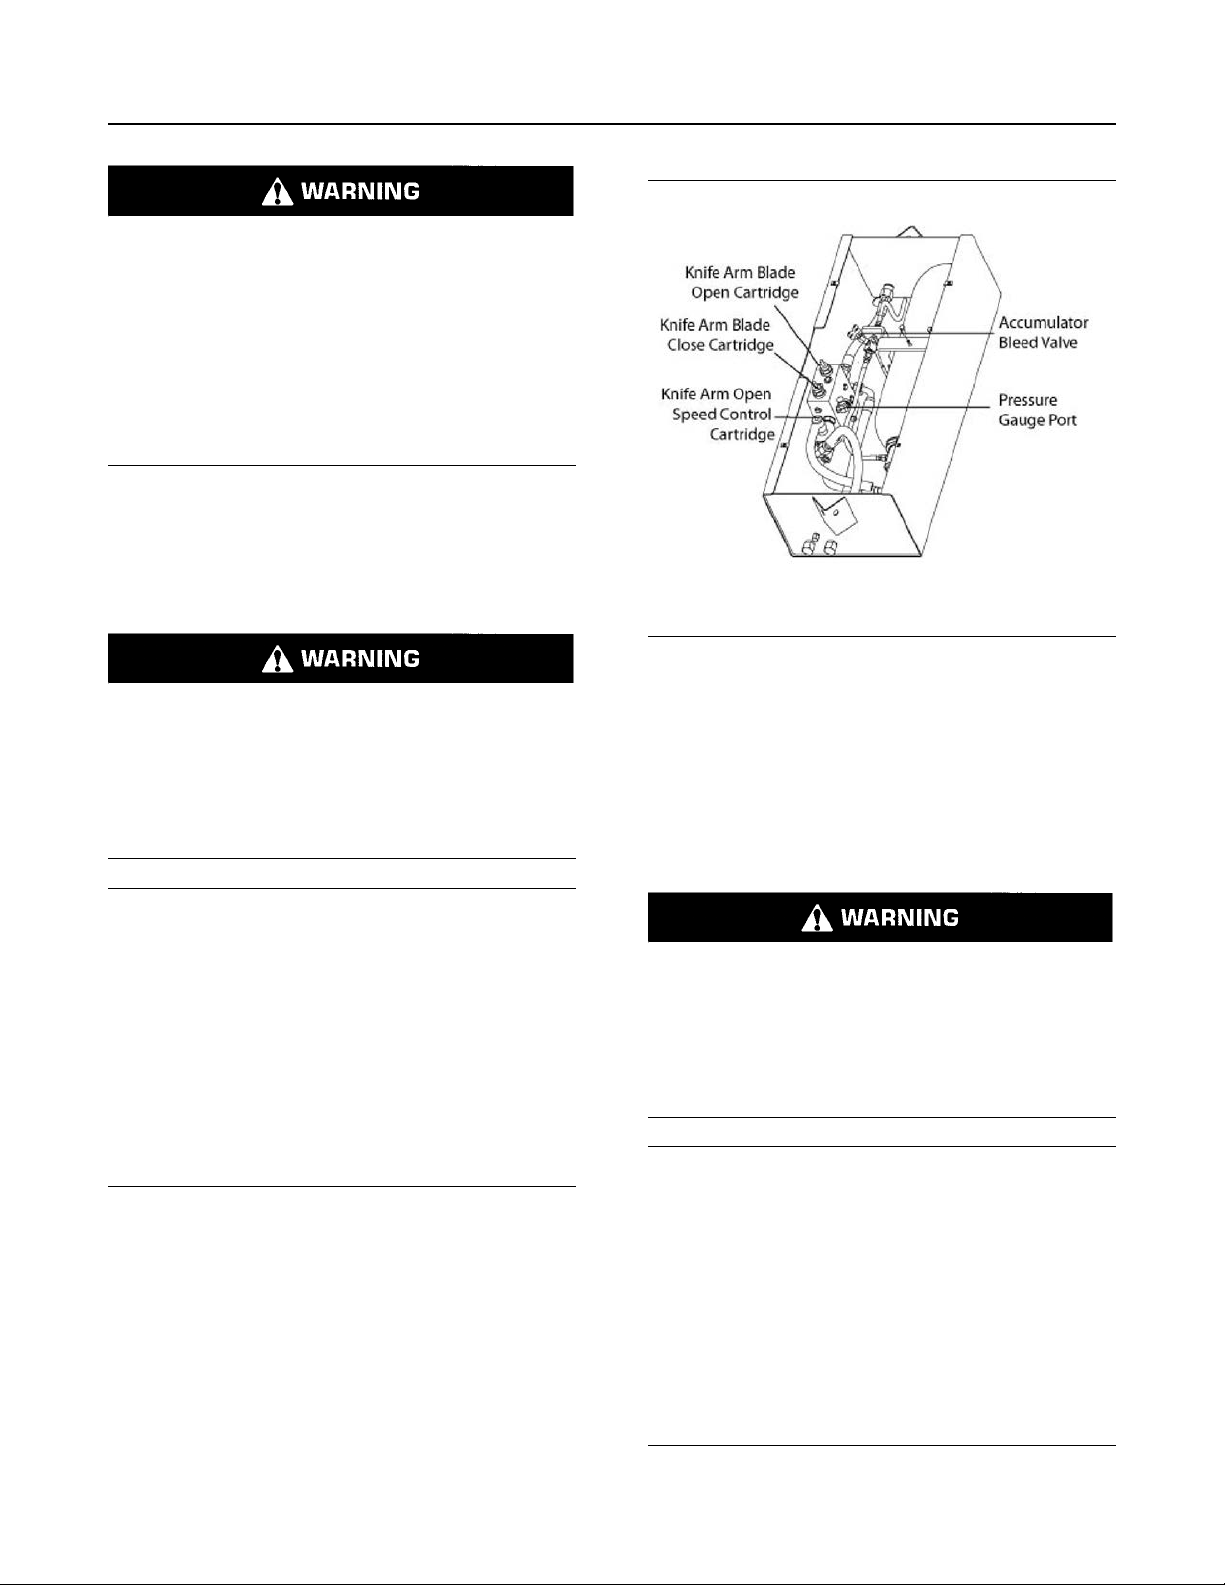
SEBU9422-02
Personal injury can result from hydraulic oil pressure and hot oil.
Hydraulic oil pressure can remain in the hydraulic
system after the engine has been stopped. Serious injury can be caused if this pressure is not
released before any service is done on the hydraulic system.
Make sure all of the attachments have been lowered, oil is cool before removing any components
or lines.
The accumulator cylinder contains a bladder.
Accumulator pressure is set by pumping nitrogen gas
into the bladder through the nitrogen charge and
check port.
Discharging the Accumulator
39
Safety Section
Accumulator Pressure Release
Escaping fluid under pressure, even a pinhole
size leak, can penetrate body tissue, causing serious injury, and possible death. If fluid is injected
into your skin, it must be treated immediately by
a doctor familiar with this type of injury.
Always use a board or cardboard when checking
for a leak.
NOTICE
Care must be taken to ensure that fluids are contained during performance of inspection, mainte-
nance, testing, adjusting, and repair of the product.
Be prepared to collect the fluid with suitable containers before opening any compartment or disassembling any component containing fluids.
Refer to Special Publication, NENG2500, “Dealer
Service Tool Catalog” for tools and supplies suitable
to collect and contain fluids on Cat
®
products.
Dispose of all fluids according to local regulations
and mandates.
Delimbers mounted on a loader or trailer have
hydraulic oil pressure that must be bled from the
accumulator before performing any maintenance or
disconnecting any hydraulic lines.
Verify that machine engine is OFF.
Open purge valve in the accumulator box by turning
the purge valve handle counterclockwise.
Illustration 51 g03321206
Give the accumulator 45 seconds to purge off
pressure.
Note: In a quiet area, the purge off will be audible.
The accumulator purge valve must be closed for
operation.
Discharging the Pilot Accumulator
Escaping fluid under pressure, even a pinhole
size leak, can penetrate body tissue, causing serious injury, and possible death. If fluid is injected
into your skin, it must be treated immediately by
a doctor familiar with this type of injury.
Always use a board or cardboard when checking
for a leak.
Care must be taken to ensure that fluids are contained during performance of inspection, mainte-
nance, testing, adjusting, and repair of the product.
Be prepared to collect the fluid with suitable containers before opening any compartment or disassembling any component containing fluids.
Refer to Special Publication, NENG2500, “Dealer
Service Tool Catalog” for tools and supplies suitable
to collect and contain fluids on Cat
NOTICE
®
products.
Dispose of all fluids according to local regulations
and mandates.
Discharge pilot hydraulic circuit by turning the engine
OFF.
Page 40

40
Safety Section
Operator Station
SEBU9422-02
Lower the left-hand arm rest to enable the hydraulic
circuit.
Turn the key switch to the on position.
Verify that engine is OFF.
Verify that the pilot enable button is enabled.
Cycle both joysticks in all directions at least 4 times
each.
i03634321
Operator Station
SMCS Code: 7000
S/N: KP51–Up
Any modifications to the inside of the operator station
should not project into the operator space or into the
space for the companion seat (if equipped). The
addition of a radio, fire extinguisher, and other
equipment must be installed so that the defined
operator space and the space for the companion seat
(if equipped) is maintained. Any item that is brought
into the cab should not project into the defined
operator space or the space for the companion seat
(if equipped). A lunch box or other loose items must
be secured. Objects must not pose an impact hazard
in rough terrain or in the event of a rollover.
Other Guards (If Equipped)
Protection from flying objects and/or falling objects is
required for special applications. Logging
applications and demolition applications are two
examples that require special protection.
A front guard should be installed when a work tool
that creates flying objects is used. Mesh front guards
that are approved by Cat or polycarbonate front
guards that are approved by Cat are available for
machines with a cab. On machines that are equipped
with cabs, the window should also be closed. Safety
glasses are recommended when flying hazards exist
for machines with cabs and machines with open
canopies.
If the work material extends above the cab, top
guards and front guards should be used. Typical
examples of this type of application are listed below:
• Demolition applications
• Rock quarries
• Forestry products
Additional guards may be required for specific
applications or work tools. The Operation and
Maintenance Manual for your machine or your work
tool will provide specific requirements for the guards.
Consult your Cat dealer for additional information.
i05142050
Guards
(Operator Protection)
SMCS Code: 7000
S/N: KP51–Up
S/N: KP71–Up
S/N: KBF1–Up
There are different types of guards that are used to
protect the operator. The machine and the machine
application determines the type of guard that should
be used.
A daily inspection of the guards is required in order to
check for structures that are bent, cracked, or loose.
Never operate a machine with a damaged structure.
The operator becomes exposed to a hazardous
situation if the machine is used improperly or if poor
operating techniques are used. This situation can
occur even though a machine is equipped with an
appropriate protective guard. Follow the established
operating procedures that are recommended for your
machine.
Page 41

SEBU9422-02
41
Product Information Section
General Information
Product Information
Section
General Information
Specifications
SMCS Code: 7000
Basic machine specifications are listed in the
following tables.
Table 1
Knuckleboom Loader 2384D
Operating Weight - Loader Only
(approximate)
Engine
Engine RPM
15500 kg (34100 lb)
C 4.4
1800
i06952595
(Table 2, contd)
Knuckleboom Loader 2484D
Engine RPM
Hydraulic System
System Pressure
Swing Pressure
Swing Speed
Capacities
Fuel Capacity
Hydraulic Capacity
Swing Drive Capacity
Counterweight 653.2 kg (1440 lb)
Tail Swing (with counterweight) 2750 (108.2)
Knuckleboom Length 12.5 m (41.0 ft)
1800
24993 kpa (3625 psi)
25855 kpa (3750 psi)
9 RPM
378.5 L (100 gal)
302.8 L (80 gal)
5.9 L (1.56 gal)
Hydraulic System
System Pressure
Swing Pressure
Swing Speed
Capacities
Fuel Capacity
Hydraulic Capacity
Swing Drive Capacity
Counterweight
Tail Swing 2692 (106)
Knuckleboom Length 12.5 m (41.0 ft)
Table 2
24993 kpa (3625 psi)
25855 kpa (3750 psi)
11 RPM
378.5 L (100 gal)
302.8 L (80 gal)
4 L (1.06 gal)
Knuckleboom Loader 2484D
Operating Weight - Loader Only
(approximate)
Engine
16582 kg (36480 lb)
C 4.4
(continued)
Page 42
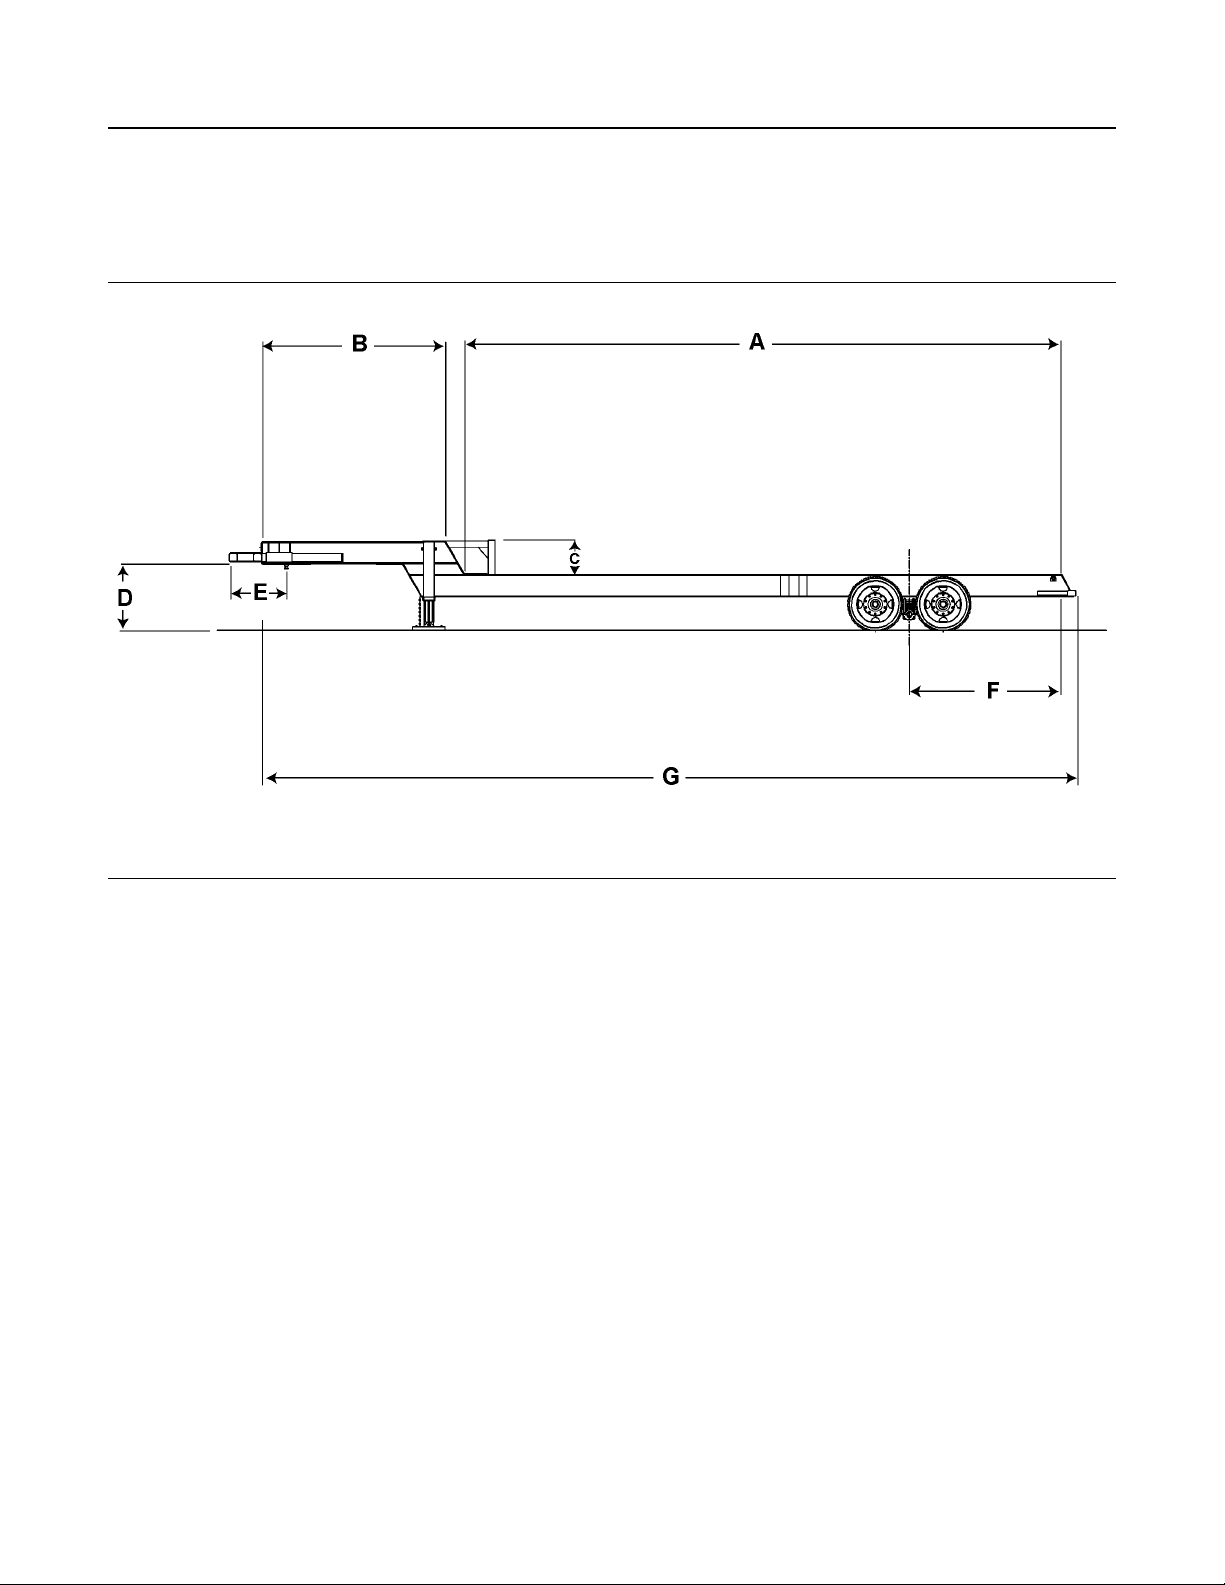
42
Product Information Section
Specifications
Trailer Dimensions (w/Suspension)
2384D 2484D Option
SEBU9422-02
Illustration 52 g03247996
(A) 11.2 m (36.8 ft).
(B) 3.4 m (11.3 ft).
(C) 0.6 m (2 ft).
(D) 1.3 m (4.1 ft).
(E) 0.46 m (1.5 ft).
(F) 2.8 m (9.3 ft).
Page 43
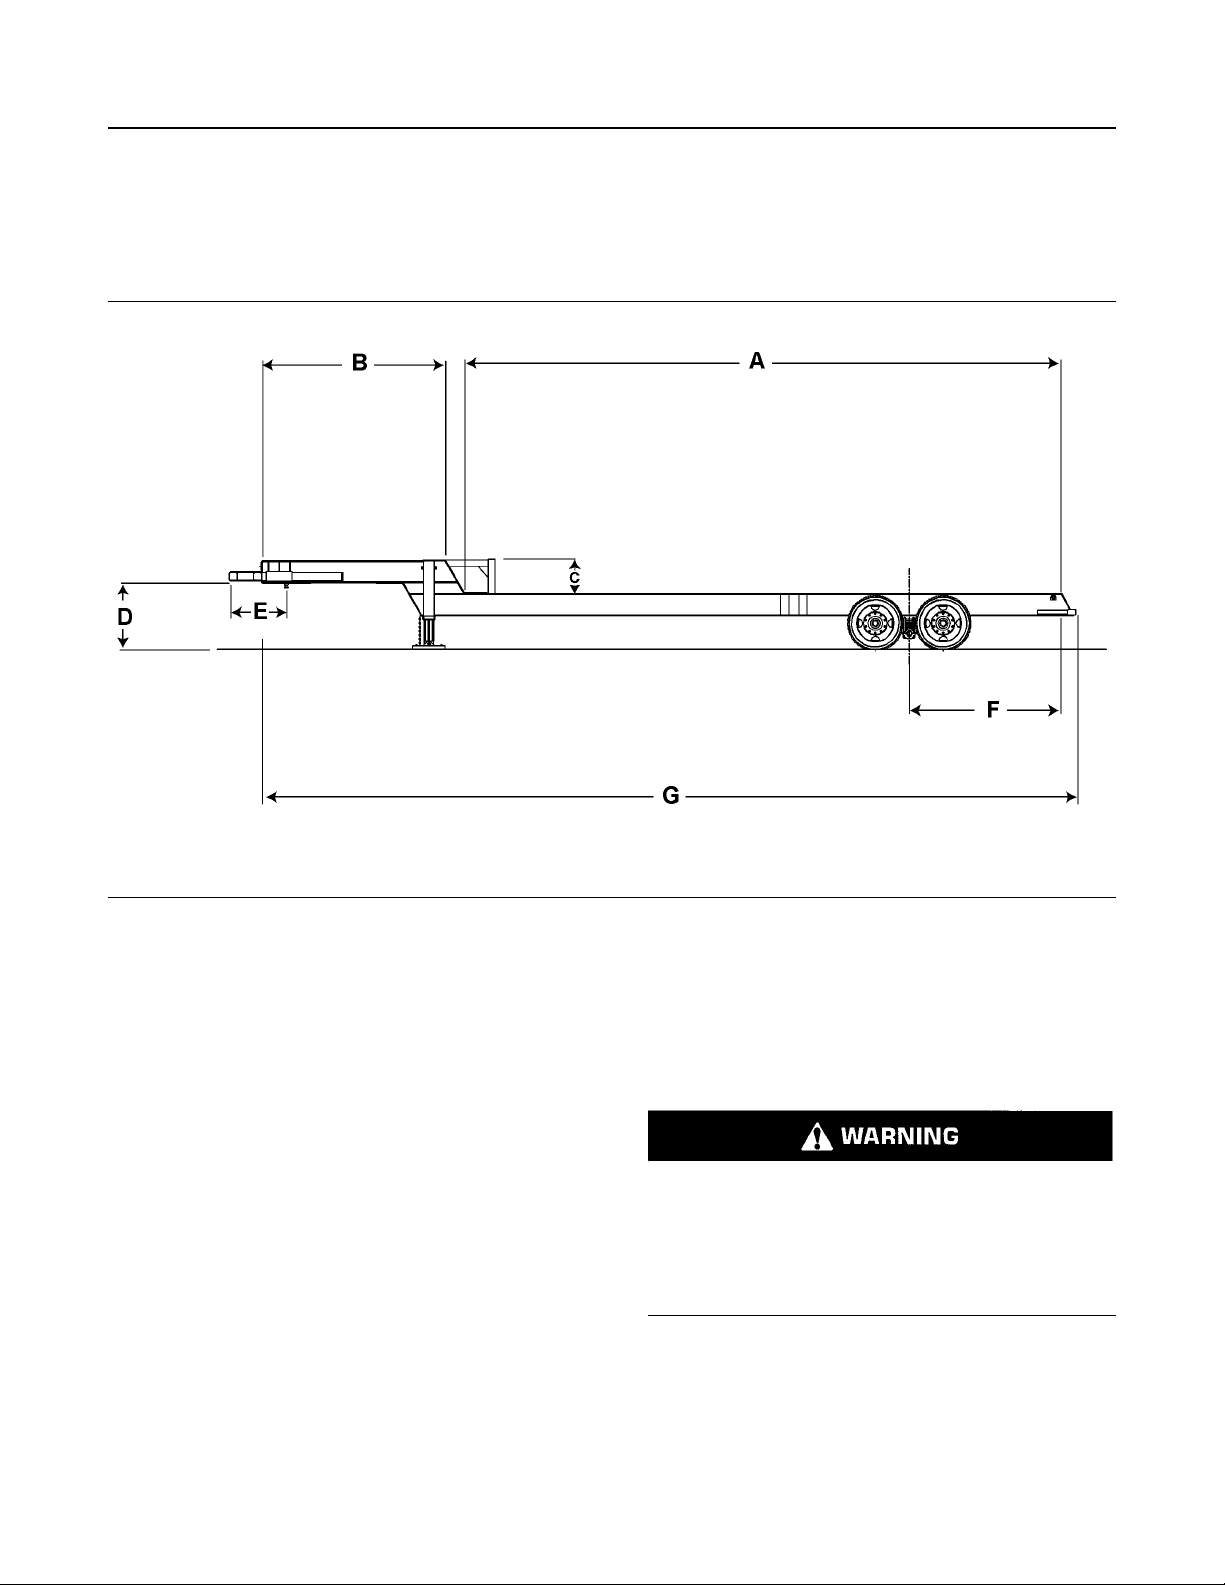
SEBU9422-02
(G) 15.85 m (52 ft).
Trailer Dimensions (wo/Suspension)
2384D Standard
43
Product Information Section
Lifting Capacities
Illustration 53 g03247996
(A) 11.2 m (36.8 ft).
(B) 3.4 m (11.3 ft).
(C) 0.6 m (2 ft).
(G) 15.3 m (50 ft).
i07103672
Lifting Capacities
(D) 1.2 m (3.8 ft).
(E) 0.46 m (1.5 ft).
(F) 2.8 m (9.3 ft).
SMCS Code: 7000
Failure to comply to the rated load can cause
possible personal injury or property damage.
This includes the risk of unintended boom lower-
ing. Review the rated load of a particular work
tool before performing any operation. Make adjustments to the rated load as necessary for nonstandard configurations.
There may be local regulations and/or government
regulations that govern the use of knuckleboom
loaders which lift heavy objects. Obey all local and
government regulations.
Page 44

44
Product Information Section
Lifting Capacities
Lifting capacities should be used as a guide. Work
tools, uneven ground conditions, soft ground
conditions, or poor ground conditions have effects on
lifting capacities. The operator is responsible for
being aware of these effects.
Lifting capacities will vary with different work tools
and attachments. The weight of a work tool
attachment must be subtracted from the lift capacity.
Consult your Prentice dealer regarding the lifting
capacities for specific work tools and attachments.
2384D
Table 3
All lifting capacities are in kilograms and pounds.
L O A D R A D I U S
HEIGHT
10.6 m
35.0 ft
9.1 m
30.0 ft
7.6 m
25.0 ft
6.0 m
20.0 ft
4.5 m
15.0 ft
3.0 m
10.0 ft
kg
3 m
10 ft
lb
kg
6586
5729
5729
8462
7362
7362
9997
8697
8697
4.5 m
15 ft
22039
19174
19174
lb
14519
12631
12631
18655
16230
16230
6.0 m
20 ft
kg
6222
5413
5413
6606
5747
5747
6770
5889
5889
7247
6305
6305
8176
7113
7113
lb
13717
11934
11934
14564
12671
12671
14925
12984
12984
15977
13900
13900
18025
15682
15682
kg
5555
4833
4833
6116
5321
5273
6300
5481
5182
6809
5924
5041
7.6 m
25 ft
lb
12246
10654
10654
13483
11730
11625
13889
12084
11425
15011
13060
11114
kg
5099
4436
3707
5444
4736
3653
9.1 m
30 ft
lb
11242
9780
8172
12002
10442
8053
MAXIMUM
REACH
kg
3967
3542
3275
SEBU9422-02
lb
100%
Over
End
Over
Side
100%
Over
End
Over
Side
100%
Over
End
Over
Side
100%
Over
End
Over
Side
100%
Over
End
Over
Side
8746
7809
7220
100%
Over
End
(continued)
Page 45

SEBU9422-02
(Table 3, contd)
1.5 m
5.0 ft
0
Line
−1.5 m
−5.0 ft
10359
9012
9012
9843
8563
8563
22837
19868
19868
21700
18879
18879
All lifting capacities are in kilograms and pounds.
L O A D R A D I U S
11524
10026
10026
11889
10343
10343
10932
9511
9511
25407
22104
22104
26210
22803
22803
24101
20968
20968
8700
7569
7244
8755
7617
6982
8008
6967
6840
19181
16687
15971
19302
16792
15393
17655
15360
15079
6942
6040
4889
6729
5854
4766
5849
5089
4709
15305
13315
10778
14835
12906
10508
12895
11219
10381
5270
4585
3590
4720
4107
3550
Product Information Section
Lifting Capacities
11618
10108
7915
10406
9054
7826
4026
3502
3242
8875
7721
7147
45
Over
Side
100%
Over
End
Over
Side
100%
Over
End
Over
Side
100%
Over
End
Over
Side
2484D
Table 4
HEIGHT
10.6 m
35.0 ft
9.1 m
30.0 ft
7.6 m
25.0 ft
6.0 m
20.0 ft
kg
3 m
10 ft
All lifting capacities are in kilograms and pounds.
L O A D R A D I U S
4.5 m
15 ft
lb
kg
7555
6573
6573
lb
16656
14490
14490
kg
7142
6214
6214
7855
6843
6843
8053
7006
7006
6.0 m
20 ft
lb
15746
13699
13699
17318
15067
15067
17754
15446
15446
kg
6385
5555
5555
7314
6363
5893
7.6 m
25 ft
lb
14076
12246
12246
16125
14029
12992
kg
9.1 m
30 ft
MAXIMUM
REACH
lb
kg
lb
100%
Over
End
Over
Side
100%
Over
End
Over
Side
100%
Over
End
Over
Side
100%
(continued)
Page 46

46
Product Information Section
Lifting Capacities
(Table 4, contd)
4.5 m
15.0 ft
3.0 m
10.0 ft
1.5 m
5.0 ft
0
Line
−1.5 m
−5.0 ft
12902
11225
11225
12266
10672
10672
28444
24746
24746
27042
23527
23527
All lifting capacities are in kilograms and pounds.
L O A D R A D I U S
19007
9995
8695
8695
11705
10184
10184
13708
11926
11926
14178
12335
12335
13082
11381
11381
22035
19170
19170
25806
22452
22452
30222
26293
26293
31258
27195
27195
28840
25091
25091
10385
10473
8621
7501
7501
9743
8476
8442
9035
8100
9112
7825
9614
8364
7676
16536
16536
21479
18687
18612
22896
19919
17857
23090
20089
17251
21195
18440
16923
7539
6559
5798
8148
7089
5649
8320
7032
5361
8083
7032
5361
7061
6143
5302
16620
14460
12782
17964
15628
12455
18342
15957
12103
17821
15504
11820
15567
13544
11688
5868
5105
4173
6555
5703
4117
6358
5532
4051
5670
4933
4009
12937
11255
9199
14452
12573
9076
14018
12196
8931
12501
10876
8838
4583
3987
3699
4649
4045
3665
SEBU9422-02
Over
End
Over
Side
100%
Over
End
Over
Side
100%
10103
8790
8156
10249
8917
8080
Over
End
Over
Side
100%
Over
End
Over
Side
100%
Over
End
Over
Side
100%
Over
End
Over
Side
Page 47
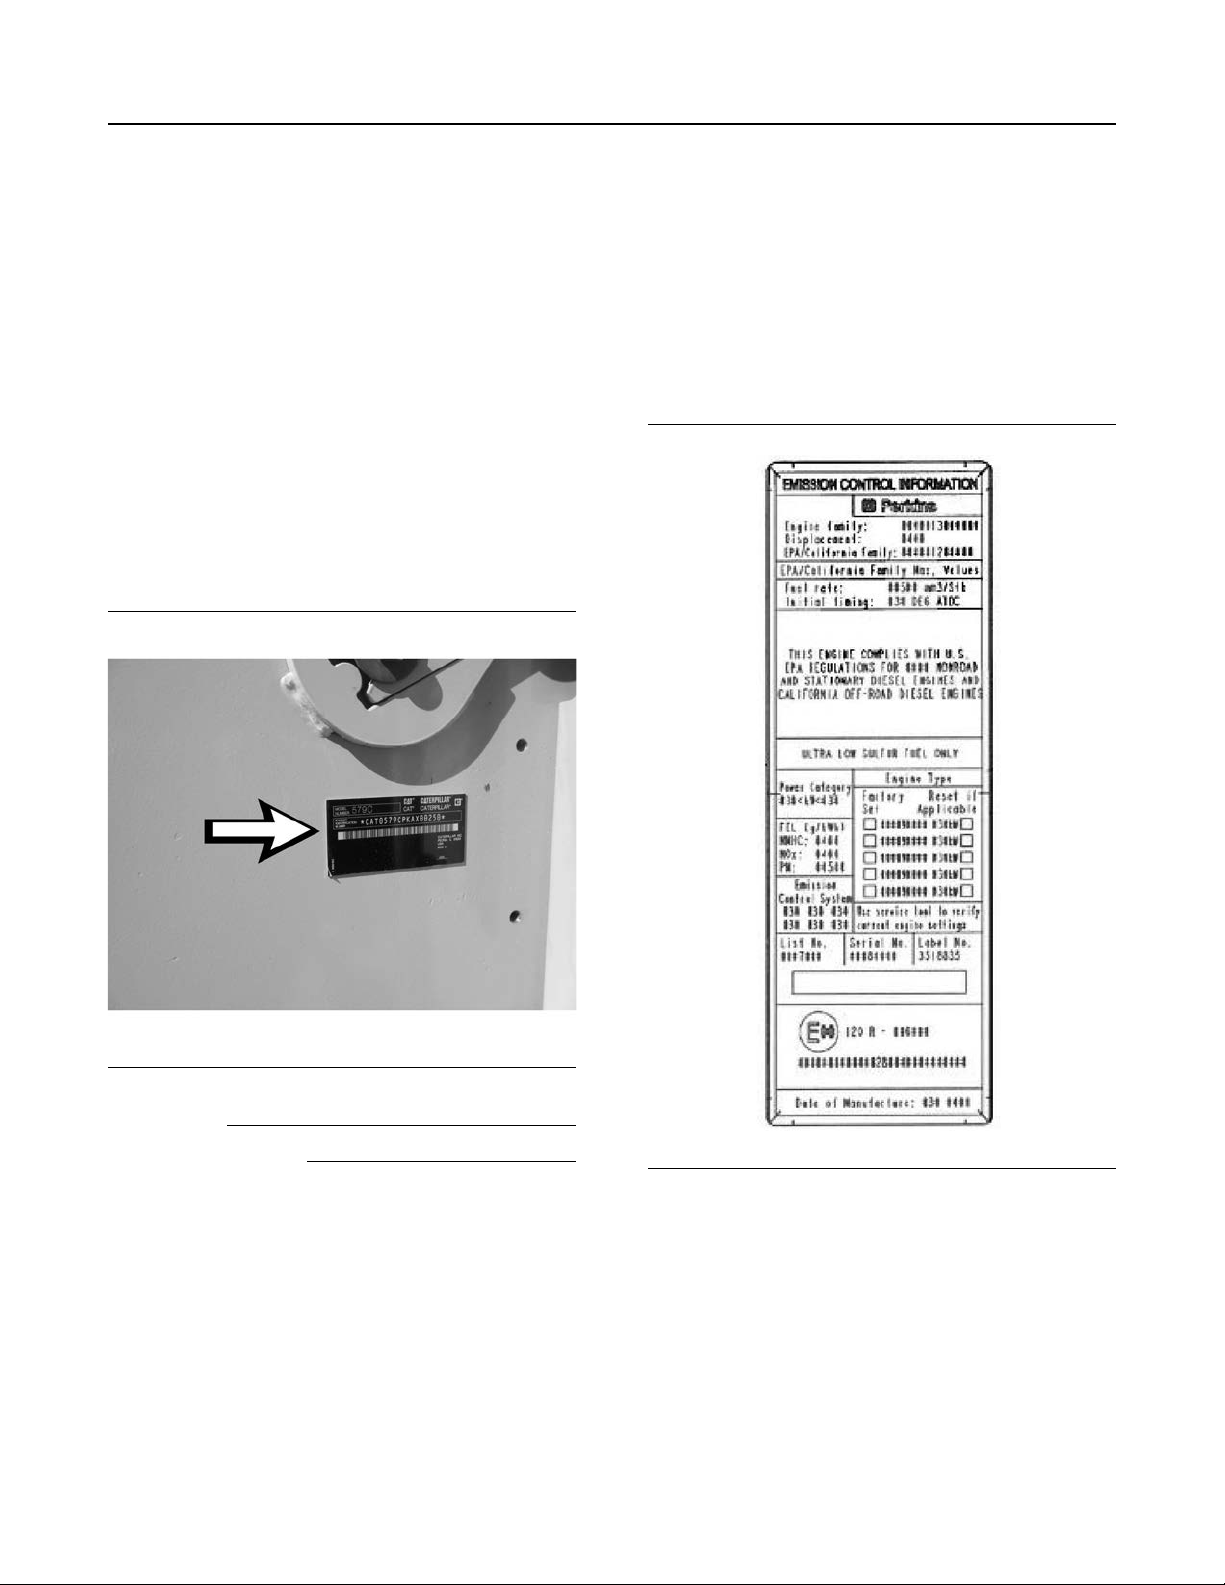
SEBU9422-02
47
Product Information Section
Identification Information
Identification Information
i06952597
Plate Locations and Film
Locations
SMCS Code: 1000; 7000
The Product Identification Number (PIN) is used to
identify a powered machine that is designed for an
operator to ride.
Prentice products such as engines, transmissions,
and major attachments that are not designed for an
operator to ride are identified by Serial Numbers.
For quick reference, record the identification
numbers in the spaces that are provided below the
illustration.
i06952607
Emissions Certification Film
SMCS Code: 1000; 7000; 7405
Note: This information is pertinent in the United
States, Canada, and Europe.
Consult your Prentice dealer for Emission Control
Warranty Statement.
Illustration 54 g03299878
Machine PIN
Engine Serial Number
i04019095
Emissions Certification Film
SMCS Code: 1000; 7000; 7405
S/N: KP51–Up
Note: This information is pertinent in the United
States, in Canada and in Europe.
Consult your Cat dealer for an Emission Control
Warranty Statement.
This label is located on the engine.
Illustration 55 g03320827
The certification label (if equipped) is used to verify
an engine conformance to the emissions
requirements of the EPA.
This label is on the engine.
Page 48
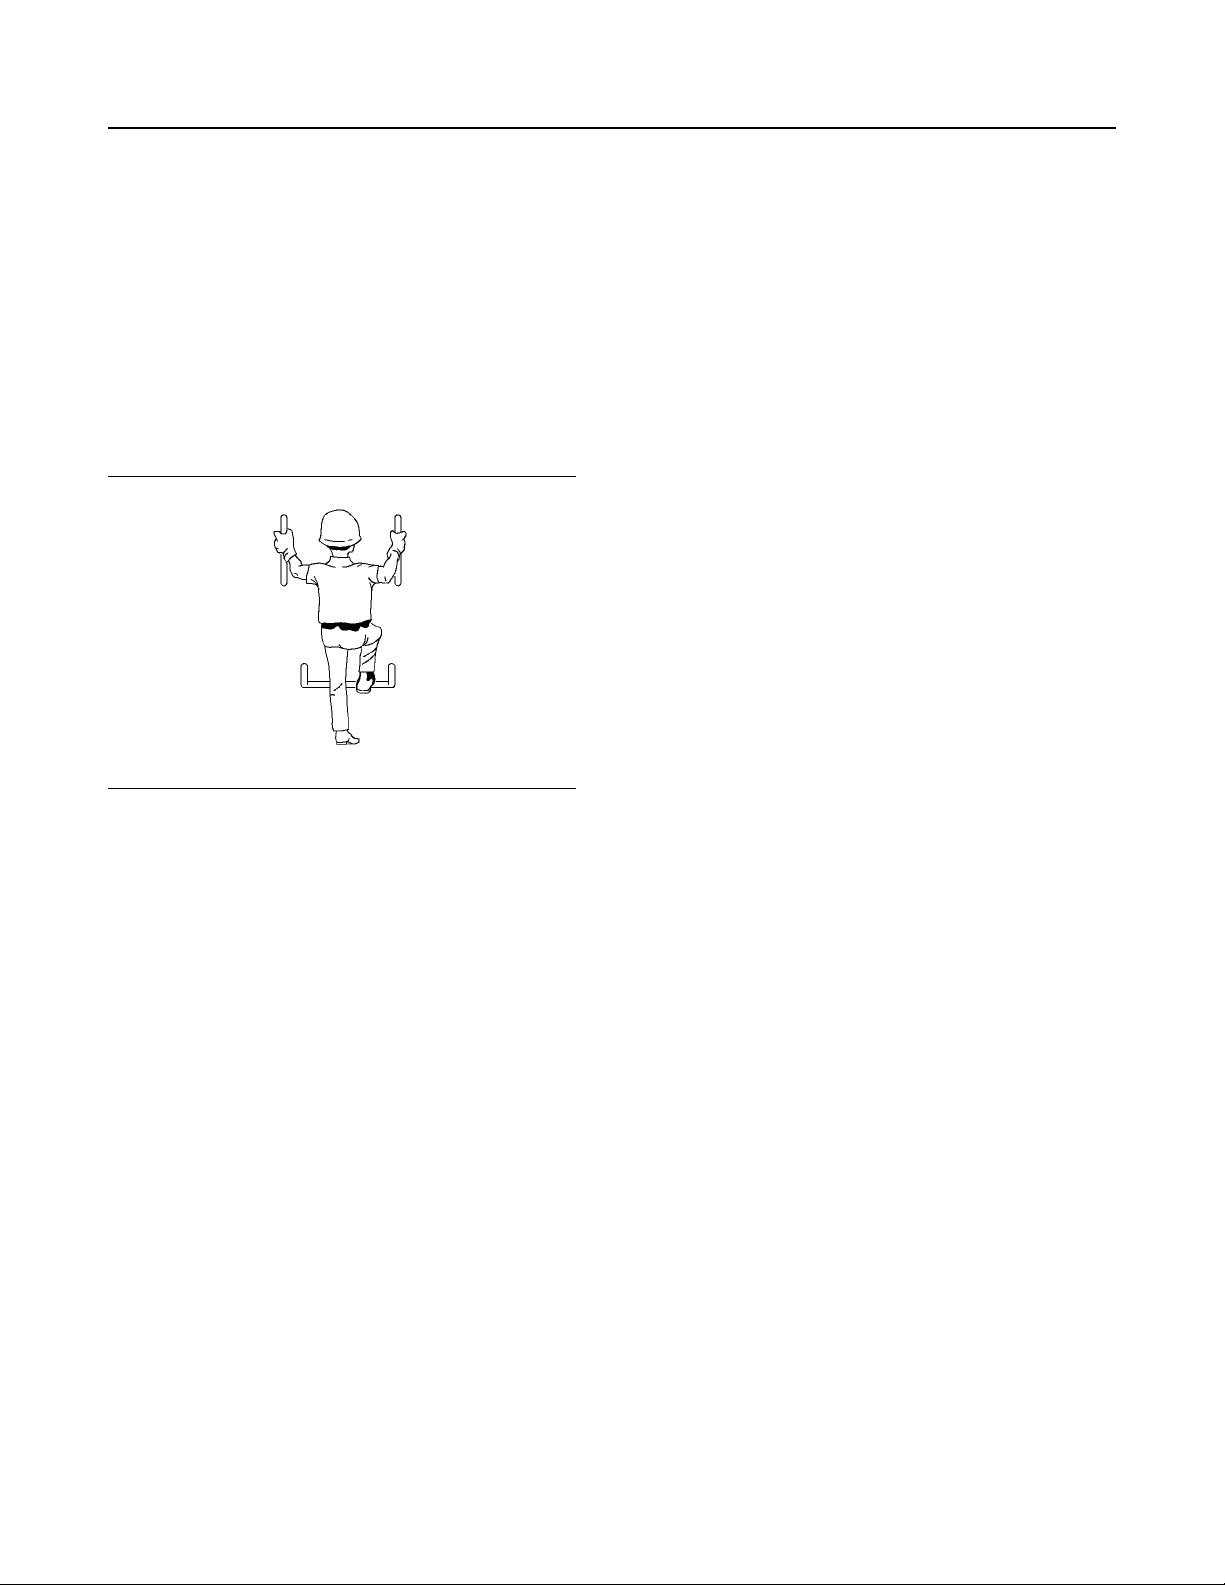
48
Operation Section
Before Operation
SEBU9422-02
Operation Section
Before Operation
Mounting and Dismounting
SMCS Code: 7000
S/N: KP51–Up
i05278197
Machine Access System
Specifications
The machine access system has been designed to
meet the intent of the technical requirements in “ISO
2867 Earth-moving Machinery – Access Systems”.
The access system provides for operator access to
the operator station and to conduct the maintenance
procedures described in the maintenance section.
Alternate Exit
Machines that are equipped with cabs have alternate
exits. For additional information, see Operation and
Maintenance Manual, “Alternate Exit”.
i05278203
Daily Inspection
SMCS Code: 1000; 7000
S/N: KP51–Up
For a maximum service life of the machine, complete
a thorough daily inspection before you mount the
machine and before you start the engine.
Illustration 56 g00037860
Typical example
Mount the machine and dismount the machine only
at locations that have steps and/or handholds. Before
you mount the machine, clean the steps and the
handholds. Inspect the steps and handholds. Make
all necessary repairs.
Face the machine whenever you get on the machine
and whenever you get off the machine.
Maintain a three-point contact with the steps and with
the handholds.
Note: Three-point contact can be 2 feet and one
hand. Three-point contact can also be 1 foot and two
hands.
Do not mount a moving machine. Do not dismount a
moving machine. Ensure that the work tool is fully
lowered to the ground and the brake is applied.
Ensure that the Left Hand Joystick Control (if
equipped) is tilted up and out of the way before you
enter or exit the cab. Never jump off the machine. Do
not carry tools or supplies when you try to mount the
machine or when you try to dismount the machine.
Use a hand line to pull equipment onto the platform.
Do not use any controls as handholds when you
enter the operator compartment or when you exit the
operator compartment.
• Daily, perform the maintenance requirements that
are applicable to your machine.
Reference: For more information on the daily
maintenance requirements, refer to Operation and
Maintenance Manual, “Maintenance Interval
Schedule”.
• Inspect the area around the machine and under
the machine. Look for loose bolts, trash buildup,
oil, fluid leakage, broken parts, or worn parts.
• Watch closely for leaks. If you observe a leak, find
the source of the leak and correct the leak.
Replace hoses, as needed. If you suspect a leak
or you observe a leak, check the fluid levels more
frequently.
• Inspect the engine compartment. Remove any
debris buildup from the engine compartment.
Inspect the engine for any obvious component
damage.
• Inspect the hydraulic system for leaks. Check the
hydraulic tank, all hoses, and all tubes. Inspect
plugs, seals, couplings, and fittings. Fix any leaks
and replace hoses, as needed.
• Inspect all attachments and the linkages for wear
and for damage.
• Make sure that all access doors, all access covers
and all guards are secured. Inspect the access
doors, the access covers and the guards for
damage.
Page 49

SEBU9422-02
• Inspect the tires for damage. Replace any missing
valve caps.
• Inspect the steps, the walkways, and the
handholds. Remove any debris. Repair any
damage or replace any damaged parts.
• Inspect the lights. Replace any broken bulbs and
any broken lenses.
• Inspect the cab structure for obvious damage.
Consult your authorized dealer for repairs.
• Inspect the operator compartment. Remove any
trash buildup. Keep the operator compartment
clean. Inspect the dash panel for broken gauges
and for broken indicator lights. Replace any
broken parts.
• Inspect the windows. Make sure that the operators
vision is not impaired by dust, by mud, or by other
foreign materials. Clean the windows, if
necessary. For more information, refer to
Operation and Maintenance Manual, “Windows Clean”.
49
Operation Section
Daily Inspection
• Make all necessary repairs before you operate the
machine.
Page 50
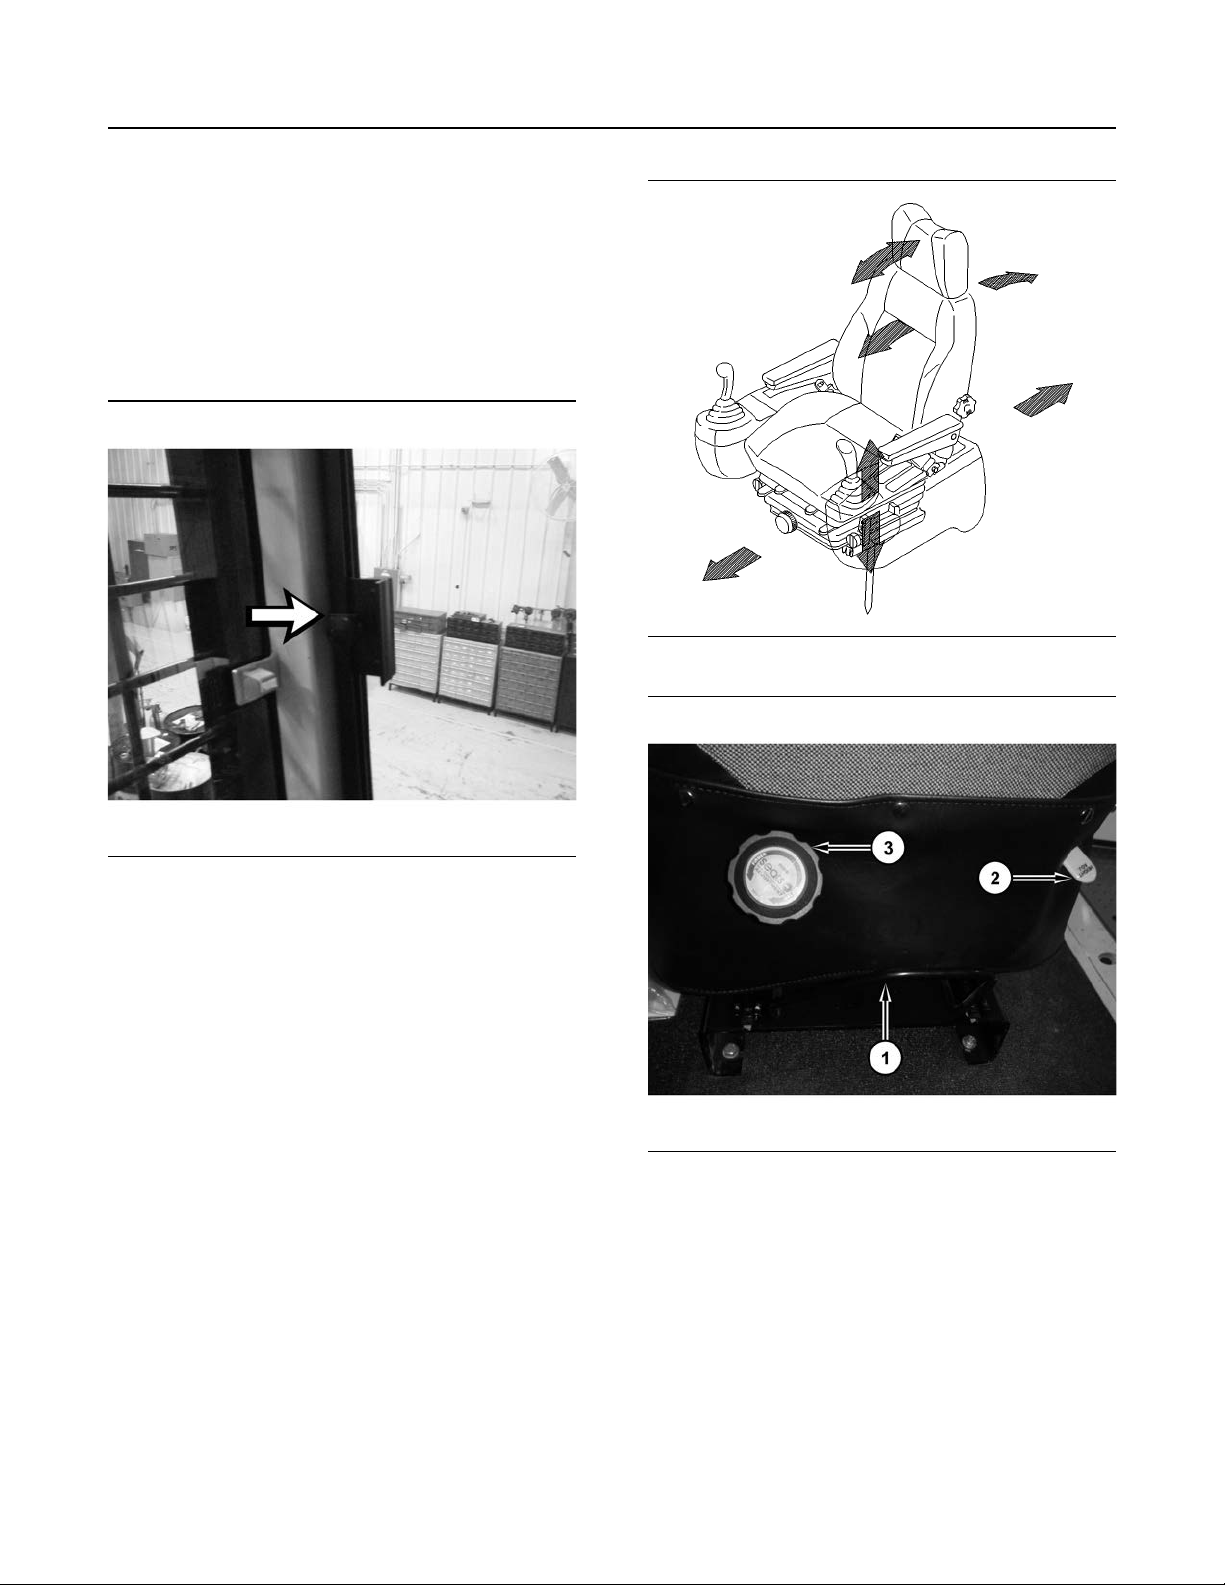
50
Operation Section
Machine Operation
Machine Operation
Alternate Exit
SMCS Code: 7310
S/N: KP51–Up
SEBU9422-02
i05278251
Illustration 57 g03319904
Front right-hand window.
The right-hand cab window can be used as an
alternate exit. The window can be opened from the
inside of the cab. There is a latch that holds the righthand window in place. Release latch in order to free
the window. Slide window rearward in the track as far
as possible.
i06843137
Seat
SMCS Code: 7312
S/N: KP51–Up
Put the hydraulic lockout control in the LOCKED
position. For further details on this procedure, refer to
Operation and Maintenance Manual, “Hydraulic
Lockout Control”. Do this procedure before you
adjust the seat and the console. This will prevent any
possibility of unexpected movement of the machine.
Adjust the seat at the beginning of each work period
and adjust the seat when you change operators.
The seat should be adjusted so that full pedal travel
is allowed.
Illustration 58 g00101115
Illustration 59 g03319863
The operator can adjust the seat position forward or
backward. Pull up on the adjustment lever (1) and
slide the seat forward and backward to the desired
seat position. Select the desired position to allow full
pedal travel and full lever travel.
The seat position can be adjusted up and down. Pull
up on the height adjustment lever (2) to raise or lower
the seat to the desired position.
The firmness of the seat cushion can be adjusted.
Turn firmness adjustment knob (3) clockwise for a
softer seat, counterclockwise for a firmer seat.
Page 51
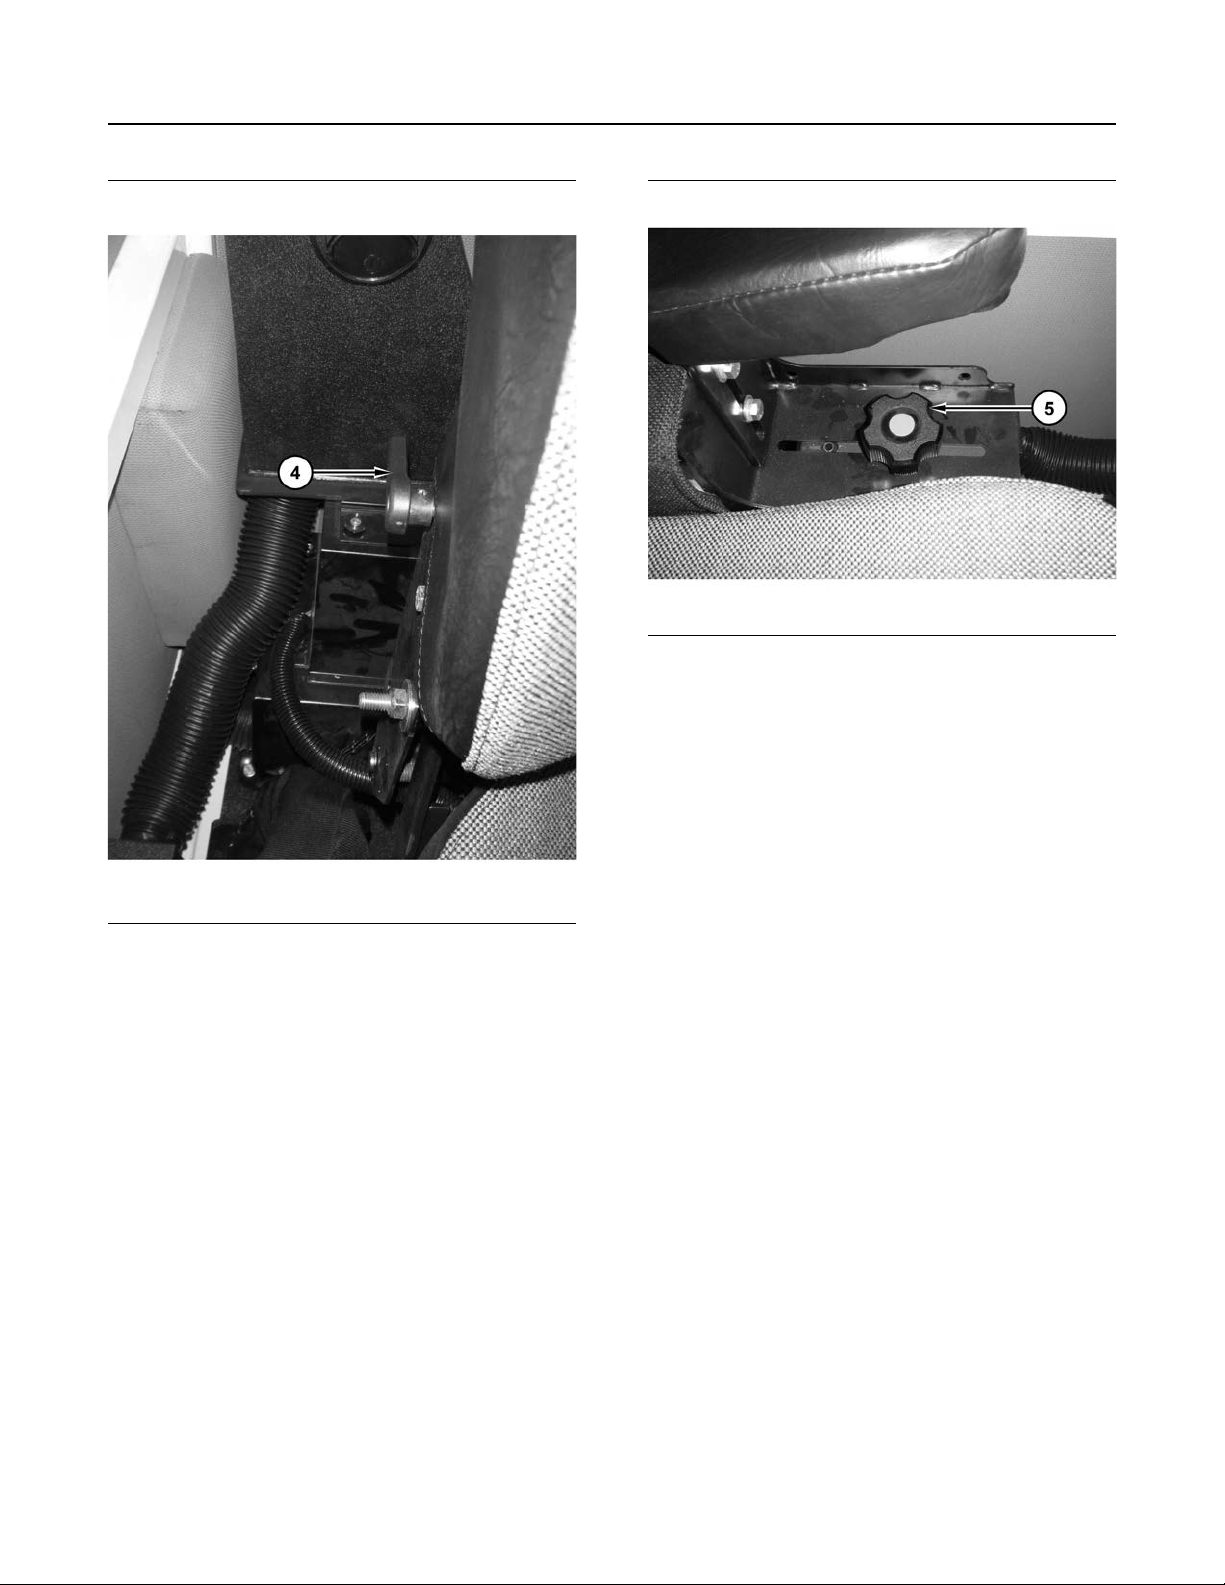
SEBU9422-02
51
Operation Section
Seat
Illustration 60 g03319865
The operator may also adjust the seat back lumbar
support. Use the knob (4) on the right-hand side of
the seat to select the firmness of the seat back
lumbar support.
Illustration 61 g03319867
The right console and the left arm rest console (5)
can be adjusted horizontally.
There is an adjustment knob underneath the arm rest
to adjust vertical positioning.
The seat and the consoles can also slide as one unit.
Page 52

52
Operation Section
Operator Controls
SEBU9422-02
i07176359
Operator Controls
SMCS Code: 5705; 6461; 6700; 7000; 7008; 7220;
7300; 7301; 7451; 7490
Display Monitor (1)
Refer to Monitoring System in the Operation section
of the Operation and Maintenance Manual.
Radio (2)
Note: The radio can be used only when the battery
disconnect switch and the engine start switch are in
the ON position.
Power Switch – Push the power switch to turn on
the radio. Push the power switch again to turn off the
radio.
AM/FM Band Selector – After you push the AM/FM
band selector, the selected radio band appears on
display panel .
Preset Buttons – The circuitry in the memory
system allows you to preset six radio stations.
Tone Control – Music is optimized by pressing the
tone control so that display will show “MUSIC” .
Scan and Auto Memory – Press button for less than
0.5 seconds to listen to 5 seconds of each preset
radio station. Press button at least 1.5 seconds to
store the radio stations with the six strongest signals.
Illustration 62 g06055325
Operator Console
(1) Display Monitor
(2) Radio
(3) Wiper Switch
(4) Light Switch
(5) Fan Switch
(6) Heater Air Conditioner Switch
(7) Key Switch
(8) Switch Panel (Stabilizer Select, Throttle, Pilot)
““Tune”” Buttons – Push the “tune” buttons to select a
radio station. Pressing “tune” button will decrease the
frequency. Pressing “tune” button will increase the
frequency. Pressing the “tune” button for less than
0.5 seconds changes the radio station one at a time.
Pressing the “tune” buttons for more than 0.5
seconds will change the frequency automatically until
a radio station is found.
Volume Control – Turn volume control knob
clockwise to increase the sound level and turn knob
counterclockwise to decrease the sound level.
Page 53
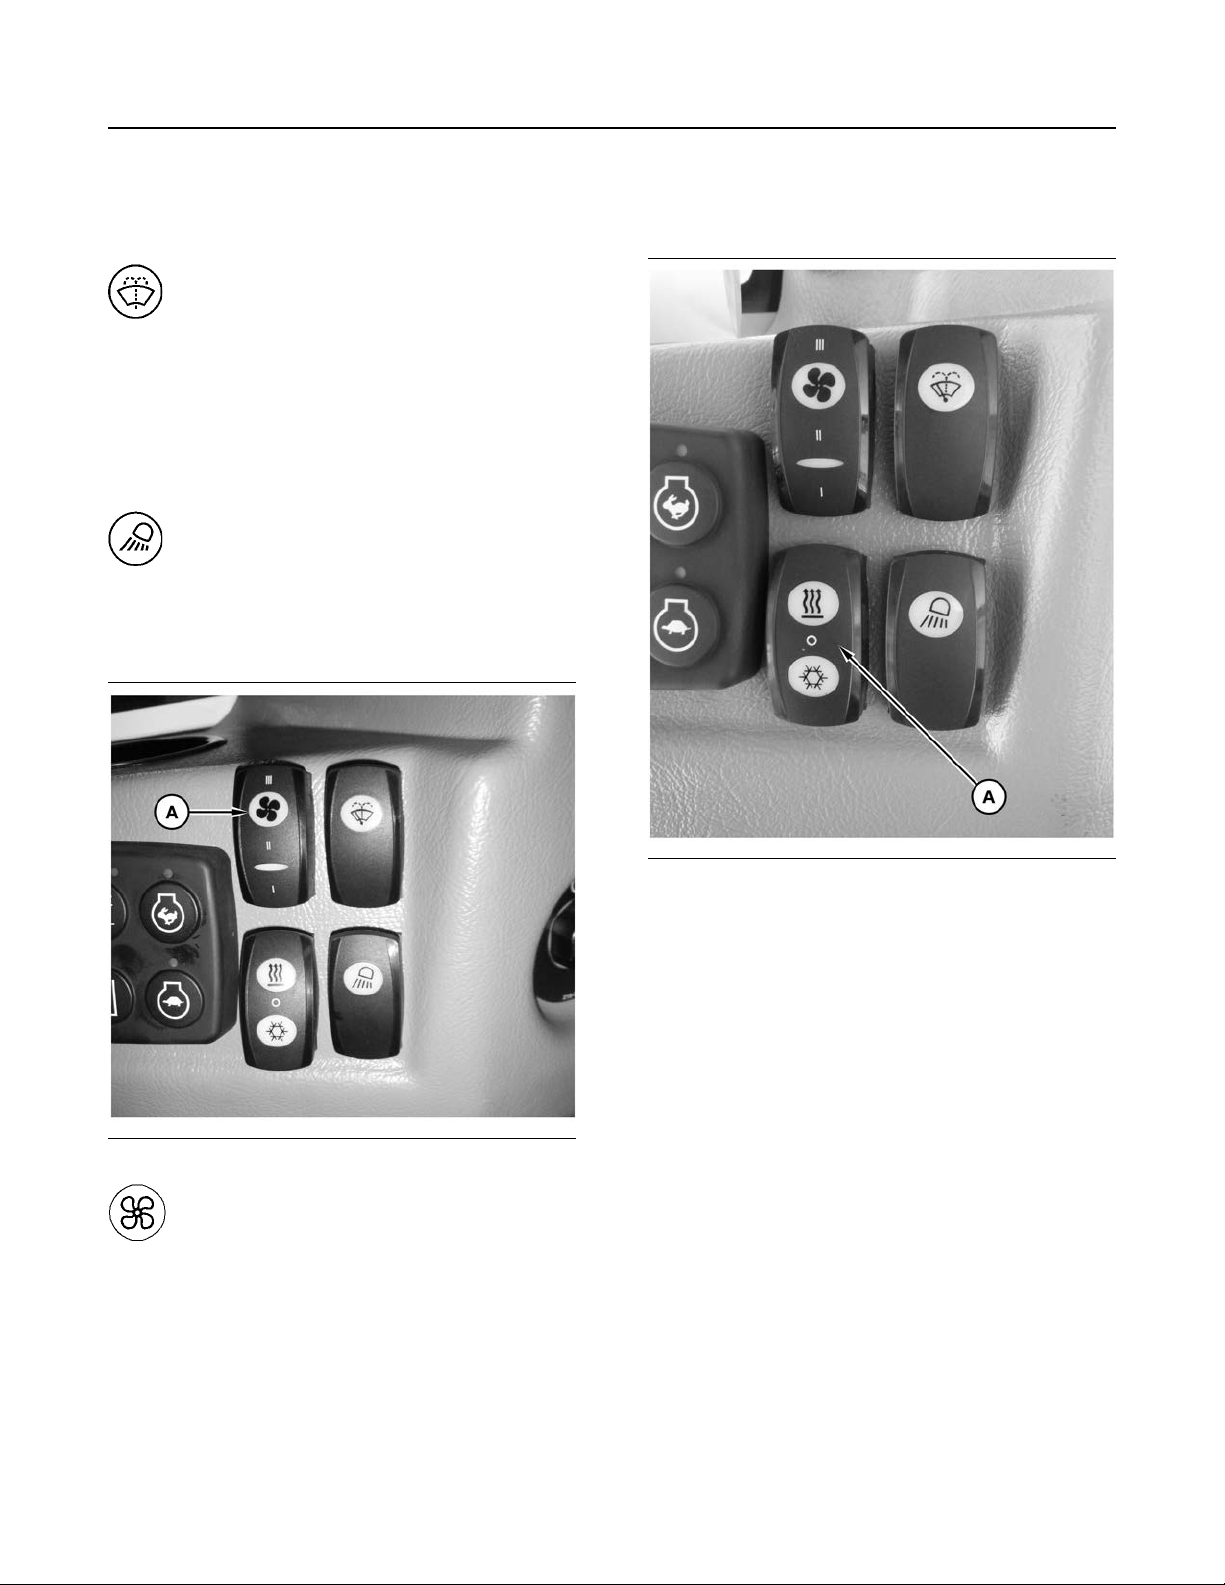
SEBU9422-02
Wiper and Washer Switch (3)
Window Washer – Push the switch to
activate the window washer. When the
switch is depressed, the indicator light
will come on and washer fluid will spray from the
nozzle. The window wiper will also operate when
the switch is depressed. After the switch is
released for approximately 3 seconds, the
window wiper will stop.
Working Light Switch (4)
Light Switch – This a three position
switch. Depressing the switch once will
turn on the work lights. Depress the
switch fully to turn on all machine lights
53
Operation Section
Operator Controls
Heater and Air Conditioner Switch
(6)
Fan Switch (5)
Illustration 63 g03321226
Fan Speed Switch – Fan speed switch
(A) controls the speed of the blower fan
motor for the heating and air
conditioning system.
Illustration 64 g03320629
The control switch for the heating and air conditioning
system are on the console of the operator cab.
On/Off Switch
Selector Switch (A) allows the selection between
Heater or Air Conditioner on and off.
Page 54
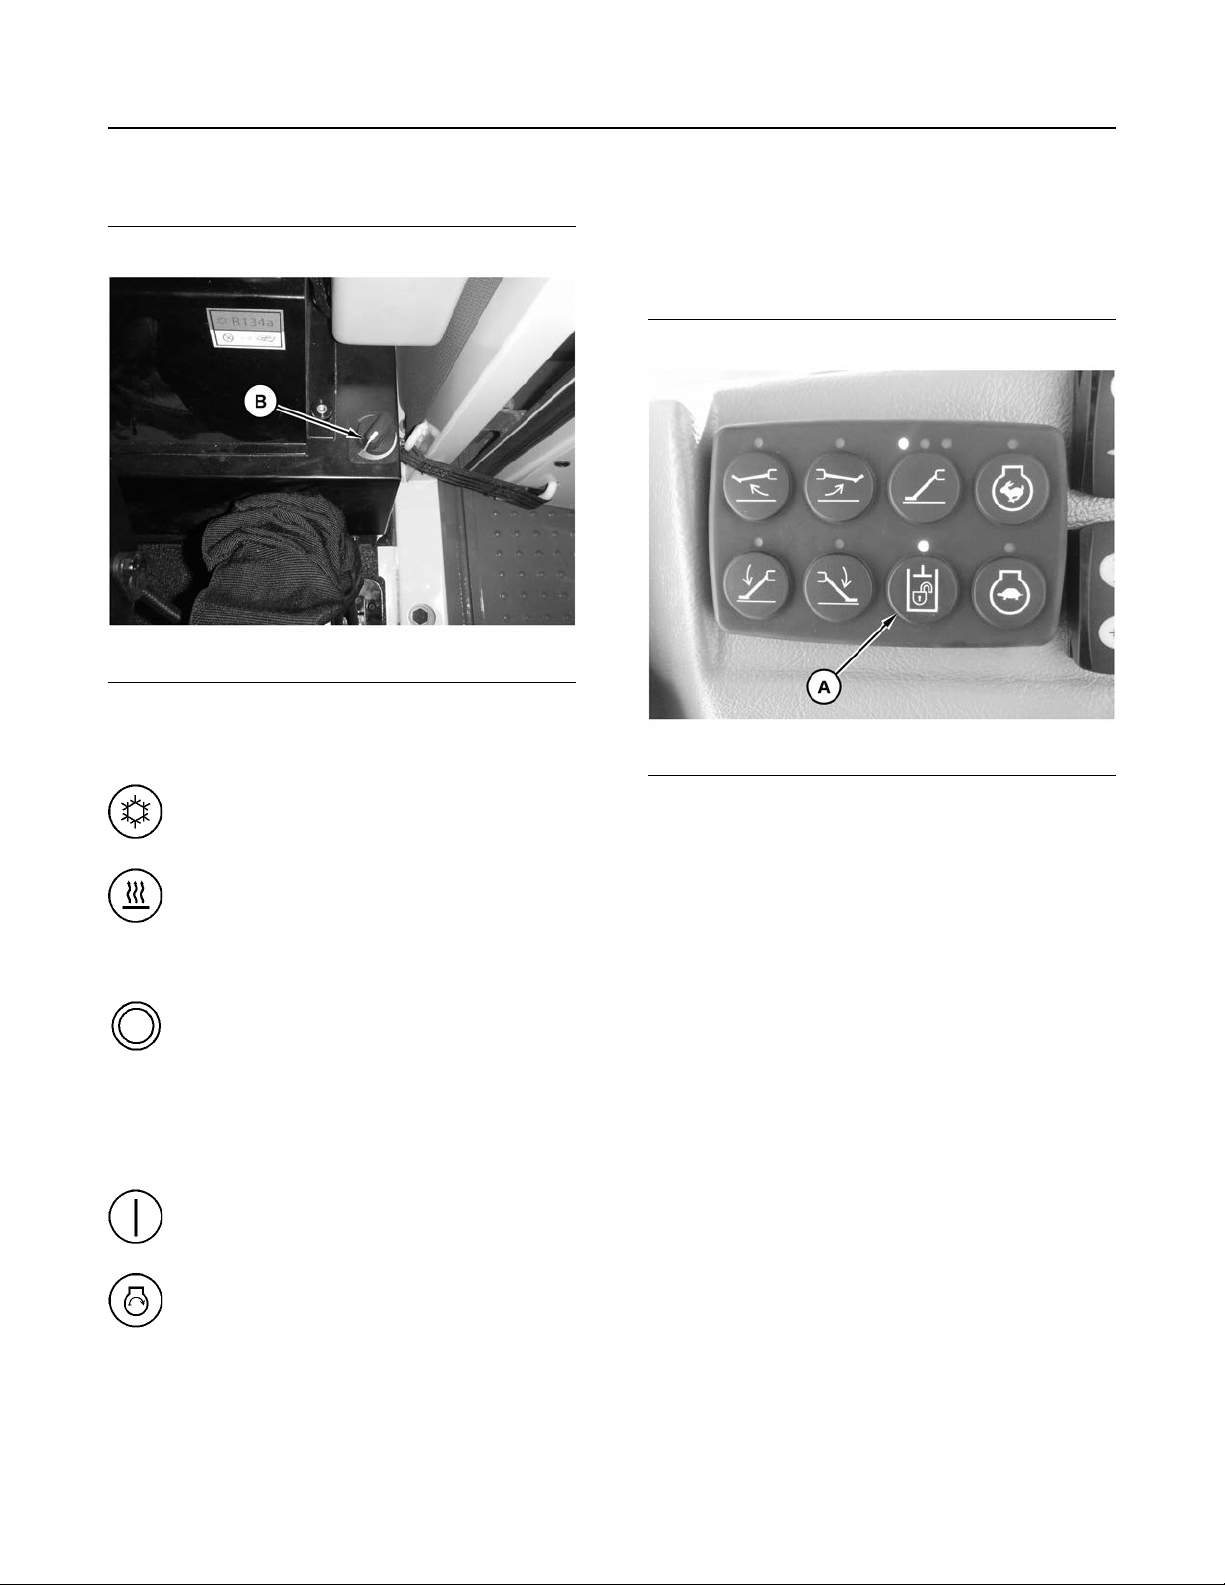
54
Operation Section
Operator Controls
SEBU9422-02
Temperature Control
Illustration 65 g03320650
The temperature control knob is on the unit behind
the operator seat.
Cooling – Turn knob (B)
counterclockwise to decrease the
temperature in the cab.
Heating – Turn knob (B) clockwise to
increase the temperature in the cab.
Engine Start Switch (7)
OFF – When you insert the engine start
switch key and when you remove the
engine start switch key, the engine start
switch must be in the OFF position. To
disconnect the power to the electrical circuits in
the cab, turn the engine start switch to the OFF
position. Also, turn the engine start switch to the
OFF position to stop the engine.
Note: If the engine fails to start, return the engine
start switch to the OFF position. Action must be taken
before you attempt to start the engine again.
Switch Panel (8)
Illustration 66 g03320667
Note: Hydraulic arming control refers to the System
Controllers and Joysticks. The Main Hydraulic
System will still be pressurized.
The hydraulic arming control (A) is used to turn the
machine hydraulic system (implement and steering)
on and off. The hydraulic control arming control is on
the operator console of the machine.
When the hydraulic arming control is in the LOCKED
position, the machine control hydraulic system is not
on.
When the hydraulic arming control is in the
UNLOCKED position, the machine hydraulic system
is on.
ON – To activate the electrical circuits in
the cab, turn the engine start switch key
clockwise to the ON position.
START – To start the engine, turn the
engine start switch clockwise to the
START position. When the engine start
switch key is released, the engine start switch
will return to the ON position.
Page 55
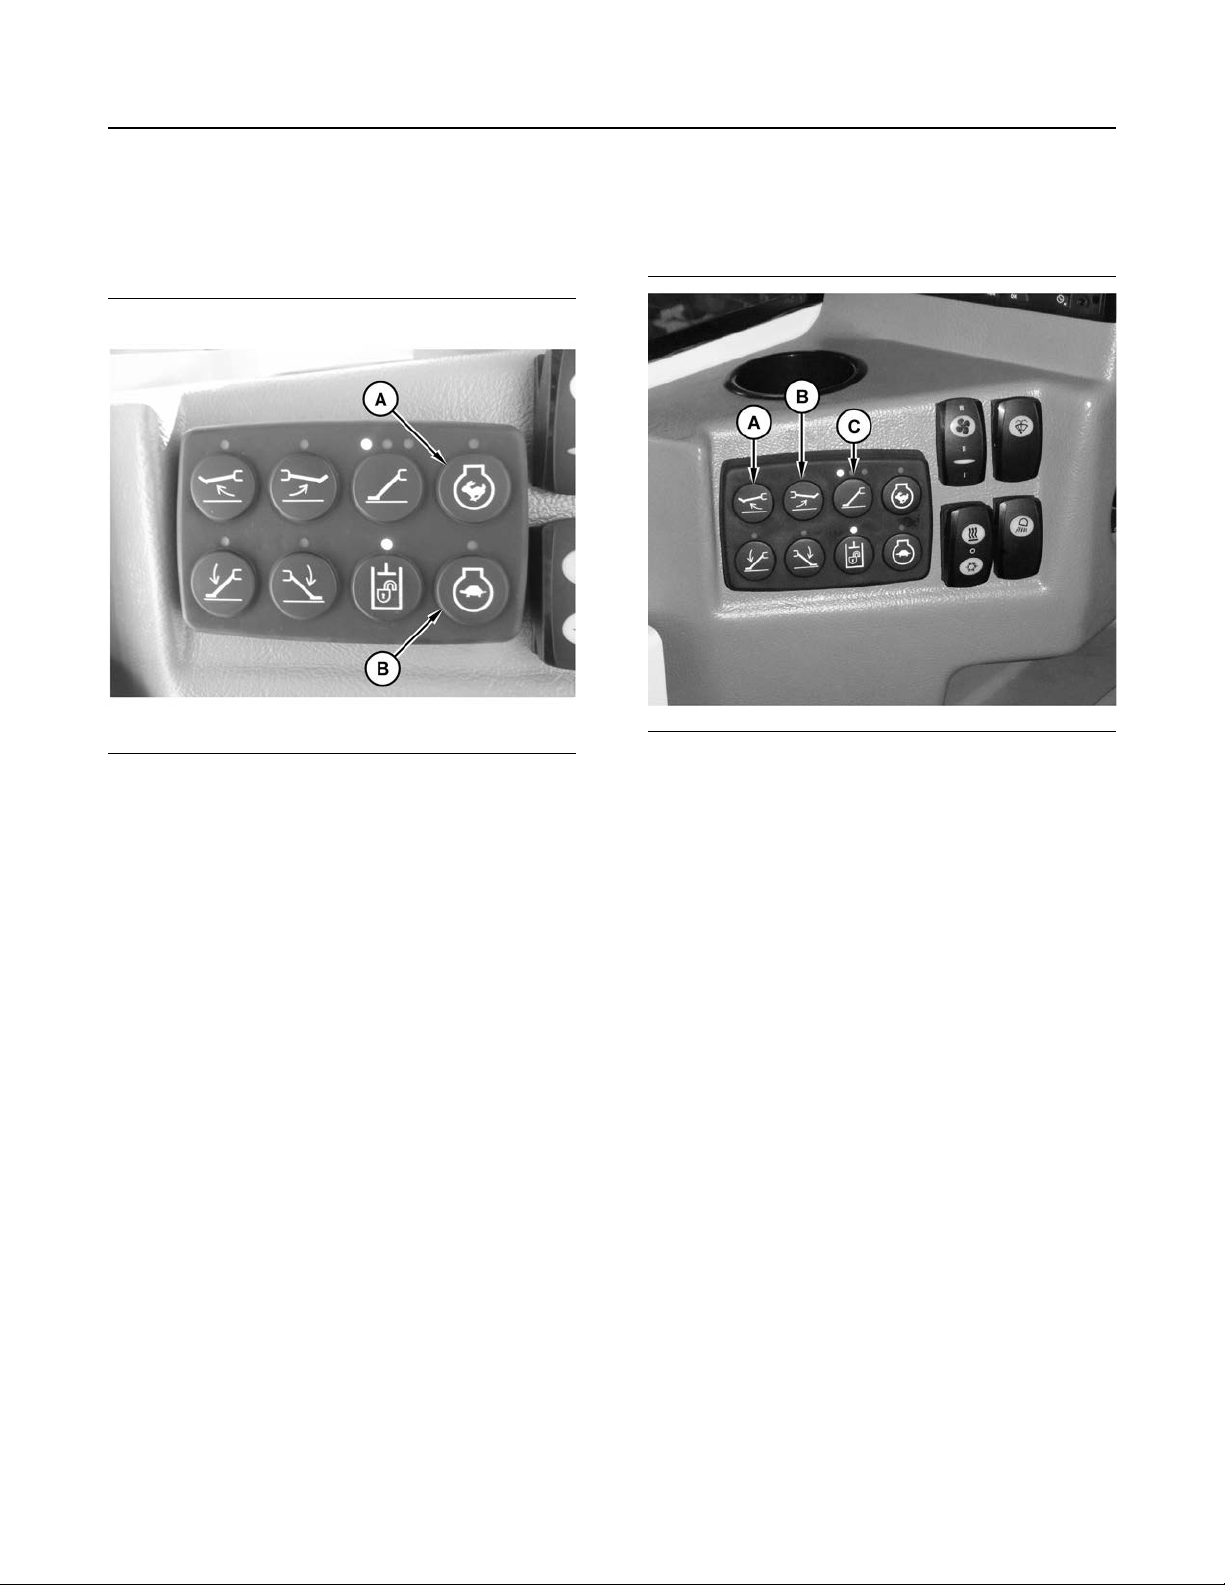
SEBU9422-02
55
Operation Section
Diesel Particulate Filter Regeneration
Note: The left-hand arm console must be lowered to
arm the hydraulics.
Throttle Up Speed Control
Illustration 67 g03320684
The switch (A) controls the engine speed by
regulating the signal pressure to the engine ECM.
Depress switch to increase engine speed.
Throttle Down Speed Control
Depress switch to decrease engine speed.
Stabilizer Switches
Illustration 68 g03356091
These switches select which stabilizer function will be
active.
The left-hand switches (A) control the up and down
functions of the left-hand stabilizers.
The right-hand switches (B) control the up and down
functions of the right-hand stabilizers.
This switch (B) controls the engine speed by
regulating the signal pressure to the engine ECM.
The switch in the center (C) controls the selection of
the front and rear stabilizers.
Note: The center switch also controls the trailer
stabilizer legs if equipped.
i06952618
Diesel Particulate Filter
Regeneration
SMCS Code: 108F
Reduction of Particulate Emissions
The Diesel Particulate Filter (DPF) will reduce
particulate emissions. The DPF collects the soot and
any ash that is produced by the combustion in the
engine. During regeneration, the soot is converted
into a gas which is released into the atmosphere. The
Ash remains in the DPF.
The temperature of the DPF must be above a
particular value in order for regeneration to occur.
The exhaust gas provides heat for the regeneration
process.
Page 56
56
Operation Section
Diesel Particulate Filter Regeneration
SEBU9422-02
Passive Regeneration The engine provides
sufficient exhaust gas temperature for regeneration.
Engine Operation and a DPF
During normal engine operation, the operator of the
engine may notice the lack of black smoke from the
exhaust system.
Passive regeneration is the process that is used by
the DPF to remove soot from the DPF. In some
applications, the engine idle speed will automatically
be increased to allow passive regeneration to occur.
Regeneration
Regeneration is to increase the exhaust temperature
for a given time. The Caterpillar Regeneration
System (CRS) is used to remove soot from the DPF,
and warmup the Selective Catalyst Reduction (SCR)
system. The DPF traps both soot and ash. The ash is
removed through a manual cleaning process. Refer
to Operation and Maintenance Manual, “Diesel
Particulate Filter - Clean” for more information on the
service of the DPF.
Regeneration Indicators
Regeneration Active – When
illuminated, this indicator shows that
the system is active. This indicator
shows that elevated emission temperatures are
possible. This indicator will turn off when
regeneration is complete.
DPF – This indicator will illuminate to
show that regeneration is required. This
indicator will illuminate when ““Time to
Regen”” is less than a pre-determined amount of
time.
Regeneration Disabled – This indicator
will illuminate to show that regeneration
has been disabled.
Regeneration Switch
Note: When engine start switch key is cycled or the
“Force Regeneration” switch is pressed for longer
than 2 seconds the system will no longer be disabled.
When the “Force Regeneration” switch is pressed
and “Time to Regen” is less than 8 hours,
regeneration will begin if the machine is at low idle
and is parked.
Note: If the engine start switch key is cycled while
the regeneration system is disabled via the “Disable
Regeneration” switch., Press and hold the “Disable
Regeneration” switch for 2 seconds to reinitiate.
Modes of Regeneration
Automatic: The Electronic Control Module (ECM)
uses multiple inputs from the engine and the machine
to determine the best time to perform automatic
regeneration. Automatic regenerations can take
place throughout the operating cycle of the engine.
The regeneration active indicator will be illuminated
when regeneration is being performed. Interruptions
of the regeneration are acceptable. If regeneration is
in progress and needs to be stopped, it is permissible
to press the “Disable Regeneration” switch.
Note: Automatic adjustments of engine speed may
be noticed during regenerations. If regeneration is
taking place and the engine is taken to low idle, the
engine speed may remain elevated to maintain the
regeneration.
Note: If the machine returns to work while automatic
regeneration is active, the regeneration may be
stopped. The ECM will continue to monitor inputs to
determine the best time to restart the regeneration.
Manual: Manual regeneration is initiated by pressing
the “Force Regeneration” switch. Manual
regeneration will only be allowed if the “Time to
Regen” is less than 8 hours. If the “Force
Regeneration” switch is pressed before “Time to
Regen” is less than 8 hours, then “Regen not
Required” will be displayed. The machine must be
stationary, the parking brake must be applied, and
the engine must be at low idle to perform manual
regeneration.
Force Regeneration – Press in the top
switch for 2 seconds to begin
regeneration.
Disable Regeneration – Press in the
bottom switch for 2 seconds to disable
regeneration.
Note: If equipped with a rocker style switch, the
MIDDLE position of the regeneration switch is the
default position for automatic regeneration.
Disabled: When the regeneration system is in
disabled mode, automatic regenerations will not be
performed. The DPF indicator will illuminate if manual
regeneration is required. The “Time to Regen”
displayed on the performance screen will indicate
that the time until the next regeneration will be
required. However, the DPF indicator may illuminate
with time remaining on the display. When the DPF
indicator illuminates, the operator must perform
manual regeneration.
Regeneration Triggers
Regeneration may be required for the following
reasons:
Page 57
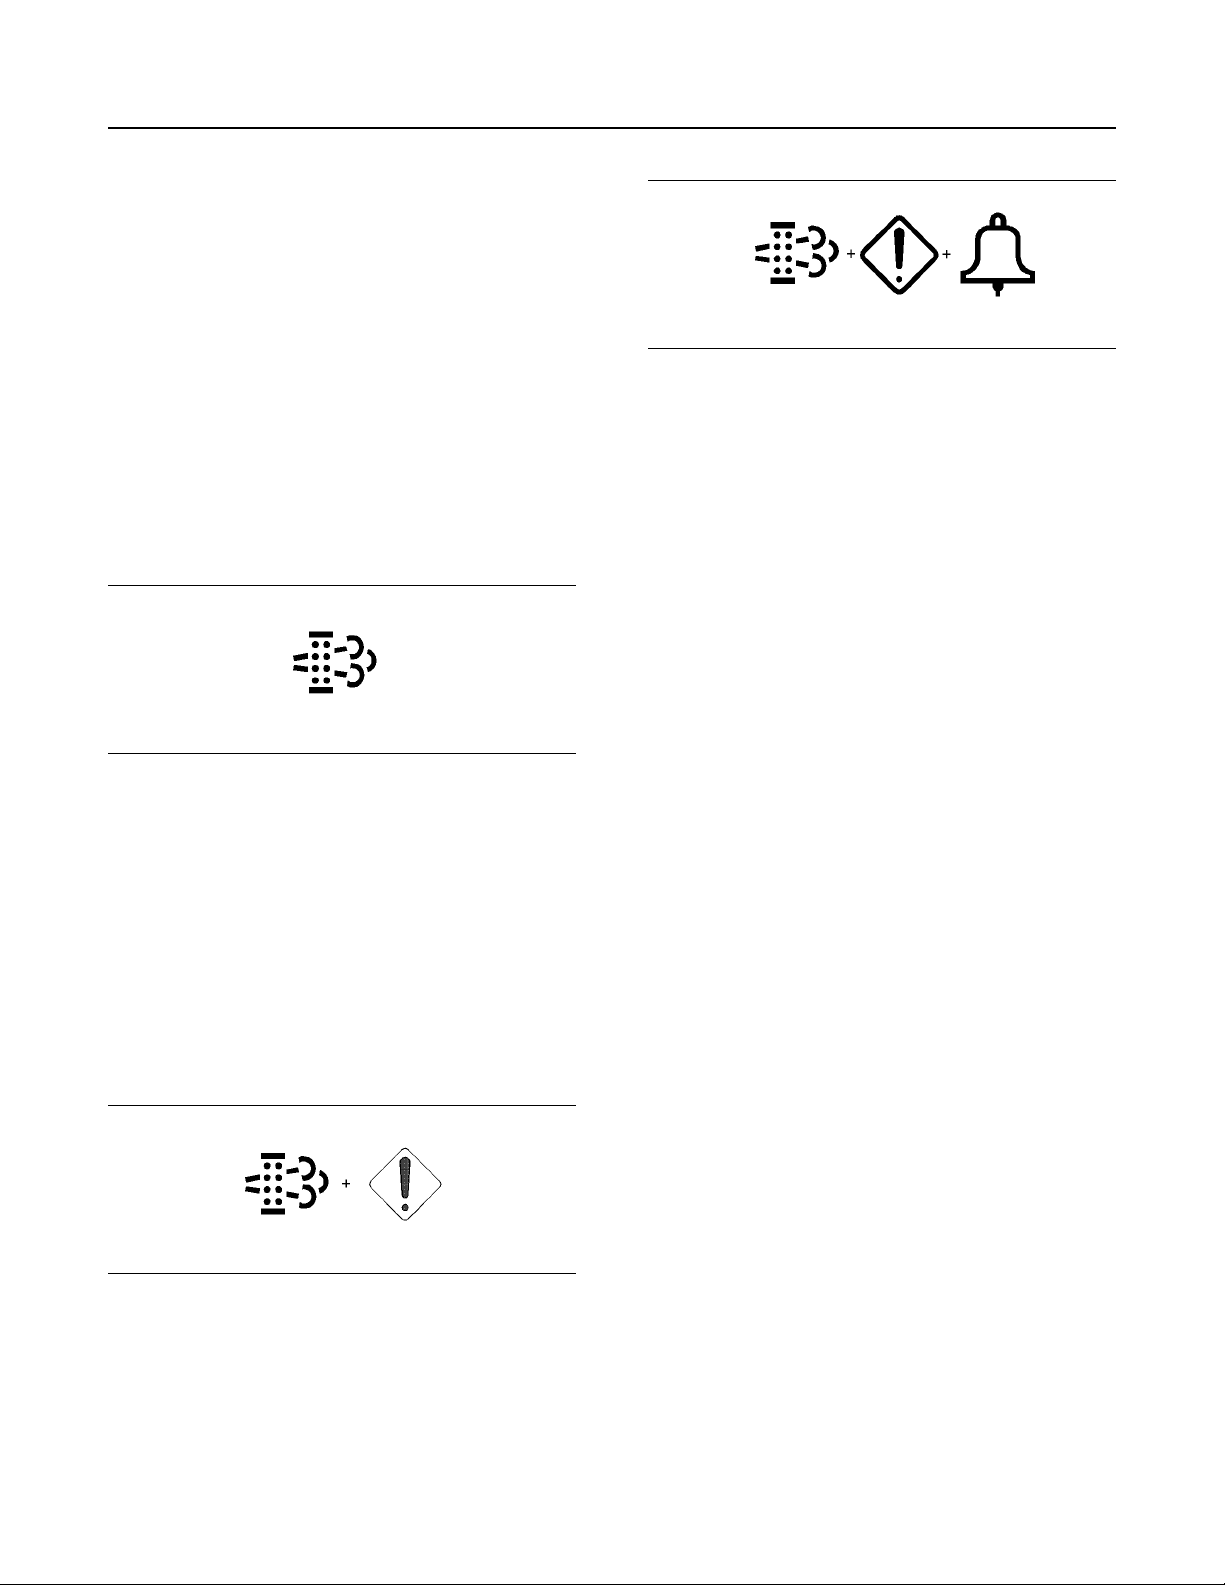
SEBU9422-02
Soot: The DPF will collect soot produced by the
engine. Automatic regeneration will become active to
reduce soot level.
Start-Up Regeneration: Start-up regeneration is
initiated by the ECM after a cold engine start. This
regeneration is performed to heat the system to a
required temperature for Diesel Exhaust Fluid (DEF)
dosing to begin.
SCR Maintenance: Regeneration is performed to
maintain the SCR system.
ARD Maintenance: Regeneration is performed to
maintain the CRS system.
Regeneration System Warning
Indicators
57
Operation Section
Diesel Particulate Filter Regeneration
Illustration 71 g03676115
Once the amount of soot collected in the DPF has
reached a threshold or “Time to Regen” has been at
0 hours for a pre-determined time, the DPF indicator
and an action indicator will be illuminated and an
audible alarm will sound.
10 minutes after the illumination of the DPF indicator,
action indicator, and audible alarm, the engine will
shutdown. The engine can be restarted by cycling the
engine start switch key. The engine will return to the
previous derate state before shutdown.
Once the amount of soot collected reaches a
threshold level or 6.4 hours of run time has passed
since the action indictor was illuminated without
successful regeneration, the engine will have a 100%
derate.
Illustration 69 g02117258
The DPF Indicator will illuminate when regeneration
is required. Regeneration should be performed as
soon as possible.
Note: In some situations, the DPF indicator may stay
illuminated after regeneration ends. The illuminated
DPF indicator indicates that complete regeneration
has not been performed. Complete regeneration is
when the soot has been depleted or all the criteria for
one of the other regeneration types have been met. If
the DPF indicator stays illuminated, perform
regeneration without interruption. The DPF indicator
will shut off when regeneration is complete.
Illustration 70 g02117259
If the soot load is above a threshold or “Time to
Regen” is 0 hours, then regeneration is required. The
DPF indicator and an action indicator will be
illuminated. Engine power will be slightly derated. If
the machine continues to operate without
regeneration, derate will eventually reach 100%.
Stop the machine and apply the parking brake. With
the engine at low idle, initiate manual regeneration.
Page 58

58
Operation Section
Operator Station
Once the amount of soot collected reaches a critical
threshold level, the regeneration will be locked out.
Now, regeneration can only be done through Cat
Electronic Technician (ET), by an authorized dealer.
The engine may be restarted, but will only run for 30
seconds before shutting down again.
i05085870
Operator Station
SMCS Code: 7300; 7451
S/N: KP51–Up
SEBU9422-02
Page 59
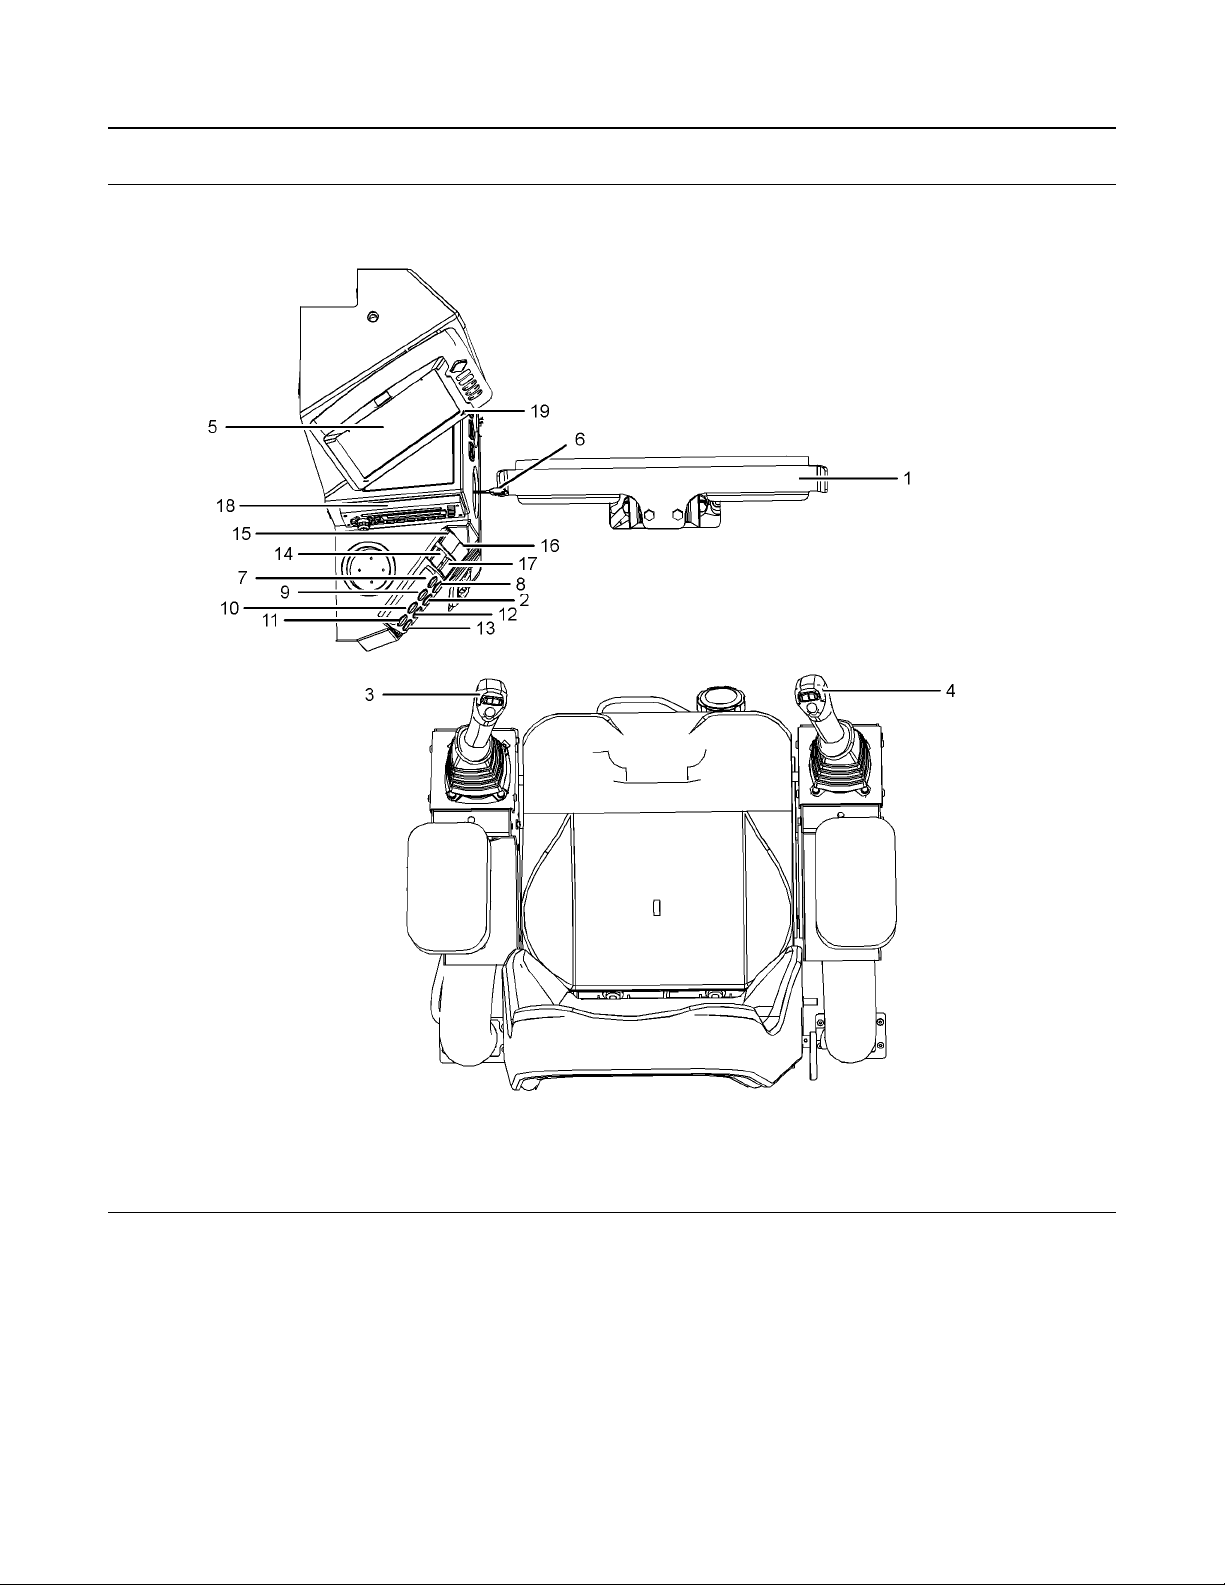
SEBU9422-02
59
Operation Section
Operator Station
Illustration 72 g03304176
(1) Swing Control
(2) Hydraulic Lockout Control
(3) Joystick for Boom Control and Open/
Close Function for the Grapple
(4) Joystick Control for Stick Control and
Grapple Rotate
(5) Monitor System
(6) Engine Start Switch
(7) Increase Engine Speed Switch
(8) Decrease Engine Speed Switch
(9) Stabilizer Select Switch (Front, Rear,
Trailer)
(10) Raise Right-hand Stabilizer Switch
(11) Raise Left-hand Stabilizer Switch
(12) Lower Right-hand Stabilizer Switch
(13) Lower Left-hand Stabilizer Switch
(14) Heater/Air Conditioner Fan Switch
(15) Wiper/Washer Switch
(16) Working Lights Switch
(17) Heater/Air Conditioner Select Switch
(18) Satellite Radio
(19) 12V Power Receptacles
Page 60
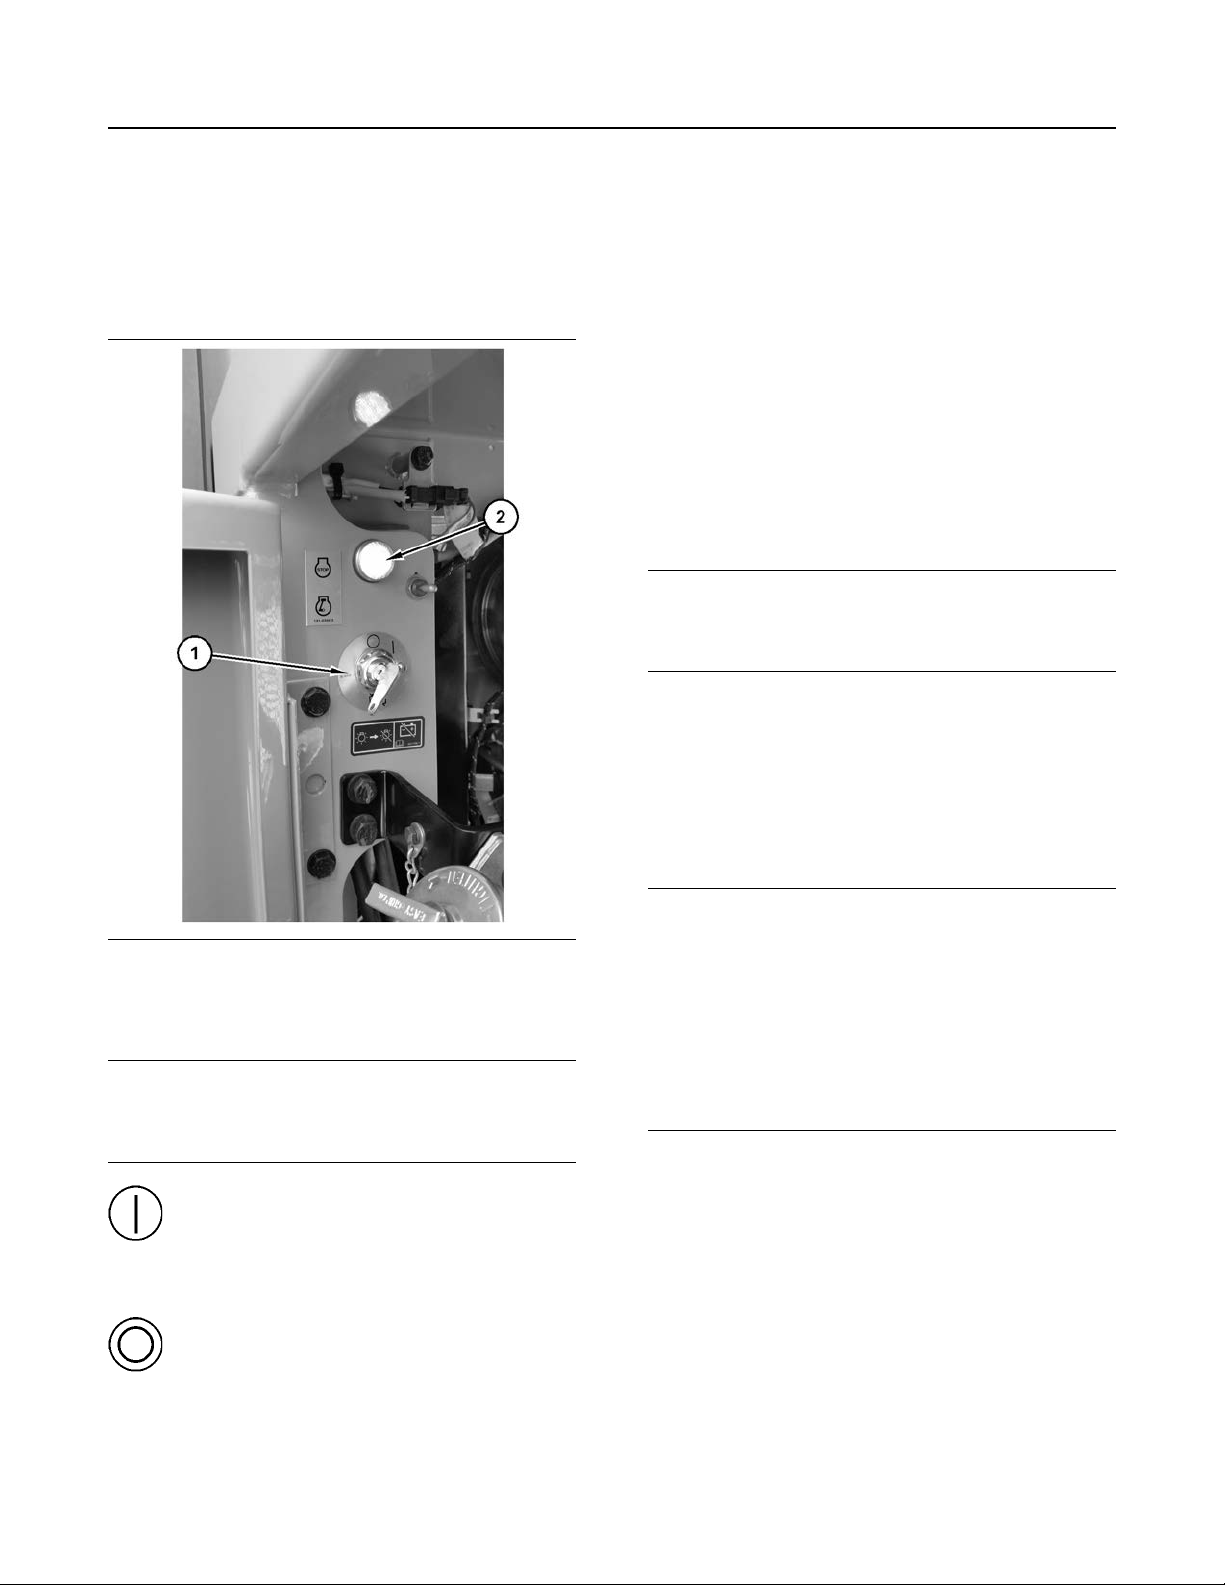
60
Operation Section
Battery Disconnect Switch
SEBU9422-02
Battery Disconnect Switch
SMCS Code: 1411
S/N: KP51–Up
i06635486
The battery disconnect switch operates differently
than the engine start switch. When the battery
disconnect switch is in the OFF position, the
electrical system is disabled. When the engine start
switch is turned to the OFF position and the battery
disconnect switch is turned to the ON position, the
battery remains connected to the entire electrical
system.
Turn the battery disconnect switch to the OFF
position. Remove the disconnect switch key when
you service the electrical system or other
components on the machine.
Turn the battery disconnect switch to the OFF
position. Remove the disconnect switch key if you do
not operate the machine for an extended period of a
month or more. This will prevent drainage of the
battery.
NOTICE
Never move the battery disconnect switch to the OFF
position when the engine is operating. Serious damage to the electrical system could result.
i06635588
Illustration 73 g06055316
The battery disconnect switch (1) is in the engine
compartment, accessible from the platform of the
knuckleboom loader.
NOTICE
Never move the battery disconnect switch to the OFF
position when the Indicator light (2) is illuminated.
Serious damage to the electrical system could result.
ON – To activate the electrical system,
turn the battery disconnect switch (1)
clockwise. The battery disconnect
switch must be turned to the ON position before
you start the engine.
OFF – To deactivate the electrical
system, turn the battery disconnect
switch (1)counterclockwise to the OFF
position.
Monitoring System
SMCS Code: 1900; 5258; 7000; 7400; 7402; 7450;
7451; 7490; 7600; 7601; 7603
S/N: KP51–Up
NOTICE
When the monitor provides a warning, immediately
check the monitor and perform the required action or
maintenance as indicated by the monitor.
The monitor indicator does not guarantee that the
machine is in a good condition. Do not use the monitor panel as the only method of inspection. Maintenance and inspection of the machine must be
performed on a regular basis. See the Maintenance
Section of this Operation and Maintenance Manual.
Page 61
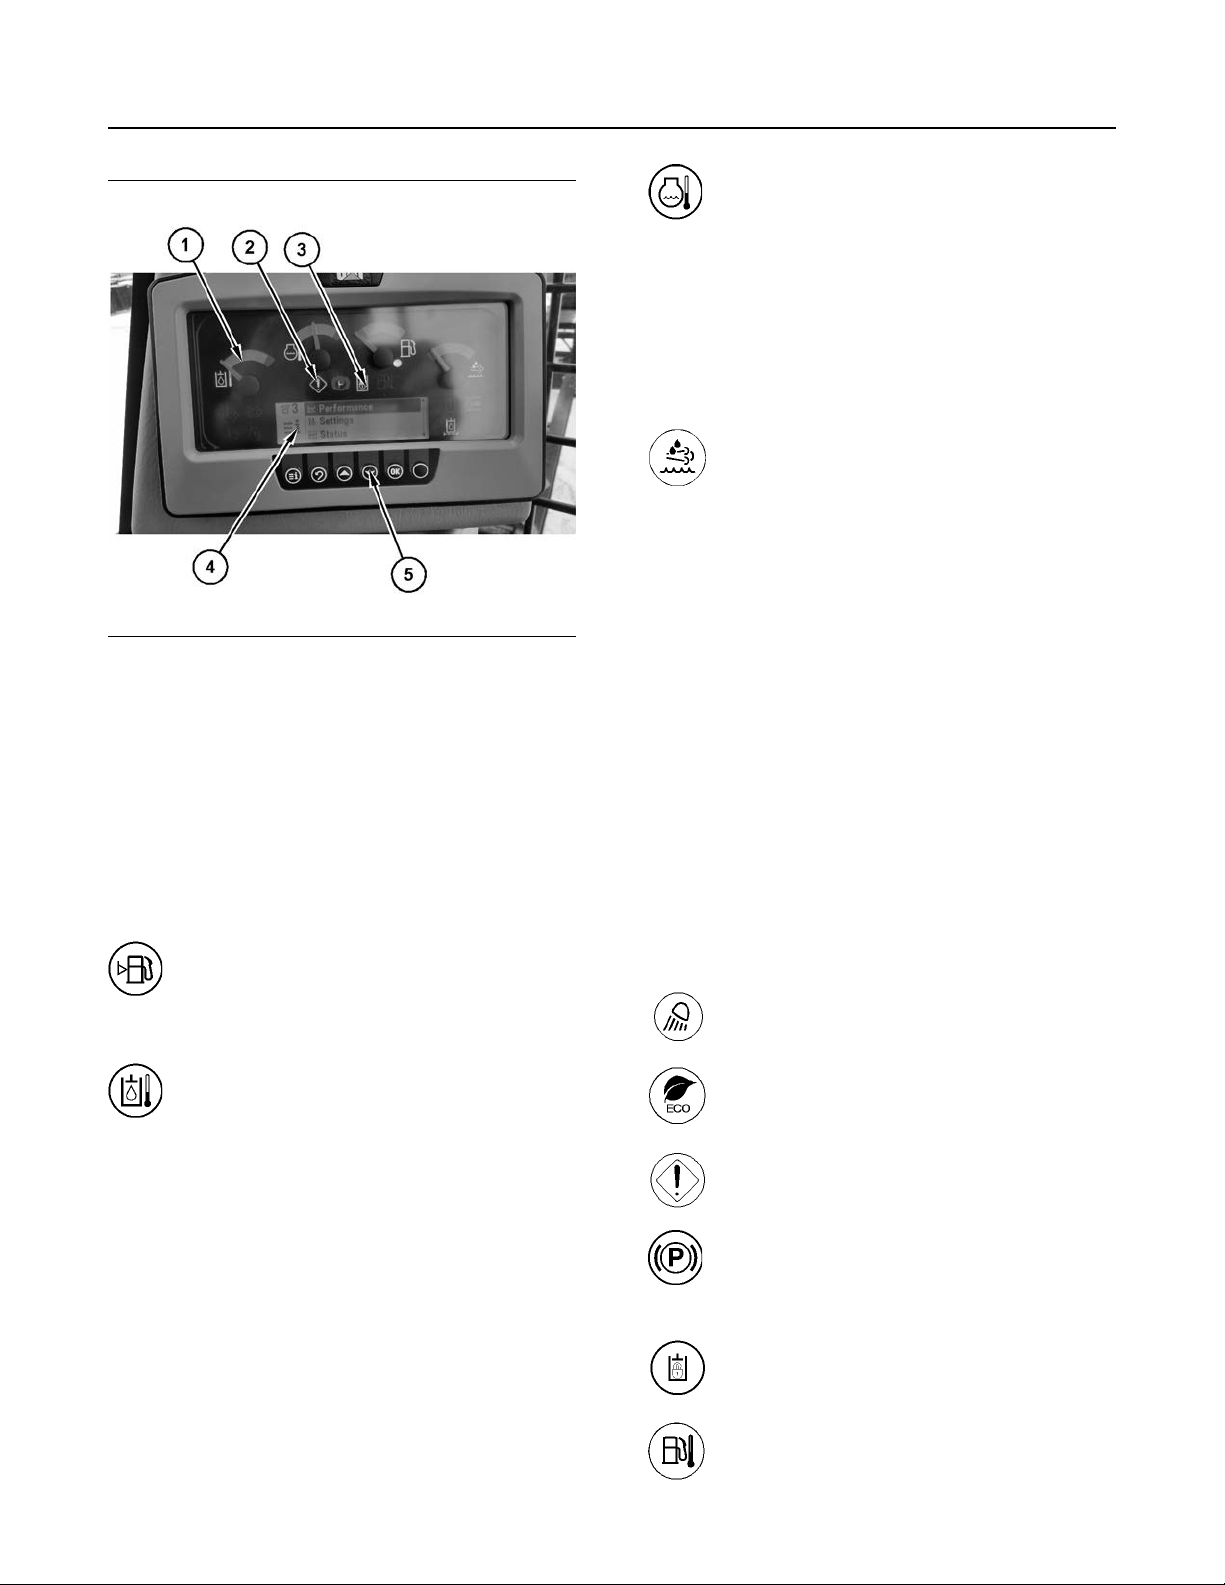
SEBU9422-02
61
Operation Section
Monitoring System
Engine Coolant Temperature – The
gauge represents the coolant
temperature of 45 °C (113 °F) to 122 °C
(252 °F). If the pointer enters the red zone, the
coolant temperature is 107 °C (225 °F). Increased
temperatures will sound the warning alarm.
Machine operation during the sounding of the
alarm may damage the engine. Also, machine
operation with the pointer in the red zone may
damage the engine. Stop the machine in a safe
place and investigate the cause.
DEF Level – The gauge represents the
level of the DEF If the pointer enters the
red zone, the DEF is low. Increased
temperatures will sound the warning alarm.
Machine operation during the sounding of the
alarm may damage the engine. Also, machine
operation with the pointer in the red zone may
damage the engine. Stop the machine in a safe
place and investigate the cause.
Illustration 74 g06056649
(1) Gauge area.
(2) Alert indicator.
(3) Status indicators.
(4) Graphical display area.
(5) Menu navigation buttons.
Note: For more information refer to Systems
Operation Troubleshooting, Testing and Adjusting
559D and 579D Knuckleboom Loader Machine
Monitoring System, UENR0395.
Gauges (1)
Fuel Level – The fuel level gauge
indicates the amount of fuel that is left in
the fuel tank. The fuel level gauge
indicates a percentage from 5% to 95%. The red
zone indicates 15%.
Hydraulic Oil Temperature – The gauge
indicates the temperature of the
hydraulic oil in the hydraulic sump for
the implement circuit. The gauge represents the
hydraulic oil temperature of 45 °C (113 °F) to
120 °C (248 °F). If the pointer enters the red zone,
the hydraulic oil temperature is 80 °C (176 °F). If
necessary, reduce the load that is on the machine
until the hydraulic oil temperature decreases.
Alert Indicator (2)
The alert indicator will flash amber and the action
alarm will sound to indicate a level 2 warning. A level
2 warning indicates that a failure has occurred and
that the machine operation will be changed.
The alert indicator will flash red and the action alarm
will sound to indicate a level 3 warning. A level 3
warning requires an immediate safe shutdown.
Status Indicators (3)
The indicators will illuminate or flash when any
function or level of warning is active.
Lights – Indicator will illuminate when
working lights are turned on.
Economy Mode – Indicator will
illuminate when the machine is set to
operate in the economy mode.
Operator Alert – Indicator will illuminate
when there has been a system error
detected.
Parking Brake – This indicator
illuminates when the parking brake is
engaged. The indicator should flash
during start-up.
Hydraulic Lockout – This indicator is
illuminated when the hydraulic oil
pressure is locked out.
Fuel Temperature – Indicator will
illuminate/flash when fuel temperature
is above recommended temperature.
Page 62
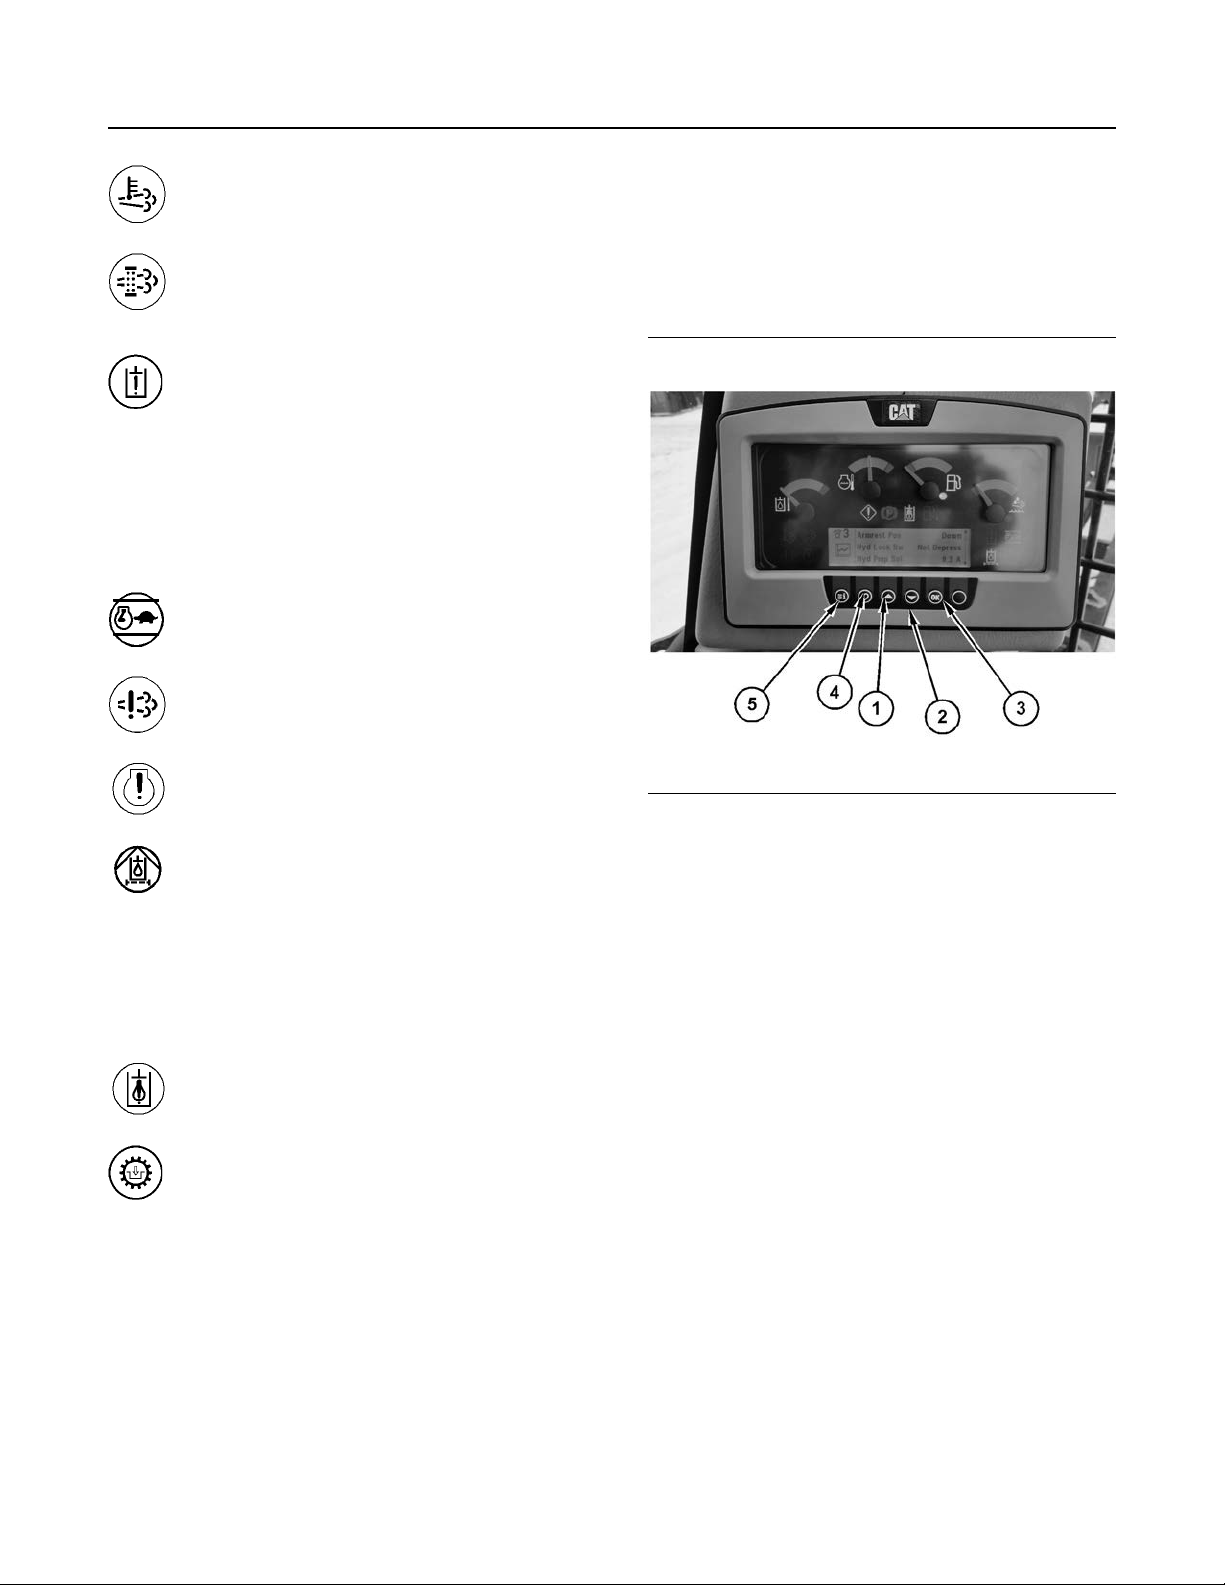
62
Operation Section
Monitoring System
SEBU9422-02
Engine Emission Temperature –
Indicator will illuminate/flash when DEF
is above recommended temperature.
Engine Emission System Filter –
Indicator will illuminate/flash when a
restriction is detected in the emission
filter.
Hydraulic System Failure – The
hydraulic filter is restricted. Restriction
of the filter will cause hydraulic
components to malfunction. Turn the engine start
switch to the OFF position and then turn the
engine start switch to the ON position. If the
warning disappears, the filter is good. Operate
the machine on flat ground for at least 10
minutes. If the warning reappears, replace the
filter.
Auto Kick Down – Indicator will
illuminate when the engine RPM needs
to decelerate.
Engine Emission Failure – Stop the
engine and contact your authorized
dealer.
The display module is used to change the customer
preferences and operation parameters. Allowing an
extra means for the operator to increase machine
efficiency.
Menu Navigation Buttons (5)
Engine System Warning – Indicator will
illuminate/flash when the engine system
needs attention.
Hydraulic System Filter – The hydraulic
filter is restricted. Restriction of the filter
will cause hydraulic components to
malfunction. Turn the engine start switch to the
OFF position and then turn the engine start
switch to the ON position. If the warning
disappears, the filter is good. Operate the
machine on flat ground for at least 10 minutes. If
the warning reappears, replace the filter.
Hydraulic System Warning – Indicator
will illuminate/flash when a restriction in
the hydraulic system is detected.
Transmission Engage – Indicator will
illuminate when the transmission is
engaged.
Graphical Display Area (4)
The LCD screen provides readouts for the display
module. The LCD screen displays the following
items: machine operations, diagnostic events, and
modes of operation.
If a fault indication occurs, the message will override
any screen that was displayed on the monitoring
system display.
Illustration 75 g06056671
Navigation Buttons
The navigation buttons (1 & 2) are used to navigate
the menu.
Up – Depress the up arrow
Down – Depress the down arrow
Up
• Navigating a menu list in the upward direction
• Scrolling a highlighted letter in a letter entry screen
• Scrolling a highlighted number in a number entry
screen
• Navigating to the previous performance page
Down
• Navigating a list in the downward direction
• Scrolling a highlighted letter in an entry screen
• Scrolling a highlighted number in an entry screen
Note: You may snooze the fault display from the
screen by pushing the OK button or the back button.
Page 63

SEBU9422-02
63
Operation Section
Monitoring System
OK/Select Button
The OK/Select button (3) is used for the following
functions:
• Selecting the highlighted entry in a list
• Opening the configuration screen for a highlighted
performance page quadrant
• Selecting a highlighted item
• Confirming an action when a popup is visible
• Snooze a warning or information popup
Back/Previous Button
The back/previous button (3) is used for the following
functions:
• Navigating to the previous screen
• Cancel an action when a popup is visible
Operator Select Button
The operator select button (4) is used for the
following functions:
If the engine is started during the fluid level check,
the monitor will cancel these checks.
Machine Warnings
The Cat Monitoring System provides three warning
categories. The first category requires only operator
awareness. The second and 2S warning categories
require an operator response. The third warning
category requires immediate shutdown of the
machine.
• Navigate to main menu screen from anywhere in
the menu structure
• If the main menu is visible, the menu button will
return to performance pages
Information Button
The information button (5) is used to obtain menu
information.
Prestart Monitoring Function
Turn the engine start switch to the ON position.
The coolant temperature, the hydraulic oil
temperature, the fuel level, and the position of the
engine speed dial are now indicated.
The monitoring system checks the level of the engine
coolant, the engine oil, and the hydraulic oil before
the engine starts.
If the fluid level check detects a low fluid level, the
appropriate message will be displayed. A pictograph
will be shown to indicate the fluid level that is low.
Note: The machine cannot perform an accurate fluid
level check when the machine is on a slope. Perform
the fluid level check on level ground.
Page 64
64
Operation Section
Monitoring System
Table 5
Warning Indications
SEBU9422-02
WARNING OPERATION
(1)
Warning
Category
1 No immediate action is required. The sys-
2 X X Change machine operation or perform
2S X X X
3 X X X
(1)
The active warning indications are marked with an X.
(2)
This is the possible result if the operator takes no action.
(3)
A steady alarm sounds.
(4)
A pulsating action alarm sounds.
Flashing Alert
Indicator
The monitoring system has the following three
warning levels for events:
Warning Level 1 – Warning level 1 does not alert the
operator that a warning has occurred and does not
affect the operation of the machine. Warning level 1
is recorded. This warning may be viewed from the
“Diagnostics” menu of the display. Warning level 1
may also be viewed with Cat
Flashing
Action
Lamp
®
Electronic Technician
Action
Alarm
(3)
(4)
Action
tem needs attention soon.
maintenance to the system.
Change machine operation or perform
maintenance to the system.
Immediately perform a safe engine
shutdown.
If the monitoring system detects an abnormal
operating condition, the operator will be notified.
If multiple warnings are present in the system, the
most important problem is shown first. Press the right
key or press the left key to view all the warnings that
are present in the machine. If no keys are pressed
within 5 seconds, the display will return to the most
important problem.
(Cat ET) Service Tool.
Note: The menu is still functional by pressing the
Warning Level 2 – Warning level 2 requires
changing the operation of the machine or performing
a maintenance procedure. Failure to correct the
problem that causes this warning may result in
damage to the involved components or system of the
machine.
Warning Level 2S – Warning level 2S requires
changing the operation of the machine or performing
menu key.
Main Menu
The “Main Menu” allows the operator to view
information concerning the machine. This menu also
allows the operator to change information concerning
the machine.
a maintenance procedure. Failure to correct the
problem that causes this warning may result in
damage to the involved components or system of the
Operator Parameters
machine. A steady alarm sounds when Warning
Level 2S is active.
Possible Result
No damage will occur to the machine. Minor reductions in machine performance may occur.
Severe damage to components
can occur.
Severe damage to components
can occur.
Injury to the operator or severe
damage to components can
occur.
(2)
Warning Level 3 – Warning level 3 requires an
immediate safe shutdown of the machine to avoid
damage to the machine or injury to personnel around
the machine. The problem that caused the event
must be corrected before machine operation can
resume.
Note: Certain conditions will allow the machine to be
operated in the partial limp home mode.
Table 5 indicates the status of the alarm and “Check
Monitor” indicator for each warning level.
Illustration 76 g03881117
The “Information” (1) allows the operator to view
information concerning the machine. This menu also
allows the operator to change information concerning
the machine.
Page 65
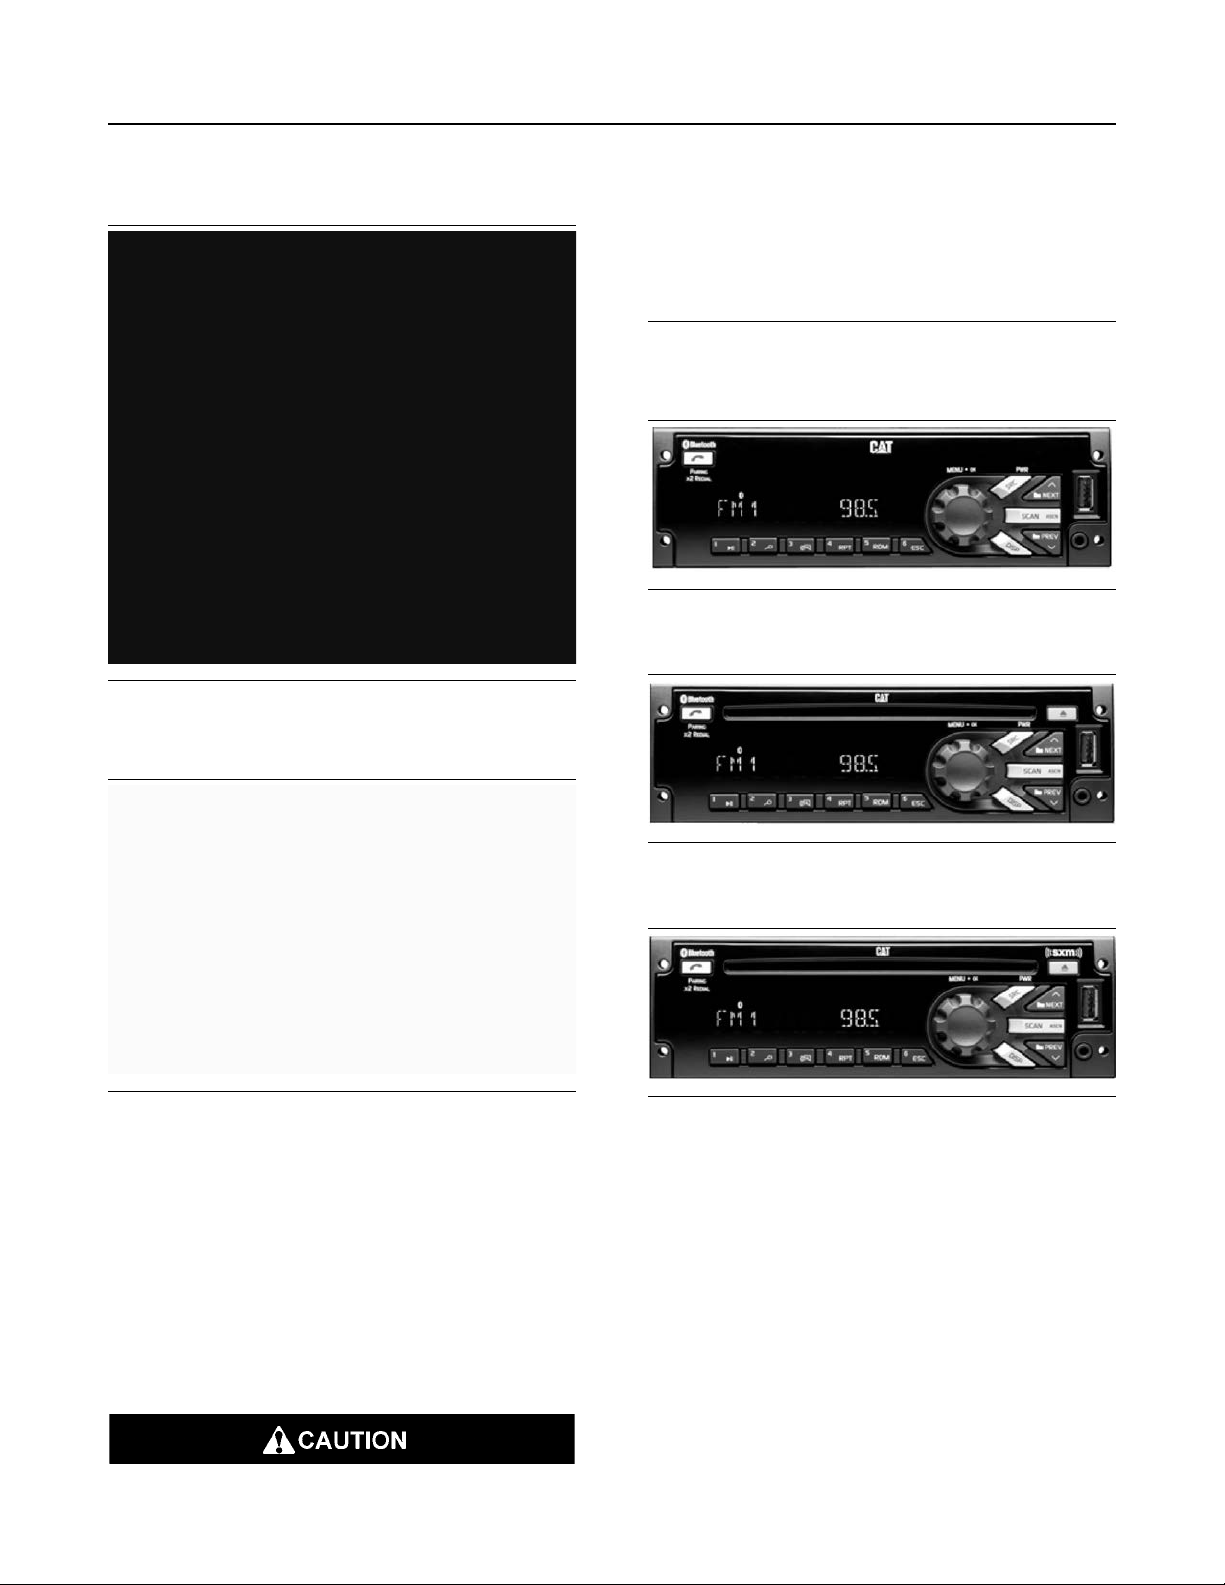
SEBU9422-02
65
Operation Section
Radio
Operator Parameters can be set by selecting the
Information Button.
Illustration 77 g06056686
From the main menu, select Machine (2). Depress
the OK button (3).
When driving, always keep your eyes on the road
and hands on the steering wheel, paying careful
attention to normal driving tasks. As always, the
driver is responsible for safe vehicle operation.
Not keeping your eyes on the road and hands on
the wheel while driving could result in injury to
you or others.
Stereo Receivers
Illustration 79 g03566500
MP3/USB/iPod/Aux/Bluetooth Receiver
Illustration 78 g06056692
The list of Operator Parameters will be displayed.
The operator will be able to select and set the
parameters listed. Select the function to be adjusted
select the OK button, adjust to preferred settings.
i06204660
Radio
(Entertainment If Equipped)
SMCS Code: 7338
Illustration 80 g03566527
MP3/USB/iPod/Aux/Bluetooth/CD Receiver
Illustration 81 g03566571
MP3/USB/iPod/Aux/Bluetooth/CD/SAT Receiver
Radio Pin out
Radio pinout is shown below
Page 66
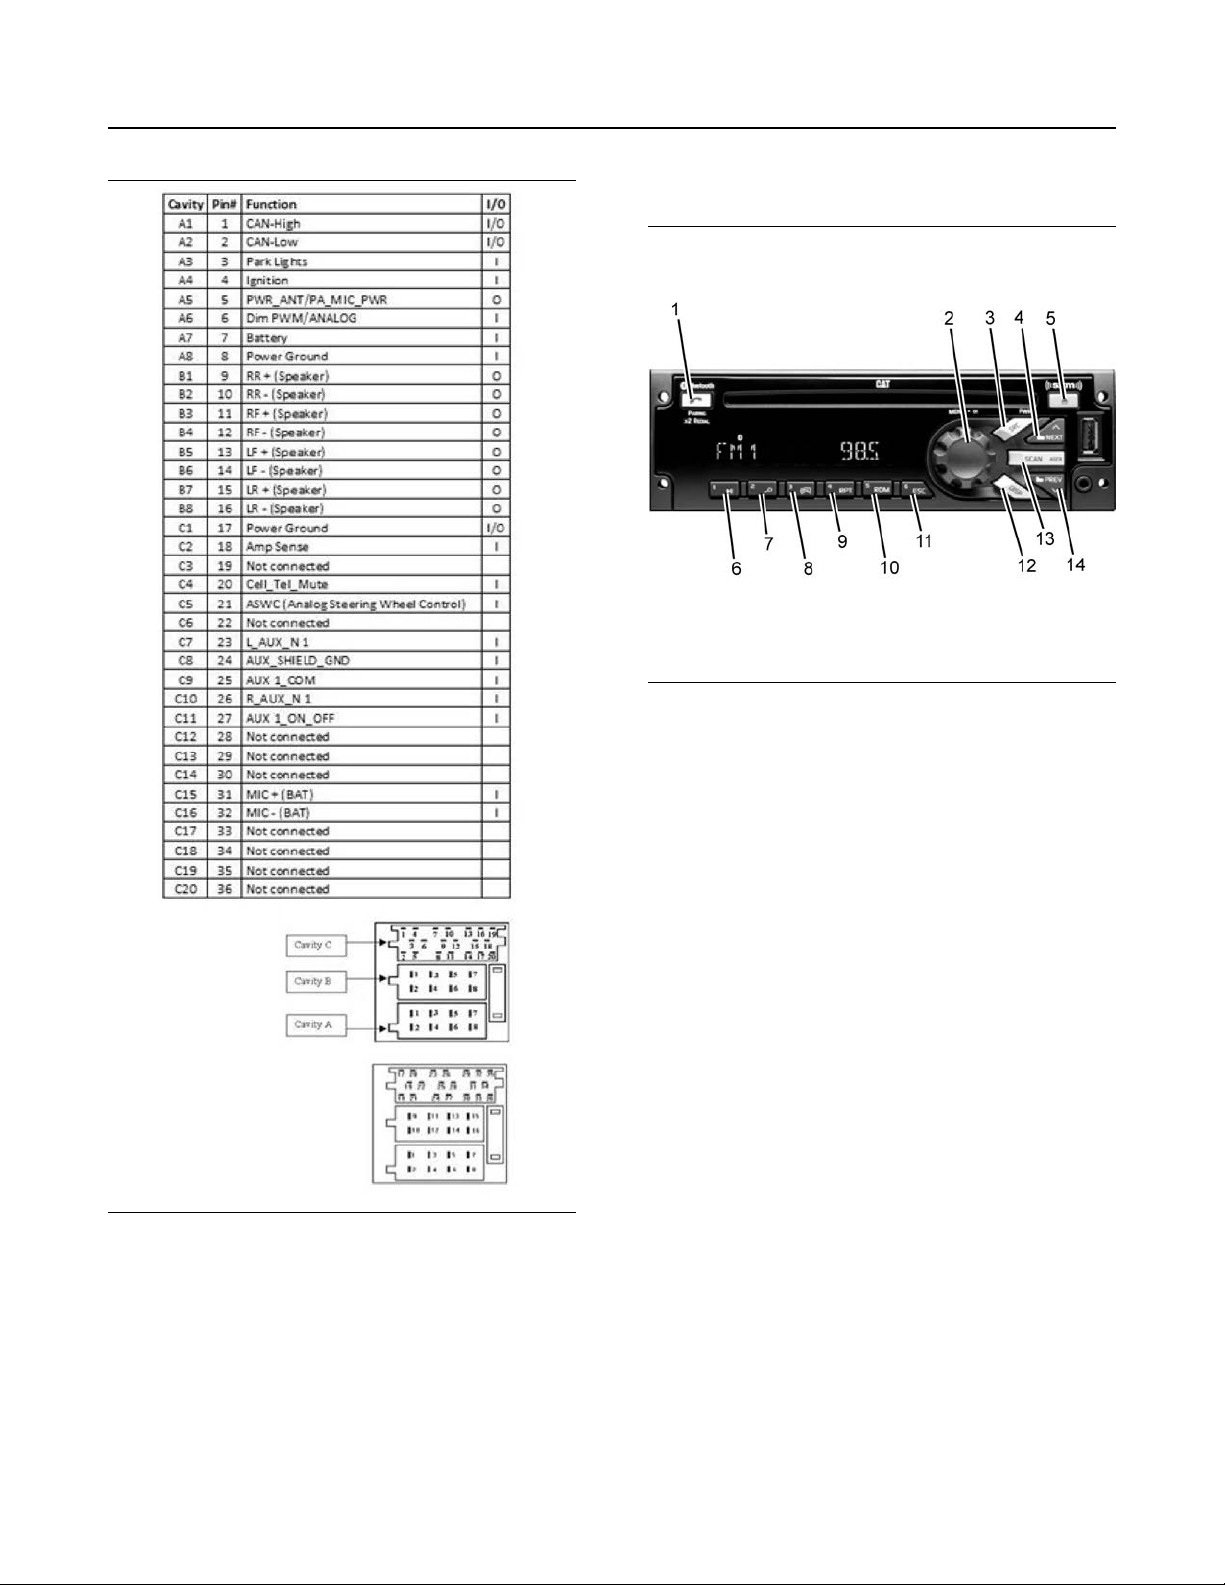
66
Operation Section
Entertainment If Equipped
SEBU9422-02
General Radio Receiver Functions
Illustration 82 g03566584
Illustration 83 g03566592
(1) Phone
(2) Knob
(3) SRC/PWR (Source/Power)
(4) Next
(5) Eject
(6) Play/Pause
(7) Browse
(8) Clock/Alarm
(9) RPT (Repeat)
(10) RDM (Random)
(11) ESC (Escape)
(12) DISP (Display)
(13) SCAN/ASCN (Scan/Autoscan)
(14) PREV (Previous)
Options
• An AM band with 6 AM presets
• Three FM bands with a total of 18 FM presets
• One weather band with six WX presets
Phone (if equipped)
Press the Phone button for more than 3 seconds to
show the Bluetooth Menu. When Bluetooth is
enabled, press the button to display the Dial Menu or
to accept an Incoming Call (if a Phone is paired).
During a call press the button for more than 3
seconds to transfer the call from the radio to the
Phone.
VOLUME KNOB/OK
Press for less than 3 seconds to display Audio
Control Menu. Press for more than 3 seconds to
show the user menu. Rotate to increase/decrease
volume or during a menu for navigation. Press while
in a menu to confirm the selected action.
Page 67
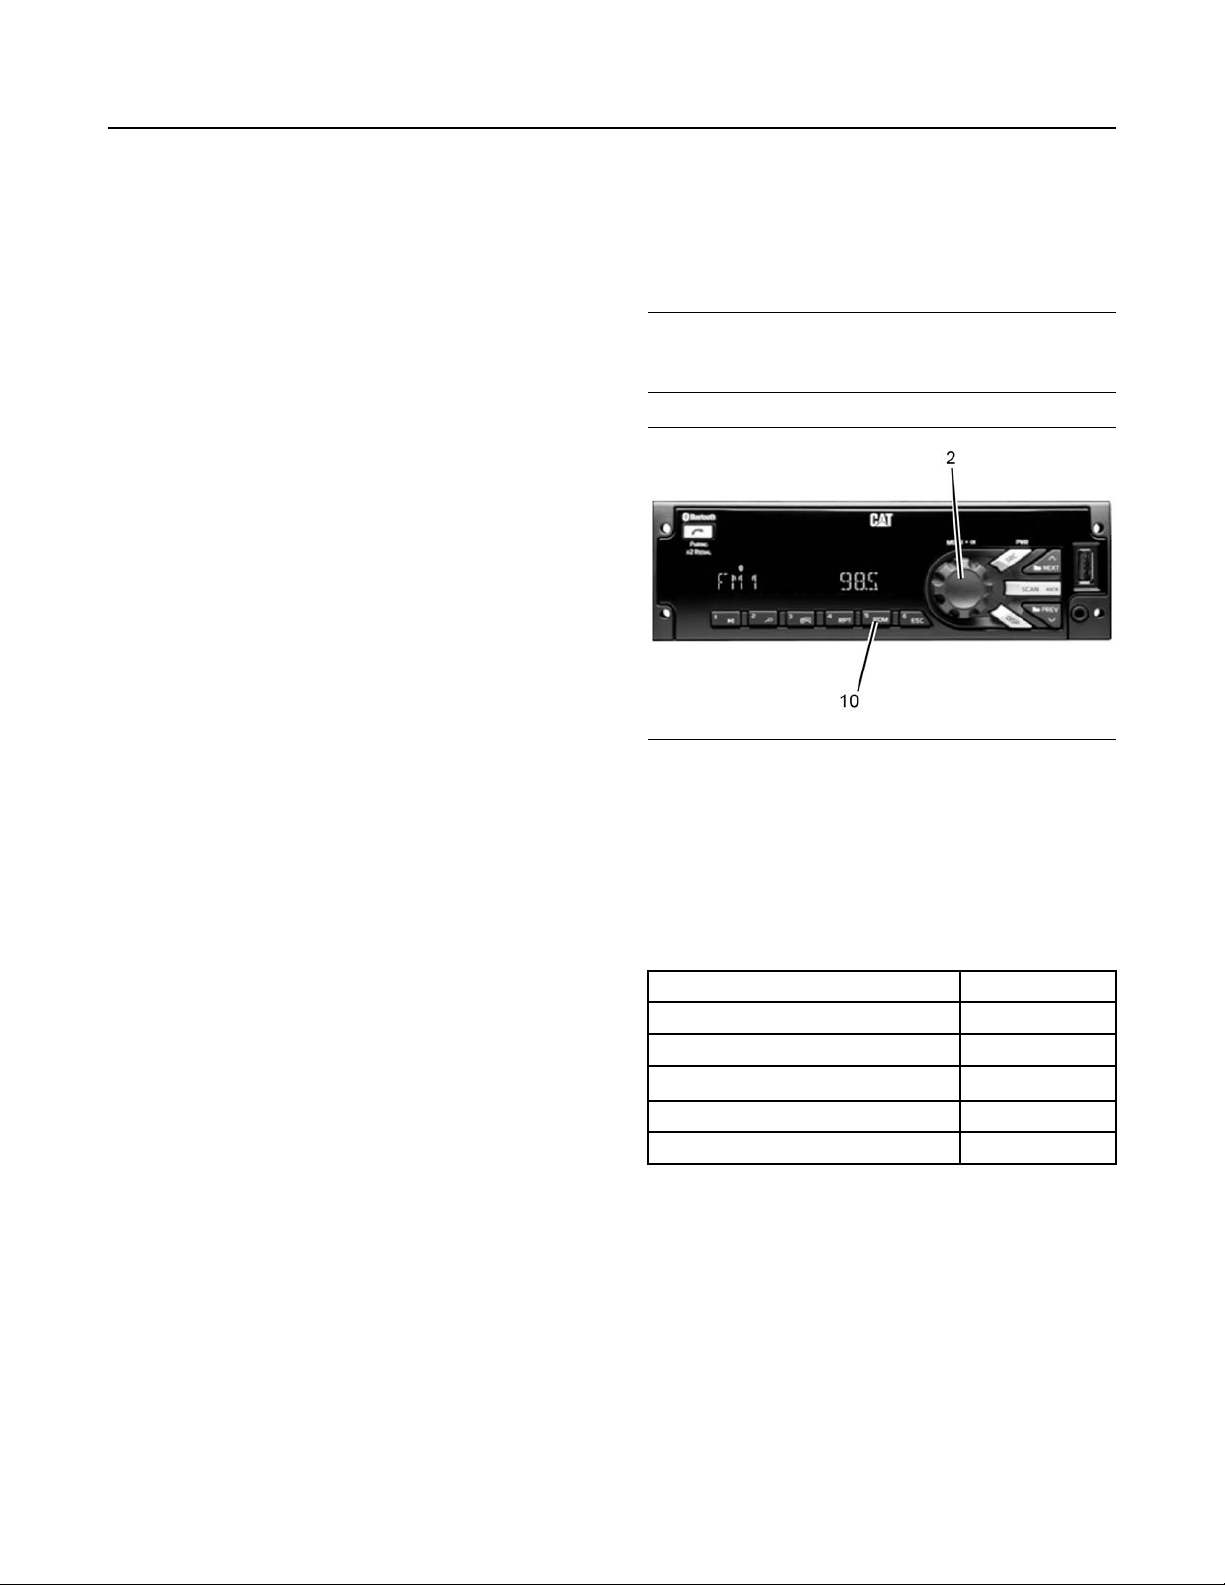
SEBU9422-02
67
Operation Section
Entertainment If Equipped
SRC/PWR (Source/Power)
Press to switch to FM -> AM -> WX -> SXM -> CD ->
USB/iPod ->AUX -> Bluetooth Audio (if equipped)
and to turn Radio ON. Press and hold to turn radio
OFF.
NEXT (Next/Forward)
Press to select next track or station. Press and hold
for FF or Tune Up
EJECT
Press to eject the CD
PLAY/PAUSE
Press to pause / unpause current Media.
BROWSE
Press to navigate on the device and select a specific
song or play context (Applicable to USB sticks, CD
MP3 discs and iPod).
CLOCK/ALARM
Press during Alarm activation to cancel the Alarm.
RPT (Repeat)
Press to repeat current track. Press again to stop
repeat. Look for the RPT icon in the radio display to
turn this feature ON or OFF.
RDM (Random)
Press to play the tracks randomly. Press again to
stop random mode. Look for the RDM icon to turn on
in the radio display.
ESC (ESCAPE)
Press to exit one Menu Level.
DISP (DISPLAY)
If vehicle ignition is ON: Press to change source
display
SCAN/ASCAN
Scans stations/CD tracks/MP3/WMA files and folder
and in tuner, stores stations to presets
PREV (Previous/Reverse)
Press to select previous track or station. Press and
hold for FR or Tune Down
Change the Frequency Band
The following instruction provides information on how
to correctly set the frequency band on the radios
installed on Caterpillar machines. Once in the
frequency then you will have the correct increments.
NOTICE
If the radio is set to the Saudi Arabia frequency band,
the radio CANNOT be reset to any other country.
Illustration 84 g03812356
1. Radio OFF, ignition on
2. Press preset 5 (RDM 10) and volume knob (2) at
the same time for 6 seconds.
3. Display will show USA number 1/6
4. Turn knob clockwise to select Frequency:
Table 6
USA 1/6
EUROPE 2/6
JAPAN 3/6
LATAM (Latin America) 4/6
CHINA 5/6
SAUDI 6/6
5. Push knob to select zone.
6. Turn on radio to verify frequency.
To return to USA, follow same procedure.
Setting the Presets
The six numbered pushbuttons allow you to preset 6
of your favorite stations per band and easily return
with the touch of a button. To set the presets:
(1) Turn on the receiver.
(2) Select the band.
Page 68
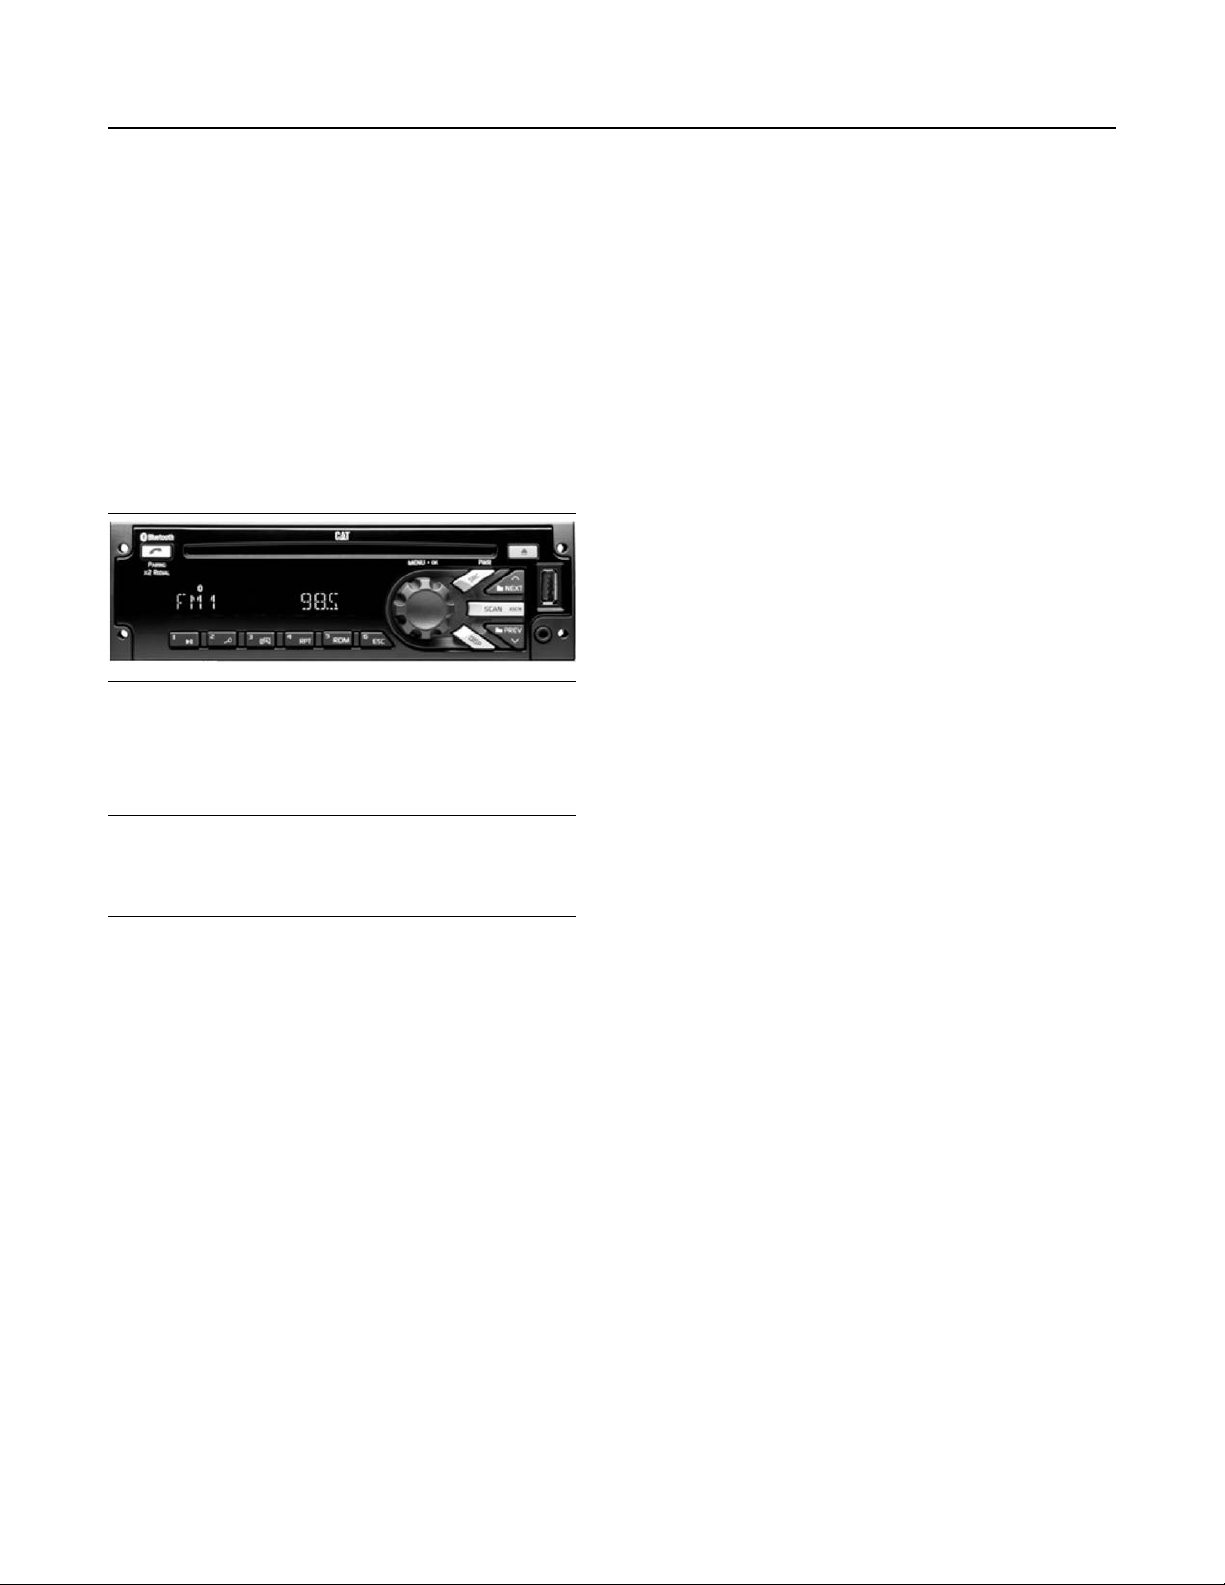
68
Operation Section
Entertainment If Equipped
SEBU9422-02
(3) Tune to the desired station.
(4) Press and hold one of the six numbered buttons
for more than 2 seconds to store the selected station.
When the station has been set to the preset number
you chose, you will hear a beep and the preset
number will be visible.
(5) Repeat steps 1-4 for each pushbutton.
Note: Pressing a preset button in the future will tune
the radio to the station you set on the band to which
you are listening.
CD Receiver
Illustration 85 g03566527
Compact Disc Player (If Equipped)
Note: On newer machines there is an internal battery
backup in the radio to retain time when using the
machine battery disconnect switch.
TUNE/SEEK
Press (5) button to forward to the next track. The
track number and elapsed time will appear.
TUNE/SEEK
Press (6) button to go to the beginning of the track
being played. Press this button within the first 8
seconds of the track to go to the beginning of the
previous track. The track number and elapsed time
will appear.
PAUSE
Press the (9) button to pause a CD. PAU will appear
on the display and the audio will be muted. Press the
button again to resume play of the CD.
RDM
Press the RDM (10) button to activate random track
selection. RDM will appear on the display and the
tracks on the loaded disc will play in random order.
Press the RDM (10) button to turn off random play.
Your integral CD player plays full size compact discs.
NOTICE
Never insert anything other than a CD into your CD
player. Doing so could damage your CD player, result
in unnecessary repairs and/or void the unit's warrant.
Playing a Compact Disc
(1) Turn on the ignition and receiver.
(2) Insert a disc partway into the slot, label-side up.
The player will automatically pull the disc in once disc
has been partially inserted. The CD icon and
LOADING will appear on the display followed by the
track number and elapsed time. Then, the disc will
begin to play.
(3) If you are listening to AM/FM/WX radio, press the
AUX (2) button to play a CD that has been loaded
into the player. If no CD has been loaded, the display
will show "NO CD" for 5 seconds and return to the
default display. If a CD has been loaded, the track
number and the elapsed time will be displayed.
Note: If a CD is ejected and not removed within 16
seconds, the CD will reload but will not start playing
until the AUX (2) button is pressed.
RPT
Press the RPT (11) button to repeat the track you are
playing. RPT will appear on the display and the track
you are playing will be repeated until you press the
RPT (11) button again.
FF
Press and hold the FF (13) button to fast-forward
through a track. When you release the button, play
will resume at normal speed. The track number and
elapsed time will appear for 5 seconds before the
default display reappears.
REV
Press and hold the REV (11) button to fast
REVERSE. When you release the button, play will
resume at normal speed. The track number and
elapsed time will appear for 5 seconds before the
default display reappears.
TRACK SCAN
Press SCAN/PSCAN (17) to scan all tracks on the
CD. After playing 10 seconds of the current track, the
player will automatically go to the next track. To end
track scan, press SCAN/PSCAN (17) again.
DSPL/TIME
Press DSPL/TIME to toggle between the track
number/elapsed time and time of day. To change the
display, see the Display section of this manual.
Page 69
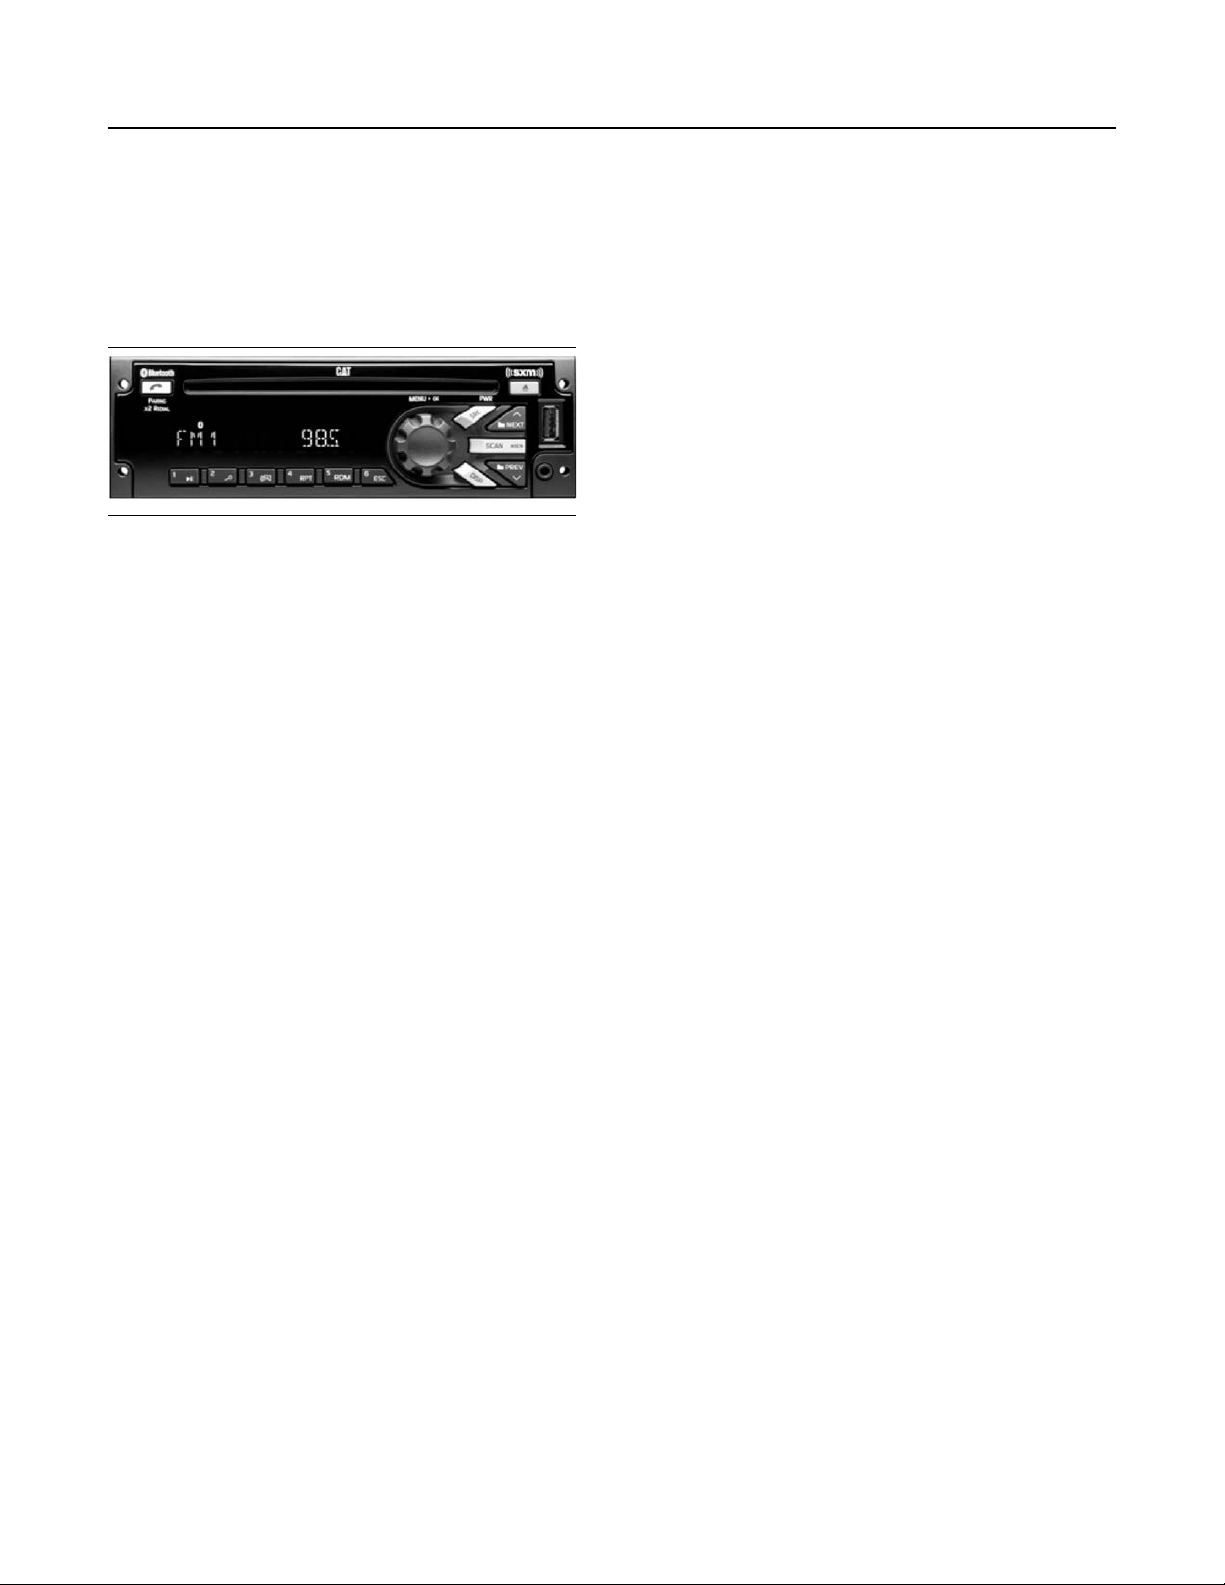
SEBU9422-02
69
Operation Section
Entertainment If Equipped
EJECT
Press the Eject (18) button to eject a CD.
MP3/USB/iPod/Aux/Bluetooth/CD/
SAT
Illustration 86 g03566571
Mode Display
When you are playing MP3 or WMA files, press the "i
Title/Menu" button to toggle between different
displays views
(1) Track Number
(2) Artist Name
(3) Song Name ("Song Title" for iPod)
(3) Album Name
(5) Folder/PLST Name (excluding iPod)
AUX Input Display
When you are using an external device connected
through the auxiliary inputs, pressing the "i Title/
Menu" button will have no effect.
When a device is connected via the aux input, the
radio will display FRONT AUX as long as radio is
kept in this mode. AUX is selected by pressing the
SRC button and no device is connected, the radio will
select the rear auxiliary input, and display REAR
AUX as long as REAR AUX is kept in this mode.
Hands Free Display (Bluetooth®)
Bluetooth Hands Free section) with the radio and an
incoming call is received, the radio will pause/mute.
The display will show the phone name on the first line
and the phone number on the second line. The <<
characters indicate an incoming call. Note: If the
phone is in normal mode, the radio will emit a ring
tone. If the phone is in silent mode, there will not be a
ring tone.
When a cell phone has been previously paired and
connected (see Using the Bluetooth Hands Free
section) with the radio. A call is placed from the radio
or the cell phone, the radio will pause/mute and the
display will show the phone name on the first line and
the phone number on the second line. The
characters >> indicate an outgoing call.
Phone Disconnection
If the cell phone ends the Bluetooth connection, the
phone turns off or the phone signal weakens, the
radio will terminate the connection, and the radio will
display PHONE DISCONNECTED for 3 seconds.
Use the DISCONNECT (see Using the Bluetooth
Hands Free section) option from the Hands Free
menu and the radio will attempt to disconnect with
the current cell phone device.
Phone Reconnection
If a previously connected cell phone reactivates the
connection with the radio, the cell phone is turned on
or the phone re-establishes signal, the radio will
display PHONE CONNECTED for 3 seconds.
Use the CONNECT (see Using the Bluetooth Hands
Free section) option from the Hands Free menu to
reconnect with a previously paired cell phone device.
Using an iPod®
The radio is capable of controlling and playing music
from an iPhone/iPod.
Playing an iPod
Insert the iPod USB cable connector into the radio
USB connector (the other end connected to your
iPod). iPod READING will appear on the display.
After all the connections have been made and the
radio has finished reading the iPod, the iPod will
begin playing. The elapsed time and the track
number will be displayed. Play begins from current
track played on iPod and continues sequentially
through all tracks from the iPod's last selected mode.
After playing the last track of the iPod's last selected
mode, play stops and the radio will display the iPod
Menu.
Files supported on USB sticks: MP1, MP2, MP3
(VBR) and WMA (ver. 9 and VBR).
Your MP3 player is able to read and play a maximum
of 50 folders and playlists. Long files, folders, or a
combination can reduce the number of files and
folders that can be played. If you want to play many
files or folders, minimize the length of the files and
folders. You can also play an MP3/WMA recorded
without file folders. The system can support up to 11
levels of folder nesting. If a disc contains more than
50 folders or 11 folder levels, your player will only let
you access and navigate the maximum number and
will ignore additional items.
Page 70

70
Operation Section
Entertainment If Equipped
SEBU9422-02
WX
The WX band is for the Governmental weather radio
services frequencies; the radio can tune the seven
weather channels following the steps in Tuning,
Presets, and SCAN sections.
SXM (If Equipped)
Vehicles with a valid SiriusXM® satellite radio
subscription can receive SiriusXM programming.
SiriusXM satellite radio has a wide variety of
programming and commercial-free music, coast to
coast, and in digital-quality sound.
SiriusXM®
SXM Display
When SiriusXM is active, the channel number,
channel name, artist name/content info, song title, or
category name could be displayed on the screen.
SiriusXM may update the information at any time.
To change the current display view, short press the
DISP button.
When a new channel is selected, a song change
occurs, SXM source is selected (from power up or
source change) or the information is updated, all the
elements will be displayed using paging; the paging
can be stopped by short pressing the DISP button
Category mode Enable/Disabled
Category Search Mode Enabled means that only
channels in the current Category are searched.
When enabled, the CATEGORY icon is turned on.
Category Search Mode Disabled means that all
channels are searched. When disabled, the
CATEGORY icon is turned off.
To enable/disable the category browse mode follow
the steps in the User Menu section
The default after a power up is Category Disabled.
SXM Channel Selection
Presets and SCAN functions work the same as
defined in the SCAN subsection of AM-FM-WX
Radio.
NEXT button
While in SXM the radio will scroll to the next channel
available in numerical order.
PREV button
While in SXM the radio will scroll to the previous
channel available in numerical order
Note: If the SXM service is not activated, only the
free-to-air channels will be present.
Display labels
To recognize the displayed text the radio uses the
following convention :
• Channel Number: CH
• Channel Name: CH
• Artist Name: ART
• Content Info: INFO
• Song Title: SONG
• Category name: CAT
SXM Categories
SiriusXM stations are organized in categories.
The category list for SXM is in the following webpage:
“http://www.siriusxm.com/sxm/pdf/sirius/
channelguide.pdf”
To change the current category long press the NEXT/
PREV button and the radio will tune the first channel
on next or previous category.
SXM Radio ID
If tuned to channel 0, "RADIO ID" label alternates
with the SXM radio eight-digit code. This code is
needed to activate the service.
DISP button does not work in channel 0. Channel 0 is
not available in category mode enabled.
SXM Messages
SXM BUSY – The audio system is acquiring and/or
processing audio and/or text data. No action is
needed.
ART UNAVAIL – There is not Artist Name related
with the current song.
SONG UNAVAIL – There is not Song Title related
with the current song.
CHAN UNAVAIL – There is no Channel Name
related with the current channel.
CHECK ANTENNA – SXM antenna or antenna cable
is not connected to the radio or the antenna is
shorted.
NO SIGNAL – SXM tuner module reports the No
Signal condition. Under this condition only Channel 0
will work as stated in this manual.
CHAN UNSUB – Active channel has become
unsubscribed or the requested channel is not
unsubscribed.
Page 71
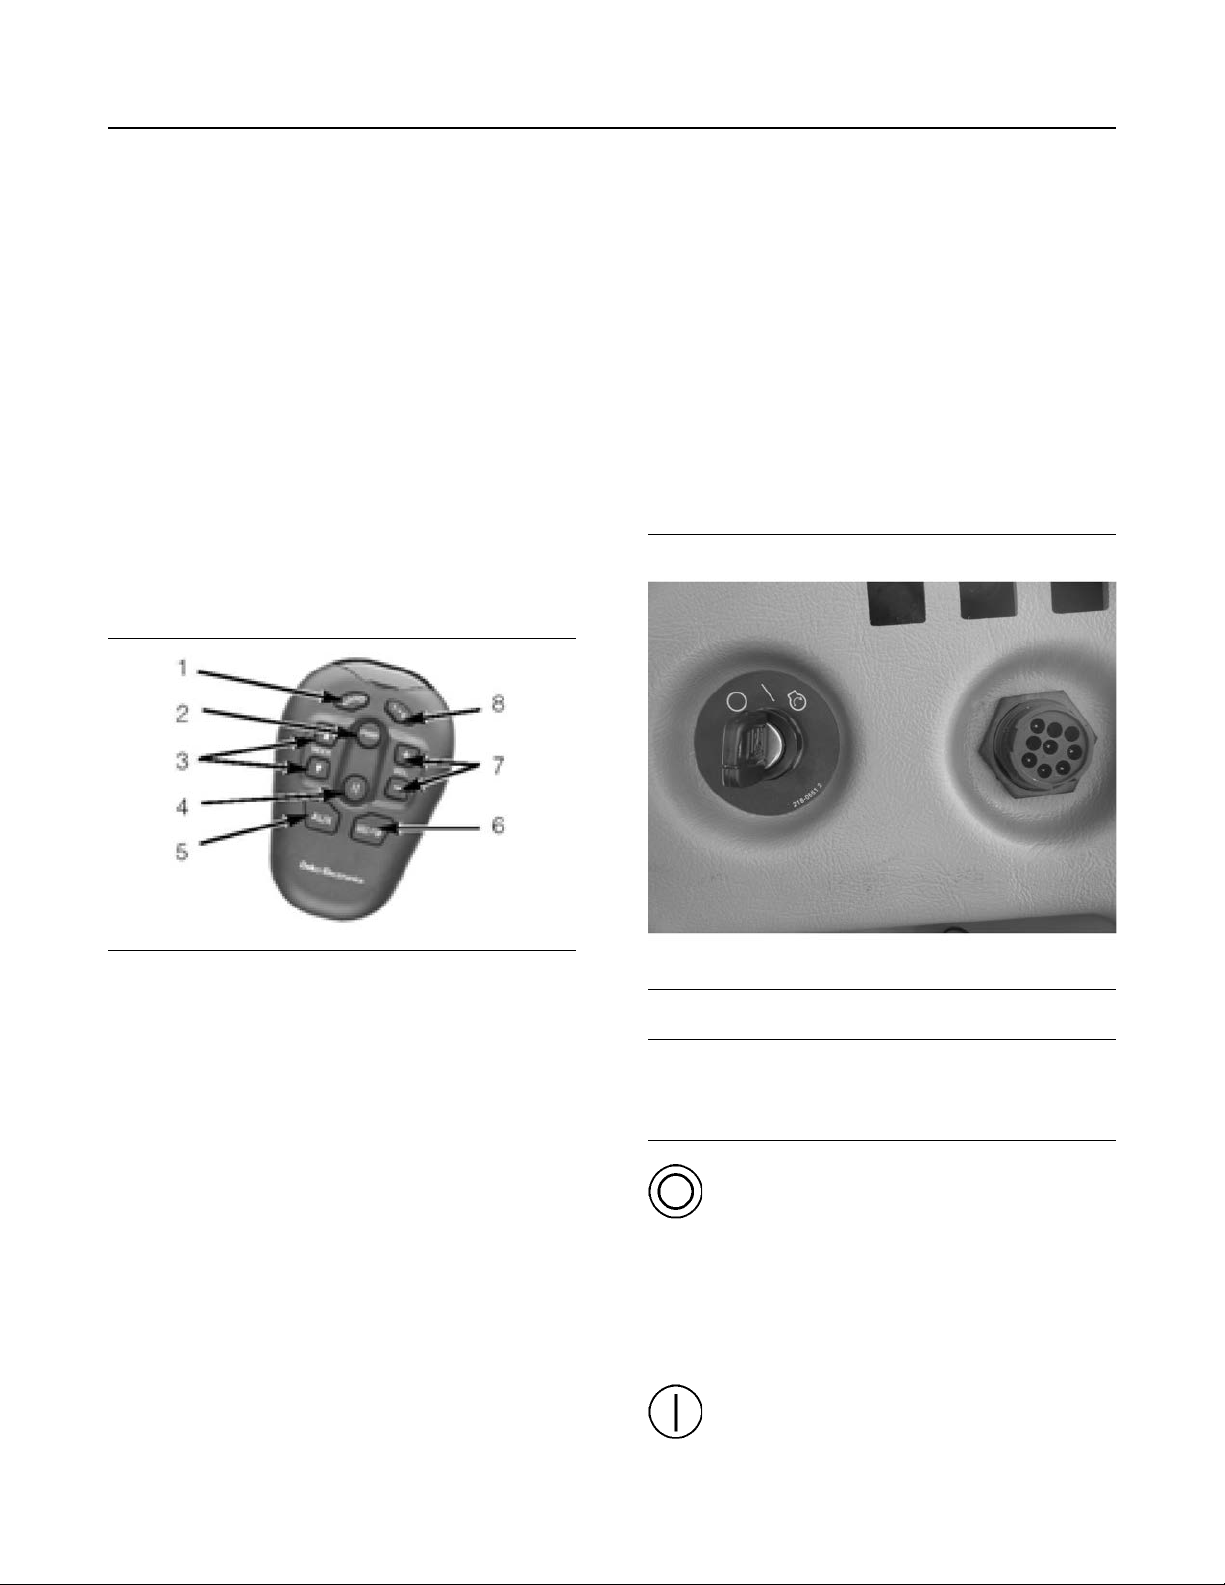
SEBU9422-02
71
Operation Section
Engine Start Switch
SUBSCRIPTION UPDATED - PRESS OK TO
CONTINUE – The subscription of the radio was
updated. To remove the message and return to the
previous state pres "OK" (Knob).
CH UNAVAIL – Requested channel is reported
unavailable for a newly selected channel or the
currently selected channel. Unavailable channels are
those that are in the legal channel range but are not
currently available for display or subscription as a
broadcast service. After 3 seconds the previous
channel (if available) or channel 1 will be tuned.
OPTIONAL EQUIPMENT
Infrared Remote Control
Your receiver is compatible with an optional handheld
remote control available from your dealer. The
remote control will:
CD – Press this button to turn on your integrated CD
player.
VOL – Press this button to adjust the volume
1-6 – Press this button to advance through the
presets in the selected band.
i06635590
Engine Start Switch
SMCS Code: 1416
S/N: KP51–Up
Illustration 87 g03566682
(1) Select a band
(2) Turn your receiver on and off
(3) Select the next or previous track/ Seek up and down
(4) Mute/Pause
(5) Select AUX inputs 1 or 2, iPod/USB
(6) Play a CD
(7) Adjust volume
(8) Select a preset station
Button Functions
BAND – Press this button to select FM1, FM2, AM or
WX.
PWR – Press this button to turn the receiver on/off.
SEEK – Press these buttons to move to the next
available radio station or to go to the next track.
II: – Press this button to reduce volume to a
minimum. The radio display will read
MUTE – To deactivate mute, press this button again.
The audio source will continue to play while the
volume is at a minimum
AUX – Press this button to select Front Auxiliary,
Rear Auxiliary, iPod/USB, or Bluetooth® Audio
Illustration 88 g03300457
NOTICE
Key must be in the ON position with engine running
to maintain electrical and hydraulic functions and prevent serious machine damage.
OFF (1) – Insert the engine start switch
key only when the engine start switch is
in the OFF position. Also, remove the
engine start switch key only when the engine
start switch is in the OFF position. Turn the
engine start switch to the OFF position before
you attempt to restart the engine. Turn the engine
start switch to the OFF position to stop the
engine.
ON (2) – The engine start switch will
return to the ON position when the
engine start switch key is released from
the START position.
Page 72
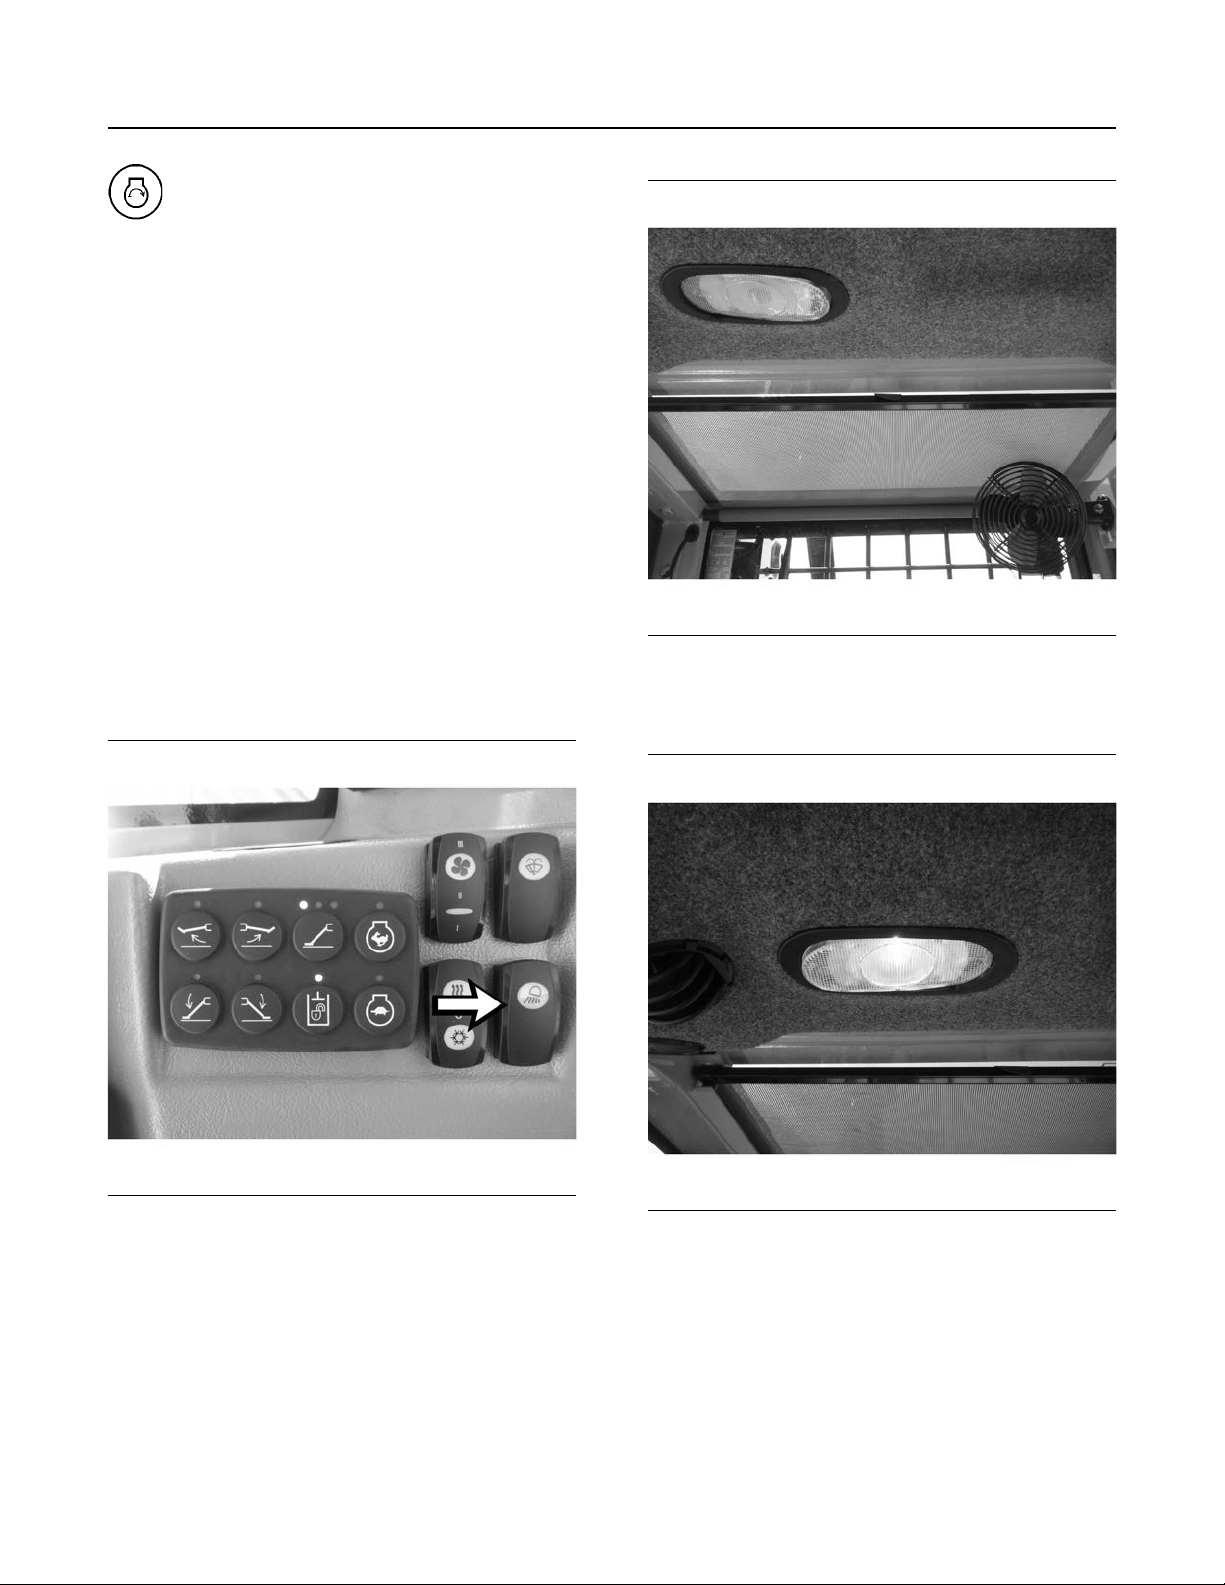
72
Operation Section
Light Switches
START (3) – Turn the engine start switch
to the START position to crank the
engine. Release the engine start switch
key when the engine starts.
Note: Return the key to the OFF position if the
engine does not start. This must be done before
another starting attempt is made.
Note: If the engine does not start after 30 seconds,
return the engine start switch to the OFF position.
Wait for 2 minutes before you turn the engine start
switch to the START position again.
To start the engine, the battery disconnect switch
must be in the ON position. Also, the hydraulic
activation control lever must be in the LOCKED
position.
i06635592
Light Switches
SMCS Code: 1429-ZS; 7451
S/N: KP51–Up
SEBU9422-02
Illustration 90 g03304537
The interior light is on the upper left side of the cab.
The switch for the interior light is located inside the
light.
Illustration 89 g03304458
Working Lights Switch
Move the Light Switch to center position to turn on
the front work lights.
Move the Light Switch to bottom position to turn on all
machine lights.
Illustration 91 g03304520
Press the right-hand side of the lens to turn on the
light.
Page 73
SEBU9422-02
73
Operation Section
Window Wiper and Washer Control
Illustration 92 g03304498
Press the left-hand side of the lens to turn off the
light.
Illustration 93 g06055339
The engine compartment light switch is on the same
bracket as the battery disconnect switch. The switch
is inside the platform engine access door.
Flip the toggle switch to turn the engine compartment
light on and off.
i05147649
Window Wiper and Washer
Control
SMCS Code: 7305; 7306
S/N: KP51–Up
Page 74
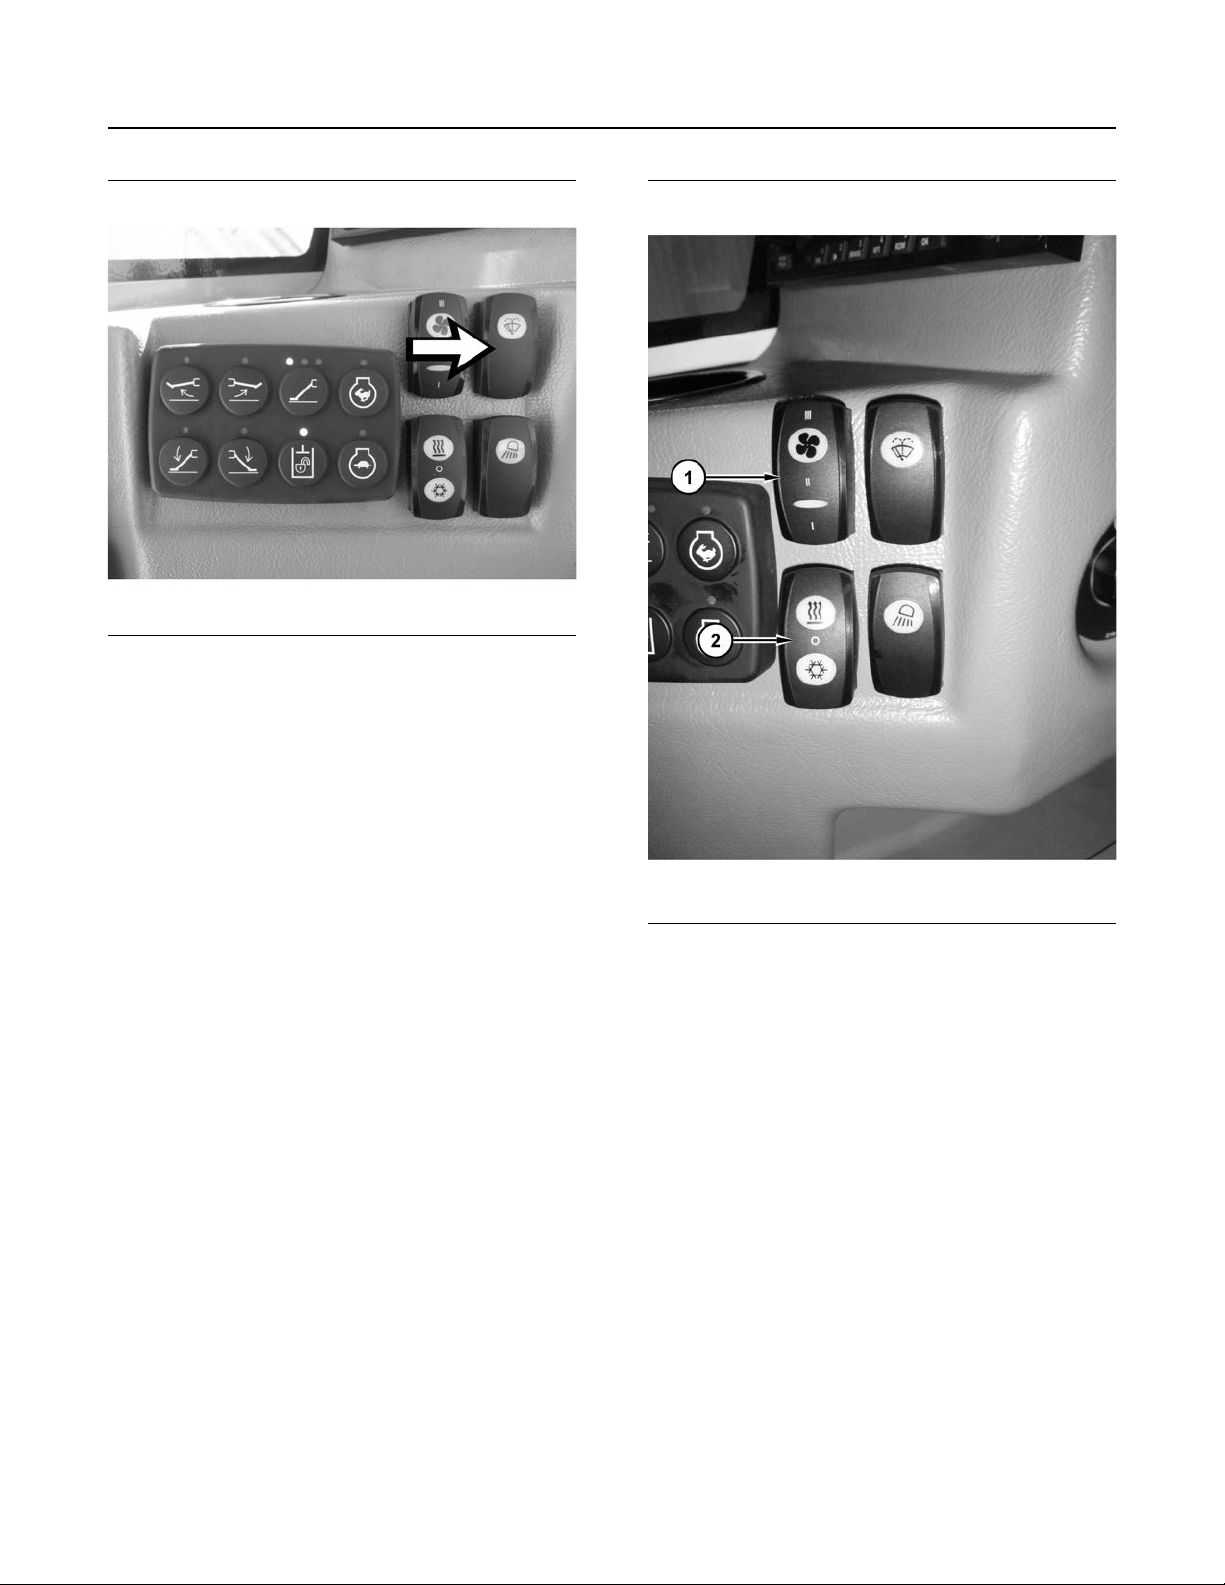
74
Operation Section
Heating and Air Conditioning Control
SEBU9422-02
Illustration 94 g03304656
The control switch for the window wiper and the
window washer is located on the left-hand console of
the cab.
Depress top of the control switch in order to activate
the window wipers. Depress top switch again to
increase speed of wiper.
Depress and hold the control switch in order to
activate the window washer.
i05281414
Heating and Air Conditioning
Control
SMCS Code: 7304; 7320; 7337
S/N: KP51–Up
Illustration 95 g03320387
Heater and Air Conditioner Controls
Switch (1) controls the heater fan and the air
conditioning fan. Depress the upper switch in order to
activate fan.
Switch (2) toggles between the heater and the air
conditioning. Depress the upper switch in order to
activate the heater. Push the lower in order to
activate the air conditioner.
Page 75
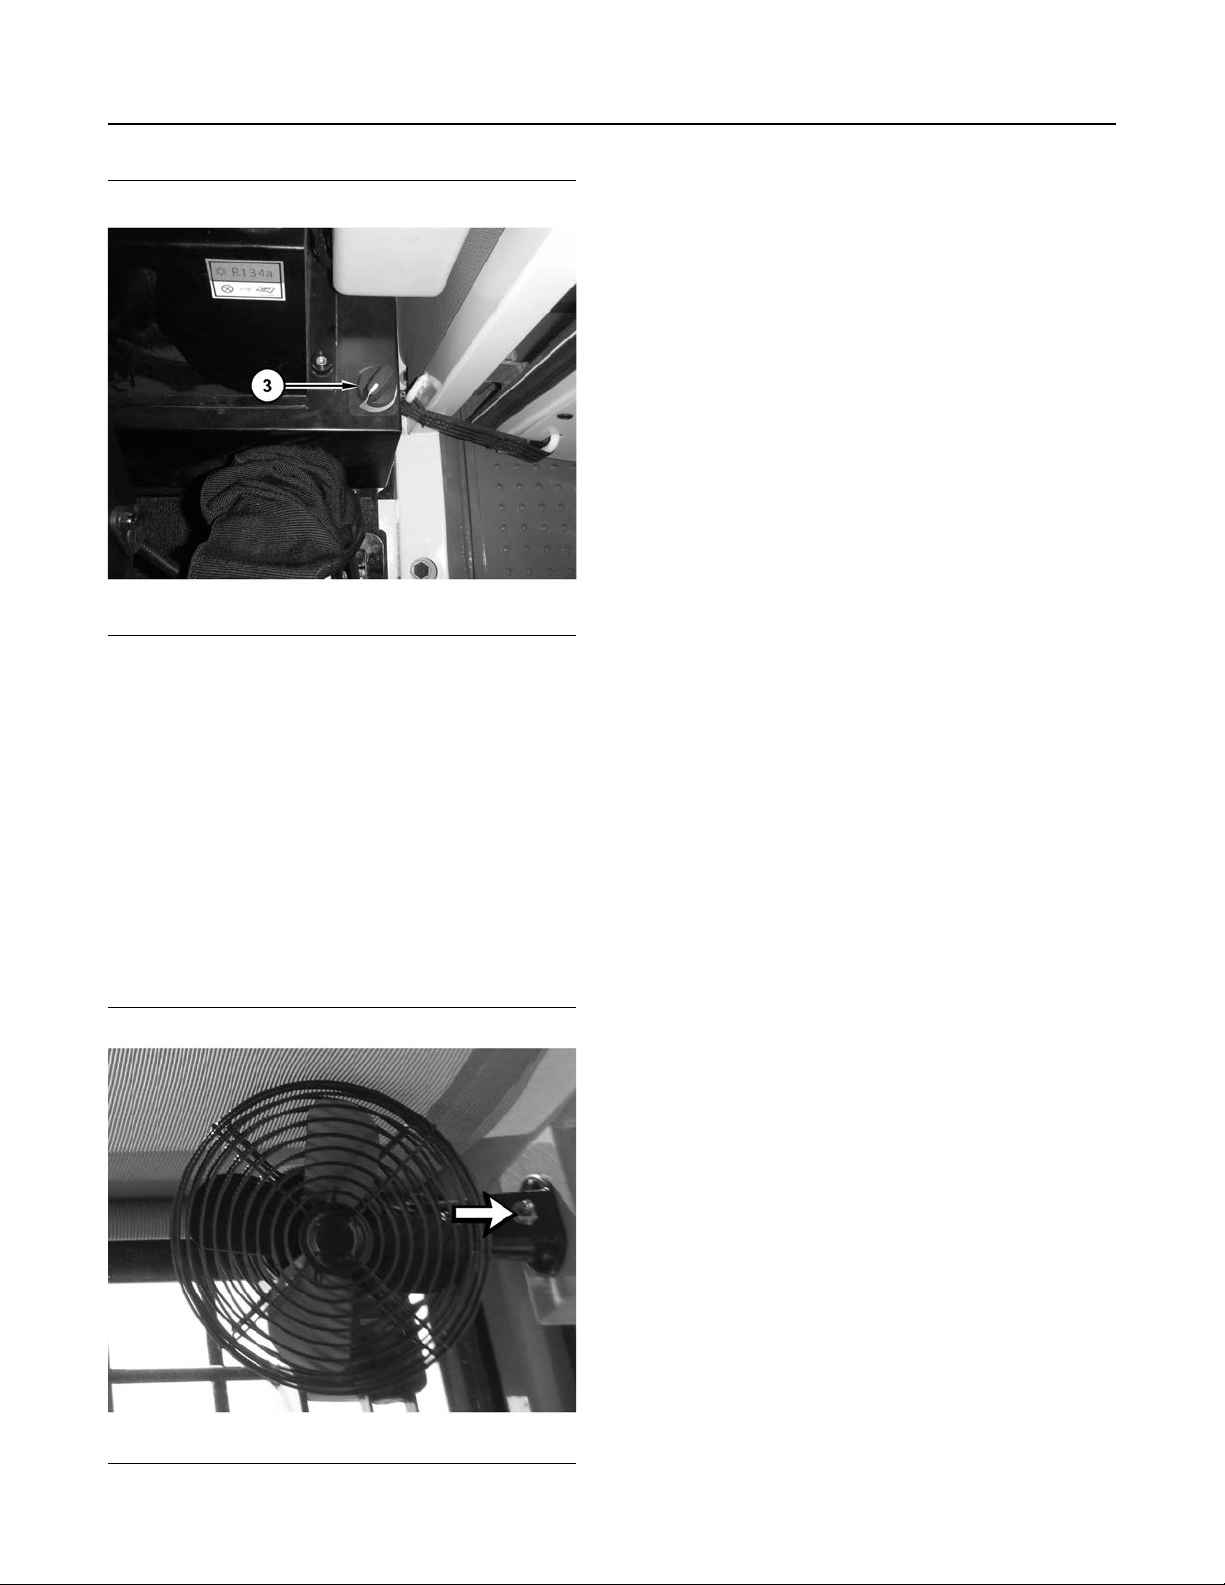
SEBU9422-02
75
Operation Section
Defroster Fan Control
The fan uses a three-position switch. The middle
position is the OFF position. The remaining switch
positions are LOW and HIGH.
Illustration 96 g03320388
Temperature Control Dial
Turn the temperature control dial (3) located behind
the operator seat on the temperature control in order
to change the temperature setting. Turn the dial to
the left in order to lower the temperature. Turn the
dial to the right in order to raise the temperature.
i05162657
Defroster Fan Control
SMCS Code: 7316
S/N: KP51–Up
Illustration 97 g03316891
Fan Switch
Page 76
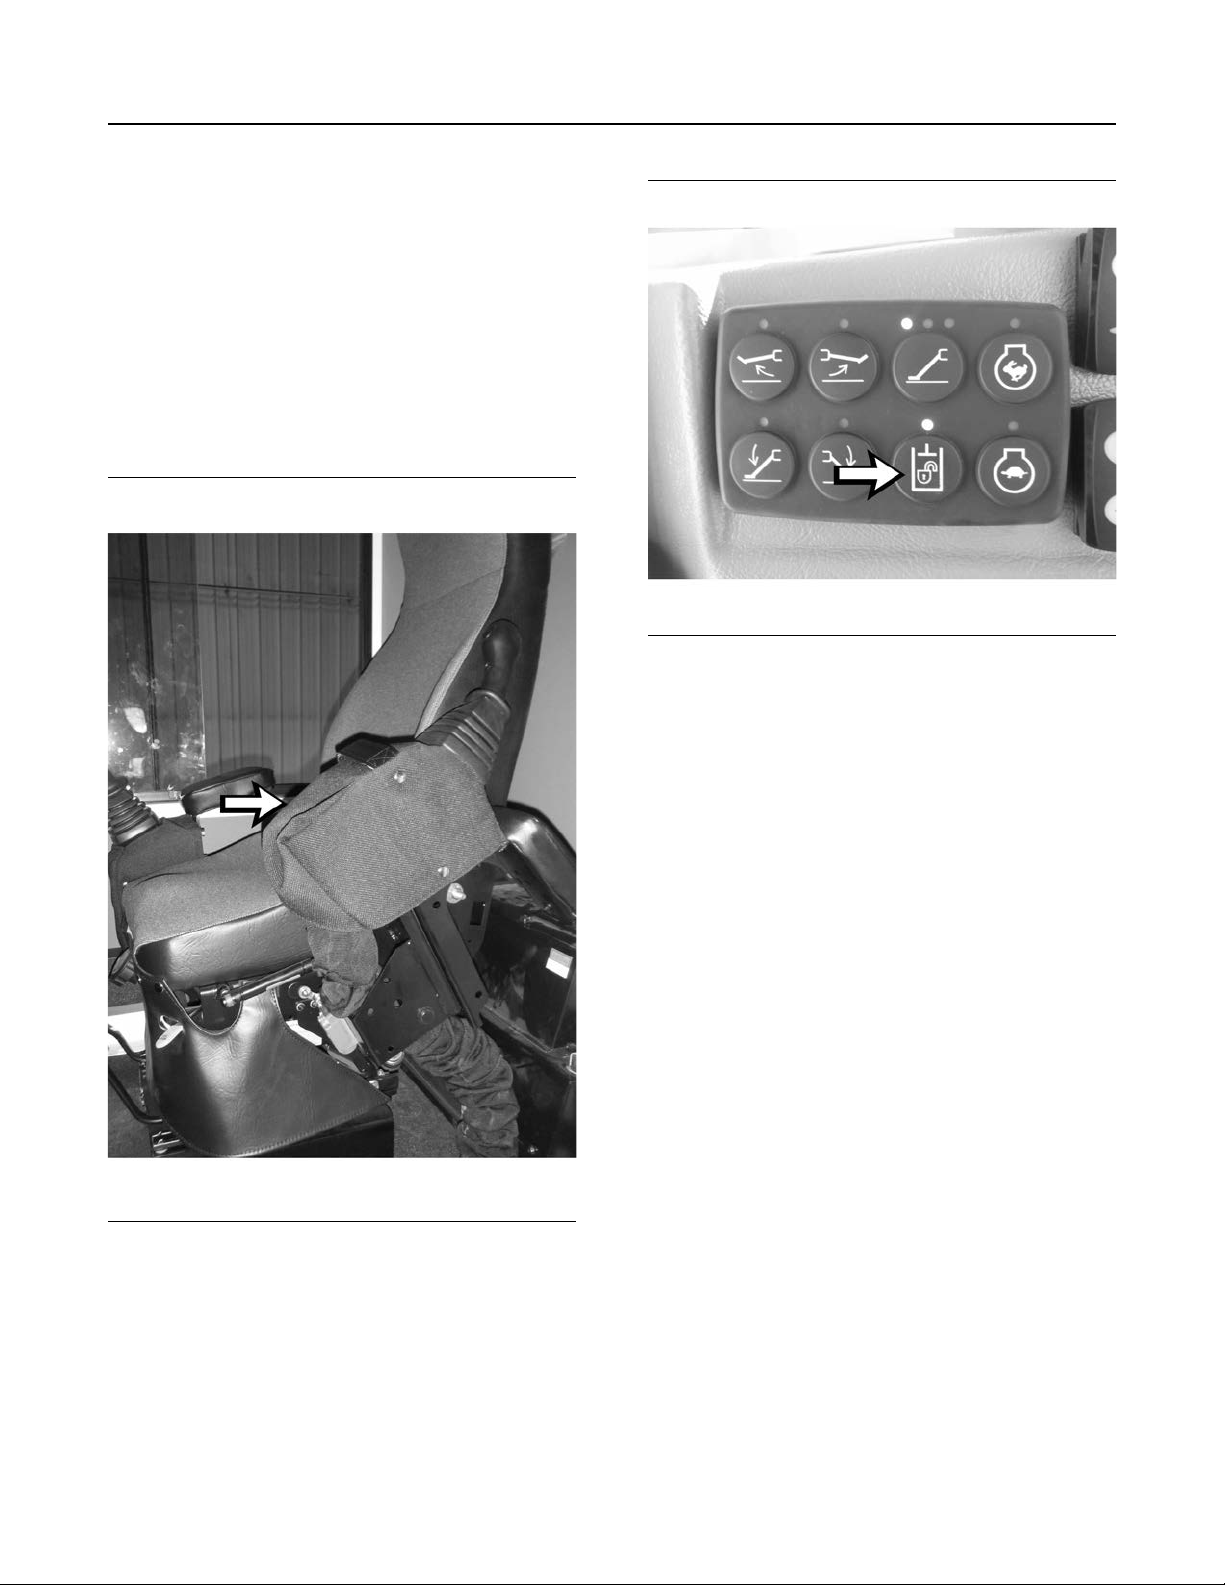
76
Operation Section
Controls
Controls
i06843192
Hydraulic Lockout Control
SMCS Code: 5258
S/N: KP51–Up
The hydraulic lock is used to turn the machine pilot
hydraulic system on and off. The hydraulic system
will lock when the left-hand joystick control console is
raised .
SEBU9422-02
Illustration 99 g03321116
Hydraulic Lock/Unlock Button
To UNLOCK the control/function hydraulic system,
depress the Hydraulic Lock/Unlock Button.
Illustration 98 g03356610
Note: Verify that left-hand arm console is lowered to
activate the hydraulic system.
When the hydraulic system lock is in the LOCKED
position, the machine pilot hydraulic system is
charged. The control/function hydraulic system is not
charged.
Note: Always place the left-hand joystick control
console in the LOCKED (RAISED) position when you
exit the operator compartment.
Page 77
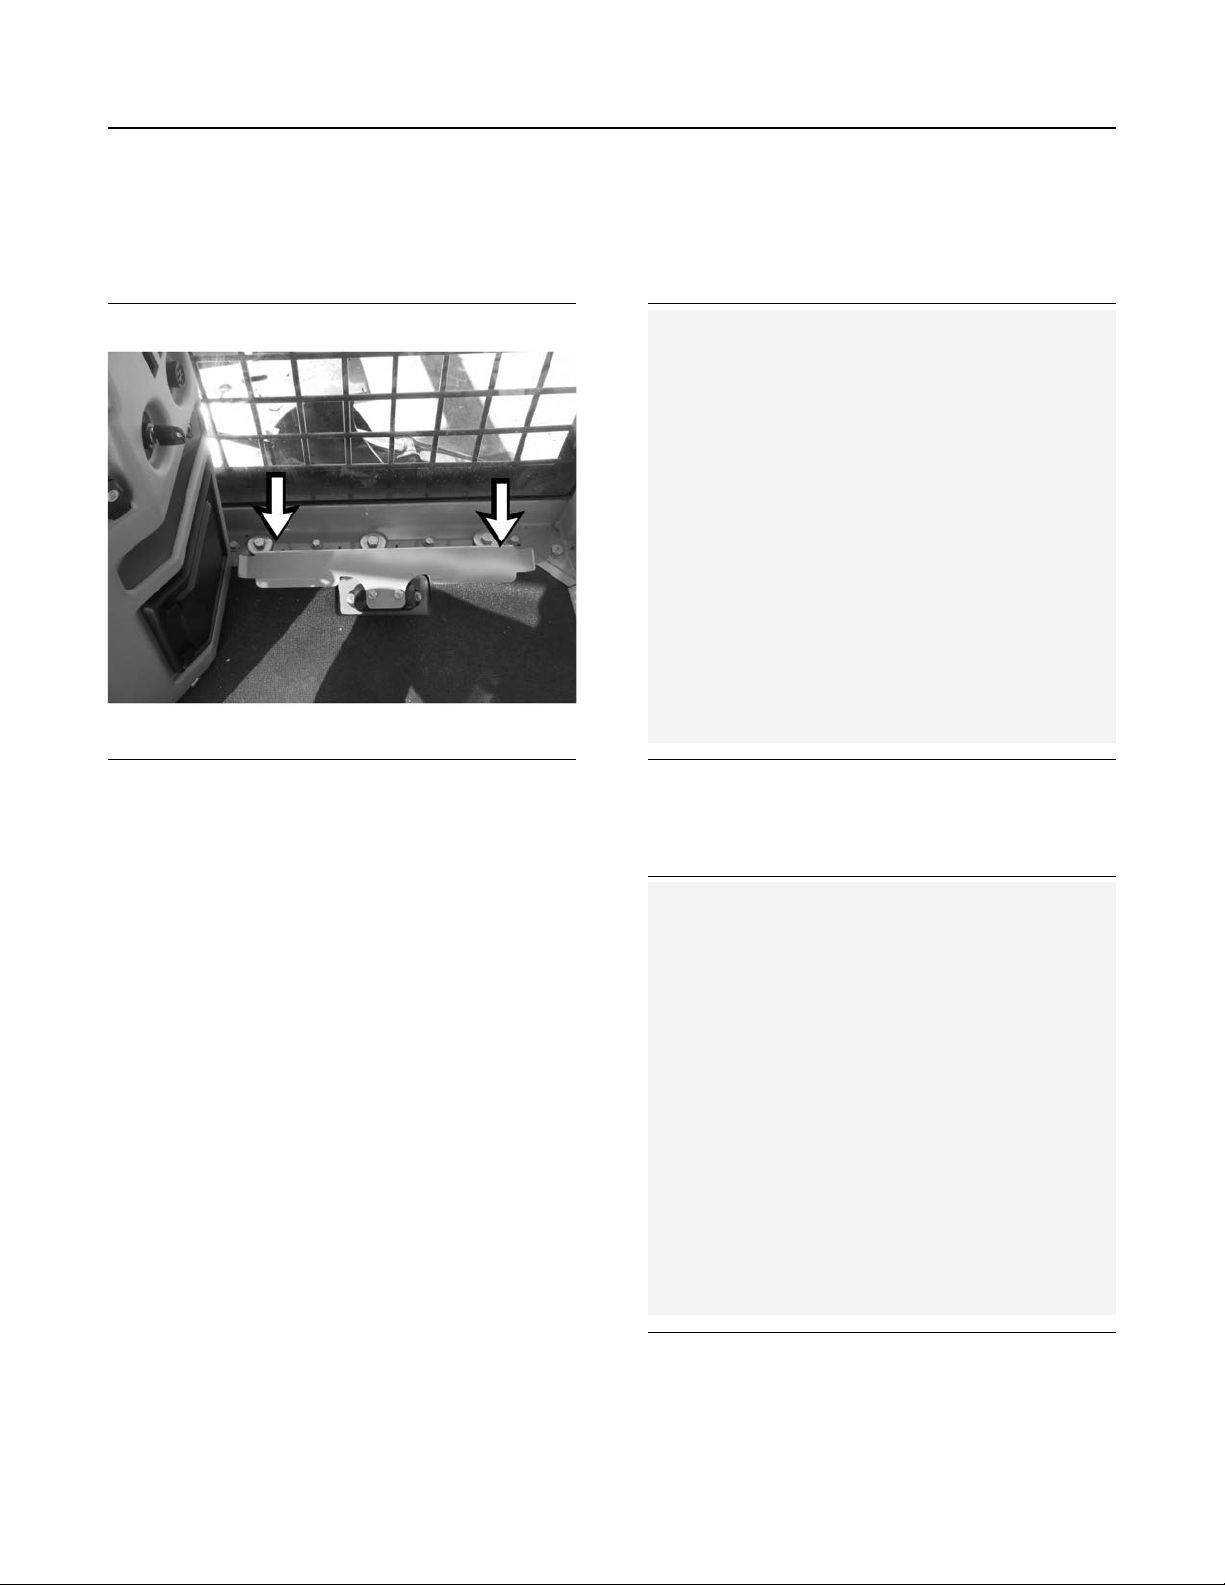
SEBU9422-02
77
Operation Section
Swing Control (Foot Pedal)
Swing Control (Foot Pedal)
SMCS Code: 5059
i06923798
i07167426
Stabilizer Control
SMCS Code: 5258; 7222-ZS
Illustration 100 g03317678
Press the left swing control foot pedal toward the
floor in order to swing the machine platform to the
left. Release pressure on the left swing control foot
pedal in order to decrease the swing speed of the
platform. If you completely release pressure from the
pedal, the platform will stop.
Press the right swing control foot pedal toward the
floor in order to swing the machine platform to the
right. Release pressure on the right swing control foot
pedal in order to decrease the swing speed of the
platform. If you completely release pressure from the
pedal, the platform will stop.
Illustration 101 g06169545
(1) Left Stabilizer Raise Control Switch.
(2) Left Stabilizer Lower Control Switch.
Illustration 102 g06169547
(3) Right Stabilizer Raise Control Switch.
(4) Right Stabilizer Lower Control Switch.
Page 78
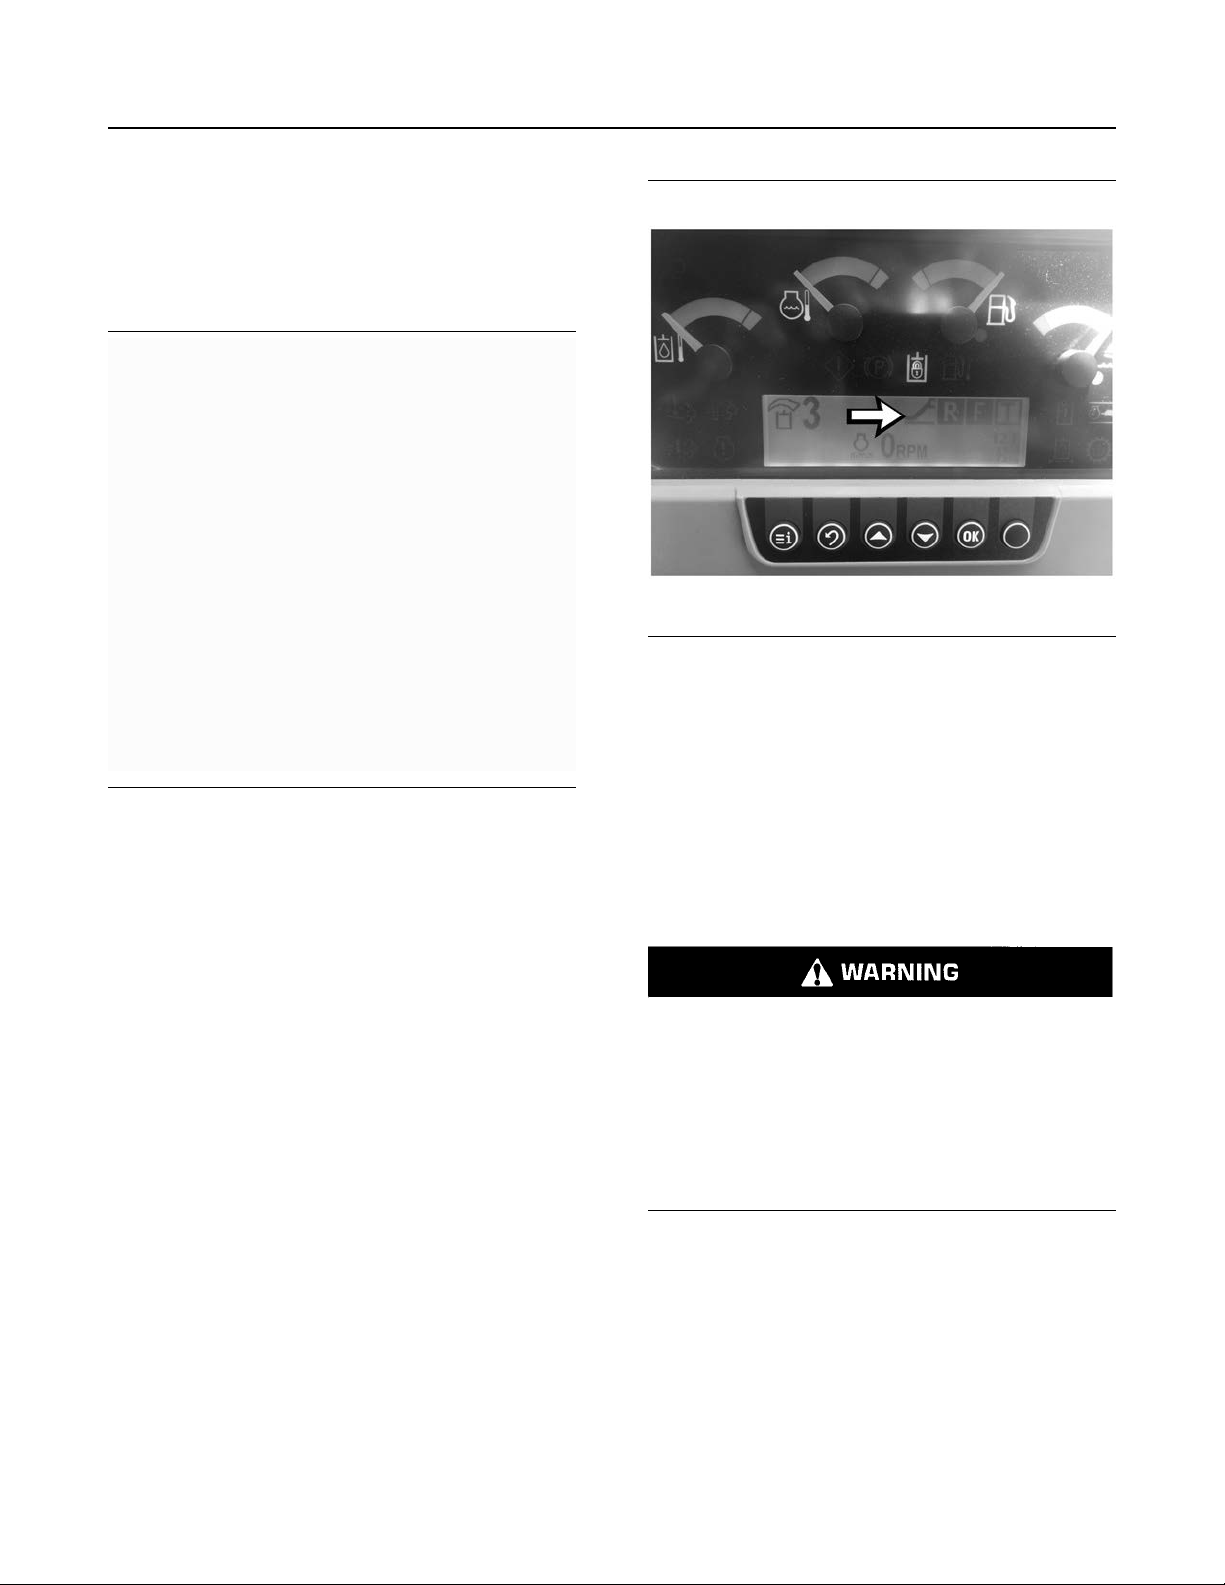
78
Operation Section
Machine Operation Information
Note: There are 4 different stabilizer modes that can
be selected. Front and rear, front, rear, or trailer.
Front and rear enable the operator to move all four
front and rear stabilizers simultaneously. The alarm
will sound once per second when any of the
stabilizers are being actuated.
SEBU9422-02
Illustration 103 g06169549
(5) Trailer Stabilizer Control Switch (If equipped)
The stabilizer control switches are on the left-hand
console. Use the corresponding stabilizer control
switches to raise each stabilizer arm and lower each
stabilizer arm.
The stabilizer control switch selected will be
displayed on the monitor screen. The stabilizer
control selected will also be illuminated above the
control panel switch.
Illustration 104 g06241505
Note: If the trailer stabs are selected and not
actuated for more than 1 minute, then the stabilizer
selection will automatically transition to “front and
rear” selection.
i06925260
Machine Operation
Information
SMCS Code: 7000
Operating the machine while personnel are working on or near the machine can cause personal
injury or death.
Before operating the machine, make sure all personnel are clear of the machine and are outside
of the machine operation area. The machine operation area consists of the length of the boom,
stick, and grapple when fully extended, as well as
the length of the load being carried.
Page 79
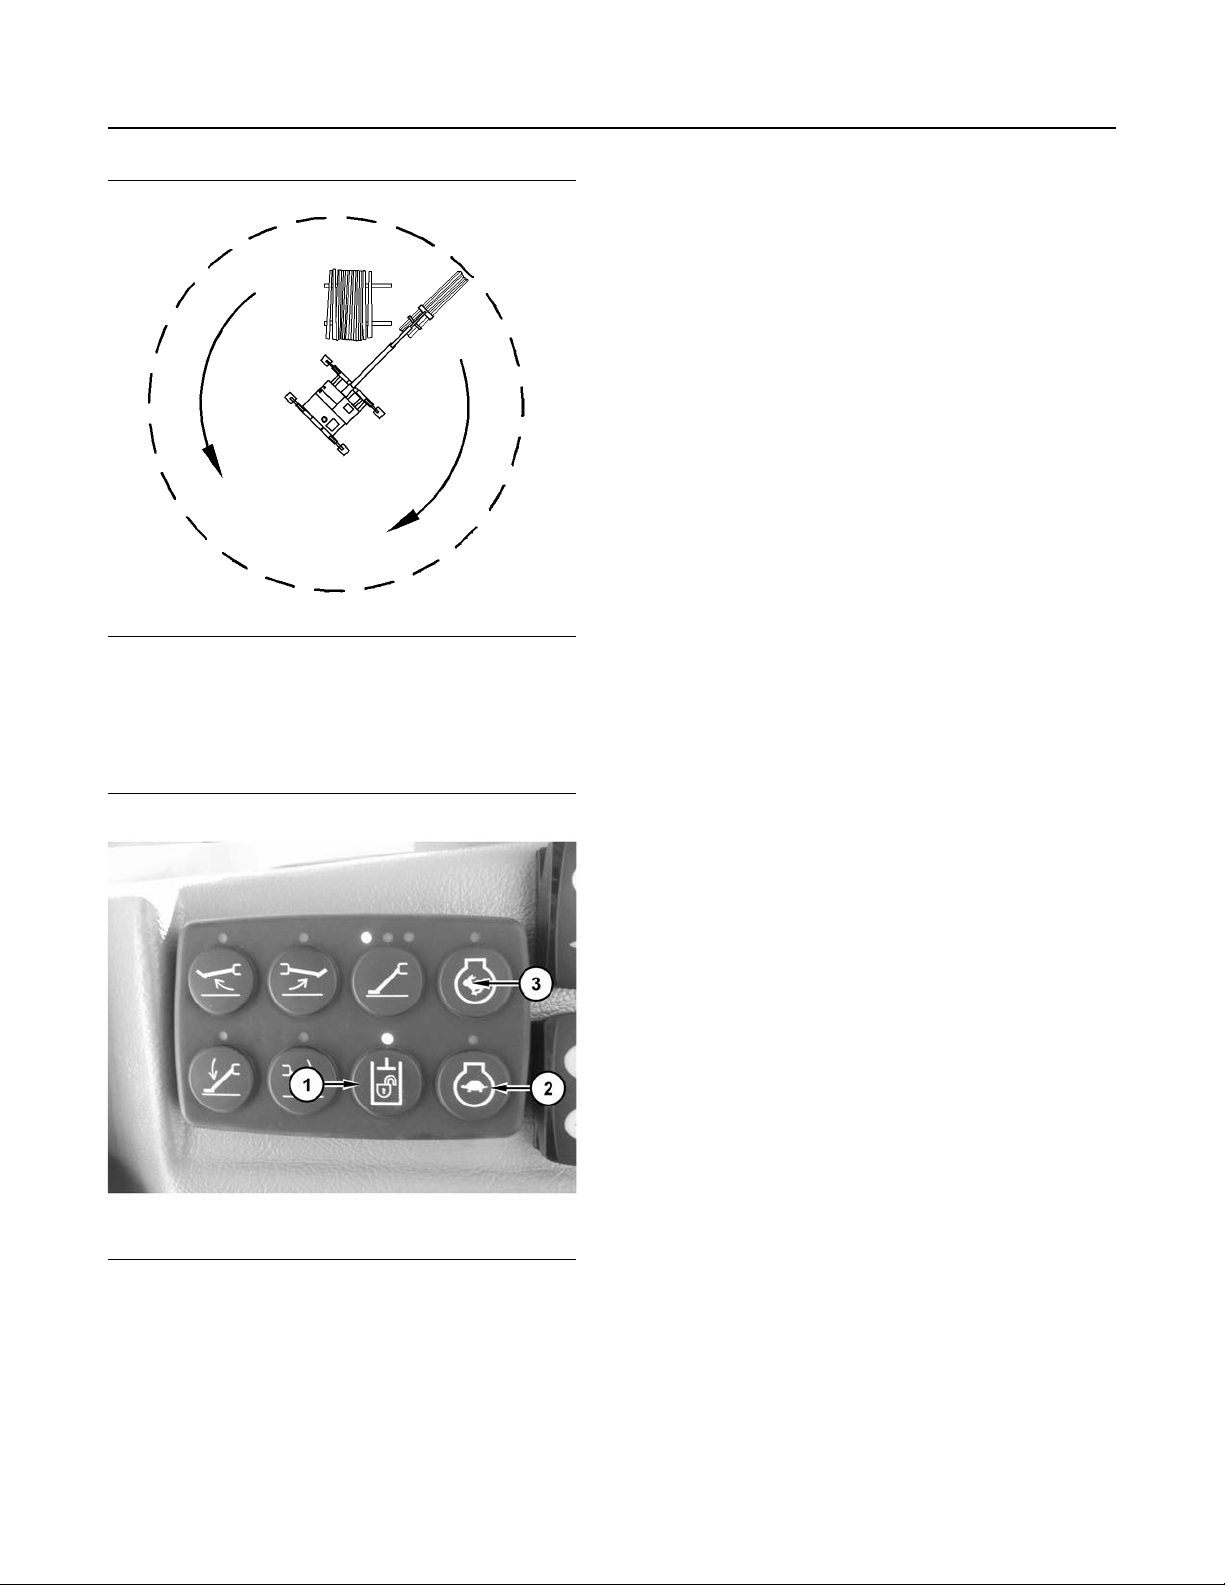
SEBU9422-02
79
Operation Section
Machine Operation Information
Note: Raise machine slowly until trailer tires are
completely off the ground.
5. Raise the boom to a height that is sufficient to
provide clearance of the trailer.
6. Adjust the engine speed control switch to increase
the engine speed (RPM) to the desired speed.
7. Apply pressure to either side of the boom swing
pedal to swing the machine.
Note: If the machine does not operate correctly or if
the machine does not swing smoothly, consult your
authorized dealer.
Illustration 105 g00488011
Operation Area of Loader
1. Adjust the operator seat.
2. Depress hydraulic unlock button (1).
Illustration 106 g03316925
3. Use the engine speed increase button to adjust the
engine speed to the operating range. Depress the
decrease (turtle) (2) button to decrease engine
speed. Depress the increase (rabbit) (3) order to
increase the engine speed.
4. Lower the four stabilizers to the ground so that the
machine is supported by the stabilizers.
Page 80
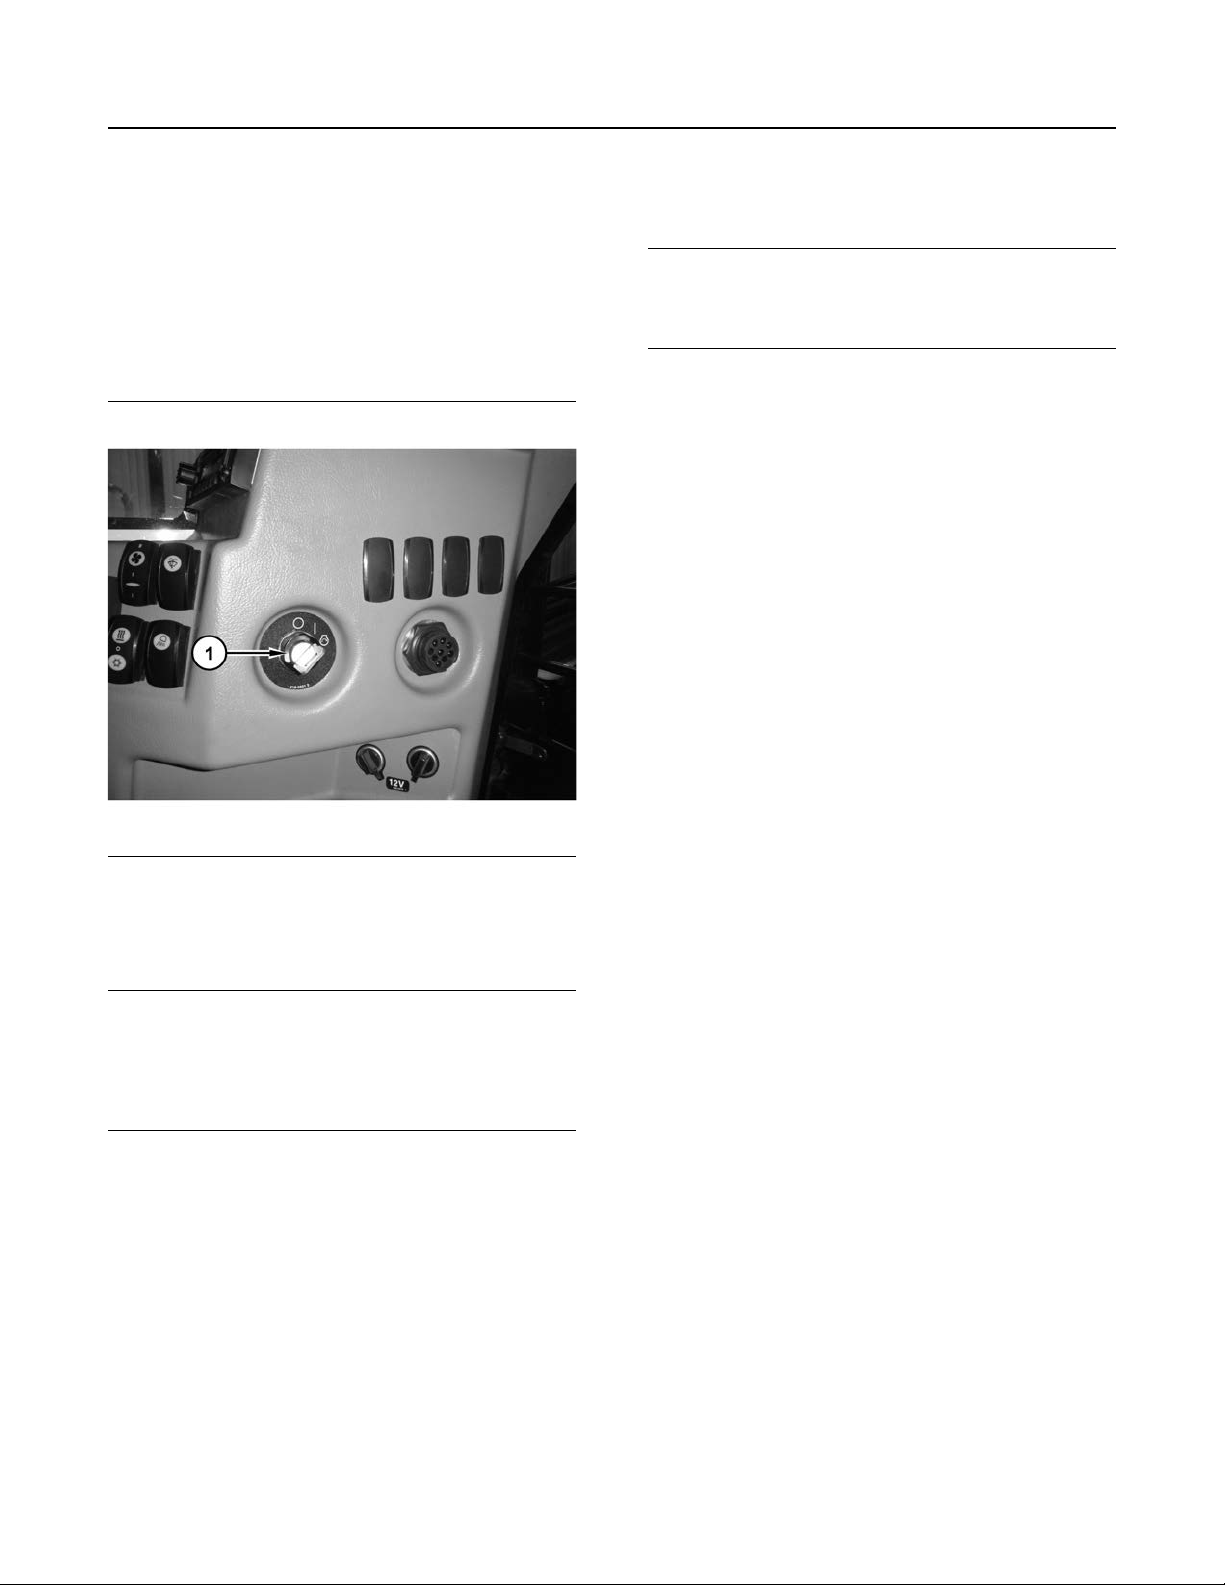
80
Operation Section
Engine Starting
SEBU9422-02
Engine Starting
Engine Starting
SMCS Code: 1000; 7000
S/N: KP51–Up
If the display monitor does not display properly,
inspect the machine for the trouble. Repair all
problems before operating the machine.
i06635598
NOTICE
Rotate the grapple at least 20 complete revolutions
every 10 hours, allowing hydraulic oil to completely
flow through all lines.
3. Cycle all controls to allow warm oil to circulate
through all the lines and the cylinders.
Observe the following recommendations during the
warmup period for the engine:
• In temperatures above 0°C (32°F), the warmup
period is 15 minutes.
• In temperatures below 0°C (32°F), the warmup
period is 30 minutes or a longer time period.
• In temperatures below −18°C (0°F), more time is
required if the hydraulic controls are sluggish.
Illustration 107 g03319977
1. Turn the engine start switch (1) to the START
position to start the engine. Release the engine
start switch key after the engine starts.
Do not crank the engine for more than 30 seconds.
Allow the starter to cool for two minutes before crank-
ing again. Turbocharger damage can result if the engine rpm is not kept low until the oil gauge display
verifies that the oil pressure is sufficient.
NOTICE
i07161651
Engine and Machine Warm-Up
SMCS Code: 1000; 7000
1. Allow a cold engine to warmup at LOW IDLE for at
least 5 minutes.
2. Look at the display monitor and the indicator lights
frequently during operation.
If low engine oil pressure fails to register, inspect
the machine for the cause of the trouble.
Page 81
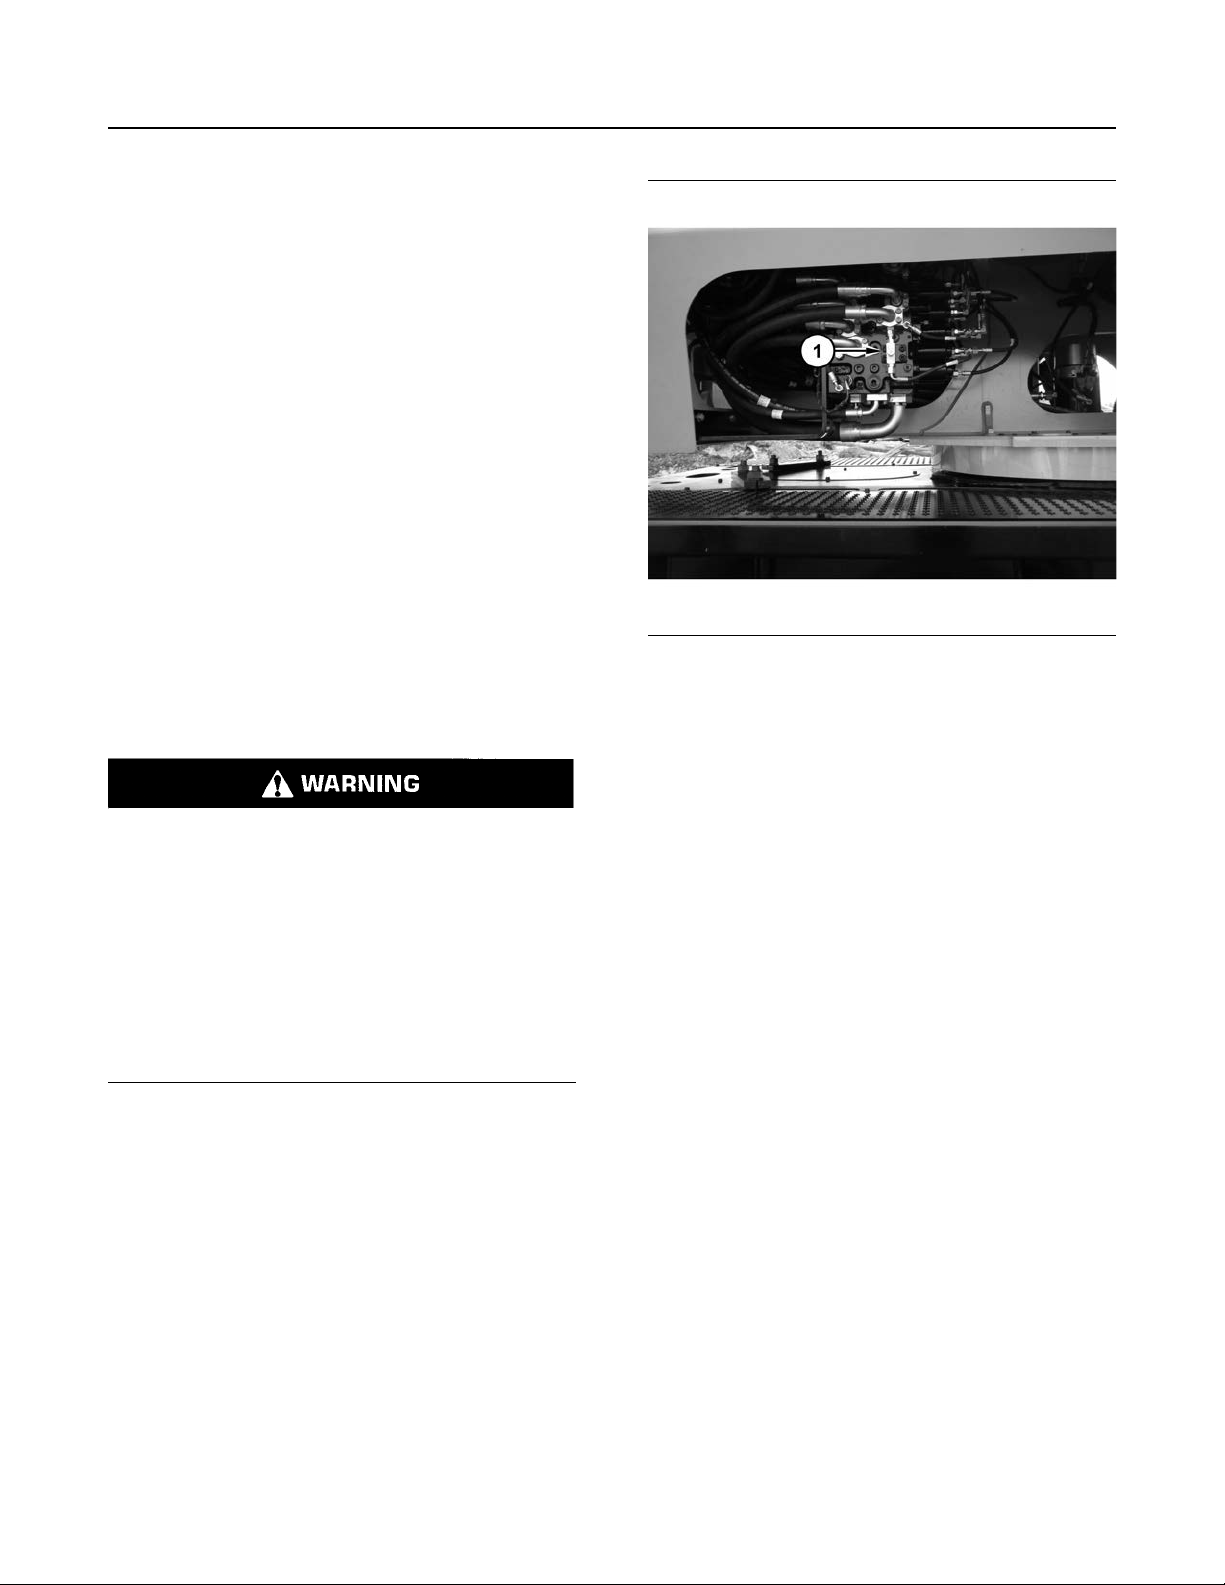
SEBU9422-02
Parking
i06843219
Equipment Lowering with
Engine Stopped
SMCS Code: 7000
S/N: KP51–Up
To relieve pressure on hydraulic cylinders other than
boom hydraulic cylinders, turn off the engine, leaving
the key switch on and the hydraulic system armed.
Cycle the joysticks to relieve pressure. Turn key
switch OFF.
Note: The pressure can be relieved within 60
seconds after turning off the engine if the
accumulator is charged. After 60 seconds, the
hydraulic electronic control module will shut off and
the joysticks will be disabled.
81
Operation Section
Parking
Illustration 108 g03701382
Machine With a Boom Lowering
Control Valve (If Equipped)
Boom load may cause cylinder oil pressure to
reach relief pressure of the boom lowering control device when the boom is supported by one
cylinder. Boom can lower suddenly, causing possible injury or death.
To avoid possible injury or death, be sure no one
is under or near the work tool before manually
lowering the boom.
Keep all personnel away from the boom drop area
when lowering the boom with the engine
stopped.
If the engine is stopped or the hydraulic system is
disabled, the operator can still lower the boom. Use
the following procedure if the machine is equipped
with a boom lowering control valve.
The boom lowering control valve (1) (if equipped) is
installed on the main valve bank. The boom lowering
control valve allows the operator to manually lower
the boom if the engine is stopped.
1. Loosen valve by turning counter-clockwise.
2. Slowly lower boom to the ground.
3. Make sure that the work tool has been lowered
onto the ground. Tighten valve by turning
clockwise.
4. Before you put the machine into operation, make
any necessary repairs.
For additional information, consult your authorized
dealer.
i06635606
Leaving the Machine
SMCS Code: 7000
S/N: KP51–Up
Page 82
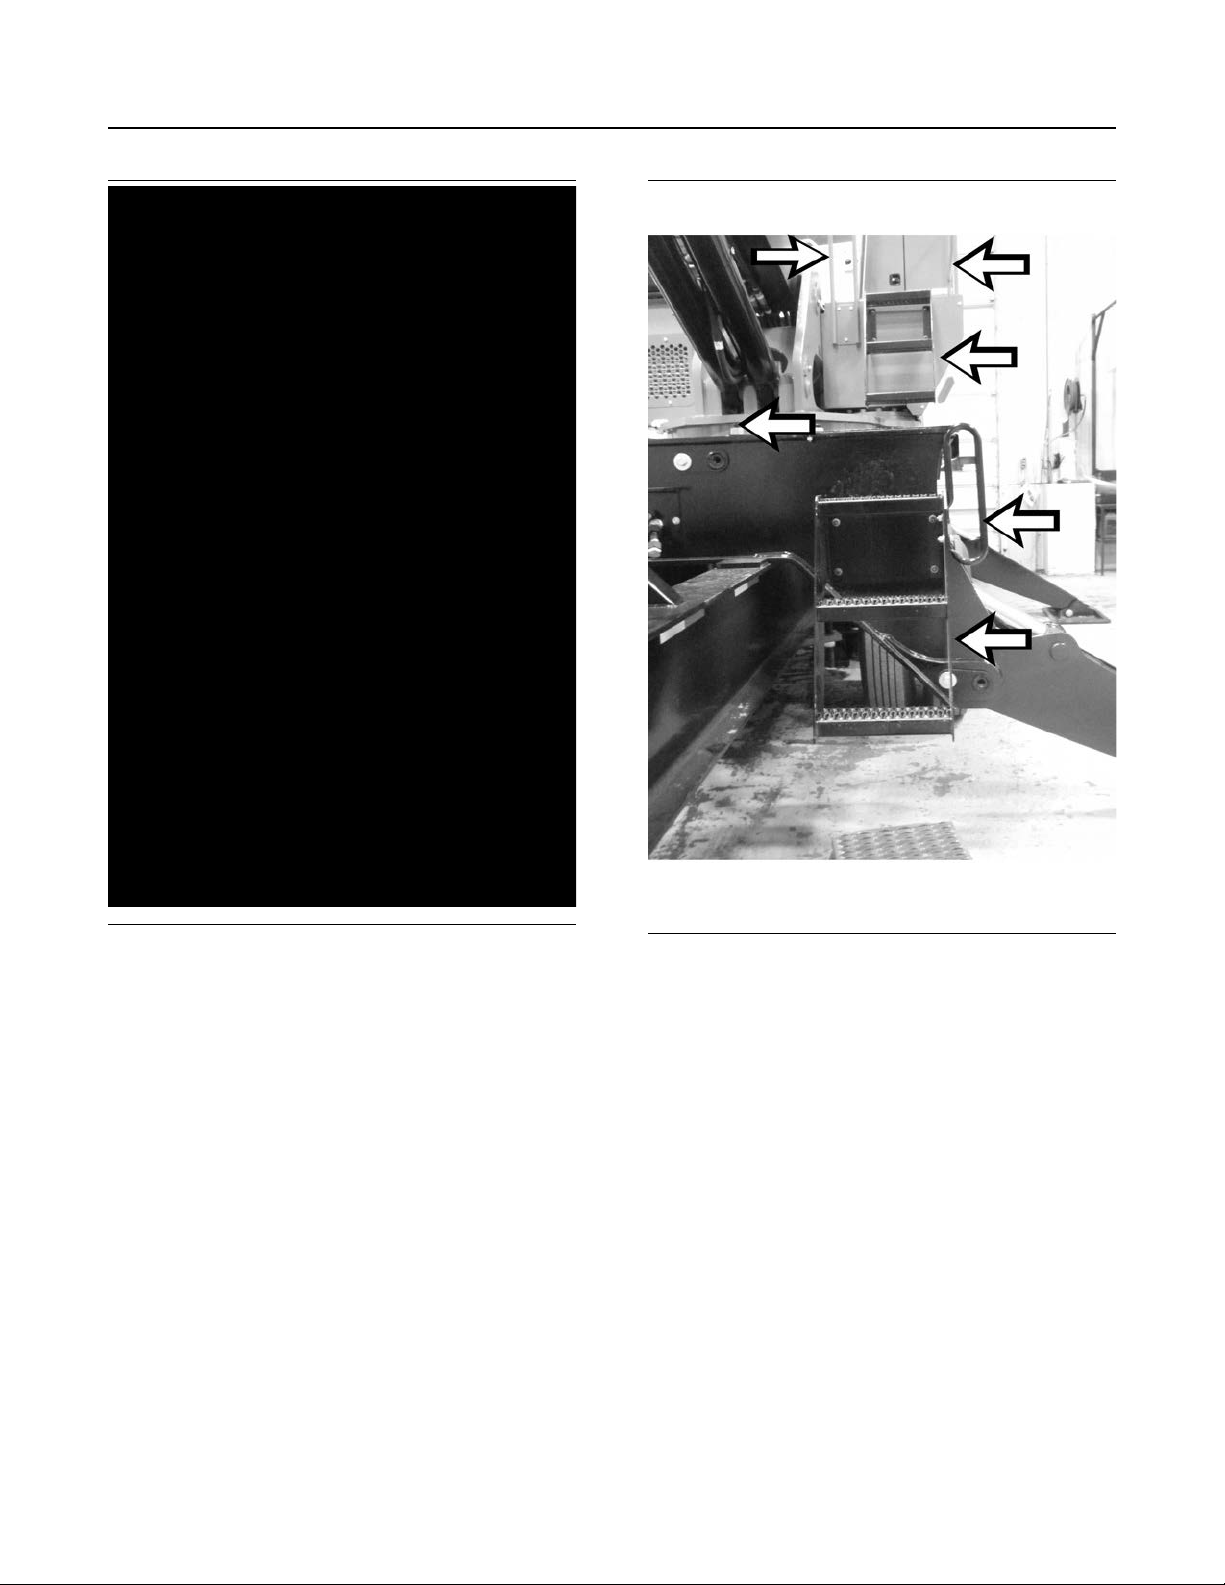
82
Operation Section
Leaving the Machine
SEBU9422-02
Illustration 109 g06055354
1. Turn the battery disconnect switch to the OFF
position.
Note: Do not turn the battery disconnect OFF until
after the light has gone out.
2. Inspect all engine compartments for debris. Clean
out any debris to avoid a fire.
Illustration 110 g03321070
3. Use the steps and the handholds when you get off
the machine. Make sure that the steps are clear of
debris before you dismount.
4. Turn the battery disconnect switch to the OFF
position.
Note: Do not turn the battery disconnect OFF until
after the light has gone out.
5. Install all vandalism protection locks and all
vandalism covers.
Page 83

SEBU9422-02
83
Maintenance Section
Lubricant Viscosities and Refill Capacities
Maintenance Section
Lubricant Viscosities and
Refill Capacities
i06952631
Lubricant Viscosities
SMCS Code: 7581
General Information for Lubricants
When you are operating the machine in temperatures
below −20°C (−4°F), refer to Special Publication,
SEBU5898, “Cold Weather Recommendations”. This
publication is available from your Prentice dealer.
Refer to the “Lubricant Information” section in the
latest revision of the Special Publication, SEBU6250,
“Caterpillar Machine Fluids Recommendations” for a
list of Cat engine oils and for detailed information.
This manual may be found on the Web at Safety.Cat.
com.
The footnotes are a key part of the tables. Read ALL
footnotes that pertain to the machine compartment in
question.
Cat oils have been developed and tested to provide
the full performance and life that has been designed
and built into Cat engines.
Cat DEO-ULS or oils that meet the Cat ECF-3
specification and the API CJ-4 are required for use in
the applications listed below. Cat DEO-ULS and oils
meeting Cat ECF-3 specification and the API CJ-4
and ACEA E9 oil categories have been developed
with limited sulfated ash, phosphorus, and sulfur.
These chemical limits are designed to maintain the
expected aftertreatment devices life, performance,
and service interval. If oils meeting the Cat ECF-3
specification and the API CJ-4 specifications are not
available, oils meeting ACEA E9 may be used. ACEA
E9 oils meet the chemical limits designed to maintain
aftertreatment device life. ACEA E9 oils are validated
using some but not all ECF-3 and API CJ-4 standard
engine performance tests. Consult your oil supplier
when considering use of an oil that is not Cat ECF-3
or API CJ-4 qualified.
Failure to meet the listed requirements will damage
aftertreatment-equipped engines and can negatively
impact the performance of the aftertreatment
devices. The Diesel Particulate Filter (DPF) if
equipped, will plug sooner and require more frequent
DPF ash service intervals.
Typical aftertreatment systems may include the
following:
Selecting the Viscosity
To select the proper oil for each machine
compartment, refer to the “Lubricant Viscosity for
Ambient Temperature” table. Use the oil type AND oil
viscosity for the specific compartment at the proper
ambient temperature.
The proper oil viscosity grade is determined by the
minimum ambient temperature (the air in the
immediate vicinity of the machine). Measure the
temperature when the machine is started and while
the machine is operated. To determine the proper oil
viscosity grade, refer to the “Min” column in the table.
This information reflects the coldest ambient
temperature condition for starting a cold machine and
for operating a cold machine. Refer to the “Max”
column in the table for operating the machine at the
highest temperature that is anticipated. Unless
specified otherwise in the “Lubricant Viscosities for
Ambient Temperatures” tables, use the highest oil
viscosity that is allowed for the ambient temperature.
Engine Oil
Machines that are operated continuously should use
oils that have the higher oil viscosity in the final drives
and in the differentials. The oils that have the higher
oil viscosity will maintain the highest possible oil film
thickness. Refer to “General Information for
Lubricants” article, “Lubricant Viscosities” tables, and
any associated footnotes. Consult your Cat dealer if
additional information is needed.
• Diesel Particulate Filters (DPF)
• Diesel Oxidation Catalysts (DOC)
• Selective Catalytic Reduction (SCR)
• Lean NOx Traps (LNT)
Other systems may apply.
Page 84
84
Maintenance Section
Lubricant Viscosities
Table 7
SEBU9422-02
Lubricant Viscosities for Ambient Temperatures
Compartment or System
Oil Type and Performance
Requirements
Oil Viscosities
°C °F
Min Max Min Max
Cat DEO-ULS Cold Weather SAE 0W-40 −40 40 −40 104
Engine Crankcase for all Machines
Cat DEO-ULS SYN SAE 5W-40 −30 50 −22 122
Cat DEO-ULS
SAE 10W-30 −18 40 0 104
SAE 15W-40 −9.5 50 15 122
Table 8
Lubricant Viscosities for Ambient Temperatures
Compartment or System Oil Type and Classification
Oil Viscosities
°C °F
Min Max Min Max
SAE 0W-20 −40 40 −40 104
SAE 0W-30 −40 40 −40 104
Cat HYDO
Cat DEO
Cat MTO
Cat TDTO
Cat TDTO-TMS
Hydraulic Systems
Cat Arctic TDTO SYN
Cat ECF-1
Cat BIO HYDO (HEES)
API CG-4
API CF
commercial TO-4
commercial BF-1
Transmission Gearbox
Swing Drive Gearbox
Grease Points
(1)
Commercial biodegradable hydraulic oil (HEES) must meet the Caterpillar BF-1 specification. The listed ambient temperature range is for the
current Cat BIO HYDO (HEES), not for commercial BF-1 oil.
(2)
Refer to the machine Operation and Maintenance Manual or contact your local Caterpillar dealer before using Cat BIO HYDO (HEES) or
commercial BF-1 oil in Caterpillar Hydraulic Excavators.
(3)
Cat TDTO-TMS (Transmission Multi-Season) (synthetic blend that exceeds the TO-4M multigrade specification requirements).
(4)
Preferred gear oil in the transmission gearbox only.
(5)
Extreme Pressure - EP Gear Oil SAE 80 or API GL-4 gear oil
(6)
4.0 L (1.0 US gal) (0.9 Imp gal) capacity in small swing drive; 5.9 L (1.5 US gal) (1.3 Imp gal) in large swing drive; fill at angled inlet port IP
(7)
If CAT GO or CAT Synthetic GO cannot be used, select a commercial oil that meets the API GL-5 specification. Non-Caterpillar commercial
“API GL-5” gear oils are as a group second choice oils.
(8)
If MPGM is not available, use multipurpose type grease which contains 3 to 5 percent molybdenum.
(6)
(8)
API GL-4 gear oil
API GL-5 gear oil
CAT GO (Gear Oil)
Caterpillar MPGM 3% Moly
(4)
(7)
SAE 5W-30 −30 40 −22 104
SAE 5W-40 −30 40 −22 104
SAE 10W −20 40 −4 104
SAE 30 10 50 50 122
SAE 10W-30 −20 40 −4 104
SAE 15W-40 −15 50 5 122
Cat MTO −25 40 −13 104
Cat BIO HYDO (HEES)
(1)(2)
Cat TDTO-TMS
(5)
SAE 80
−40 43 −40 110
(3)
−20 50 −4 122
-20 40 -4 104
SAE 80W90 -20 40 -4 104
SAE 85W-140 -10 50 14 122
-20 40 -4 104
Page 85

SEBU9422-02
i05195838
S·O·S Information
SMCS Code: 1348; 1350; 5050; 7542
S·O·S Services is a highly recommended process for
Prentice customers to use in order to minimize
owning and operating cost. Customers provide oil
samples, coolant samples, and other machine
information. The dealer uses the data in order to
provide the customer with recommendations for
management of the equipment. In addition, S·O·S
product problem.
Refer to Special Publication, SEBU6250, “Caterpillar
Machine Fluid Recommendations” for detailed
information concerning S·O·S Services.
Refer to the Operation and Maintenance Manual,
“Maintenance Interval Schedule” for a specific
sampling location and a service hour maintenance
interval.
85
Maintenance Section
S·O·S Information
Consult your Prentice dealer for complete information
and assistance in establishing an S·O·S program for
your equipment.
Page 86

86
Maintenance Section
Maintenance Support
SEBU9422-02
Maintenance Support
i06858501
Welding on Machines and
Engines with Electronic
Controls
SMCS Code: 1000; 6461; 6640; 6700-KH; 6700;
7000; 7220
S/N: KP51–Up
Do not weld on any protective structure. If it is
necessary to repair a protective structure, contact
your authorized dealer.
Proper welding procedures are necessary to avoid
damage to the electronic controls and to the
bearings. When possible, remove the component
that must be welded from the machine or the engine
and then weld the component. If you must weld near
an electronic control on the machine or the engine,
temporarily remove the electronic control to prevent
heat-related damage. The following steps should be
followed to weld on a machine or an engine with
electronic controls.
• Engine ECM Module - On the engine
• Control Module - Located in the cab
• Machine ECM Module - Located in the cab
• Product Link Module - Located under the
hydraulic tank
5. Protect any wiring harnesses and components
from the debris and the spatter which is created
from welding.
6. Use standard welding procedures to weld the
materials together.
1. Turn off the engine. Place the engine start switch
in the OFF position.
2. Turn the battery disconnect switch to the OFF
position. If there is no battery disconnect switch,
remove the negative battery cable at the battery.
Do NOT use electrical components (ECM or sensors)
or electronic component grounding points for grounding the welder.
3. Clamp the ground cable from the welder to the
component that will be welded. Place the clamp as
close as possible to the weld. Make sure that the
electrical path from the ground cable to the
component does not go through any bearing. Use
this procedure to reduce the possibility of damage
to the following components:
• Bearings of the drive train
• Hydraulic components
• Electrical components (Engine ECM, and the
Product Link Module.
NOTICE
• Other components of the machine
4. Disconnect power source to or remove the
following components
Page 87

SEBU9422-02
87
Maintenance Section
Maintenance Interval Schedule
i06952723
Maintenance Interval Schedule
SMCS Code: 7000
When Required
“ Battery - Recycle” . . . . . . . . . . . . . . . . . . . . . . . . . 89
“ Cab Air Filter - Clean/Replace” . . . . . . . . . . . . . . . 93
“ Circuit Breakers - Reset” . . . . . . . . . . . . . . . . . . . . 93
“ Circuit Breakers - Reset” . . . . . . . . . . . . . . . . . . . . 94
“ Fuel System Primary Filter (Water Separator) -
Drain” . . . . . . . . . . . . . . . . . . . . . . . . . . . . . . . . . . . 122
“ Oil Filter - Inspect” . . . . . . . . . . . . . . . . . . . . . . . . 143
“ Window Washer Reservoir - Fill” . . . . . . . . . . . . 149
“ Window Wiper - Inspect/Replace” . . . . . . . . . . . 149
“ DEF Filler Screen - Clean” . . . . . . . . . . . . . . . . . 100
“ Diesel Exhaust Fluid - Fill”. . . . . . . . . . . . . . . . . . 102
Every 10 Service Hours or Daily
“ Boom and Stick Linkage - Lubricate” . . . . . . . . . . 92
“ Differential Pinion - Lubricate”. . . . . . . . . . . . . . . 103
“ Engine Oil Level - Check” . . . . . . . . . . . . . . . . . . 116
“ Engine Oil and Filter - Change”. . . . . . . . . . . . . . 118
Initial 500 Hours (for New Systems,
Refilled Systems, and Converted
Systems)
“Cooling System Coolant Sample (Level 2) -
Obtain” . . . . . . . . . . . . . . . . . . . . . . . . . . . . . . . . . . . 99
Every 500 Service Hours
“ Fuel Filter (In-Line) - Replace” . . . . . . . . . . . . . . 122
“ Hydraulic System Oil Filter (Case Drain) -
Replace” . . . . . . . . . . . . . . . . . . . . . . . . . . . . . . . . . 134
“ Hydraulic System Oil Filter (Pilot) - Replace” . . . 136
“ Hydraulic System Oil Filter (Return) -
Replace” . . . . . . . . . . . . . . . . . . . . . . . . . . . . . . . . . 137
“ Hydraulic System Oil Sample - Obtain” . . . . . . . 142
“Cooling System Coolant Sample (Level 1) -
Obtain” . . . . . . . . . . . . . . . . . . . . . . . . . . . . . . . . . . . 98
“ Engine Crankcase Breather - Clean” . . . . . . . . . 109
“ Fuel Tank Cap and Strainer - Clean” . . . . . . . . . 127
“ Hydraulic System Oil Filter - Replace” . . . . . . . . 133
Every 1000 Service Hours
“ Diesel Exhaust Fluid - Fill”. . . . . . . . . . . . . . . . . . 102
“ Grapple Head - Lubricate” . . . . . . . . . . . . . . . . . . 128
“ Stabilizer and Cylinder Bearings - Lubricate”. . . 144
“ Swing Bearing - Lubricate” . . . . . . . . . . . . . . . . . 146
Every Week
“ Hoses and Clamps - Inspect/Replace” . . . . . . . . 129
Every 50 Service Hours or Weekly
“ Fuel Tank Water and Sediment - Drain” . . . . . . . 127
Every 250 Service Hours or
Monthly
“ Battery - Clean” . . . . . . . . . . . . . . . . . . . . . . . . . . . 89
“ Battery Hold-Down - Tighten” . . . . . . . . . . . . . . . . 90
“ Belts - Inspect/Adjust/Replace”. . . . . . . . . . . . . . . 91
“ Battery or Battery Cable - Inspect/Replace”. . . . . 90
“ Fuel System Primary Filter (Water Separator)
Element - Replace” . . . . . . . . . . . . . . . . . . . . . . . . 124
“ Fuel System Secondary Filter Number One -
Replace” . . . . . . . . . . . . . . . . . . . . . . . . . . . . . . . . . 125
“ Swing Drive Oil - Change” . . . . . . . . . . . . . . . . . . 147
Every 1500 Service Hours
“Engine Crankcase Breather Element -
Replace” . . . . . . . . . . . . . . . . . . . . . . . . . . . . . . . . . 113
Every 2000 Service Hours or 1 Year
“ Hydraulic System Oil - Change” . . . . . . . . . . . . . 130
“ Swing Drive Oil Level - Check” . . . . . . . . . . . . . . 148
Page 88

88
Maintenance Section
Maintenance Interval Schedule
“ Receiver Dryer (Refrigerant) - Replace”. . . . . . . 143
Every Year
“Cooling System Coolant Sample (Level 2) -
Obtain” . . . . . . . . . . . . . . . . . . . . . . . . . . . . . . . . . . . 99
Every 3000 Service Hours or 2
Years
“ Cooling System Coolant Extender (ELC) -
Add” . . . . . . . . . . . . . . . . . . . . . . . . . . . . . . . . . . . . . 97
Every 6000 Service Hours or 4
Years
“ Cooling System Coolant (ELC) - Change” . . . . . . 94
SEBU9422-02
Page 89
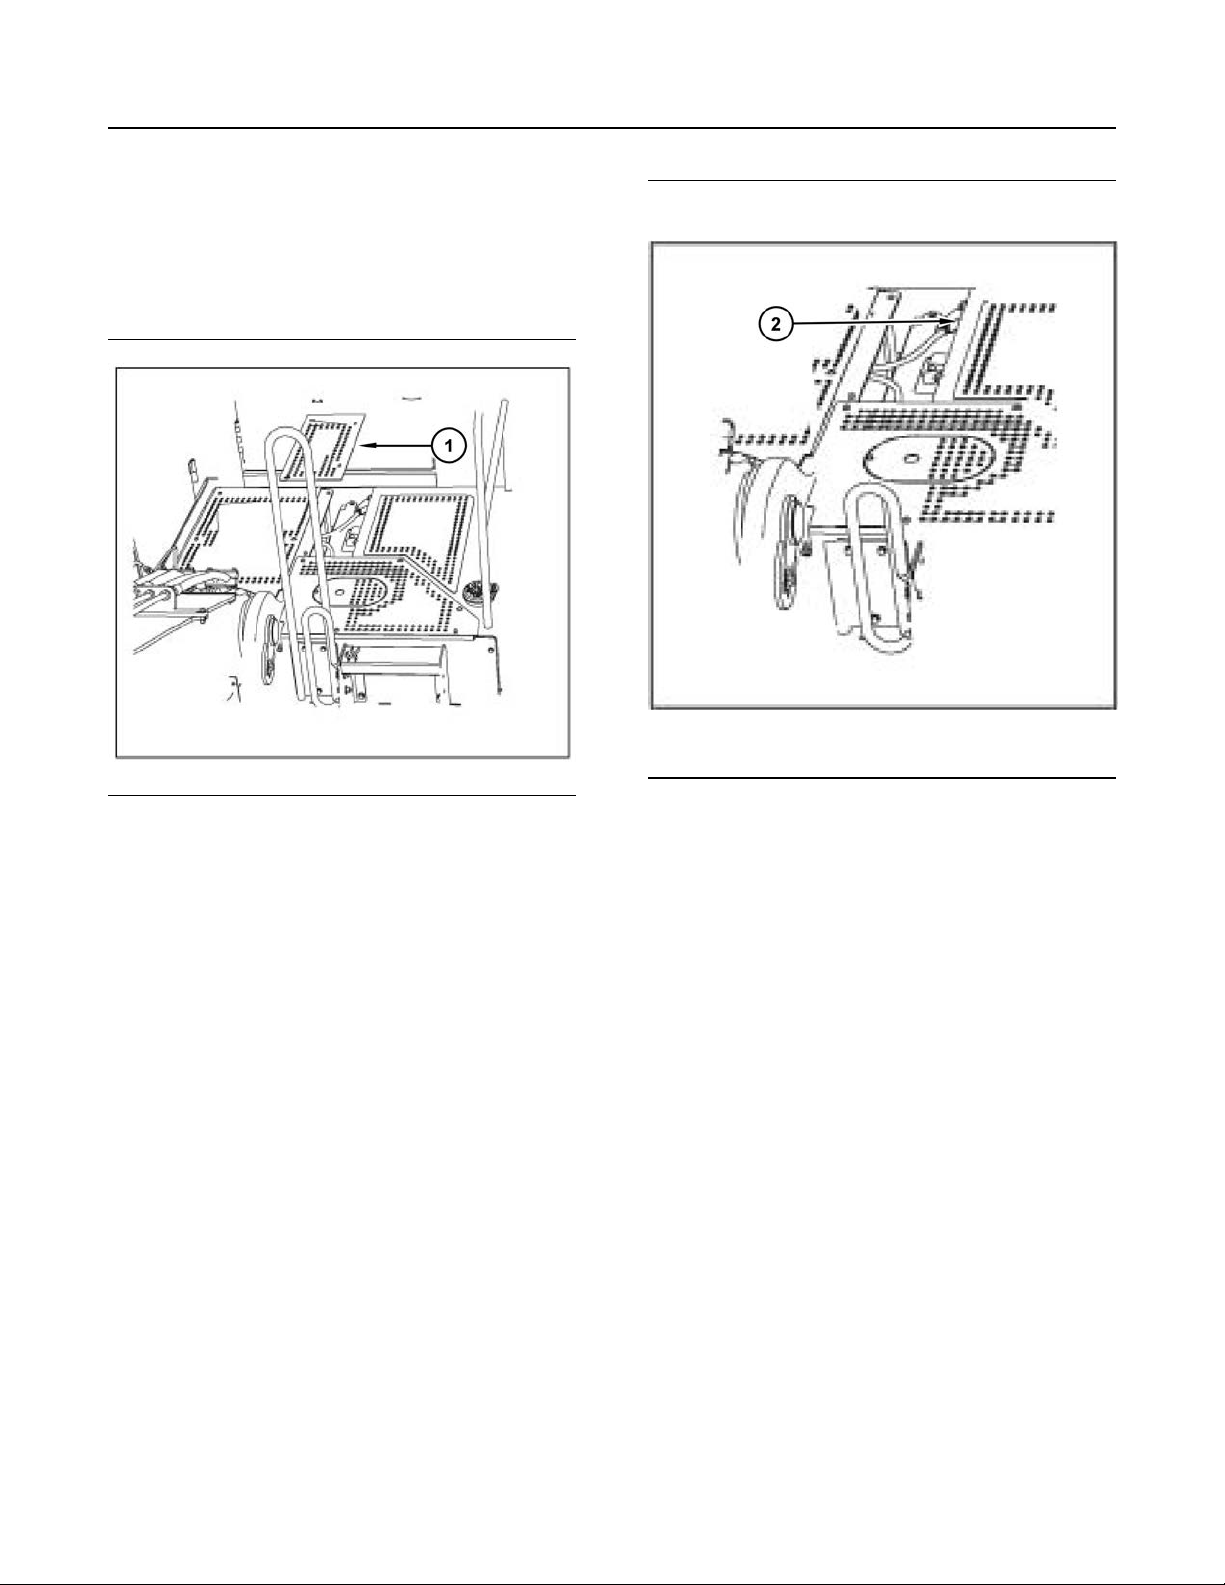
SEBU9422-02
Battery - Clean
SMCS Code: 1401-070
S/N: KP51–Up
89
Maintenance Section
Battery - Clean
i05164804
Illustration 111 g03320832
Remove the access panel (1) in order to expose the
batteries.
Illustration 112 g03320835
Clean the battery terminals (2) and the surfaces of
the batteries with a clean cloth. Coat the battery
terminals with petroleum jelly. Make sure that the
battery cables are installed securely.
i02039199
Battery - Recycle
SMCS Code: 1401-561
S/N: KP51–Up
Always recycle a battery. Never discard a battery.
Return used batteries to one of the following
locations:
• A battery supplier
• An authorized battery collection facility
• A recycling facility
Page 90

90
Maintenance Section
Battery Hold-Down - Tighten
i06932694
Battery Hold-Down - Tighten
SMCS Code: 7257-527
SEBU9422-02
Illustration 113 g06173045
The batteries are located in the platform of the
machine. The access door (1) for the batteries is
located in the center of the platform of the machine.
Remove the two bolts from the battery access door to
access the battery compartment.
Illustration 114 g06173057
Over time, the vibration of an operating machine can
cause the battery hold-down to loosen. To help
prevent loose batteries and the possibility of loose
cable connections, tighten all fastening hardware (2).
i06635612
Battery or Battery Cable Inspect/Replace
SMCS Code: 1401-040; 1401-510; 1402-510; 1402-
040
S/N: KP51–Up
1. Turn the engine start switch and all cab switches to
the OFF position.
Page 91
SEBU9422-02
91
Maintenance Section
Belts - Inspect/Adjust/Replace
4. Disconnect all battery cables.
5. Perform the necessary repairs. Replace the
battery cable or the battery, as needed.
6. Turn the battery disconnect switch (2) clockwise
into the ON position.
7. Install access plate (1).
i05164815
Belts - Inspect/Adjust/Replace
SMCS Code: 1357-040; 1357-510; 1357-025
S/N: KP51–Up
Serpentine Belt
Illustration 115 g06173045
2. Remove access plate (1) to gain access to the
batteries. The batteries are located in the platform
of the machine.
Illustration 117 g03317751
1. Stop the engine. Open the engine access doors
that are located on the platform or on the rear of
the machine.
2. Inspect the condition of the serpentine belt (1). If
the belt is cracked or frayed, replace the belt.
Illustration 116 g06055373
3. Turn the battery disconnect switch (2)
counterclockwise into the OFF position.
Page 92
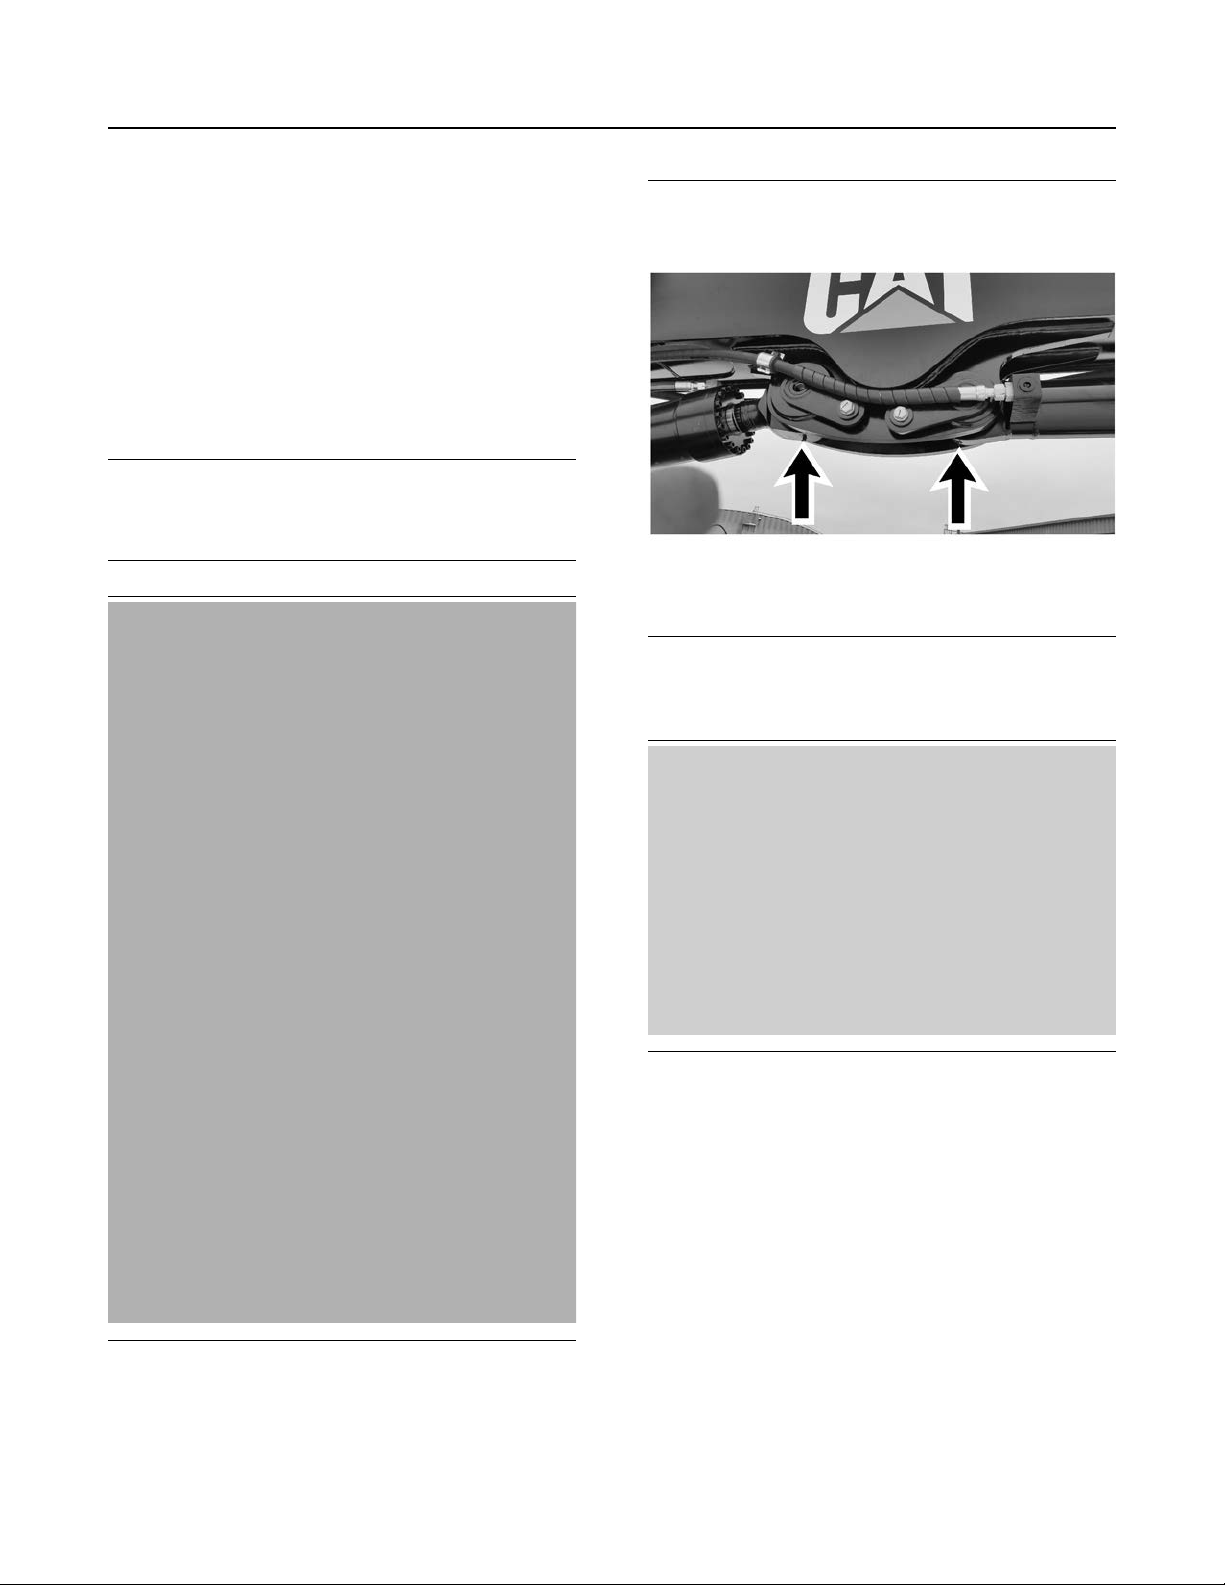
92
Maintenance Section
Boom and Stick Linkage - Lubricate
3. Cat engines are equipped with a belt tensioner.
Refer to the Perkins Engine OMM for maintenance
procedures.
i06635616
Boom and Stick Linkage Lubricate
SMCS Code: 6501-086-KL; 6502-086-KL
S/N: KP51–Up
SEBU9422-02
When performing maintenance above ground level,
NOTICE
always use appropriate devices such as ladders and
man lift machines.
Illustration 119 g06055401
Center Joint Lubrication - Main Boom Rod End, Stick
Boom Base End
Illustration 118 g06056553
Main Boom Base End Lubrication Point
Illustration 120 g06173080
Stick Cylinder Rod End
1. Wipe excess grease and dirt off all grease fittings.
2. Lubricate all fittings.
Use ADV 3 Moly Grease.
Page 93
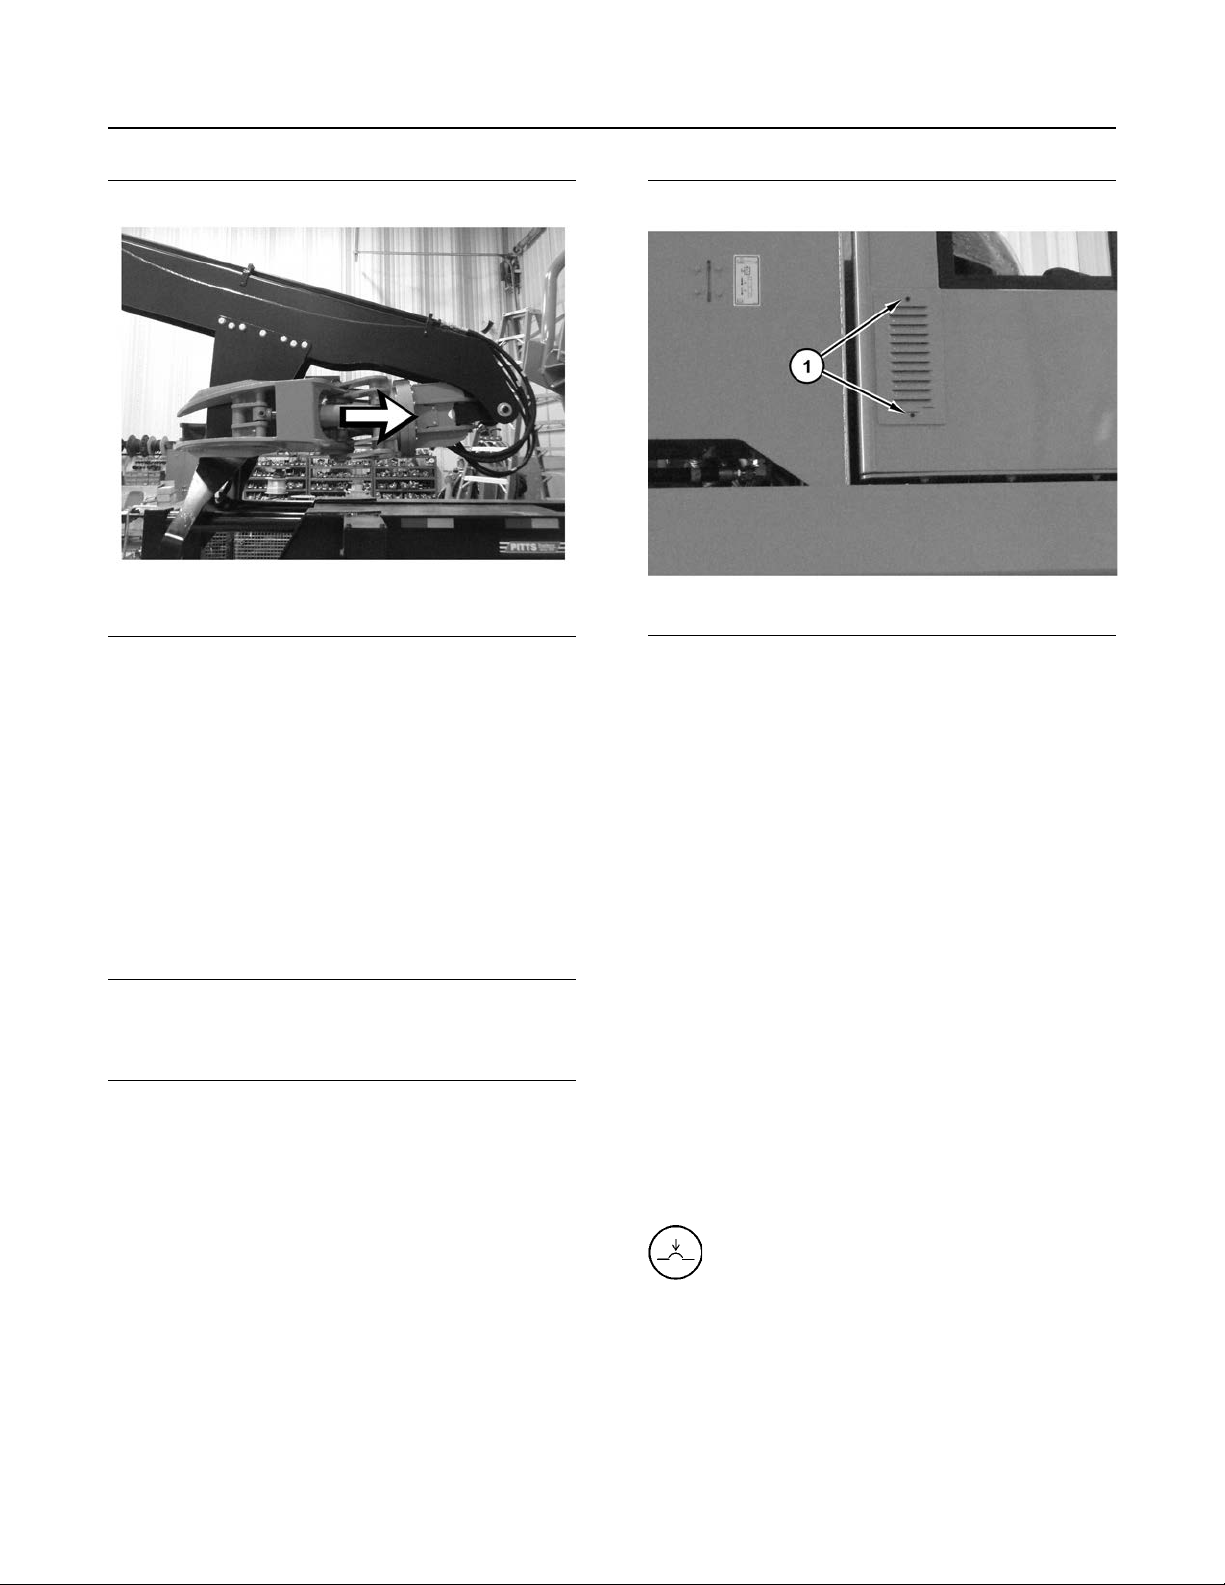
SEBU9422-02
93
Maintenance Section
Cab Air Filter - Clean/Replace
Illustration 121 g03321410
Note: Be sure to lubricate the link between the
grapple and the stick.
i05164839
Cab Air Filter - Clean/Replace
SMCS Code: 7342-510; 7342-070
S/N: KP51–Up
Note: Clean the cab air filters more often if the
machine is being operated in dusty conditions.
NOTICE
When performing maintenance above ground level,
use appropriate devices such as ladders or man lift
machines.
Illustration 122 g03317774
1. Using a ladder or man machine lift the access door
on the right-hand side of the cab. Remove the filter
element.
2. Remove the two retaining bolts (1) to access the
filter.
3. Clean the filter element with pressure air or wash
the filter element in warm water with a nonsudsing
household detergent.
4. If water and detergent are used to clean the filter
element, rinse the filter element in clean water.
Allow the filter element to air dry thoroughly.
Note: If the filter element is damaged, install a new
filter element.
5. Install the filter element. Refasten the access door.
i06843259
Circuit Breakers - Reset
SMCS Code: 1420-529
Circuit Breaker Reset – Depress the
button to reset the circuit breakers. If
the circuit is functioning properly, the
button will remain depressed. If the button will
not remain depressed, check the appropriate
electrical circuit.
Page 94
94
Maintenance Section
Circuit Breakers - Reset
Illustration 123 g06173552
The circuit breakers are located near the hydraulic
filters on the right-hand rear of the machine.
i06865173
Circuit Breakers - Reset
SMCS Code: 1420-529
SEBU9422-02
Illustration 124 g06146602
Main circuit breaker(1)
Glow plug circuit breaker (2)
DEF ECM circuit breaker (3)
Engine ECM circuit breaker (4)
The circuit breakers are on the rear right-hand side of
the machine.
i06843263
Cooling System Coolant (ELC)
- Change
SMCS Code: 1350-044-NL
S/N: KP51–Up
Circuit Breaker Reset – Depress the
button to reset the circuit breakers. If
the circuit is functioning properly, the
button will remain depressed. If the button will
not remain depressed, check the appropriate
electrical circuit.
S/N: KP51–Up
Engine hood and engine hood parts can be hot
while engine is running or immediately after engine shutdown. Hot parts or hot components can
cause burns or personal injury. Do not allow
these parts to contact your skin, when engine is
running or immediately after engine shutdown.
Use protective clothing or protective equipment
to protect your skin.
Page 95

SEBU9422-02
Personal injury can result from hot coolant,
steam and alkali.
At operating temperature, engine coolant is hot
and under pressure. The radiator and all lines to
heaters or the engine contain hot coolant or
steam. Any contact can cause severe burns.
Remove cooling system pressure cap slowly to
relieve pressure only when engine is stopped and
cooling system pressure cap is cool enough to
touch with your bare hand.
Do not attempt to tighten hose connections when
the coolant is hot, the hose can come off causing
burns.
Cooling System Coolant Additive contains alkali.
Avoid contact with skin and eyes.
95
Maintenance Section
Cooling System Coolant (ELC) - Change
Do not change the coolant until you read and under-
NOTICE
stand the cooling system information in Special Publication, SEBU6250, “Caterpillar Machine Fluids
Recommendations”.
Failure to do so could result in damage to the cooling
system components.
NOTICE
Mixing ELC with other products will reduce the effectiveness of the coolant.
This could result in damage to cooling system
components.
If Caterpillar products are not available and commercial products must be used, make sure they have
passed the Caterpillar EC-1 specification for premixed or concentrate coolants and Caterpillar
Extender.
Note: This machine was filled at the factory with Cat
Extended Life Coolant.
If the coolant in the machine is changed to Extended
Life Coolant from another type of coolant, see
Special Publication, SEBU6250, “Caterpillar Machine
Fluids Recommendations”.
1. Open the cooling system access door.
Illustration 125 g06146673
2. Slowly loosen the pressure cap (1) that is on the
coolant reservoir to release pressure from the
cooling system.
3. Remove the pressure cap.
4. Inspect the o-ring of the cooling system pressure
cap. If the o-ring is damaged, replace the pressure
cap.
Note: Refer to Operation and Maintenance Manual,
“General Hazard Information” for information that
pertains to containing fluid spillage.
5. Open the cooling system access door on the left
side of the machine.
6. Open the draincock valve and allow the coolant to
drain into a suitable container. The draincock valve
is on the bottom of the radiator.
7. Flush the cooling system. Follow Step 7.a through
Step 7.h to flush the cooling system.
a. Close the drain valve.
b. Fill the cooling system with clean water.
c. Install the pressure cap.
d. Start the engine and run the engine until the
engine reaches operating temperature.
e. Stop the engine and allow the engine to cool.
f. Loosen the pressure cap slowly to relieve any
pressure in the cooling system.
Page 96
96
Maintenance Section
Cooling System Coolant Extender (ELC) - Add
g. Open the drain valve that is on the bottom of the
radiator and allow the coolant to drain into a
suitable container.
h. Flush the radiator with clean water until the
draining water is transparent.
8. Close the drain valve.
9. Add the Extended Life Coolant. Refer to the
following topics:
• Special Publication, SEBU6250, “Caterpillar
Machine Fluids Recommendations”
SEBU9422-02
Engine hood and engine hood parts can be hot
while engine is running or immediately after engine shutdown. Hot parts or hot components can
cause burns or personal injury. Do not allow
these parts to contact your skin, when engine is
running or immediately after engine shutdown.
Use protective clothing or protective equipment
to protect your skin.
• Operation and Maintenance Manual,
“Capacities (Refill)”
10. After the cooling system has been filled, perform
the following procedures during initial start-up:
a. Start the engine without the filler cap.
b. Run the engine at low idle for 10 minutes.
c. Then, increase the engine speed to a high idle
until the water temperature regulator is open
and the coolant level is stabilized.
d. Maintain the coolant at the proper level as the
water temperature regulator opens, and the air
is purged from the system. Refer to Operation
and Maintenance Manual, “Cooling System
Coolant Level - Check”.
11. Install the cooling system pressure cap.
12. Stop the engine.
13. Check the coolant reservoir. Maintain the coolant
level between “FULL” mark and “LOW” mark .
14. If more coolant is necessary, remove the
pressure cap and add the appropriate coolant
solution.
15. Install the pressure cap.
16. Close the cooling system access door and latch
the cooling system access door.
i05096733
Cooling System Coolant
Extender (ELC) - Add
SMCS Code: 1352-544-NL
Personal injury can result from hot coolant,
steam and alkali.
At operating temperature, engine coolant is hot
and under pressure. The radiator and all lines to
heaters or the engine contain hot coolant or
steam. Any contact can cause severe burns.
Remove cooling system pressure cap slowly to
relieve pressure only when engine is stopped and
cooling system pressure cap is cool enough to
touch with your bare hand.
Do not attempt to tighten hose connections when
the coolant is hot, the hose can come off causing
burns.
Cooling System Coolant Additive contains alkali.
Avoid contact with skin and eyes.
Use Cat Extended Life Coolant (ELC) when you add
coolant to the cooling system. See Special
Publication, SEBU6250, “Caterpillar Machine Fluids
Recommendations” for all cooling system
requirements.
Use a Coolant Conditioner Test Kit in order to check
the concentration of the coolant.
NOTICE
Mixing ELC with other products will reduce the effectiveness of the coolant.
This could result in damage to cooling system
components.
If Caterpillar products are not available and commercial products must be used, make sure they have
passed the Caterpillar EC-1 specification for premixed or concentrate coolants and Caterpillar
Extender.
Note: This machine was filled at the factory with Cat
Extended Life Coolant.
S/N: KP51–Up
1. Park the machine on level ground.
2. Stop the engine.
Page 97
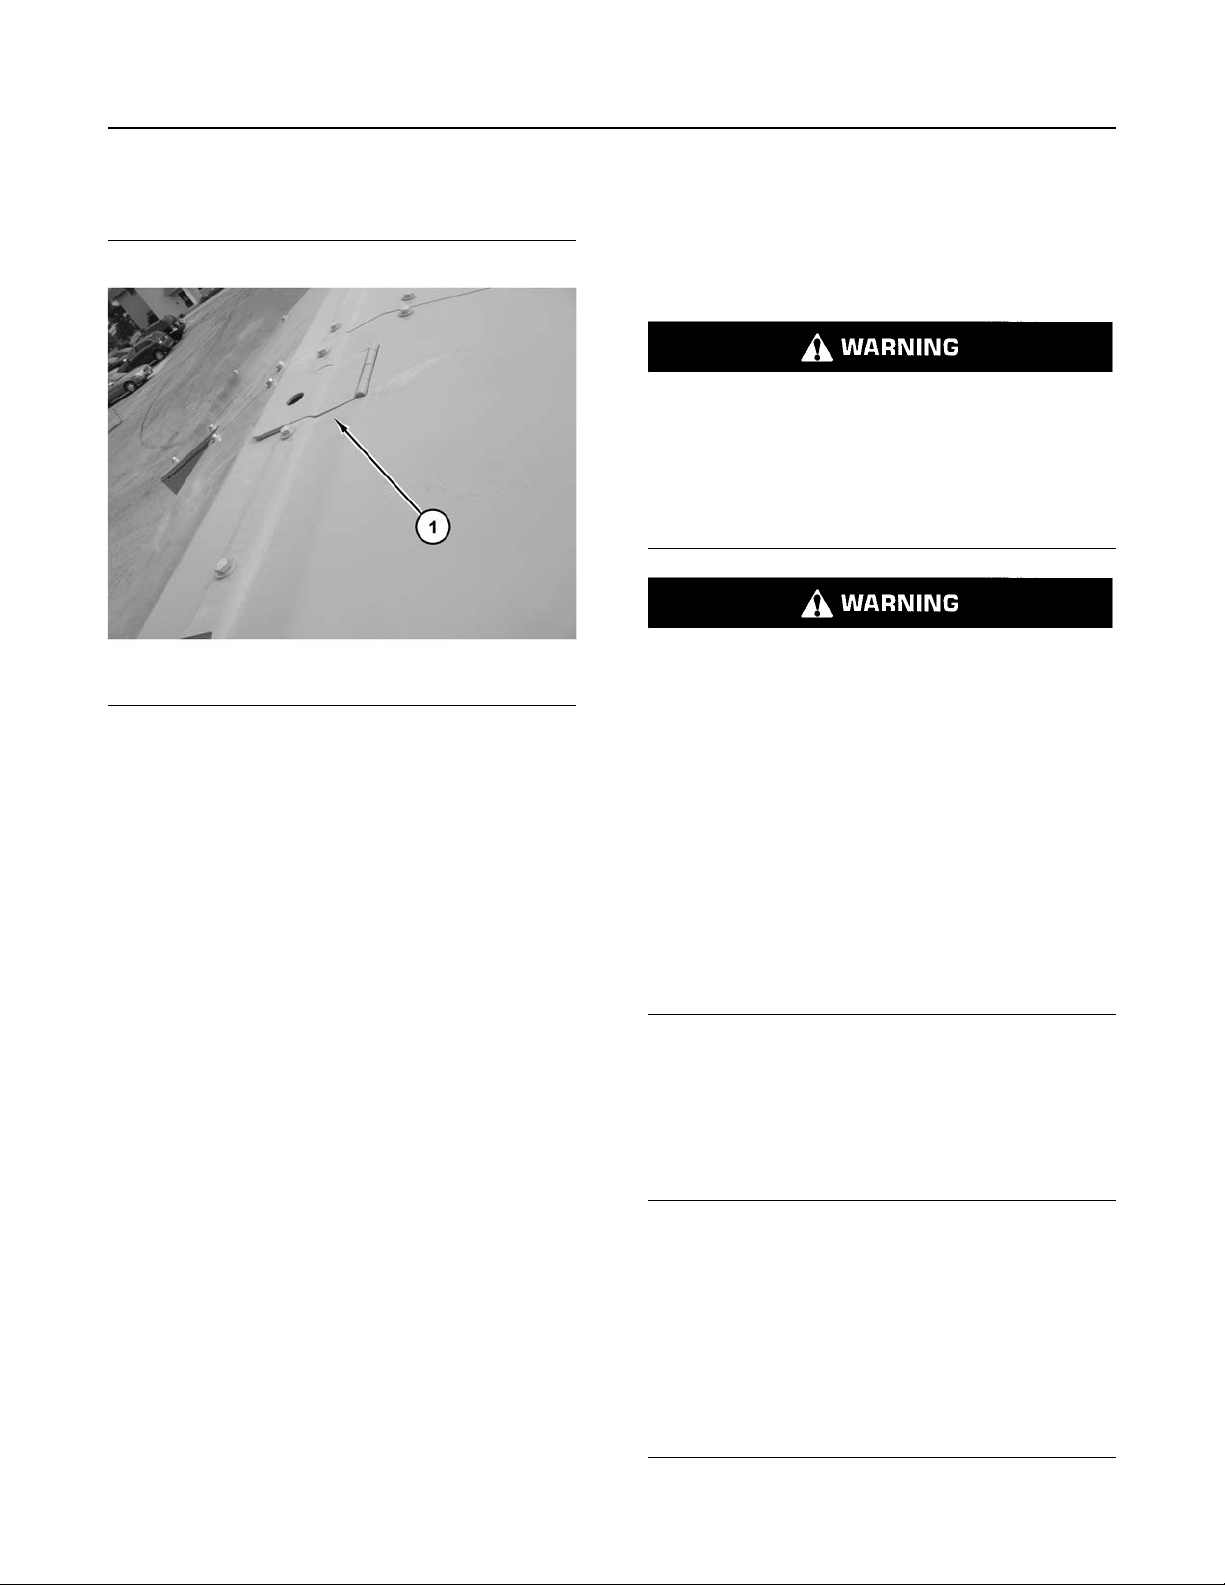
SEBU9422-02
97
Maintenance Section
Cooling System Coolant Extender (ELC) - Add
3. Unlatch the cooling system access door and raise
the cooling system access door .
Illustration 126 g02930019
4. Make sure that the cooling system has cooled
down. Loosen the cooling system pressure cap
slowly in order to relieve system pressure.
Remove the pressure cap.
Note: Refer to Operation and Maintenance Manual,
“General Hazard Information” for information on
containing fluid spillage.
5. It may be necessary to drain some coolant from
the radiator so that Cat Extender can be added to
the cooling system.
Note: Always discard drained fluids according to
local regulations.
6. Add Cat Extended Life Coolant (ELC) to the
cooling system. Refer to the following topics for
the proper amount of Caterpillar Extender:
• Special Publication, SEBU6250, “Caterpillar
Machine Fluids Recommendations”
• Operation and Maintenance Manual,
“Capacities (Refill)”
7. Inspect the o-ring of the cooling system pressure
cap. If the o-ring is damaged, replace the pressure
cap.
8. Install the cooling system pressure cap.
9. Close the cooling system access door and latch
the cooling system access door .
i06869593
Cooling System Coolant
Extender (ELC) - Add
SMCS Code: 1352-544-NL
Engine hood and engine hood parts can be hot
while engine is running or immediately after engine shutdown. Hot parts or hot components can
cause burns or personal injury. Do not allow
these parts to contact your skin, when engine is
running or immediately after engine shutdown.
Use protective clothing or protective equipment
to protect your skin.
Personal injury can result from hot coolant,
steam and alkali.
At operating temperature, engine coolant is hot
and under pressure. The radiator and all lines to
heaters or the engine contain hot coolant or
steam. Any contact can cause severe burns.
Remove cooling system pressure cap slowly to
relieve pressure only when engine is stopped and
cooling system pressure cap is cool enough to
touch with your bare hand.
Do not attempt to tighten hose connections when
the coolant is hot, the hose can come off causing
burns.
Cooling System Coolant Additive contains alkali.
Avoid contact with skin and eyes.
Use Cat Extended Life Coolant (ELC) when you add
coolant to the cooling system. See Special
Publication, SEBU6250, “Caterpillar Machine Fluids
Recommendations” for all cooling system
requirements.
Use a Coolant Conditioner Test Kit to check the
concentration of the coolant.
NOTICE
Mixing ELC with other products will reduce the effectiveness of the coolant.
This could result in damage to cooling system
components.
If Caterpillar products are not available and commercial products must be used, make sure they have
passed the Caterpillar EC-1 specification for premixed or concentrate coolants and Caterpillar
Extender.
Page 98

98
Maintenance Section
Cooling System Coolant Sample (Level 1) - Obtain
SEBU9422-02
Note: This machine was filled at the factory with Cat
Extended Life Coolant.
1. Park the machine on level ground.
2. Stop the engine.
3. Unlatch the cooling system access door and raise
the cooling system access door .
7. Inspect the o-ring of the cooling system pressure
cap. If the o-ring is damaged, replace the pressure
cap.
8. Install the cooling system pressure cap.
9. Close the cooling system access door and latch
the cooling system access door .
i06952651
Cooling System Coolant
Sample (Level 1) - Obtain
SMCS Code: 1350-008; 1395-008; 7542
Personal injury can result from hot coolant,
steam and alkali.
At operating temperature, engine coolant is hot
and under pressure. The radiator and all lines to
heaters or the engine contain hot coolant or
steam. Any contact can cause severe burns.
Remove filler cap slowly to relieve pressure only
when engine is stopped and radiator cap is cool
enough to touch with your bare hand.
Illustration 127 g06146673
4. Make sure that the cooling system has cooled
down. Loosen the cooling system pressure cap (1)
slowly to relieve system pressure. Remove the
pressure cap.
Note: Refer to Operation and Maintenance Manual,
“General Hazard Information” for information on
containing fluid spillage.
5. It may be necessary to drain some coolant from
the radiator so that Cat Extender can be added to
the cooling system.
Note: Always discard drained fluids according to
local regulations.
6. Add Cat Extended Life Coolant (ELC) to the
cooling system. Refer to the following topics for
the proper amount of Caterpillar Extender:
• Special Publication, SEBU6250, “Caterpillar
Machine Fluids Recommendations”
• Operation and Maintenance Manual,
“Capacities (Refill)”
Do not attempt to tighten hose connections when
the coolant is hot, the hose can come off causing
burns.
Cooling System Conditioner contains alkali.
Avoid contact with skin and eyes.
Note: It is not necessary to obtain a Coolant
Sample (Level 1) if the cooling system is filled
with Cat ELC (Extended Life Coolant). Cooling
systems that are filled with Cat ELC should have a
Coolant Sample (Level 2) obtained. Refer to the
recommended interval as stated in the Maintenance
Interval Schedule.
Note: Obtain a Coolant Sample (Level 1) if the
cooling system is filled with any other coolant
instead of Cat ELC. Including the following types of
coolants.
• Commercial long life coolants that meet the
Caterpillar Engine Coolant Specification -1
(Caterpillar EC-1)
• Cat Diesel Engine Antifreeze/Coolant (DEAC)
• Commercial heavy-duty coolant/antifreeze
Page 99

SEBU9422-02
99
Maintenance Section
Cooling System Coolant Sample (Level 2) - Obtain
Always use a designated pump for oil sampling, and
use a separate designated pump for coolant sampling. Using the same pump for both types of samples may contaminate the samples that are being
drawn. This contaminate may cause a false analysis
and an incorrect interpretation that could lead to concerns by both dealers and customers.
Care must be taken to ensure that fluids are contained during performance of inspection, mainte-
nance, testing, adjusting, and repair of the product.
Be prepared to collect the fluid with suitable containers before opening any compartment or disassembling any component containing fluids.
Refer to Special Publication, NENG2500, “Dealer
Service Tool Catalog” for tools and supplies suitable
to collect and contain fluids on Cat
Dispose of all fluids according to local regulations
and mandates.
Note: Level 1 results may indicate a need for
Level 2 Analysis.
Obtain the sample of the coolant as close as possible
to the recommended sampling interval. To receive
the full effect of S·O·S analysis, establish a
consistent trend of data. To establish a pertinent
history of data, perform consistent samplings that are
evenly spaced. Supplies for collecting samples can
be obtained from your authorized dealer.
1. Use the following guidelines for proper sampling of
the coolant:
• Complete the information on the label for the
sampling bottle before you begin to take the
samples.
NOTICE
NOTICE
®
products.
2. Submit the sample for Level 1 analysis.
Reference: For additional information about coolant
analysis, refer to Special Publication, SEBU6250,
“Caterpillar Machine Fluids Recommendations” or
consult your Prentice dealer.
i06933221
Cooling System Coolant
Sample (Level 2) - Obtain
SMCS Code: 1350-008; 1395-008; 7542
NOTICE
Always use a designated pump for oil sampling, and
use a separate designated pump for coolant sampling. Using the same pump for both types of samples may contaminate the samples that are being
drawn. This contaminate may cause a false analysis
and an incorrect interpretation that could lead to concerns by both dealers and customers.
1. Obtain the sample of the coolant as close as
possible to the recommended sampling interval.
Supplies for collecting samples can be obtained
from your authorized dealer.
Reference: Refer to Operation and Maintenance
Manual, “Cooling System Coolant Sample (Level 1) Obtain” for the guidelines for proper sampling of the
coolant.
2. Submit the sample for Level 2 analysis.
Reference: For additional information about coolant
analysis, refer to Special Publication, SEBU6250,
“Machine Fluids Recommendations”.
i05698174
• Keep the unused sampling bottles stored in
plastic bags.
• Obtain coolant samples directly from the
coolant sample port. You should not obtain the
samples from any other location.
• Keep the lids on empty sampling bottles until
you are ready to collect the sample.
• Place the sample in the mailing tube
immediately after obtaining the sample to avoid
contamination.
• Never collect samples from expansion bottles.
• Never collect samples from the drain for a
system.
DEF Filler Screen - Clean
SMCS Code: 108K-070-Z3
S/N: KP51–Up
NOTICE
Ensure that the engine is stopped before any servicing or repair is performed.
Page 100
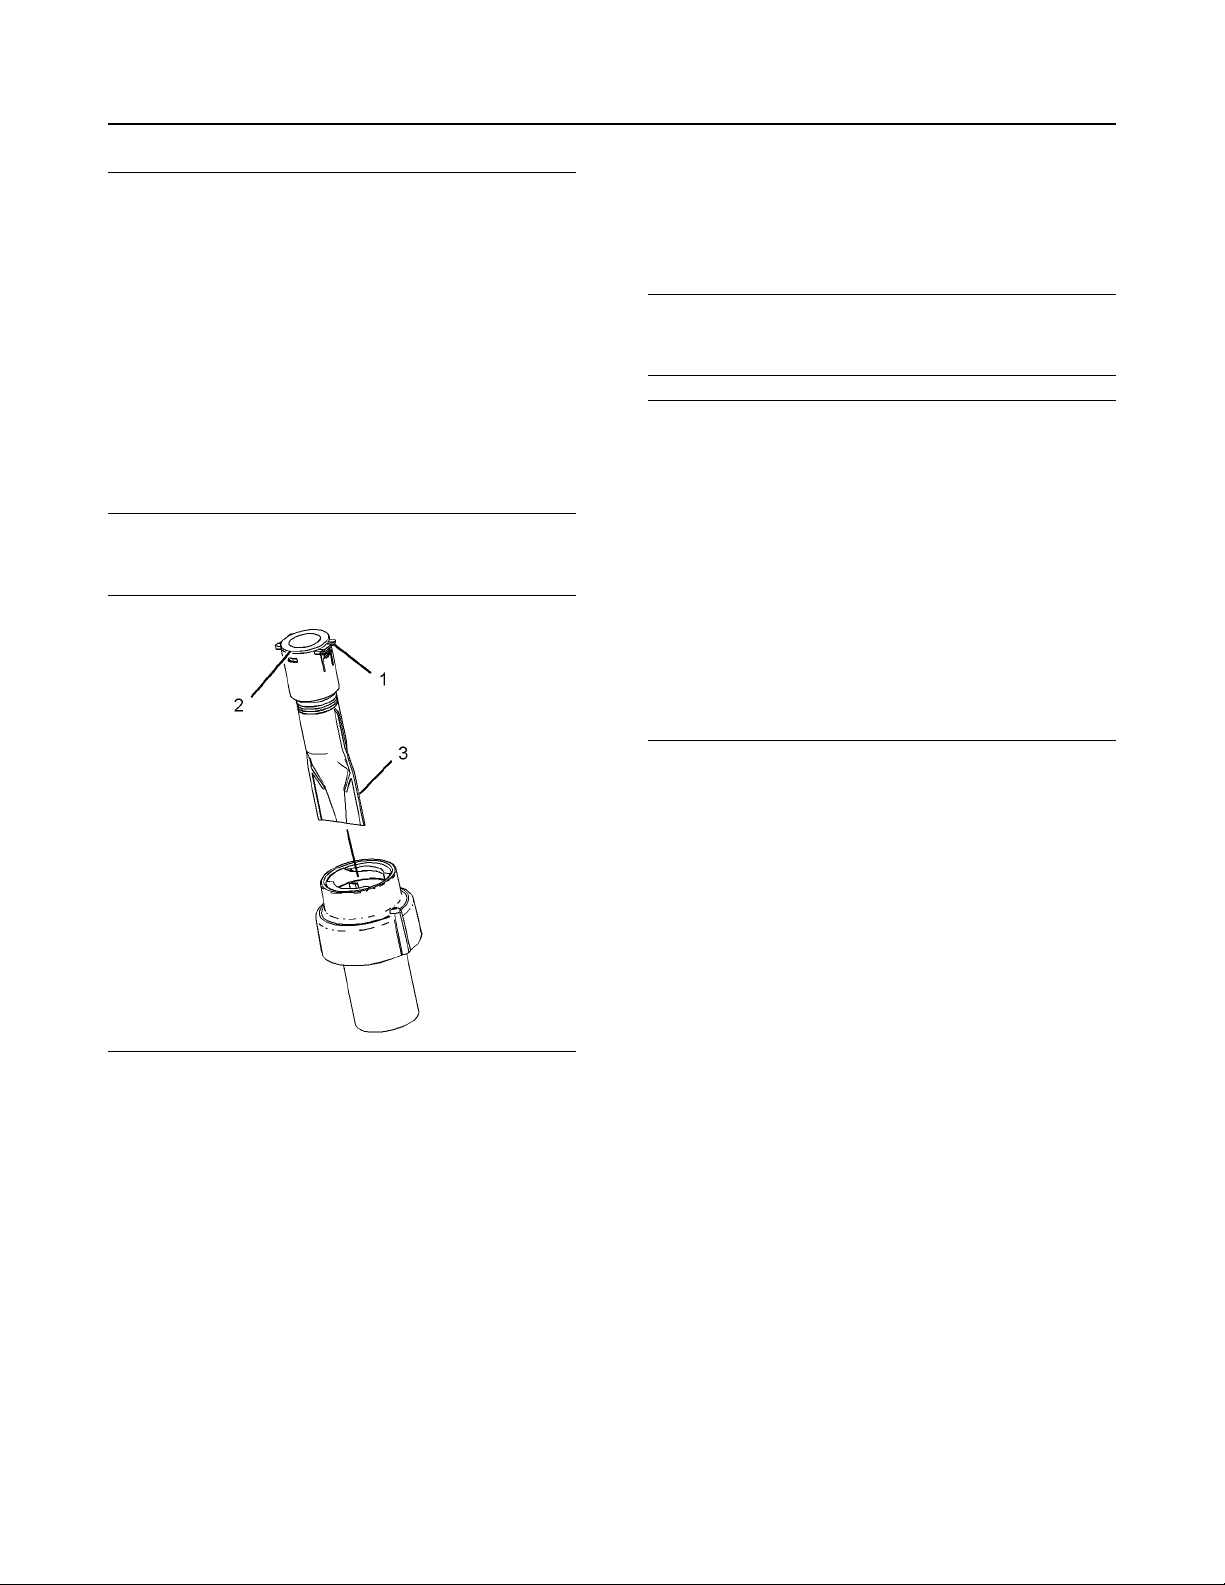
100
Maintenance Section
DEF Filler Screen - Clean
SEBU9422-02
Care must be taken to ensure that fluids are con-
NOTICE
tained during performance of inspection, maintenance, testing, adjusting, and repair of the product.
Be prepared to collect the fluid with suitable containers before opening any compartment or disassembling any component containing fluids.
Refer to Special Publication, NENG2500, “Cat Dealer
Service Tool Catalog” or refer to Special Publication,
PECJ0003, “Cat Shop Supplies and Tools Catalog”
for tools and supplies suitable to collect and contain
fluids on Cat products.
Dispose of all fluids according to local regulations
and mandates.
The filler neck adapter filter screen in the diesel
exhaust fluid tank will need to be cleaned or replaced
if contaminated.
i06870469
DEF Filler Screen - Clean
SMCS Code: 108K-070-Z3
NOTICE
Ensure that the engine is stopped before any servicing or repair is performed.
NOTICE
Care must be taken to ensure that fluids are contained during performance of inspection, mainte-
nance, testing, adjusting, and repair of the product.
Be prepared to collect the fluid with suitable containers before opening any compartment or disassembling any component containing fluids.
Refer to Special Publication, NENG2500, “Cat Dealer
Service Tool Catalog” or refer to Special Publication,
PECJ0003, “Cat Shop Supplies and Tools Catalog”
for tools and supplies suitable to collect and contain
fluids on Cat products.
Dispose of all fluids according to local regulations
and mandates.
The filler neck adapter filter screen in the diesel
exhaust fluid tank will need to be cleaned or replaced
if contaminated.
Illustration 128 g03618438
1. Use a screwdriver or pick to press the tabs (1).
2. Pull the screen assembly (2) upward from both
sides and remove from the fill neck adapter
3. Use water or compressed air to clean out the filter
screen (3). If there is any debris inside, let dry and
remove the debris by turning the screen upside
down and dumping debris out. If the debris cannot
be removed or the filter screen is damaged,
replace the filler neck adapter filter screen.
 Loading...