

Page 1
®
®
®
®
CONTACT
TOASTER
MODEL
HCT13M, HCT13S
HCTE13M, HCTE13S
®
Installation and
Operation
Instructions
2M-Z19028 Rev. C 10/28/2014
IL2845b
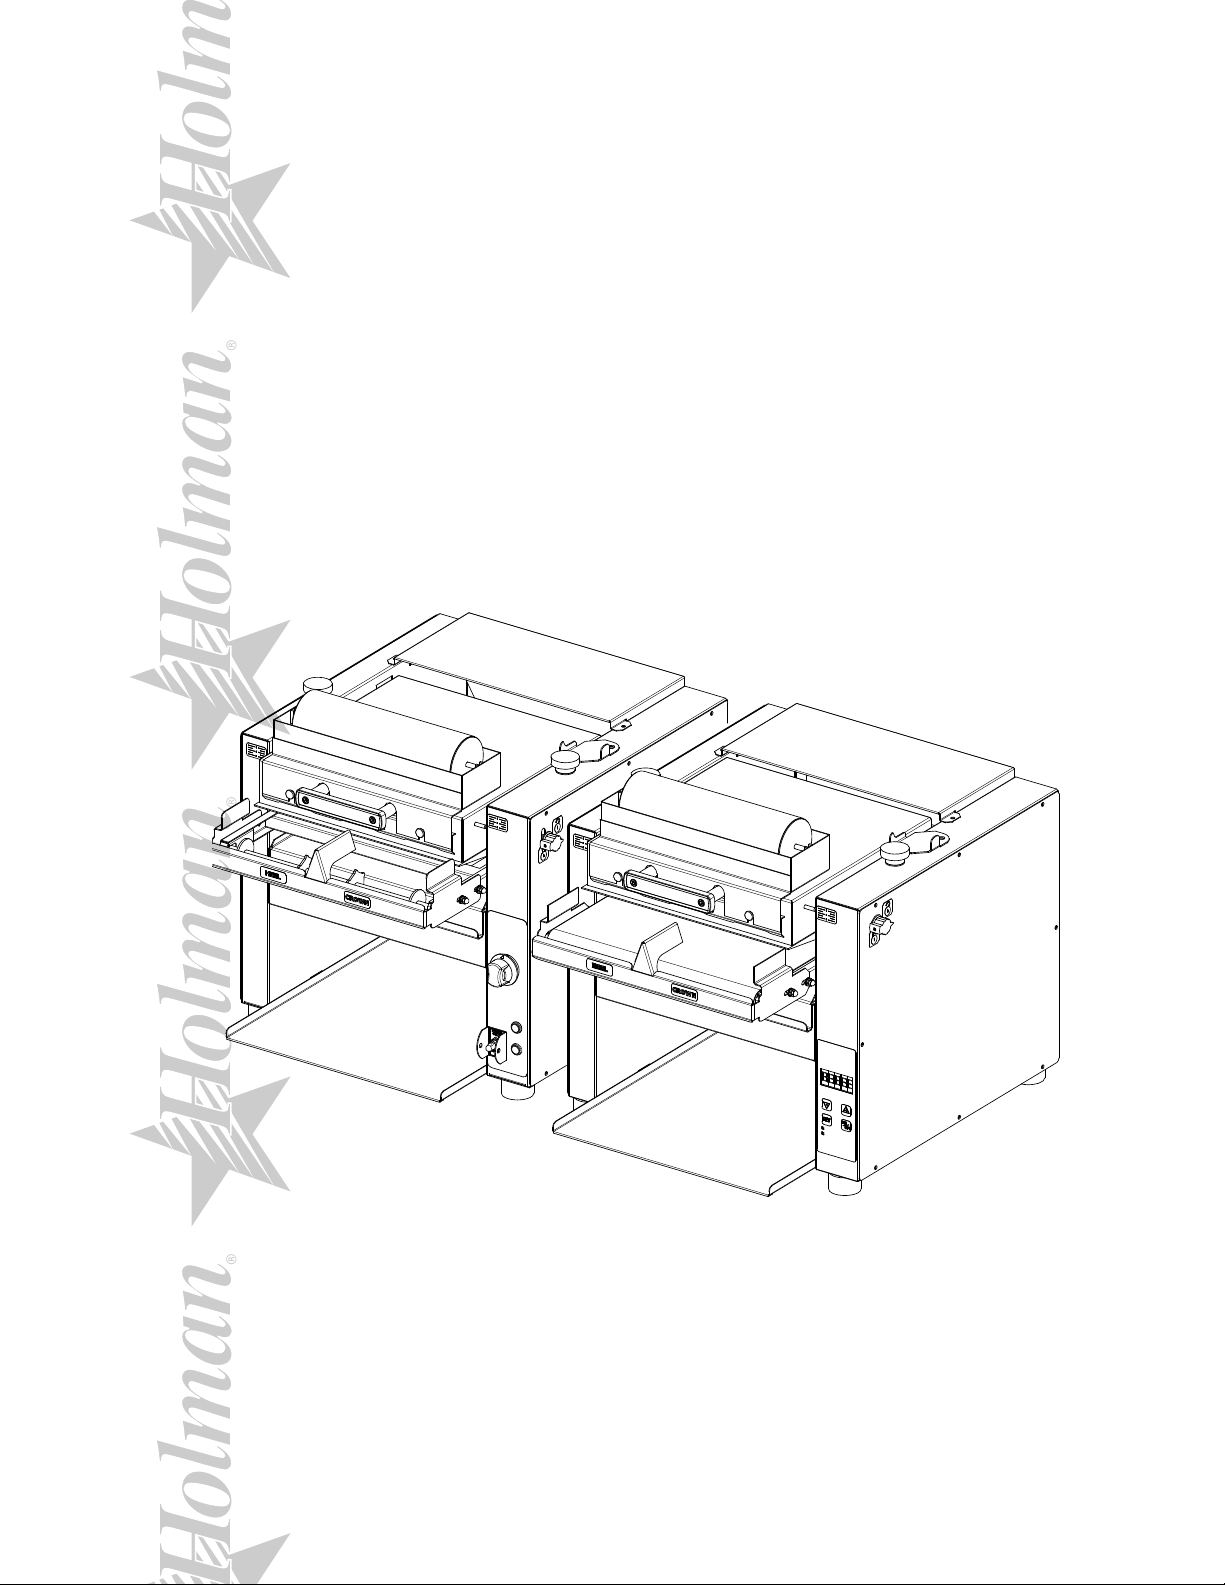
HCT13 & HCTE13
(Shown with optional butter wheel)
Page 2

SAFETY SYMBOL
Using any part other than genuine Star factory supplied parts relieves the
manufacturer of all liability.
Star reserves the right to change specications and product design without
notice. Such revisions do not entitle the buyer to corresponding changes,
improvements, additions or replacements for previously purchased
equipment.
Due to periodic changes in designs, methods, procedures, policies and
regulations, the specications contained in this sheet are subject to change
without notice. While Star International Holdings Inc., Company exercises
good faith efforts to provide information that is accurate, we are not
responsible for errors or omissions in information provided or conclusions
reached as a result of using the specications. By using the information
provided, the user assumes all risks in connection with such use.
These symbols are intended to alert the user to the presence of
important operating and maintenance instructions in the manual
accompanying the appliance.
RETAIN THIS MANUAL FOR FUTURE REFERENCE
NOTICE
MAINTENANCE AND REPAIRS
Contact your local authorized service agent for service or required maintenance.
Please record the model number, serial number, voltage and purchase date in the area below and have it ready when
you call to ensure a faster service.
Authorized Service Agent Listing
Model No.
Serial No.
Voltage
Purchase Date
Reference the listing provided with the unit
or
for an updated listing go to:
Website: www.star-mfg.com
E-mail Service@star-mfg.com
Service Help Desk
Business 8:00 am to 4:30 p.m. Central Standard Time
Hours:
Telephone: (314) 678-6303
Fax: (314) 781-2714
E-mail Parts@star-mfg.com
Service@star-mfg.com
Warranty@star-mfg.com
Website: www.star-mfg.com
Mailing Address: Star International Holdings Inc., Company
10 Sunnen Drive
St. Louis, MO 63143
U.S.A
2M-Z19028; Holman Contact Toaster
2
Page 3
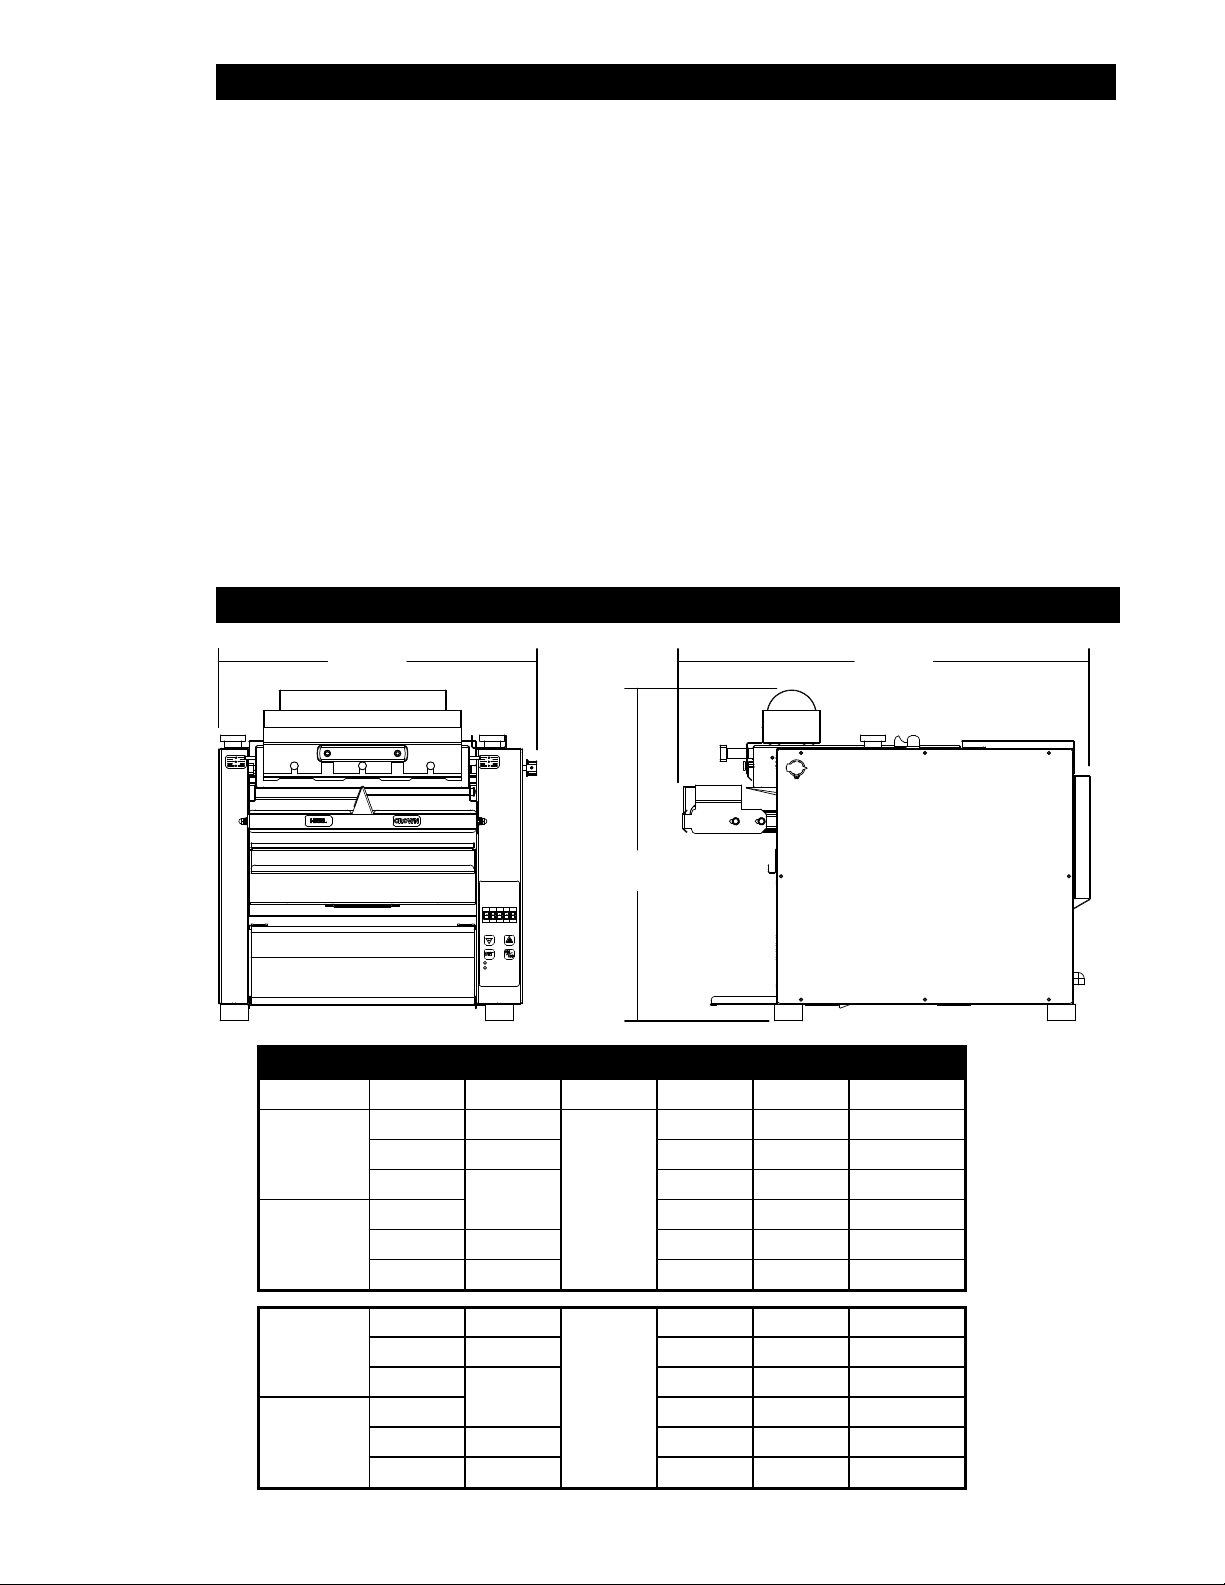
TABLE OF CONTENTS
Specications . . . . . . . . . . . . . . . . . . . . . . . . . . . . . . . . . . . . 1
Features & Benets . . . . . . . . . . . . . . . . . . . . . . . . . . . . . . . . . 2
General Information . . . . . . . . . . . . . . . . . . . . . . . . . . . . . . . . . 3
Uncrating & Inspecting . . . . . . . . . . . . . . . . . . . . . . . . . . . . . . . 3
Electrical Connection . . . . . . . . . . . . . . . . . . . . . . . . . . . . . . . . 3
Assembly & Inspection . . . . . . . . . . . . . . . . . . . . . . . . . . . . . . . 4
Toaster Settings . . . . . . . . . . . . . . . . . . . . . . . . . . . . . . . . . . . 4
Daily Operation . . . . . . . . . . . . . . . . . . . . . . . . . . . . . . . . . . . 5 & 6
Cleaning . . . . . . . . . . . . . . . . . . . . . . . . . . . . . . . . . . . . . . . 7
Troubleshooting . . . . . . . . . . . . . . . . . . . . . . . . . . . . . . . . . . . 8
Maintenance . . . . . . . . . . . . . . . . . . . . . . . . . . . . . . . . . . . . 9-10
Warranty . . . . . . . . . . . . . . . . . . . . . . . . . . . . . . . . . . . . . . .11
Wiring Diagram . . . . . . . . . . . . . . . . . . . . . . . . . . . . . . . . . . . 12-13
Exploded View . . . . . . . . . . . . . . . . . . . . . . . . . . . . . . . . . . . 14-17
SPECIFICATIONS
19.25”
24.662”
20”
Electrical Specicaons
Model Voltage Hz Ph Amps Watts Powercord
HCTE13M
HCTE13S
208V 60
230V 50 12 2750 CEE7/VII
240V
208V 12.25 2550 6-20P
230V 50 10.5 2450 CEE7/VII
240V 60 11 2650 6-20P
60
1
13.5 2800 6-20P
12.5 3000 6-20P
IL2844
2M-Z19028; Holman Contact Toaster
HCT13M
HCT13S
208V 60
230V 50 12 2750 CEE7/VII
240V
208V 12.25 2550 6-20P
230V 50 10.5 2450 CEE7/VII
240V 60 11 2650 6-20P
60
1
13.5 2800 6-20P
12.5 3000 6-20P
1
Page 4
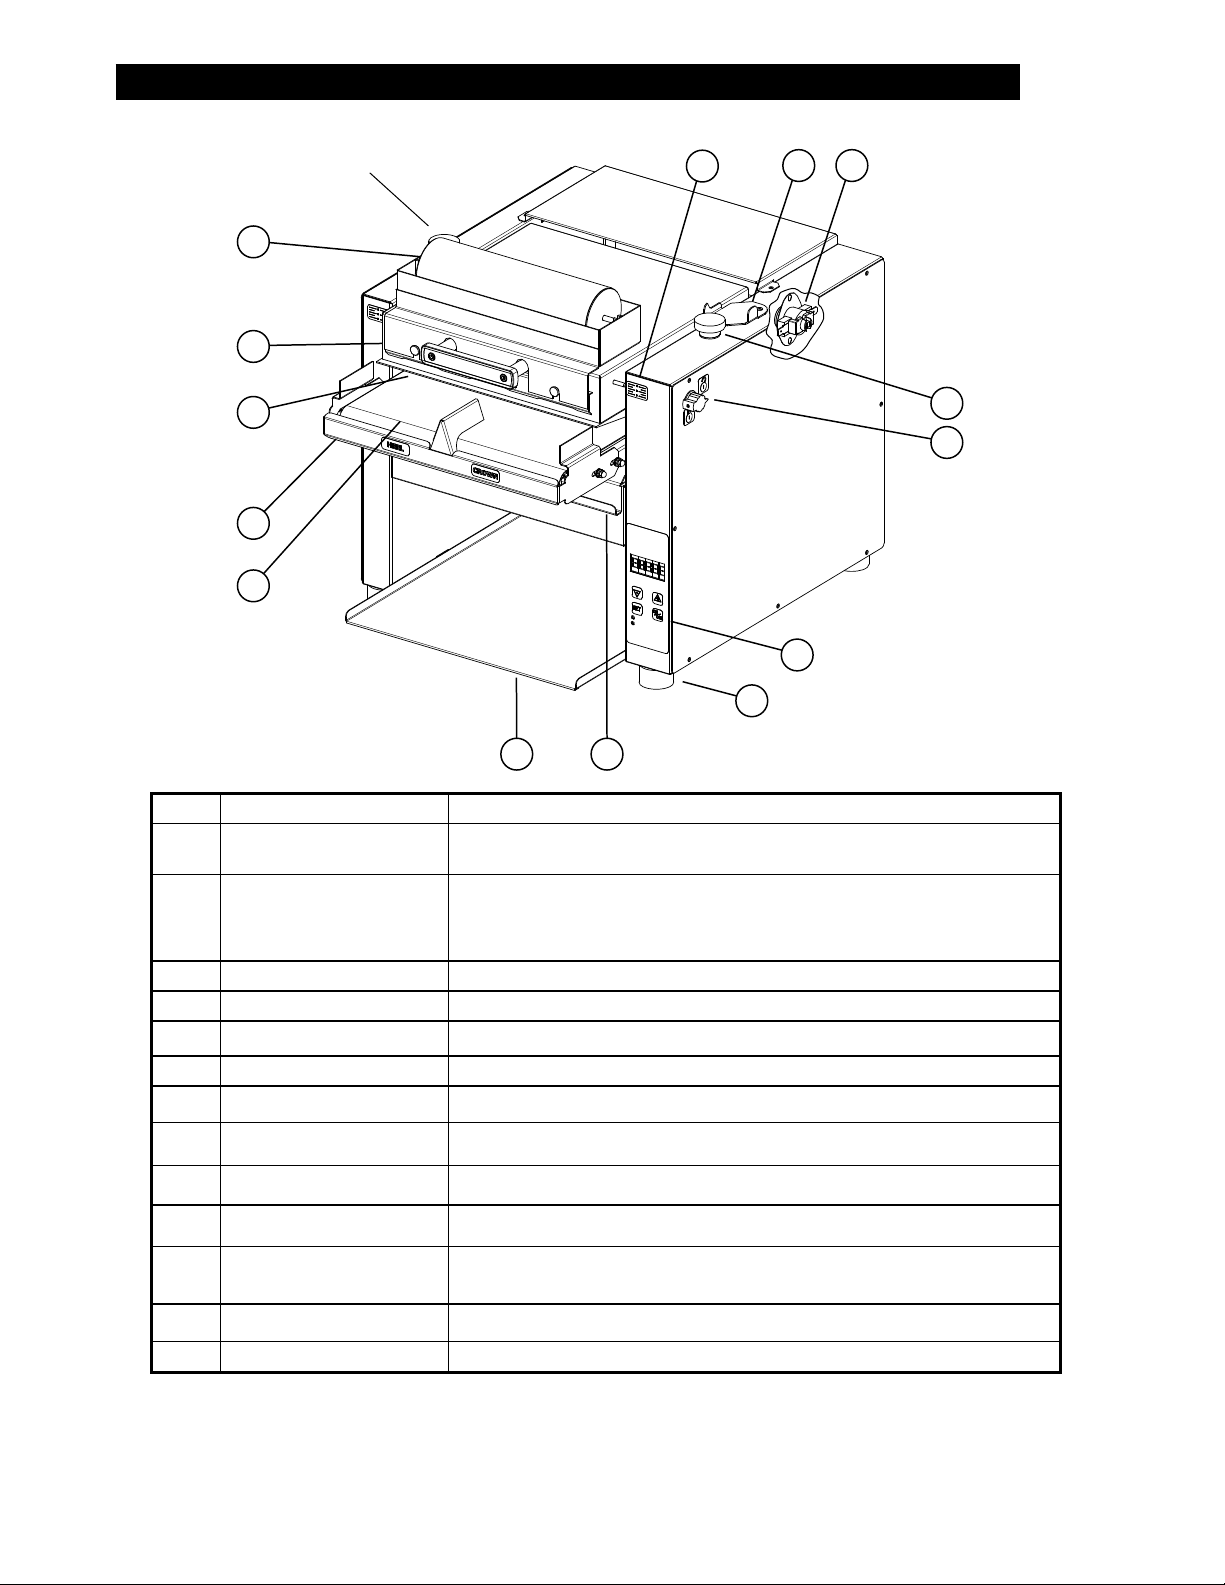
FEATURES & BENEFITS
N
M
L
K
J
Namplate
A
B C
D
E
IL2846a
F
G
HI
A Platen Height Indicator Indicates the height of the upper platen
B Platen Support Bracket Keeps the upper platen in the up position, useful while cleaning
Interrupts the heater tube connections if the air temperature in the control box
C High Limit
D Platen Height Knob Controls the height of the upper platen
E Locking Platen Latch Keeps the upper platen in the down position.
F Control Board Controls the conveyor speeds, turns unit on & off, & temperature settings.
G Foot Silicone foot keeps unit rmly in place.
H Crumb Tray Slide out crumb tray used to catch particles from falling
I Toaster Chute Removable Chute returns product for easy access.
J Conveyor Takes the heel and crown separately through their toasting process
K Burn Guard Protects users from touching the conveyor belt
Durable Non-Stick Coated
L
Sheet
M Upper Platen Assy Heating surface designed to toast the product as it slides across the surface
exceeds 190°F (88°C). This limit switch can be reset manually by pushing the
button in the center of the switch.
Non-Stick surface between the upper platen and the product, allowing the product
to slide easily through the toasting process.
N Optional Butter Wheel Saves time for preparing buns for toasting
2
2M-Z19028; Holman Contact Toaster
Page 5

CAUTION
GENERAL INFORMATION
This equipment is designed and sold for commercial use only by personnel trained and
experienced in its operation and is not sold for consumer use in and around the home nor
for use directly by the general public in food service locations.
Before using your new equipment, read and understand all the instructions & labels
associated with the unit prior to putting it into operation. Make sure all people associated
with its use understand the units operation & safety before they use the unit.
INSPECTION
UN-CRATING AND INSPECTING
Unpack the unit and components from the shipping container. Remove all visible packing
material and those from inside the cooking chamber. If damage is discovered, le a claim
immediately with the carrier that handled the shipment. Do not operate the unit if it was
damaged during shipping. All shipping containers should be checked for freight damage
both visible and concealed. This unit has been tested and carefully packaged to insure
delivery of your unit in perfect condition. If equipment is received in damaged condition,
either apparent or concealed, a claim must be made with the delivering carrier.
Concealed damage or loss - if damage or loss is not apparent until after equipment is
unpacked, a request for inspection of concealed damage must be made with carrier within
15 days. Be certain to retain all contents plus external and internal packaging materials for
inspection. The carrier will make an inspection and will supply necessary claim forms.
ELECTRICAL CONNECTION
Disconnect the unit from the power source before installing or removing any parts.
Be absolutely sure that the ground connection for the receptacle is properly wired.
Do not connect equipment to power without proper ground connections. Improper
grounding may result in personal injury or death.
CAUTION
Allow enough space around the toaster for adequate ventilation. Do not operate the unit
without the crumb tray properly positioned. Overheating and poor toasting may occur.
Read all labels on the unit and follow their instructions.
WARNING
Before making any electrical connection to this unit, check that the power
supply is adequate for the voltage, amperage and requirements stated on the
rating plate. A wiring diagram is included.
WARNING
DO NOT CUT OR REMOVE THIS PLUG OR THE GROUNDING PRONG FROM
THE PLUG. FAILURE TO COMPLY MAY RESULT IN DEATH OR SERIOUS
INJURY.
WARNING
CONNECT/PLUG UNIT INTO DEDICATED A. C. LINE ONLY SPECIFIED ON THE
DATA PLATE OF THE UNIT.
2M-Z19028; Holman Contact Toaster
CAUTION
SOME SURFACES ARE EXTREMELY HOT DURING OPERATION AND CARE SHOULD
BE TAKEN WHILE USING THIS UNIT.
3
Page 6

ASSEMBLY AND INSTALLATION
The unit was shipped fully assembled and ready to plug into a standard outlet specied for its
voltage and amp draw. If improper electrical supply is determined, contact a qualied electrician
prior to using the unit. Removal and replacement of the power cord and plug voids the warranty.
For assistance, contact your local authorized service agent for service or required maintenance.
1. Place the unit in its operating location.
2. Wipe down the exterior with a damp cloth.
3. Place the Toaster Chute & Crumb Tray into position.
4. Unlock the Platen Latch and raise the platen, move the Platen Support Bracket to hold the
platen in the up position.
Sheet Retainer
5. Loosen the Sheet Retainer and
install the non-stick sheet into
position, and secure.
Non-Stick Sheet
6. Lower the Platen and latch in
place.
CAUTION
Failure to use non-stick sheets can
lead to damaging the unit and a loss
of warranty. The durable non-stick
coated sheets are not a warranty
item.
TOASTER SETTINGS
Before using the unit for the rst time,
test the pass time of the conveyor
belt.
The pass time through the toaster
should be between 16 to 20 seconds for standard setting.
Crumb Tray
Toaster Chute
Platen Support
Bracket
IL2848a
Platen Latch
1. Turn unit ON and wait for it to complete the PRE-HEAT process.
2. Set the Platen height by adjusting the two (2) Platen Height Knobs on top of the unit.
3. Make sure the platen lock is on.
4. Place a bun on the conveyor belt, cut side up, “HEEL” on one side and
“CROWN” on the other.
IF TO DARK: Decrease TEMP.
IF TO LIGHT: Increase TEMP. or lower platen
2M-Z19028; Holman Contact Toaster
4
Page 7

DAILY OPERATION ELECTONIC CONTROL
IL2856
RUN
CLEAN
SET
TEMP
ON
OFF
CHANGING TEMPERATURE
1. Push and hold the "SET TEMP" button for three seconds.
2. The display will ash the current top temperature setting.
3. Using the ↑ and ↓ adjust the top heat to desired temperature
(increments of 10°)
4. Press the "SET TEMP" button again to change the bottom heat
setting.
5. Using the ↑ and ↓ adjust the bottom heating setting (0 – 10).
6. Press the "SET TEMP" button again to save the settings and exit
program mode.
CHANGING CONVEYOR SPEED
1. Push and hold the ↑ and ↓ for three seconds
2. Using the ↑ and ↓ adjust the motor speed to the desired
setting (1 through 99)
3. Press the "SET TEMP" button to exit the program
CHECK TEMPERATURE SETTING
1. Press the "SET TEMP" button to check the platen temperature.
CLEAN MODE
1. Press the "CLEAN" button to enter the clean mode
a. Elements will be turned OFF and the belt will continue to run
b. The screen will ash CLEAN and WAIT.
c. When the platen has lowered to a safe temperature the screen will ash CLEAN and
READY.
2. Press the "ON/OFF" button to exit the clean mode.
CHANGING BUN THICKNESS SETTING
1. Set the "Height Adjustment Knobs" to their desired settings.
2. Turn unit ON, allow to warm-up before proceeding.
3. Place buns on the conveyor, cut side up.
4. Toasted buns will drop down the toaster chute.
5. Turn the "Height Adjustment Knobs" to lower the platen for darker buns, raise for lighter buns.
CERTAIN SURFACES ARE EXTREMELY HOT DURING OPERATION AND
CARE SHOULD BE TAKEN WHILE USING THIS UNIT.
CAUTION
2M-Z19028; Holman Contact Toaster
5
Page 8

DAILY OPERATION MANUAL CONTROL
OPERATING
1. Turn the Power Switch to the "ON" position
2. The conveyor belt will begin to move.
3. Using Temperature Knob, move it from the "OFF" position to your desired
temperature.
4. The Element Power Light will turn "ON" when the unit is calling for heat.
When your desired temperature is reached, the light will turn "OFF". Wait
for the Element Power Light to cycle twice before using.
5. When nished using, turn the Temperature Knob to the "OFF" position, but
leavet the Power Switch in the "ON" position to allow the cooling fan to run.
6. Once cooled, move the switch to the "OFF" position.
HCT
HORIZONTAL CONTACT
TOASTER
ELEMENT
POWER
CHANGING CONVEYOR SPEED
Changing conveyor speed is only capable on the electronically controlled units.
CERTAIN SURFACES ARE EXTREMELY HOT DURING
OPERATION AND CARE SHOULD BE TAKEN WHILE USING
CAUTION
THIS UNIT.
CHANGING BUN THICKNESS SETTING
1. Set the "Height Adjustment Knobs" to their desired settings.
2. Turn unit ON, allow to warm-up before proceeding.
3. Place buns on the conveyor, cut side up.
4. Toasted buns will drop down the toaster chute.
5. Turn the "Height Adjustment Knobs" to lower the platen for
darker buns, raise for lighter buns.
POWER
ON (I)
OFF (O)
Height Adjusting Knob
Height Indicator
MAIN
POWER
IL2912
IL2849
2M-Z19028; Holman Contact Toaster
6
Page 9

CLEANING
Preventive maintenance for your Holman contact toaster consists of the following recommended
cleaning procedures. To keep your toaster in top operating condition, these steps should be performed
daily or weekly as indicated.
Daily Cleaning
1. Turn the temperature knob to the "OFF" position, and keep the power switch in the "ON" position.
IMPORTANT: Allow the unit to cool before attempting to clean it.
2. Wipe down moving belt with mild detergent and damp cloth.
(an abrasive pad can be used on metal belt).
3. Wipe down exterior of toaster with mild detergent and damp cloth.
4. Remove non-stick sheet and clean with mild detergent and damp cloth. (If excess buildup is unable
to be removed and causing buns to stick to the sheet, a new sheet may need to be installed.)
5. Remove crumb tray and toast slide and wash in a sink with mild detergent.
6. Dry and return crumb tray, toast slide, and non-stick sheet back into position.
7. Turn the power switch to the "OFF" position, until you need
DO NOT IMMERSE OR LET THE UNIT STAND IN WATER.
DO NOT HOSE DOWN THE UNIT OR THE TABLE/COUNTER IF THE
WARNING
UNIT IS ON THE TABLE/COUNTER.
KEEP AWAY FROM RUNNING WATER.
CAUTION
2M-Z19028; Holman Contact Toaster
DO NOT use caustic cleaners on any surface of the unit, conveyor belt or
Durable Non-Stick Coated Sheets
Sheet Retainer
Platen Suppot Bracket
IL2859b
Locking Platen Latch
Crumb Tray
Toaster Chute
7
Page 10

TROUBLESHOOTING GUIDE
A. Unit Will Not Heat, Conveyor Belt Will Not Move.
1) Be sure the main circuit breaker is switched to the ON
2) Check to see if the toaster is plugged in and all controls are turned to the ON position.
B. Unit Has Heat Only On One Side, Conveyor Belt Turns Freely.
1) Call the Holman Service Help Desk at 1-314-678-6303, as heating element may need replacing.
C. Conveyor Will Not Turn, Unit Heats Properly.
To check for mechanical binding:
1) DISCONNECT UNIT FROM POWER SOURCE.
3) Remove 4 screws on the back of the toaster and remove back panel.
4) Remove the right side panel.
5) Loosen the four screws that hold the drive motor in place.
6) Slide the motor up allowing the drive chain to be removed from the sprockets.
7) Move the conveyor belt by hand to check for mechanical binding. If conveyor moves freely,
call the Holman Service Help Desk at 1-314-678-6303, as the drive motor and/or speed control
may need replacing.
8) Re-install the rear and side panels.
D. Heat Limit Switch (Reset)
Your Holman contact toaster is equipped with an automatically activated heat limit switch that
interrupts the heater tube connections if the ambient temperature in the control box exceeds
190°F (88°C). This switch can be reset manually by pushing the red button located behind
the right side panel as shown in the Toaster Components Illustration on Page 2.
1) DISCONNECT UNIT FROM POWER SOURCE.
2) Check to see if air intake area in the bottom center of the control box cover is free of dust,
grease or other obstructions.
3) Check if crumb tray is in place. .
4) If no obstructions to the airow can be found
call the Holman Service Help Desk at 1-314-678-6303 for assistance.
E. Conveyor Turns At One Speed Regardless Of Speed Control Setting
(HCTE models only).
1) Call the Holman Service Help Desk at 1-314-678-6303, as speed control should be replaced.
F. Product Sticking To Conveyor Or Slide
Your Holman conveyor toaster is designed to toast product that is current room temperature.
DO NOT attempt to put frozen, refrigerated, or any butter or a butter substitute material in the
toaster. Doing so may cause it to come out doughy or very moist, as well as possibly sticking to
parts of the unit.
Follow the cleaning procedures.
2M-Z19028; Holman Contact Toaster
8
Page 11

MAINTENANCE PROCEDURES
A. Replacing the Bottom Element
1) DISCONNECT UNIT FROM POWER SOURCE.
2) Remove the side panels and bottom panel.
3) Remove element wire from terminal block connection, keeping top and
bottom wires separate.
4) Lift element retainers by loosening retaining screws and removing the retainer plate up.
5) Gently, pull defective element out of unit.
6) Gently, put new element into unit.
7) Slide the retainer back into place. Tighten the screw to secure the retainer in place
over the ends of the elements.
B. Replacing the Fan Motor
1) DISCONNECT UNIT FROM POWER SOURCE.
2) Remove the toaster slide.
3) Remove screws from the bottom panel.
4) Unplug power supply cord from fan motor.
5) Remove (4) screws, which hold fan motor and grill to bottom of unit and remove fan.
6) Put replacement motor and grill in place and secure to the bottom of unit with screws.
7) Reconnect power supply cord to fan motor.
8) Replace bottom panel. Fasten with screws removed in step 2.
C. Replacing the Belt Drive Motor
1) DISCONNECT UNIT FROM POWER SOURCE.
2) Remove the right side and bottom panels.
3) Remove sprocket from motor shaft, using an Allen wrench and loosening the set-screw.
4) Remove the wire from terminal block connecting the drive motor to internal wiring.
On units rated 208 or 240 volts, note which color leads are being used for these connections
and which lead is capped with white tape. The new motor should use the same arrangement.
5) Remove screws holding motor in place and remove motor from unit.
6) Put new motor in place and attach loosely with mounting screws.
7) Replace sprocket on motor shaft.
NOTE The two sprockets should line up parallel with each other, so the chain does not twist
any during operation. Also the hub gets installed closets to the motor.
8) Slide motor until the drive chain has about 1/4” slack when lightly pushed at the center of its top
open run. See chain tensioning illustration.
9) Tighten screws to secure motor.
10) Rewire leads same as removed in step 4.
11) Replace previously removed panels.
2M-Z19028; Holman Contact Toaster
D. Clean the Air Intake (Once A Week)
1) DISCONNECT UNIT FROM POWER SOURCE.
2) Place unit on its backside.
3) Use a vacuum cleaner and or a damp cloth to clean
the air intake.
E. Lubricate the Chain & Sprockets (Every 6 Months)
1) DISCONNECT UNIT FROM POWER SOURCE.
2) Remove enclosure exposing chain drive.
3) While wearing rubber gloves and using an extreme pressure,
synthetic chain lubricant with a temperature range up to
400°F (204°C) lubricate chain and sprockets. Apply liberally.
This grease is available as part no. 1L-Z12397 .
4) Replace enclosure, Reconnect power source and test unit.
9
1/4”
Chain Tension
Page 12

MAINTENANCE continued
REMOVING & REPLACING SILICONE BELT
1. Disconnect unit from power allow to cool before beginning process.
2. Remove guard from in front of the belt.
3. Rotate belt by hand until belt seam is visible.
4. The Idler Shaft is spring loaded. Press on the front idler shaft to remove tension from the
belt. (Continuous pressure is required).
5. Pull splicing rod from belt.
6. Carefully release pressure from idler shaft so the roller is not propelled from the unit by the
springs.
7. Installation is similar to removal. Feed the belt around the drive shaft and idler shaft rollers
making sure the tracking guide on the backside of the belt is seated in the roller grooves.
8. Press the front roller to create slack in the belt.
9. Feed the splicing rod through the two ends of the belt.
10. Remove pressure from roller and install belt guard.
11. Plug unit back into outlet and test for proper operation.
Top Panel
Burn Guard
CAUTION
Groove
Idler Shaft
Locking Platen Latch
Platen Support Bracket
Above: Removing and Installing Silicone Belt
Drive Shaft
Groove
IL2857
DISCONNECT THE POWER SUPPLY BEFORE SERVICING OR
CLEANING THIS OVEN. SAFEGUARD THE POWER SO IT CANNOT BE
ACCIDENTALLY RESTORED. FAILURE TO DO SO COULD RESULT IN
DISMEMBERMENT, ELECTROCUTION, OR FATAL INJURY.
10
2M-Z19028; Holman Contact Toaster
 Loading...