

Page 1
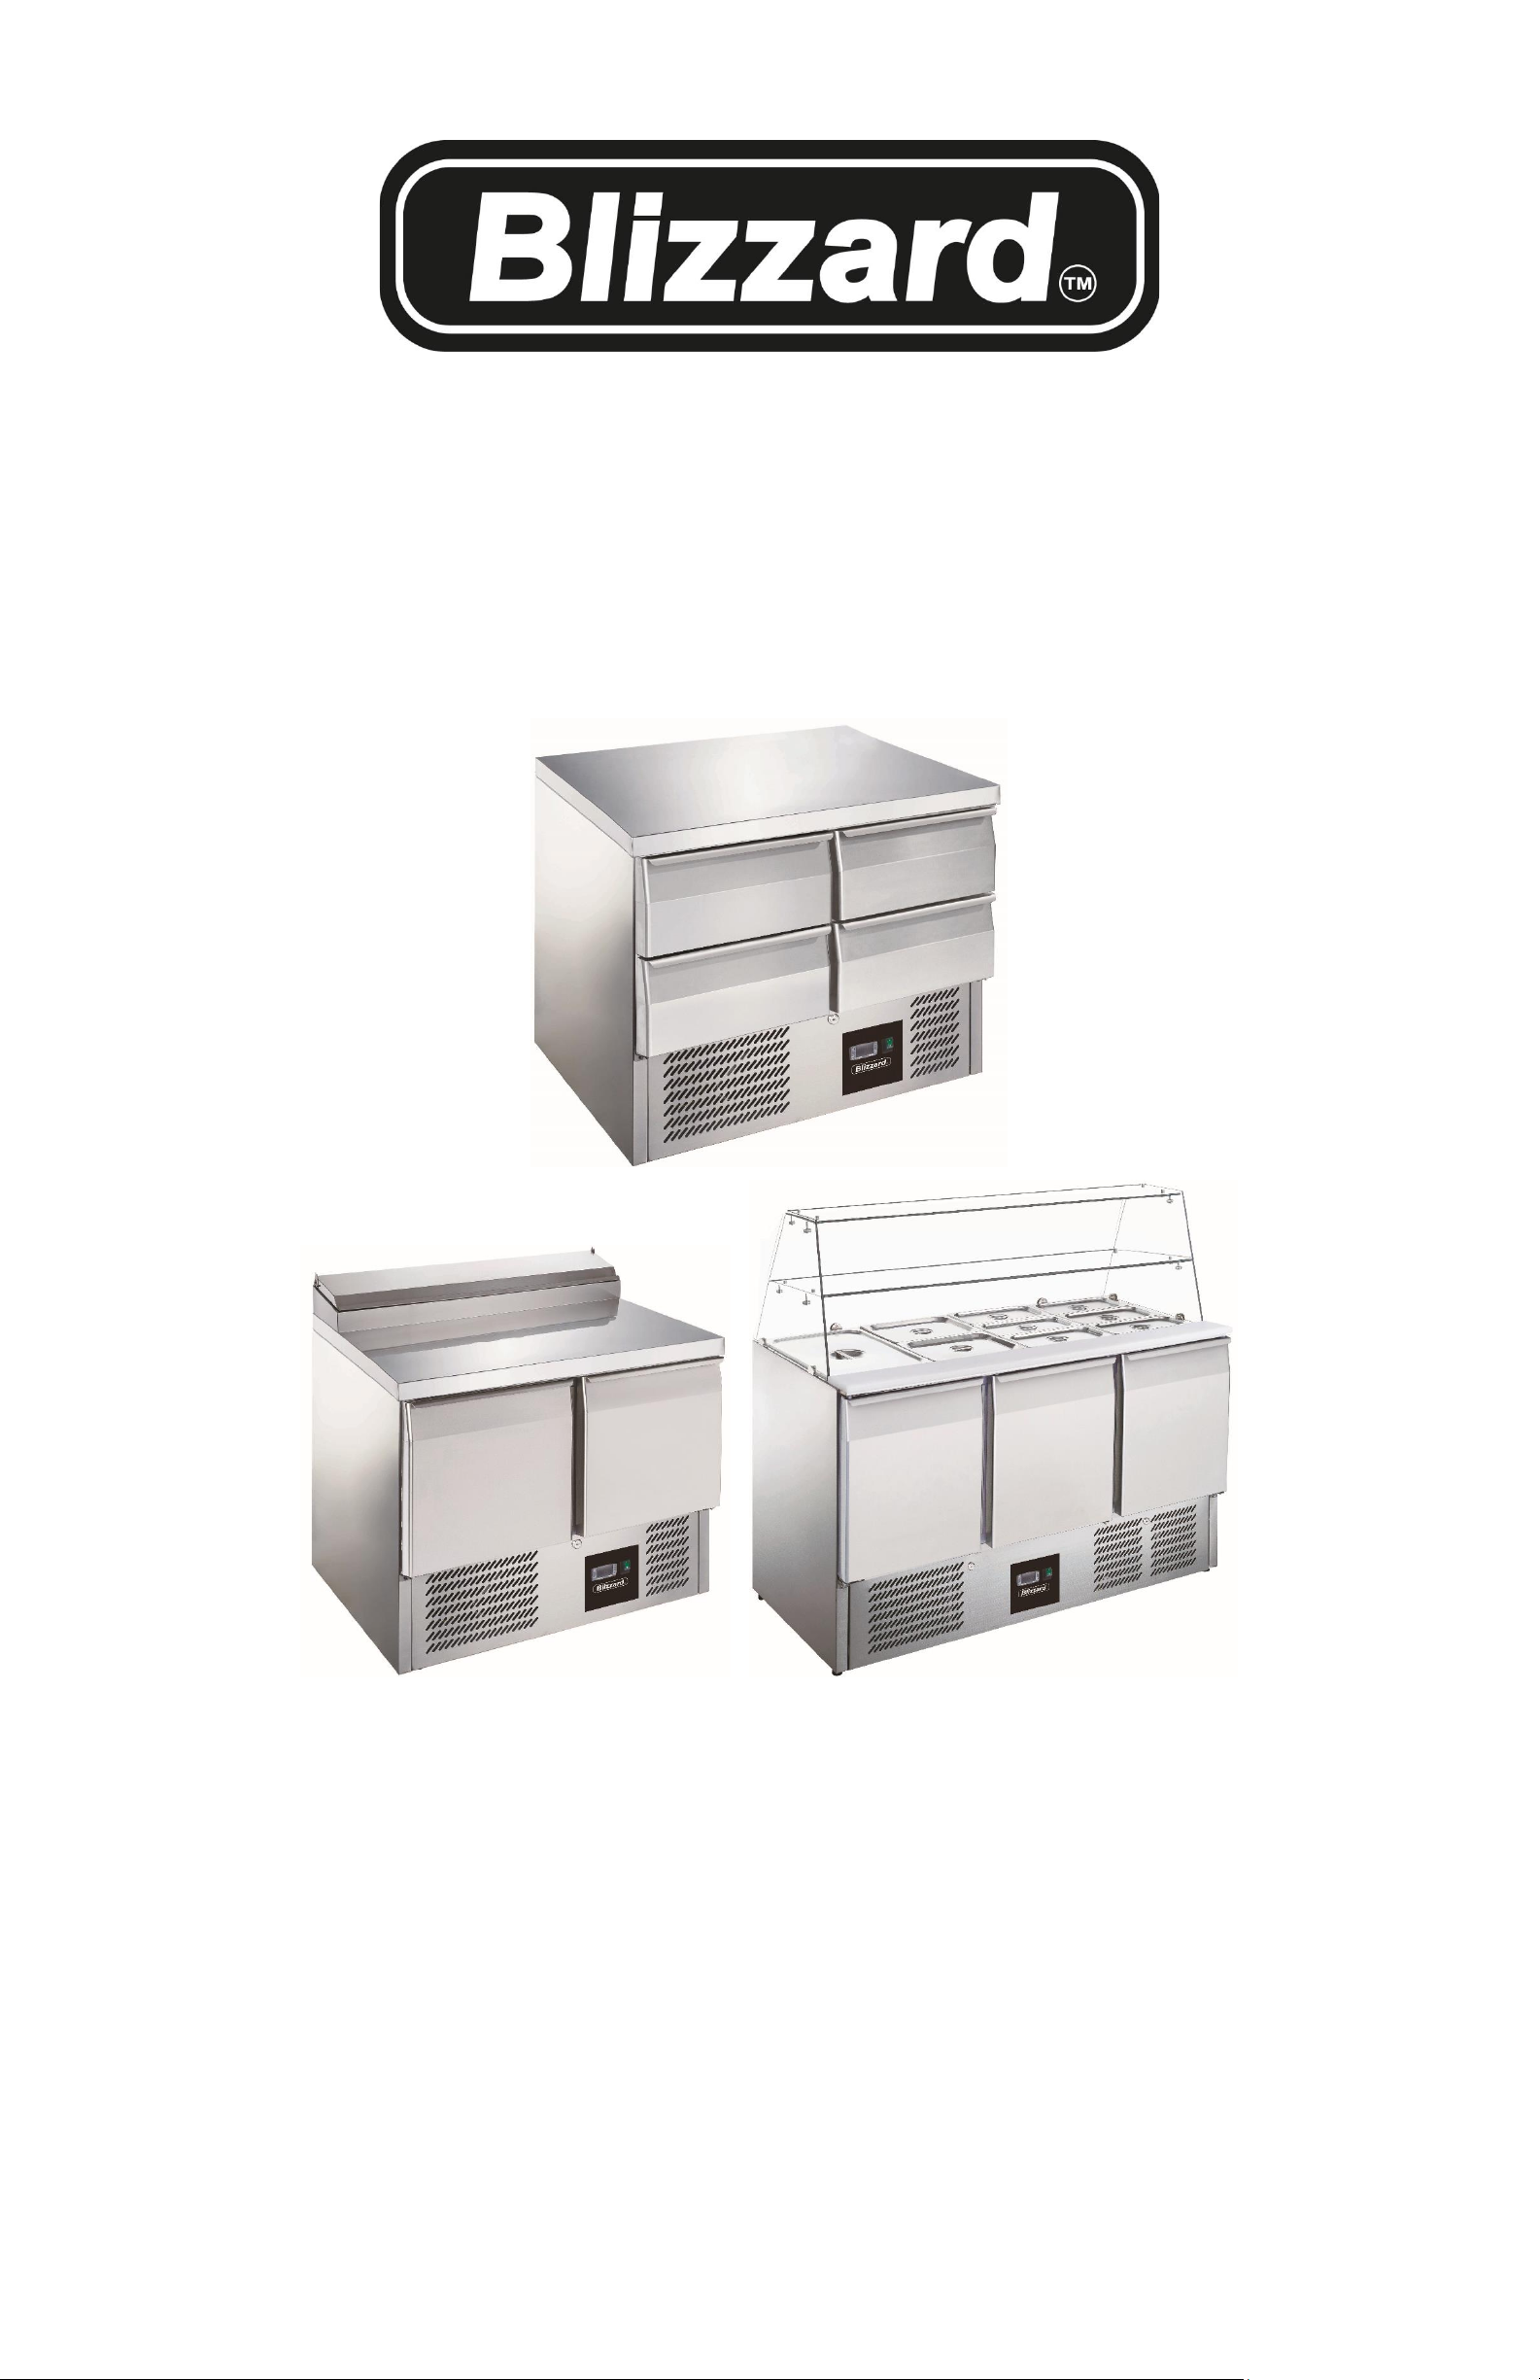
Stainless Steel Saladette
Installation, Operation & Maintenance Manual
(HC-Gas R290 & R600a used)
Page 2

Table of Contents
Safety Tip …………………………………………………………………....1
Introduction ……………………………………………………………………1
Pack Contents ………………………………………………………………...1
Installation ……………………………………………………………………..1
Fit Glass Panels ………………………………………………………………1
Operation ……………………………………………………………………..1
Storing Food …………………………………………………………………..1
Turn On ……………………………………………………………………….1
Manual Defrost ………………………………………………………………1
Cleaning, Care & Maintenance…………………………………………… 2
Cleaning the Condenser …………………………………………………2
Troubleshooting ……………………………………………………………..2
Technical Specifications ……………………………………………………..3
Electrical Wiring ………………………………………………………………3
Disposal ……………………………………………………………………..3
Compliance…………………………………………………………………. 3
Page 3

1
Safety Tips
⚫ Position on a flat, stable surface.
⚫ A service agent/qualified technician should carry out
installation and any repairs if required. Do not remove
any components or service panels on this product.
Consult Local and National Standards to comply with
The following:
·Health and Safety at Work Legislation
·BS EN Codes of Practice
·Fire Precautions
·IEE Wiring Regulations
·Building Regulations
⚫ DO NOT use jet/pressure washers to clean the appliance.
⚫ DO NOT use the appliance outside.
⚫ DO NOT use this appliance to store medical supplies.
⚫ DO NOT use electrical appliances inside the appliance.
(e.g. heaters, ice-cream makers etc.)
⚫ DO NOT stand or support yourself on the base,
drawers or doors.
⚫ DO NOT allow oil or fat to come into contact with the
plastic components or door seal. Clean immediately if
contact occurs.
⚫ Bottles that contain a high percentage of alcohol must
be sealed and placed vertically in the refrigerator.
⚫ Always carry, store and handle the appliance in a
vertical position and move by holding the base of the
appliance.
⚫ Always switch off and disconnect the power supply to
the unit before cleaning.
⚫ Keep all packing away from children. Dispose of the
packaging in accordance with the regulations of local
authorities.
⚫ If the power cord is damaged, it must be replaced by
an agent or a recommended qualified technician in
order to avoid a hazard.
Introduction
Please take a few moments to carefully read through this
manual. Correct maintenance and operation of this
machine will provide the best possible performance from
your product.
Pack Contents
The following is included:
·Refrigerator
·Instruction manual
·Shelves and shelf guides
·Gastronorm Adaptor Bars
We pride ourselves on quality and service, ensuring that
at the time of packing the contents are supplied fully
functional and free of damage. Should you find any
damage as a result of transit, please contact your dealer
immediately.
Installation
Note: If the unit has not been stored or move in an
upright position, let it stand upright for approximately
12 hours before operation. If in doubt allow to stand.
1. Remove the appliance from the packaging. Make
sure, that all protective plastic film and coatings
are thoroughly removed from all surfaces.
2. Maintain a distance of 20 cm (7 inches) between
the unit and walls or other objects for ventilation
increase this distance if the obstacle is a heat source.
3. Ensure the ambient temperature is within the design
range of the cabinet, avoid locations below 15 degrees C.
Beware of enclosed rooms with other refrigeration
equipment as additional ventilation may be required.
Note: Before using the appliance for the first time,
clean the shelves and interior with warm soapy
water, dry thoroughly afterwards.
3. Set the brakes on the castors to keep the appliance
in position OR level, the appliance by adjusting the screw feet.
Fitting the Shelves
1. Place one set of shelf guides on either side of the cabinet
at the desired height.
2. Slide the shelf into place.
3. Repeat for the remaining shelves.
Note: This is vital for ensuring correct drainage of condensation.
Operation
Storing Food
To get the best result from your appliance, follow these instructions:
·Only store foodstuffs in the appliance when it has reached the
correct operating temperature.
· Ensure gastronorm bays are full at all times, even if the
gastronorms are unused or empty. Empty bays will greatly reduce
efficiency of the appliance.
·Always close the lid when not in use.
·Do not place hot food or liquid inside the appliance.
·All food must be covered including sauces.
·Do not overload each shelf allow sufficient space to allow for air
movement around the products.
·Do not obstruct the fans inside the appliance.
·Avoid opening the doors for prolonged periods of time.
Turn on
1. Close the door(s) of the appliance.
2. Ensure the power switch is set to [O] and turn on at the socket.
3. Switch on the power [l]. The current temperature within the
the appliance is displayed.
Adjusting the Set Temperature
1. Press and hold the set button for 3 seconds till the C led starts
blinking with the current set temperature shown
2. Use the arrow keys to adjust to the required set temperature
setting.
3. Press the set key to store, then leave for approx. 5 secs till the
display shows the cabinet temperature, the cabinet will then
cool down to the new set temperature.
NOTE! The temperature shown on the display will fluctuate during
normal use as the unit regulates the cabinet temperature.
Open/Close the Lid (SAL/PREP Only)
The lid of the SAL and PREP Saladette Counter is multi-positional:
1. With the lid closed, slide the panel back into the half open position.
This allows partial access to the gastronorm trays.
2. Lift the lid up and back so the hinge settles into the support slot.
3. Lift the lid up and completely back so the gastronorm trays are
completely exposed.
▲ WARNING: The sliding lid does not have a locking mechanism.
Always make sure that the lid is in the “half-open” position
before opening.
Page 4
2
Manual Defrost
The appliance will automatically run a defrost cycle every six hours.
Note: The cycle starts from the time the appliance is initially
powered up.
To manually defrost the appliance:
1. Press and hold the DEFROST button for 5 seconds.
2. The defrost cycle will start immediately and the Defrost
LET illuminates. The defrost will last a maximum of 30 minutes
Note: Starting a manual defrost also resets the automatic defrost
timer. The next automatic defrost will start six hours after the
manual defrost has finished
3. Waste water is collected in the waste water tray.
Cleaning, Care & Maintenance
· Switch off and disconnect from the power supply before
cleaning.
· Clean the interior of the appliance as often as possible.
· Do not use abrasive or corrosive cleaning agents or sprays.
These can leave harmful residues.
· Clean the door seal with warm water with a mild detergent only.
· Always wipe dry after cleaning. Stainless steel cleaner can be
applied to exterior surfaces to preserve the finish.
· Do not allow water used in cleaning to run through the drain
hole into the evaporation pan.
· Take care when cleaning the rear of the appliance. Sharp edges
can cut.
· An agent or qualified technician must carry out repairs if required.
Cleaning the Condenser
Periodically cleaning the condenser can extend the life of the
appliance. We recommend that our agent or qualified
technician clean the clean the condenser.
Troubleshooting
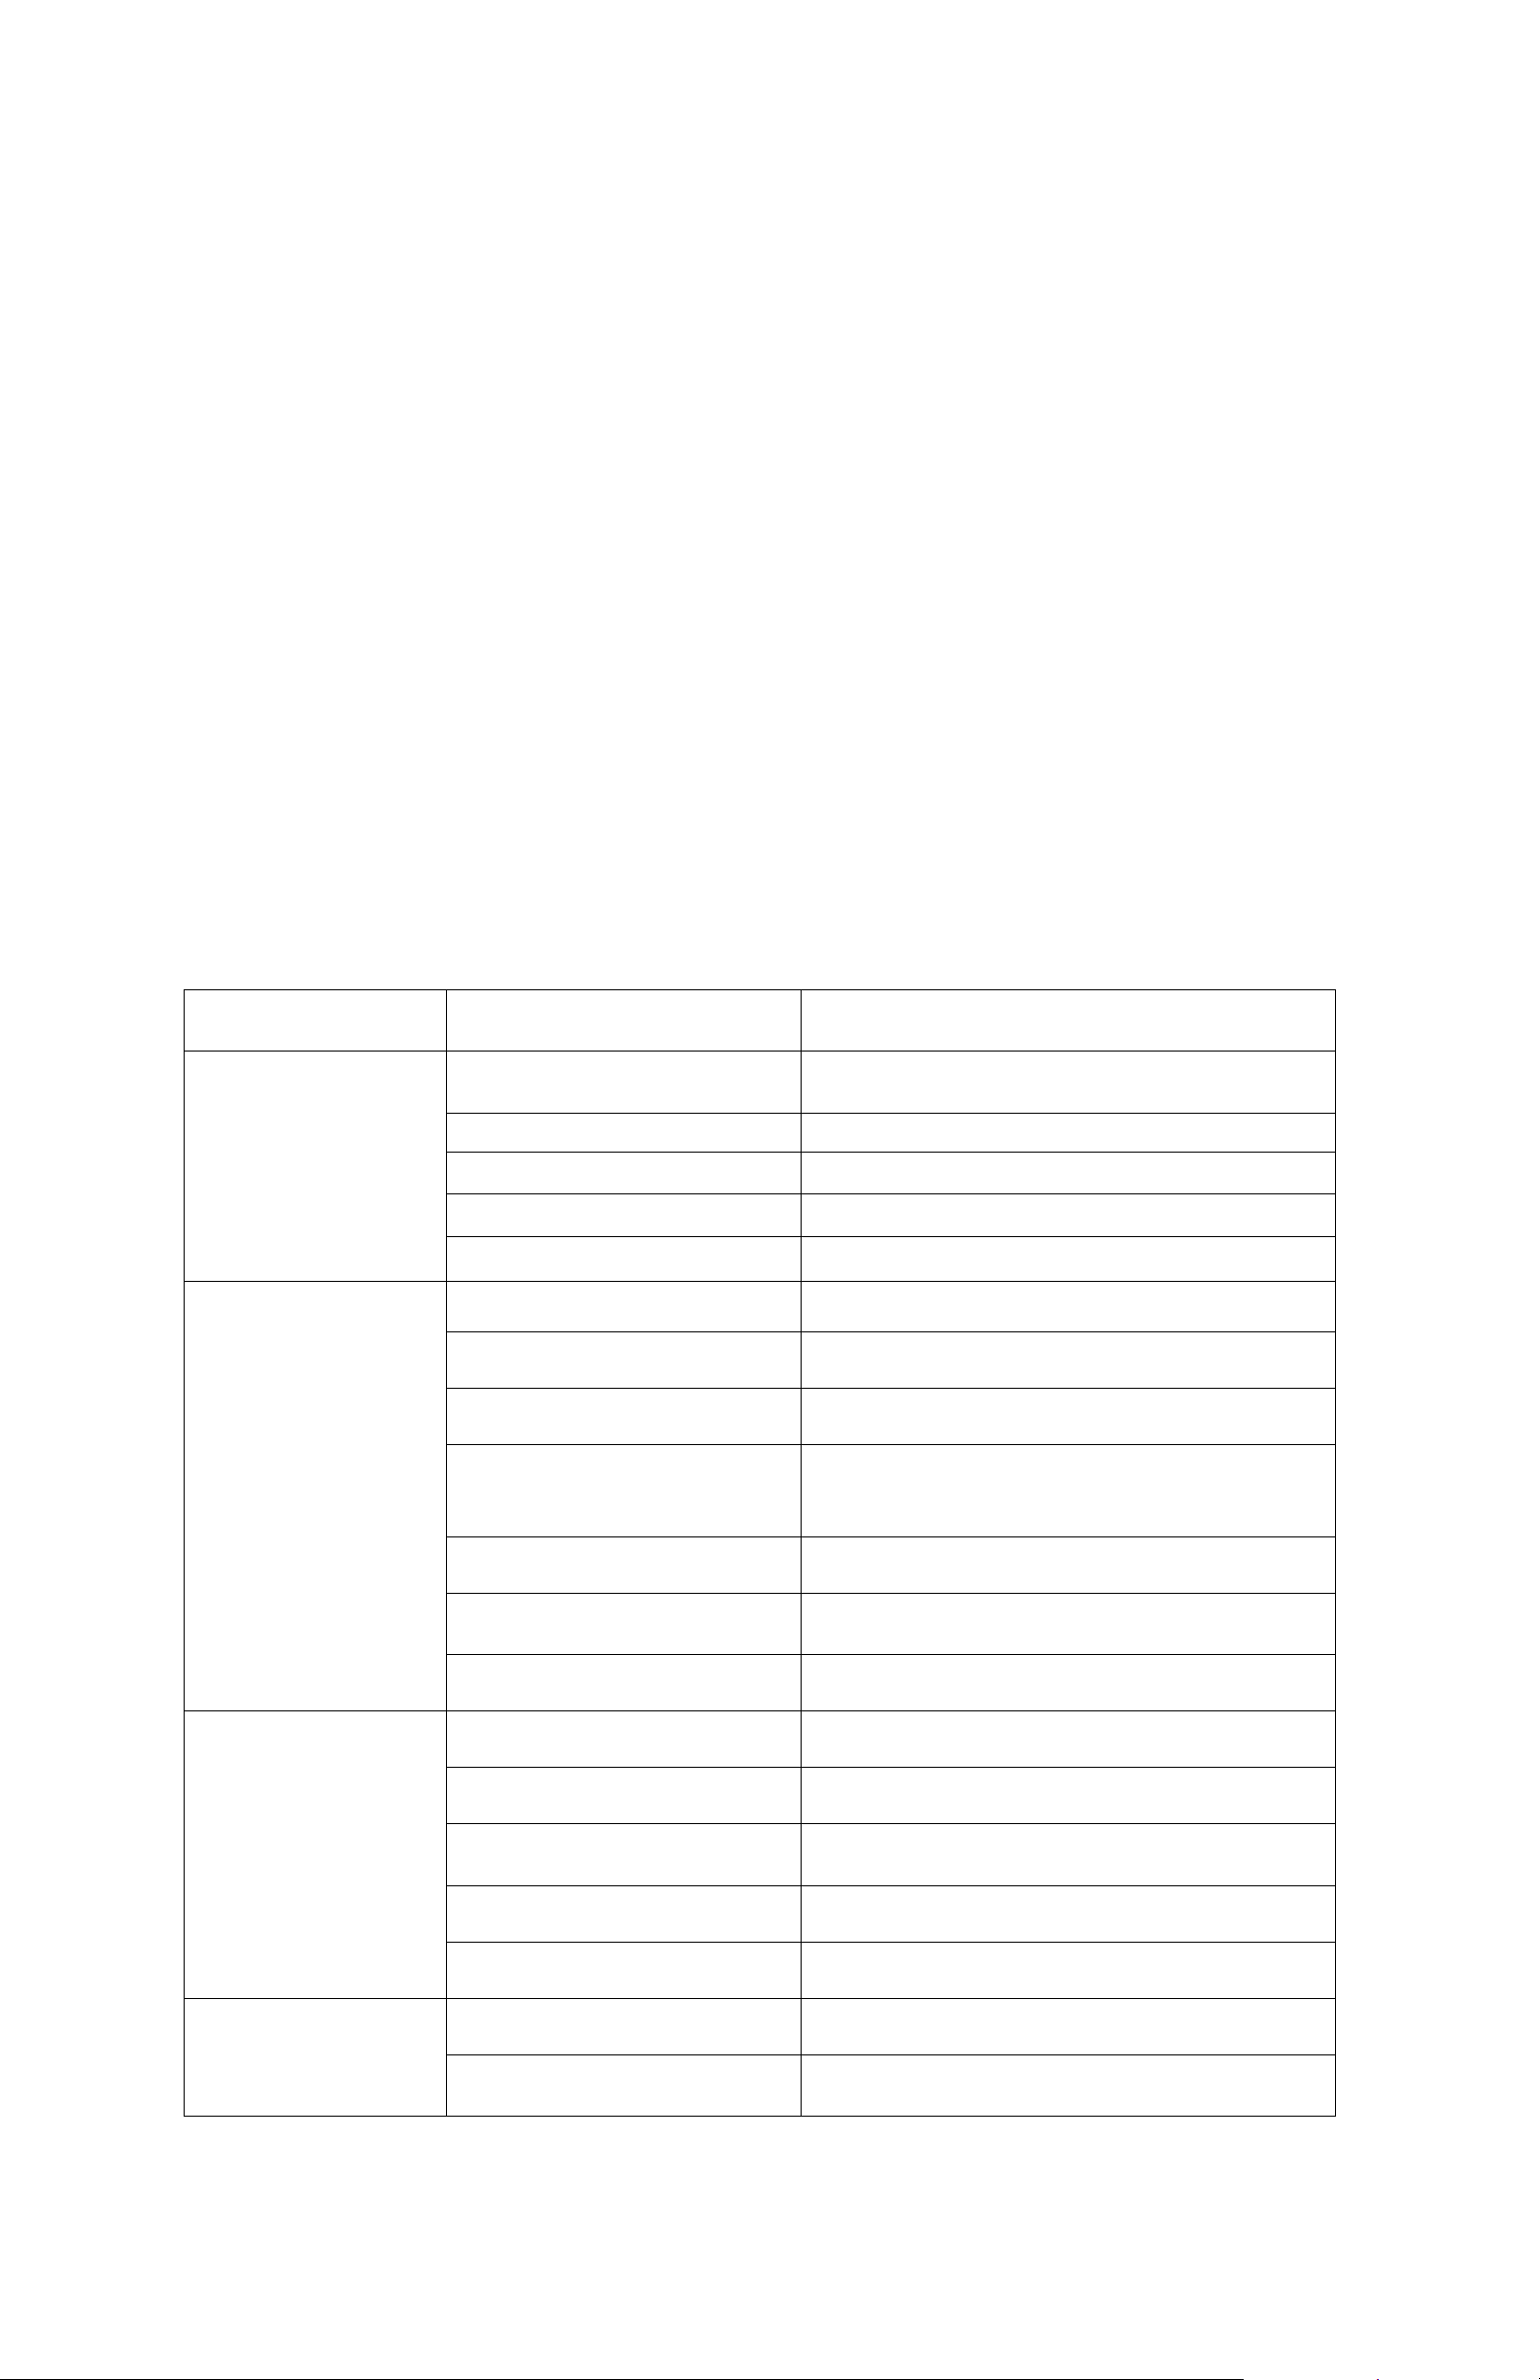
If your appliance develops a fault, please check the following table before making a call to your retailer.
Fault
Probable Cause
Action
The appliance is not working
The unit is not switch on
Check the unit is plugged in correctly and switched on
Plug and lead are damaged
Call your agent or qualified technician
Fuse in the plug has blown
Replace the fuse
Power supply
Check power supply
Internal wiring fault
Call your agent or qualified technician
The appliance turns on, but
the temperature is too
high/low
Too much ice on the evaporator
Defrost the appliance
Condenser blocked with dust
Call your agent or qualified technician
Doors are not shut properly
Check doors are shut and seals are not damaged
Appliance is located near a heat source
or air flow to the condenser is being
interrupted
Move the refrigerator to a more suitable location
Ambient temperature is too high
Increase ventilation or move appliance to a cooler position
Unsuitable foodstuffs are being stored in
the appliance
Remove any excessive hot foodstuffs or blockages to the fan
Appliance is overloaded
Reduce the amount of food stored in the appliance
The appliance is leaking
water
The appliance is not properly levelled
Adjust the screw feet to level the appliance (If applicable)
The discharge outside is blocked
Clear the discharge outlet
Movement of water to the drain is
obstructed
Clear the floor of the appliance (if applicable)
The water container is damaged
Call your agent or qualified technician
The drip tray is over flowing
Empty the drip tray (if applicable)
The appliance is unusually
loud
Loose nut/screw
Check and tighten all nuts and screws
The appliance has not been installed in a
level or stable position
Check installation position and change if necessary
Page 5
3
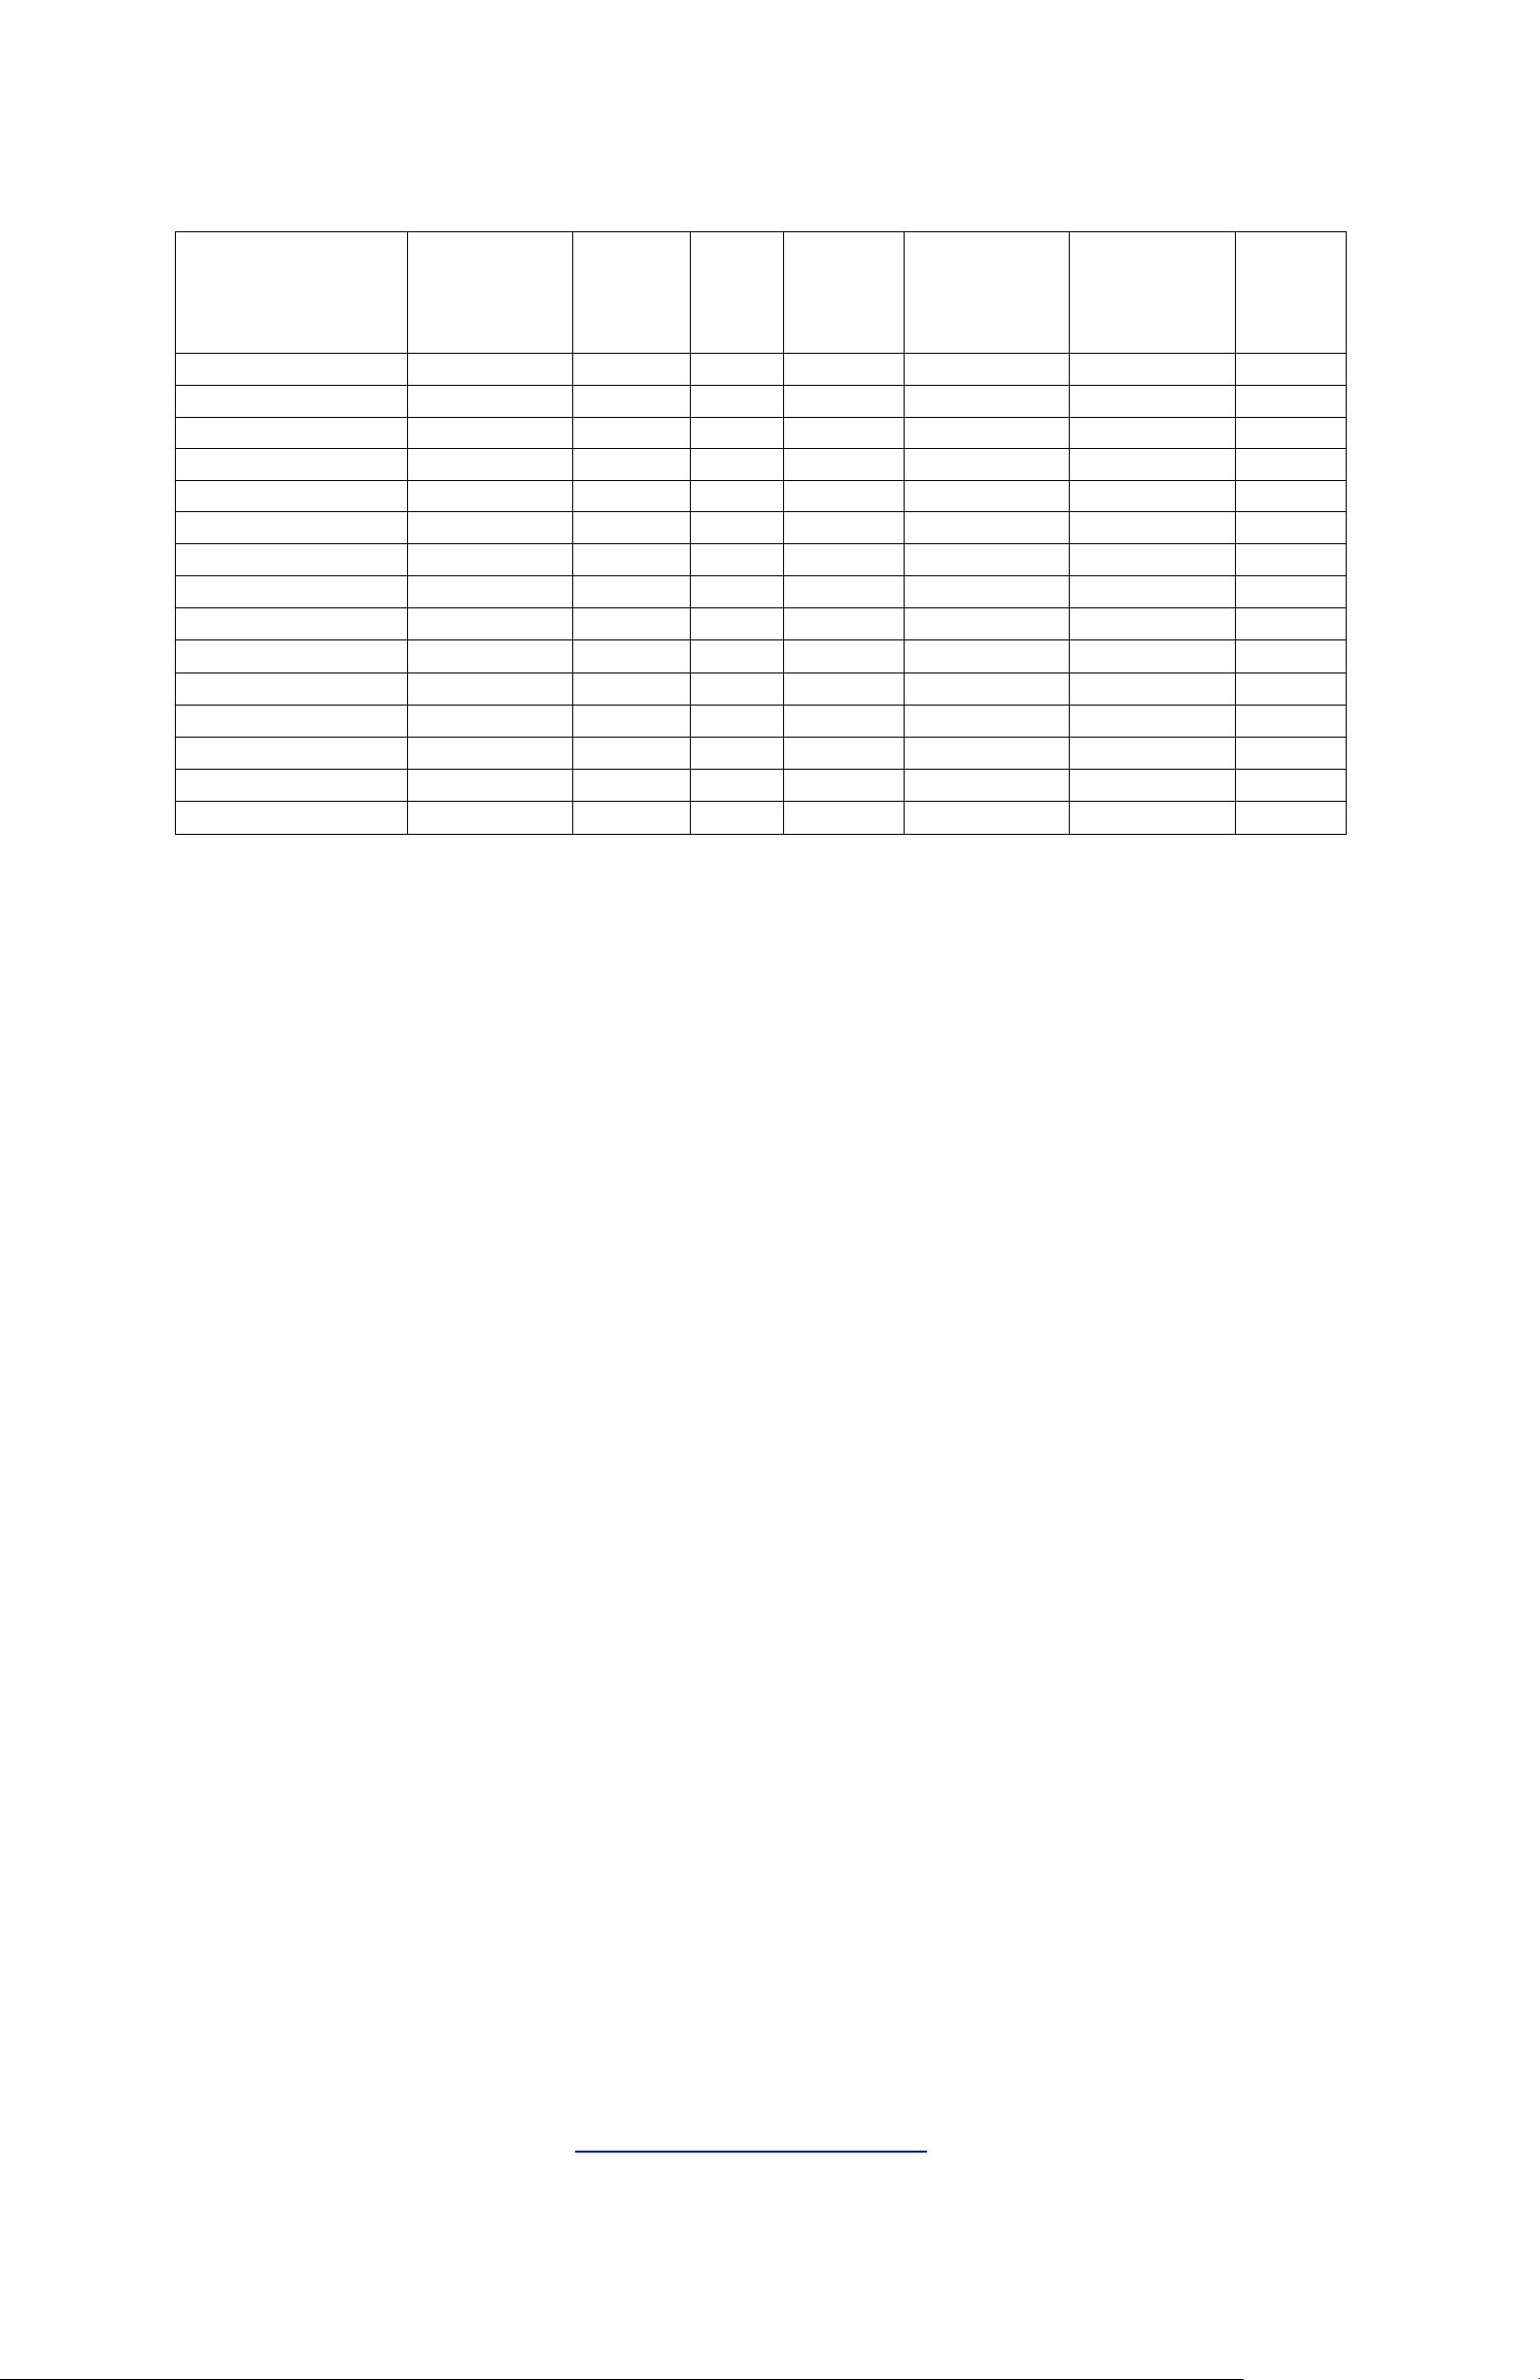
Technical Specifications
Model
Voltage
Gas
type
Power
(W)
Current
(A)
Temperature
Range
Dimensions
HxWxD(mm)
Weight
(kg)
BZ-BCC2XX
220~240V/50Hz
R600a
170
1.2
2~10℃
850x900x700
75
BZ-BCC2-4DXX
220~240V/50Hz
R600a
170
1.2
2~10℃
850x900x700
75
BZ-BCC2-GR-TOPXX
220~240V/50Hz
R600a
170
1.2
2~10℃
850x900x700
75
BZ-BSP2XX
220~240V/50Hz
R600a
170
1.2
2~10℃
876x900x700
69
BZ-BCC2PREPGRANITEXX
220~240V/50Hz
R600a
170
1.2
2~10℃
1075x900x700
106
BZ-BCC2ENXX
220~240V/50Hz
R600a
170
1.2
2~10℃
970x900x700
69
BZ-BPD2XX
220~240V/50Hz
R600a
170
1.2
2~10℃
850x900x700
69
BZ-BCC3XX
220~240V/50Hz
R290
240
1.6
2~10℃
850x1365x700
110
BZ-BCC3-6DXX
220~240V/50Hz
R290
240
1.6
2~10℃
850x1365x700
110
BZ-BCC3PZBAXX
220~240V/50Hz
R290
240
1.6
2~10℃
1020x1400x700
170
BZ-BCC3-GR-TOPXX
220~240V/50Hz
R290
240
1.6
2~10℃
850x1365x700
110
BZ-BSP3XX
220~240V/50Hz
R290
240
1.6
2~10℃
876x1365x700
115
BZ-BPD3XX
220~240V/50Hz
R290
240
1.6
2~10℃
876x1365x700
115
BZ-BCC3ENXX
220~240V/50Hz
R290
240
1.6
2~10℃
970x1365x700
115
BZ-BCC3PREPGRANITEXX
220~240V/50Hz
R290
240
1.6
2~10℃
1075x1365x700
166
Electrical Wiring
Appliances are supplied with a 3 pin, moulded BS1363 plug and lead, with a 13 amp fuse as standard. The plug is to be
connected to a suitable mains socket. Appliances are wired as follows:
·Live wire (coloured brown) to terminal marked L
·Neutral wire (coloured blue) to terminal marked N
·Earth wire (coloured green/yellow) to terminal marked E
All appliances must be earthed, using a dedicated earthing circuit.
If in doubt consult a qualified electrician.
Electrical isolation points must be kept clear of any obstructions. In the event of any emergency disconnection being
required they must be readily accessible.
Pentland Wholesale Ltd, Blizzard house, Unit17 Walker Park Industrial Estate, Walker Road, Blackburn,
Lancs, BB1 2QE. Tel: 01254 614444, www.pentlandwholesale.co.uk
Page 6
4
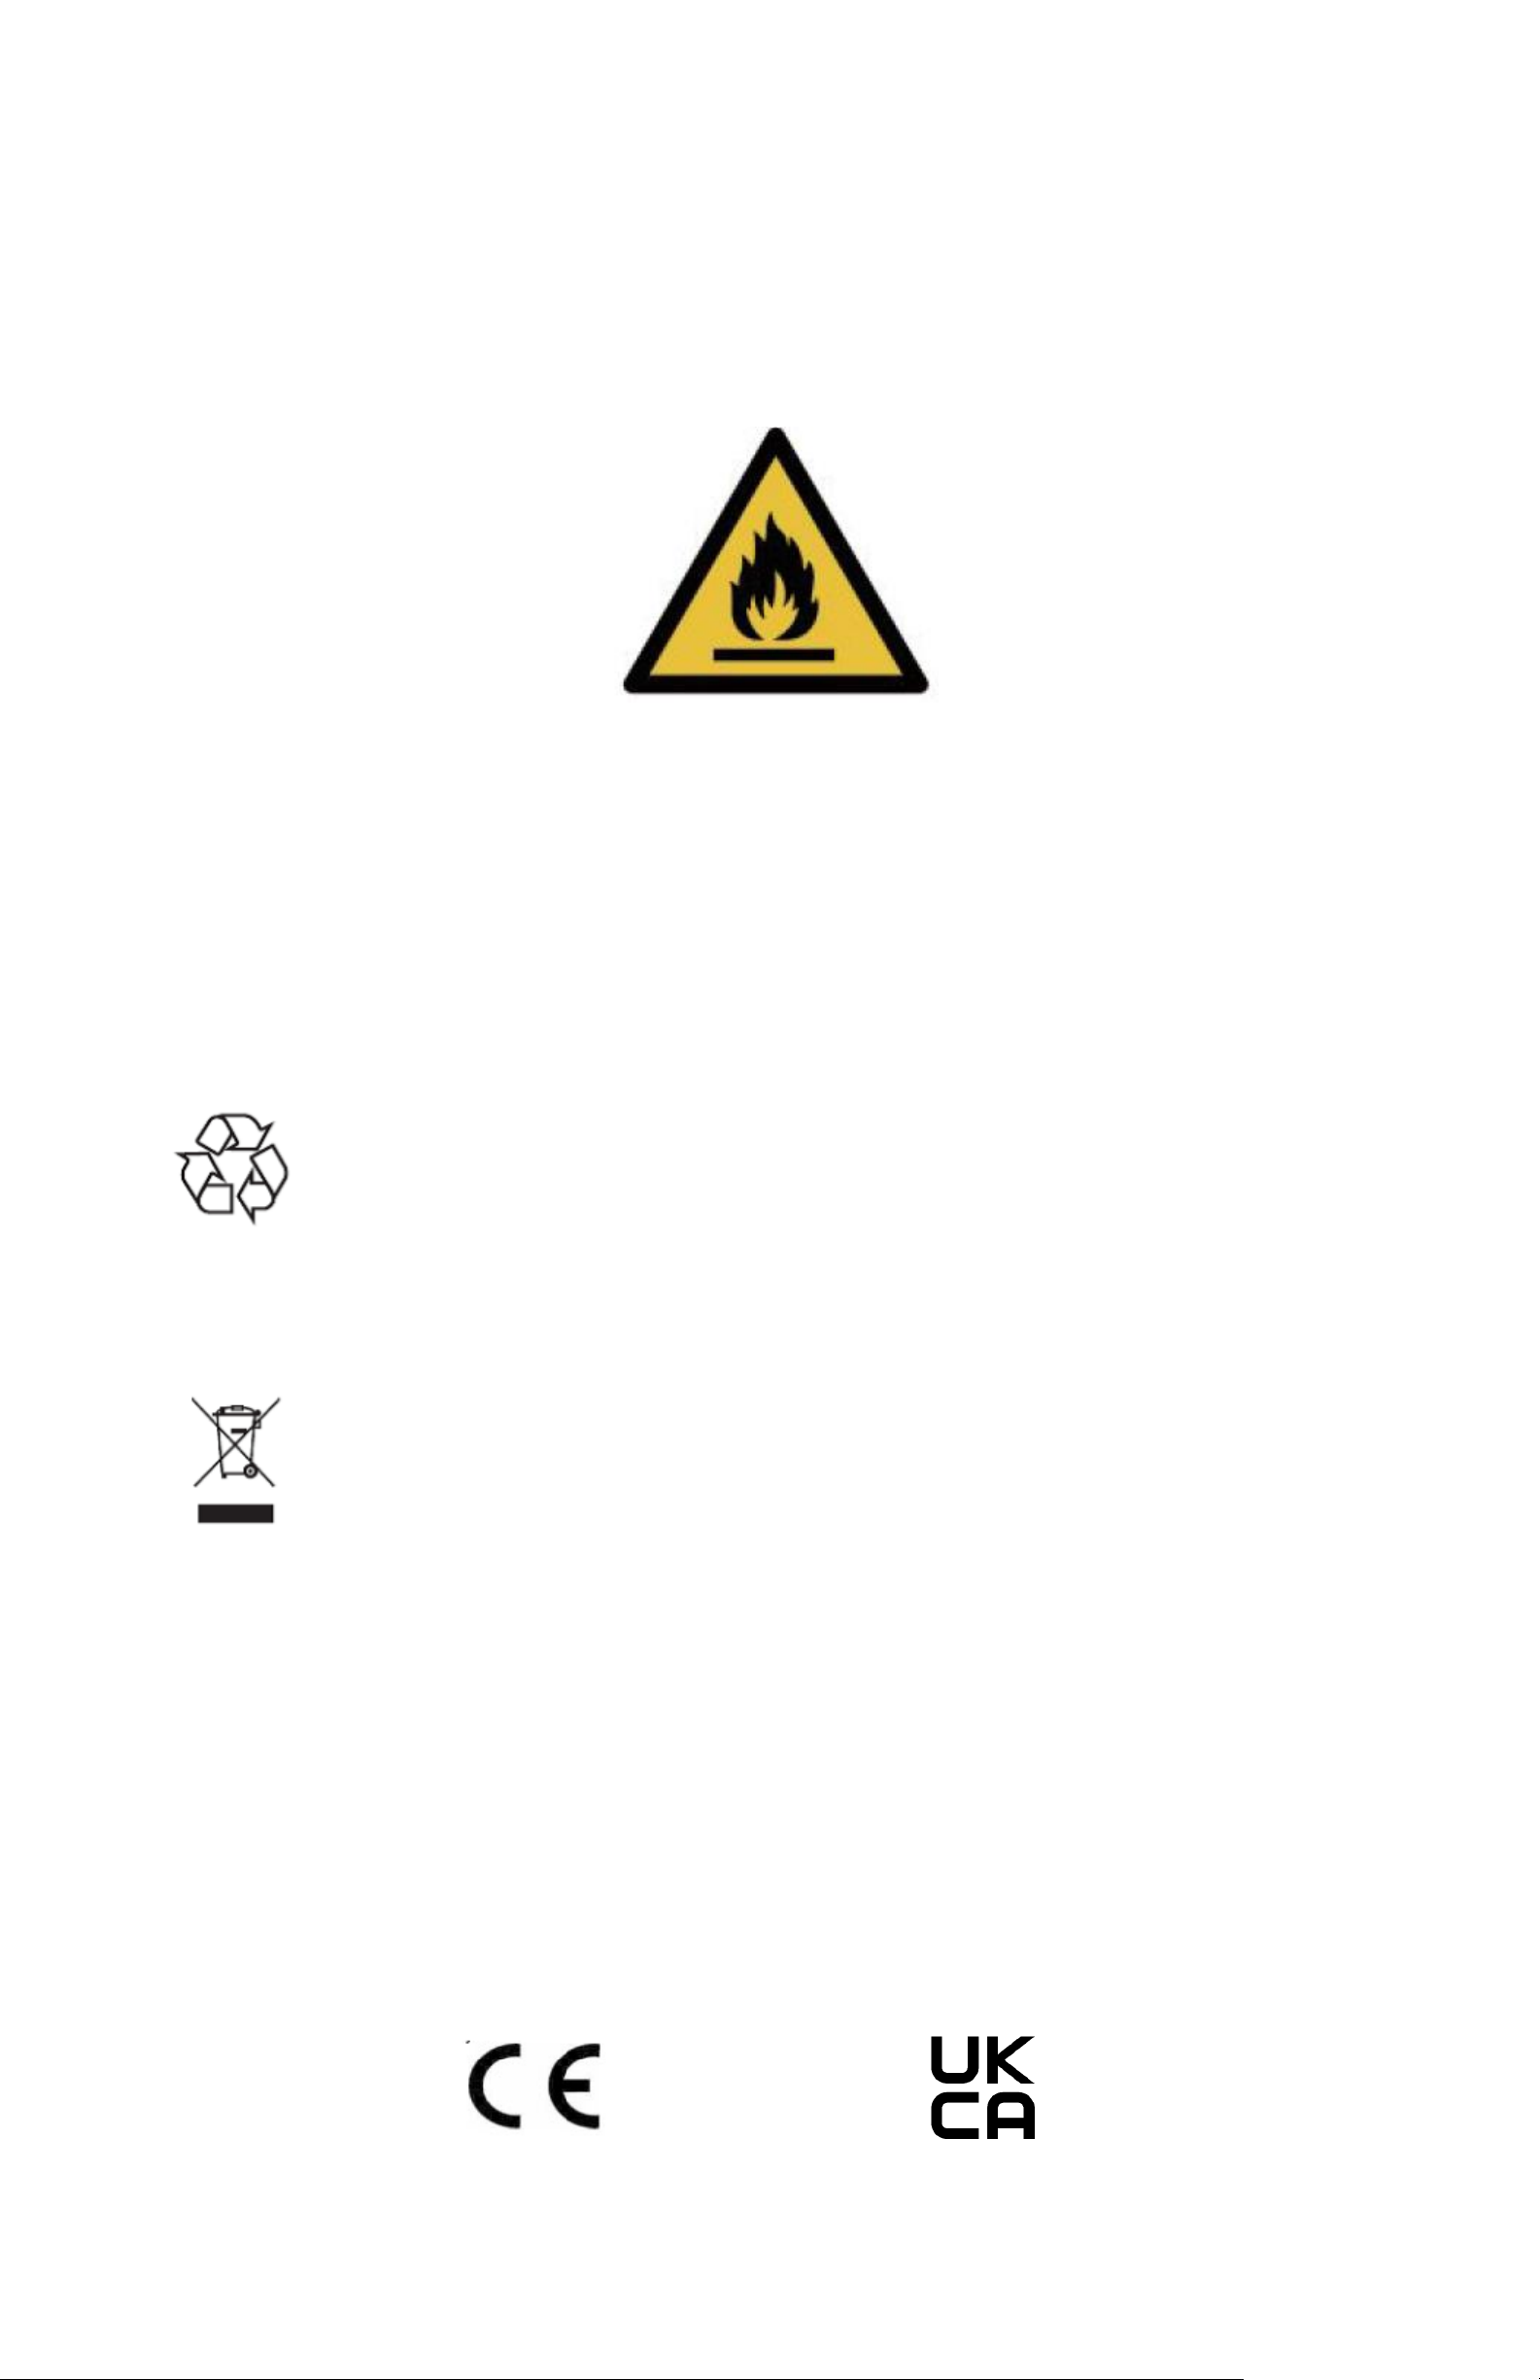
R290 / R600a refrigerant is used for this equipment.
Caution!
Consult repair manual/owner’s guide before attempting to install or service this product. All safety precautions must be followed. Dispose of
properly in accordance with federal or local regulations. Risk of fire or explosion due to puncture of refrigerant tubing. Follow handling
instructions carefully.
Danger!
Risk of fire or explosion. Flammable refrigerant used. To be repaired only by trained service personnel. Do not use mechanical devices to defrost
refrigerator. Do not puncture refrigerant tubing.
Disposal
EU regulations require refrigeration product to be disposed of by specialist companies who remove or recycle all glasses,
metal and plastic components.
Consult your local waste collection authority regarding disposal of your appliance. Local authorities are not obliged to
dispose of commercial refrigeration equipment but may be able to offer advice on how to dispose of the equipment locally.
All packaging materials should be disposed of in an environmentally friendly way.
The cardboard may be used as scrap paper. The protective foil and the foam cushions are CFC-free.
Do not allow children to play with the packaging and destroy plastic gags safely.
Environmental protection
Discarded electric appliances are recyclable and should not be discarded in the domestic waste! Please actively support us in
conserving resources and protecting the environment by returning this appliance to the collection centers (if available).
Compliance
Parts have undergone strict product testing in order to comply with regulatory standards and specification set by
international, independent, and federal authorities.
Products have been approved to carry the following symbol:
 Loading...