

Page 1
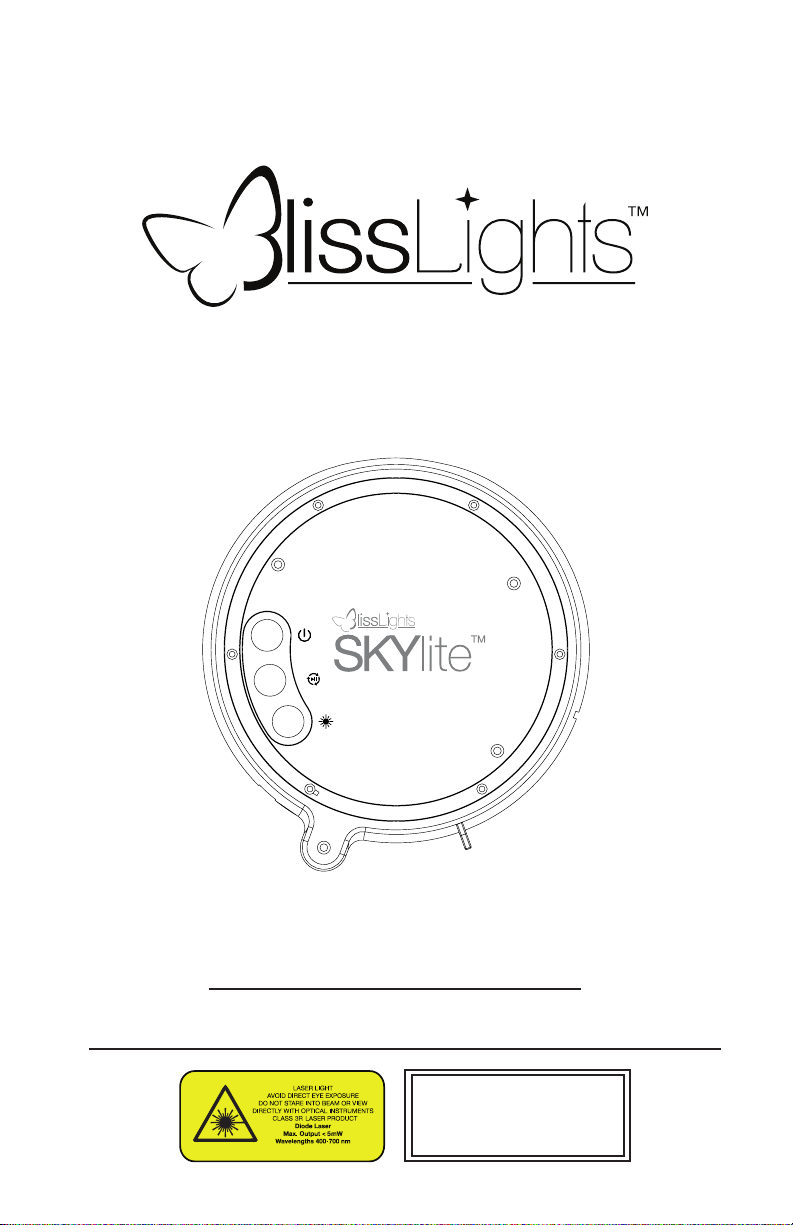
SKY LiteTM Laser Projector
User’s Guide
Model: SKYlite
Please ONLY use
manufacturer-provided
power supply
Page 2

TABLE OF CONTENTS
Notice ..............................................................................................................................1
Introduction ..................................................................................................................2
Before You Begin ..........................................................................................................2
Parts List ..........................................................................................................................2
Setting up the Laser Projector ................................................................................3
Default Settings ...........................................................................................................3
Installation Tips ............................................................................................................4
Product Specications ...............................................................................................4
Limited Warranty .........................................................................................................5
Caution ............................................................................................................................5
Cleaning Instructions ................................................................................................. 5
Disposal...........................................................................................................................5
Page 3

NOTICE
CAUTION—Use of controls or adjustments or performance of procedures other than those
specied herein may result in hazardous radiation exposure.
This laser product is certied as a CLASS 3R laser product, and adheres to the requirements
of the US Federal Laser Product Performance Standard (FLPPS) contained in the regulations
in 21 CFR Subchapter J.
Avoid direct eye contact of CLASS 3R laser energy as it can be hazardous. For reference,
the FLPPS requirements for demonstration laser products, like laser pointers, are limited
to CLASS 3R levels of laser energy. This product uses diractive optics to scatter the beam
energy. This scattering eect causes the energy concentration to drop below the exposure
limits for momentary or accidental viewing at a relatively short distance from the laser
aperture. As with all bright light-sources, when you operate this device in unsupervised
general public areas, it is recommended that up-close access to the light be restricted or
prevented.
This laser display device incorporates a CLASS 3R laser system which, by itself, may be
hazardous. However, this laser display device incorporates a protective housing and
diractive holographic optics in the machine design so that there is no exposure or human
access to laser radiation during operation or maintenance above the CLASS 3R limits. Each
individual laser beamlet’s power is under 1 mW, which is less than a standard laser pointer.
UNDER NO CIRCUMSTANCES shall attempts be made to open the protective housing or
operate the device if the aperture window is damaged.
All service to this laser display device requiring the protective housing to be opened and/
or removed shall be performed by service personnel or their authorized agents. Opening
the protective housing voids the warranty.
NO LASERS SHOULD BE POINTED INTO THE SKY WITHIN 10 NAUTICAL MILES
(18.5 km) OF AN AIRPORT. IF YOU ARE LOCATED WITHIN THIS SPECIFIC PERIMETER, WE
RECOMMEND THE LASERS BE POINTED DOWN AT THE GROUND SO NO STRAY BEAMS
ARE PROJECTED INTO THE AIR. CHECK WITH YOUR LOCAL AIRPORT OR PROVINCIAL
GUIDELINES FOR FURTHER INFORMATION.
1
Page 4
INTRODUCTION
Thank you for purchasing the BlissLights SKYLiteTM Laser Nebula Projector. This product is a
unique indoor light xture that uses patented laser and holographic technology to project
thousands of moving pin-points of light against a transforming nebula cloud. Sleep under
the stars, create a romantic starlit dinner, or take your home entertainment center to the
next level. We hope you enjoy this incredibly unique lighting experience.
Each unit provides up to 50 x 50 ft of coverage. It has maximum electrical usage of less than
10 Watts and operates in temperatures between 14°F to 95°F (-10°C to 40°C).
BEFORE YOU BEGIN
Immediately upon receiving the xture, carefully unpack and check the carton contents to
ensure that all parts are present and in good condition. Notify the retailer immediately and
retain packing material for inspection if any parts appear damaged from shipping or the
carton itself shows signs of mishandling. Save the carton and all packing materials. In the
event that the xture must be returned, it is important that the xture be returned in the
original factory box. Please see parts list below for box contents.
PARTS LIST:
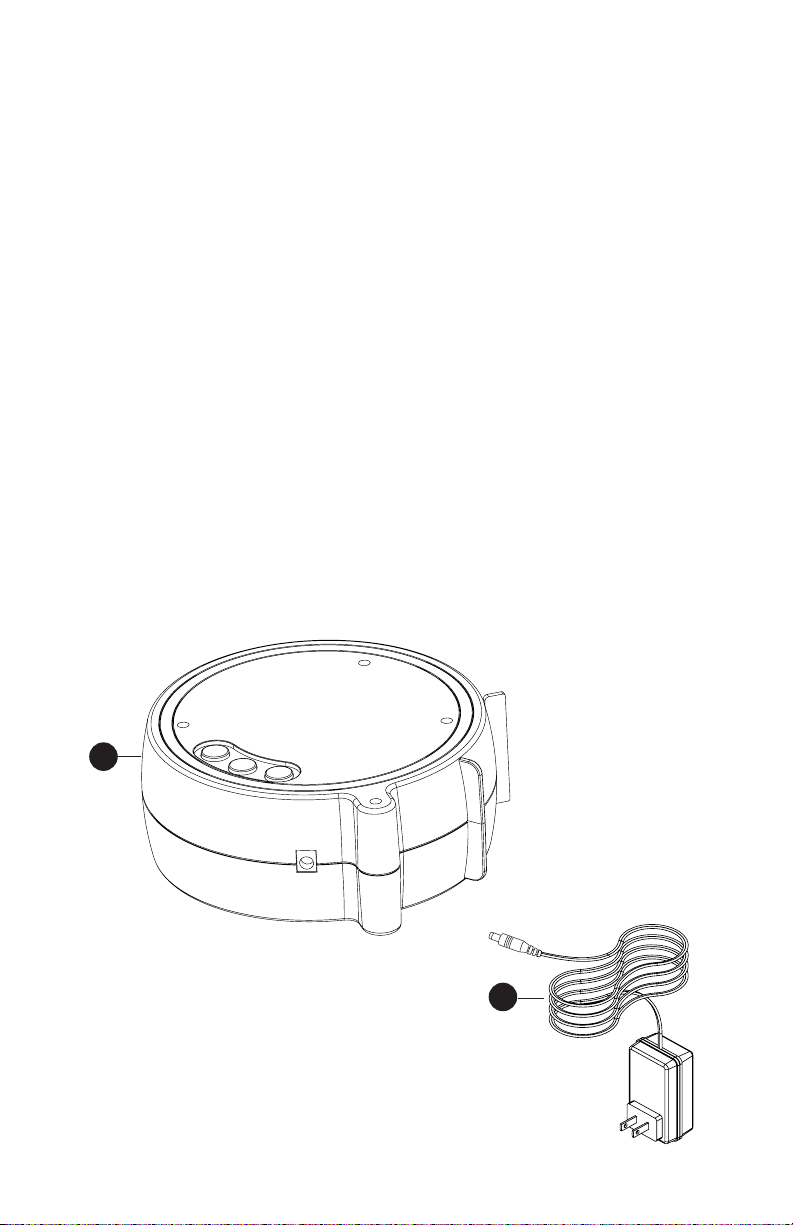
1) Laser Projector
2) Power Adapter
1
2
2
Page 5
SETTING UP THE LASER PROJECTOR
Before operating your laser projector, please read the “Before you Begin” section and
“Notice” section of this user’s guide.
1. Connect the power supply into an available standard electrical outlet.
2. Place the SKY on a at solid surface and aim toward desired ceiling/wall.
3. Press and hold the power button. The nebula and laser stars will gradually illuminate
and begin moving by default.
4. To adjust the illumination angle for walls, tilt the light forward onto the secondary
support panel.
5. To turn o the light, press and hold the power button, and remove the power plug from
electrical outlet.
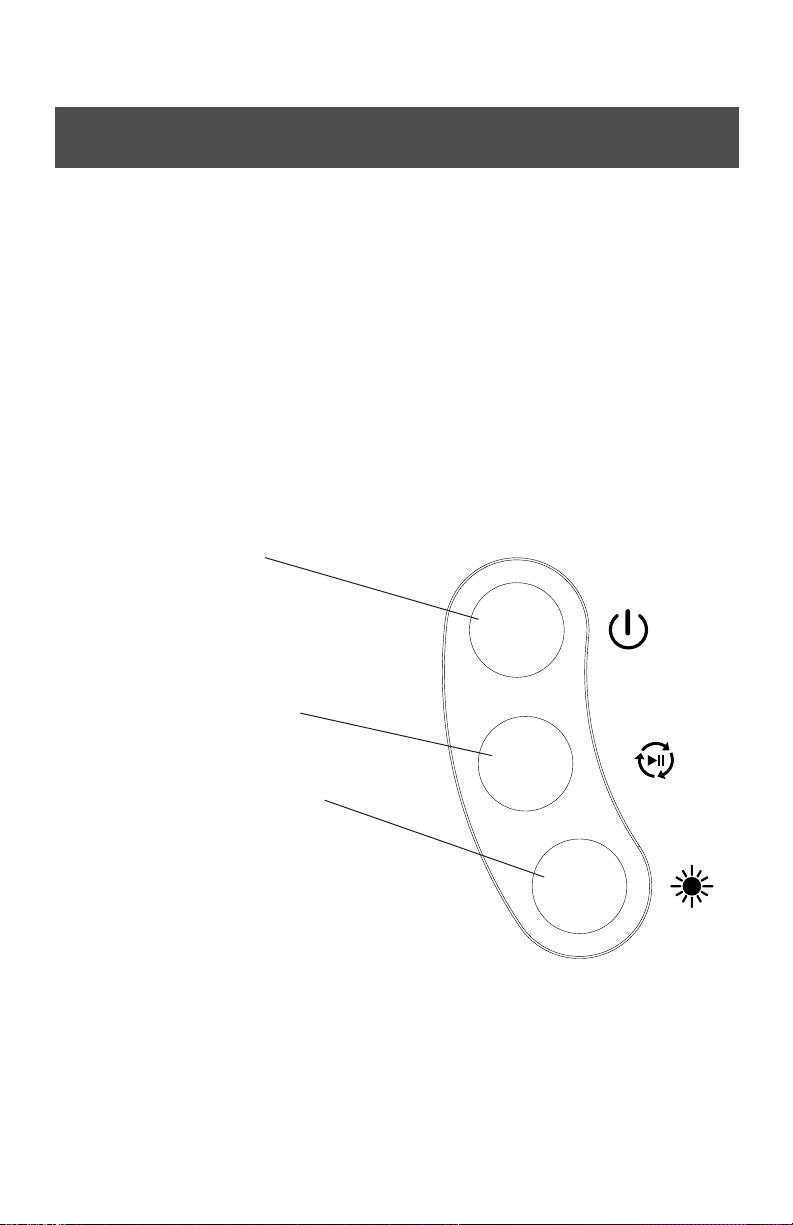
6. Use the following buttons to control lighting eects:
Top button (eects):
• Power on
• Pulse mode
• Stars only
• Cloud only
• Power o
Middle button (rotation):
• Rotation o
• Rotation on
Bottom button (brightness):
• Normal
• Low
• High
DEFAULT SETTINGS
Once the laser projector is plugged in, it will enter the default mode where all eects are
on. Use the buttons to change the eect settings and brightness. This light has a built-in
timer that is designed to automatically shut o after 6 hours of operation.
3
Page 6
INSTALLATION TIPS
• Do not connect the light to a dimmer pack, as a dimmer accessory may damage
the laser component.
• Use only the manufacturer-provided CUL power supply.
• Limit the use of extension cords. If you need an extension cord, use only UL, CUL, or
CSA approved 3rd party extension cords.
• The darker the display area, the brighter your projection will appear. Try to avoid
display areas with strong ambient light sources, such as commercial street lights or
bright security ood lights.
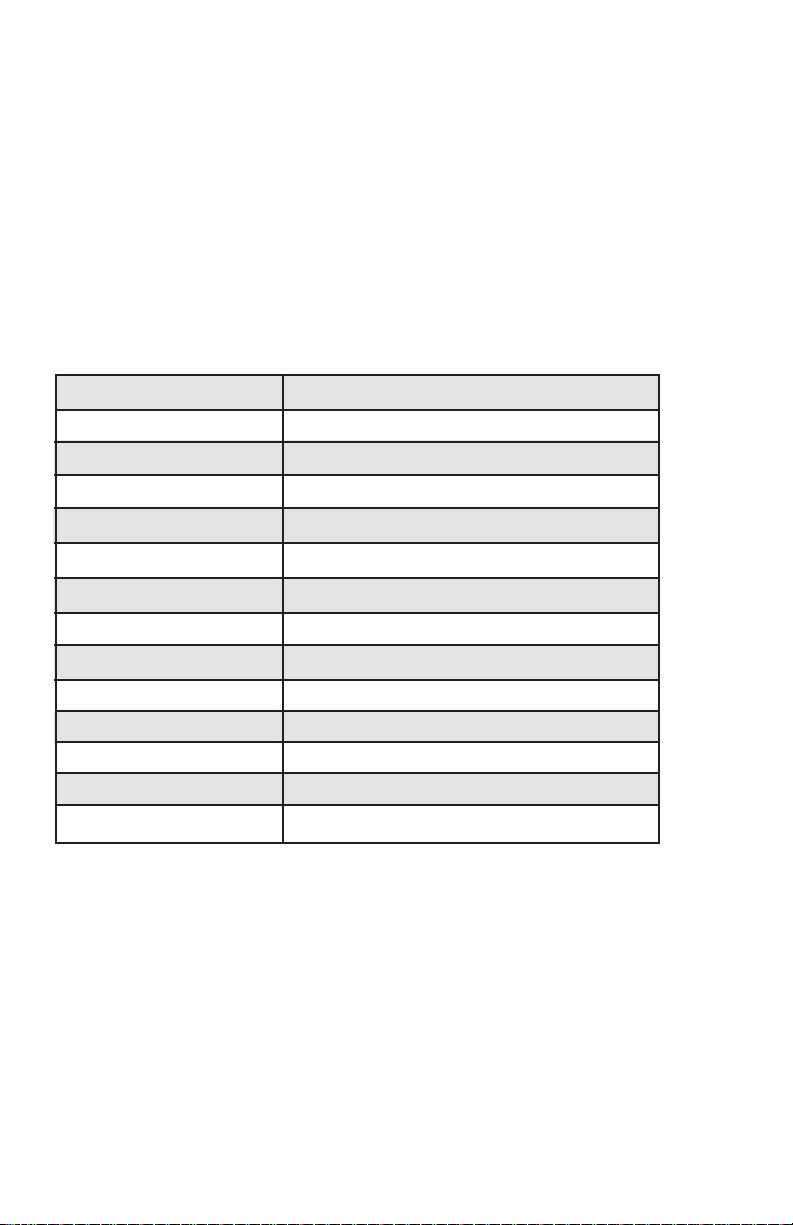
PRODUCT SPECIFICATIONS
Laser Classication Class 3R
Laser Wavelength 507 nm—Green +/- 10nm
Nebula Cloud 445 nm—Blue
Housing ABS plastic
Power Consumption Less than 10 W
Power Input 120 V AC
Power Output < 1 mW per beamlet
Operation Indoor
Operating Temperature 14°F to 95°F (-10°C to 40°C)
Projection Coverage Laser - 50 x 50 ft Nebula cloud - 15 x 15ft
Maintenance Maintenance Free
Dimensions 6.5”L x 2.5”W x 6.5”H
Cord Length 3 ft (1 m)
Warranty Limited One Year
Made in China
Designed in the USA
By BlissLights, LLC
San Marcos, CA 92069
4
Page 7
1-YEAR LIMITED WARRANTY
This product carries a one (1) year warranty against defects in workmanship and materials. BlissLights,
LLC agrees to replace the defective product free of charge within the stated warranty period, when
returned by the original purchaser with proof of purchase. This product is not guaranteed against
wear or breakage due to misuse and/or abuse. For more detailed warranty information, please visit
www.blisslights.com/warranty/
CAUTION
This is not a toy. Young children must be supervised while using this device at all times.
This unit is not waterproof. Use and store indoors or in a dry place.
CLEANING INSTRUCTIONS
Surface clean only with a soft, dry cloth. Unplug unit before cleaning.
DISPOSAL
At the end of its serviceable life, this product should not be treated as household or general waste. It
should be handed over to the applicable collection point for the recycling of electrical and electronic
equipment.
5
Page 8

www.blisslights.com
6
 Loading...